turbowoodworker
Well-known member
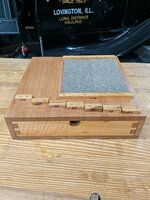
Fantastic. Looks like that might have involved an Incra jig set? Well done.

Thanks yes it was done with a incra jig but i had to modify the jig they are ok from the factory but they need to have some adjustments done to them to make them perfect
Thanks yes it was done with a incra jig but i had to modify the jig they are ok from the factory but they need to have some adjustments done to them to make them perfect
Searching “Incra double dovetails” will get you all you need to make those joints (if you have the Indra jig).
To be clear, I was not asking about how to make the double dovetails nor the wooden hinges. Just the mods to the jigs.
They (search results) don't mention mods or adjustments, they act as though the jig is perfect out of the box. Rockil mentioned mods...perhaps he was referring only to the wooden hinge jig? I don't have, nor do I desire one of those. I was thinking from his post that Rockil had some adjustments or mods to the original Incra jig itself?
As an example of what I'm looking for on a somewhat related INCRA product,
I found this guy's mods and tips pretty good for an Incra 5000 sled.
I've got the 5000 sled, though since my saw is a left tilt, I have everything on mine reversed.
I have to say that I'm not a fan of all of his mods (not totally disagreeing; just a "to each his own" sort of thing), but I still found it worth watching. I'll explain:
For my part, I like the fact that the 5000 acts more like a sliding table and less like a sled. I don't have anything against sleds, however, a sled only works when everything fits onto the sled. In this case, that includes the off-cut. By creating a zero-clearance bridge that goes over the blade, he has created a bad situation where both the work piece and off cut are being pushed unequally (just like using one hand on each side of the blade). That only works if the fence extends far enough to support the off cut as well (a proper sled), and his bridge just cannot do that.
As designed, the sliding table allows the off cut to just sit there next to the blade as soon as the work piece is disconnected, since nothing is pushing on the side opposite the blade.
However, I think he's onto something. I may just create a zero-clearance end for my 5000. But I won't be having it cross the blade. I only want it to be zero-clearance tearout free on the sliding table side. Then again, I have my aluminum fence quite close to the blade, and have not had tearout issues. Maybe because I only use very sharp blades.
Also, his magnetic table spacer/support is a GREAT idea. I WILL be making one of those. Right now my offcut table is larger than the one that came with the 5000, but there's still some iron left uncovered on the left side (remember, my setup is backwards) that could be used to support work.
(He) Someone made a new cutoff side board that is only for cuts made with the blade tilted at 45 degrees. I thought it was Unemployed Redneck but I don't see it right now to link to perhaps I'll go back and watch again.


I've been on a homemade pizza making kick lately and decided I needed a pizza peel. Not a huge project, actually knocked it out in one day. Looking through my stash of lumber and found a smaller piece of Birdseye maple. Then found a skinny piece of left over mahogany and had a bunch of walnut scraps. Used it that night and it worked well.
I've been on a homemade pizza making kick lately and decided I needed a pizza peel. Not a huge project, actually knocked it out in one day. Looking through my stash of lumber and found a smaller piece of Birdseye maple. Then found a skinny piece of left over mahogany and had a bunch of walnut scraps. Used it that night and it worked well.
No, just edge glue with Titebond3. If run through the jointer with straight edges it is stronger than the wood itself. I finished it with a product that is mineral oil with waxes.


All good choices. Long grain joints work well with just glue, so long as the fitup is good, and Titebond III is the best glue I've ever used on wood. I've also seen that product, and the ingredients appear to be really good (I'm just too cheap to buy something like that so I'll make it myself). It looks to have a lot of beeswax, so a little heat from a hair dryer will speed up it's absorption.
Good idea r. I should do that since I am a beekeeper and have wax. I'm sure it is not critical but what is your recipe? Does the mineral oil just dissolve the wax or do you have to heat it up with heat gun or double boiler?
...Titebond3...
he took a dull chisel to get them up, the glue took pieces of glass with it...
So if anybody says that glue is not strong enough or adhesive enough you will know they don't know what they are talking about...
What your son did to that table has absolutely no bearing whatsoever on how Titebond will perform as a wood glue.
What your son did to that table has absolutely no bearing whatsoever on how Titebond will perform as a wood glue.
I disagree. On further inquiry it was a dull, wide blade putty knife. Such attachment to a nonporous surface compared to wood at least to me was impressive. If it sticks this well to glass I think one could assume it will also stick to lignum vitae.
One of the things that prompted me to bring this up was discussions with other woodworkers in the past that were under the impression that epoxy is much stronger than Titebond or other similar type glues. Tests have been published that show there is very minimal difference between the two when used on wood and stressed tested. This is assuming well designed and oil-free tight joints


Wow, dominoed baseboard! Impressive, that's going further than I typically do. I agree that miter saw is awesome. I still have my old green Ryobi CMS from 30 years ago and use it for mobile applications but when I built my new shop I got the Festool.
Well for the past few months my woodworking time has been directed toward finishing out about 830 sq ft of our basement. Finally getting to the trim work and accent wall stuff though.
The baseboards are finger joint pre-primed 1x4 and the wall at the fireplace is finger joint pre-primed shiplap. Looking forward to getting to the built-ins and floating walnut shelving on either side of the fire place.
I did use the domino on all the base boards and it was great to be able to do long runs and corners with no gaps and perfect alignment.
And I’m super happy I got rid of my old craftsman compound miter saw and got the KS120REB. I actually don’t dread miters anymore.
Not the usual fine furniture or jar944 level work but man it feels good to be making progress!
Sent from my iPhone using Tapatalk
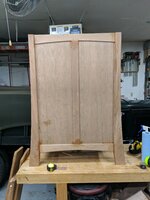
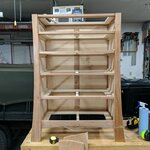
Finished this media console up.
View media item 104896
View media item 104898
View media item 104897
Two questions for you, would you have an interest in sharing the plans for this.
Do you glue your MDF centers in, or use a product like space balls?