DocsMachine
Well-known member
- Joined
- Sep 16, 2006
- Messages
- 1,870
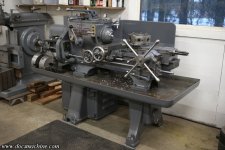
For the past several months, I've been working on an old Warner & Swasey turret lathe. I'm probably one of the few people around that can actually use one- that is, I actually have a use for it, not saying I'm the only one that knows how to work one. 
Basically I need to make enough parts that doing them individually on an engine lathe takes far too long, but I don't need enough of them to justify a five-figure CNC.
I found this one on Craigslist, it was supposed to be plug-and-play, and of course it turned into a near-full-rebuild project.
One of the last bits I had to do was a backsplash- a sheetmetal chip-and-oil-spray guard to go behind the machine.
Unlike my other manual machines, I plan to run flood cutting oil on this beast, and so needed to take steps to control the splash and spray.
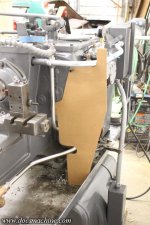
I started with the usual cardboard template...
That got transferred to and bandsawed out of 16 gauge steel...

And I figured I'd jazz it up a bit by quartering a chunk of 2" exhaust pipe, also 16 ga- and using that to form a rounded corner, rather than a typical square one.

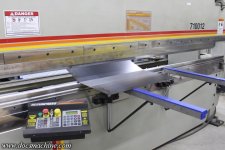
I'd had a neighbor with a CNC press brake take on the daunting task of putting a 10-degree kink in another piece of 16 ga...
And set about fastening it to the drip tray without welding or drilling. I machined four clamping blocks...

Drilled and filed four holes at the bottom edge...

And fitted the new clamps like so:

With that fitted, I tacked the two together...
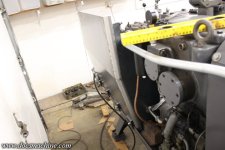
And finish welded the seams with the TIG.

Don't go lookin' for the stack o' dimes. I'm a machinist that sort of knows how to weld, not a full-time YouTube Celebrity Welder.
After that, I trimmed the top edge down and, using a steel sawhorse, some scrap and a lot of clamps...

Got the top and sides bent over to form a 3/4" flange. Not a great one, but functional.

Rounded the upper-right corner... (It's smoother than it looks)

Reinforced the seam at the break...

Added a flange on the upper left corner...

Filled in the last bit...
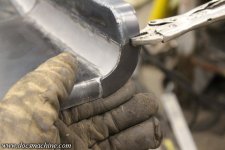
Had to do a minor bit of last-minute hot-adjusting...
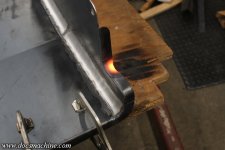
And done!
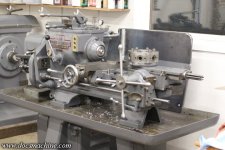
Still have to do some finish-grinding before I can paint, but this was the last even semi-major piece that needed to be done before the machine is pretty much 100% operational!
Doc.
Basically I need to make enough parts that doing them individually on an engine lathe takes far too long, but I don't need enough of them to justify a five-figure CNC.
I found this one on Craigslist, it was supposed to be plug-and-play, and of course it turned into a near-full-rebuild project.
One of the last bits I had to do was a backsplash- a sheetmetal chip-and-oil-spray guard to go behind the machine.
Unlike my other manual machines, I plan to run flood cutting oil on this beast, and so needed to take steps to control the splash and spray.
I started with the usual cardboard template...
That got transferred to and bandsawed out of 16 gauge steel...
And I figured I'd jazz it up a bit by quartering a chunk of 2" exhaust pipe, also 16 ga- and using that to form a rounded corner, rather than a typical square one.
I'd had a neighbor with a CNC press brake take on the daunting task of putting a 10-degree kink in another piece of 16 ga...
And set about fastening it to the drip tray without welding or drilling. I machined four clamping blocks...
Drilled and filed four holes at the bottom edge...
And fitted the new clamps like so:
With that fitted, I tacked the two together...
And finish welded the seams with the TIG.
Don't go lookin' for the stack o' dimes. I'm a machinist that sort of knows how to weld, not a full-time YouTube Celebrity Welder.
After that, I trimmed the top edge down and, using a steel sawhorse, some scrap and a lot of clamps...
Got the top and sides bent over to form a 3/4" flange. Not a great one, but functional.
Rounded the upper-right corner... (It's smoother than it looks)
Reinforced the seam at the break...
Added a flange on the upper left corner...
Filled in the last bit...
Had to do a minor bit of last-minute hot-adjusting...
And done!
Still have to do some finish-grinding before I can paint, but this was the last even semi-major piece that needed to be done before the machine is pretty much 100% operational!
Doc.