To avoid these ads, REGISTER NOW!

Above 1200 Sq/FT Zeph's Quasi WWII Era Shop

Wokspaces above 1200 squarefeet.

250

Well-known member
Joined
Oct 16, 2014
Messages
537
Location
West of the Sierras
That little trailer is looking good. Shoot, its all looking good.

I know the dilemma about painting. I have to do a little shuffling when painting time comes and don't even think about getting the main garage door open.
 
To avoid these ads, REGISTER NOW!

smschriefer

Well-known member
Joined
May 28, 2009
Messages
842
Location
Yorktown, VA
I think Ralphie needs to be a junior enlisted member. You could then promote him and demote him as needed. One day he can be a sergeant and the next a PFC. Who knows, he might make it to MSgt one day.

I hate to tell you this, but Ralphie sounds like he might have Ford blue blood. Just kidding, but maybe the military vehicles are too loud for him?
 
OP
Z

zepher11

Well-known member
Joined
Jan 4, 2015
Messages
1,493
Location
Northern, Northern CalifornIA
That little trailer is looking good. Shoot, its all looking good.

I know the dilemma about painting. I have to do a little shuffling when painting time comes and don't even think about getting the main garage door open.

Thanks. Yeah, painting always seems to be a major production. Not just the mixing and clean up that takes a lot of time, but noodling through how to pain certain things due to their size or odd shapes. Items with holes in them are my favorite! :)

I think Ralphie needs to be a junior enlisted member. You could then promote him and demote him as needed. One day he can be a sergeant and the next a PFC. Who knows, he might make it to MSgt one day.

I hate to tell you this, but Ralphie sounds like he might have Ford blue blood. Just kidding, but maybe the military vehicles are too loud for him?
That's funny. I immediately conjured up an image in my mind of Ralphie in a OD shirt with the outline of a freshly removed rank insignia.

It's actually pretty amazing how quiet the Jeep and the Dodges are. They sound good and are surprising quiet. My Ford F-250 with the 7.3 diesel is much louder. I wish I knew what it was.

I was trying to recall what I was doing the last time he rode with me, and then I realized that I was jumping my Jeep. Found a little ramp on the driveway and when I got some speed up, I could launch the Jeep off all four wheels. Now wondering if that's the issue. Hmmm...not sure how to find out now.
 
OP
Z

zepher11

Well-known member
Joined
Jan 4, 2015
Messages
1,493
Location
Northern, Northern CalifornIA
I also attempted my next project on the sewing machine. I have an ammo boom box I take in the rigs. I thought it would be cool to have a cover for it. It has a handle, and I wanted to make a hole where the handle would go through the canvas, but was worried about cutting hole before I sewed everything together. Now a little difficult to do it.

Learned a lot. I couldn't figure out how to sew this together, but just kept going. I sewed myself into a corner, literally, a few times. After I was done, I looked up some videos. My wife called it a toaster cozy or something like that, so found a video that was almost identical. I didn't follow any of their process...which would have been nice, but I find it easier for me to do it without knowing what I'm doing and then watching how to really do it. Answers a lot of questions I have and I can understand what and why they are doing it that way. If I watch the video first, it doesn't really grab me because I have no idea what they are doing or why. Good learning experience in any event. Future videos will make more sense now that I've actually have used a sewing machine.

Not perfect, and wish I would have figured out a slot for the handle beforehand. I also picked up some 1" binding and a binding tool to practice with.

I put binding on the bottom of the cover. I will need to figure out how to become an expert in installing binding in order to attempt my Command Car canvas doors. Those will be a major project. Last two photos are the doors.

They have metal frames sewn inside and will be very technical. I have been analyzing them for weeks. Based on the look of the sewing machine, and the way the doors are put together, there is a certain order to follow. If I only had Rosie the Riveter to help:

CC_2499.JPG


CC_2500.JPG


CC_2501.JPG


CC_2502.JPG


Command Car doors:

CC_2450.JPG


CC_24511.JPG
 

jake28

Well-known member
Joined
Aug 28, 2018
Messages
482
Location
SF, CA
Looks like you have the binding foot set up well. You’re in the right track. I learned to do binding by hand folding and ironing ribbon, and then pinning it in place. I had some choice words when I found out there was a specific tool for the intended purpose.

Boxes are hard. One truck that I learned that helped me shift from working in metal and wood to fabric, was to get out of the mindset that fabric can do 90 degree corners. I started think of everything in terms of having at least 1/4” radius. That means that your corners end with sewing “around the corner”, rather than to a point. Sewing to a point nearly guarantees you’ll wind up with a hole. You can then push and fold the material from the “wrong” side to get a nice sharp edge / corner.

Jm
 

jake28

Well-known member
Joined
Aug 28, 2018
Messages
482
Location
SF, CA
In the spirit of showing rather than telling:
3ae0f36b057aae95b48672fa7a422d44.jpg
23b4789e022780e24a9a49ea65f8bc1f.jpg
Here is a waxed canvas bag I made early on. I did all the corners sewing to my 1/2” seam allowance and then back stitching. I’ve drawn over in black the preferred method of sewing around the corner with a continuous stitch.
 

Attachments

  • 3ae0f36b057aae95b48672fa7a422d44.jpg
    3ae0f36b057aae95b48672fa7a422d44.jpg
    100.1 KB · Views: 1
  • 23b4789e022780e24a9a49ea65f8bc1f.jpg
    23b4789e022780e24a9a49ea65f8bc1f.jpg
    110.7 KB · Views: 0
Last edited:
OP
Z

zepher11

Well-known member
Joined
Jan 4, 2015
Messages
1,493
Location
Northern, Northern CalifornIA
Looks like you have the binding foot set up well. You’re in the right track. I learned to do binding by hand folding and ironing ribbon, and then pinning it in place. I had some choice words when I found out there was a specific tool for the intended purpose.

Boxes are hard. One truck that I learned that helped me shift from working in metal and wood to fabric, was to get out of the mindset that fabric can do 90 degree corners. I started think of everything in terms of having at least 1/4” radius. That means that your corners end with sewing “around the corner”, rather than to a point. Sewing to a point nearly guarantees you’ll wind up with a hole. You can then push and fold the material from the “wrong” side to get a nice sharp edge / corner.

Jm

In the spirit of showing rather than telling:

Here is a waxed canvas bag I made early on. I did all the corners sewing to my 1/2” seam allowance and then back stitching. I’ve drawn over in black the preferred method of sewing around the corner with a continuous stitch.

Thanks for the tips and the photos. I see what you are saying about stitching around the corner vs. a 90 degree turn. Of course, I did neither as I had no idea what I was doing. I see now that it would have been good to have the whole thing turned inside out.

I understand what you mean about leaving a hole. I have a couple of areas where it was really difficult to access, and has sort of a hole. I think it's stitched, but just a bit different than the other areas along the edges.

I like to make another cover for my old school stereo system. It really gets with it, so don't want to destroy it with all of the dust I create in the shop. I've had it for over 30 years, would be nice to protect it.
 
OP
Z

zepher11

Well-known member
Joined
Jan 4, 2015
Messages
1,493
Location
Northern, Northern CalifornIA
The boom box cover looks great, I think its beyond acceptable and will serve you well.
Thanks man. It looks better and better every day. I thought it looked rough when I first finished it, but now when I look at it, it looks pretty decent.

Just like my trucks. When I finish a little project on the restoration, I always think I could have done better. Later I look at it and wonder how I did it so well. Weird.

How has your weather in Oregon been the past few days? We finally received some moisture yesterday. Here's a couple of photos when I arrived at work yesterday:

attachment.php


attachment.php


Lunch time was a little cool:

attachment.php
 

Attachments

  • 2 Snow Strom City Hall Parking Lot 1-27-2021.jpg
    2 Snow Strom City Hall Parking Lot 1-27-2021.jpg
    100.9 KB · Views: 379
  • 1 Snow Strom City Hall Parking Lot 1-27-2021.jpg
    1 Snow Strom City Hall Parking Lot 1-27-2021.jpg
    141.2 KB · Views: 383
  • 1 Snow Strom City Hall Lunch Room 1-27-2021.jpg
    1 Snow Strom City Hall Lunch Room 1-27-2021.jpg
    151.1 KB · Views: 379

jake28

Well-known member
Joined
Aug 28, 2018
Messages
482
Location
SF, CA
[mention]zepher11 [/mention] the biggest challenge for me switching from wood to fabric is wrapping my head around building things from the inside out, and inside out. Adding zippered pockets inside of a bag for example, required (for me) Olympic level mental gymnastics. However, on YouTube there are a bunch of grandmas who seem to nail it every time.

Re: your sewing:
- your stitching is super neat and spot on. Well done.
- seam allowances are your friend. Measure and cut all of your fabric exactly 1/2” oversized. It’s generous, but means that if you need to expand something, you just put another stock down and rip out the old one. You could 1/4” SA if you’re feeling brave.
- stitch inside out, then fold over right side out for final product.

I may bust out the sewing magi home and make a bag or two for my own thread.
Jm
 

BORING HOP YARD

Well-known member
Joined
Jan 13, 2007
Messages
1,101
Location
Boring Oregon
Weather up here has been a mild January, my wife and I were talking about this latest storm going to you guys in the south and giving much needed snow pack and water. I hope the land slides won't be to bad overall but you guys need the water in the mountains and further south. It would be nice to see Lake Shasta full again.
Were at 675 feet elevation and had a trace of snow from this last storm.
I think were forecasted to get 1 1/2 inch's of rain over the next three or four days

A few years ago Portland had close to a draught and we were asked to not wash our cars and such. The first fall storm filled everything up, no more draught.
 
OP
Z

zepher11

Well-known member
Joined
Jan 4, 2015
Messages
1,493
Location
Northern, Northern CalifornIA
[mention]zepher11 [/mention] the biggest challenge for me switching from wood to fabric is wrapping my head around building things from the inside out, and inside out. Adding zippered pockets inside of a bag for example, required (for me) Olympic level mental gymnastics. However, on YouTube there are a bunch of grandmas who seem to nail it every time.

Re: your sewing:
- your stitching is super neat and spot on. Well done.
- seam allowances are your friend. Measure and cut all of your fabric exactly 1/2” oversized. It’s generous, but means that if you need to expand something, you just put another stock down and rip out the old one. You could 1/4” SA if you’re feeling brave.
- stitch inside out, then fold over right side out for final product.

I may bust out the sewing magi home and make a bag or two for my own thread.
Jm

Your build is looking great on your thread. I see I'm not the only one that doesn't slow down too much after shoulder surgery. I had a superior labrum tear for about 25 years. Once they figured out how to repair that, I had it fixed in 2010. Been great since. Clavicle...not so much, but much better after the October surgery.

Appreciate the sewing tips and information. All new to me and I totally understand the mental gymnastics! On the cover I made, I didn't have any seam allowance on the top section. On the top section, I just folded over 1/2" and sewed it all around shooting for that "military" seam look that I see. This didn't leave me anything to sew to when I went to put it together. I just sewed the sides to the top. on the side section, I did leave a 1/2' seam or tab to sew directly to the flat top piece. That did make it a bit difficult...:lol_hitti

Now I have a better idea for the next attempt!

Nice job on the cover.

Thank you!
 
OP
Z

zepher11

Well-known member
Joined
Jan 4, 2015
Messages
1,493
Location
Northern, Northern CalifornIA
Weather up here has been a mild January, my wife and I were talking about this latest storm going to you guys in the south and giving much needed snow pack and water. I hope the land slides won't be to bad overall but you guys need the water in the mountains and further south. It would be nice to see Lake Shasta full again.
Were at 675 feet elevation and had a trace of snow from this last storm.
I think were forecasted to get 1 1/2 inch's of rain over the next three or four days

A few years ago Portland had close to a draught and we were asked to not wash our cars and such. The first fall storm filled everything up, no more draught.

That's great that you do not have a drought to deal with now. Lake Shasta is about 104 feet down right now. Two years ago the rain fall total at Shasta Dam was 88 inches. Last year it was 32 inches. To date, after this last storm, the total rainfall is 11 inches. Not good whatsoever. I keep saying one mention of drought and I'm outta here! The last drought was very stressful. Really do not want to go through that again whatsoever. However, I can see it coming if we do not get a steady stream of wet weather...
 
OP
Z

zepher11

Well-known member
Joined
Jan 4, 2015
Messages
1,493
Location
Northern, Northern CalifornIA
Well, all that looking to find 1-15/16" hub seals really didn't pay off. The ones I ordered didn't fit due to the depth of the hub cover. The new ones are not deep enough. Need about another 1/4" of depth. I had to go to the auto parts store for something else today. I haven't been to an A/P store for quite a while. Showed the kid there what the problem was and did he think they had anything like the old one...which I knew they wouldn't.

He asked what it was off of. I said well, I don't think that's going to help. Finally told him they were off a 1942 Mark II Bomb Trailer. His eyes spun and that was the end of that. He can't look it up anything unless it's for a particular vehicle.

Came home and searched online for a while. They don't exist. Was going to install the ones I received and then heat up the center section with the torch and hammer the edges in to customize them. However, I ended up just hammering them on as far as they would go. Most people won't notice. I'll keep an eye out for some, but I really do not think they exist:

CC_2503.JPG


CC_2504.JPG


CC_2505.JPG


Also, I couldn't leave well enough alone. I watched a video on sewing covers like I made for my ammo boom box. The person that made the video said that if one sewed along the outer edge over where the two panels met on each of the four corners, it would square it off and make the cover look more finished. It really did tighten up the corners and make them more square. Pretty interesting tip. Not too difficult to do at all, but it really made the cover into a custom fit look.

CC_2506.JPG


CC_2507.JPG


CC_2508.JPG


Also, after waiting seven months since I ordered them, the DMV had my new plates. 91st Bomb Group. Installed them today. What's totally amazing is that I went to DMV and walked right in. Not one person there. In and out in under 5 minutes. Now that has never happened before!

I like the plates. Kelley would have been proud:

CC_2509.JPG
 

InsaneEd

Well-known member
Joined
Feb 16, 2018
Messages
51
I like the plates. Kelley would have been proud

Yes, he would of been. You should be too. The rest of us are just as proud even if we didn't ever meet the hero Kelly or even you....

Yeah, the parts stores anymore just know what they can look up in the computer. Most don't even have catalogs with sizes and other information anymore. Some of the Napa sores around me have older guys that know alot of the parts or at least how to look stuff up... Good luck with finding the exact caps for the bomb trailer, it is looking really good!
 
OP
Z

zepher11

Well-known member
Joined
Jan 4, 2015
Messages
1,493
Location
Northern, Northern CalifornIA
No Doubt Kelley was up there looking out for you when you went to DMV. Did you hear any bells ring?

You know, as I walked out of the DMV the guard arms for the railroad crossing across the street came down with the bells clanging. Not a train in sight. Put the plates on the truck and then drove to the crossing. Had to go around the lowered crossing arms. No train in sight for miles in any direction. Bells clanging loudly. Didn't think too much of it at the time until you mentioned it above. :thumbup:

Yes, he would of been. You should be too. The rest of us are just as proud even if we didn't ever meet the hero Kelly or even you....

Yeah, the parts stores anymore just know what they can look up in the computer. Most don't even have catalogs with sizes and other information anymore. Some of the Napa sores around me have older guys that know alot of the parts or at least how to look stuff up... Good luck with finding the exact caps for the bomb trailer, it is looking really good!

There is one guy in a NAPA store about 30 miles north of me that I'll go to once in a while. He's old school and can use the parts catalogs. I mostly get everything online now. Have to eat a few parts, but still beats going to the parts store. Most of the time the things I'm looking for are just not made any longer. I have to make a few things here and there. Of course, that's kinda fun too. :beer:

Appreciate you comments. Have a great day!
 

ZRX61

Well-known member
Joined
Aug 15, 2006
Messages
28,716
Location
Solar Blight Valley, SoCal
Maybe machine a piece of hardwood or plastic to the correct shape & hammer/press it into the original hub seals to remove the dings & dents etc.
Do you have a lead shot or sand filled beater bag?
 
To avoid these ads, REGISTER NOW!
OP
Z

zepher11

Well-known member
Joined
Jan 4, 2015
Messages
1,493
Location
Northern, Northern CalifornIA
Zeph, what size are the tires/wheels on the bomb cart?

The bomb trailer tires are 6 x 9. Kind of an odd size, but they're out there.

Maybe machine a piece of hardwood or plastic to the correct shape & hammer/press it into the original hub seals to remove the dings & dents etc.
Do you have a lead shot or sand filled beater bag?

I actually just picked up a bag and hammer from Eastwood. Haven't used it yet. I guess I'll fill it with coal slag or find some sand.

Thought about working over the old hub seals. Two are really super bad. However, that's some real steel. I can bend the metal on the new hubs with a pair of pliers. The originals are rock solid. Was thinking my shop press and heat would need to be employed to make any meaningful metal adjustment on them.

A job for another day...
 
OP
Z

zepher11

Well-known member
Joined
Jan 4, 2015
Messages
1,493
Location
Northern, Northern CalifornIA
Still can't leave enough alone on my ammo boom box cover. Decided to make room for the handle. I first cut a slit, folded the edges under and sewed all the way around it. Sewing the flap underneath.

I then made the two end flaps. Next made the lower flap to cover below the handle just to totally seal it. Kind of overkill, but it gave me a lot of practice inserting the cover into the machine over and over again. I kinda like it:

CC_25131.JPG


CC_25141.JPG
 

ZRX61

Well-known member
Joined
Aug 15, 2006
Messages
28,716
Location
Solar Blight Valley, SoCal
I actually just picked up a bag and hammer from Eastwood. Haven't used it yet. I guess I'll fill it with coal slag or find some sand.

Thought about working over the old hub seals. Two are really super bad. However, that's some real steel. I can bend the metal on the new hubs with a pair of pliers. The originals are rock solid. Was thinking my shop press and heat would need to be employed to make any meaningful metal adjustment on them.

A job for another day...


I got the 18in bag (from TP tools I think) I got a deal on some lead shot. Bag weighs around 240lb now...
 
OP
Z

zepher11

Well-known member
Joined
Jan 4, 2015
Messages
1,493
Location
Northern, Northern CalifornIA
I got the 18in bag (from TP tools I think) I got a deal on some lead shot. Bag weighs around 240lb now...

I would think lead shot is probably the way to go. I've never used one of those beater bags before, but I have a few of the fenders on the VC1, my next truck project, that need a bit of work.

The VC1 was built for the Army in 1940 with civilian closed fenders. They are considerably thinner than the 1941 and on flat fenders. The later just need a sledge hammer and concrete...which I have.

I'll have to look around for a deal on lead shot.

Nice work Zeph!
Your sewing is coming right along, keep it up.

Thanks. I'm actually enjoying it. I have the sewing machine in the house, and I finding it odd to actually be inside the house during the day on a weekend. Something to get used to. I had to set up a stereo in there as well or I wouldn't survive.

I think if I saw that canvas cover somewhere for sale, I'd throw down $5 for it! :rocker:
 

XJSuperman

Well-known member
Joined
Jan 26, 2018
Messages
3,087
Location
Central Iowa
I'd put more than $5 down for that cover if I saw one. Thats really well done Z. The handle opening you made is exactly what I was thinking it needed. To be able to carry it while covered will be super handy.
 

ZRX61

Well-known member
Joined
Aug 15, 2006
Messages
28,716
Location
Solar Blight Valley, SoCal
I would think lead shot is probably the way to go. I've never used one of those beater bags before, but I have a few of the fenders on the VC1, my next truck project, that need a bit of work.
Fairly straight forward, just start light/easy. Some people just start wailing on the metal & it ends up like a bag of walnuts.


I have mine on a Craftsman Industrial toolbox so I can move it away from the walls when I need to use it. (plywood under it so it doesn't cave in the top of the toolbox). Trying to pick it up is something you don't want to try too often. If I had more space it would be on a proper stand like the one in the 2nd pic.
 

Attachments

  • 20210201_090219[1].jpg
    20210201_090219[1].jpg
    82.6 KB · Views: 50
  • Beaterbag1aa.jpg
    Beaterbag1aa.jpg
    43 KB · Views: 62
OP
Z

zepher11

Well-known member
Joined
Jan 4, 2015
Messages
1,493
Location
Northern, Northern CalifornIA
I'd put more than $5 down for that cover if I saw one. Thats really well done Z. The handle opening you made is exactly what I was thinking it needed. To be able to carry it while covered will be super handy.

Well, thank you. It is looking better and better to me. It sure will be way more handy now that the handle is easily accessible.
 
OP
Z

zepher11

Well-known member
Joined
Jan 4, 2015
Messages
1,493
Location
Northern, Northern CalifornIA
Fairly straight forward, just start light/easy. Some people just start wailing on the metal & it ends up like a bag of walnuts.


I have mine on a Craftsman Industrial toolbox so I can move it away from the walls when I need to use it. (plywood under it so it doesn't cave in the top of the toolbox). Trying to pick it up is something you don't want to try too often. If I had more space it would be on a proper stand like the one in the 2nd pic.

That stand you show looks pretty handy for the shot bag.

Just thought of another option:
Make a female die from Kirksite & try flow-forming the knackered covers into it.

I'll have to check this out. Not familiar with Kirksite, but looks pretty interesting for a number of potential projects.
 
OP
Z

zepher11

Well-known member
Joined
Jan 4, 2015
Messages
1,493
Location
Northern, Northern CalifornIA
Added some finishing touches to the bomb trailer. Scored a 12" x 12" - 1/2" thick piece of rubber. Cut it into eight rectangles, punched holes, and used countersunk screws to hold them down. Screwed them in about 1/8' into the rubber so the bomb wouldn't get scratched up while sitting on the cradles. Who wants to be blown up by scratched up bomb. Right? :dunno:

Anyway, the holes were already in the cradles and threaded 1/4-28, so hardest part was matching up each rubber section and punching the holes in the correct spot. Each two hole pattern were not the same distance apart. Now that should keep the bomb from sliding around after it's clamped down.

CC_2518.JPG


CC_2519.JPG


I also found this little chain binder to secure the chain that goes over the bomb that holds it down on the cradles. Not sure exactly how it was done back in the day, but I thought this miniature chain binder could play the part:

CC_25121.JPG
 
OP
Z

zepher11

Well-known member
Joined
Jan 4, 2015
Messages
1,493
Location
Northern, Northern CalifornIA
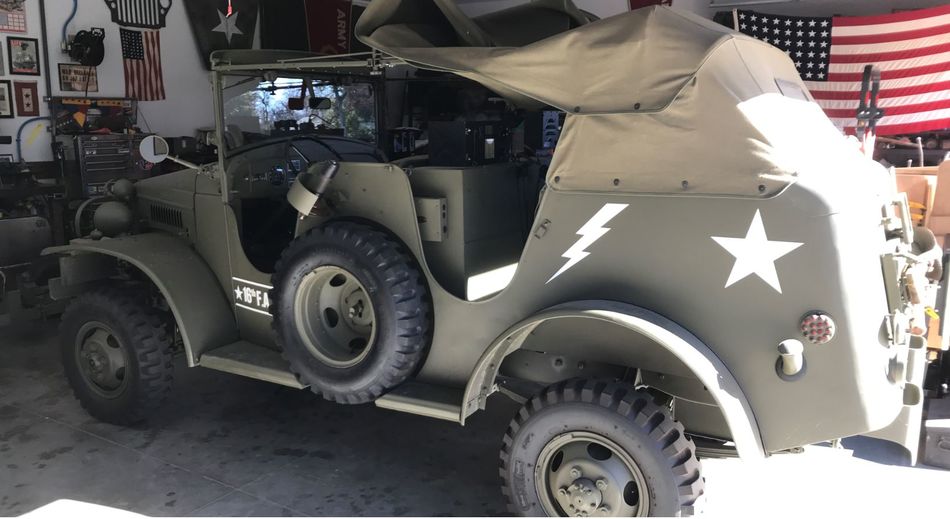
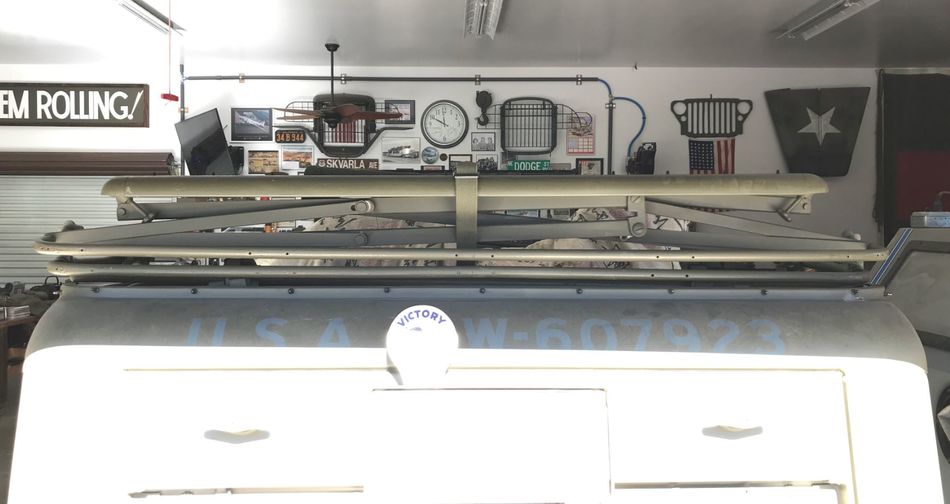
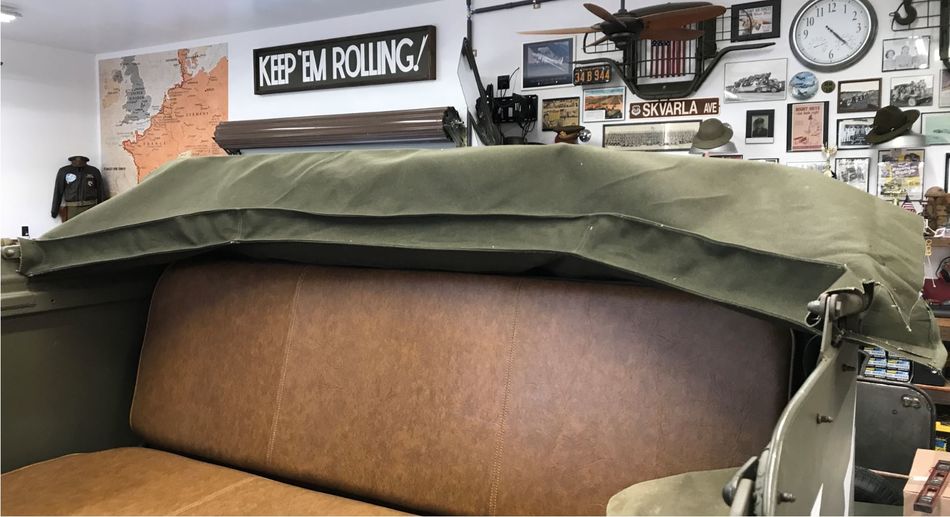
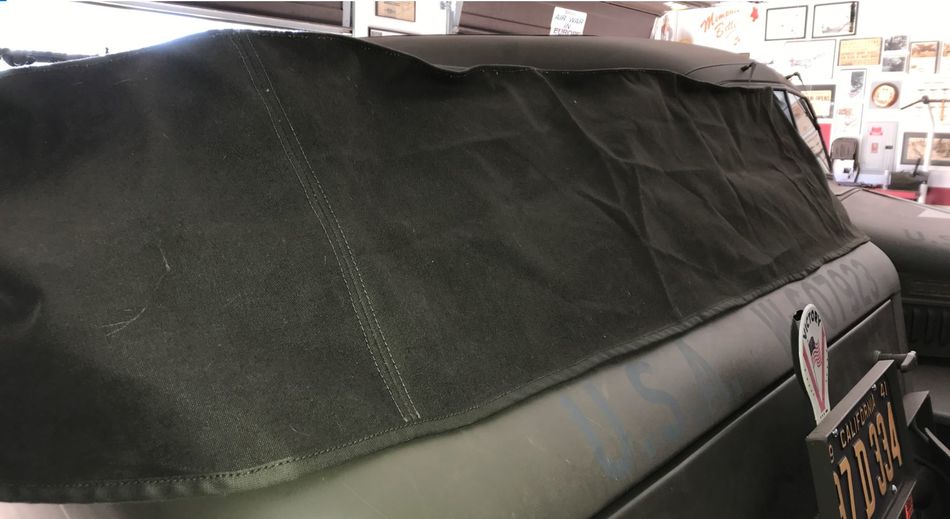
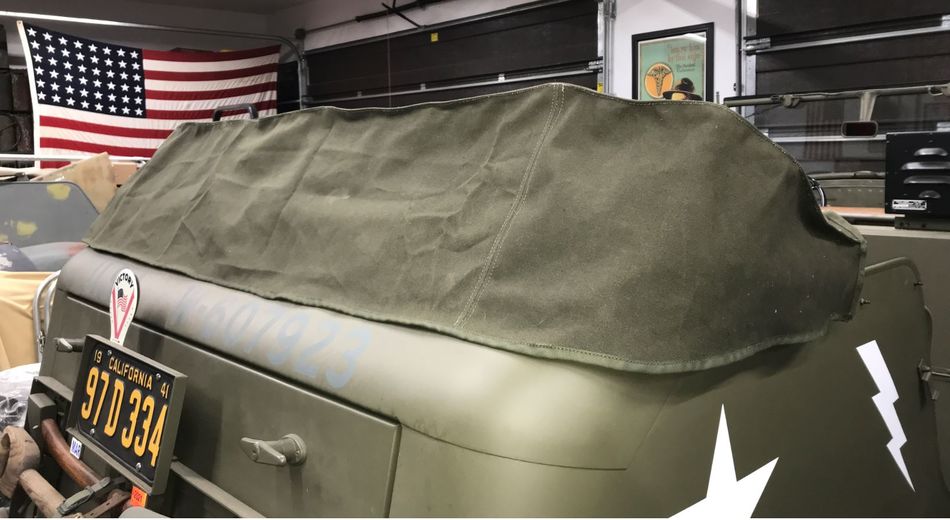
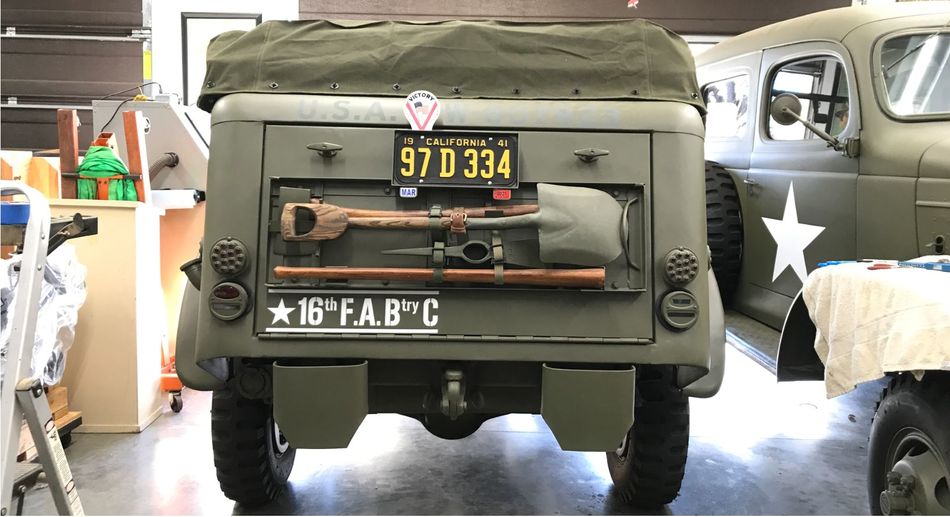
Well, had a wild idea to construct a top bow cover for the Command Car out of canvas. Figured I need to learn to sew, so might as well make some things that hopefully will be useful

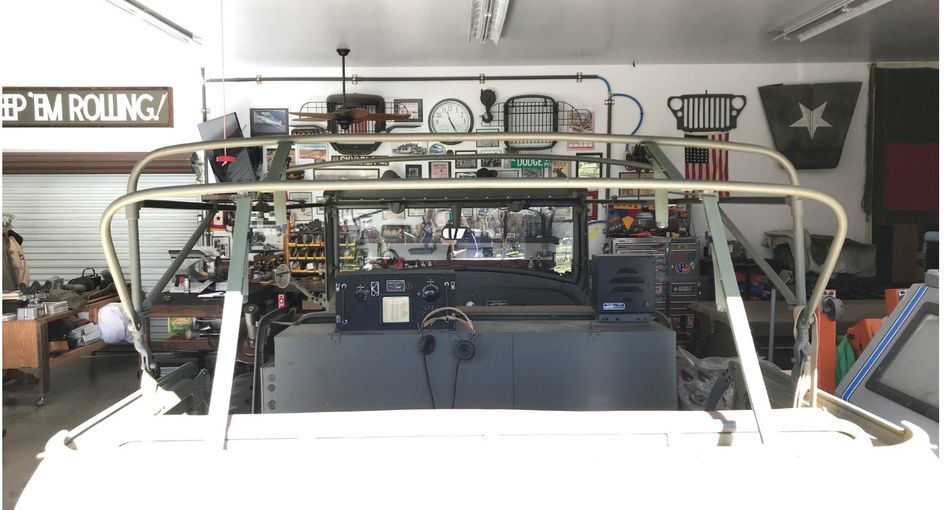
First had to pull the canvas top off the bows:

CC_2520.JPG


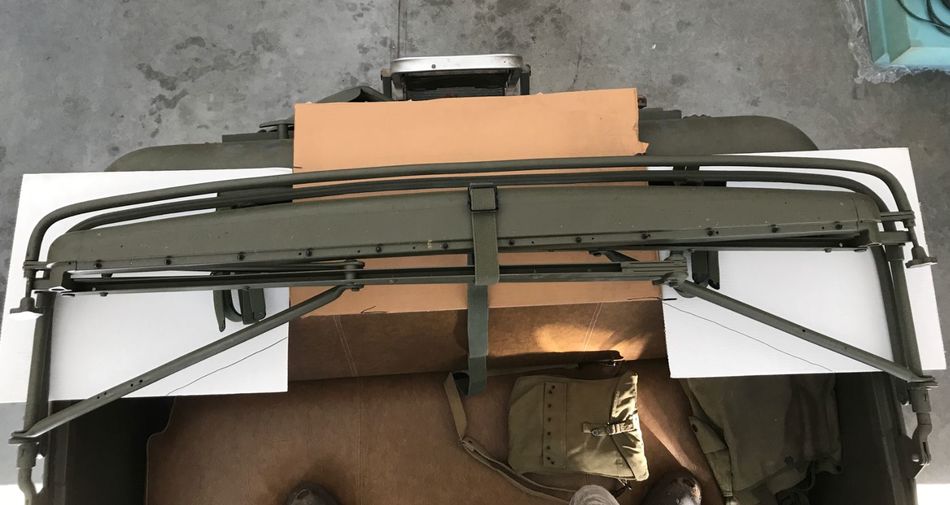
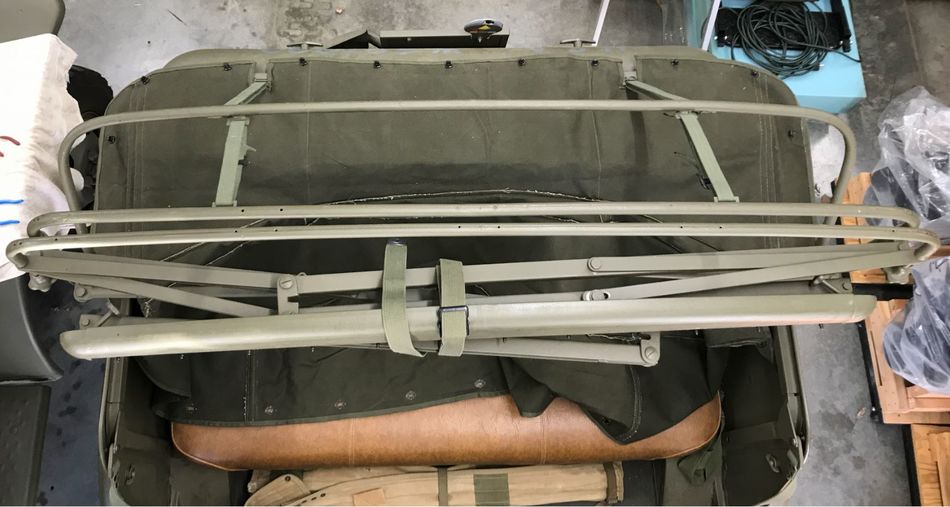
The bows fold like regular style convertible top bows, but the sit on the package tray metal on metal:

CC_2522.JPG


CC_2524.JPG


CC_2525.JPG


CC_2526.JPG


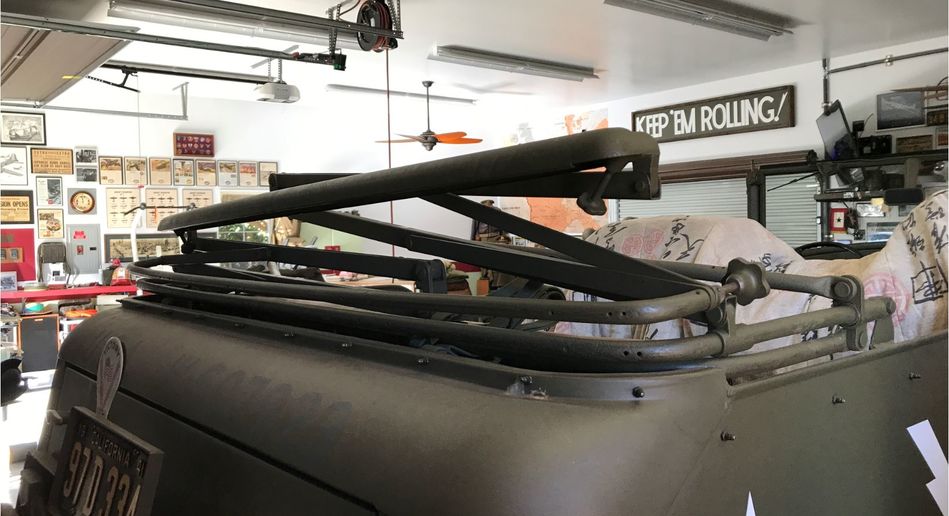
The bows don't quite sit lever, but found if I strapped them in the center, it would keep them level. Be a lot easier making a symmetrical cover. Well, easier said then done:

CC_2527.JPG


Roll out the canvas...when I bought this they folded it. All the other canvas I have bought came in rolls. Folded canvas just isn't right:
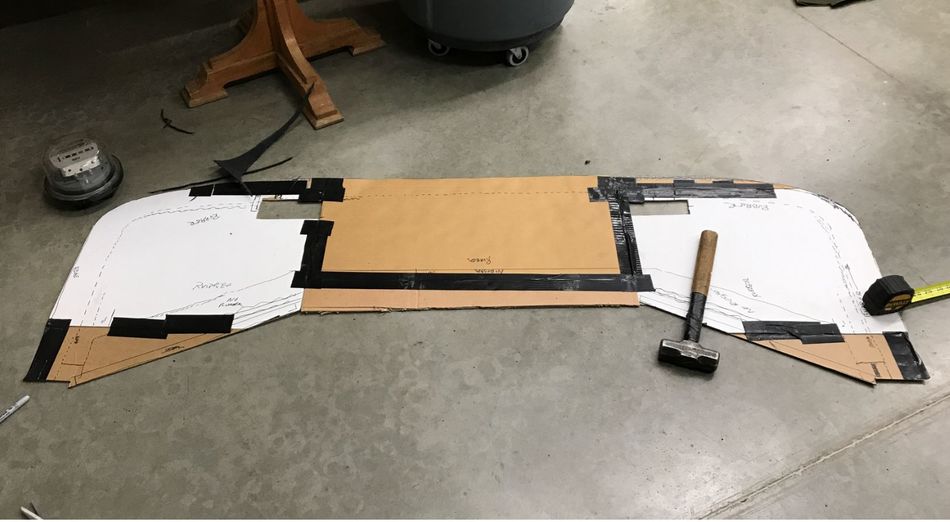
CC_2528.JPG


Making a template:

CC_2530.JPG


CC_2533.JPG


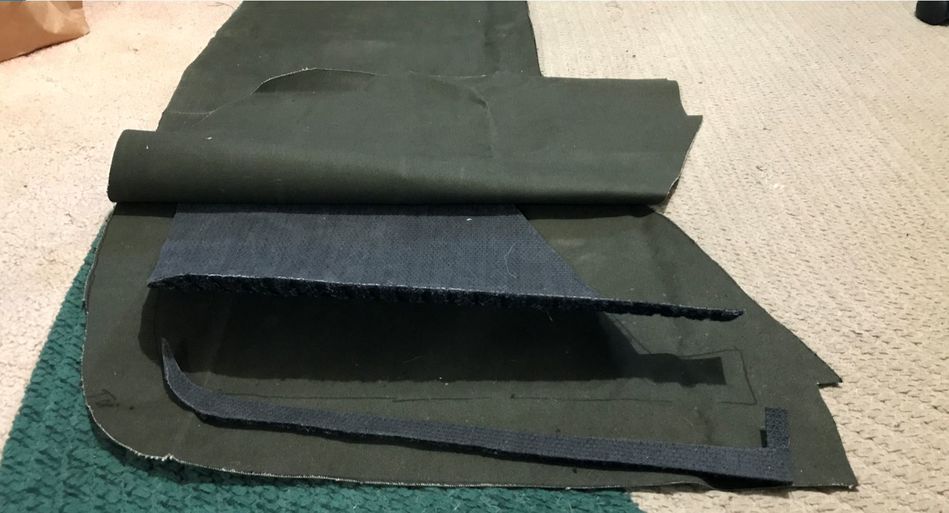
I wanted a bit of a cushion, so I picked up some of the carpet runner at home depot. Probably about 1/8" think with carpet like those classic shop door mats.

I cut two canvas sections to sandwich the rubber in between:

CC_2532.JPG


Rubber:

CC_25311.JPG


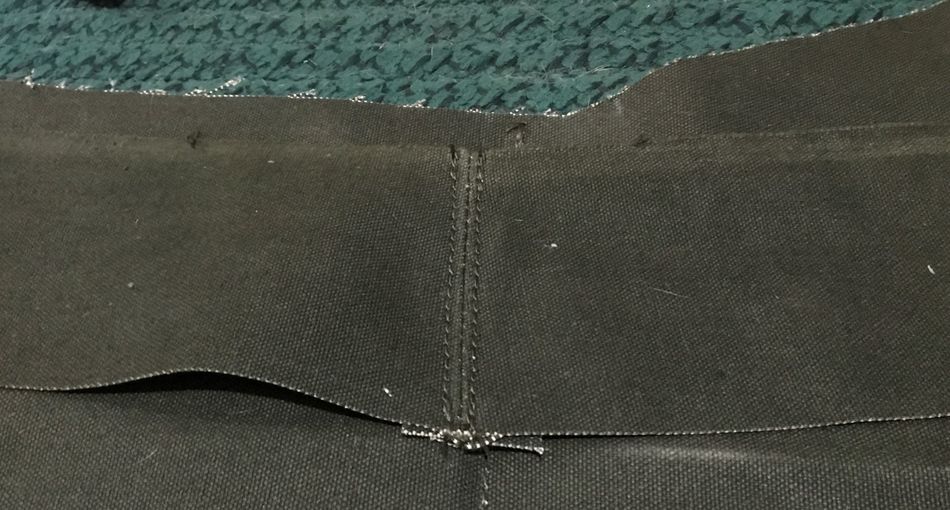
I tried everything to keep the rubber perfectly centered within the two pieces of canvas, but the rubber still migrated when I sewed it in place. Mostly left to right. I trimmed the one side off and added a little tad to this side:

CC_2534.JPG


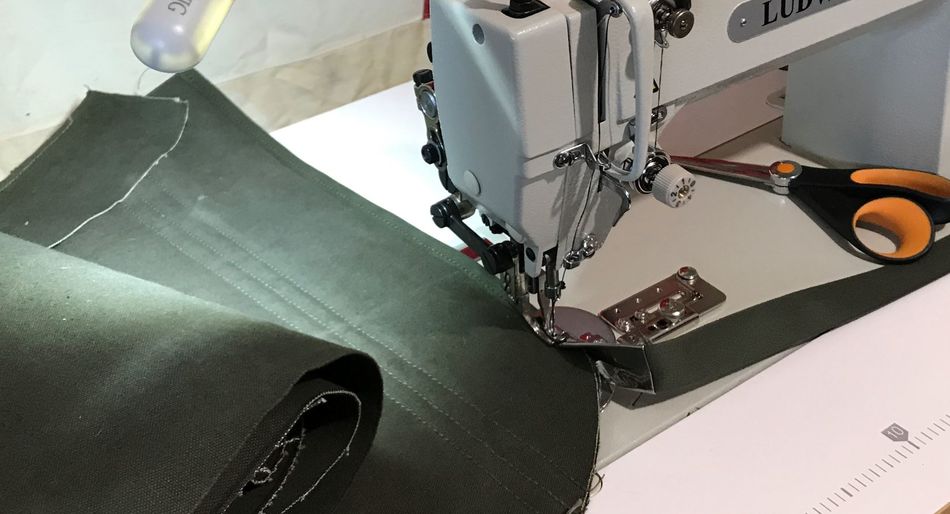
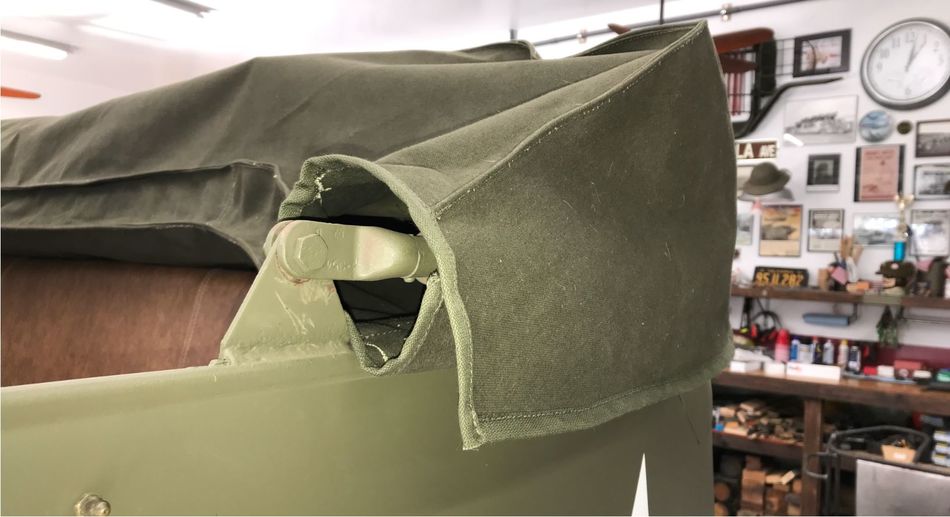
I wanted about a 3" strip of canvas on the interior side of the cover, but I had those angles. When I looked at it, I could see how it would bunch up if I didn't do something different. Finally decided to cut the strip at the angles. Had to cut them at an angle as well, and then sewed them together. Actually worked out ok. Here's where I want to add the strip:

CC_2535.JPG


Strip with the angles all sewn onto the bottom cover:

CC_2536.JPG


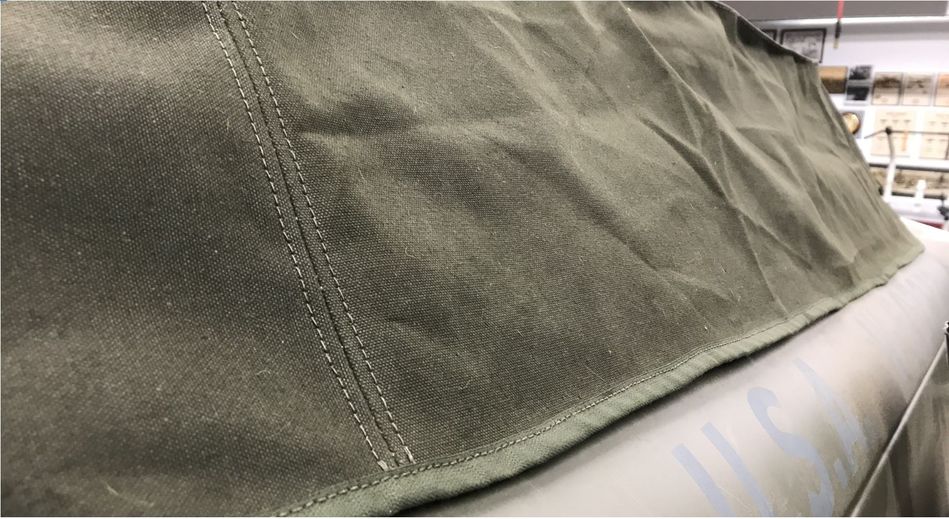
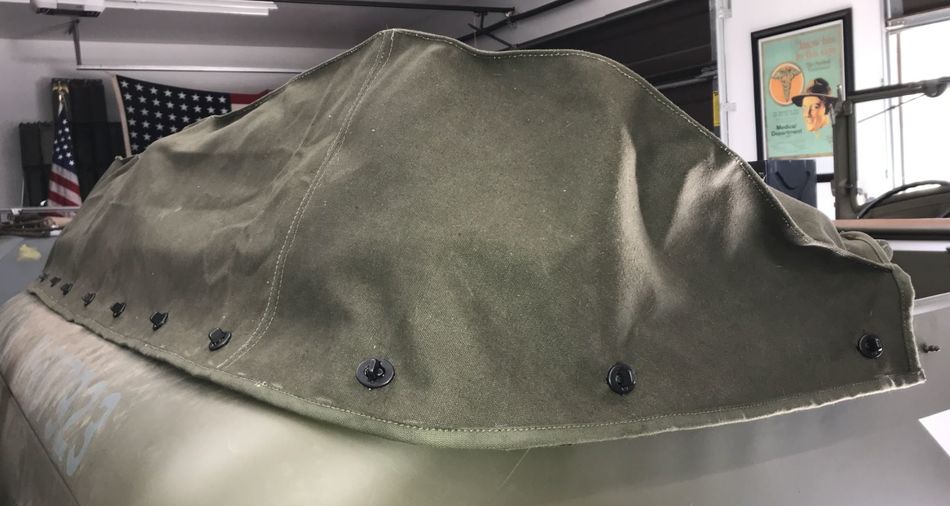
Then I wanted to add some binding all the way round the bottom section. It was a workout, but turned out pretty good:

CC_2538.JPG


CC_2540.JPG


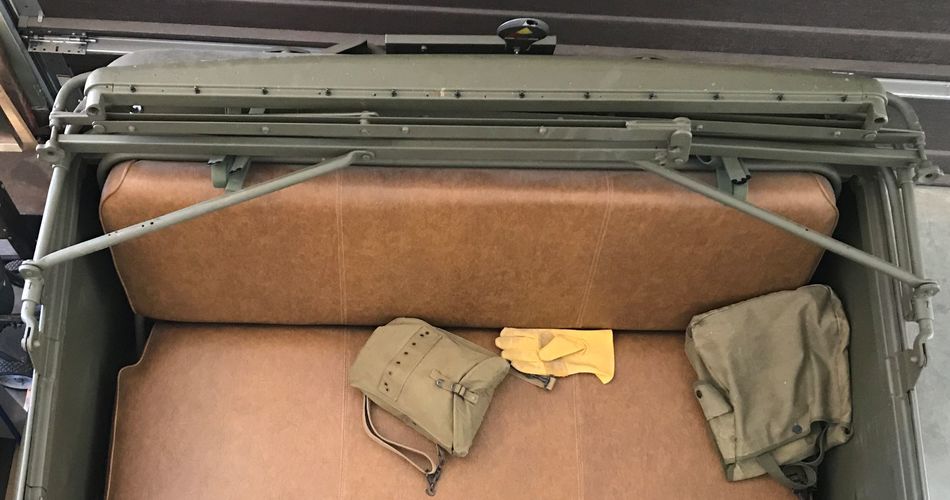
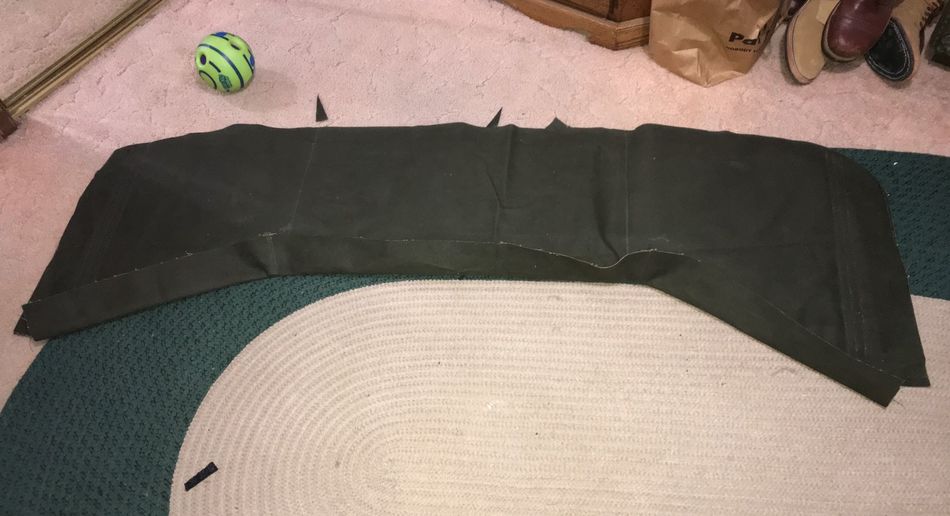
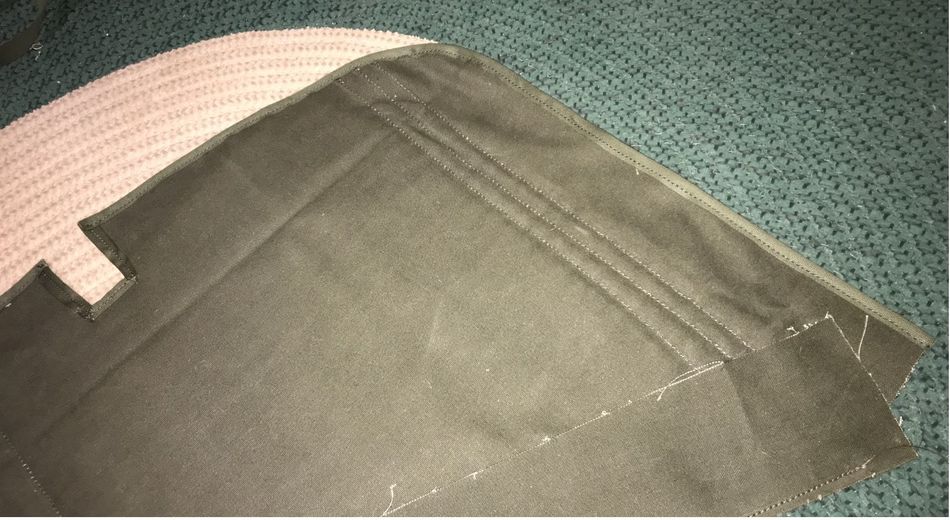
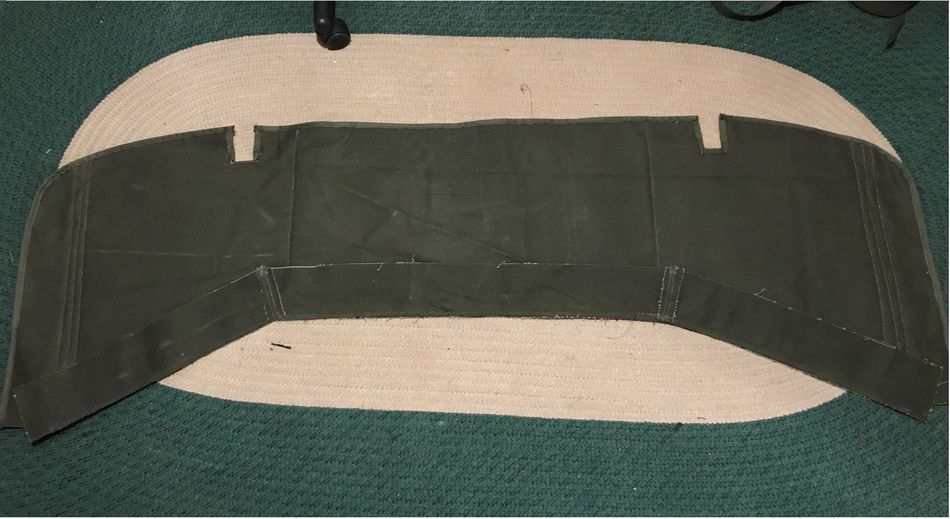
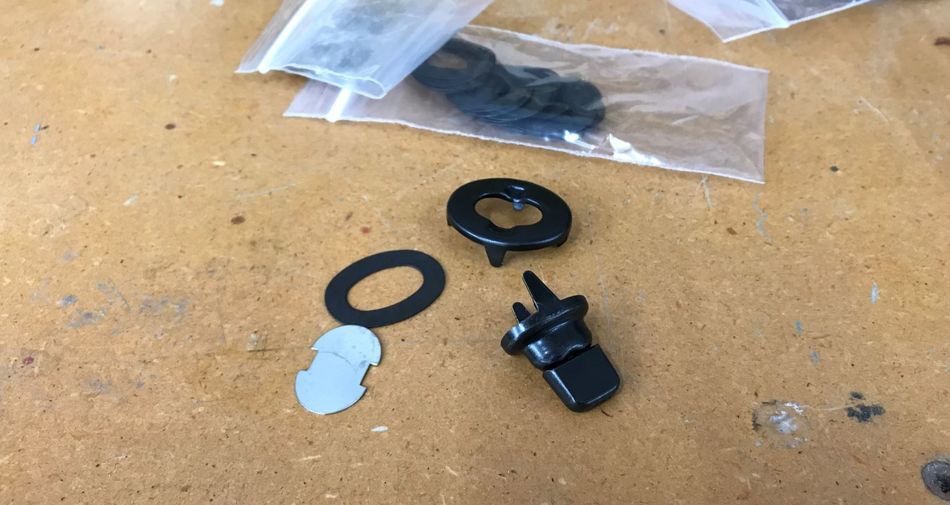
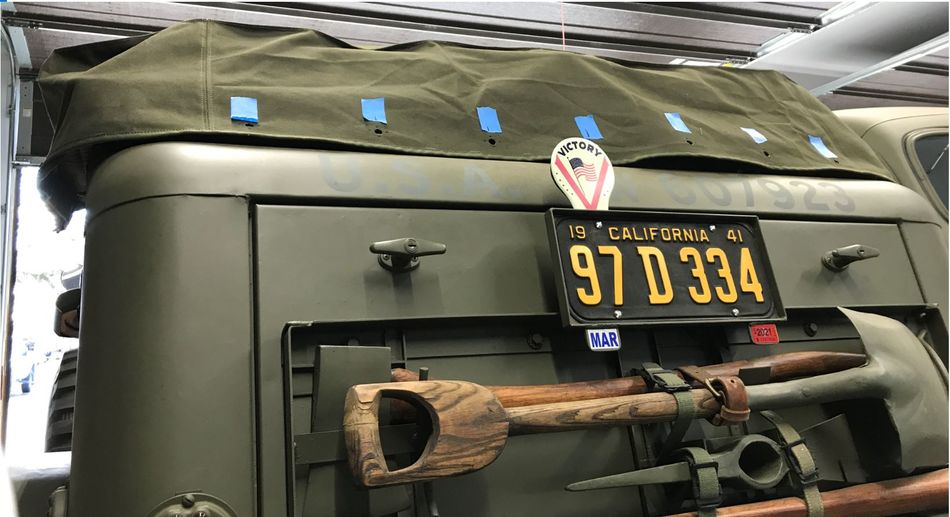
Binding all done, plus I had to add a couple of cut outs for the bow straps:

CC_2539.JPG


CC_25411.JPG


Here's a shot of the front/interior side like I was trying make it:

CC_2542.JPG


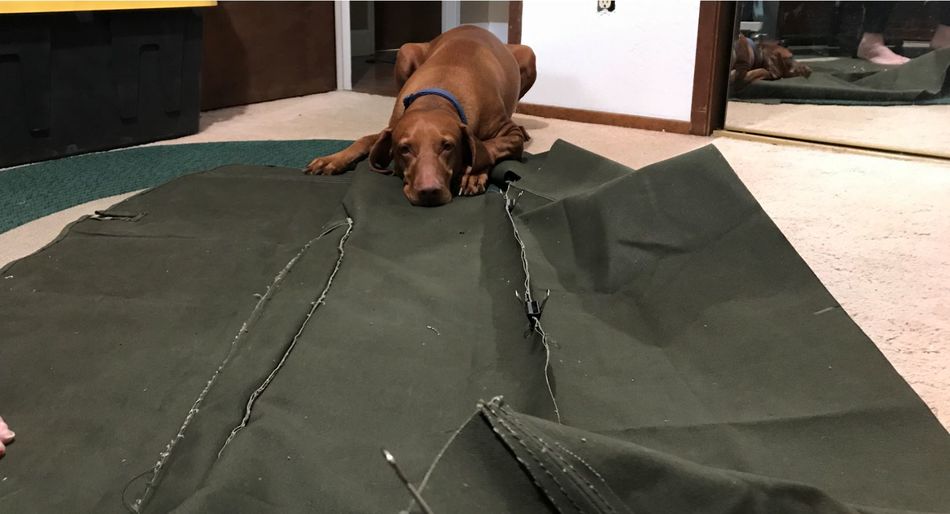
My wife thinks I'm nuts learning to sew, so she shot this:

CC_2544.jpg
 

jake28

Well-known member
Joined
Aug 28, 2018
Messages
482
Location
SF, CA
Nice job [mention]zepher11 [/mention]. Keep up that rate of improvement and you’ll be tailoring suits next week.
 
OP
Z

zepher11

Well-known member
Joined
Jan 4, 2015
Messages
1,493
Location
Northern, Northern CalifornIA
Nice job [mention]zepher11 [/mention]. Keep up that rate of improvement and you’ll be tailoring suits next week.

Thank you. I was laughing yesterday as I was telling my wife about your comment on the Olympic metal gymnastics. Geez, no kidding. I was a bit confused on the angles to cut, and then sewing them backwards. Whew...I was exhausted! lol
 
OP
Z

zepher11

Well-known member
Joined
Jan 4, 2015
Messages
1,493
Location
Northern, Northern CalifornIA
[mention]zepher11 [/mention]

https://ripstopbytheroll.com/

Great resource for mail order fabrics and buckles that your local shop likely won’t have. I go to them for backpack making supplies.

That's a good site. I also am liking the Sailrite site. https://www.sailrite.com/?ext=F&t=1612923908008&lang=en_US Ordered a few tools and Lift-the-Dot fasteners past couple of days there.

Northwest tarp also has some good stuff. http://www.nwtarp.com/

Also found a couple of sources for OD cotton binding and webbing. Most of the stuff one finds is nylon or polyester nowadays. Can't work with that post-war material. lol
 
OP
Z

zepher11

Well-known member
Joined
Jan 4, 2015
Messages
1,493
Location
Northern, Northern CalifornIA
Finished up the Command Car canvas top bow cover today. Had a few issues. The beautiful binding that I sewed on the lower rear edge where the fasteners are installed was not quite sewn correctly. A section about an inch long along the lower edge wasn't actually sewn to the canvas.

Somehow someone must not have been paying attention. I tried to sew it as a fix, but that went nowhere. I then thought I could rip a piece out and fix it, but that turned out to be a disaster. The canvas became really messed up, so today I cut the whole thing off. Trued up that canvas and resewed the whole length of binding again. Thought I had destroyed it, but saved it. Good thing I left it a little long. Whew!

Installed the common sense fasteners on the canvas after I fixed the cover issue above. It's always a little stressful punching that first hole in the canvas, but I think it actually turned out pretty good. Also shot a little video to give one a better perspective than just the photos:

Ralphie is very interested why I'm in the house during the day. He's used to me only being in the house when it's dark and bedtime:

CC_2545.JPG


Little shorter. It doesn't hang down as much as it did before, since I had to cut about an inch off to fix the binding:

CC_2546.JPG


CC_2547.JPG


CC_2548.JPG


Fastener hardware:

CC_2549.JPG


CC_2550.JPG


CC_2552.JPG


CC_25511.JPG


CC_2553.JPG


CC_2555.JPG


CC_2558.JPG


CC_2557.JPG


CC_2559.JPG


CC_2556.JPG
 

BORING HOP YARD

Well-known member
Joined
Jan 13, 2007
Messages
1,101
Location
Boring Oregon
Hey Zeph the bow cover came out great! I can see it now when you go to a show. "Hey that bow cover looks new' "I sewed it myself" Can you make one for me? and so on.
Great work!
 
To avoid these ads, REGISTER NOW!
Top Bottom