To avoid these ads, REGISTER NOW!

west of Philly - barn saving

OP
R

rieferman

Well-known member
Joined
May 18, 2009
Messages
2,586
Location
Collegeville PA (30 min west of Philly)
Been enjoying your thread Eric! I'll post in there at some point, but mostly I just read and admire your attention to detail. Nice work!

-----

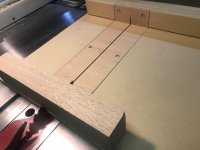
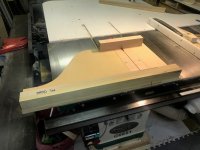
Table saw sled #2 was completed today... This is a "dado sled" in that it will only be used when I swap to a stack of dado blades.

My primary reason for needing to accurately cross cut dados is that I like to cut my tenons this way. Having a sled setup that allows repeatability comes in real handy.

I could also use this for (say) cutting grooves when building a book case. Although, this sled only allows for a 12" wide piece, so it's somewhat limited (i.e. I couldn't use it for big cabinet projects... but then, I probably wouldn't use a sled for that anyways).

On sled 1, the replaceable insert takes a bit of work to swap out. But the goal there is to very infrequently have to do that. So, fit for purpose.

On this sled though, replacing the inserts to match dado stack width will be a common occurrence. Therefore, I used materials that are thick enough to allow me to install post sleeves that accept 8-32 machine screws. Everything counter sunk. Swapping in/out takes about 20 seconds.

Since this sled is for non-through cuts, the safety plexiglass is not needed. After these pics, I did add a blade-exit block. Also, pics are shown with normal blade since I was in process of squaring the fence.
 

Attachments

  • dado sled 1.jpg
    dado sled 1.jpg
    130.7 KB · Views: 71
  • dado sled 2.jpg
    dado sled 2.jpg
    117.6 KB · Views: 57
To avoid these ads, REGISTER NOW!
OP
R

rieferman

Well-known member
Joined
May 18, 2009
Messages
2,586
Location
Collegeville PA (30 min west of Philly)
I used Sled 1 today for the first time for an actual project...

Wow, it was nice to use. I got perfect and repeatable cuts, and my project went more smoothly as a result. And, it was safer. Wins!

---

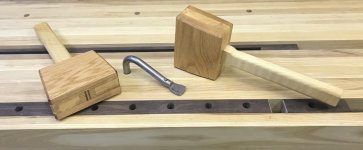
Anyways, my current super-fast project is that I'm building a couple of wooden mallets for use around the shop.

I've been using "hold fasts" (metal hooks that require a hit from a hammer to hold materials to your bench top) a lot now that the new workbench is functional and in use, so having a mallet is useful to set and release.

Also, chisels are making their way into my life, so mallets help you have a nice wide surface which allows more likelihood of good contact on each swing (think of a driver in golf rather than a putter). Since hitting the chisel is easier, you can keep your eyes on what the chisel is doing which helps you do a nicer cut.

In this case, I'm building a mallet "lamination" style. You cut the parts, stack and glue them. A "true" mallet has a head that is a single piece with a through-mortise cut. I plan to make some of those too, but right now just wanted to get the project done from scrap that I have laying around.

The outside layers are really old oak that a neighbor woodworker gave me when he moved out of state. He'd had it in his shop for about 30 years, and I've had it for about 5 now.

The interior layer and handle are leftover scraps of ash from the workbench build. Ash is pretty hard heavy, so that's desirable for a mallet. I was able to find a really cool grain pattern for the handles.

I'm making 2 of these. I'll keep one, and send one to my dad. He won't use it, but he's really taken an interest in following my woodworking over the years and he will be proud to have the mallet in his shop.
 

Attachments

  • mallet oak and ash.jpg
    mallet oak and ash.jpg
    132.3 KB · Views: 56
OP
R

rieferman

Well-known member
Joined
May 18, 2009
Messages
2,586
Location
Collegeville PA (30 min west of Philly)
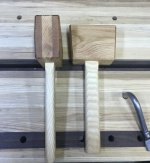
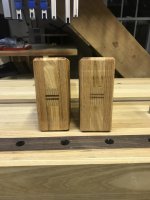
Got the mallets finished! While they aren’t perfect, I’m still very pleased with the results. I’ll start using one tomorrow when the finish is dry, and will give my dad the nicer of the two.
 

Attachments

  • B64D17E3-2321-41A5-95CA-04202A1C79B9.jpg
    B64D17E3-2321-41A5-95CA-04202A1C79B9.jpg
    100.8 KB · Views: 55
  • A2E37814-5517-4FD6-97B0-93B723779FDE.jpg
    A2E37814-5517-4FD6-97B0-93B723779FDE.jpg
    110.7 KB · Views: 61
  • 5FCF195F-280C-4529-827F-241381CC28C2.jpg
    5FCF195F-280C-4529-827F-241381CC28C2.jpg
    75.8 KB · Views: 68

Kev442

Well-known member
Joined
Jan 15, 2009
Messages
5,386
Location
Wi
When I hear mallet, all I can think of is Mario, and I never even played. :)
 
OP
R

rieferman

Well-known member
Joined
May 18, 2009
Messages
2,586
Location
Collegeville PA (30 min west of Philly)
Started my next shop re-org this weekend.

The real fun portion of this change is that the interior stairs in my shop will be removed (frees up a TON of space), water/sewer connection will enable a real shop sink with hot water!!, and the multi-purpose room will no longer be shared with the wife and kids... all miiiiiiiiiiiiiine!
:3gears:

Anyways, until then, I wanted to improve a few other things that have been bothering me.

My bandsaw needed to move during almost every cut in its old location, so it has swapped spots with my planer now, and both tools now have 12 feet infeed and outfeed as a result.

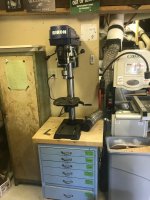
Also, I sold my floor drill press in favor of a new/better drill press (for my usage) - Rikon 30-212VS which has hand lever for changing speeds on the fly (instead of a step pulley system.. very convenient for woodworkers changing speeds a lot). An old set of drawers with butcher block top will hold that once the new DP arrives (I will add locking casters soon).

A hole cut in my wall allows the planer to do its thing in its new spot, and it sits on our old kitchen island from an apartment we had 20 years ago. IKEA for the win LOL

These moves also alleviate a pinch area near my jointer which was driving me crazy. I can now easily use the jointer for long boards.

:rocker:
 

Attachments

  • reorg before the real reorg AFTER 5.jpg
    reorg before the real reorg AFTER 5.jpg
    94.3 KB · Views: 96
  • reorg before the real reorg AFTER 4.jpg
    reorg before the real reorg AFTER 4.jpg
    112.9 KB · Views: 92
  • reorg before the real reorg AFTER 3.jpg
    reorg before the real reorg AFTER 3.jpg
    113.6 KB · Views: 93
  • reorg before the real reorg AFTER 2.jpg
    reorg before the real reorg AFTER 2.jpg
    105.6 KB · Views: 92
  • reorg before the real reorg AFTER 1.jpg
    reorg before the real reorg AFTER 1.jpg
    100.7 KB · Views: 98
OP
R

rieferman

Well-known member
Joined
May 18, 2009
Messages
2,586
Location
Collegeville PA (30 min west of Philly)
Well, I finished up some final "before the actual renovation renovations" in the shop the other night.

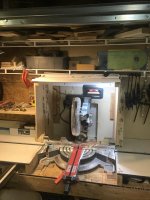
I have long wanted to remove the fence that runs on the left and right side of my miter saw. Miter saws are generally used in a woodworking shop for "rough" work, or as a homeowner for "construction" work... not suited for the tight tolerances in furniture work in many cases. As such, the lumber being cut is often not "perfect", and it may bump into an auxiliary fence causing it to be out-of-square by the tool's actual fence.

So, I removed the old fence, routed a groove into my counter top, and installed t-track instead. Lumber no longer "fights" with my fence, but I can still slide a stop block along the t-track to make repeatable cuts.

While I was at it, since I brought home my new miter saw, I hadn't yet installed a nice dust hood like I used to have. I cobbled together miscellaneous parts and achieved the objective. Wing extensions on both sides are in place with the help of gravity, and therefore require no tools to remove. Nonetheless, Shopnut... shield your eyes at my ugly solution :)

Otherwise, some minor odds and ends and organizing.

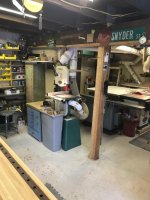
And then... removing my old under-stairs desk and tools....


BECAUSE....


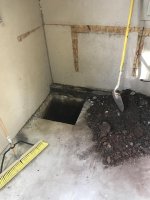
Water and sewer lines are being run to my barn next week!!!!!!!!!!! The interior stub-in will be right where my desk used to be, so that all had to go.


After the w/s job, the rest of the renovation will follow. So, goodbye interior stairs!! Hello new counter top / cabinets / wall storage system (likely french cleats).

More soon
 

Attachments

  • E6AC04CE-D3F8-4C26-AA31-972847D2EF18.jpg
    E6AC04CE-D3F8-4C26-AA31-972847D2EF18.jpg
    101.7 KB · Views: 90
  • 9727194D-8D17-44CD-B7FD-B5B83D2635F3.jpg
    9727194D-8D17-44CD-B7FD-B5B83D2635F3.jpg
    65 KB · Views: 78

Kev442

Well-known member
Joined
Jan 15, 2009
Messages
5,386
Location
Wi
We've all been waiting for this.
When I saw how tight it was to build your bench, I understood the staircase going outside, even if that is less than ideal in the winter.
 
OP
R

rieferman

Well-known member
Joined
May 18, 2009
Messages
2,586
Location
Collegeville PA (30 min west of Philly)
Thanks Kev! Yeah, those stairs really cramp that space considerably so they have to go. The good news is that our winters tend to bring only a handful of snow/ice events per year typically, so clearing the new exterior stairs will be only an occasional hassle. If the years prove that to be more of an issue, we can cove the stairs later (but wanted less "clutter" on the side of the barn for starters). Also, clearing stairs in this situation is easy because it's just the dog's play pen underneath... simply push stuff into the pen and the dogs will romp in it. :)

---

The crews arrived yesterday and started digging.

In my stint in construction sales and project management, digging was always the most worrisome step. You can't tell what's underground until you are committed and past the point of no return. If something pops up, you either cancel the entire project or incur extra cost.

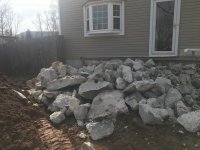
We had a huge concrete porch to remove.. we were unsure if it was tied into the stone foundation (which would be bad) or not... it wasn't. Sigh of relief.

We also learned via our PA One Call that the gas line runs directly under our planned foundation. Brainstorming with the PECO guy, we have a viable path forward. $1000 hit to the budget. Could've been worse.

Dig out next to the house and next to the barn (needed for the horizontal boring crew) went nicely, thank goodness.

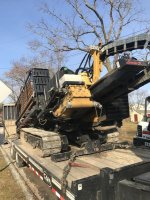
And now, huge equipment out front.
 

Attachments

  • 8557989F-1E91-4C1F-8059-8E13851C0B8C.jpg
    8557989F-1E91-4C1F-8059-8E13851C0B8C.jpg
    148.1 KB · Views: 115
  • 409BC8F0-1EFD-4F17-A1D2-1B8921488D31.jpg
    409BC8F0-1EFD-4F17-A1D2-1B8921488D31.jpg
    148.1 KB · Views: 125
  • 0156A56C-9274-4CA7-AF05-F4C67A474A6A.jpg
    0156A56C-9274-4CA7-AF05-F4C67A474A6A.jpg
    85 KB · Views: 121
  • 2B8D4B38-D508-40BB-9675-DAB4C70BB4FF.jpg
    2B8D4B38-D508-40BB-9675-DAB4C70BB4FF.jpg
    150 KB · Views: 133
  • A058A089-C229-4350-B39C-1743CDC9E6FF.jpg
    A058A089-C229-4350-B39C-1743CDC9E6FF.jpg
    151.1 KB · Views: 120
Last edited:

Kev442

Well-known member
Joined
Jan 15, 2009
Messages
5,386
Location
Wi
Ooo, some major change happening there.


I remember being rather anxious about the cutting of my poured foundation and concrete floor for the sewage stack to go down and out. I wanted the smallest hole I could manage, so I measured the outside like 5 times to be sure my 5" x 5" hole in the wall would line up. I nailed it, TG. I had forgotten that I tortured my circular saw on that project cutting concrete. It's still running 20 years later, so I guess all is good! :)
 
OP
R

rieferman

Well-known member
Joined
May 18, 2009
Messages
2,586
Location
Collegeville PA (30 min west of Philly)
Major changes for sure! Stressful and exciting at the same time.

I posted in the morning time above, and by the end of that same day, the guys had successfully installed the 1" water line, 4" sewer run, and 1" data conduit with pull string. I saw them place coated cable in the tunnel too, I suspect to help if the pipes ever need to be found in the future with a metal detector.

It was really amazing to watch these guys work. Very professional, and super nice to explain details to me and let me watch.

For the shop connection, they were able to dig deep enough to tuck the pipes under the old foundation, so no hole cut through the foundation wall was needed (just the floor as pictured above). The digging at that spot was inside the dog kennel that is adjacent to the shop... they carefully pushed all the 3/8" river rock that's in the kennel aside, flipped back the geotextile fabric, did their work neatly, backfilled, flipped the geotextile back down, carefully re-spread the river rock... looks like they were never even there. Very impressed.

Back at the house, they expertly tied into the sewer main, brought the 1" lines into the basement through the foundation wall below freeze depth, and then patched with hydraulic cement. The hole outside the building was filled with "fines" (as the excavator called it.. small clean stone) and hand compacted until the pipes were all safely encased, and then topped with soil. Covered with straw to keep the mud at bay until they return later in the project to do final grading and seeding.

In front of the house, where the addition will go, they dug for footers and deck piers and received a glowing review from the inspector. Then installed rebar, and poured. They worked like a well-oiled machine, and I can't wait to see the rest of the project go up now.

After a past experience being held hostage by a terrible "builder" (more of a con man really), working with these guys is such a blessing. They're nice, they work hard, they are craftsmen. I made sure to express that to all of them and could tell they really felt proud that their efforts were noticed.

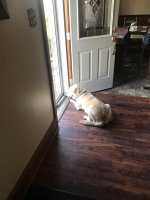
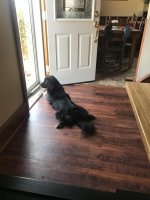
Edit: Also, the dogs took turns keeping a close eye on the crew. Buttercup (the yellow lab).. she thinks the workers are the best thing ever. Sat in the lawn all day watching and getting patted now and again. Mabel (a rescue that we got as a puppy.. we think border collie mix of some sort) was verrrrry skeptical of these guys. She's interested, but very concerned. Barks her head off. lol
 

Attachments

  • 558A4F68-61C6-47EB-AFD6-E581F66F7FF2.jpg
    558A4F68-61C6-47EB-AFD6-E581F66F7FF2.jpg
    76.3 KB · Views: 76
  • E8CCE51C-861E-47B2-83A4-6F6C8B55343E.jpg
    E8CCE51C-861E-47B2-83A4-6F6C8B55343E.jpg
    88.7 KB · Views: 72
OP
R

rieferman

Well-known member
Joined
May 18, 2009
Messages
2,586
Location
Collegeville PA (30 min west of Philly)
I recently posted about my woodworking bench build, and I'm very happy with that new tool in my shop... but on to the next thing.

As part of the upcoming renovation, the room next to my shop that used to be shared with the kids (they had weight lifting equipment in there, but now workout in the house or at the YMCA instead) is now mine.. mine I tell you!!! alllllllllllll miiiiiiiiiiiiine... <insert evil laugh>


That room will now be the "assembly room"... meaning, glue ups, assembly, and finishing.

All clamps, glues, stains, dies, brushes etc. etc. etc. will live in this room, thereby greatly reducing the clutter in my main shop.

The central aspect of the assembly room will be the assembly table, with the following features:

- Height adjustable (the base will be a hydraulic lift cart, such as this one, that I convert for this purpose)

- Large table to accommodate larger projects - likely 3' x 7'

- VERY flat top (I will be building a torsion box design)

- VERY easily cleaned top... can't have glue sticking to the table top (planning to use Formica)

- Storage underneath.. I'll need to limit how low the lift table can go to allow for some storage underneath


The rest of the room will feature clamps storage, hose management for shop vac and spray gun hose, curtain system to protect walls when spraying finishes, filtered exhaust (again, for spraying), and then just tons of storage for paints/consumables etc.
 

borgdog

Well-known member
Joined
Jan 8, 2011
Messages
109
Location
Spokane, WA
Re: west of Philly - barn saving (tours on pages 14, 19, and FINAL tour on 35)

That sounds like a cool table. Interested to see how you incorporate the lift cart into it so I can steal the idea.

Sent from my SM-T720 using Tapatalk
 
OP
R

rieferman

Well-known member
Joined
May 18, 2009
Messages
2,586
Location
Collegeville PA (30 min west of Philly)
Re: west of Philly - barn saving (tours on pages 14, 19, and FINAL tour on 35)

That sounds like a cool table. Interested to see how you incorporate the lift cart into it so I can steal the idea.


I'll keep you posted! :)


---

That said, I'm doing a lot of planning and not a lot more building right now as the home remodel heats up. I like planning, but miss building.

My latest project (can't remember if I posted about this) was something we're calling "the credenza", but perhaps the wrong term. Basically central cabinet is flanked by two beverage refrigerators, and the whole thing is topped with a maple counter top. Anyways, the project turned out great but it's just sitting taking up space in the shop until our addition is done and I have a place to put it.

Edit: I don't think I did post about the credenza yet... I've attached a pic from near to the end of that project.. just mocked up/dry fit, not finished, but you can get the idea. The middle shelf is on full extension runners and will hold my office printer. The other shelves are fixed. Amrosia maple and maple plywood.

Anyways, my point is... I can do planning, but if I build another thing, I'll be entirely out of space. And I'll need to use my tools for carpentry tasks soon, so they can't be buried.

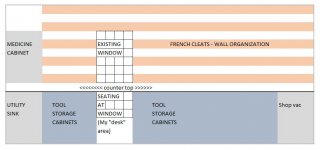
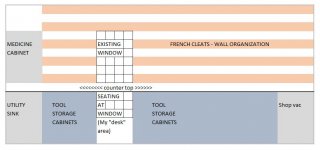
Today's planning is around the new wall space in my main shop. The one I posted a few posts ago. That wall will begin with my sink on the left followed by cabinets under a long counter top. Two no-cabinet areas will allow me to be seated at one spot, and a shop vac to be stored in the other. I want the counter top to be pretty narrow, around 18".

My initial thought was to build plywood cabinets.

And then...

I saw these YUKON cabinets from good ol' HF.


If I bought 2 of these (one on each side of the sitting/desk space) and spanned then with a common counter top... That's similar or cheaper than I could accomplish using quality plywood.

I would plan to remove the casters and build them onto a toe kick because I want it to be permanent and non-wobbly.

Here's drawing of that wall again as a reminder
 

Attachments

  • new shop wall high level plan 3-6-21.JPG
    new shop wall high level plan 3-6-21.JPG
    40 KB · Views: 55
  • credenza dry fit.jpg
    credenza dry fit.jpg
    136.5 KB · Views: 73
OP
R

rieferman

Well-known member
Joined
May 18, 2009
Messages
2,586
Location
Collegeville PA (30 min west of Philly)
Foundation done! First story joists and subfloor installed!!!

The framing crew is up next, and they'll also look at the barn / shop work while they're here so we can get that planned and on the schedule too.
 

Attachments

  • 8C382A5A-3077-458C-B82F-ACD7D440106D.jpg
    8C382A5A-3077-458C-B82F-ACD7D440106D.jpg
    141.2 KB · Views: 92

Kev442

Well-known member
Joined
Jan 15, 2009
Messages
5,386
Location
Wi
It's always a ton of fun walking around where nothing but air existed a week prior. :)
 

NUTTSGT

Super Moderator
Staff member
Joined
Sep 14, 2009
Messages
51,068
Location
Northern Central Ohio
Looking at the foundation/first floor pic, it doesn't look big. However, the second picture as a two story addition, that adds a ton of square footage to the house.
 
To avoid these ads, REGISTER NOW!
OP
R

rieferman

Well-known member
Joined
May 18, 2009
Messages
2,586
Location
Collegeville PA (30 min west of Philly)
Looking at the foundation/first floor pic, it doesn't look big. However, the second picture as a two story addition, that adds a ton of square footage to the house.


Our house, before the addition and ignoring the barn / finished rec room, was about 1800 square feet. The addition adds a total of 480 square feet, or about a 25% increase. Plus the covered front porch, and barn/shop work. Major impact for our household :)
 
OP
R

rieferman

Well-known member
Joined
May 18, 2009
Messages
2,586
Location
Collegeville PA (30 min west of Philly)
looking good Bob, hope it is going to your liking. Did you get the barn work on the schedule?

Thanks Kev!

The crews are great, the weather has been awful, but we're getting there. I haven't been able to nail the builder down on when exactly he'll fit in the barn work around all the house work, but it can't be too long since they want to be completely out of here in May
 
OP
R

rieferman

Well-known member
Joined
May 18, 2009
Messages
2,586
Location
Collegeville PA (30 min west of Philly)
Recently, I sold my vintage Walker Turner drill press... it was a beast, ran smoothly, but was way too big for my usual needs and had a bit of runout that was proving difficult to resolve.

Instead, I bought a new Rikon 30-212VS benchtop model because it has some key features that are of value to me...

1. Speed changes are done real-time using a lever while watching the digital readout. Very nice not to have to constantly change belts, and the number one thing I cared about.

2. 3/4 hp is actually a bit stronger than my old WT drill press

3. The table is nicely designed to easily accept auxiliary tables that most woodworkers like to use. So, very easy for me to enhance.
4. The table surface on my old DP had to be lifted manually.. A nice hand crank makes easy work of that now.

5. LED light and cross-hairs laser both work nicely and are on their own switches.

6. It's a benchtop with some guts. Due to strong motor, and over 3" of quill travel, I have the best of both worlds for the type of work that I do.. I can have drawers underneath, but still have a very capable drill press.
 

Attachments

  • new drill press.jpg
    new drill press.jpg
    101.5 KB · Views: 89

shopnut

Well-known member
Joined
Feb 22, 2006
Messages
4,237
Location
Florida
Looks like a great drill press. Enjoy using it! Yeah, you will love the on-the-fly speed changes.
 

jar944

Well-known member
Joined
Jul 26, 2010
Messages
5,950
Location
Northern VA
Looks like a nice unit. Its always interesting to see how people go about things differently. For me the drill press is the least used tool in he shop, but I've had conversations with people where it's their go to machine for almost every project.
 
OP
R

rieferman

Well-known member
Joined
May 18, 2009
Messages
2,586
Location
Collegeville PA (30 min west of Philly)
Thanks guys!

Jar - It's funny because I have one nearby buddy that is very serious into woodworking, and he and I are opposites on several items (despite that we often build similarly difficult projects with similar quality results). And the drill press is one we totally disagree on. He hasn't used his in years, and I tend to use mine nearly every time I'm in the shop.

He and I also take different paths in terms of investment approach and tools. He has easily $30-40,000 invested in tools, but works in a small unheated garage. I have far less than $10K in tools, having researched and purchased many used items over time, but have a lots more $$ into my shop as it is my temple of sanity.

One more example... he believes in a specialty tool for every task. Domino, many other Festool items, power feeders, precision store-bought sleds, 5 routers all setup for specialty jobs etc. He works in spurts and in a production-like manner, cranking through tasks, and then not working in the shop for weeks. I tend to enjoy working with what I have available to me (cutting my own mortise and tenon, hand feeding boards through tools, making my own jigs), slowly upgrading when the need is very obviously needed, and take a bit longer to finish projects, but am in the shop almost every day year-round.

In any case, he has produced some really nice furniture, and I've produced a bunch of decent stuff too, so I think there are lots of viable ways to the finish line :)
 

jar944

Well-known member
Joined
Jul 26, 2010
Messages
5,950
Location
Northern VA
Thanks guys!

Jar - It's funny because I have one nearby buddy that is very serious into woodworking, and he and I are opposites on several items (despite that we often build similarly difficult projects with similar quality results). And the drill press is one we totally disagree on. He hasn't used his in years, and I tend to use mine nearly every time I'm in the shop.

He and I also take different paths in terms of investment approach and tools. He has easily $30-40,000 invested in tools, but works in a small unheated garage. I have far less than $10K in tools, having researched and purchased many used items over time, but have a lots more $$ into my shop as it is my temple of sanity.

One more example... he believes in a specialty tool for every task. Domino, many other Festool items, power feeders, precision store-bought sleds, 5 routers all setup for specialty jobs etc. He works in spurts and in a production-like manner, cranking through tasks, and then not working in the shop for weeks. I tend to enjoy working with what I have available to me (cutting my own mortise and tenon, hand feeding boards through tools, making my own jigs), slowly upgrading when the need is very obviously needed, and take a bit longer to finish projects, but am in the shop almost every day year-round.

In any case, he has produced some really nice furniture, and I've produced a bunch of decent stuff too, so I think there are lots of viable ways to the finish line :)

:lol:

I'm likely closer in methodology to you friend. If there is a specific tool for a specific process (that is commonly used in commercial shops) it's on my want (or already have) list. Now with that said I'm as cheap as possible when it comes to acquiring tools so I scour the earth looking for deals.. doesn't matter if I have a current need or not ill buy it if it's cheap. That has allowed me to outfit my shop for a good bit less than 20k. Its the same reason I have 2 hinge borers but no edge sander.. (good deal vs no deal)

My goal in the shop is to be as efficient as possible (while maintaining a high level of quality) and spend as little time in there as I can. Its a basic production mentality without it being a business.
 
OP
R

rieferman

Well-known member
Joined
May 18, 2009
Messages
2,586
Location
Collegeville PA (30 min west of Philly)
In preparation for the upcoming barn work, I started shop re-org version 1 million (seemingly).

Basically, it will be like this...
- If it is "building furniture" or "common household repair/maintenance" item, it will be in my main shop area.

> So, this means, commonly used fasteners, tools, jigs, and the associated accessories


- If it is "assembling / finishing furniture", it will be in the new assembly room (former exercise room for the kids)

> This is clamps, consumables, spray equipment etc.


- And, all other "use rarely" items will go to the 2nd story storage area in the barn. I'll call this my "hardware store".

> Most of my electrical and plumbing supplies
> Infrequently used tools (e.g. pipe threader, come along, buffer, framing nailer etc.)
> Infrequently used fasteners and other hardware (e.g. joist hangers, shelf brackets, thick bolts from barn saving)


- Of course, the machine side of my shop is just for machines and the lumber I'm cutting, so that part is already accomplished.


I'm sure I'll make some mistakes around what is in each place and need to do minor fine tuning over time, but it really will be nice to have less clutter in the shop, and stay focused on the work I do in there.
 
OP
R

rieferman

Well-known member
Joined
May 18, 2009
Messages
2,586
Location
Collegeville PA (30 min west of Philly)
Got much of the reorg above done over the last week with help from my two teenagers. Clamps have moved to new shop-built racks in the next room over, clearing the way for structural work in the main shop.

The structural work was removing a post and beam that supported cut joists in the stairwell to the 2nd story. Since those stairs are being removed (relocated to exterior of building) and the stairwell is being enclosed (will become a full 2nd story bathroom) the post and beam need to go in order to enable the rest of my shop renovation plans.

So, I added some temporary supports under each of three cut joists by the stairwell, which then allowed me to remove the old post and beam.

On either side of the stairwell opening full length joists were in place already. I sistered additional 2x8's to each of those to strengthen them for their new job (see below).

Then, I trued up the ends of the cut joists so that the are all in the same plane, cut the old support beam to fit between the sistered full length joists and installed that beam. Joist hangers hold the beam in place to the sistered joists... and then additional joist hangers hold the cut joists to the beam.

(note: our architect drew up the plan of attack, I just enacted it.. so this isn't "guess work")

I also swapped out all old fluorescent lights for LED shop lights while I was at this.

So now, I have super bright shop with the major structural overhaul complete. My contractor will pick it up from here (he's doing the stair removal, new stair build).
 
OP
R

rieferman

Well-known member
Joined
May 18, 2009
Messages
2,586
Location
Collegeville PA (30 min west of Philly)
Picked up my new Yukon (Harbor Freight) boxes today. Very nicely packaged, not a dent/scratch anywhere. Very heavy. All drawers slide smoothly.

And...

Now...

I...

Wait...


Sigh.. My builder's urgency vs. mine are not aligned. He'll get to me when he gets to me. Which means these boxes will sit right here for probably 2 months, and my shop is basically shut down for lack of room to work since all my stuff is piled to the ceiling right now. Ugh.

So, fun to get new stuff, but frustrating to have to wait to install/enjoy.
 

Attachments

  • new tool boxes may 2021.jpg
    new tool boxes may 2021.jpg
    133.3 KB · Views: 61
OP
R

rieferman

Well-known member
Joined
May 18, 2009
Messages
2,586
Location
Collegeville PA (30 min west of Philly)
New garage door went in yesterday up at the barn. This one just looks and works nicer than the previous option, has better insulation, and includes a window for the top panel which brings in nice light on the machine side of shop. I think barn exterior stairs is next week, and then I can begin my interior improvements in my shop.
 
OP
R

rieferman

Well-known member
Joined
May 18, 2009
Messages
2,586
Location
Collegeville PA (30 min west of Philly)
Well, another month later... and the builders... are... still.... here..................

The good news is that the home addition is basically 95% finished, and we can enjoy the space. Just some punch list items being impacted by still-lagging-"due to covid" supply chain.

He tells me barn stairs is happening a week from today and should take them 2 days. Lots of interior work in the barn after that, but I'll do most of that myself which speeds things up considerably.

More soon!
 
OP
R

rieferman

Well-known member
Joined
May 18, 2009
Messages
2,586
Location
Collegeville PA (30 min west of Philly)
Fun weekend! My folks came in from Pittsburgh (their first visit to see us since COVID began) and were able to see the completed home addition and enjoy some great weather.

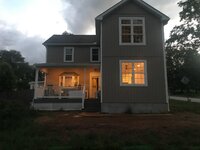
I'll do a proper home tour set of pics soon once a few final punch list items are done, and the grass grows back in. Meantime, here's a preview (the board/batten portion and the porch is new).


house nearly complete.jpg

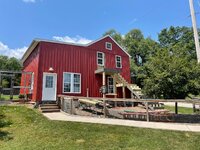
And, more fun for the GJ guys... the exterior barn stairs project began last week. The builders got a lot done in a single day, and will be able to finish this in short order. A top landing leads to a middle landing, then a 90 degree turn to a landing that will be installed at ground level (not complete in this pic yet). The access to the bottom landing will be from the street, which allows the adjacent dog pen area to stay as-is.

exterior stairs in progress.jpg

Since the exterior stairs are nearly done, I could remove the interior stairs to begin my shop remodel. I gain about 60 square feet of usable floor space, plus use of the wall that was previously blocked by the stairs. Here's how far I made it yesterday:

stairs removal 1.jpg stairs removal 2.jpg
 
To avoid these ads, REGISTER NOW!
Top Bottom