To avoid these ads, REGISTER NOW!

ZMotorsports Shop Projects 2.0

OP
Z

zmotorsports

ALLIANCE MEMBER
Joined
Oct 20, 2009
Messages
21,441
Location
Northern Utah
Great work on the axle and gauge pod! That axle jig sure is nice. It's incredible how nice, easy, and quick the right tools makes a job.

How is the gauge pod attached? I see a couple of holes in the side, but how do you get to them?

Thanks for the comments.

I drilled the holes in the flange of the gauge panel before adding the enclosure. Also before adding the enclosure I transferred the hole pattern onto the side control panel that the gauges will be bolted to and drilled the holes. Lastly I inserted a couple of 1/4"-20x 1" bolts into the holes from the inside outward and tacked them in place. The gauge console will simply install by inserting the bolts into the two drilled holes and secure them from the backside as I have the lower panel removed for wiring and I can reach up under the backside to where the transmission switch panel is in the pictures to secure the new gauge console.

Hope that makes sense.
 
To avoid these ads, REGISTER NOW!

Blsmith

Member
Joined
Mar 15, 2021
Messages
10
Location
so cal
The trans jack to take out the axel and the axel fixture
really worked well. I've pulled axels with just a floor jack
and a volunteer it's not fun.
With trans jack adapter did the axel stay balanced and secured when
you moved to the table and did you move it by yourself?
 
OP
Z

zmotorsports

ALLIANCE MEMBER
Joined
Oct 20, 2009
Messages
21,441
Location
Northern Utah
The trans jack to take out the axel and the axel fixture
really worked well. I've pulled axels with just a floor jack
and a volunteer it's not fun.
With trans jack adapter did the axel stay balanced and secured when
you moved to the table and did you move it by yourself?

Yes, the jack/axle adapter worked fantastic. It remained balanced very well and the pinion didn't fall or drop when the final suspension bolt was removed and even rolling from the lift area over to the fabrication area it remained balanced.

I had disconnected everything and lowered the axle by myself and by the time my son arrived he had to help me lift it off the jack and onto the fixture plates that were bolted to the fabrication table. Had my son not been there I would have had to use the engine hoist. On a bare housing I've lifted them before but this one was complete even up to and including knuckles and unit bearings so it was very heavy.

Seeing as how nice both axle related tools have worked out I really am kicking myself for not doing this many years ago when I thought about them. I can't count how many axles I have removed with the car on jackstands and lowering the axle with a floor jack and then lifting it up onto a workbench to work on while fighting to hold it and move it around.
 
OP
Z

zmotorsports

ALLIANCE MEMBER
Joined
Oct 20, 2009
Messages
21,441
Location
Northern Utah
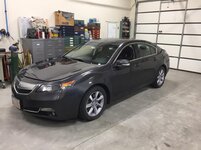
Friday night I pulled the wife’s Acura TL into the shop to replace the passenger airbag cutout switch. Her SRS light came on last week and after diagnosing to check for short or open from SRS module to switch I determined it was the switch. I ordered one last week and it arrived Thursday night so I pulled it into the shop to perform the repair.

87ad36c924ef8fa647e1cb35fcad009a.jpg

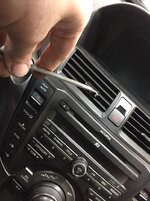
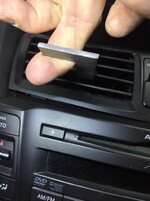
I fabricated a small hook tool to reach inside the vent and pull as none of my interior tools were shallow enough to fit between the louvers in the center vent.
ffb3bb0c71b47cfefd47e476fe20605d.jpg

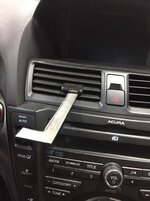
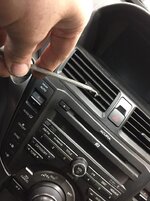
Reached inside the left side of vent first and engaged the tool to the back side of the vent.
35ffe913f60a4fd94e190f11ccbd2a9d.jpg

41a83a072a3ae8cd4dc26fb0014c2d44.jpg

A slight pull and the left side clips released.
15f31048faef76e8b630db8ba9decc40.jpg

Then moved over to the right side and repeated. The vent popped right out with no damage or marks on the dash or vent.
c612610be9823d09f37fb22acc4db2fc.jpg

Replaced the switch and reassembled.

Thanks for looking.
 

Attachments

  • c612610be9823d09f37fb22acc4db2fc.jpg
    c612610be9823d09f37fb22acc4db2fc.jpg
    100.6 KB · Views: 1
  • 15f31048faef76e8b630db8ba9decc40.jpg
    15f31048faef76e8b630db8ba9decc40.jpg
    77.3 KB · Views: 0
  • 41a83a072a3ae8cd4dc26fb0014c2d44.jpg
    41a83a072a3ae8cd4dc26fb0014c2d44.jpg
    84.6 KB · Views: 0
  • 35ffe913f60a4fd94e190f11ccbd2a9d.jpg
    35ffe913f60a4fd94e190f11ccbd2a9d.jpg
    97 KB · Views: 0
  • ffb3bb0c71b47cfefd47e476fe20605d.jpg
    ffb3bb0c71b47cfefd47e476fe20605d.jpg
    64 KB · Views: 0
  • 87ad36c924ef8fa647e1cb35fcad009a.jpg
    87ad36c924ef8fa647e1cb35fcad009a.jpg
    82.2 KB · Views: 0
Last edited:

bigdave_185

Well-known member
Joined
Feb 14, 2021
Messages
443
Location
Utah
My truck needs motor mounts can I just park it out front and get it picked up in like a week? Lol


Sent from my iPhone using Tapatalk
 
OP
Z

zmotorsports

ALLIANCE MEMBER
Joined
Oct 20, 2009
Messages
21,441
Location
Northern Utah
So I’m going to try this here as I think most are tool and shop minded and maybe I won’t get verbally abused like I did on Facebook.

I belong to the Monaco owner’s group on Facebook and there seems to have been a lot of people with air spring issues lately so I thought I would post up how “I” chose to perform the repair and maybe it would help others. I don’t think I’ll make that mistake again as I’ve discovered lately that there are a lot of idiots on the Monaco Facebook page, or maybe it’s just Facebook period, which is why I don’t participate much on that platform.

I used to say there’s no such thing as a stupid question but I’ve since changed my mind because there are a LOT of them on that particular group’s page. It seems like years ago people would do at least some research on their own and even open the owners manual before opening their mouths for help but anymore people seem to speak first before thinking. Then there’s the keyboard genius’ that know everything and post erroneous information when someone does ask a question which is worse than the person asking the question.

I realize that it’s the internet but for hell's sake I don’t know where some of these people come up with their idiotic answers and all it does is lead people more astray and cause them more confusion, frustration and stress. If these people don’t know the answers they should keep quiet and let others pass along legitimate information.

I’m tired of trying to help others with their Monaco related issues in that group. I don’t know if it’s because the prices have come down on these coaches and the pandemic of the past year has gotten every idiot out looking for a good quality RV or what it is but my hell the high volume of idiocy in that group is staggering.

I posted up pictures and an explanation of how I went about my suspension’s air spring replacement and even after explaining in detail how I supported the weight of our coach I still had people calling me an idiot or nuts or crazy because I was using automotive jackstands and floor jack to raise and support our coach. [emoji35] Too stupid to read the comments AND decipher the pictures but they know it all.

Let me try again......

The air spring replacement is not a difficult task and there’s no need to cut holes in the sides of the coach like I’ve seen some do.

Most are using blocks or “cribbing” placed between the coach’s frame rails and the suspension’s H-frame then lifting and supporting the axle as normal. Once the air springs (air bags) are unbolted you then must fight to compress the air bags enough to get the upper and lower studs out of the holes in the upper and lower mounting brackets. This works perfectly other than the efforts needed to compress the old then the new air bags for removal and installation.

I chose to go a different route. I used my tall 22-ton jackstands with the weight of the coach sitting straight down on them. Before beginning I raised the coach as high as I could with the coach’s air system and placed the jackstands just above the steer axle with positive engagement with the chassis.

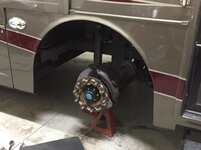
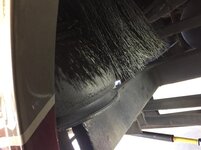
Now this allowed me to only need a smaller 3-ton floor jack to raise and lower the front suspension. I raised one side slightly and removed a steer tire/wheel. Now I can sit up under the coach and have access to the air bags. I removed the mudflap and hulla skirt material that protects each air bag for better access but that only requires removal fo a few tech screws on each.

Now I could reach around the H-frame and air bag to each of the fasteners and the 90-degree air fitting. I removed the air line, then the air fitting, then the 3/4” NPT to 1/4” NPT adapter and lastly grabbed my 1/2” drive fine tooth ratchet and 3/4” socket to break the two upper nuts loose (I hit them with some Aerokroil just before starting). Once the nuts were broken loose j could use my Snap-on FAR72 high torque 3/8” air ratchet to zip the nuts off the top of the air bags. I was able to do this on all but two upper buts where I had to use a ratcheting wrench due to gussets being in the way. The lower bolts were easily accessed with a 1/2” impact gun and 3/4” socket in which were easily zipped off in no time.

Once the fittings and upper & lower nuts were removed came the easy part. I simply and slowly lowered the 3-ton floor jack and the suspension pulled away from the chassis allowing the air bag to sit there with plenty of space to reach in and lift the old one out and set the new one in place. Then raised the floor jack and made sure the studs properly engaged with the holes and reassemble the nuts and air fittings then move on to the next. Easy peezy.

Now for the pictures depicting the process.

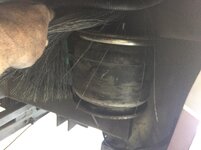
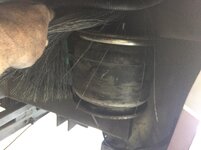
Mudflap and hulla skirt (brush) removed for better access to the old air bag.
06378bb7a2a0bcc7967c70688703cf5b.jpg

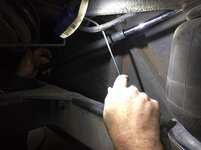
Using 1/2” fine tooth ratchet with about a 16" long cheater on it.
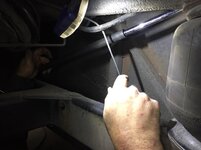
645c8916c576f08370b02280c63de455.jpg

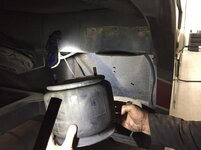
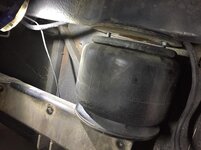
Here you can see a slight gap at the top of the air bag as it fell away during fastener removal.
a0207f043efa5a30e6984dc3a48a1694.jpg

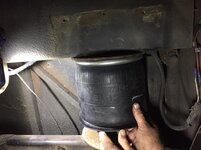
Lowered the suspension down and the air bag is completely free from the upper bracket.
8fda9d0e5a08c872d1b4964764027948.jpg

Now simply lift the air bag out.
6c51425cb6f778c580e104cbbea69d9e.jpg

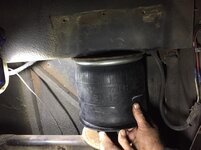
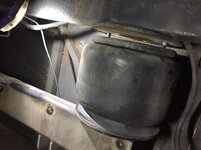
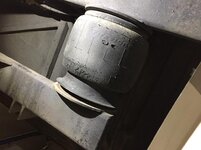
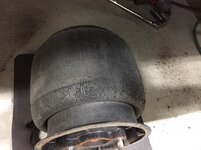
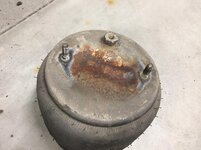
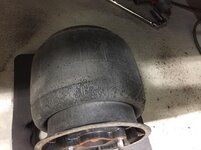
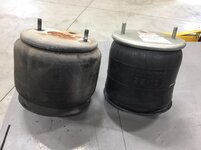
They were due for replacement. I’ve been keeping an eye on them for the last couple of years. They started as just weather cracking two years ago then last year I noticed some advanced deterioration on the lower roll and by the end of last year’s travel season there were small pieces of rubber flaking off. None had developed leaks yet and I’m sure they could have gone a bit longer as I’ve seen worse still in service but I’m a big proponent of replacing things prior to failure. I figured this would be much more problematic of a repair out on the road and ruin a vacation so I opted to replace them prior to this year’s travel season.
4e5649ae70f4bc4bb2cc7988bee35ae4.jpg

New one ready to install the reducer and apply anti-seize to the studs prior to installation.
c284fb5367a730ac1d57edaea5937036.jpg

New air bag easily slid into place.
1aa9af973d9f844c7aad98dbab216d68.jpg

Raised the suspension up using my small 3-ton automotive floor jack.
8ab2433bb96bf0066b8c5f421efa1f6a.jpg

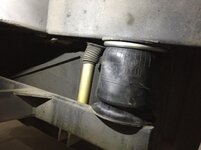
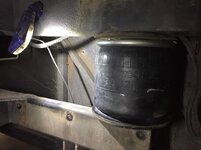
Air bag fully engaged in the upper and lower mounting brackets and ready to install the nuts and tighten in place.
44c42300c41bfb367528717c79de2edc.jpg

That air bag replaced and shock reinstalled. Ready to reinstall the hulla skirt and mudflap then move on the next air bag.
69282e00c3739ced5989a99465c80033.jpg

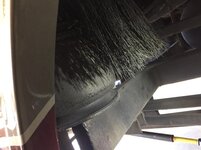
Next air bag showing the hulla skirt before removal.
c51aefeb250228db3e0982327a497de6.jpg

Driver’s side front of steer tire didn’t require shock removal. The easiest air bag to replace.
cf66f91fd3f2d5b36dc480ae6c136711.jpg

Old air bag removed.
cf145da944c1aeb9d0972adeb190cbf1.jpg

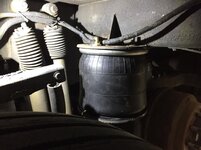
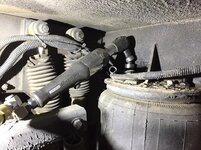
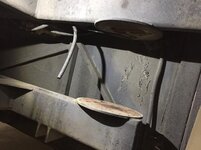
Moved around to the passenger’s side. This one on passenger’s side in front of the steer tire was the most difficult due to several large wire looms/bundles complicating access but just took a few minutes longer.
5343aab30d35586fa311c0af9723b78f.jpg

Passenger’s side just behind steer tire replaced.
f46aac3ff6aefabbbedc9ff9bd1cf200.jpg

Ready to reinstall passenger’s side mudflap and hulla skirt then tire & wheel and the front is complete.
27d9499bac84de2bf57997606c7f8a4f.jpg

Forty percent of the air bags completed.
954e3472b7e3768b208760392dfd76e8.jpg

Rear still to go.
04724b77fed26d1628a5bb6e484ff87f.jpg

Thanks for looking.
 

Attachments

  • 04724b77fed26d1628a5bb6e484ff87f.jpg
    04724b77fed26d1628a5bb6e484ff87f.jpg
    83.7 KB · Views: 1
  • 954e3472b7e3768b208760392dfd76e8.jpg
    954e3472b7e3768b208760392dfd76e8.jpg
    67.2 KB · Views: 1
  • 27d9499bac84de2bf57997606c7f8a4f.jpg
    27d9499bac84de2bf57997606c7f8a4f.jpg
    68 KB · Views: 1
  • f46aac3ff6aefabbbedc9ff9bd1cf200.jpg
    f46aac3ff6aefabbbedc9ff9bd1cf200.jpg
    66.2 KB · Views: 1
  • 1aa9af973d9f844c7aad98dbab216d68.jpg
    1aa9af973d9f844c7aad98dbab216d68.jpg
    90.6 KB · Views: 1
  • c284fb5367a730ac1d57edaea5937036.jpg
    c284fb5367a730ac1d57edaea5937036.jpg
    63.8 KB · Views: 1
  • 4e5649ae70f4bc4bb2cc7988bee35ae4.jpg
    4e5649ae70f4bc4bb2cc7988bee35ae4.jpg
    66.6 KB · Views: 1
  • 8fda9d0e5a08c872d1b4964764027948.jpg
    8fda9d0e5a08c872d1b4964764027948.jpg
    91 KB · Views: 1
  • a0207f043efa5a30e6984dc3a48a1694.jpg
    a0207f043efa5a30e6984dc3a48a1694.jpg
    83.9 KB · Views: 1
  • 645c8916c576f08370b02280c63de455.jpg
    645c8916c576f08370b02280c63de455.jpg
    71.7 KB · Views: 1
  • 06378bb7a2a0bcc7967c70688703cf5b.jpg
    06378bb7a2a0bcc7967c70688703cf5b.jpg
    70.2 KB · Views: 1
  • 6c51425cb6f778c580e104cbbea69d9e.jpg
    6c51425cb6f778c580e104cbbea69d9e.jpg
    75 KB · Views: 1
  • 8ab2433bb96bf0066b8c5f421efa1f6a.jpg
    8ab2433bb96bf0066b8c5f421efa1f6a.jpg
    50.8 KB · Views: 1
  • 44c42300c41bfb367528717c79de2edc.jpg
    44c42300c41bfb367528717c79de2edc.jpg
    74.6 KB · Views: 1
  • 69282e00c3739ced5989a99465c80033.jpg
    69282e00c3739ced5989a99465c80033.jpg
    70.3 KB · Views: 1
  • 5343aab30d35586fa311c0af9723b78f.jpg
    5343aab30d35586fa311c0af9723b78f.jpg
    72.4 KB · Views: 1
  • cf145da944c1aeb9d0972adeb190cbf1.jpg
    cf145da944c1aeb9d0972adeb190cbf1.jpg
    78.5 KB · Views: 1
  • cf66f91fd3f2d5b36dc480ae6c136711.jpg
    cf66f91fd3f2d5b36dc480ae6c136711.jpg
    78.6 KB · Views: 1
  • c51aefeb250228db3e0982327a497de6.jpg
    c51aefeb250228db3e0982327a497de6.jpg
    83.2 KB · Views: 4
Last edited:

WoodsTruck

Well-known member
Joined
Jan 12, 2013
Messages
1,025
"My truck needs motor mounts can I just park it out front and get it picked up in like a week? Lol"

But he didn't say "No"!!
 

bigdave_185

Well-known member
Joined
Feb 14, 2021
Messages
443
Location
Utah
This might fall into a dumb question but are the suspension bags or cabin bags to float the chassis over the frame like a semi cab?

All else looks great. I did wonder if you could use a vacuum pump to close the bag down a bit for removal or install


Sent from my iPhone using Tapatalk
 

OutlawDrifter

Well-known member
Joined
Jan 20, 2015
Messages
3,894
Location
KS
Mike, having replaced an air bag in a rest stop, in Wyoming, in the Winter...I'd say yes, do it now! This was on a semi, so a little easier access, but still wasn't a "fun" job.

Looks like your process makes it "easy". I too stray from facebook groups and trying to help at this point. This forum and one other specific to GMT400 vehicles is all I frequent at this point.
 
OP
Z

zmotorsports

ALLIANCE MEMBER
Joined
Oct 20, 2009
Messages
21,441
Location
Northern Utah
This might fall into a dumb question but are the suspension bags or cabin bags to float the chassis over the frame like a semi cab?

All else looks great. I did wonder if you could use a vacuum pump to close the bag down a bit for removal or install


Sent from my iPhone using Tapatalk

The air bags reside between the suspension and the chassis of the coach just like an OTR truck. The coach completely rides on air. The house portion of the coach is built directly on top of the chassis.

An air pump could be used and some do but it still is hard to get the new rubber compressed enough to easily remove and install. Most that I have seen do this fight longer and harder to get the air bag out of the mounting brackets than actually getting the fasteners and air fittings removed, which is why I chose a different route for replacement. Raising and lowering the suspension negated any need to have to compress the air bag. Simply lower the suspension, remove the old air bag, insert the new air bag, raise the suspension with the floor jack and reinstall the fasteners. Easy peezy.
 
OP
Z

zmotorsports

ALLIANCE MEMBER
Joined
Oct 20, 2009
Messages
21,441
Location
Northern Utah
Mike, having replaced an air bag in a rest stop, in Wyoming, in the Winter...I'd say yes, do it now! This was on a semi, so a little easier access, but still wasn't a "fun" job.

Looks like your process makes it "easy". I too stray from facebook groups and trying to help at this point. This forum and one other specific to GMT400 vehicles is all I frequent at this point.

Thanks Marc. I was completely dumbfounded by the idiots on the Monaco Facebook page. I was called everything from an idiot to being unsafe and crazy for using automotive jackstands to support a 40k pound coach. They didn't take the time to read the description nor really look at the pictures and it can be seen that the chassis is NOT being supported by those small 6-ton automotive jackstands.

I'm done trying to help those morons. They can fend for themselves. I explained that this is not a task for everyone but IF they chose to tackle it themselves this is an easier method and if not at least they will know what they are paying for at a repair shop.
I had actually recorded the process for my YouTube channel to show others how easy these are to replace but after the weekend's ********, I tossed the video and won't post it. I don't need that kind of negativity and ******** in my life when trying to help people.
 

Snapped-off

Well-known member
Joined
Feb 22, 2012
Messages
4,810
Location
Indiana
Those groups can be a bit of a cesspool. Have you checked out any of the duramax groups?

It's kind of a shame because there are some big names in the industry that get driven away by all the morons.

Top notch work on the Acura and coach by the way!
 

Mark_17

Well-known member
Joined
Jun 27, 2018
Messages
754
Location
NJ
Nice job Mike.

FB and a lot of forums have declined in the past few years.

I've spent my entire adult life (12+ years) actively on various forums. They are not what they used to be. A lot of friends now spend time in FB groups and its just an echo chamber of the same stupid questions and the "experts" have no real world experience, they just regurgitate the same rhetoric they read a decade ago.

I've been FB free for close to 7 years and I don't miss it at all.
 
OP
Z

zmotorsports

ALLIANCE MEMBER
Joined
Oct 20, 2009
Messages
21,441
Location
Northern Utah
Those groups can be a bit of a cesspool. Have you checked out any of the duramax groups?

It's kind of a shame because there are some big names in the industry that get driven away by all the morons.

Top notch work on the Acura and coach by the way!

Thank you. No affiliation with any of the DMax groups. I used to post on duramaxforum.com but got tired of the idiots there as well. There is a wealth of knowledge from several guys on that forum but the idiots seemed to have scared them off as well.

I am very knowledgeable about many diesel pusher RV's and in particular about Monaco coaches between late 90's and around 2007~ish model years so I feel I have somewhat of an obligation to share that knowledge but I think I'll keep my comments to myself from here on out and let those idiots fend for themselves.
 
OP
Z

zmotorsports

ALLIANCE MEMBER
Joined
Oct 20, 2009
Messages
21,441
Location
Northern Utah
Nice job Mike.

FB and a lot of forums have declined in the past few years.

I've spent my entire adult life (12+ years) actively on various forums. They are not what they used to be. A lot of friends now spend time in FB groups and its just an echo chamber of the same stupid questions and the "experts" have no real world experience, they just regurgitate the same rhetoric they read a decade ago.

I've been FB free for close to 7 years and I don't miss it at all.

My wife and I only joined FB to stay in communication with many of our RV'ing friends. Most of them full-time and it is nice to stay in touch with them and see where they are at and what they are up to. I joined the Monaco FB group about a year ago to try and assist using the knowledge that I have gained over the years but I think I'm done helping.

We'll stay in touch with friends but that's about it.
 
Last edited:

GRN96WS6

Well-known member
Joined
Dec 23, 2012
Messages
2,249
Location
SOMD
Don't let the idiots detract you from sharing knowledge. On youtube you can turn off comments I believe.

It really is a **** show anymore posting online.... Some people as you said make no comment that's helpful to the issue at hand but like to post for FOMO or some other dumb reason it seems.
 

Graham08

Well-known member
Joined
Dec 10, 2007
Messages
713
Location
Iron Station, NC
They didn't take the time to read the description nor really look at the pictures and it can be seen that the chassis is NOT being supported by those small 6-ton automotive jackstands.

Scott Adams said:
You can never underestimate the stupidity of the general public.

:D

Because cutting a hole is the side of the coach is a far better solution!

Seriously, I've seen the same things checking out forums and FB groups specific to the Yamaha XS650 I purchased recently. Some good knowledge and a whole lot of really sketchy workarounds for doing things properly...that get repeated over and over to the point that the sketchy workaround is the accepted solution.
 

quadrcr87

Well-known member
Joined
Jul 5, 2013
Messages
1,036
Location
Travelers Rest, SC
It has been my experience that the Facebook groups are pretty useless. I am a member of a Yamaha ATV group and it is filled with questions about what oil to use and why is my friends ATV faster.
 
To avoid these ads, REGISTER NOW!
OP
Z

zmotorsports

ALLIANCE MEMBER
Joined
Oct 20, 2009
Messages
21,441
Location
Northern Utah
:D

Because cutting a hole is the side of the coach is a far better solution!

Seriously, I've seen the same things checking out forums and FB groups specific to the Yamaha XS650 I purchased recently. Some good knowledge and a whole lot of really sketchy workarounds for doing things properly...that get repeated over and over to the point that the sketchy workaround is the accepted solution.

That is what is sad Graham, the stupid and idiotic solutions get repeated so many times that they become the accepted solution. Like cutting holes in the body and installing water fill doors. THAT was actually quickly becoming the "only" solution because it kept getting repeated so often by idiots. Then I show an easy way to replace them and I get ridiculed for it. :headscrat
 
OP
Z

zmotorsports

ALLIANCE MEMBER
Joined
Oct 20, 2009
Messages
21,441
Location
Northern Utah
Don't let the idiots detract you from sharing knowledge. On youtube you can turn off comments I believe.

It really is a **** show anymore posting online.... Some people as you said make no comment that's helpful to the issue at hand but like to post for FOMO or some other dumb reason it seems.

Nicely done letting physics work for you, instead of fighting it.

Thanks for the comments guys. The job really wasn't all that bad and I had procrastinated and made it worse than it really was. On OTR trucks they are simple but you don't have the tight quarters to work in like on an RV.

Shitshow is about as accurate of description as I have heard of lately.:D
 
OP
Z

zmotorsports

ALLIANCE MEMBER
Joined
Oct 20, 2009
Messages
21,441
Location
Northern Utah
It has been my experience that the Facebook groups are pretty useless. I am a member of a Yamaha ATV group and it is filled with questions about what oil to use and why is my friends ATV faster.

I pretty much only post here and irv2.com these days for that very reason. I thought I would post to the Monaco group to help out but I should have kept to myself and just posted here and irv2.com where people seem to be a bit more mechanically minded and not so idiotic in their thinking. Lesson learned.
 

Yarz

Well-known member
Joined
Sep 11, 2013
Messages
121
Location
Tarentum PA
Your method makes perfect sense. That's the same method I've used to replace leaf springs on my Jeep (no air suspension to raise it though - that makes it easy!). Yours is just a little heavier. I can't see why anyone would argue, but that's the internet...


I would definitely take your word over anyone else I read - I mean somehow you can take this picture and still have two hands in it :bowdown:
:lol_hitti

Using 1/2” fine tooth ratchet with about a 16" long cheater on it.
645c8916c576f08370b02280c63de455.jpg
 
Last edited:
OP
Z

zmotorsports

ALLIANCE MEMBER
Joined
Oct 20, 2009
Messages
21,441
Location
Northern Utah
Your method makes perfect sense. That's the same method I've used to replace leaf springs on my Jeep (no air suspension to raise it though - that makes it easy!). Yours is just a little heavier. I can't see why anyone would argue, but that's the internet...


I would definitely take your word over anyone else I read - I mean somehow you can take this picture and still have two hands in it :bowdown:
:lol_hitti

Thanks. Now that's dedication and talent alright........:lol_hitti
 
OP
Z

zmotorsports

ALLIANCE MEMBER
Joined
Oct 20, 2009
Messages
21,441
Location
Northern Utah
Last night I finished up the front end and torqued the tires/wheels back on.

I reinstalled the hulla skirt and mudflap on the driver’s side.
7fe634f14e20fe26dc050597010b9d3d.jpg

Then reinstalled the driver’s steer tire and torqued to 450 ft/lbs before wiping it down with some Final Inspection.
9a8484f379cf5c5d41cf58bb1493d521.jpg

I then moved over to the passenger’s side and took a few minutes to fix my clunking noise that developed late last year.

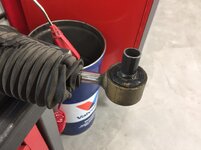
I noticed the last couple of trips that when driving slowly through campgrounds and especially when going over a speed bump I could hear a slight clunk. It sounded like it was right under the wife’s co-pilot seat but she did not hear it. Upon arriving home I crawled around under it and noticed the upper shock had play at the eyelet mount. It wasn’t severe but enough to bug me. I knew I’d be getting into the suspension early this year so I figured I would correct it then.

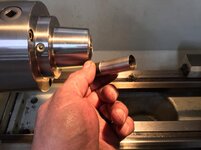
After taking some measurements I decided the easiest solution would be to machine a sleeve to compensate for the wear in the upper shock eyelet.

The ID of the steel shock sleeve was .714” so I machined the OD of this sleeve to .715” for a slight interference fit. The shock mounting stud measured .677” so I machined the ID of the sleeve to .680” for a slip fit which would allow a small amount of anti-seize.
ecb53936eb432479d539e9e2d6704a96.jpg

34460130b0efe5060f8c0067afcefd12.jpg

I then used a few drops of Loctite 640 sleeve retainer.
0755521eb527079f640ec005da2a8950.jpg

Pressed the sleeve into the shock.
421e0c997e0cc0d95c25655b5519c9ce.jpg

8e2fe90d1336dc3c060ade0d40887f04.jpg

Trimmed the excess to flush.
783a1e2c238f46541cdb1398dd357ce8.jpg

Next I cleaned the ID of the sleeve with some brake wash and applied a liberal coating of anti-seize and reinstalled the shock. Loose figment is gone as should be my clunk.

I then installed the hulla skirt, mudflap and tire/wheel and the passenger’s side was complete.

Now I can move on to the rear suspension as soon as time allows.

Thanks for looking.
 

Attachments

  • 7fe634f14e20fe26dc050597010b9d3d.jpg
    7fe634f14e20fe26dc050597010b9d3d.jpg
    68.9 KB · Views: 2
  • 783a1e2c238f46541cdb1398dd357ce8.jpg
    783a1e2c238f46541cdb1398dd357ce8.jpg
    73.2 KB · Views: 0
  • 8e2fe90d1336dc3c060ade0d40887f04.jpg
    8e2fe90d1336dc3c060ade0d40887f04.jpg
    60.3 KB · Views: 0
  • 421e0c997e0cc0d95c25655b5519c9ce.jpg
    421e0c997e0cc0d95c25655b5519c9ce.jpg
    78.1 KB · Views: 0
  • 0755521eb527079f640ec005da2a8950.jpg
    0755521eb527079f640ec005da2a8950.jpg
    74.3 KB · Views: 0
  • 34460130b0efe5060f8c0067afcefd12.jpg
    34460130b0efe5060f8c0067afcefd12.jpg
    98.5 KB · Views: 0
  • ecb53936eb432479d539e9e2d6704a96.jpg
    ecb53936eb432479d539e9e2d6704a96.jpg
    65 KB · Views: 0
  • 9a8484f379cf5c5d41cf58bb1493d521.jpg
    9a8484f379cf5c5d41cf58bb1493d521.jpg
    62.2 KB · Views: 0

zanyad

ALLIANCE MEMBER
Joined
Apr 26, 2018
Messages
2,817
Location
NE Ohio
8e2fe90d1336dc3c060ade0d40887f04.jpg

Trimmed the excess to flush.
783a1e2c238f46541cdb1398dd357ce8.jpg

Curious why you didn't just make the spacer to length to begin with? Don't you run the risk of damaging the bearing if you cut after installation?

Edited to add: Very nice repair, BTW. I appreciate your attention to the smallest detail. Most people (I count myself in this group ) probably wouldn't have even noticed the clunk, let alone fixed it. :bowdown:
 

Attachments

  • 8e2fe90d1336dc3c060ade0d40887f04.jpg
    8e2fe90d1336dc3c060ade0d40887f04.jpg
    57.3 KB · Views: 0
  • 783a1e2c238f46541cdb1398dd357ce8.jpg
    783a1e2c238f46541cdb1398dd357ce8.jpg
    69.9 KB · Views: 0
OP
Z

zmotorsports

ALLIANCE MEMBER
Joined
Oct 20, 2009
Messages
21,441
Location
Northern Utah
Curious why you didn't just make the spacer to length to begin with? Don't you run the risk of damaging the bearing if you cut after installation?

Edited to add: Very nice repair, BTW. I appreciate your attention to the smallest detail. Most people (I count myself in this group ) probably wouldn't have even noticed the clunk, let alone fixed it. :bowdown:

I grabbed a length of .750" 4130 out of my drop box/drawer that was slightly overlength so I could grab it in the collet in the lathe without having to swap end for end. That way I could cut the OD down in full length passes.

I also thought that having the tubing intact would be easier to press in without folding the edge of the thin spacer. If it was just the spacer at the exact length I think the edges would have folded or at least been damaged during the pressing process.

Lastly, the eyelet isn't a bearing per se, it is just a thick steel center that is vulcanized into the rubber shock eyelet. It cut easily being so thin and then just touched up the end with a small Roloc disc.

Hope that answers your question. I appreciate you following along.
 

casmurbax

Well-known member
Joined
Sep 25, 2012
Messages
2,759
Location
Wilton, NY
Mike, I am glad you post here and you don't chastise me for the many dumb questions I ask on your projects. I never joined facebook, just reminded me to much of being back in school...

I appreciate that you share your knowledge and the thought process for what you are working on here.

Now that being said, do I see a rip in that shock boot?
 
OP
Z

zmotorsports

ALLIANCE MEMBER
Joined
Oct 20, 2009
Messages
21,441
Location
Northern Utah
Mike, I am glad you post here and you don't chastise me for the many dumb questions I ask on your projects. I never joined facebook, just reminded me to much of being back in school...

I appreciate that you share your knowledge and the thought process for what you are working on here.

Now that being said, do I see a rip in that shock boot?

Thanks.

Yes there are a couple of imperfections on the shock boots. When I installed these several years ago they didn't come with boots and most people don't put boots on these Koni shocks on the RV's but I wanted to protect the shafts from the elements so I bought some inexpensive boots and installed them. It is a very tight fit at the upper shock mounts and the boots are not fairing well but I like that they are protecting the rods at least to some extent.
 

bigdave_185

Well-known member
Joined
Feb 14, 2021
Messages
443
Location
Utah
I’m sure in the many vehicles you have had over the year you might have come across it but curious non the less, I have had shock boots hold water from pressure washing the undercarriage of pickups. Rusting the top of the shock body excessively over time.

Any thing in your experience ?


Sent from my iPhone using Tapatalk
 
OP
Z

zmotorsports

ALLIANCE MEMBER
Joined
Oct 20, 2009
Messages
21,441
Location
Northern Utah
I’m sure in the many vehicles you have had over the year you might have come across it but curious non the less, I have had shock boots hold water from pressure washing the undercarriage of pickups. Rusting the top of the shock body excessively over time.

Any thing in your experience ?


Sent from my iPhone using Tapatalk


No I haven’t. I’ve actually had the opposite affect and have had shock rods get pitted from road grime or road debris and create leaks so that’s why I’ve been more prone to use boots on mine.


Sent from my iPhone using Garage Journal
 
OP
Z

zmotorsports

ALLIANCE MEMBER
Joined
Oct 20, 2009
Messages
21,441
Location
Northern Utah
I had a guy cancel on me tonight that I was supposed to do a welding job for so I decided to tackle the drive axle air bags on the coach. I thought maybe I could get one side done but ended up getting all four on the drive axle replaced.

The rears were easier than the front ones. I got all four replaced in about three hours. All that is left are the two for the tag axle. I’m 80% done with the air bag replacement project.

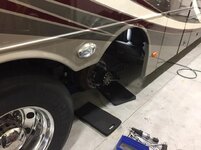
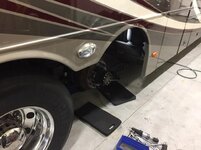
Removal of the drive tires/wheels make access easy.
f1b94b2999e901992c6ba28552db4cca.jpg

f5f109d97c491ccfeafd0e9cbe7fd632.jpg

9f409d16cb9f808c461dc17e4934a74d.jpg

910e5fd6d199da35b277601641348ee4.jpg

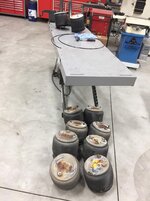
Rear air bags were slightly worse than the fronts as far as condition.
80dcb8ecdd4895ea0f17b1405031ba36.jpg

d08f20ecb14e9bf17886fe9c8c22219b.jpg

Air bag replaced and shock bolted back in place.
b6d7079732e212a1dc99ac0cdccfe462.jpg

Drive axle rear air bag was the easiest of any of them to access. Didn’t need to remove the tag tire & wheel but having the drive axle tires/wheels removed made it a breeze to replace.
1ee1f5f8feaeb6b95947c674850cbb96.jpg

Zipped the nuts off with my Snap-on FAR72 3/8” air ratchet.
b76737a9efc0332bfd974438a8588f6a.jpg

debc7e708b0e5b6f41f765ee2913ddb2.jpg

9fa55327df0af80b83cf75707aa4430c.jpg

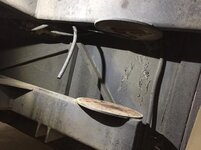
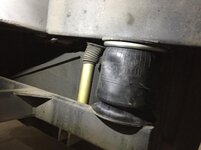
After reinstalling the passenger side drive tires & wheels I moved on to the driver’s side. The rear driver’s side drive axle bag appears to have been struck by something and even did damage all the way to the cords. I noticed this last year and this was the one I was most concerned about.
dca702aebaae7b32f0f455bd4343309f.jpg

522f3994368a7a361ce861baca9eef48.jpg

b8c938885d9ef8307582f48929280686.jpg

Only two remaining.
793b2ec660622813a71147657acf597b.jpg

Thanks for looking.
 

Attachments

  • f5f109d97c491ccfeafd0e9cbe7fd632.jpg
    f5f109d97c491ccfeafd0e9cbe7fd632.jpg
    62.2 KB · Views: 0
  • b6d7079732e212a1dc99ac0cdccfe462.jpg
    b6d7079732e212a1dc99ac0cdccfe462.jpg
    61.5 KB · Views: 0
  • b76737a9efc0332bfd974438a8588f6a.jpg
    b76737a9efc0332bfd974438a8588f6a.jpg
    133.5 KB · Views: 0
  • 1ee1f5f8feaeb6b95947c674850cbb96.jpg
    1ee1f5f8feaeb6b95947c674850cbb96.jpg
    93.8 KB · Views: 0
  • f1b94b2999e901992c6ba28552db4cca.jpg
    f1b94b2999e901992c6ba28552db4cca.jpg
    78.6 KB · Views: 0
  • 793b2ec660622813a71147657acf597b.jpg
    793b2ec660622813a71147657acf597b.jpg
    88.7 KB · Views: 0
  • b8c938885d9ef8307582f48929280686.jpg
    b8c938885d9ef8307582f48929280686.jpg
    55.8 KB · Views: 0
  • d08f20ecb14e9bf17886fe9c8c22219b.jpg
    d08f20ecb14e9bf17886fe9c8c22219b.jpg
    84.9 KB · Views: 0
  • 522f3994368a7a361ce861baca9eef48.jpg
    522f3994368a7a361ce861baca9eef48.jpg
    68.2 KB · Views: 0
  • 9fa55327df0af80b83cf75707aa4430c.jpg
    9fa55327df0af80b83cf75707aa4430c.jpg
    88.7 KB · Views: 0
  • debc7e708b0e5b6f41f765ee2913ddb2.jpg
    debc7e708b0e5b6f41f765ee2913ddb2.jpg
    85 KB · Views: 0
  • 80dcb8ecdd4895ea0f17b1405031ba36.jpg
    80dcb8ecdd4895ea0f17b1405031ba36.jpg
    90.5 KB · Views: 0
  • 910e5fd6d199da35b277601641348ee4.jpg
    910e5fd6d199da35b277601641348ee4.jpg
    84.8 KB · Views: 0
  • 9f409d16cb9f808c461dc17e4934a74d.jpg
    9f409d16cb9f808c461dc17e4934a74d.jpg
    75.4 KB · Views: 0
  • dca702aebaae7b32f0f455bd4343309f.jpg
    dca702aebaae7b32f0f455bd4343309f.jpg
    112.1 KB · Views: 0
Last edited:

E12-535iTurbo

Well-known member
Joined
Feb 27, 2014
Messages
492
Location
The Netherlands
Mike, just make sure you don't leave this forum. I don't have a RV, sandrail, off-road truck or what ever but I read everything you write. Everything you do and specifically the profound explanation you provide us with is gold. It's generally applicable for all engineering/fixing stuff.

I don't post much but just wanted to let you know I'm silently appreciative here. :)
 
OP
Z

zmotorsports

ALLIANCE MEMBER
Joined
Oct 20, 2009
Messages
21,441
Location
Northern Utah
Mike, just make sure you don't leave this forum. I don't have a RV, sandrail, off-road truck or what ever but I read everything you write. Everything you do and specifically the profound explanation you provide us with is gold. It's generally applicable for all engineering/fixing stuff.

I don't post much but just wanted to let you know I'm silently appreciative here. :)

Thank you very much for the comments, I am flattered. I'm also happy to hear my contributions are appreciated but trust me, I learn just as much from other members I'm sure as others do from me.

Thank you for following.
 

zanyad

ALLIANCE MEMBER
Joined
Apr 26, 2018
Messages
2,817
Location
NE Ohio
Mike, just make sure you don't leave this forum. I don't have a RV, sandrail, off-road truck or what ever but I read everything you write. Everything you do and specifically the profound explanation you provide us with is gold. It's generally applicable for all engineering/fixing stuff.

I don't post much but just wanted to let you know I'm silently appreciative here. :)

I second all this! :rocker:
 

OutlawDrifter

Well-known member
Joined
Jan 20, 2015
Messages
3,894
Location
KS
Mike, tough to tell from the picture, is it a cut or scrap on the bag?

Is your engine equipped with an engine or exhaust brake?
 
OP
Z

zmotorsports

ALLIANCE MEMBER
Joined
Oct 20, 2009
Messages
21,441
Location
Northern Utah
I second all this! :rocker:

Thank you.


Mike, tough to tell from the picture, is it a cut or scrap on the bag?

Is your engine equipped with an engine or exhaust brake?

Marc, it appears to be a scrape that actually cut the outermost cords. I'm assuming something got picked up by a tire and spun around catching the air bag. Maybe a piece of road gator that already was sharp and sliced through the outer cover and damaged a few cords. I don't recall running over something but I guess it happened. I noticed this last season and was especially concerned about his bag in particular. Once I got it out my son and I were investigating and it was quite thin in that section and I could easily push the rubber in. I don't think it was long for this world but it wasn't leaking, yet.

As for my Cummins ISL400, it is equipped with a 2-stage engine compression brake (aka Jake Brake). I had a PAC exhaust brake on our last coach and although they are better than nothing, the Jake Brake was on our "must have" list when we were looking for this coach.
 
Last edited:
To avoid these ads, REGISTER NOW!
Top Bottom