To avoid these ads, REGISTER NOW!

ZMotorsports Shop Projects 2.0

OutlawDrifter

Well-known member
Joined
Jan 20, 2015
Messages
3,898
Location
KS
Thank you.


Marc, it appears to be a scrape that actually cut the outermost cords. I'm assuming something got picked up by a tire and spun around catching the air bag. Maybe a piece of road gator that already was sharp and sliced through the outer cover and damaged a few cords. I don't recall running over something but I guess it happened. I noticed this last season and was especially concerned about his bag in particular. Once I got it out my son and I were investigating and it was quite thin in that section and I could easily push the rubber in. I don't think it was long for this world but it wasn't leaking, yet.

As for my Cummins ISL400, it is equipped with a 2-stage engine compression brake (aka Jake Brake). I had a PAC compression brake on our last coach and although they are better than nothing, the Jake Brake was on our "must have" list when we were looking for this coach.

100% agree, there is nothing as effective as a Jacobs Engine Brake. :rocker:

I wasn't sure how they treated the coaches in your size/configuration, it would be a must have on my list also. Nice to run down a mountain pass and not have to touch the brakes.
 
To avoid these ads, REGISTER NOW!

purplezr2

Well-known member
Joined
Jun 1, 2010
Messages
5,300
Location
Central MN
Mike,

I don't post much, or ask many questions, but I really like your thread. I would say I read it 3-5 times a week. I have also taken some of your ideas, or bought tools you have posted about.

Really enjoy your writing and attention to details.
 
OP
Z

zmotorsports

ALLIANCE MEMBER
Joined
Oct 20, 2009
Messages
21,467
Location
Northern Utah
100% agree, there is nothing as effective as a Jacobs Engine Brake. :rocker:

I wasn't sure how they treated the coaches in your size/configuration, it would be a must have on my list also. Nice to run down a mountain pass and not have to touch the brakes.

Marc, I learned a quick lesson when we bought this coach back in 2007 and towed our enclosed trailer for the first time. With the compression brake activated it turns on brake lights, which in turn also activated the trailer brakes.:eyecrazy: Not good companions on long descents.:bounce:

Upon returning home I wired in a relay activated by a toggle switch next to my Jake Brake switch that I could simply flip and it would interrupt the signal to the trailer brake controller yet still keep the brake lights activated on both the coach and the trailer. It works great so that the coach's compression brakes can slow the descent but not drag the trailer brakes causing an overheating condition. Even a quick stab of the service brakes to slow the speed down will use the coach to slow and not the trailer brakes.

I used a rocker switch to match my OEM switches but with a small LED in the rocker so a quick glance from my peripheral and I can make sure the trailer brakes are in the correct position for normal driving. IF the light is on, then the trailer brakes are deactivated. Once down the grade I flip the switch to the normal operating position and everything functions as normal. This setup has worked great for the past 14 years/75k miles.
 
OP
Z

zmotorsports

ALLIANCE MEMBER
Joined
Oct 20, 2009
Messages
21,467
Location
Northern Utah
Mike,

I don't post much, or ask many questions, but I really like your thread. I would say I read it 3-5 times a week. I have also taken some of your ideas, or bought tools you have posted about.

Really enjoy your writing and attention to details.

Thank you, I appreciate the feedback and thanks for following along. I am happy you enjoy the content.
 

OutlawDrifter

Well-known member
Joined
Jan 20, 2015
Messages
3,898
Location
KS
With the compression brake activated it turns on brake lights, which in turn also activated the trailer brakes.:eyecrazy: Not good companions on long descents.:bounce:

That is wild...I guess I understand the theory behind it from the company's standpoint, but man, that could definitely cause some problems! :lol_hitti
 
OP
Z

zmotorsports

ALLIANCE MEMBER
Joined
Oct 20, 2009
Messages
21,467
Location
Northern Utah
That is wild...I guess I understand the theory behind it from the company's standpoint, but man, that could definitely cause some problems! :lol_hitti

Agreed. I'm glad I caught it when I did and devised a work-around. That could cause serious damage to trailer brakes if someone didn't realize that was happening.
 

4 FN 27

ALLIANCE MEMBER
Joined
Oct 19, 2015
Messages
4,635
Location
Minnesnowta
Great work all the way around Mike. After seeing you Air Bags I might have to crawl around under my Coach...

Love the Gauges and Mount. On the American Eagle I can change the DIC to show me what ever I want engine related. I like that except it is all numbers. I would rather prefer a Needle I can glance at and know I am OK.
 

Bigblue&Goldie

Well-known member
Joined
Mar 12, 2009
Messages
10,729
Location
AZ
Great job Mike! My dad had a ~2000 model year Holiday Rambler that was constantly blowing air bags. Holiday Rambler kept "fixing" them, but he was left stranded on a couple of occasions waiting on parts/repairs. I forget what the underlying issue was, but it was something that kept rubbing on them. I think being proactive with replacing your airbags is money ahead and worth the peace of mind.
 
OP
Z

zmotorsports

ALLIANCE MEMBER
Joined
Oct 20, 2009
Messages
21,467
Location
Northern Utah
Great work all the way around Mike. After seeing you Air Bags I might have to crawl around under my Coach...

Love the Gauges and Mount. On the American Eagle I can change the DIC to show me what ever I want engine related. I like that except it is all numbers. I would rather prefer a Needle I can glance at and know I am OK.

Thank you Pat. I don't know what the life expectancy is of these air springs but it sure seems like I've seen a lot of people with 1999-2004 years having issues lately, so I'm guessing right around 20 years, give or take a couple years. Glad I've about got mine done and can clear my mind of that stress for the foreseeable future.

I hope to get my gauge panel back from my upholsterer soon so I can put the dash back together and take her for a road test before our first trip in a few weeks.
 
OP
Z

zmotorsports

ALLIANCE MEMBER
Joined
Oct 20, 2009
Messages
21,467
Location
Northern Utah
Great job Mike! My dad had a ~2000 model year Holiday Rambler that was constantly blowing air bags. Holiday Rambler kept "fixing" them, but he was left stranded on a couple of occasions waiting on parts/repairs. I forget what the underlying issue was, but it was something that kept rubbing on them. I think being proactive with replacing your airbags is money ahead and worth the peace of mind.

Thanks Ryan. Having gone through multiple air bags there had to be a real issue causing them to fail as these things are quite durable considering the weight they carry and the environment they have to work in.

I am happy to have mine nearly done so I can quit worrying about them now.
 

Mr.zippy

Well-known member
Joined
Apr 27, 2020
Messages
2,221
Location
Wyoming
Mike,
I am happy to see that I actually have some of the same fancy tools that you use! I see that you used a couple of the "foam carry around knee pad protectors" on your air bag replacement project. I must have about 5 of those things, and they are a must have for my tired knees........
 
OP
Z

zmotorsports

ALLIANCE MEMBER
Joined
Oct 20, 2009
Messages
21,467
Location
Northern Utah
Mike,
I am happy to see that I actually have some of the same fancy tools that you use! I see that you used a couple of the "foam carry around knee pad protectors" on your air bag replacement project. I must have about 5 of those things, and they are a must have for my tired knees........

Yes, knee pads are a life (or knee) saver.:beer:

Thanks for following along on my projects.
 
OP
Z

zmotorsports

ALLIANCE MEMBER
Joined
Oct 20, 2009
Messages
21,467
Location
Northern Utah
Finished the last two air springs tonight on the coach. The tag axle ones were definitely the hardest due to limited access.

I’m not the smallest person but I think even a 5’6” 150lb. guy would struggle to fit up in between the transmission and the control arms (suspension) to reach those two air springs which are the only two mounted inboard of the frame rails.

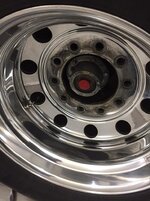
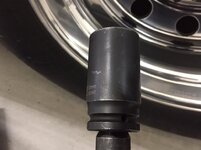
First I removed the tag tires/wheels using my IR2235 1/2” impact gun.
2a590104fc2a718e145c78ec24131de8.jpg

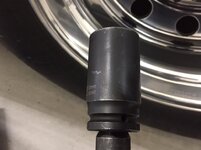
33mm impact socket.
5d1ddcbcfc6f5bfba46c25be589dad5c.jpg

Long prybar to walk the tire/wheel outward off the hub.
38f4dbcee4c41ba45bc7372586bae87b.jpg

Once off the hub walk the tire out of the wheelwell.
43c9de459a9b75f4e5845e73e49cbaa1.jpg

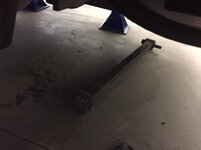
Removed the tag axle lower control arm at the axle pivot.
59b88cab6474484fb198dffda8fda8a7.jpg

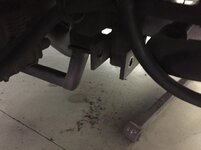
Remove at the chassis pivot.
e2f3e0f0b77ac81d9fdb3078e1aca3e9.jpg

92d2a1a9a6566f52f35f92fe6fdfda5e.jpg

While I’m under there I opted to put a purge valve rebuild kit in my Bendix air dryer. Purge valve removed.
49c455f744339146753c1681390ae702.jpg

It was due as there was some buildup on the purge valve that eventually would have gotten lodged in the valve causing air leakage.
ed1afc67179db55039f8921b1cc26541.jpg

All ten old air springs/air bags.
16e0cff6e8f125b43841c0f1f44ef444.jpg

Glad that job is done but not as bad as I thought it would be.

Thanks for looking.
 

Attachments

  • 16e0cff6e8f125b43841c0f1f44ef444.jpg
    16e0cff6e8f125b43841c0f1f44ef444.jpg
    85.7 KB · Views: 0
  • ed1afc67179db55039f8921b1cc26541.jpg
    ed1afc67179db55039f8921b1cc26541.jpg
    108.9 KB · Views: 0
  • 92d2a1a9a6566f52f35f92fe6fdfda5e.jpg
    92d2a1a9a6566f52f35f92fe6fdfda5e.jpg
    40.8 KB · Views: 0
  • e2f3e0f0b77ac81d9fdb3078e1aca3e9.jpg
    e2f3e0f0b77ac81d9fdb3078e1aca3e9.jpg
    58.7 KB · Views: 0
  • 59b88cab6474484fb198dffda8fda8a7.jpg
    59b88cab6474484fb198dffda8fda8a7.jpg
    89.8 KB · Views: 0
  • 43c9de459a9b75f4e5845e73e49cbaa1.jpg
    43c9de459a9b75f4e5845e73e49cbaa1.jpg
    113.7 KB · Views: 0
  • 49c455f744339146753c1681390ae702.jpg
    49c455f744339146753c1681390ae702.jpg
    75 KB · Views: 0
  • 38f4dbcee4c41ba45bc7372586bae87b.jpg
    38f4dbcee4c41ba45bc7372586bae87b.jpg
    75.1 KB · Views: 0
  • 5d1ddcbcfc6f5bfba46c25be589dad5c.jpg
    5d1ddcbcfc6f5bfba46c25be589dad5c.jpg
    60.5 KB · Views: 0
  • 2a590104fc2a718e145c78ec24131de8.jpg
    2a590104fc2a718e145c78ec24131de8.jpg
    102 KB · Views: 0
Last edited:

bigdave_185

Well-known member
Joined
Feb 14, 2021
Messages
443
Location
Utah
Now what ya gonna do with the bags? Iv played with suspension ideas on my enclosed trailer, no logical reason but I have considered shocks. Why not air bags right?


Sent from my iPhone using Tapatalk
 
OP
Z

zmotorsports

ALLIANCE MEMBER
Joined
Oct 20, 2009
Messages
21,467
Location
Northern Utah
Now what ya gonna do with the bags? Iv played with suspension ideas on my enclosed trailer, no logical reason but I have considered shocks. Why not air bags right?


Sent from my iPhone using Tapatalk

My plans were dumpster but if you would like any/all let me know as you are welcome to them. The two I removed from the tag axle last night are actually in pretty good condition still and showed no signs of cracking, unlike the others.
 
To avoid these ads, REGISTER NOW!

mercracing

Well-known member
Joined
Feb 14, 2015
Messages
156
No need I guess. A prybar works perfectly and is easier to store. The couple of times I've used the dolly at work it seemed to be more hassle than it's worth.


That’s been my experience with taking school bus and motor coach tires and wheels on/off.


Sent from my iPhone using Tapatalk
 

losdudes

Well-known member
Joined
Mar 10, 2011
Messages
210
Location
Colorado
Mike, How do you torque to 450 ft lbs? I've only used torque wrenches to about 150 ft lbs.

I also like reading all your repair work and like your welding skills.
 
OP
Z

zmotorsports

ALLIANCE MEMBER
Joined
Oct 20, 2009
Messages
21,467
Location
Northern Utah
With the air drier so hard to access on these S-Series chassis, I figured while I had the left rear tag tire/wheel off I would rebuild the purge valve. It hasn’t given me any issues but over time they can begin to build up deposits in the valve itself and then not seal completely resulting in an air leak. With 130k miles on the coach I opted to tear it apart, clean it and reassemble with new software components.

The Wabco/Meritor kit that I purchased came with all of the internals so in they went.
8ef791dfd69573c5d7632ccac7cbbf6a.jpg

It was due as there was some buildup just waiting to cause an air leak. Nothing too awfully bad though, just enough that I feel good about my decision to rebuild it.
8ae5ccf7a76fc86b0111db6980cd6b94.jpg

New parts in the background, old in the foreground.
66b62dbf3badadc06865eb40db703203.jpg

I’ve seen people leave these steel washers out by mistake but it’s important to put them in place to keep the steel spring from gouging into and wearing the brass valve as well as the plastic cone.
fc4925af2057104cc490168310268b3c.jpg

One steel washer goes into the seat of the plastic diffuser cone. I put a little of the supplied grease on the washer which helps hold things together during assembly.
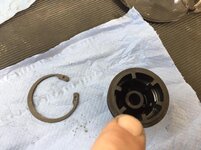
0217b30a8f5fcc181c306fca76248d11.jpg

The other steel washer goes on the brass valve, again using some grease to hold everything together plus lube then new o-rings and seal.
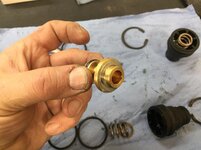
cd579711e193323267814d382a88ddbd.jpg

One o-ring on either side of the steel seat before installing and the grease helps hold things in place. Usually if doing this on the bench it’s not so important but I didn’t feel like removing the entire air drier to just rebuild the purge valve so I’ll be inserting the parts up into the drier and fighting gravity.
ca7feee0d7d5bb8e0eb9f708f0290bd2.jpg

Parts greased up and installed into position.
b65a93f6e6b6c31e88311c9b97e27ae1.jpg

Now comes the fun part and the hardest part when doing this on the coach. The plastic diffuser end has to go in place and you must compress the spring enough to install the heavy snap-ring into place. If your lucky enough to have three hands you’re all set otherwise you have to devise a plan to push the diffuser up into the bore far enough to then install the snap ring and the spring is fairly stiff.
ea2df9a92a7c8c23fcb655a16a94b61f.jpg

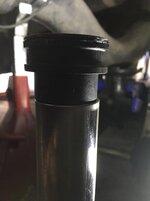
I grabbed a piece of steel tubing approx. 2’ long that just fit around the reduced section of the diffuser.
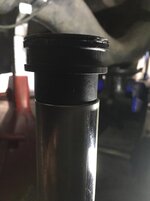
90a5c9c0a0677f89f94ef8622ba9d154.jpg

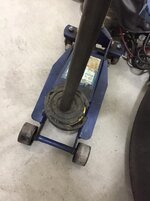
Then grabbed my floor jack and positioned it directly below the purge valve. I raised the floor jack GENTLY and just enough to push the plastic diffuser into place. Be sure to put the snap ring over the tubing prior to using the floor jack.
e11eae0e1241f207d1bc71d697e38be1.jpg

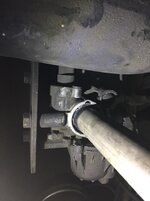
Then simply use a pair of snap ring pliers to compress and put into place. Easy peasy.
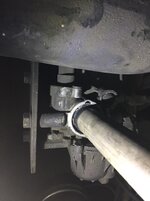
8ce7de64bed3d061404ac65b91b3ecd9.jpg

Purge valve rebuild complete.
b7e79006de15556a33982e35926d1820.jpg

Thanks for looking.
 

Attachments

  • b65a93f6e6b6c31e88311c9b97e27ae1.jpg
    b65a93f6e6b6c31e88311c9b97e27ae1.jpg
    50.3 KB · Views: 0
  • ca7feee0d7d5bb8e0eb9f708f0290bd2.jpg
    ca7feee0d7d5bb8e0eb9f708f0290bd2.jpg
    111.5 KB · Views: 0
  • ea2df9a92a7c8c23fcb655a16a94b61f.jpg
    ea2df9a92a7c8c23fcb655a16a94b61f.jpg
    62.3 KB · Views: 0
  • 90a5c9c0a0677f89f94ef8622ba9d154.jpg
    90a5c9c0a0677f89f94ef8622ba9d154.jpg
    49.1 KB · Views: 0
  • e11eae0e1241f207d1bc71d697e38be1.jpg
    e11eae0e1241f207d1bc71d697e38be1.jpg
    66.2 KB · Views: 0
  • 8ce7de64bed3d061404ac65b91b3ecd9.jpg
    8ce7de64bed3d061404ac65b91b3ecd9.jpg
    64.1 KB · Views: 0
  • b7e79006de15556a33982e35926d1820.jpg
    b7e79006de15556a33982e35926d1820.jpg
    85.7 KB · Views: 0
  • cd579711e193323267814d382a88ddbd.jpg
    cd579711e193323267814d382a88ddbd.jpg
    69.4 KB · Views: 0
  • 0217b30a8f5fcc181c306fca76248d11.jpg
    0217b30a8f5fcc181c306fca76248d11.jpg
    97.7 KB · Views: 0
  • fc4925af2057104cc490168310268b3c.jpg
    fc4925af2057104cc490168310268b3c.jpg
    105.7 KB · Views: 0
  • 8ef791dfd69573c5d7632ccac7cbbf6a.jpg
    8ef791dfd69573c5d7632ccac7cbbf6a.jpg
    63.8 KB · Views: 0
  • 8ae5ccf7a76fc86b0111db6980cd6b94.jpg
    8ae5ccf7a76fc86b0111db6980cd6b94.jpg
    108.9 KB · Views: 0
  • 66b62dbf3badadc06865eb40db703203.jpg
    66b62dbf3badadc06865eb40db703203.jpg
    99.4 KB · Views: 1
Last edited:

GRN96WS6

Well-known member
Joined
Dec 23, 2012
Messages
2,267
Location
SOMD
I bet that facebook group would have had some special tool that you should've done it with [emoji1787][emoji1787]

I've used my floor jack for similar things where one needs three hands.
 

Monza Harry

Well-known member
Joined
Dec 29, 2018
Messages
1,433
Location
Windsor ON
I’ve seen people leave these steel washers out by mistake but it’s important to put them in place to keep the steel spring from gouging into and wearing the brass valve as well as the plastic cone.
If your lucky enough to have three hands you’re all set otherwise you have to devise a plan to push the diffuser up into the bore far enough to then install the snap ring and the spring is fairly stiff.
I ordered 4 but I was short shipped, Damn Amazon! ;)

Then grabbed my floor jack and positioned it directly below the purge valve. I raised the floor jack GENTLY and just enough to push the plastic diffuser into place. Be sure to put the snap ring over the tubing prior to using the floor jack.
I can hear the compound 4 letter words from here!
Easy peasy. Uhm yeah! Sounds easy, but somehow I think it looks easier than it is!

Thanks for looking.
Yep there could be a few DOH! moments there! I forget the sleeve when doing hydraulic 45 & 37* flares all the time! [Reference to the snap ring above] Harry
 
OP
Z

zmotorsports

ALLIANCE MEMBER
Joined
Oct 20, 2009
Messages
21,467
Location
Northern Utah
Yep there could be a few DOH! moments there! I forget the sleeve when doing hydraulic 45 & 37* flares all the time! [Reference to the snap ring above] Harry

You got me Harry. Attempt # 1 with the piece of tubing was just me pushing upwards with one hand while trying to install the snap ring with the other. That is when I realized the snap ring was lying beside me. Attempt # 2 failed as I was unable to both compress the spring with the one hand AND install the snap ring with the other. Attempt # 3 was using the floor jack and it want right together. That's the easy peasy part.:lol:
 

Bob Heine

ALLIANCE MEMBER
Joined
Oct 24, 2009
Messages
10,708
Location
Boca Raton, Florida
Mike, at least 50% of my projects involve your three-step process. The other 50% end up being easy peasy because I don't need to get two hands into the small space. You reminded me why I keep so much scrap -- never know what it's gonna take to conquer those three-handed jobs.
 

Monza Harry

Well-known member
Joined
Dec 29, 2018
Messages
1,433
Location
Windsor ON
That is actually the only method that repeatedly works for self improvement Mike! I remember as a teenager reading "The Readers Digest" "Humour in Uniform" a submitted "funny" was an enlisted man asking his Sgt. why he kept getting all of the "crappy jobs"? The Sargents reply was, "I find the laziest guy to do the hardest jobs, because he will always find the easiest way to do it", if you were lazier you might have done it in 2 or even 1 attempt. I always try and do that little ditty in my head when tackling "Fugly Jobs" Besides how do you think I knew there would be a "DOH!" moment, we all live there and done that, with different scenery is all, or do it the hardest way possible, :willy_nil and when finished realize hey I could have just...:lol_hitti :eek: Harry :D P.S. if three attempts were only my worst go around. :shocking: I know Eh.
 
OP
Z

zmotorsports

ALLIANCE MEMBER
Joined
Oct 20, 2009
Messages
21,467
Location
Northern Utah
Well, according to my wife I had another “learning opportunity” this week.

I’m trying to wrap things up on the coach and silly me thinking it will all fall together by proper planning. I had installed the gauges into the console that I fabricated and then wired everything up on the bench. I drew up some somewhat crude but accurate wiring schematics for the gauge panel to a 8-pin Deutsch connector and then the coach side to a female plug. All I had to do was plug them together after bolting the panel to the dash. Easy peasy. [emoji23]

I had only a little bit of time last night because I was ready to move on to some Jeep maintenance tonight. Well that didn’t happen.

After console installation I turned the ignition key expecting everything to function perfectly. The pyrometer needle swept but nothing from the fuel pressure gauge. I fired it up and the pyrometer started to climb slightly, I burped the throttle and got the boost needle to bump but nothing from the fuel pressure gauge. Shut her down and went to troubleshooting.

Started by cutting my nicely tie wrapped wire loom apart and checked my connections. I then grabbed a spool if wire and some test leads double checking continuity and wiring from the engine bay to the dash. All three wires from the sending unit were perfect. Next checked ignition positive and ground at the gauge. All checked out so that was an hour wasted. Before closing up the shop in frustration last night I snapped a picture of the back of the connector on the fuel pressure gauge.
766a8df0ffb3559a7aa6f1d2178044cb.jpg

Today I did some research to try and find a pinout from Auto Meter for the connector. After some digging I found one. See anything wrong? The positive and negative from the sender should be in the upper right (pins 6 & 7) rather than where they are in mine at upper left (pins 9 & 10).
2c2d9076cfa8814d79670025699e1da7.jpg

Ignition positive and sending unit ground were in the wrong locations. For hells sake, why me?

This afternoon after work I swapped the wires around and tested before putting gauge and panel back in place. Everything worked perfectly so back together it went.

Dash gauge panel done.
5b1c0e421d51d7126ce5f288912109ac.jpg

First was the FASS pressure relief issue and now an Auto Meter wiring connector incorrectly assembled. Is it just me or is quality REALLY slipping lately? Maybe I’m just the lucky one who gets these scenarios.

Now I can move on to Jeep maintenance.
 

Attachments

  • 766a8df0ffb3559a7aa6f1d2178044cb.jpg
    766a8df0ffb3559a7aa6f1d2178044cb.jpg
    58 KB · Views: 0
  • 2c2d9076cfa8814d79670025699e1da7.jpg
    2c2d9076cfa8814d79670025699e1da7.jpg
    95.2 KB · Views: 0
  • 5b1c0e421d51d7126ce5f288912109ac.jpg
    5b1c0e421d51d7126ce5f288912109ac.jpg
    80.1 KB · Views: 0
Last edited:

OutlawDrifter

Well-known member
Joined
Jan 20, 2015
Messages
3,898
Location
KS
Not just you Mike, QC seems to be slipping across the board in a lot of industries!

Glad it was an "easy" fix. They always seem to take more time to troubleshoot!
 

GRN96WS6

Well-known member
Joined
Dec 23, 2012
Messages
2,267
Location
SOMD
I know you've said you're not one to email support per se but I think I'd send them the pic you snapped before fixing it. Not all people would know how to even go about fixing that.

QC sadly seems to be a thing of the past.
 

stinkity stoink

Well-known member
Joined
Apr 8, 2007
Messages
736
Location
New Jersey
I probably would have sent it back and said it was defective. I am definitely not as persistent or as skilled as you when it comes to troubleshooting. Excellent find !!
 
To avoid these ads, REGISTER NOW!
Top Bottom