OP
cyamaha2007
Well-known member
Yes i have a donor frame.

 . Should be a fun and quick little project.

I also have never heard of catastrophic frame failure causing a multiple fatality traffic accident. Seriously, most compact cars have less frame material than the back half of this guys truck. To equate his repair with putting your children in danger is absurd and unwarranted.
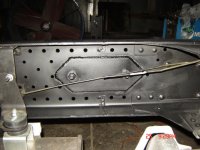
Im stuck with frame cut at a 45 and over the axle since it has already been done to both frames. How would i fasten the GLOVE to the frame. I just dont understand where to weld it if it was on the top rail of the frame?

How would i fasten the GLOVE to the frame. I just dont understand where to weld it if it was on the top rail of the frame?
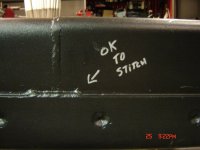
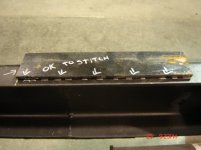
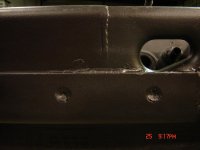
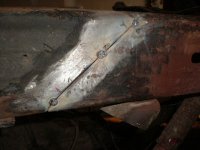
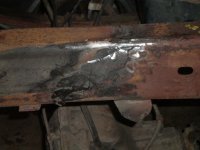
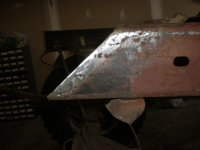
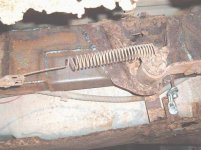
 ). I do not recommend using angle iron for this. You've got plenty of excess frame to use as a glove from the donor truck. The first pic details where not to weld. Never weld a glove across the flange. It's a crack waiting to happen.
 Evil 16v i just started to work on that brake line. Its was really rusty and just moving it around to look at it i sprung a leak. Thanks alot for the tips


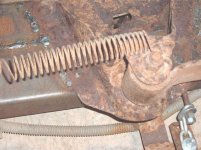
dude that isn't a little rust........


do bags really have a place on a farm truck??
It would make getting in and out way easier. Is there durabilty issues? I dont want to do it just curious.


Wow thats alot of rust. I would check your cab mounts also. A decent used frame would have been a better fix IMO.
Kalifornia has obviously spoiled you! In the rust belt I would not consider that bad for something that is even just 10 years old. This thing being an 89, it's in pretty good shape!
My brother bought an 03 GMC about a month ago and had to replace the rocker panels and door skins since they were rusted out. (Lives in Maine)

On my Jeep the rear crossmember was gone too, but when I took the body off to check the rest of the chassis, I felt both relieved and stumped. Stumped for having even more work to add to the list but mainly relieved to see that I had been driving around with all of the body mounts rusted out which I was now going to fix properly. My chassis was salvageable with a lot of reconstructive work and yes, you should take your time. But keep it real and seriously look if it really is worth saving
It almost looks like a pencil line through there instead of two separate pieces.Hey man i would love to see the finished product. F*** all these nay sayers. I just picked up a 1999 chevy 2500 6.0 truck and the rear section of the frame is rotted where the hitch attaches, i am going to attempt to repair it.