To avoid these ads, REGISTER NOW!

Between 705 & 1200 SQ/FT MaverickMade's 24x35 Workshop

Workspaces between 705 and 1200 squarefeet.

MaverickMade

Active member
Joined
Oct 19, 2021
Messages
28
Hello All,

Long time lurker and first time posting a build thread. Like others, I have spent countless hours browsing here and taking inspiration for my own shop.

I started this build in June 2020, so I have almost a year and half worth of updates to give everyone!

I think a good start would give some background history on how I got to where I am today. I grew up in a small town and never really had my own garage. Growing up, we had a single car dilapidated garage which I was never able to work out of. When I was a teenager, I got heavily interested in cars which became my passion, and then my career.

After graduating college, I really couldn't afford a nice garage as I was saddled with student loan debt, so I had always been left wanting more. In 2009, I bought my first house, which was a fixer upper, that had a decent two car garage with a small work room nestled in one corner. It took several years, but I flipped the house in 2015 and eventually settled upon what I thought was my dream house with a three car garage!! During this time, I started getting interested in woodworking as well as my car hobby and really learned how to navigate carpentry.

As fate would have it, right before closing on the 'dream garage', I began dating my now wife and we now have two wonderful children (currently 3 yo and 1 yo). We were happy in the house, but I wanted my wife to feel like she and I both had a say in our next house. So, we went looking and settled upon a house closer to the in-laws with much less of a garage :cry: The house was much older (early 90s build), but with more space.

My deal with the wife was that I could convert the 24 x 24 carport into an enclosed garage.

In 2019, I started the research of converting the 24 x 24 carport into a garage. I drew up plans in sketch up, created a material take off list and gave my local building department a call. Boy was I surprised to find out I would have to underpin the full stem wall in order to convert the carport, which obviously is not cost conducive to doing the conversion as I'd be better off building new.

On to plan B : finish my attached two car garage into a workable garage.
- Finish out sheetrock ✅
- Install LED lighting✅
- Install full garage cabinets✅
- Install plastic tile flooring✅

This worked out well until.....kids......toys....decorations.....blah.....blah....blah....low ceilings.....

On to plan C: In 2020, I stopped compromising and decided to build a suitable Shop. Below are the keys stats :
- 24' x 35' x 12'
- 1 foot overhangs
- 'carport' style build
- 6" fiber reinforced concrete with wire mesh throughout for a future lift
- Full concrete footers

This thread will walk everyone through where I currently sit today and subsequent updates thereafter. As this is the first thread I've ever done, look forward to any feedback! I've named the thread MaverickMade's Shop.

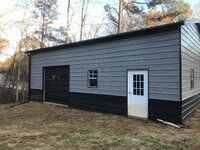
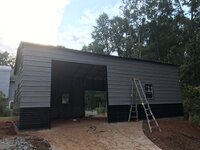
I will leave you all tonight with a couple of shots of the shop.Shop1.jpgShop2.jpg
 
Last edited:
To avoid these ads, REGISTER NOW!
OP
M

MaverickMade

Active member
Joined
Oct 19, 2021
Messages
28
The shop build process started slowly with trying to coordinate settling the shop between my septic field and the required setback off the road. Below is the crude photo I used to submit the shop location to the city.
 

Attachments

  • Workshop layout.001.jpg
    Workshop layout.001.jpg
    979.8 KB · Views: 182
OP
M

MaverickMade

Active member
Joined
Oct 19, 2021
Messages
28
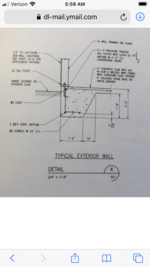
I also submitted a copy of the slab layout, site layout and building plans directly from the builder.

As you can see from the layout, 24 x 35 was about maxed without encroaching on septic and setbacks.
 

Attachments

  • Shop Build Layout.001.png
    Shop Build Layout.001.png
    1.4 MB · Views: 154
  • Workshop layout.001.png
    Workshop layout.001.png
    1.6 MB · Views: 148
OP
M

MaverickMade

Active member
Joined
Oct 19, 2021
Messages
28
This is what I used to submit for concrete. Disregard the j-bolts and 2x4 construction, obviously didn't use that.
 

Attachments

  • ConcreteSketch.PNG
    ConcreteSketch.PNG
    1.4 MB · Views: 124
OP
M

MaverickMade

Active member
Joined
Oct 19, 2021
Messages
28
Nice looking shop! So, does the drive on the back side lead to the street?
Yes, I have two garage doors, one facing the street and the second facing in toward my yard, for lawn access. I’m on a corner lot, so this layout seemed to make the most sense.
 
OP
M

MaverickMade

Active member
Joined
Oct 19, 2021
Messages
28
We started concrete, which probably was the most enjoyable and stressing part of the project for me.

In order to start the concrete, I removed a total of about 35 tress throughout my property and brought in a stump grinder to get two trees that were directly on the slab area.

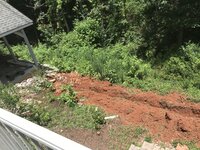
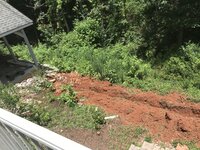
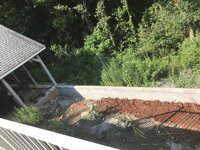
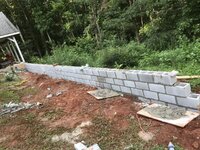
The concrete guys I used were awesome workers. While doing my concrete, they also built a 85 foot retaining block wall for me so I could level out my backyard some. While doing this, we also brought in several truckloads worth of dirt to raise the pad area. To this day, we still have a pretty steep drop off from the shop that I eventually will need to take care of.

Concrete process for me :
- Submitted drawing for permit ✅
- Reach out to a bunch of contractors and get snubbed by most of them. ✅
- Find a reliable contractor✅
- Removal of trees ✅
- Bring in dirt ✅
- Rough grading and staking ✅
- Layout ✅
- Set forms ✅
- Dig footers ✅
- Set vapor barrier ✅
- Set rebar in footers ✅
- Set wire mesh ✅
- Concrete Pour! ✅
 

Attachments

  • Drop Off.jpg
    Drop Off.jpg
    567.9 KB · Views: 98
  • DriveWay.jpg
    DriveWay.jpg
    668.8 KB · Views: 85
  • Footer.jpg
    Footer.jpg
    562.8 KB · Views: 84
  • Footer 2.jpg
    Footer 2.jpg
    616.2 KB · Views: 79
  • Footer 3.jpg
    Footer 3.jpg
    616.2 KB · Views: 78
  • Pad.jpg
    Pad.jpg
    530.1 KB · Views: 77
  • VaporBarrier.jpg
    VaporBarrier.jpg
    573.8 KB · Views: 77
  • Retaining Wall2.jpg
    Retaining Wall2.jpg
    786.2 KB · Views: 72
  • Retaining Wall.jpg
    Retaining Wall.jpg
    749.1 KB · Views: 74
  • Retaining Block.jpg
    Retaining Block.jpg
    407.7 KB · Views: 78
OP
M

MaverickMade

Active member
Joined
Oct 19, 2021
Messages
28
Additional photos of retaining wall and concrete process....
 

Attachments

  • Poured Wall Footer.jpg
    Poured Wall Footer.jpg
    713 KB · Views: 78
  • Retaining Wall.jpg
    Retaining Wall.jpg
    749.1 KB · Views: 76
  • Retaining Wall2.jpg
    Retaining Wall2.jpg
    786.2 KB · Views: 70
  • VaporBarrier.jpg
    VaporBarrier.jpg
    573.8 KB · Views: 70
  • Wallbuild4.jpg
    Wallbuild4.jpg
    599.4 KB · Views: 68
  • Wallbuild3.jpg
    Wallbuild3.jpg
    712.7 KB · Views: 72
  • WallBuild2.jpg
    WallBuild2.jpg
    686.9 KB · Views: 75
  • WallBuild.jpg
    WallBuild.jpg
    680.7 KB · Views: 101
OP
M

MaverickMade

Active member
Joined
Oct 19, 2021
Messages
28
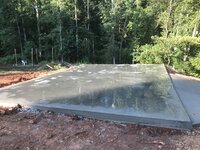
Slab completed! At this point, it was exciting to see the footprint of the building.

I made sure to try to keep water on the pad for a couple of weeks to help it cure. My concrete guys also made sure to add a small lip to the garage door entrance to keep the water out.
 

Attachments

  • ConcretePadPark.jpg
    ConcretePadPark.jpg
    459.8 KB · Views: 98
  • FinishedSlab.jpg
    FinishedSlab.jpg
    607.1 KB · Views: 105
  • Finshed Drive.jpg
    Finshed Drive.jpg
    493.4 KB · Views: 104
  • Wallbuild3.jpg
    Wallbuild3.jpg
    712.7 KB · Views: 110

Chrisb62

Well-known member
Joined
Jul 30, 2019
Messages
1,095
Location
southwest fl
Don't know if that is camera angle or if that is a fairly steep angle for the short pad into the building, no Corvettes or other very low cars I presume.......
 
OP
M

MaverickMade

Active member
Joined
Oct 19, 2021
Messages
28
Don't know if that is camera angle or if that is a fairly steep angle for the short pad into the building, no Corvettes or other very low cars I presume.......
Hey, Chris, thanks for stopping by.

I think it’s the camera angle, I’ve had several low cars in there (Miata, lowered Eagle Talon, etc.) and haven’t had any issue.

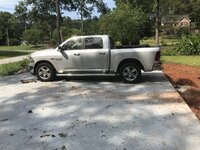
Here’s some more shots showing the drive.
 

Attachments

  • 40100F91-F2D7-4F53-948E-38B3C0197346.jpeg
    40100F91-F2D7-4F53-948E-38B3C0197346.jpeg
    450.9 KB · Views: 89
  • BE3792F3-64E3-4447-9CA3-E079323F46AB.jpeg
    BE3792F3-64E3-4447-9CA3-E079323F46AB.jpeg
    666.1 KB · Views: 113

Chrisb62

Well-known member
Joined
Jul 30, 2019
Messages
1,095
Location
southwest fl
Second pictures show no drastic angle.......my bad, everything looks great.....awaiting more pictures of your build.
 
OP
M

MaverickMade

Active member
Joined
Oct 19, 2021
Messages
28
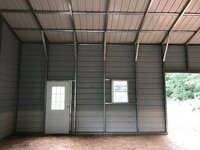
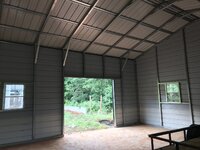
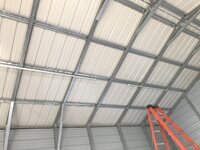
After concrete comes the fun part. I ordered a 24x35 "carport" style building from TOL buildings (Top of the Line Buildings). I updated in some areas with 155 mph approved drawings, wainscoting, vertical roof, additional windows, etc. The crew took two long days to put up the building. I actually felt kind of bad for the crew, they showed up on a flat bed and worked a ton of hours in two days trying to get this thing up.

Interested to hear feedback as I haven't seen many "carport" style builds while surfing.
 

Attachments

  • ExteriorBeforeDoors.jpg
    ExteriorBeforeDoors.jpg
    551 KB · Views: 99
  • ExteriorBeforeDoors2.jpg
    ExteriorBeforeDoors2.jpg
    400.4 KB · Views: 98
  • ExteriorBeforeDoors3.jpg
    ExteriorBeforeDoors3.jpg
    548.8 KB · Views: 108
  • InteriorBeforeDoors.jpg
    InteriorBeforeDoors.jpg
    302 KB · Views: 106
  • InteriorBeforeDoors2.jpg
    InteriorBeforeDoors2.jpg
    316.6 KB · Views: 117
  • InteriorBeforeDoors3.jpg
    InteriorBeforeDoors3.jpg
    277.3 KB · Views: 126

GreenIron

Well-known member
Joined
Sep 26, 2021
Messages
2,093
Location
A bit north of the GOA
Interested to hear feedback as I haven't seen many "carport" style builds while surfing.

Nice work shop, MM. (y)

My work shop is similar to yours(carport style) with different measurements. It's 20'x 35' (700sf) with 14' walls. I built a 20'x12' loft(mezzanine) at the rear of the shop for storage. The loft give me an additional 240sf of floor space. A total of 940sf available space.
I went with vertical roof and vertical walls with the 155mph wind rating. The only windows I have are the ones on the two 36"x80" Man-Doors. I will soon have one 10'x10' sliding barn door on one sidewall and a 8'x8' sliding barn door directly across from it(for backyard access). I'm not quit finished with mine, so I'll start a thread on it soon.
 
OP
M

MaverickMade

Active member
Joined
Oct 19, 2021
Messages
28
Nice work shop, MM. (y)

My work shop is similar to yours(carport style) with different measurements. It's 20'x 35' (700sf) with 14' walls. I built a 20'x12' loft(mezzanine) at the rear of the shop for storage. The loft give me an additional 240sf of floor space. A total of 940sf available space.
I went with vertical roof and vertical walls with the 155mph wind rating. The only windows I have are the ones on the two 36"x80" Man-Doors. I will soon have one 10'x10' sliding barn door on one sidewall and a 8'x8' sliding barn door directly across from it(for backyard access). I'm not quit finished with mine, so I'll start a thread on it soon.
Mike - Would love to see how you did the loft. I wouldn't mind having that for some tool storage.
 
OP
M

MaverickMade

Active member
Joined
Oct 19, 2021
Messages
28
Next, I had power brought into the shop from my existing home meter. I sub'ed out the trench and some of the wiring, but ended up hanging the panel myself.
- 100A panel
- MC cable for everything except for the 220V which was ran inside of conduit. Since I ran the conduit and 220V later, I will post about that in the future.
- At least two outlets on every wall
- LED lighting, total of 14 lights so far. These were put on four way switches at each entrance.
- Four outlets on wall closet to the street for a future work area with built ins
- HVAC mini split wiring (will post later) - 40A breaker with 8ga wiring
- 2 post lift wiring (will also post later) - 25A breaker with 10ga wiring

The work I sub'ed out was only so so. It will get the job done, but not as neat as I would have done it myself. Guess that's the way these things go these days.
 

Attachments

  • Power.jpg
    Power.jpg
    257.1 KB · Views: 98
  • LEDLighting.jpg
    LEDLighting.jpg
    307 KB · Views: 114
To avoid these ads, REGISTER NOW!

CombatNinja

Well-known member
Joined
Aug 24, 2013
Messages
1,456
Good work on the shop. The big muscle movements appear done, now it is all the little stuff.

Question, what was the rationale for NOT having the doors line up for drive-thru access to the backyard? Seems like that would've been the move.
 
OP
M

MaverickMade

Active member
Joined
Oct 19, 2021
Messages
28
Good work on the shop. The big muscle movements appear done, now it is all the little stuff.

Question, what was the rationale for NOT having the doors line up for drive-thru access to the backyard? Seems like that would've been the move.
Good question!

The main reason is my zero turn mower sits on the side of the shop with the yard access. I didn’t want to have to move cars and stuff around to get the mower access.

Plan is to have the lift on the car access side and tools / mower on the other side.

Thanks for stopping by!
 
OP
M

MaverickMade

Active member
Joined
Oct 19, 2021
Messages
28
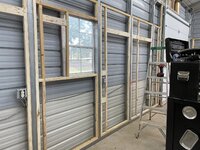
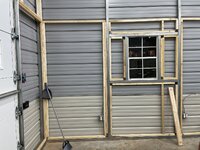
After the wiring was the most work intensive part for me so far, I purchased 2x2 studs to trim out the interior of the shop. Eventually I'm going to hang OSB, drywall or plywood to finish it out. I could have gone the more traditional route by strapping 1x or 2x boards horizontally on the outside of the tubing, but I didn't want to lose the space and wanted more flexibility on wall options.

So, I started the slow and arduous process of installing all of the 2x2 studs. In total, I ordered 125 2x2x96in. furring strips for the framing. This doesn't include the extra framing that I did for the mini split, garage doors and openers as these were done in 2x4s.
 

Attachments

  • InteriorFrameOut2.jpg
    InteriorFrameOut2.jpg
    234.4 KB · Views: 90
  • Interior frameout.jpg
    Interior frameout.jpg
    256.2 KB · Views: 88
  • InteriorFrameout5.jpg
    InteriorFrameout5.jpg
    390.3 KB · Views: 91
  • Interiorframeout4.jpg
    Interiorframeout4.jpg
    434.7 KB · Views: 91
  • InteriorFrameout3.jpg
    InteriorFrameout3.jpg
    337.8 KB · Views: 92
  • Interiorframeout.jpg
    Interiorframeout.jpg
    383.4 KB · Views: 96
OP
M

MaverickMade

Active member
Joined
Oct 19, 2021
Messages
28
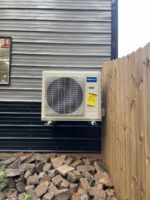
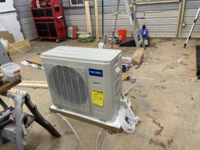
For the HVAC, I decided to go with a Mr. Cool 36k BTU DIY unit. This unit comes with pre-charged line sets, meaning it can be installed by most homeowners. The unit itself was easy to install, the more time consuming part of the process was framing and installing all the wiring/conduit that was needed.

Basic install of HVAC unit :

- 3/4" EMT conduit to the panel
- HVAC quick disconnect on exterior
- 40A breaker
- flexible whip from quick disconnect to the exterior condenser
- 8 gauge wiring (two hots, one ground)
- 2x4 wood framing to mount both exterior unit and interior unit
- Connect line set from interior handling unit to exterior condenser
 

Attachments

  • mini split indoor unit.png
    mini split indoor unit.png
    1.6 MB · Views: 68
  • mini split framing.png
    mini split framing.png
    2.1 MB · Views: 66
  • Mini split wiring2.png
    Mini split wiring2.png
    1.9 MB · Views: 62
  • mini split wiring.png
    mini split wiring.png
    1.3 MB · Views: 59
  • mini split2.png
    mini split2.png
    2.4 MB · Views: 62
  • Mini Split1.png
    Mini Split1.png
    2.7 MB · Views: 64
  • Minisplit3.png
    Minisplit3.png
    2.1 MB · Views: 75
OP
M

MaverickMade

Active member
Joined
Oct 19, 2021
Messages
28
This brings us to the present day. I just finished up installed google mesh wifi system so I could extend my house wifi to the shop. I'm also working on getting quotes for spray foam installation.

I have several pending items left, in no particular order :
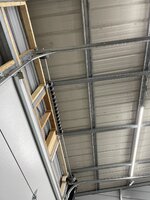
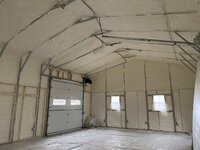
- Spray foam (3" closed cell on ceiling, 2" on walls)
- I plan to finish out 8' of the walls with either OSB or plywood
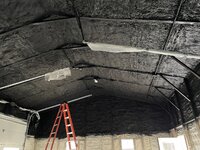
- Spray paint foam black
- Paint finished walls
- Add TV
- Waiting for quote for Challenger VE10 lift with installation
- I'm going to go with modular flooring, either Racedeck or equivalent
- Move my NewAge cabinets from the attached garage to the Shop

I wanted to add some photos of the current state. Would love any feedback on my progress and plans!
 

Attachments

  • IMG_3254.JPG
    IMG_3254.JPG
    351.3 KB · Views: 61
  • IMG_3251.JPG
    IMG_3251.JPG
    355.8 KB · Views: 57
  • IMG_3252.JPG
    IMG_3252.JPG
    275.1 KB · Views: 55
  • IMG_3250.JPG
    IMG_3250.JPG
    328 KB · Views: 53
  • IMG_3247.JPG
    IMG_3247.JPG
    370.7 KB · Views: 53
  • IMG_3249.JPG
    IMG_3249.JPG
    324.3 KB · Views: 56
  • IMG_3244.JPG
    IMG_3244.JPG
    414.4 KB · Views: 54
  • IMG_3245.JPG
    IMG_3245.JPG
    414.1 KB · Views: 50
  • IMG_3243.JPG
    IMG_3243.JPG
    342.9 KB · Views: 53
  • IMG_3240.JPG
    IMG_3240.JPG
    407.2 KB · Views: 72
OP
M

MaverickMade

Active member
Joined
Oct 19, 2021
Messages
28
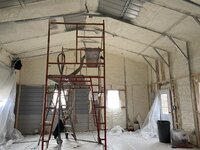
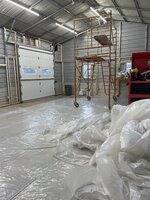
Just started the spray foam. Again, we did 3” on ceiling and 2” on walls. Hope this will allow me to reasonably run hvac throughout the year.

Bought a Graco Magnum X7 to paint the spray foam black once it’s completed.

Next will be OSB and a lift. I’m having a hard time finding a reasonable lift with the C-19 supply shortage. Right now, cheapest lift is like $6k without delivery surcharges. From my memory, used to be like $2.8k
 

Attachments

  • C1DCB35B-C348-4052-A6D4-1B7E6D9A5A96.jpeg
    C1DCB35B-C348-4052-A6D4-1B7E6D9A5A96.jpeg
    369.1 KB · Views: 67
  • BB9093D4-47A9-49D4-A09D-6D0F88426FBA.jpeg
    BB9093D4-47A9-49D4-A09D-6D0F88426FBA.jpeg
    409.8 KB · Views: 68
  • 4CE1D52E-09BF-478B-9EC5-E215B1085590.jpeg
    4CE1D52E-09BF-478B-9EC5-E215B1085590.jpeg
    400.6 KB · Views: 79
OP
M

MaverickMade

Active member
Joined
Oct 19, 2021
Messages
28
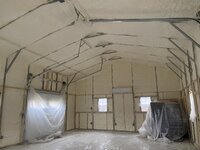
Spray foam all finished. I just ordered a two post lift, install coming soon!
 

Attachments

  • 5530CBE4-0F19-4454-8B44-E8338CE9101F.jpeg
    5530CBE4-0F19-4454-8B44-E8338CE9101F.jpeg
    298.6 KB · Views: 68
  • F477C36F-78EE-4977-98C3-A642DB5A84B5.jpeg
    F477C36F-78EE-4977-98C3-A642DB5A84B5.jpeg
    323.5 KB · Views: 83
OP
M

MaverickMade

Active member
Joined
Oct 19, 2021
Messages
28
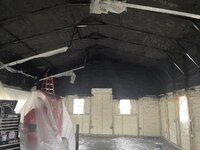
Painted the spray foam ceiling black and received my two post lift. Next I need to install the two post lift and begin to finish out the walls.

I also encountered issues with the cheap windows that were installed. They leak like crazy and condensate pretty bad due to not having a thermal break. So, I have a company coming out next week to give me a quote to replace. I would like opinions from others on what brand and type of windows they’ve used on this type of construction?
 

Attachments

  • F40723EE-D981-451D-8650-05249E3E0CE4.jpeg
    F40723EE-D981-451D-8650-05249E3E0CE4.jpeg
    571.4 KB · Views: 60
  • 659B8BFD-2138-49DF-897C-4B345591667D.jpeg
    659B8BFD-2138-49DF-897C-4B345591667D.jpeg
    377 KB · Views: 57
  • 3D22F257-2744-4970-B10C-61CCD96F4069.jpeg
    3D22F257-2744-4970-B10C-61CCD96F4069.jpeg
    426.6 KB · Views: 52
  • BE17C6B8-C42D-4FC3-AA4F-7C05EF3B709F.jpeg
    BE17C6B8-C42D-4FC3-AA4F-7C05EF3B709F.jpeg
    390.5 KB · Views: 53
  • D96ABE03-3FFE-443B-A3EA-E16B928B6737.jpeg
    D96ABE03-3FFE-443B-A3EA-E16B928B6737.jpeg
    446.2 KB · Views: 54
  • 7028F28D-A2CE-4C09-9EFC-9B119502FC4A.jpeg
    7028F28D-A2CE-4C09-9EFC-9B119502FC4A.jpeg
    389.3 KB · Views: 72
OP
M

MaverickMade

Active member
Joined
Oct 19, 2021
Messages
28
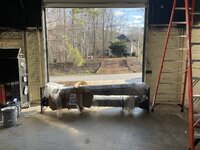
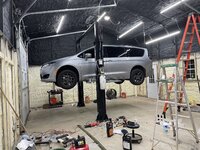
Got the lift in! Went relatively smooth. I did have an issue with the cheap anchors that came with it pulling. So, I ordered some new anchors and pounded the old ones through.

I put the heaviest vehicle I currently own to make sure weight wouldn’t be a problem!

Now on to wall finishing and flooring!
 

Attachments

  • CDC30EF1-DB6C-4F5D-A08E-565664C6360C.jpeg
    CDC30EF1-DB6C-4F5D-A08E-565664C6360C.jpeg
    389 KB · Views: 70
  • 3ACD3B88-F9CA-4D5E-BA75-D024571037FD.jpeg
    3ACD3B88-F9CA-4D5E-BA75-D024571037FD.jpeg
    522.8 KB · Views: 72
  • FD135451-44AD-4EA2-99E8-DE265E5A30D9.jpeg
    FD135451-44AD-4EA2-99E8-DE265E5A30D9.jpeg
    554 KB · Views: 67
  • ED83F8A7-A6D3-4AF7-ABA7-73692144724F.jpeg
    ED83F8A7-A6D3-4AF7-ABA7-73692144724F.jpeg
    443 KB · Views: 56
  • C35EA859-7718-41A3-A69C-79F8669A7152.jpeg
    C35EA859-7718-41A3-A69C-79F8669A7152.jpeg
    456.4 KB · Views: 54
  • 82979B48-205F-4880-892C-9BD483E93DF1.jpeg
    82979B48-205F-4880-892C-9BD483E93DF1.jpeg
    377.9 KB · Views: 53
  • 400126EE-2497-485D-8374-2171D86551BF.jpeg
    400126EE-2497-485D-8374-2171D86551BF.jpeg
    446.2 KB · Views: 56
  • 78398C3A-33D2-4AFF-8C1F-44F2B7FB236B.jpeg
    78398C3A-33D2-4AFF-8C1F-44F2B7FB236B.jpeg
    624.4 KB · Views: 72
OP
M

MaverickMade

Active member
Joined
Oct 19, 2021
Messages
28
Been a couple of months since I updated, but here goes.

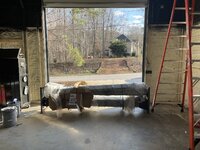
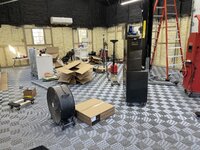
I recently installed RaceDeck free flow flooring throughout the shop. After installing the flooring, I moved my NewAge cabinets into the shop. Also added my custom Maverick Made vinyl on one of the garage doors.

For the windows, I’ve replaced j-channel with new j-channel on one of the windows and am waiting to see if this fixes it. If so, I’ll do the other five windows.

Next, I need to figure out what I want to do with the walls, but haven’t decided yet.

Enjoy!
 

Attachments

  • 8B73BBFD-2C58-443B-91B7-7FFF1CF9EBE3.jpeg
    8B73BBFD-2C58-443B-91B7-7FFF1CF9EBE3.jpeg
    589.5 KB · Views: 45
  • 472A73FB-B640-4E7F-8519-91E48EB9CE2A.jpeg
    472A73FB-B640-4E7F-8519-91E48EB9CE2A.jpeg
    623.8 KB · Views: 42
  • B79F2D01-163B-4E23-BEB3-41D440B3B567.jpeg
    B79F2D01-163B-4E23-BEB3-41D440B3B567.jpeg
    535.3 KB · Views: 50
  • 3D47009E-0BE1-4073-9056-CEACA08963F0.jpeg
    3D47009E-0BE1-4073-9056-CEACA08963F0.jpeg
    543.8 KB · Views: 51
To avoid these ads, REGISTER NOW!
Top Bottom