To avoid these ads, REGISTER NOW!

What did you do "IN" your garage today?

To avoid these ads, REGISTER NOW!

vwpieces

Well-known member
Joined
Apr 28, 2020
Messages
5,925
Location
Hills, PA
Put some holes in the box
Only had a 2in hole saw router it out to 4in. And some tapers

20220123_004705.jpg

20220123_040652.jpg
Hole for a power Inlet plug too. No pic. But needed 1 7/8in hole... More router to size.

Also got the 70K btu freebie finished up.
20220121_204131.jpg
 

Hal

Well-known member
Joined
Mar 8, 2008
Messages
673
Location
Vermont
Drained the water separator on my waste oil heater, and sat around with my hand on my *** waiting for the auto parts store to deliver the third attempt at a fuel pump[ for my truck. Called them at 2;30, and they said it had "disappeared" en route. Promised by 5:00PM, but I never went back to check. I need to go over after supper and lock up. If the pump is there and correct, I may try to install it then.
 

FMB4

Well-known member
Joined
Jan 19, 2017
Messages
2,926
Broke down and cut up who knows how many boxes that'll hit the recycle bin this week. We have large 'junk room' that tends to collect way too much... well... junk. Wife wants to put a pool table in it. And, I must say that I'm starting to agree with her on that. Wait... did I just say that?
 

niget2002

Well-known member
Joined
Oct 2, 2012
Messages
11,253
Location
Josephine, TX
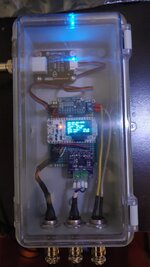
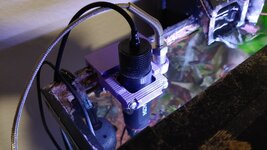
Finished the aquarium controller. Still need to build the external relay box with the outlets, but this will at least allow me to monitor values.

0124222005.jpg

Also put another coat of urethane on the stand. Tomorrow night I'll lightly sand with 220 and then put one more coat on.
 

jshillin

Well-known member
Joined
Nov 9, 2008
Messages
5,620
Location
PA
My buddy just picked up a Raptor and the front bumper and driver side nerf bar was not in the greatest shape, but he found nice ones down here. I went and picked them up, put them in my garage and cleaned them up for him.
 

bugnut

ALLIANCE MEMBER
Joined
Jul 14, 2012
Messages
3,998
Location
Central Ohio
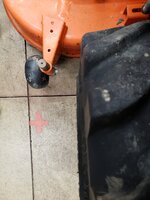
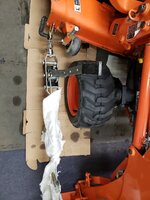
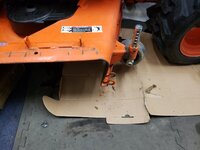
Finished straightening the bent mower deck. A little come along action, followed up with a 4x4 clamped on to provide a lot more leverage,
Also posting before and after pics of the spacer installation, cause I forgot to take an after pic.
 

Attachments

  • 20220123_105317.jpg
    20220123_105317.jpg
    323.9 KB · Views: 60
  • 20220124_102758.jpg
    20220124_102758.jpg
    219.2 KB · Views: 57
  • 20220124_102906.jpg
    20220124_102906.jpg
    318.3 KB · Views: 57
  • 20220124_103247.jpg
    20220124_103247.jpg
    371.5 KB · Views: 58
  • 20220124_104104.jpg
    20220124_104104.jpg
    239.2 KB · Views: 80

kaymccampbell

Well-known member
Joined
Feb 27, 2015
Messages
29,624
Location
Upstate New York
Finished straightening the bent mower deck. A little come along action, followed up with a 4x4 clamped on to provide a lot more leverage,
Also posting before and after pics of the spacer installation, cause I forgot to take an after pic.
We usually just back over the rock we hit in the first place.
 

ambenz

Well-known member
Joined
Dec 12, 2010
Messages
4,237
Location
NW Chicago Suburbs
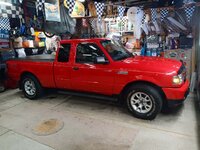
A product came in from the Croftgate test labs to test and evaluate, so I decided Ruby, my winter beater could use a bit of love.
You know you have a problem when your winter beater looks good enough to show at the World of Wheels Car Show...LOL!

This is how the product comes in from the lab, ready to use...no fancy label.....
_nc_ohc=XRje01ncWvEAX_kyYqw&_nc_ht=scontent-ort2-2.jpg

Gosh, the product wiped on easy and using a separate microfiber to remove, dragged a bit, like polishing a ceramic coat that finished flashing off....the shine is incredible!
oOHDaVM&tn=BlngiY2mZ6ts7CiV&_nc_ht=scontent-ort2-2.jpg

All and all, I like the test product better than some of the current products I am using to keep Ruby clean...nice shine!
_nc_ohc=104pLZ8s2P4AX_YL3mf&_nc_ht=scontent-ort2-2.jpg

Really deep shine is like a mirror on this utility do it all machine...
_nc_ohc=eoITBO6PbKkAX_3Iagf&_nc_ht=scontent-ort2-2.jpg

Another look at the shine....
_nc_ohc=nEIwv2eMXl8AX_lCbDH&_nc_ht=scontent-ort2-2.jpg


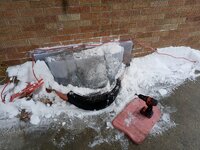
Another project also kept me busy as I am making a bumper for our basement window well out of a damaged drag racing tire.
I went through 4 cutoff wheels to remove a chunk....
0124221208_HDR.jpg

Thinking I could have used a reciprocating saw with a metal blade....hmmmm.
Cutting it outside to keep out the burn't rubber smell and debre from my clean car stalls inside...
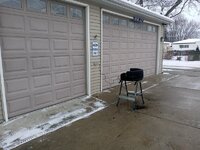
0124221208b.jpg

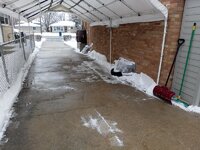
When you have a 3 car garage and 4 cars, you improvise!
I jury rigged this Shelter Logic 20x12 top to carry a small snow load and this is where the 4th car parks.
0124221208a.jpg

The wife parked too close to the window well and tore a chunk out of her old tire, hence the new rubber bumper...
0124221222.jpg

Of course my work bench is cluttered again. Time to clean up the mess...
0125221215.jpg

And refill my small containers of road salt for the next snow event....
0125221215a.jpg

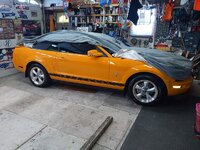
I still have PMS.....Parked Mustang Syndrome....awaiting for warmer temps and a good rain to wash the salt off the streets.
0125221229.jpg

Spending time in my heated garage when it is 10F outside...."PRICELESS!"
 

evildky

Well-known member
Joined
May 1, 2005
Messages
774
Location
Louisville, KY
Continued work on the new to me Kubota, installed rear wheel spacers and started to straighten a bent mower deck. Sometime something got hit hard with the deck! Forgot the after install tire pic, ugh!
I'm guessing the spacers arent to achieve a "hellaflush" fitment on the tractor. I'm really curious why you are running spacers on your tractor?
 

larry4406

Well-known member
Joined
Jan 27, 2006
Messages
19,578
Location
Northern Virginia
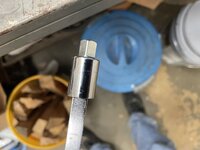
Drilled out an 8 mm drain plug socket on the lathe to create a conical counterbore. It receives the pointed end of a 3/8” grill rotisserie spit. 8 mm happens to be 5/16” so made a nice adapter to new rotisserie motor.
 

Attachments

  • 4DA33672-1457-40F7-BC64-6FA8333251A4.jpeg
    4DA33672-1457-40F7-BC64-6FA8333251A4.jpeg
    176.2 KB · Views: 42
  • C489D9DC-74EE-4630-BB75-00549F2E6CA2.jpeg
    C489D9DC-74EE-4630-BB75-00549F2E6CA2.jpeg
    285.5 KB · Views: 37
  • C34E1A55-DA59-4303-A191-649A28AE4151.jpeg
    C34E1A55-DA59-4303-A191-649A28AE4151.jpeg
    216.6 KB · Views: 31
  • B2C58776-9341-42F9-A61E-49D9F51B0CF4.jpeg
    B2C58776-9341-42F9-A61E-49D9F51B0CF4.jpeg
    242 KB · Views: 57

FMB4

Well-known member
Joined
Jan 19, 2017
Messages
2,926
Shave it! You'll save approx. $200 on hair care products yearly. Ask me how I no....:cool:
I've been buzzing my hair, or what's left of it, down since the early '90s when a paid 6 bucks or so to have it butchered at barber shop. Had to wear a ball cap for weeks (which I often wore anyway). I figure that doing so has helped payoff about 3% or less of the cost of the 'sodas' I drink anually. But hey, paid off beer is better than paid for beer. Or something like that.
 

Magnum440d100

Well-known member
Joined
Dec 2, 2018
Messages
3,581
Location
Indiana
Started off as a “organize the garage” day I had planned yesterday.

But, of course, plans changed on me. Last night, I kept hearing a weird/different sound coming from the wood stove. Like a crackling/crinkling sound. Not like bark popping, more like cellophane being manipulated. So I shut her down.

Last month or so, I had cleaned the chimney. Well, as best I could. The brush left here by the previous owner had a long handle, and I assumed it could reach the whole length. I had pushed it as far down as I could go, even pushing my hand/arm down the chimney. That wasn’t good enough I suppose, so I went to the LHS, and picked up a connector and another 5’ length of pipe. I had to use the 5’ length as the initial, as the threads on the other side of the original piece were boogered, and I didn’t want to spend the time fixing them (Work was on the roof and I wasn’t sure of the weather forecast, so I had to hurry up).

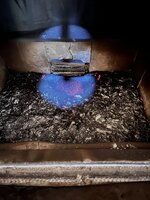
Glad I listened to my gut! The top portion of the chimney was still decently clean from a month ago. But that bottom few feet I couldn’t reach from the top?? That all dropped into the firebox and started smoldering (still had warm coals apparently. Even though I had killed the fire the night before).

So, after successfully cleaning the chimney and cleaning out the ashes, I lit a fire. The stove seems to be working better (no funny noises). It’s currently at just over 400° on the corner thermometer, 500° on my infrared. I don’t know how the previous owner cleaned the bottom portion. It was unscrewed when I bought the place, but I couldn’t slide it up to access that portion. I wonder if they were gonna take it, but couldn’t get it undone??

While I was working on the roof dealing with the chimney, I turned on the torpedo heater in the garage to get it warm enough to work in there. I got a few things done, main one was getting the replacement lock in the replacement door handle I bought a while ago. I did not try to rekey it, as the original key is worn out. I can turn the lock and pull the key out. I don’t think you should be able to do that! Lol so it got the whole replacement. I’m going to do the passenger side too, just have to order the new handle (nothing “wrong” with the handle, except the bolt holding it in is cross threaded in there, and the handle is “loose in the hole”. It’s gonna come apart soon on its own volition! HA!).

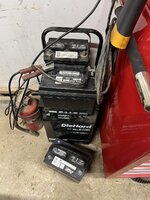
I have a couple batteries I’m trying to bring around. So those are being trickle charged. Alternating between the two (gives time for the “other” to rest). I haven’t load tested them yet, since they just started being trickle charged not too long ago. 12.7v out of one and 12.3v out of the other so far. I have a feeling they’ll come around.

Edited to add a couple pics I forgot to upload with the original posting.

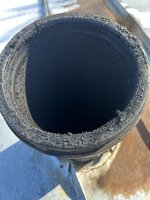
One is of the battery “charge station”, the other is how the top of the chimney looked this morning before I cleaned it.

Of note: since some of y’all’s are eagle eyed, yes that’s a battery on the floor. Yes I know the saying of having batteries on floors. This one’s case is cracked. So it is of very little importance to me that it’s on the floor lol
 

Attachments

  • 59D7AAFA-9442-4A5C-95BA-41E5C405786E.jpeg
    59D7AAFA-9442-4A5C-95BA-41E5C405786E.jpeg
    395.3 KB · Views: 59
  • 1134691A-E511-47C9-8F00-5DA5708E77B5.jpeg
    1134691A-E511-47C9-8F00-5DA5708E77B5.jpeg
    417 KB · Views: 55
  • 68865315-5219-4BE8-9076-44ACDB76C285.jpeg
    68865315-5219-4BE8-9076-44ACDB76C285.jpeg
    358.8 KB · Views: 53
  • DDF2AAF3-9117-46F3-86F3-C3C9D35432B9.jpeg
    DDF2AAF3-9117-46F3-86F3-C3C9D35432B9.jpeg
    275.8 KB · Views: 58
  • 104CF8E7-68E0-4A3A-B00A-FD481B99578A.jpeg
    104CF8E7-68E0-4A3A-B00A-FD481B99578A.jpeg
    296 KB · Views: 40
  • 3D870875-E53C-4989-AA3A-E2264DAC8FBF.jpeg
    3D870875-E53C-4989-AA3A-E2264DAC8FBF.jpeg
    429.9 KB · Views: 40
Last edited:

niget2002

Well-known member
Joined
Oct 2, 2012
Messages
11,253
Location
Josephine, TX
Cleaned up yesterday's mess.

Cut n welded up the frame for the printer enclosure.
IMG_20220125_161311.jpg
That's quite the stack of printers.

I finished putting the last coat of finish on the aquarium stand.

0125221850.jpg0125221851a.jpg0125221851.jpg

Then I designed and 3d printed a probe holder for the electronic box.

0125222001.jpg

I currently have it running on my existing aquarium. The code is pretty much done at this point. I'll wipe out the data in the database when I move the probes over to the new tank. I'm running it along side an inkbird controller to calibrate the temp probe (inkbird was calibrated using other methods)
 

T_Roze

Well-known member
Joined
Nov 5, 2013
Messages
481
Location
Edmonton Alberta
Fixed the little clip on the back of the sleds tool storage flap. Didn’t have black rivets, but after a little (lots) of black sharpie, you can’t tell ;)

24AB0AB9-66CA-4895-B079-8DC53459B220.jpeg
 

Mirage

Well-known member
Joined
Aug 15, 2005
Messages
318
Location
Easley, SC
Extended 2 emt conduit runs (2 separate circuits) to add outlets on the wall I don't have any, was 3 feet short of wire *facepalm* guess I should have measured.
 
To avoid these ads, REGISTER NOW!

jonshonda

Well-known member
Joined
Jul 17, 2017
Messages
4,749
Location
Wisconsin
Tore apart my Dyson DC17... replaced the Hepa Filter and cleaned the "washable" prefilter only to tear it while trying to re-install it. Replaced the prefilter as a result. Blew out the whole machine. The cyclones in the dust container are "Accumulators" I needed a wire hook to pull some of the junk out of them. Not bad enough to pull the dust bin apart. (It's a job)

I routinely knockout/blow out the dust bin on both of ours on a monthly or bi-monthly basis. The brush bars also get attention frequently with a yellow lab, cat, and two shedding long haired women in the house.
 

PelicanPines

ALLIANCE MEMBER
Joined
Apr 30, 2014
Messages
38,140
Location
New Jersey, USA, Earth, My own reality
I routinely knockout/blow out the dust bin on both of ours on a monthly or bi-monthly basis. The brush bars also get attention frequently with a yellow lab, cat, and two shedding long haired women in the house.
The cyclone tubes at the top of the dust bin... actually can collect hair and can't be blown out in the DC17 (annoying) apparently they redesigned the bin so this doesn't happen in other models. To properly clean it... you literally have to pry apart the parts (that were NOT MEANT to be pried apart.) An alternative is to use a stiff wire with a hook on the end ... to reach up into each cyclone tube and pull out the collected hair/dust that is clogging the unit. I have to do it every year.
 

56vette461

Well-known member
Joined
Jan 13, 2013
Messages
494
Location
Northern California
Cut and welded parts for a new to me 2-in-1 metal brake/shear stand. Making everything square and not distorted took a bunch of c-clamps and vice grips. The resident spider on my welder was upset at the disturbance. Then cleaned up the work benches and swept up floors. It was good to get start in the shop again.
 

rd65

Well-known member
Joined
Sep 29, 2017
Messages
2,841
Location
Granite Falls, WA
I have a couple batteries I’m trying to bring around. So those are being trickle charged. Alternating between the two (gives time for the “other” to rest). I haven’t load tested them yet, since they just started being trickle charged not too long ago. 12.7v out of one and 12.3v out of the other so far. I have a feeling they’ll come around.
I have a couple motorcycle batteries and a lawn mower battery I thought were done, wouldn't come up over 8v. Turns out they were/are fine, it was my meter that was TU. Meter was reading 4v short on every battery I checked. I have been cycling them through my trickle charger and my optimate desulfate charger. Will be nice if I can save them.
Never did buy in to the battery on floor thing. Maybe the cold concrete may have some effect but doesn't stop me from leaving mine on the floor. Not that cold here. Old wives tale in my book.
 

vwpieces

Well-known member
Joined
Apr 28, 2020
Messages
5,925
Location
Hills, PA
Wiring up the Box.
Found I need a bigger box.
20220126_025450_1.jpg

And some crimps
20220126_011902.jpg

And another hole in the Box.
20220125_205304.jpg

And made a couple more boxes for the Box.
20220126_115055.jpg

One is a double decker, with removable top.
20220126_115122.jpg

And round 2 for a Contact High.
Been at it for over 24 hours, gonna sleep Goood.
20220126_115918.jpg
 
Last edited:

jonshonda

Well-known member
Joined
Jul 17, 2017
Messages
4,749
Location
Wisconsin
The cyclone tubes at the top of the dust bin... actually can collect hair and can't be blown out in the DC17 (annoying) apparently they redesigned the bin so this doesn't happen in other models. To properly clean it... you literally have to pry apart the parts (that were NOT MEANT to be pried apart.) An alternative is to use a stiff wire with a hook on the end ... to reach up into each cyclone tube and pull out the collected hair/dust that is clogging the unit. I have to do it every year.

Interesting! I remember years back I took it apart and cleaned it, but it's been a while. My wife has always run it past the max dirt mark, regardless of my comments asking her not to! I seem to remember needing a really long torques bit when it did it, which likely means I didn't dismantle the lower portion that clips in.
 

vwpieces

Well-known member
Joined
Apr 28, 2020
Messages
5,925
Location
Hills, PA
3.5 hours later....
Still at it. Working on the lid of Box.
This is Rev 2. Messed the first up pretty bad cutting the slots.. Flipped top over and started over. Bought a full sheet of black. I wanted black originally but an old leftover off cut was too cheep to say no.
20220126_151406.jpg

20220126_152020.jpg

Now its time to quit before I mess something up!
 

sweetk30

Well-known member
Joined
Jan 2, 2011
Messages
2,306
Location
finger lakes area upstate ,ny
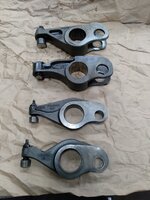
rebuilt a FULL SET of cat c-15 rocker arms for a friend . new main shaft bearings . new cam rollers and pins . pressed out all the old and cleaned up and checked out . found 1 injector arm was industrial version not road spec engine use . 1 other was bent on the cam roller end . he found a local guy with good used parts in stock and got a pair of arms to match his 4 others . then we installed all new parts and got him ready to have the main shaft bearings honed to the correct size of the new 3 piece main shafts he got as his were worn a bit and could feel the grooves with your finger tips before finger nail test .

and the industrial injector rocker arms are 1/2 lb heavy over the regular road motor units even tho the same engine . so when 1 out of 6 has this we are thinking it might be the source of some of his harmonic vibes he has had in this engine along with all the wear we found just in this part of the engine . . he is waiting on the rest of the FULL in frame rebuild kit yet .
 

Wrench97

Well-known member
Joined
Jun 23, 2018
Messages
12,163
Location
Southeastern Pa
Investigated leak under the SB Honda, it's PS fluid.. again. Checked the oil, it has some.

New gizmo showed up to lift the Explorer ST:

20220126_113151.jpg
Now you have to remember to remove them before backing the car out.................................we use to have 4 of them now we seem to only have 2 at the shop...................................................
 

ZRX61

Well-known member
Joined
Aug 15, 2006
Messages
28,716
Location
Solar Blight Valley, SoCal
Now you have to remember to remove them before backing the car out.................................we use to have 4 of them now we seem to only have 2 at the shop...................................................
That's why I got the bright orange version & I only have one so I have to move it around the vehicle :)

It's a "for now" tool as I'm going to buy a pair of the combo bottle jack/jack stand UniJacks.. maybe 4 of them.
 

RivennHewn

Well-known member
Joined
Jun 4, 2011
Messages
10,385
Location
PNW
Changed the geometry of the pick on my pickaroon.

It was a little too curved, and on a normal swing, it would just bounce off.

Sticks much better now.
 

Attachments

  • 5436A5B9-B3D9-4DB4-92C5-692225B7EBBB.jpeg
    5436A5B9-B3D9-4DB4-92C5-692225B7EBBB.jpeg
    345.9 KB · Views: 50

sweetk30

Well-known member
Joined
Jan 2, 2011
Messages
2,306
Location
finger lakes area upstate ,ny
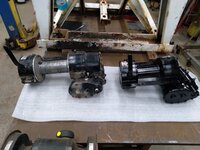
Started the swap out of my winch on the holmes 220 wrecker build . Had a std width drum ramsey DC 200 but it calls for a narrow Y drum unit . I found the correct unit and cleaned it up new seals and gaskets . Ready for install just need to make the mounting plates as the unit is 2" narrower than a std drum unit .

The std width unit will NOT be going to far tho . Going to mount it down behind the tower rear legs for a drag line winch .
 

Attachments

  • 20220125_191600.jpg
    20220125_191600.jpg
    297.1 KB · Views: 57

Bessy

Well-known member
Joined
Dec 18, 2012
Messages
995
Location
Ontario, Canada
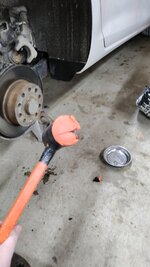
More work on the SportWagen now that all of the new tools have arrived. I cracked the bleeder screws on both rear calipers and turned them in, torqued the caliper carriers and then installed and torqued the calipers as well. New Tekton torque wrench did the trick. I don't love the way the handle is on that wrench, but I didn't feel the need to spend hundreds more on a better quality one this time around.

After that, I cleaned up some tools, and read the instructions for the Motive power bleeder. Dad and I will bleed the brakes tomorrow then pull the Fusion in to look at the brakes before my parents take it to FL.

Unfortunately this project has not been without its casualties, a moment of silence for my Pittsburgh Deadblow and my Titan long handled fine tooth rat (which is still fully functional after I taped up the handle).
 

Attachments

  • IMG_20220126_212031_01.jpg
    IMG_20220126_212031_01.jpg
    117.2 KB · Views: 127
  • IMG-20220122-WA0000.jpeg
    IMG-20220122-WA0000.jpeg
    188.3 KB · Views: 91
To avoid these ads, REGISTER NOW!
Top Bottom