To avoid these ads, REGISTER NOW!

Above 1200 Sq/FT The Lone Beech Garage (60x46x16)

Wokspaces above 1200 squarefeet.
OP
S

sbosecker

Well-known member
Joined
Sep 25, 2012
Messages
3,539
Location
Peachtree City, GA
Wednesday - August 24, 2022

I've been continuing to make my aluminum dividers and other small, every day projects since I acquired the Ellis Band Saw.

On Thursday last week my wife & I drove down to a Squadron Reunion at Jacksonville, FL. We were supposed to tour NAS Jacksonville as well as some activites at Naval Station Mayport. On Monday, August 15th, both NAS Jacksonville & Naval Station Mayport, due to an uptick in COVID infections went to Health Protection Condition (HPCON) Charlie protocols.

Much like Double Secret Probation in the movie Animal House, no one really seems to know exactly what that means ...but it did cause all our on-base activities to be canceled.

On Thursday evening, after a pleasant day rubbing elbows with old squadronmates, I returned to my hotel room and discovered a text from my son. He was taking care of my wife's cat and when he arrived at the house for that chore he found the following in the basement.
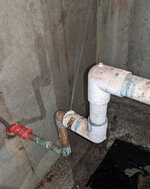


202208018-00.jpg

The main water line that comes into our home had sprung a leak. Fortunately it must have happened just before he discovered it because the amount of water was so minimal that there was no damage. He got all the valves shut off and set up a dehumidifier and some fans.

We dodged a huge bullet and we owe him big time!

Still, when we got home on Sunday we were without water in the house. The bathroom and shower in the LBG was our temporary "outhouse". Tuesday morning we got a plumber to the repair the leak and now we're back in business.

All of the above soaked up quite a bit of time but today I was able to exercise the Ellis Band Saw for the first time.


202208024-01.jpg

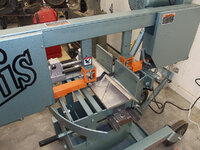
I had a length of 2-7/8 inch diameter mystery metal that I had gotten for small money at an Estate Sale. The end facing the camera had a ragged cut and I decided to clean that up with a fresh cut.


202208024-02.jpg

Since this was the first time I'd tried to cut anything I was listening intently for any odd noises or other signs of trouble. Every so often there was a little bit of a "shuddering noise" so I'll have to find out if that's normal or a symptom of some needed adjustment.


202208024-03.jpg

Other than that the cut went fantastic. I'm very pleased with this first run.

Scott
 
Last edited:
To avoid these ads, REGISTER NOW!

LutzTD

Well-known member
Joined
Dec 31, 2011
Messages
3,673
Location
Lutz, Florida
nice. one possible noise generator could be the blade weld if it seems to happen on a constant time span. seems unlikely judging by the condition of that saw.
 

Matias

Well-known member
Joined
Feb 28, 2015
Messages
616
Location
Finland
Very lucky to find out that leak so early, that was some great news!

Bandsaw looks really nice! Maybe a stupid question, is cutting fluid normally used when cutting, or is it used only when you need to cut a lot of pieces? Was just thinking if the blade/piece gets a little hot, somehow becoming a little sticky? Just threw it out there, I know absolutely nothing about these, I don't remember even if I've ever used one in my life.
 

Jayman17

Well-known member
Joined
Feb 6, 2017
Messages
3,811
Location
Seattle, Wa
I will second the opinion of how lucky you were with the plumbing leak and the timing
of your son’s visit. You sure dodged the bullet on that Scott! Would have been a terrible discovery after returning from your trip.
That saw sure cuts nice!

Jay
 
OP
S

sbosecker

Well-known member
Joined
Sep 25, 2012
Messages
3,539
Location
Peachtree City, GA
nice. one possible noise generator could be the blade weld if it seems to happen on a constant time span. seems unlikely judging by the condition of that saw.
LutzTD,

It doesn't seem like a blade weld noise... It did have a pattern (I think) but it wasn't a noise then a set time period followed by the noise again. It was more of a noise followed shortly by a lower intensity/lower duration version of the same noise repeated maybe a couple of times... then a quiet period which seemed longer than a complete orbit of the blade but I don't know that to be true.

I'll be checking it again in the near future and trying to nail down the pattern of the noises.

Tonight I hosted the neighborhood poker game in the LBG and Sunday we are hosting another social event in the house.

We're busy ...but in the very best of ways. Spending time with good friends!

Best regards,

Scott
 
OP
S

sbosecker

Well-known member
Joined
Sep 25, 2012
Messages
3,539
Location
Peachtree City, GA
Very lucky to find out that leak so early, that was some great news!

Bandsaw looks really nice! Maybe a stupid question, is cutting fluid normally used when cutting, or is it used only when you need to cut a lot of pieces? Was just thinking if the blade/piece gets a little hot, somehow becoming a little sticky? Just threw it out there, I know absolutely nothing about these, I don't remember even if I've ever used one in my life.
Matias,

Many band saws like this DO use cutting fluid ...but not the Ellis saws. They specifically direct their customers not to use cutting fluid.

I too am new at this so I will be learning as I go. I believe if the blade is getting warm the user needs to adjust the downward force on the blade. I touched the blade after the cut... it was quite cool. The cut-off piece was fairly warm right after the cut. How Ellis manages this bit of witchcraft isn't clear to me.

Best regards,

Scott
 
Last edited:
OP
S

sbosecker

Well-known member
Joined
Sep 25, 2012
Messages
3,539
Location
Peachtree City, GA
I will second the opinion of how lucky you were with the plumbing leak and the timing
of your son’s visit. You sure dodged the bullet on that Scott! Would have been a terrible discovery after returning from your trip.
That saw sure cuts nice!

Jay
Jay,

On Monday I was at a church council meeting (I am currently Vice-President) and one of the members of the council had to miss the meeting. Another Delta Pilot, he had come home from a very long trip and found that his Water Heater was puking all over his floor ...and it had been doing it for a while.

This would be bad no matter when but summer time in Georgia is probably the worst. Moisture & warm temperatures are Mold Heaven... yeah... I dodged a bullet.

The Pacific Northwest is moist but not (usually) warm. HA!

Best regards,

Scott
 
Last edited:
OP
S

sbosecker

Well-known member
Joined
Sep 25, 2012
Messages
3,539
Location
Peachtree City, GA
Monday - September 5, 2022

I just now had to look at a calander to figure out what I've been doing since my last post. That was a reminder of all the social, and other stuff, that's taken place since August 25th.

I hosted another neighborhood poker game in the LBG, we hosted a 4-couples dinner at our house on the 28th and, on the morning of September 1st, I flew our airplane up to southeastern Illinois, had lunch with my dad and brothers and then returned home that afternoon.

All of the above was good but that last item was particularly gratifying... I'd been trying to make that happen all summer but either weather or airplane maintenance got in the way. Last Thursday the stars finally aligned and I was up at the crack of dawn preflghting the airplane. My 91 year old father really seemed to get a kick out me being able to fly into the local airport while he was sitting there waiting for me.

So yeah, a few really good things since my last post.

...back to the shop.


20220905-01.jpg

Today I did another little test cut with the Ellis 1600. This time it was some aluminum angle - another Estate Sale acquisition - that needed to be cleaned up. Once again a very nice cut resulted.

I think this is the beginning of a beautiful friendship. HA!

This evening I started to impliment "The Plan".


20220905-02.jpg

Last month I acquired a RapidAir FastPipe Kit via Craigslist (see post from August 13th). Since then I have spent a little time sketching out the start of a compressed air distribution system. This evening I started moving forward with that plan.


20220905-04.jpg

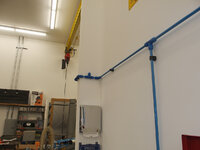
The first item of business was to install a clip to hold the 3/4-inch FastPipe. The kit came with 20 of these clips. The clips have a hexagonal area that will receive a 5/16-inch nut (not included). After the nut is put in place, a #10 size screw can be used to fasten the clip to the wall. I used #10 2-1/2" Deck Screws.

I've been trying to upload another picture of the clip but, for some reason, the Garage Journal Web Site is showing that image "the hand".


20220905-05.jpg

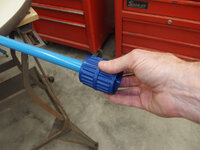
The pipe is 7-1/2 feet long. This deburring tool is included in the kit.


20220905-06.jpg

I don't know if it was necessary to deburr the factory cut ends but I did so anyway.


20220905-07.jpg

Someone of my advanced years probably shouldn't be up on a ladder with power tools ...but here I am installing one of the clips.


20220905-08.jpg

The deburred pipe is inserted into the appropriate connector. In this case a "T-Fitting". A bit of soapy water on the end of the pipe provides some lubrication allowing the pipe to be fully inserted into the fitting. The 3/4-inch pipe I am using should be fully seated when 2-inches into the fitting. I marked 2 inches on the pipe with a Sharpie Pen to make sure that I had the pipe fully engaged in the fitting.


20220905-09.jpg

20220905-10.jpg

I only got about 15 feet of pipe installed this evening. I'm trying to get the uncut 7-1/2 foot pieces in place first. Then I'll start cutting & fitting items.

A good start on this project.

Scott
 
Last edited:
OP
S

sbosecker

Well-known member
Joined
Sep 25, 2012
Messages
3,539
Location
Peachtree City, GA
Tuesday - September 6, 2022

This evening I managed to get a little more of the RapidAir FastPipe installed.


20220906-01.jpg

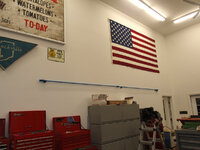
I started off by measuring and installing a couple more clips on the southeast portion of this project.


20220906-02.jpg

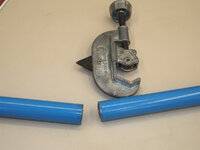
Then it was time for another opportunity to excel... I needed to make my first "cut to size" piece of FastPipe. I used a plumber's tubing cutter to acomplish this. I chamfered the ends and placed the pipe into position.


20220906-03.jpg

...and I managed to get the length correct! Black arrow points to this newest section.


20220906-04.jpg

I took the "leftover" piece and used it as a down leg in the next section to be worked on.


20220906-06.jpg

Again it was cut, chamfer and install. I will be putting a manifold on the bottom of this down leg.


20220906-07.jpg

I took the newest "cut off" and installed it - for the moment - in the T-Fitting that serves the down leg to the air compressor.

That's as far as I got tonight.

Scott
 
Last edited:
OP
S

sbosecker

Well-known member
Joined
Sep 25, 2012
Messages
3,539
Location
Peachtree City, GA
Wednesday - September 7, 2022

The FastPipe installation continued tonight...


20220907-01.jpg

First item in this evening's agenda was adding some clips on the south wall for a couple of 7-1/2 foot lengths of the 3/4-inch FastPipe.


20220907-02.jpg

I put these two pieces together while on the floor and then, looking like one of The Flying Wallendas, I mounted a step ladder and placed the 15 feet of pipe assembly onto the clips.


20220907-03.jpg

Now I moved to the opposite end of my project. I started to do a lot of pipe cutting to get around the vertical support column for the Yellow Beam.


20220907-04.jpg

20220907-05.jpg

The "T-Fitting" will eventually allow some pipe to go vertical and then be mounted on the ceiling going towards the 3 garage doors on the front of the LBG. That's going to require getting my scaffolding out of the house basement and into the center bay.


20220907-06.jpg

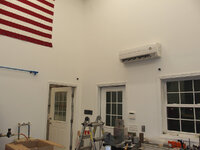
Meanwhile, I continued around the corner and into the Long Bay.


20220907-07.jpg

When I completed this bit, it was after 11 pm. Time to quit for the night.


20220907-08.jpg

20220907-09.jpg

That's everything that's been done from one end to the other. I'm going to run out of pipe before I get the leg going up to the ceiling and completely to the front of the building. Once I get everything done that I have material for, I will be able to do an accurate estimate of what is needed to complete this project.

Estimating needed parts at this point IS kind of a backwards approach to a project. But from my sketch I knew getting the F28070 Master Kit would probably be the cheapest way to get started and I was confident that none of it would be wasted. I even bought a few extra fittings that I knew - based on my sketch - I would need from Zoro.com with a 20% off coupon.

Once I get all the FastPipe in the kit used up, I should be able to nail down a list of materials needed to finish this project.

Scott
 
OP
S

sbosecker

Well-known member
Joined
Sep 25, 2012
Messages
3,539
Location
Peachtree City, GA
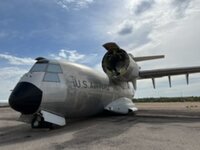
Went to the Pima Air Museum this week. Been working in Tucson for a few weeks. Nice place. Thought you would like these.

AZpilot,

Thanks for posting those pictures! I need to go to Tuscon someday. I had some layovers there but they were usually pretty short and no time for sightseeing.

Best regards,

Scott
 
OP
S

sbosecker

Well-known member
Joined
Sep 25, 2012
Messages
3,539
Location
Peachtree City, GA
Saturday - September 17, 2022

I had to take a hiatus from the FastPipe installation as I began my first Owner-Performed Oil Change on the Cirrus SR22 I co-own.


20220909-01.jpg

This took place at the Lone Beech Garage Aviation Annex.


20220909-02.jpg

My Co-Owner helped me get the lower cowling off.


20220909-03.jpg

Started draining the oil at 6 pm Sept 9th and let it go for about 18 hours. Oil was strained through a fine wire mesh.


20220910-04.jpg

Removing the Oil Filter was the next chore. This is prone to make a mess due to the orientation of the filter. A recommended technique is to carefully punch a couple of holes into the top of the filter with an awl and wait quite a while before removing the filter.


20220910-05.jpg

The Safety Wire was cut and the Filter was removed,

I installed the new Filter and safety wired it. The act of safety wiring is a Dark Art and I spent a bit of time doing that.


20220912-06.jpg

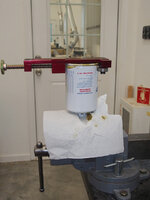
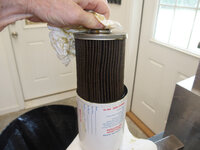
The next day I started the process of opening the old Oil Filter to examine the media.


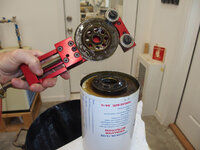
20220912-07.jpg

I used a Filter Cutter to open the filter,


20220912-08.jpg

20220912-09.jpg

20220912-10.jpg

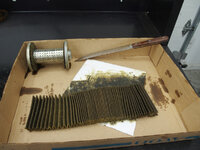
I now had the media out and started examining it. Every previous oil change done by a shop had indicated the examination of the Filter Media resulted in "No Discrepancies" or words to that effect.

Yet, to my surprise, I was seeing some very small shiny bits here and there.

Perfect ...now what?

I've spent quite a bit of time this past week cleaning the Filter Media with some Mineral Spirits and trying to collect the bits of material. We also utilize the services of an Aviation Maintenance Advisor and I am exchanging information with them.

That's on-going but I suspect that the advice will be to continue to use the airplane and do another oil change in 25 hours and inspect the filter media again.

One of the things one looks for in the collected bits is how they react to a magnet. Here's a video I made after I chased anything that responded to a "magnet on a stick" into a common location. The diameter of the end of the magnet's housing is 7/16-inch.

VIDEO

It's a pretty small amount of ferrous material but I'd prefer to see none. HA!

Hoping to get back into the LBG proper after this issue is resolved,

Scott
 

LutzTD

Well-known member
Joined
Dec 31, 2011
Messages
3,673
Location
Lutz, Florida
I wonder if a car engine oil filter has those tiny bits in it for a control? I have never cut one open. is it possible some of the bits are from the cutting operation?
 

tj675

Well-known member
Joined
Apr 9, 2019
Messages
905
Location
The Mitten
I’ve found a proper set of safety wire pliers will make the job much easier if you end up doing more of the work yourself. I struggled to safety wire my race bike for a couple years until I spent the money on a good set of pliers.

I sprung for a set of Snap-On pliers 20 years ago and they still work great. The Milbar 25W reversible pliers look to be identical at half the price. Being able to twist both directions at speed sold me, but what I didn’t notice until after I used them was the little rubber cushion in the jaws keeps you from dropping the cutoff wire where you shouldn’t.
 
OP
S

sbosecker

Well-known member
Joined
Sep 25, 2012
Messages
3,539
Location
Peachtree City, GA
I wonder if a car engine oil filter has those tiny bits in it for a control? I have never cut one open. is it possible some of the bits are from the cutting operation?
LutzTD,

Prior to opening the airplane's filter, I practiced on my son's 2008 Pontiac Vibe's (Toyota Matrix clone) oil filter. Granted I didn't do the drill that I did with solvent & filtering on the airplane filter but the filter's media looked spotless when I examined it by eye. ...the airplane filter had some shiny bits visible.

The oil filter cutter should not introduce any metal bits. Particularly compared to using a hacksaw. HA!

The airplane's engine has about 330 hours on it so, while not new, it's fairly new. Time between overhaul for these engines is estimated to be 2000 hours.

Mostly I just can't believe this engine's filter has been free of any metal in the media and then, when I open it up, it appears. That's a remarkable coincidence. I'm not saying that isn't possible but it's certainly not the way I would bet.

Best regards,

Scott
 
OP
S

sbosecker

Well-known member
Joined
Sep 25, 2012
Messages
3,539
Location
Peachtree City, GA
I’ve found a proper set of safety wire pliers will make the job much easier if you end up doing more of the work yourself. I struggled to safety wire my race bike for a couple years until I spent the money on a good set of pliers.

I sprung for a set of Snap-On pliers 20 years ago and they still work great. The Milbar 25W reversible pliers look to be identical at half the price. Being able to twist both directions at speed sold me, but what I didn’t notice until after I used them was the little rubber cushion in the jaws keeps you from dropping the cutoff wire where you shouldn’t.

tj675,

Yes, Safety Wire Pliers - although they are rather bizarre looking - are the key to this operation. I did make that investment (Proto J197) and I cannot imagine trying to do this procedure without a good set of Safety Wire Pliers.

The location of the SR22's Oil Filter Mount and the location of it's safety wire made this operation difficult... for me at least. Granted I'm new at this. Putting the twist in the wire wasn't that hard, I would do that prior to spinning on the filter. Trying to get the twisted length correct (or at least close) before the filter was in place was a challange. ...for me. HA!

Best regards,

Scott
 

Jayman17

Well-known member
Joined
Feb 6, 2017
Messages
3,811
Location
Seattle, Wa
I’ve done a bit of safety-wire and it can definitely be tricky to get it right. Interesting to see you inspect the filter contents I didn’t know that was done but it makes sense. Hopefully your findings are not a problem.

Jay
 
To avoid these ads, REGISTER NOW!

LutzTD

Well-known member
Joined
Dec 31, 2011
Messages
3,673
Location
Lutz, Florida
LutzTD,

Prior to opening the airplane's filter, I practiced on my son's 2008 Pontiac Vibe's (Toyota Matrix clone) oil filter. Granted I didn't do the drill that I did with solvent & filtering on the airplane filter but the filter's media looked spotless when I examined it by eye. ...the airplane filter had some shiny bits visible.

The oil filter cutter should not introduce any metal bits. Particularly compared to using a hacksaw. HA!

The airplane's engine has about 330 hours on it so, while not new, it's fairly new. Time between overhaul for these engines is estimated to be 2000 hours.

Mostly I just can't believe this engine's filter has been free of any metal in the media and then, when I open it up, it appears. That's a remarkable coincidence. I'm not saying that isn't possible but it's certainly not the way I would bet.

Best regards,

Scott
looking at the picture of the filter cut, it seemed like there were some shavings there.
 

Attachments

  • shavings.JPG
    shavings.JPG
    43.4 KB · Views: 36
OP
S

sbosecker

Well-known member
Joined
Sep 25, 2012
Messages
3,539
Location
Peachtree City, GA
I’ve done a bit of safety-wire and it can definitely be tricky to get it right. Interesting to see you inspect the filter contents I didn’t know that was done but it makes sense. Hopefully your findings are not a problem.

Jay
Jay,

Regarding the stuff in the filter, we shall see. There are 3 different "examinations" of the airplane's oil.

1. The mesh screen that catches the oil as it drains out of the engine. That's for any "chunks" or large stuff too big to make it to the oil filter. There is a second drain plug in the Engine Sump that may have a magnet in it. I would have liked to have pulled that out during this change but our local brick & mortar airplane supply was out of the crush washers I would have needed when I reinstalled the plug - more supply chain issues I guess.
2. The oil filter catches "medium size" stuff. Microscopic bits pass through the filter media.
3. An oil analysis. A sample of the oil is sent to a lab. We use Blackstone Laboratory in Ft Wayne, IN. I'm hoping we'll have a report early this week. Several samples have been sent to this lab from our engine - some from before the airplane was purchased by my co-owner in 2021. That should give us some indication as to whether trends at the microscopic level have changed this time around.

Best regards,

Scott
 
Last edited:
OP
S

sbosecker

Well-known member
Joined
Sep 25, 2012
Messages
3,539
Location
Peachtree City, GA
looking at the picture of the filter cut, it seemed like there were some shavings there.

LutzTD,

I knock down the resolution on the images I post here. I went back to the higher resolution original and - I think - those are reflections in the residual oil from the overhead lights in the LBG.

Thanks for taking a look!

Best regards,

Scott
 
OP
S

sbosecker

Well-known member
Joined
Sep 25, 2012
Messages
3,539
Location
Peachtree City, GA
Sunday - September 18, 2022

Although the LBG is just 5 years old, many of the tools and such that are within its walls were procured by me years ago.

Example is the 80 Gallon Air Compressor that I am currently installing the FastPipe compressed air distribution system to serve. I purchased that air compressor in 2012. I was planning on getting it functional in my house garage until the LBG could be built.


20220918-01.jpg

I purchased this RapidAir 3/4" MaxLine Kit back then with the intent to install it from the house garage to the basement shop that I had at that time. I had issues with leaks on the initial plumbing of the 80 gallon compressor and, since I could still use the (barely) portable 30 gallon air compressor that I'd had forever, I abandoned the stationary air compressor project.

The MaxLine Kit was squirreled away in the attic back then. Today I brought it out to the LBG.

There's about 95 feet or so of coiled pipe. After further review, I think I can use this in conjunction with the FastPipe Kit that I've been installing. The biggest positive of using this material that I already had on hand is to "close the loop" of the air distribution system. I had planned just to have a couple (or 3) branches of the FastPipe that ended at the end of each branch. By using this MaxLine pipe, I think I can run it between the ends of a couple of the branches. That should make for a more efficient distribution of compressed air.

Back in 2012 I had planned to build a version of a MaxLine Tube Straightener similar to the one in the following link:

LINK


20220918-02.jpg

I still had some of the parts to build the "Tube Tamer" on hand and I knew I'd need to get that coiled up tube straightened out.


20220918-03.jpg

I started cutting some MDF into the correct sizes for the "Tube Tamer". I will need to get some additional hardware this coming week in order to finish it.

Scott
 
Last edited:
OP
S

sbosecker

Well-known member
Joined
Sep 25, 2012
Messages
3,539
Location
Peachtree City, GA
Wednesday - September 21, 2022

I've had to wait a few days to continue with the MaxLine "Tube Tamer" project. I needed a 3/8-inch plunge router bit and that was delivered late yesterday.


20220921-01.jpg

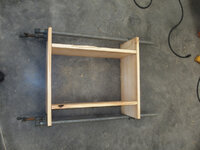
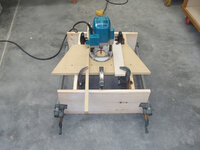
With the necessary bit in hand, I needed to cobble together a fixture to hold the workpiece off the floor without interfering with the various clamped scraps of wood that will guide my hand as I make some slots. Some cut-offs from a pantry shelf project and a couple of pipe clamps did the trick.


20220921-02.jpg

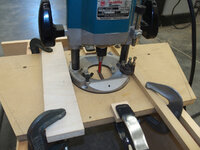
It's not pretty but it worked. The base of my ancient Makita 3612BR plunge router (probably purchased almost 40 years ago) is 160 mm wide. I scribed lines 80 mm either side of my "slot lines" and clamped scrap wood on those lines. I used a couple of spring clamps and small scrap pieces to act as stops on each end of my projected slot cuts.


20220921-03.jpg

20220921-04.jpg

Not elegant but it did work well.


20220921-05.jpg

Once I got my setup sorted out, the slots were routed out pretty quickly.


20220921-06.jpg

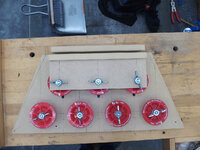
Here are the Test Plugs placed into position.


20220921-07.jpg

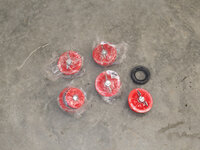
This is how it will look with the MDF "saddle" mocked up. There are a couple of vertical holes to be drilled into the top of the "saddle". These holes will receive some bolts that will force the 3 upper "Test Plugs" down against the MaxLine Tubing.


20220921-08.jpg

Sort of like this. Still some glue-up to accomplish and some additional hardware to install but I think the "Tube Tamer" project is starting to look like it could tame a tube.

Scott
 
Last edited:
jollygreengiant

Well-known member
Joined
Nov 10, 2013
Messages
2,362
Location
Ontario, Canada
That was very interesting to see the detail that goes into an oil change on an airplane. It is a lot more detailed than anything I've ever done, but I guess when it's in use you don't want any unexpected surprises! lol

That Fastpipe system looks really slick, I'm going to remember that when it comes time to run airlines in my shop.
 
OP
S

sbosecker

Well-known member
Joined
Sep 25, 2012
Messages
3,539
Location
Peachtree City, GA
That was very interesting to see the detail that goes into an oil change on an airplane. It is a lot more detailed than anything I've ever done, but I guess when it's in use you don't want any unexpected surprises! lol

That Fastpipe system looks really slick, I'm going to remember that when it comes time to run airlines in my shop.

Jollygreengiant,

Thanks for the kind words about the FastPipe. What attracts me is the modular approach that this system uses. I should be able to modify it - if necessary - in the future without too much fuss.

The airplane oil change... well that's the way I'm going to do it based on things I have read. I'm not sure that all mechanics strain the oil coming out of the airplane and using a lab to analyze a sample might not be a normal procedure either. I think most mechanics probably do cut open the filter and take a peek at that.

I think the benefit of the approach I have taken is to get a baseline established on what's normal. I think the engine's oil can give you some clues when things start to go sideways inside. The idea is that those clues may given early enough to head off a problem before it becomes expensive (OK, more expensive) and/or catastrophic.

Best regards,

Scott
 
OP
S

sbosecker

Well-known member
Joined
Sep 25, 2012
Messages
3,539
Location
Peachtree City, GA
Saturday - September 24, 2022

I've been trying to track down some hardware that I need for the Tube Tamer project. The plans call for some 3/8-inch inserts and some 6-inch long 3/8-16 carriage bolts.

My local stores don't seem to have the 6-inch long carriage bolts.


20220923-01.jpg

20220923-02.jpg

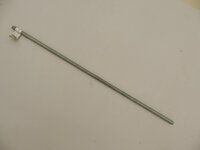
Then I recalled I had purchased some lengths of All-Thread at an Estate Sale. I couldn't remember the diameter but, among the different sizes of All-Thread I had bought at that Estate Sale, was about a foot and a half of 3/8-16 All-Thread.


20220923-03.jpg

I threaded on a rather heavier than average nut onto the All-Thread. I had a few of these oversize nuts in my hardware stash.


20220923-04.jpg

20220923-05.jpg

A few seconds of energy to the nut/allthread interface...


20220923-06.jpg

...and the required "bolt length" has been achieved. To be honest, I think a carriage bolt is a poor choice for this application. I suspect the person who drew up the plans couldn't find any other 6-inch bolt that had a thread the entire length. Hence a carriage bolt was used.

Scott
 
Last edited:
OP
S

sbosecker

Well-known member
Joined
Sep 25, 2012
Messages
3,539
Location
Peachtree City, GA
Wednesday - September 28, 2022

My Tube Tamer Project is waiting for some Threaded Insert hardware that should be delivered soon. Perhaps this delay was a blessing in disguise...

On Thursday of last week, I was doing a search of FaceBook Marketplace for "FastPipe" & "MaxLine". These are the two different compressed air distribution plumbing systems that I'm using for the LBG. There wasn't anything local but somebody in Rockvale, TN had just posted 2 FastPipe F28070 Kits for sale for $300 each.

These are being sold for around $460 delivered. It was a compelling price... if they weren't 260 miles away. Fuel & time would eat up most of the price advantage. Plus I had some volunteer obligations that would prevent me sinking that much time (9 hours on the road) into this "good deal".

On Saturday afternoon, I was doing the same search and was startled to see, after being listed for only 2 days, the price had been dropped to $200 per kit. Now the ad was talking to me... in a very loud voice ...but there was still the previously mentioned volunteer obligations that stood in my way.

It was time to play my trump card. I got on my phone and sent a text to a very good friend that lives in Franklin, TN. Franklin is located about 25 miles from Rockvale.

I sent him a text... "Do you ever travel near Rockvale, TN?"

He responded quickly, "It's only about 30 minuted from the house. I trust you need me to pick up a 5-Axis machining center or a shipping container of anvils?"

"Maybe", I responded. I was a bit surprised that he had deduced the motive for my query so quickly...

I asked him if he had access to FaceBook Marketplace. His response, "What elderly bottom feeder wouldn't?"

I gave him the details of the ad and, after a bit, he responded with, "Looks like a good deal... Do you need one or both?"

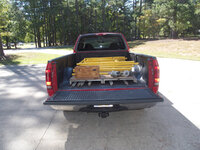
Sunday afternoon my friend sent me a picture with both F28070 FastPipe kits in the back of his pickup. Monday morning my volunteer duties that were sucking all the oxygen from the room disappeared as the outdoor event we were planning for this coming Saturday had the plug pulled. Hurricane Ian was forecast to be dumping a lot of rain on our 2nd annual OctoberFest.

I now called my buddy and asked if I could drive up Tuesday (yesterday) and pick up the kits. He said he should be available after noon.

Yesterday I left Peachtree City GA for Franklin TN at 8:40 am. 4 and a half hours later I arrived at my friends house. He was grilling some chicken breasts at the grill on his deck as I arrived.


20220927-01.jpg

20220927-02.jpg

We examined the kits in the back of his truck and he told me some entertaining stories about how the transaction had gone down. I had some of the grilled chicken for lunch with him and his bride and we had a wonderful time visiting for a couple of hours on an absolutely glorious early fall day.

I still needed to get back to my house that day so I bid my farewells and headed south with my booty. The trip home wasn't awful but it wasn't as efficient as the trip up. Google directed me off I-24 to get around some traffic issues that apparently would have added another 30 minutes to my already lengthened journey. I got to see some country I hadn't seen before so that helped soften the sting of the extra time that it took. I got home about 5 hours after I left Franklin TN.


20220927-03.jpg

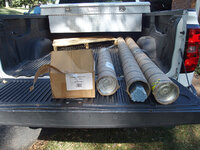
I took the 2 kits out to the LBG.


20220927-04.jpg

I pulled the tubing of one of the kits out of the packing sleeve.


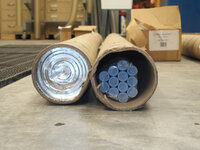
20220927-05.jpg

I also took a quick inventory of the fittings in the smaller tube.

So now I have enough FastPipe tubing to do what I was going to use my MaxLine tubing for. I will continue to build the Tube Tamer - I just need to get those inserts delivered. Now I am glad they were delayed. If I had completed the Tube Tamer, I probably would have started straightening the coiled MaxLine Tubing. If I have enough FastPipe - and I'm pretty sure I do now - I will probably attempt to sell the MaxLine Tubing and that task will be easier with a coil of tube vs almost 100 feet of straight tube. HA!

Scott
 
Last edited:
LutzTD

Well-known member
Joined
Dec 31, 2011
Messages
3,673
Location
Lutz, Florida
awesome score on the air piping, that piping and your installation and implementation fits right in with the quality of your shop infrastructure. 👍 maybe run the 100Ft of excess tubing underground and back to the house. its nice having air available at the house garage sometimes. I ran a line to the house and I use it to blow off the electrostatic filter and air up tires.
 
Last edited:
OP
S

sbosecker

Well-known member
Joined
Sep 25, 2012
Messages
3,539
Location
Peachtree City, GA
awesome score on the air piping, that piping and your installation and implementation fits right in with the quality of your shop infrastructure. 👍 maybe run the 100Ft of excess tubing underground and back to the house. its nice having air available at the house garage sometimes. I ran a line to the house and I use it to blow off the electrostatic filter and air up tires.

LutzTD,

Thanks for the kind words! I'll have to think about running pipe to the house garage... probably not practical for me but it's something I hadn't considered until you suggested it. Thanks!

Best regards,

Scott
 
OP
S

sbosecker

Well-known member
Joined
Sep 25, 2012
Messages
3,539
Location
Peachtree City, GA
Thursday - September 29, 2022

I usually change the oil in my vehicles and rotate the tires every 5000 miles. My 2000 Ford F150 pickup will hit 175,000 miles in about 160 miles so it's getting close to time for those chores.

Since I'm wanting to continue with the FastPipe installation as soon as possible...


20220929-00.jpg

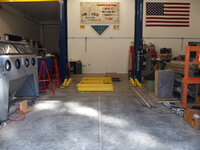
...I rotated the tires on the truck today. With that bit of routine maintenance out of the way I free up the center bay for FastPipe infrastructure. I can change the truck's oil using the "Tornado Shelter".


20220929-01.jpg

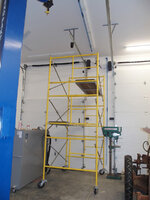
I brought some scaffolding up from its storage location in the house basement.


20220929-02.jpg

Got it all unloaded and stationed in the Center Bay.


20220929-03.jpg

A bit of a challenge getting 3 sections together by myself but managed to do it without hurting myself or damaging anything.


20220929-04.jpg

I'm going to continue the line going up and then the pipe will be attached to the ceiling and ran towards the garage doors. I'm not sure if I'm going to be able to figure out a way to install the pipe on the ceiling without another person to help.

We'll see...

This evening I spent some time looking at pictures taken during the framing of the LBG. I think the trusses overhead are mounted on 24-inch centers so I've got something for the clips to be fastened to on the ceiling. The vertical section that is visible in the last picture will probably need to have the clips mounted with some sort of hollow-wall fastener. I'm pretty sure there isn't any wood behind the center of that little wall.

Scott
 
OP
S

sbosecker

Well-known member
Joined
Sep 25, 2012
Messages
3,539
Location
Peachtree City, GA
Friday - September 30, 2022

Made a little more progress on the FastPipe installation this evening.


20220930-01.jpg

I was surprised to find some wood behind the vertical section to mount the clips to.


20220930-02.jpg

The whole process is a lot slower at this point... up & down the scaffolding... trying to be careful... I'm moving slow and remembering where I am as I work overhead.

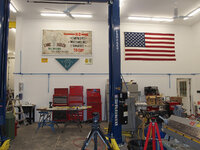
I'm wanting to run a line from this overhead line to the far post of the 2-post lift. That's going to take some thought as to where to locate the "T-Fitting" to accomplish that best. It will be somewhere in the next length of pipe.

Scott
 
OP
S

sbosecker

Well-known member
Joined
Sep 25, 2012
Messages
3,539
Location
Peachtree City, GA
Saturday - October 1, 2022

A beautiful fall day here in north Georgia... most of my shop time today revolved around "First Day of the Month" routine maintenance on tractors, cars, a truck and... an airplane. Mostly just checking tire pressures, lights and fluids but it takes time.


20221001-01.jpg

Today this ancient purchase got called up to "The Show". 8 years ago Northern Tool was having a sale on these Hose Reels and I bought a couple of them. They have been sitting on a shelf all that time and now it's time for them to be put to work.


20221001-03.jpg

I'm thinking I will mount this Hose Reel up where it would cover the "Bend" in BendPak. I need to move the scaffolding around to where I can get up there and securely drill four 3/8-inch holes.

Scott
 
OP
S

sbosecker

Well-known member
Joined
Sep 25, 2012
Messages
3,539
Location
Peachtree City, GA
Thursday - October 6, 2022

The weather continues to be magnificent here. I took advantage of that and on Monday flew from KFFC (Peachtree City GA airport) to KLWV (Lawrenceville-Vincennes Airport) in southeast Illinois. Visited my dad and brothers, checked on my aunt recovering from a stroke in the hospital and returned to Peachtree City on Tuesday afternoon. Coming back I had a bit of a tailwind and my instruments indicated my groundspeed was 170 knots. Instead of 8 hours battling buffoonery on the road (minimum time - one way) each leg of the flight was about 2-1/2 hours. What a blessing it is to be able to do that.

Today I was able to move the ball forward a little on the compressed air distribution project.


20221006-01.jpg

I changed my mind on the location of the Hose Reel on the 2-Post Lift. I decided to mount it just about as high as I could get it. A templete was taped to the post.


20221006-02.jpg


I used a punch to make some dimples in the steel and then started drilling holes with a 1/8-inch bit.


20221006-03.jpg

I stepped up the drill bit sizes an 1/8-inch at a time until I got to the required 3/8-inch hole size.


20221006-04.jpg

Then a couple of 3/8-inch bolts were placed in the upper holes. Nuts were fastened onto the bolts loosely.


20221006-05.jpg

The Hose Reel has a couple of Key Hole slots at the top of the bracket. Those slots can slide onto the loose bolts and support the Hose Reel until the remaining bolts can be installed.


20221006-06.jpg

All the bolts and nuts were torqued down.


20221006-07.jpg

That should work! Now I can better determine how I want to attach the Hose Reel to the FastPipe that is mounted to the ceiling near the Hose Reel.

Scott
 
Last edited:

Jayman17

Well-known member
Joined
Feb 6, 2017
Messages
3,811
Location
Seattle, Wa
It even mostly matches your lift color! Well done on all the air system installation.
Your airplane partnership really saves on the travel time to see your dad and brothers.

Jay
 
OP
S

sbosecker

Well-known member
Joined
Sep 25, 2012
Messages
3,539
Location
Peachtree City, GA
It even mostly matches your lift color! Well done on all the air system installation.
Your airplane partnership really saves on the travel time to see your dad and brothers.

Jay

Jay,

Yes the yellow & blue seem to blend in - for the most part - with the BendPak Lift. A complete and happy coincidence...

The airplane is finally starting to work out as far as getting to visit the Lone Beech Melon Farm. The weather didn't cooperate for most of this summer but fall weather has allowed me to take advantage of the time savings offered by flying. There's no free lunch though... Aviation gas - like car gas - is quite a bit more expensive than it was a year ago. That stings a bit... HA!

Best regards,

Scott
 
OP
S

sbosecker

Well-known member
Joined
Sep 25, 2012
Messages
3,539
Location
Peachtree City, GA
Saturday - October 8, 2022

Today I managed to get quite a bit of quality shed time in...


20221008-01.jpg

Although I had tried to avoid it, I finally realized I needed to move an item I've been storing for a friend. This Yamaha E-50 Organ was going to be a gift to my friend's mother. That all went sideways ...as sometimes happens when one tries to do something nice for a parent - don't ask me how I know this.

As a result the organ has been in the LBG for a while. While I would prefer it to be gone, I haven't made a big deal out of it. My biggest concern is that something will happen to it while I'm working on a project. Oh well...


20221008-02.jpg

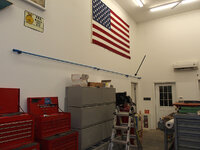
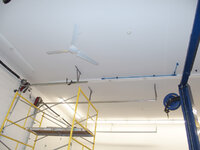
With the Organ and the Blasting Cabinet moved out of the way, I was able to get my scaffolding into position to continue installing the FastPipe along the ceiling. The observent reader will notice the black clip by itself in the ceiling between the FastPipe. That was a mistake and I'll remove the clip later.


20221008-03.jpg

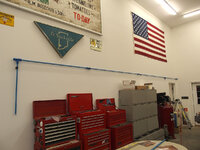
When I don't have to measure and cut the FastPipe, the project moves much faster. This was as far as I got with the first 90 feet of pipe.


20221008-04.jpg

Time to break out the next FastPipe Kit.


20221008-05.jpg

I continued installing full lengths of the pipe and waiting to fill in with pieces cut to measure. This down-leg will supply air to the Blasting Cabinet.


20221008-06.jpg

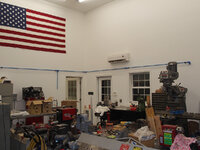
I filled in the missing sections on this end with some "cut to fit" pipe and called it a night. The small piece starting off to the left will be replaced with a whole 7-1/2 foot section of pipe when I start working on this again. The plan is for the pipe heading off to the left to run along the ceiling and, eventually, merge with the pipe behind the Milling Machine and "close the loop". Supposedly a closed loop system is more efficient.


20221008-07.jpg

20221008-08.jpg

So that's what was accomplished today. It's sort of like framing a house, this part goes pretty fast but there will still be lots to do after I get all the pipe installed.

Scott
 
Last edited:
OP
S

sbosecker

Well-known member
Joined
Sep 25, 2012
Messages
3,539
Location
Peachtree City, GA
Sunday - October 10, 2022

Today relatives were on their way from southwestern Indiana on their way to Orlando to visit the Mouse House. Our place is pretty close to their journey's midpoint so we would be receiving them mid to late afternoon.

That still gave me a reasonable amount of time in the shop today...


20221009-01.jpg

Here's where I left off yesterday. The first item on the agenda was to remove the short length of FastPipe pointing to the left and replace it with a full length piece.


20221009-02.jpg

Done... now I need to move some stuff out of the way so that I can position the scaffolding to the left.


20221009-03.jpg

Mission accomplished. The Ellis 1600 Band Saw is portable but it does require some effort to move around.


20221009-04.jpg

Another full lengthe section of FastPipe was mounted.


20221009-05.jpg

Time to move more stuff out of the way... another absolutely beautiful fall day here today.


20221009-06.jpg

Another full length of FastPipe was mounted on the wall.


20221009-07.jpg

My procrastination on getting the Rockwell Metal Lathe fully operational paid off and I was able to move it out of the way without too much effort.


20221009-08.jpg

I cut a section to fit the length required going into the corner and then mounted another full length section coming out of the corner.

I'm starting to get close to closing this loop but our guests arrived at this point. I brought all the stuff that had been positioned outside back into the LBG and I quit for the day.

Scott
 
Last edited:
To avoid these ads, REGISTER NOW!
Top Bottom