To avoid these ads, REGISTER NOW!

Above 1200 Sq/FT C Dub's Garage Build in Central NC

Wokspaces above 1200 squarefeet.
OP
C

Cdubu52

Well-known member
Joined
Sep 4, 2014
Messages
636
Location
Pittsboro, NC
Fantastic garage! I really like the screened in porch, I will bet it gets a lot of use.

Thanks for checking out the thread. Yep, the porch is used quite often. Especially this time of year. Many a beverage has been consumed out there. Just replaced my receiver that got zapped by either lightning or a power surge and now we have tunes out there again.
 
To avoid these ads, REGISTER NOW!
OP
C

Cdubu52

Well-known member
Joined
Sep 4, 2014
Messages
636
Location
Pittsboro, NC
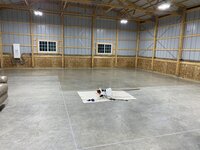
I finally started on sealing the floor. I decided to go with the Ballistix kit from Armor Poxy. I started by pressure washing the floor and once that was dry I continued on to sealing all of the expansion joints. I filled them with backer rod and flexible joint sealant. Once that dried, I swept and then finally mopped the floor with just hot water. The Ballistix kit includes an Acrylic Sealer and then the Ballistix as a top coat. I was able to get the Acrylic Sealer down and am going to put down the top coat this week. I have been fighting a cold front that came through. The temperature range is above 55 degrees so with it dropping down into the 30s at night, its been tough to plan. The building has been holding temp around 60 degrees at night. Pretty good considering its not insulated. But, it has been 70 and above during the day.

Mopping:

IMG_3519.JPEGIMG_3520.JPEG

As you can see, my helper was hard at work here.

Acrylic Sealer going on. I worked late to get it finished up and I forgot to take anymore pictures. I put on 2 coats and it took a little longer than I thought it would.

IMG_3522.JPEG

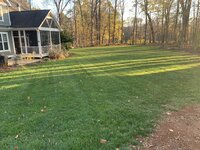
I also got in some more yard work. My yard is starting to come back around. Seedlings are starting to pop. And of course, my ******** dogs decided to add some new holes to the yard, just below where I had put in the original netting. So I had to fill the holes and add a new panel to the protection fence.


IMG_3530.JPEGIMG_3531.JPEGIMG_3532.JPEGIMG_3533.JPEGIMG_3534.JPEG
 
Last edited:

eastmtn

Well-known member
Joined
Feb 28, 2019
Messages
335
Location
Western Washington
I can't wait to see how the floor comes out. How long did it take to put down a coat of sealer? Has the humidity affected your application process?
 
OP
C

Cdubu52

Well-known member
Joined
Sep 4, 2014
Messages
636
Location
Pittsboro, NC
I can't wait to see how the floor comes out. How long did it take to put down a coat of sealer? Has the humidity affected your application process?

It took me about 5-6 hours in total. If I had to do it all over, I would get a larger roller. I used the 9" that came with the kit. The sealer went on really easy. I will say that the way that it dries is a lot like a painted wall. You can see the knap in it and the roller lines when you look at it in the right light and angle, but that doesn't bother me. It wont always be an empty building. I was also extremely paranoid of screwing up somehow, so I spent a lot of time rolling and re-rolling the same area to make sure it went down smooth. I bought the Glossy finish in the Ballistix. Im really excited to see how it goes down. I just have to find the time to get that done. As for the humidity, we have been lucky here in the south for the last couple of weeks. The Humidity has been quite low. I hope that continues at least as long as it takes me to get this project finished.

Here are the instructions and tech sheets for the actual products that Im using so that you can get all the data.
 

Attachments

  • ARM8400X-Water-Based-Sealer-TDS-v.1.8.22.pdf
    685.4 KB · Views: 15
  • Ballistix-Squire-Gloss-TDS-SDS-Instructions-V2-2022.pdf
    22.4 MB · Views: 5

eastmtn

Well-known member
Joined
Feb 28, 2019
Messages
335
Location
Western Washington
Here are the instructions and tech sheets for the actual products that Im using so that you can get all the data.
Thanks for that. It's interesting that they give temperature queues on when to move forward from the first blend to the second blend when mixing the parts. They've got the process down to a science.
I'm watching the humidity weekly in my building and the heater and ceiling fan knocks it down from 76% to 50%. I'm maintaining 60 degrees inside.
I'll take your advice on choosing the bigger roller. You've got a big floor plan and I'm sure my helper would provide about as much help as yours did. :rolleyes:😆
 

Z06Joe

Well-known member
Joined
Dec 11, 2009
Messages
84
Awesome build. I might have missed it, but do you have plans for a lift or anything like that?

Also, are those 12' ceilings and a 10'x10' garage door?
 
Last edited:
OP
C

Cdubu52

Well-known member
Joined
Sep 4, 2014
Messages
636
Location
Pittsboro, NC
Awesome build. I might have missed it, but do you have plans for a lift or anything like that?

Also, are those 12' ceilings and a 10'x10' garage door?

Thanks Joe. I plan on putting in a lift at some point, but Im not in a hurry to do so. That will probably come in a few years after my daughter is out of high school and I have more time for projects. To answer your other questions, The ceilings are 12ft and the door is 12x10. I mainly chose one door so that that front wall was still usable. I have always felt that when you put in multiple doors that only leaves you 3 walls to work with in your shop.

Thanks for checking out my build.
 
OP
C

Cdubu52

Well-known member
Joined
Sep 4, 2014
Messages
636
Location
Pittsboro, NC
I was able to finally put down the Ballistix. Saturday morning my wife and I cleaned the floor and applied the product to the floor. Since it is a 3 part process, we started mixing the chemicals and while they were setting up we went in and cleaned the floor according to the instructions. After waiting the required time before installing to make sure that the chemicals were property mixed. we started sealing. Since we were both using respirators and gloves, there was no one there to take pictures of the process. Here is one right after application.

IMG_3543.JPEG

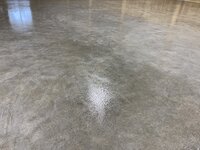
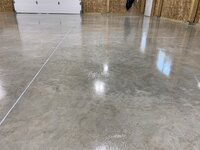
This picture looks good, but I have to say, Im very disappointed with the results. I had seen on this forum where some folks have had some bad results with the Armor Poxy kit, and I just thought their situations were different than mine. One was on new concrete without the sealer. Not my situation. The other was on older concrete that was prepped and then the sealer was applied and then the Ballistix. Again, not my exact situation. I have a new 5 month old slab that I cleaned, mopped, sealed, then mopped with the alcohol provided in the kit per the instructions. I even waited out humidity and weather to make sure that I had a perfect window to prepare everything. I never cleaned with any chemicals, only water prior to the acrylic sealer that was provided in the kit. The sealer went down great and even. Since it was applied with a roller, it had roll marks, but that wasnt a big deal. It looked good. After we mopped with the alcohol, we gave it plenty of time to dry out. There was no alcohol still on the floor. We started the application and it looked good as we were applying it. My wife worked the sprayer and I mopped it in just like all of the product videos show. I did everything just like it was prescribed. I was overly **** about it, since I had seen the posts on the flooring forum. In some areas as we were moving on, you could see it separating. Its like it was water on top of oil. I repeat, I did everything by the book. I was very mad yesterday after waiting 24 hours to cure. I think it will serve the purpose that it was designed and it looks good from afar, but at this time, I can not recommend anyone to use it. I have not yet reached out to their customer service, but I will do so soon. Here are the pictures. I purchased the high gloss finish so although it looks wet, it is not. It is totally dry and the spots that look like droplets, are just that, but hard to the touch.

IMG_3553.JPEGIMG_3554.JPEGIMG_3555.JPEGIMG_3556.JPEGIMG_3558.JPEGIMG_3559.JPEGIMG_3560.JPEGIMG_3562.JPEG
IMG_3563.JPEG


There are some areas that look really good, but others not so much. Its very splotchy. I included the zoomed out photo just to show that it looks good from afar. I really like how it looks. I love the wet look. Im just extremely dissapointed and at this point will live with it. There is no way im going to rent a sander and sand down 2000 sq/ft, just to do it all again.
 
Last edited:

EndlessHydro

Member
Joined
Nov 23, 2021
Messages
16
Shop is looking great, Sorry to hear about the floor nightmare, I too went through a similar disaster with a polyaspartic floor coating, ended up having them come back grind it all out and do it again, this time in a flake and 2 coats of clear top. Supposedly there was an issue with the materials the first time(solid grey), it was a bubbly mess and never really hardened...
 

Attachments

  • 20211123_170619.jpg
    20211123_170619.jpg
    499.7 KB · Views: 166
  • 20211124_064028.jpg
    20211124_064028.jpg
    466.1 KB · Views: 183
  • 20211201_165133.jpg
    20211201_165133.jpg
    879.3 KB · Views: 186
OP
C

Cdubu52

Well-known member
Joined
Sep 4, 2014
Messages
636
Location
Pittsboro, NC
I definitely see what you mean. Is it slippery to walk on or did you mix in some anti-skid? Maybe you can do some donuts to help break it in.
Its not slippery at all. I did not add in any anti-skid although they do offer it. From what I read it has some non slip characteristics already. Im frustrated and am curious what they will do to try and remedy it, if anything.
 
OP
C

Cdubu52

Well-known member
Joined
Sep 4, 2014
Messages
636
Location
Pittsboro, NC
Shop is looking great, Sorry to hear about the floor nightmare, I too went through a similar disaster with a polyaspartic floor coating, ended up having them come back grind it all out and do it again, this time in a flake and 2 coats of clear top. Supposedly there was an issue with the materials the first time(solid grey), it was a bubbly mess and never really hardened...

Thanks for checking out my build thread. Yeah, im frustrated because I have purposefully not done anything in the shop for a month while i have been prepping for this. At this point, im tired of waiting to get in it and think I will just live with it.
 

dmittz

Well-known member
Joined
Dec 2, 2016
Messages
1,298
Sorry you aren't happy with the floor, that's too bad.

Your lawn sure is coming along nicey, mine is still hardly sprouting 6 weeks after throwing seed down.
 
OP
C

Cdubu52

Well-known member
Joined
Sep 4, 2014
Messages
636
Location
Pittsboro, NC
Sorry you aren't happy with the floor, that's too bad.

Your lawn sure is coming along nicey, mine is still hardly sprouting 6 weeks after throwing seed down.

Thanks D,

Im still waiting to hear back from Armor Poxy to see if there is any type of resolution.

It took me about 5 years to get my yard established. Each year I would have to till up areas, add topsoil and then overseed. Now, it just seems like I have to repair spots that the dogs tear up. This year I had a lot of work due to the trenching of the power line and the reshaping of the driveway. 6 weeks seems like a long time to wait. I usually have seedlings within a week or so and then can gently mow after 4 or 5. I use a Fescue blend thats made for my area. I also put down Perennial Rye so that I have something to grow to allow the fescue to come in a little slower and not wash away the seed. I do not use straw, I hate it. I tend to use Peat Moss as a cover for the seed. It does really well to hold moisture. I also water like crazy to get the seed to germinate, then I slow down on the watering and hope for rain. I still have areas that need some topsoil and some additional work, but it looks good enough.
 

dmittz

Well-known member
Joined
Dec 2, 2016
Messages
1,298
Thanks D,

Im still waiting to hear back from Armor Poxy to see if there is any type of resolution.

It took me about 5 years to get my yard established. Each year I would have to till up areas, add topsoil and then overseed. Now, it just seems like I have to repair spots that the dogs tear up. This year I had a lot of work due to the trenching of the power line and the reshaping of the driveway. 6 weeks seems like a long time to wait. I usually have seedlings within a week or so and then can gently mow after 4 or 5. I use a Fescue blend thats made for my area. I also put down Perennial Rye so that I have something to grow to allow the fescue to come in a little slower and not wash away the seed. I do not use straw, I hate it. I tend to use Peat Moss as a cover for the seed. It does really well to hold moisture. I also water like crazy to get the seed to germinate, then I slow down on the watering and hope for rain. I still have areas that need some topsoil and some additional work, but it looks good enough.

Yes, I think that its due to the laxk of water (until recently) that my seeds didn't sprout. I have a shallow well so I can't water the lawn. Just had to wait for it to rain and now its gotten cold... o-well it will come eventually
 
OP
C

Cdubu52

Well-known member
Joined
Sep 4, 2014
Messages
636
Location
Pittsboro, NC
I finally heard back from Armor Poxy. I went through all of the steps that I followed and we discussed what could have caused the issues. They feel like I did everything possible to put it down correctly and that there is a possibility that I got a bad mix of chemicals. I will say I was very surprised when I recieved my package from them. I ordered the kit to cover 2000 sq/ft based on their recommendation. I was expecting to receive two 1 gallon bottle kits since its basically 1 gallon covers 1000 sq/ft. It is a 3 part mix where you mix Part A, B and C at different time intervals. In all of the documentation and in all of the videos they show this as a 1 gallon bottle. Well, my kit was 8 quart mixing kits. So in other words, I thought I would have 2 big bottles of the chemical, but actually had 8 small bottles. So we had to mix 8 seperate containers at the same time and then combine them into two 1 gallon sprayers. AP thinks that maybe one of those quarts was bad or contaminated or something to cause an issue in the mixing. Thus resulting in the splotching areas. They have been great so far in our discussion. They have basically offered me 3 options at their expense: Monetary Refund if Im ok with using it as is, sand the entire floor and reapply, and finally spot treat with new chemicals. The third option is to put down a stripping chemical to remove the bad Ballistix and then reapply new Ballistix. Im trying to decide the best route to take. The spot treatment seems appealing, but what worries me is the weather by the time I get everything to fix it. It would probably take a couple of weeks to receive everything and start the prep and that would put it Mid November to almost Thanksgiving before it would be cured. Not to mention that the temperatures would start to drop and then the application is very specific regarding temp and humidity. Here is a picture of the kit that I received. There was an apparent mix up and they sent me more of the part B and C than I needed, but that doesnt really help me since I dont have the additional Part A to go along with it. The 2 bags on the far right are the B and C that were sent in error. The quart container kits were all taped together with the blue tape. There was also a box of supplies that included the installation mop and microfiber mop heads, 2 1 gallon sprayers, and 8 quarts of 99% ISO Alcohol that I did not take a picture of. The kit included everything that you would possibly need to complete this job.

All Ballistix.JPEG
 

dmittz

Well-known member
Joined
Dec 2, 2016
Messages
1,298
That's too bad that you got a bad chemical mix, but at least you know it wasn't your fault. Glad Armor poxy is trying to make it right.

Which option do you think you'll take?
 
OP
C

Cdubu52

Well-known member
Joined
Sep 4, 2014
Messages
636
Location
Pittsboro, NC
I want to talk to them again. I really want to go ahead and start moving stuff in and actually using the shop. We have been lucky with the weather, but I have a feeling that is about to change. I may see if they can send me some more material to use later and use the shop for a while and then make a decision. The way I look at it, the shop is going to be used and should have some vehicles in it covering the floor so it wont always be the focus of my attention. I guess it depends on the shelf life of the product. If they can send some out and then I can sand sections of it at a later date and try and fix it then I may do that. If its going to be a huge pain, then I will just live with it. I may just seek a refund now and then buy what I need later. Its either one of those two options for me.
 
OP
C

Cdubu52

Well-known member
Joined
Sep 4, 2014
Messages
636
Location
Pittsboro, NC
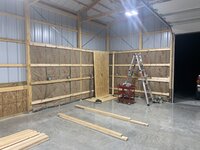
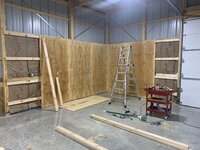
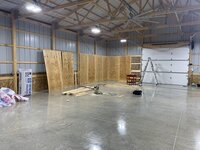
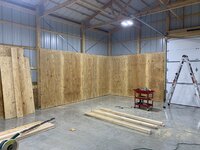
I have finally had the time to get back in the shop and start working on my workbench area. This may end up being way over built and I may be putting in too much thought about it, but oh well. The weather here in NC has been really nice up until this last week, so I have been feeding my golf addiction. That has pushed back any time that I would have spent in the garage. So dont expect a lot of fast progress. I have made quite a few trips to Lowes so far. I never seem to be able to get everything I need in one trip. Even when I make a list, I still dont always get exactly what I need (foreshadowing).

IMG_3618.JPEGIMG_3623.JPEGIMG_3625.JPEGIMG_3627.JPEGIMG_3629.JPEGIMG_3631.JPEGIMG_3642.JPEGIMG_3650.JPEGIMG_3651.JPEGIMG_3655.JPEG

I learned a few things about plywood. They are not always cut straight even from the factory. I also learned never to trust the shelves/bins at Lowes. I got 10 sheets, 8 are 5/8" and 2 are slightly larger, I think maybe 23/32 since that was the bin right beside the 5/8 bin. I got all 10 from the same bin.

I had no idea that it would take as long as it did to get this far with no help. Cutting out for the electrical was a real pain by myself, but I learned a lot. I plan on finishing the entire inside eventually so I went ahead and insulated behind this area. I dont plan on removing this wall and bench anytime soon, if ever. This area is roughly 16x11 and I havent yet decided how I want to finish the area above.

I should have enough wood left to complete the workbench and shelves. I dont really have a drawing that i can share, but I have a few sketches that Im working with. Im excited to start the next step and share along the way.

Also, I wanted to note that the Ballistix has held up great to moving and sliding the plywood and other timber. It also has been really easy to clean up the saw dust and even some paint drops. They just dried up and I was able to pick them off easily with my fingernail.
 
Last edited:
To avoid these ads, REGISTER NOW!

dmittz

Well-known member
Joined
Dec 2, 2016
Messages
1,298
I love the plywood interior cladding behind your work bench. I'm doing the inisde of my shop with plywood also. It will add a tone of ridgidity to your structure, especially with 5/8in (I only went with 1/2in).

I like that you have lots of outlets in the work bench area also. At various time in the past i've found myself needing 4 or 5 outlets and at least 3 cicuits similamiously for certain projects when I had several things going at the same time.
 
OP
C

Cdubu52

Well-known member
Joined
Sep 4, 2014
Messages
636
Location
Pittsboro, NC
I love the plywood interior cladding behind your work bench. I'm doing the inisde of my shop with plywood also. It will add a tone of ridgidity to your structure, especially with 5/8in (I only went with 1/2in).

I like that you have lots of outlets in the work bench area also. At various time in the past i've found myself needing 4 or 5 outlets and at least 3 cicuits similamiously for certain projects when I had several things going at the same time.

Thanks D. I made sure to have my electrician put more outlets in that area since I knew it would be my workbench. I went with the thicker plywood so that I could be comfortable hanging things or mounting things to it as I go. Im still not quite sure how I am going to proceed, but Im looking forward to spending time out there this weekend since its Thanksgiving here in the states. I cant decide how I am going to arrange the workbench area. I dont know if I want to use peg board or have more under shelf storage. I was planning on peg board for all of my hand tools, but apparently I am getting a new 52" tool box for Christmas that I think I am going to mount permanently under my workbench. So now I am thinking I may build a floating shelf over my workbench where I can mount some lighting underneath and store some lighter items on top. Any suggestions are welcomed.
 
OP
C

Cdubu52

Well-known member
Joined
Sep 4, 2014
Messages
636
Location
Pittsboro, NC
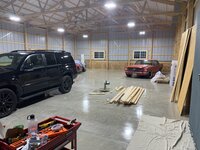
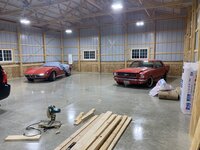
Small update, but huge progress. I was finally able to move the cars from the attached garage out to the shop. I spent all day Saturday playing in a captains choice golf tournament(finished 2nd by the way) and then had a family Thanksgiving yesterday, so I didnt have much time to spend around the house doing projects. Also, we host our entire family on Thanksgiving, so most of our free time this weekend was spent cleaning up the house and getting ready for that. Before I could move the old cars to the shop, I had to redo all of the wiring for the garage door sensors in the attached garage, thanks to that same ******** dog that likes to dig in my new grass. When he was younger and before we had the underground fence installed, we would keep him in the garage when we weren't home. I guess the door sensor lights bothered him so he chewed off all of the wires and one of the sensors. It hasnt been that big of a deal, but now that we are moving the daily's inside, its much easier pushing the button on the opener in the car to close the door instead of having to get out and manually close it from the wall switch. Well at least it makes my wife's day a little easier and that is always a plus. We also moved my daughters car into the shop. Sure is easier than having to scrape the windshield every morning.

IMG_3668.JPEGIMG_3669.JPEGIMG_3670.JPEG

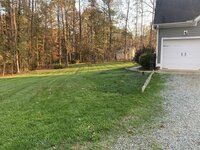
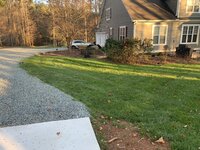
I was able to grab a couple of photos of the yard now that my overseeding has taken hold and come in. We have had some wet days as of late and the ground temps were staying up. This has been one of my best years so far with fall grass work. Now I just have to take down the protection areas and clean up my edges. I never spray any kind of weed killer in the fall just to protect the new seedlings from any over spray or drainage. I will cut all of edges soon and really clean them up in the spring.

IMG_3661.JPEGIMG_3663.JPEG
IMG_3659.JPEGIMG_3660.JPEG
 

dmittz

Well-known member
Joined
Dec 2, 2016
Messages
1,298
If you don't mind me giving my $0.02 about your work bench area... My experience has been that a tool chest or drawers below the bench is nice but also few shelves for certain heavy items. Some upper cabinets with under cabinet lights are nice but also having a decent sized (6ft +) area of bench with peg board on the wall and a vise in that area with some good over bench lighting works well. It allows you to put large items on the bench, manipulate things in the vise and keep your most frequently used tools on the wall right in front of you when your working. I prefer some sort of metal top on my bench also as I find makes it easier to clean up oil, grease etc,is more resistant to wear and of course not flamable. Also my experience is its best not to put the bench vise too close to a corner as you want enough room to be able to put larger items in there once and a while. Finally if you have a bench grinder be sure to position it so that sparks won't shoot in the direction of any vehicles or anything that could be flamable.
 

Jayman17

Well-known member
Joined
Feb 6, 2017
Messages
3,820
Location
Seattle, Wa
The photo with the cars in there tell me that is a nice sized shop! Looking forward to seeing you put together a nice workbench area. Grass is coming in nicely too. 👍

Jay
 
OP
C

Cdubu52

Well-known member
Joined
Sep 4, 2014
Messages
636
Location
Pittsboro, NC
Very nice space....yard and garage!
Looking forward to seeing how it fills up!

Thanks taking the time to check out my thread. I hope it takes a while to fill it up.

The photo with the cars in there tell me that is a nice sized shop! Looking forward to seeing you put together a nice workbench area. Grass is coming in nicely too. 👍

Jay

Jay, Thanks for checking out my thread. Its a pretty good size. Im still trying to figure out how I want to arrange everything inside. Since I have all of my lumber and other building materials in there for the workbench I had to just put things where there was room. I have some plans going forward of how I want to arrange things permanently, but Im sure that will change too.
 
OP
C

Cdubu52

Well-known member
Joined
Sep 4, 2014
Messages
636
Location
Pittsboro, NC
If you don't mind me giving my $0.02 about your work bench area... My experience has been that a tool chest or drawers below the bench is nice but also few shelves for certain heavy items. Some upper cabinets with under cabinet lights are nice but also having a decent sized (6ft +) area of bench with peg board on the wall and a vise in that area with some good over bench lighting works well. It allows you to put large items on the bench, manipulate things in the vise and keep your most frequently used tools on the wall right in front of you when your working. I prefer some sort of metal top on my bench also as I find makes it easier to clean up oil, grease etc,is more resistant to wear and of course not flamable. Also my experience is its best not to put the bench vise too close to a corner as you want enough room to be able to put larger items in there once and a while. Finally if you have a bench grinder be sure to position it so that sparks won't shoot in the direction of any vehicles or anything that could be flamable.

Thanks for your input D. The total workbench should end up somewhere around 15x8. I plan on installing 24x30x6 shelves on the end of the bench at the door and then using plastic storage bins to organized those shelves. That is where I want to keep most of my car wash and detailing chemicals. I am toying with the floating shelf on the shorter side with either 2 or 3 feet of floating shelf from the corner or nothing on the longer side. I plan on having room for my rolling cart, possibly a large garbage can, and the tool box under the workbench top. Im not sure yet how I want to arrange those, but everywhere else I plan on having a shelf underneath to store my tools and some more of the plastic bins if needed. In the future, if I get a welder, I will probably add a metal welding table, but it will be a stand alone table, not connected to the workbench. I currently have a bench grinder that is mounted to a homemade stand that I can move wherever I need it so I will not be mounting it to the workbench. I will be mounting a vise, but I havent laid out a spot for it yet. I have a large rolling toolbox that I will also be moving beside the bench, so im not sure yet where I can put everything. Im struggling with the depth. I dont know how deep I want the workbench. At one point, I thought 36" but that seems too deep. My current workbench is only 24" and I feel like that is too short. Im thinking somewere around 28" to 32". I wanted to be able to have a tool box on the workbench and still be able to work in front of it. Also, if I decide to use peg board, I can still work on the bench without interference from the tools or bins hanging above. Feel free to agree or disagree and Im always open to suggestions.
 

dmittz

Well-known member
Joined
Dec 2, 2016
Messages
1,298
I have to agree on the bench depth of 28-32in being the sweet spot for a general purpose bench although admittedly it does depend on your height and what you tend to work on... If your on the shorter side (like me) and mostly work on smaller items a 28in deep bench is great if you are taller and tend to work on larger items on the bench going 36in might make sense. Before you build the benches you also want to measure the height and depth of any tool chests/boxes you want to put under them. Same wpuld go for the shelves make sure they have enough height and depth to accomidate all the planned items.

Have fun! Planning and building your your work area is proabbly the most fun part of a shop build IMO.
 
OP
C

Cdubu52

Well-known member
Joined
Sep 4, 2014
Messages
636
Location
Pittsboro, NC
Got a little more done this weekend. Unfortunately, I wasnt able to spend as much time as I wanted in the shop, but it was enough to get a big chunk of the workbench project completed.

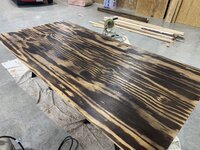
Part of the problem was this forum. Thanks to EastMtn and his EmptyCup project, I went down a Shou Sugi Ban rabbit hole. I knew that I was either going to paint or stain the wood for my work area, but this seemed perfect for my project. So Thursday night, after bellies were full and our family departed, I was able to start burning and brushing and sanding and staining. I did have to start using a respirator. Smelling burnt wood for days on end was not fun, but the wood sure looks good. I did some practice with the plywood as well. I thought if I didnt like it I would just use the other side or as the bottom layer since Im doubling up for the workbench anyway. I can be picky. I also toyed around with some of the stain colors. I originally started with a darker color and ended up going a little lighter to show off the grain a little better.

This was my first pass and before adding any stain.

IMG_3678.JPEG

IMG_3680.JPEG

Plywood test

IMG_3681.JPEG

Stain test. This looked good, but was a little dark. I started with Minwax Early American and ended up switching to a Golden Pecan after these.

IMG_3683.JPEG

This is my set up. These work stands have seen a few small projects, but they got their work in that night.

IMG_3685.JPEG

This was the Golden Pecan after putting on and then taking off quickly. I think after these, I was letting it sit for about 5 minutes.

IMG_3687.JPEG

I guess I was board (Heyo!) and decided to see what patterns I had in my plywood to determine what I wanted for the workbench top.

IMG_3701.JPEG

And, I finally got a new miter saw. My old saw was just not cutting it. Heyo, Puns again. I needed a 20 year upgrade and thanks to my collecting nature, I had about $300 in unspent gift cards, so now I have a new saw and some new metal work stands (saw horses).

IMG_3707.JPEG
 
Last edited:
OP
C

Cdubu52

Well-known member
Joined
Sep 4, 2014
Messages
636
Location
Pittsboro, NC
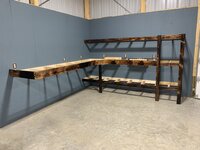
I let the stain dry for a couple of days and was able to get back out there some on Saturday and pretty much all day Sunday. On the short wall I decided to go with an 8ft by 2ft section, and on the longer wall, I attached another 8' by 28" section.

IMG_3706.JPEG

I added in a lower section at 8ft by 2ft. I also got an early Christmas present from my wife. She and her Dad went and picked up a new tool box for me and decided to go ahead and give it to me since it wasnt the easiest to hide. And like she said, she wanted me to go ahead and use it. I was just test fitting it here. This is not its final resting place.

Also, I went ahead and marked all of the mounting locations with a chalk line so that I didnt have to remeasure every time was installing a shelf. This also helped in getting a good visual of how much room I have under and above each level. My 16yo daughter came out at one point and looked at the wall and asked me where the laser was that was putting the blue lines on the wall. She had seen us use a laser transit when we were picking out locations for the electrical boxes. Since I dont own a laser level, or at least one big enough for this, I had to inform her that it was just chalk and that it was the way my dad taught me long before the use of lasers. That being said, a laser level is on my Christmas wish list.

IMG_3708.JPEG

IMG_3713.JPEG

Next, I added the top shelf that I originally planned to be a floating shelf and was going to be a little shorter, but keeping things at 8 ft seemed like the smarter thing to do. It is 8ft by 1ft. This still gives me working room below, and a place to mount some under cabinet lighting.

IMG_3714.JPEG

I decided to connect the 1ft shelf to a taller 3 shelf "cabinet". Im using cabinet there because im not sure of a better term for it at this point. Each layer here is 2ft by 2ft and will be connected vertically.

IMG_3717.JPEG

Once the plywood for the shelves has been installed, I will be adding some trim to hide some of the raw wood edges and to lock in and clean up the look.

IMG_3720.JPEG

I added 2x6s to the face of the workbench to act a guard and a catch all. That way nothing will roll off onto the floor. I did that in my work area in my attached garage and decided to carry it over. I will be doubling up the 5/8" plywood and this will leave about a qtr inch from the worktop to the edge of the 2x6.

IMG_3724.JPEG

I cut a 45 to give me a little more room and I thought it looks good.

IMG_3728.JPEGIMG_3731.JPEG

I will be adding some additional bracing and trim, but Im all out of wood at the moment. I used up pretty much all that I had prepared. I will also be installing a taller metal toolbox to the left and will then add another 30" by 28" 2 level work area to the left of that. I thought that tool boxes may be a good way to break up the space a little and I can separate projects. I may put a metal top on the unbuilt section and that is the most likely place that I mount my vise.

Once all of the framing is done, I will cut the plywood and install it. I had the table set up for the miter saw and just decided to cut and install all of that before changing it over to cut the plywood.

Also, I know that this is a little excessive for a work bench. Once the shop is done we will probably host folks a few times a year and I wanted that area to look nice and look more custom than just raw pine. I have always thought that everything in life is an extension of yourself, from the way you dress to how you keep your homes and cars. To me this is no different. This shop is another extension of me and Im enjoying every minute that I spend in there. Thanks for following along.
 
Last edited:

dmittz

Well-known member
Joined
Dec 2, 2016
Messages
1,298
You are doing an awesome job on your work bench. You have definietly thought out the layout and function of it throughly, which should make it a wonderful place to work on things for years to come.

The 45' in the corner is an interesting idea I've never seen that but its a good idea... The wood looks really great too, and if it makes you happy it is well worth the effort.
 
OP
C

Cdubu52

Well-known member
Joined
Sep 4, 2014
Messages
636
Location
Pittsboro, NC
You are doing an awesome job on your work bench. You have definietly thought out the layout and function of it throughly, which should make it a wonderful place to work on things for years to come.

The 45' in the corner is an interesting idea I've never seen that but its a good idea... The wood looks really great too, and if it makes you happy it is well worth the effort.

Thanks D. I cant remember where I saw it, maybe youtube when I was searching for ideas. I will post pictures of my current working set up in my attached garage at some time in the future. Its way too messy right now since Im having to dig through and pull out tools that I dont always need. I was able to use what I liked and disliked from when we built it 12 years ago but it is entirely different. And other than that, I just have a general vision about what I wanted and its been fun making that vision a reality. Im an accountant by trade, and am very analytical by nature. This project has really allowed me to exercise a different part of my brain and tap into the more creative side.
 

turbowoodworker

Well-known member
Joined
Mar 18, 2012
Messages
3,548
Location
Apex NC
Subscribed.
I just found this thread and love your property. We are east of you at Jordan Lake but my wife is from Pittsboro and the family farm is SW of downtown.
We finished a stick build 1400 sq foot building for my shop. You will eventually get to insulating and HVAC but I can tell you, even in mild NC, the mini splits make working really comfortable.
Keep the pics coming as the shop progresses.
Rick
 
OP
C

Cdubu52

Well-known member
Joined
Sep 4, 2014
Messages
636
Location
Pittsboro, NC
Subscribed.
I just found this thread and love your property. We are east of you at Jordan Lake but my wife is from Pittsboro and the family farm is SW of downtown.
We finished a stick build 1400 sq foot building for my shop. You will eventually get to insulating and HVAC but I can tell you, even in mild NC, the mini splits make working really comfortable.
Keep the pics coming as the shop progresses.
Rick

Welcome aboard Rick. Thanks for checking out the thread. As a Pittsboro native, I would assume that I probably know or at least know of your wife's family. I actually grew up downtown and then we moved about 2 miles out of town and my Mom still lives there. My wife is also a local and we built on her family's land out between Pittsboro and Siler City near the old stand alone silo, which was originally part of her grandfathers farm.
 

turbowoodworker

Well-known member
Joined
Mar 18, 2012
Messages
3,548
Location
Apex NC
I know that area well. Our farm is towards Goldston. In laws were antique dealers downtown for many years. Wife went to Horton and of course Northwood HS. I recognized your daughter’s green and gold.
what year did you graduate HS?
 
OP
C

Cdubu52

Well-known member
Joined
Sep 4, 2014
Messages
636
Location
Pittsboro, NC
I know that area well. Our farm is towards Goldston. In laws were antique dealers downtown for many years. Wife went to Horton and of course Northwood HS. I recognized your daughter’s green and gold.
what year did you graduate HS?

I graduated from NHS in 1995. Based on that description, I think I know your in-laws. Is the farm on Pittsboro Goldston Rd, just north of Mays Chapel Rd on the left heading south. If so, I used to play Rook with William and Naythelle back in the day.
 
To avoid these ads, REGISTER NOW!
Top Bottom