To avoid these ads, REGISTER NOW!

Above 1200 Sq/FT C Dub's Garage Build in Central NC

Wokspaces above 1200 squarefeet.
OP
C

Cdubu52

Well-known member
Joined
Sep 4, 2014
Messages
636
Location
Pittsboro, NC
I was only able to spend an afternoon in the shop this weekend. I guess its just the time of year that requires spending time doing other things. Also, I promised my wife that I would spend time in her office getting everything hung and mounted. We converted my daughters former play room/bonus room into an office for my wife since she now works from home part time. Although I have been back in the office full time, her work is still operating on a hybrid schedule and she works 2-3 days from home. She decided that she wanted to make an office out of the playroom and since I built the shop, I happily conceded the space. We bought her a new desk, monitor mounts and some other things to clean up the space and make it her office. I was able to hang the monitors, hang quite a few pictures, mount a spare flat panel on the wall, and add a power outlet for the tv. A few months ago we found an old farm sign that was the sign in front of her grandfather's dairy farm. As soon as she saw it she knew that she wanted it for her office. We cleaned it up and I was able to mount it on one of the walls. This is just the start of that project. I have a feeling I will be taking everything off the wall to paint soon.

IMG_3744.JPEG

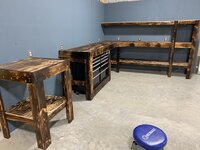
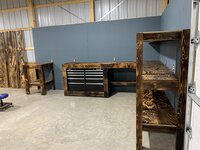
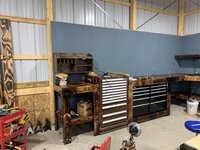
I did have some time in the shop. I was able to get my tool box permanently mounted into my work bench. I tried to make sure that I had space around the frame to best fit the tool box. I used expandable foam weather seal as well as pipe insulation to get it all snugged up and locked into place. I originally mounted the insulation with screws to help prevent it from banging on the back plate when I rolled in the box. That was a bad idea. It was too tight and made it way more difficult than needed. I just pressed in the insulation once the box was where I wanted it.

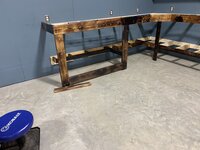
IMG_3758.JPEGIMG_3760.JPEGIMG_3762.JPEG

I framed it in to give it more of finished look. I may add some more, but there will be a taller tool box here to cover this area.
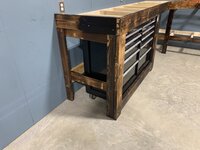
IMG_3763.JPEGIMG_3764.JPEG

Added the last piece of the workbench area.
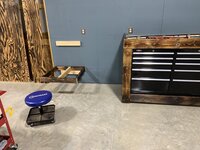
IMG_3767.JPEGIMG_3769.JPEGIMG_3770.JPEGIMG_3771.JPEG

I still need to add trim and the bench tops. I thought I would have been able to get to that this weekend, but oh well. Hopefully I will get out there some this week.
 
To avoid these ads, REGISTER NOW!

Maxcustody

Well-known member
Joined
Oct 26, 2021
Messages
1,466
Location
West Virginia
Chris shop is looking great! I love the workbench area. Sorry about the problems with your floor covering. Especially when you take the time to do it right and you are not happy with the results.
 
OP
C

Cdubu52

Well-known member
Joined
Sep 4, 2014
Messages
636
Location
Pittsboro, NC
Chris shop is looking great! I love the workbench area. Sorry about the problems with your floor covering. Especially when you take the time to do it right and you are not happy with the results.

Thanks Scott. Im getting used to the floor. It seems to be doing what its supposed to. The mustang has a problem holding its fluids, so its already been put to the test. And, it is holding up to the abuse from dragging lumber here and there.
 

turbowoodworker

Well-known member
Joined
Mar 18, 2012
Messages
3,548
Location
Apex NC
Hey Chris,
Project is really looking great. Benches I'm sure will come in handy.
Remember that for every hour in your shop, you have to figure some even time for the wife's projects too!
Rick
 
OP
C

Cdubu52

Well-known member
Joined
Sep 4, 2014
Messages
636
Location
Pittsboro, NC
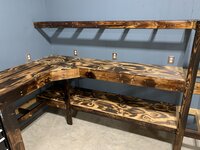
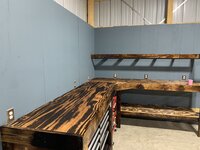
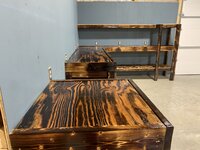
I spent a couple of hours in the shop last night. I was able to start getting some of the tops installed. I doubled up the 5/8" plywood for the tops. For the shelving I will just use a single layer. I also tested the stain to see how it would look on the plywood.

IMG_3772.JPEGIMG_3774.JPEG

Before Stain

IMG_3783.JPEG

After Stain

IMG_3784.JPEG

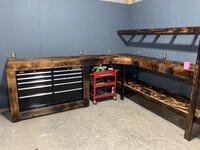
Rolling Cart fits in its spot!

IMG_3788.JPEGIMG_3789.JPEG
 

dmittz

Well-known member
Joined
Dec 2, 2016
Messages
1,298
I spent a couple of hours in the shop last night. I was able to start getting some of the tops installed. I doubled up the 5/8" plywood for the tops. For the shelving I will just use a single layer. I also tested the stain to see how it would look on the plywood.

IMG_3772.JPEGIMG_3774.JPEG

Before Stain

IMG_3783.JPEG

After Stain

IMG_3784.JPEG

Rolling Cart fits in its spot!

IMG_3788.JPEGIMG_3789.JPEG
Those look fantastic, a work of art.

Please don't take this as a criticism, but do you have a plan to protect the beautiful work bench tops from damage?
 
OP
C

Cdubu52

Well-known member
Joined
Sep 4, 2014
Messages
636
Location
Pittsboro, NC
Those look fantastic, a work of art.

Please don't take this as a criticism, but do you have a plan to protect the beautiful work bench tops from damage?

Thanks D. You can say whatever you want, dont worry, I dont take it as criticism. By no means am I a professional. I always welcome comments and even criticism. Its the only way to learn. They will get a coat or two of poly. I have a couple of different options that I bought at Lowes. I may try them out on some scrap this weekend and see how they look. But if they get messed up, I can always get another sheet and replace them. That has always been my philosophy on using the plywood tops. After saying that, I have never replaced one before, so who knows. I did build everything so that I can easily just take it all apart if I need to. I have plans to build some more counter space in the shop, so Im also using this experience to try new things and get some good practice and generate ideas.
 
OP
C

Cdubu52

Well-known member
Joined
Sep 4, 2014
Messages
636
Location
Pittsboro, NC
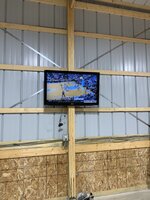
I was able to make a little more headway in the shop this weekend. I had a spare TV that I was able to mount so I could watch some basketball. There will have to be an upgrade in the future. Its a 40" but for some reason it feels like the Plasma TV scene in the Office.
69240209209__3BDDAB5E-F5AF-4373-9915-45F79B3C8037.JPEG

I was able to get all of the bench tops mounted and everything has been stained. I will put poly on the tops tonight and then all I have left is to start moving everything in from my attached garage. I will probably also need to build some additional storage shelves just to keep all of my things off of the floor and out of the way.

IMG_3805.JPEGIMG_3806.JPEGIMG_3807.JPEG

IMG_3814.JPEG

I even had a little bit of help cleaning up. It was nice to get all of the sawdust and trash off the floor.

IMG_3810.JPEG

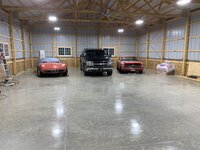
I even moved the Suburban inside.

IMG_3816.JPEG
 
Last edited:
OP
C

Cdubu52

Well-known member
Joined
Sep 4, 2014
Messages
636
Location
Pittsboro, NC
Man Chris, place is looking great. I see two problems, albeit temporary problems.
1. Big shop, need bigger big screen!
2. Your shop is so big, my first thought is to rent a Zamboni!
Cheers,
Rick
Thanks Rick. There will be a bigger screen at some point. I want to do a feature wall and mount a good sized tv. I just wanted to watch some basketball and work in the shop this weekend. We had a spare tv and I had some cheap monoprice mounts and quickly mounted everything.

Your shop is looking mighty fine!
a T.V and fancy benches. Very nice, love the style.

Thanks D. I think you have completely sheathed your entire shop in the time it has taken me to just build a workbench.
 
Last edited:

dmittz

Well-known member
Joined
Dec 2, 2016
Messages
1,298
haha the constant freezing temps have been a good motivator for me to finish the electrical, insulate, vapor barrier and get the plywood cladding done! One day I will be able to work in my shop without a heated jacket and seeing my breath.
 
OP
C

Cdubu52

Well-known member
Joined
Sep 4, 2014
Messages
636
Location
Pittsboro, NC
haha the constant freezing temps have been a good motivator for me to finish the electrical, insulate, vapor barrier and get the plywood cladding done! One day I will be able to work in my shop without a heated jacket and seeing my breath.

I will say, it was in the 30s last night when I was in my shop. Inside temps were in the 40s. With no heat and no insulation, I bundled up and could see my breath. I had a little propane heater in the area that I was working.
 
OP
C

Cdubu52

Well-known member
Joined
Sep 4, 2014
Messages
636
Location
Pittsboro, NC
Early last week, I was able to get 3 coats Poly applied. It turned out pretty good. The only thing left is to clean up the raw edges of the plywood shelves.

IMG_3821.JPEGIMG_3822.JPEGIMG_3823.JPEG

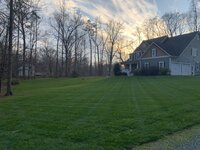
Most of my day Saturday was spent in the yard. Hopefully, it was the last day for a while doing yard work. I was finally able to get in a last cut. Actually, I had to cut it twice. Because of all of the rain, its been too wet for a few weeks. Well, its been to wet on the days that I have had the time to do it. Then I trimmed the driveway and cleaned up all of the edges. Even got the blower out to get up the last remnants of leaves. Im sure I may have to blow again. There are a few stragglers left on some trees. Then, I had the wonderful task of cleaning out the gutters. Now I feel like it should be good until spring. I still need to pressure wash my sidewalk and driveway apron, but that will be a task for another day.

IMG_3828.JPEGIMG_3831.JPEG

I did get some time in the shop to do a few things. I installed some LEDs in my daughters 4Runner. I didnt take any pictures, but it was a project that she had been begging me to do for a couple of weeks. Since her car is a 2007, it doesnt have some of the modern amenities so I had to wire in a USB adapter to get power to the lights. It wasnt that big of a deal, it just took way longer than I thought to fish the lights and the wiring to the areas that she wanted them mounted.

While I was working on her car, she took care of the raw plywood edges. I picked up some wood stain markers and she knocked them all out fairly quickly.

I had a few minutes to put together a broom holder with some leftover pieces of wood and some cheap holders from amazon.

IMG_3832.JPEG

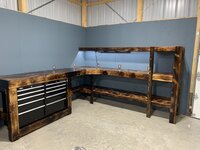
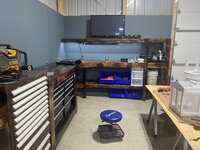
The main project for my time in the shop was installing some undercabinet lights. I also put in a power strip under the top shelf. I have to figure out a cleaner way to plug them in. Or, I just need to put more things on the bench top to cover them up. Im sure the latter will happen fairly soon. Im hoping with some time off over the holidays that I can get my tools moved and everything set up. Im waiting to see what I get for Christmas. I have asked for some plastic bins and other storage accessories. I was waiting so I dont have to move things twice, but Im sure that wont be the case.

IMG_3833.JPEGIMG_3835.JPEGIMG_3838.JPEGIMG_3839.JPEG
 

dmittz

Well-known member
Joined
Dec 2, 2016
Messages
1,298
Your benches and undercabinet lighting look fantastic. I'm envious of your beautiful green lawn mine is covered in snow, lol.
 
To avoid these ads, REGISTER NOW!

HogDude

Well-known member
Joined
Dec 25, 2020
Messages
230
Location
Nebraska
I was able to finally put down the Ballistix. Saturday morning my wife and I cleaned the floor and applied the product to the floor. Since it is a 3 part process, we started mixing the chemicals and while they were setting up we went in and cleaned the floor according to the instructions. After waiting the required time before installing to make sure that the chemicals were property mixed. we started sealing. Since we were both using respirators and gloves, there was no one there to take pictures of the process. Here is one right after application.

IMG_3543.JPEG

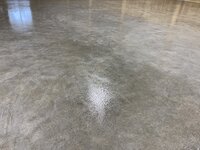
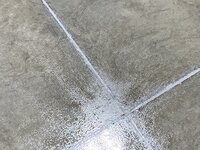
This picture looks good, but I have to say, Im very disappointed with the results. I had seen on this forum where some folks have had some bad results with the Armor Poxy kit, and I just thought their situations were different than mine. One was on new concrete without the sealer. Not my situation. The other was on older concrete that was prepped and then the sealer was applied and then the Ballistix. Again, not my exact situation. I have a new 5 month old slab that I cleaned, mopped, sealed, then mopped with the alcohol provided in the kit per the instructions. I even waited out humidity and weather to make sure that I had a perfect window to prepare everything. I never cleaned with any chemicals, only water prior to the acrylic sealer that was provided in the kit. The sealer went down great and even. Since it was applied with a roller, it had roll marks, but that wasnt a big deal. It looked good. After we mopped with the alcohol, we gave it plenty of time to dry out. There was no alcohol still on the floor. We started the application and it looked good as we were applying it. My wife worked the sprayer and I mopped it in just like all of the product videos show. I did everything just like it was prescribed. I was overly **** about it, since I had seen the posts on the flooring forum. In some areas as we were moving on, you could see it separating. Its like it was water on top of oil. I repeat, I did everything by the book. I was very mad yesterday after waiting 24 hours to cure. I think it will serve the purpose that it was designed and it looks good from afar, but at this time, I can not recommend anyone to use it. I have not yet reached out to their customer service, but I will do so soon. Here are the pictures. I purchased the high gloss finish so although it looks wet, it is not. It is totally dry and the spots that look like droplets, are just that, but hard to the touch.

IMG_3553.JPEGIMG_3554.JPEGIMG_3555.JPEGIMG_3556.JPEGIMG_3558.JPEGIMG_3559.JPEGIMG_3560.JPEGIMG_3562.JPEG
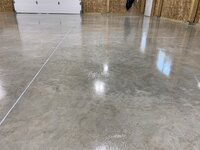
IMG_3563.JPEG


There are some areas that look really good, but others not so much. Its very splotchy. I included the zoomed out photo just to show that it looks good from afar. I really like how it looks. I love the wet look. Im just extremely dissapointed and at this point will live with it. There is no way im going to rent a sander and sand down 2000 sq/ft, just to do it all again.
Sorry it didn’t turn out as you had hoped.
Keep buying the lottery tickets (see comments regarding insulation and finishing walls) and when your numbers come in just add RaceDeck to the list. I promise you will not be disappointed. The solid tiles under the bike do have that “click & clack” when walking on them but the others do not, allow water to drain and look amazing.
Nothing about your build or thread I don’t like!
 

Attachments

  • 693E7AF1-3F05-4D51-929B-D2E14969AD40.jpeg
    693E7AF1-3F05-4D51-929B-D2E14969AD40.jpeg
    144.6 KB · Views: 59

HogDude

Well-known member
Joined
Dec 25, 2020
Messages
230
Location
Nebraska
Sorry it didn’t turn out as you had hoped.
Keep buying the lottery tickets (see comments regarding insulation and finishing walls) and when your numbers come in just add RaceDeck to the list. I promise you will not be disappointed. The solid tiles under the bike do have that “click & clack” when walking on them but the others do not, allow water to drain and look amazing.
Nothing about your build or thread I don’t like!
BTW, currently in the “Heartland” with plans to retire and relocate. Been paying attention to the Lexington area of your beautiful state. Got family in the Albemarle area and in Blacksburg, VA.
 
OP
C

Cdubu52

Well-known member
Joined
Sep 4, 2014
Messages
636
Location
Pittsboro, NC
Fantastic, Chris. Thanks for posting.
Thanks Rick

Your benches and undercabinet lighting look fantastic. I'm envious of your beautiful green lawn mine is covered in snow, lol.
Thanks D. Im a little envious of your snow. But as much as Im a fan of snow, I like it in small amounts, not months and feet.
BTW, currently in the “Heartland” with plans to retire and relocate. Been paying attention to the Lexington area of your beautiful state. Got family in the Albemarle area and in Blacksburg, VA.
HD, thanks for checking out my thread. I thought about using RaceDeck. It was just more than I wanted to spend at the time. I may look into it again later. NC is great place to live. We are right in the middle of the state. We can get to the beach or the mountains in less than 3 hours. And, as a golfer, I can play almost year round.
 
OP
C

Cdubu52

Well-known member
Joined
Sep 4, 2014
Messages
636
Location
Pittsboro, NC
As I have mentioned on here before, Im a huge golf nut. I will more than likely be adding some sort of golf hitting area in my shop in the near future. Yesterday, I was able to play at Pinehurst. I love going down there and walking around the club house and checking out all of the memorabilia. I didnt get too many photos, but its always a great experience. IMG_5607.JPEG

Thats me on the far left. Also, im not that short, my buddy there is 6'6" and im standing a little down hill. The high on the course yesterday was in the upper 30's. 2 of these guys are old college buddies and we still get to hang out with each other every once and a while.

IMG_3841.JPEGIMG_3844.JPEGIMG_3848.JPEG

We played No. 1 and then were able to get in two rounds at the Cradle.
 
Last edited:

BigDaveZJ

Well-known member
Joined
Jun 26, 2012
Messages
163
Location
Centennial, CO
Loving the shop! Helped me visualize what I want for sizing too when I get ready to build mine. I've also been considering a Morton building, but haven't quite gotten to the point where I'm really ready to start diving into it.
 
OP
C

Cdubu52

Well-known member
Joined
Sep 4, 2014
Messages
636
Location
Pittsboro, NC
wow a nice round of golf in dec, that sounds nice!
D, I play as much as I possibly can. Im supposed to play this weekend, possibly twice, and if that happens I will have played 30 rounds this year.
Loving the shop! Helped me visualize what I want for sizing too when I get ready to build mine. I've also been considering a Morton building, but haven't quite gotten to the point where I'm really ready to start diving into it.
Big Dave, thanks for tuning in. Im glad I can help you with what you want. That is exactly why I post as much as I do. I may not get a lot of comments like other threads, but I try to put a lot on here to help others and also to help myself. Morton is a wonderful company to work with. I decided to get the largest building that I could within my budget, knowing that I could finish it later. You cant beat the quality of a Morton.
 
OP
C

Cdubu52

Well-known member
Joined
Sep 4, 2014
Messages
636
Location
Pittsboro, NC
Small update: First off, Merry Christmas, Happy Holidays, and Happy New Year to everyone. I spent the last couple of days doing projects around the house, cleaning up from Christmas, and had a few minutes to start moving tools. Its amazing how much stuff can be accumulated in a short amount of time. Both the shop and the garage are a mess right now. I have been going through everything in one to then better organize the new shop.

IMG_3887.JPEG

The brown rolling tool box was my grandfather's and will always have a place in my shop. I had forgotten how heavy that thing is. I was able to get everything out of it and with the assistance of my daughter's boyfriend, we loaded it in the truck and moved it to the shop.

Im waiting on some plastic bins to better organize the new shop, so unfortunately, that means that everything is piling up on the workbench in the garage. I will be moving more stuff over soon.

IMG_3888.JPEGIMG_3890.JPEG

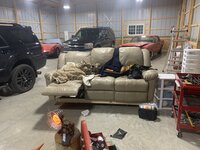
Please excuse the mess. Im still going through everything and this garage has been a holding area for quite a few months. Im ready for it to be cleaned out. Most of this will either be moved to the new shop, or will be culled and disposed of. As for the potty chair, my teenage daughter has had 2 hip surgeries due to softball injuries, it just needs to find a better home, but the garage is where it landed temporarily.

IMG_3893.JPEG

As it sits right now. Im still going through everything and reorganizing. Im still trying to figure out what goes where. I did get a chance to hang the power tool organizer and set up all of the chargers.

IMG_3894.JPEG
 

Jayman17

Well-known member
Joined
Feb 6, 2017
Messages
3,820
Location
Seattle, Wa
Looks great, I love that Vidmar type box of your grandpa. Have you considered swapping places with the small bench to it’s left in the last photo. That way your bench top height would be uninterrupted? Just an idea not meant as criticism.

Jay
 
OP
C

Cdubu52

Well-known member
Joined
Sep 4, 2014
Messages
636
Location
Pittsboro, NC
Looks great, I love that Vidmar type box of your grandpa. Have you considered swapping places with the small bench to it’s left in the last photo. That way your bench top height would be uninterrupted? Just an idea not meant as criticism.

Jay

Jay, Thanks for the question. I cant really move them since they are anchored to the wall. Also, the work tops are not at the same height. The overall height is the same, but the work surface on the left section is flush with the top of the 2x6 and the larger section has an inset of about 1/4 of an inch to prevent anything from rolling off. I built that left section as a place to mount my vise and I plan on using it as a separate work station for golf club repair.

That tool box is one that my Grandfather had for years. He was a master welder and had a few tool boxes. After he passed away in 2007 his wife either sold or gave away most of his tools. I was able to grab what I could, this box included. Im not even sure what brand it is. I will see if I can do some research. I do know that the original color is a 50's style teal. You can see it a little peeking through the bottom before I got the trim piece put back on. I will probably refinish it at some point.
 
OP
C

Cdubu52

Well-known member
Joined
Sep 4, 2014
Messages
636
Location
Pittsboro, NC
Armor Poxy Update. I was able to speak to Customer Service regarding my floor and was able to work out what I feel is a fairly reasonable settlement. I decided that I do not want to redo it at this time, so I went with the % refund. My only gripe is their first offer was 10% refund. I thought that was a bit laughable, considering they were willing to provide me with enough material to redo the entire floor and sanding discs at their cost. I brought that up and threw out a more reasonable counter offer. We were able to reach a mostly reasonable solution.

I also had a conversation with them about providing better information and instruction up front. I felt like I had to independently research how to use the product, even though it was marketed as a DIY kit. I just suggested that all of the information that I had to dig around to find, or send emails to request, should be provided as soon as the kit is ordered. Or at a minimum, on the website where the kit is for sale, it would be included in the product details, so that you can read the instructions first before you purchase. I own a Jeep and I use Quadratec to purchase aftermarket parts. If you are shopping for a lift, or a bumper, etc., on the page where you would buy them, the installation instructions are included. To me, that is how DIY is marketed. You can read the supplied instructions in PDF, and if you lose the paper version, you know exactly where to find the electronic version. Also, you can read them to decide if that is even something you want to take on.
 
OP
C

Cdubu52

Well-known member
Joined
Sep 4, 2014
Messages
636
Location
Pittsboro, NC
I was able to get back out in the shop for a little bit over the last week. I broke a tooth and had some terrible nerve pain for a few days, but got a good ole root canal and now Im back in business. Just in time to head to Myrtle Beach for a golf trip.

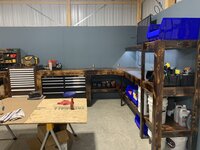
The Acro-Mils bins finally arrived and I was able to start sorting and organizing all of my chemicals. I am still waiting on some of the hanging strips for the bins, but I have been able to use the larger bins so far. I also bastardized an old plastic bin that I used to hold all of my cutting and polishing pads. I figured I can put it here for now, and if I dont like it, throw it away later. I started to mount my tv, but 2 things happened, the mount that I ordered isn't going to work since I decided to corner mount the tv and one of the new 30ft cables is bad. So, that will have to wait. I will save that mount for later use since I am determined to have some sort of a golf simulator in the shop at some point. I didnt get photos of the process, but here are some as I am getting it sort of completed.

As you can see, it was a little chilly in the shop and my helper must have been just warm enough. I guess my old duck coat is warm enough for the shop.

IMG_3911.JPEGIMG_3913.JPEGIMG_3914.JPEGIMG_3918.JPEG

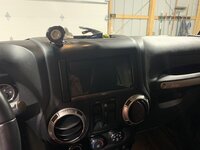
Then, I completed my first project in the shop without having to drag tools from my garage. I installed a new head unit in the Jeep. I dont know why I waited this long, but it was time for the OE unit to go. Of course, I didnt take any pics of it while it was on. It was late and I was tired and cold, and I was recovering from the root canal.

IMG_3920.JPEGIMG_3923.JPEG
 

rufus39

Member
Joined
Jul 9, 2013
Messages
8
Chris,
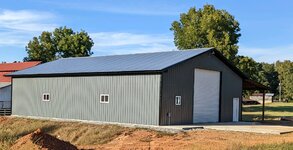
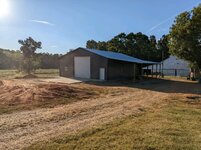
I just went through all of your posts. I really like what you've done. It looks great. I have just gotten a 40 x 60 x14 , with an attached 16 x60 shed dried in and started a little wiring. I went with a "pole barn " style, and I'm happy with it.
Would you mind sharing some info on your high bay lights and the ceiling fan ?
Both are items I'd like to add soon.
 

Attachments

  • 38721.jpeg
    38721.jpeg
    660.8 KB · Views: 55
  • 38722.jpeg
    38722.jpeg
    731.2 KB · Views: 55

eastmtn

Well-known member
Joined
Feb 28, 2019
Messages
335
Location
Western Washington
Holy ****! For some reason I wasn't getting notifications of your posts. I'm up to speed now. You took an idea and made it your own in a big way. I appreciate the whole hog attitude. Nice work!
If I had memories bound in steel and history like your grandfather's toolbox I would make the same effort as you to showcase them.
 

dmittz

Well-known member
Joined
Dec 2, 2016
Messages
1,298
For some reason I wasn't getting notifications of your posts either. Lots of great progress you have made. Glad your tooth is all fixed up, I had to get some similar dental work done end of last summer.
 

BigDaveZJ

Well-known member
Joined
Jun 26, 2012
Messages
163
Location
Centennial, CO
My wife's got a JK as well, and man that OEM head unit is garbage. Hoping to swap it for something with Android Auto at some point. Need to do the same in my ZJ too.
 
OP
C

Cdubu52

Well-known member
Joined
Sep 4, 2014
Messages
636
Location
Pittsboro, NC
Chris, Great job on the workbenches and tool area!
Thanks Scott. I appreciate it. You have anything going on in your shop lately? I noticed that you haven't posted anything in a while.
Holy ****! For some reason I wasn't getting notifications of your posts. I'm up to speed now. You took an idea and made it your own in a big way. I appreciate the whole hog attitude. Nice work!
If I had memories bound in steel and history like your grandfather's toolbox I would make the same effort as you to showcase them.
Well, in that case welcome back. I very much appreciate your complement on my work bench area. In the beginning, I had been looking at ideas for staining and maybe even painting the workbench in a funky way and when I saw your post, I knew exactly how I was going to proceed. I just didnt want you to feel like I was taking your idea for my own. Your posts were definitely a big help in researching and were the basis of my project.


As for that tool box, Im glad I have it and now I think I have decided to leave it as it is. I was going to refinish it, but I think I love it the way it is. My grandfather had an entire wall of those boxes at one point. He was in the welding industry all of his life and accumulated many tools and boxes, but by the time I was interested in learning from him, Alzheimer's and Dementia had taken over. I say I regret not learning, but I really never even got the chance to learn form him. By the time I got out of college and started my life, he was already past the point of being able to teach. My Step-grandmother sold or gave away a lot of his tools, not maliciously, but as needed to make sure that he was safe. I still have some of his other tools, but this box will stay with me forever.

For some reason I wasn't getting notifications of your posts either. Lots of great progress you have made. Glad your tooth is all fixed up, I had to get some similar dental work done end of last summer.

Thanks D, and welcome back as well. That is pain that I would prefer to never have again. I had never been so happy to go to the dentist in my life. Put it this way, I turned down golf because I was so uncomfortable.
 

Maxcustody

Well-known member
Joined
Oct 26, 2021
Messages
1,466
Location
West Virginia
Nothing very exciting……🤔 I have got some new tools here and there but no real changes to the shop. Last thing was adding a motion sensor light.
 
OP
C

Cdubu52

Well-known member
Joined
Sep 4, 2014
Messages
636
Location
Pittsboro, NC
Chris,
I just went through all of your posts. I really like what you've done. It looks great. I have just gotten a 40 x 60 x14 , with an attached 16 x60 shed dried in and started a little wiring. I went with a "pole barn " style, and I'm happy with it.
Would you mind sharing some info on your high bay lights and the ceiling fan ?
Both are items I'd like to add soon.

Rufus, Thanks for tuning in. I will have to get you some information on the lights. My electrician sourced them locally. As for the fan, I ordered it on Amazon. Its obviously a Big *** Fan knock off, but for 1/10th of the price, it was worth it to me.

 
To avoid these ads, REGISTER NOW!
Top Bottom