To avoid these ads, REGISTER NOW!

Above 1200 Sq/FT Restored 1930's Auto Shop

Wokspaces above 1200 squarefeet.
OP
B

BB767

Well-known member
Joined
Dec 24, 2009
Messages
3,724
Location
Philo, IL
I think it simply has to do with ergonomics. Oil cans by their very nature, get slippery, the smaller diameter allows you to get a grip. Notice the can on the left is a larger diameter, but has a handle. I'd say the one on the right does also.

Take a look at any household cleaning sprayer, and they have the same general shape.

Nuts

Frankly, my first impression was that it's just a small oil can placed into the opening of a larger can. I figured it was to keep it from tipping over by providing a larger base. If you look at the picture closely it does not appear to be all one sealed piece. I have a smaller oil can just like the top one and if the surface you place in on isn't dead level and the oil amount inside is low, it'll easily topple over. Very annoying.

BenchNRm2005sm.jpg


As we all know finding a clean level spot on any of his benches was something of a challenge. :wtf: 
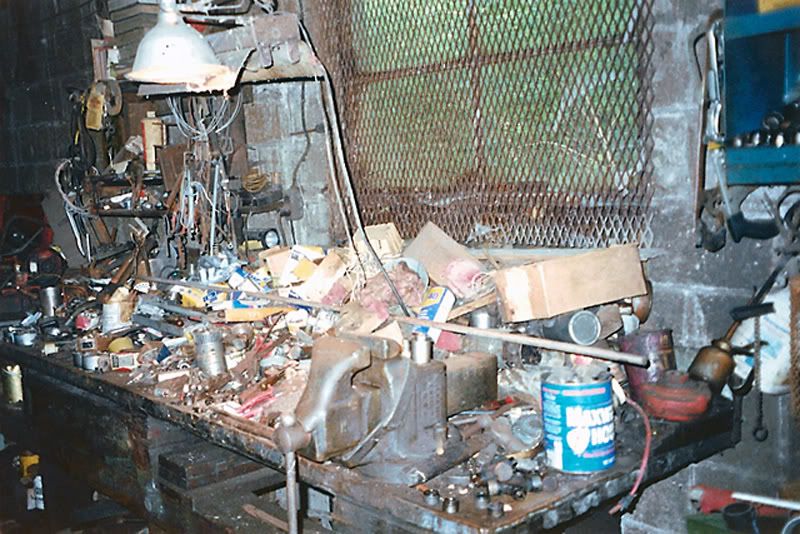
Note the oil can in the back right of his bench.

I'll take a look shortly once I'm home. Soon, very soon now.

Thomas
 
To avoid these ads, REGISTER NOW!

willy3486

Well-known member
Joined
Jan 14, 2010
Messages
1,592
Location
Middle Tennessee
Wasn't stone bush hammers a grunge rock group in the late 90s? Seriously all kidding aside isn't that a hammers stone and concrete workers use to texture stone and concrete to give it a weathered look? I think it is.
 

Omphaloskeptic

Well-known member
Joined
Oct 11, 2008
Messages
2,346
Location
Ultima Ratio, Wa.
Re: "Y MANIFOLD UPDATE"

I guess that old saying is true - "One man's junk IS another man's treasure!"

Considering the way it was gifted by Thomas and Chris, and the way it was presented by Charles, it becomes a treasure all the more! Bravo:bowdown:
 

birdman1

Well-known member
Joined
Jul 10, 2008
Messages
74
Location
Erwin, N C
I have never seen this much interest--and it's great!!!!!!!!! As a sentimental, guy and a Johnson (no relation) I think is is great that you could, and would rework the shop into a work of art. Most folks would have ran a dozer through it and hauled it off. Thanks for bring the old gal back to life.
Mike J.
 

BigDaddyUSMC

Well-known member
Joined
Oct 30, 2010
Messages
105
Location
Santee Calif
Re: "Y MANIFOLD UPDATE"

I guess that old saying is true - "One man's junk IS another man's treasure!"

Considering the way it was gifted by Thomas and Chris, and the way it was presented by Charles, it becomes a treasure all the more! Bravo:bowdown:

This is a TRUE TREASURE , considering Al Jerauld only made 50 of these Y manifolds in the late 1940's. this pre-dates Vic Edelbrock Sr SLONGSHOT
 
OP
B

BB767

Well-known member
Joined
Dec 24, 2009
Messages
3,724
Location
Philo, IL
Eco Air Meters:

Booksm.jpg


HISTORY OF ECO

The first ECO air meter was made around 1916 or 1917 by the Western Manufacturing Company, of Oskoloosa, Iowa. The oldest patent record that I have found is from 1914.

It appears that the first ECOs were actually called the Economy Air Meters. The name was then shortened to ECO and is pronounced EEEECO, not ECHO.

The earliest advertisement I have is for the ECO No. 8, from around 1917. The first seven were probably the Economy Air Meters. The Model 8 through the Model 20 (the number Model 20 was used twice, this is the early 20) had an unique option, it could be purchased equipped with a coin attachment. The coin attachment would require the motorist to put in a nickel, dime or quarter to get some air. I personally doubt that many of these were sold. I do know of two 1917 ear ECOs having been found and have personally seen one.

During the 1920s the Western Manufacturing Company also made equipment used to repair Model T Fords. They made engine stands, transmission stands, etc. To see some of the equipment they made, click HERE.

Around 1925, ECO announced a new series of air meters which we have nicknamed the ECO 19 Series Air Meters. There were at least eleven different units in this series.

In 1928 the ECO Division of the Western Company was purchased by the Service Station Equipment Company. SSEC moved ECO to their Bryan, Ohio factory. Bryan, Ohio, is a small town, but at the time it was also the home of AERO, a large manufacturer of automobile lubrication equipment. There may be a connection here.

Around 1930 the ECO Division was again moved, this time to Muskegon, Michigan, the home of the Bennett Pump Company, also a division of SSEC.

In 1931 five new ECO Air Meters were announced, we refer to them as the ECO 39 Series Air Meters. With the depression, this was not the best time for high price equipment, so in 1932 three more units were announced, the ECO Series 15 Air Meters. These were a very simple unit, selling for the lowest prices ever charged for an ECO meter.

In 1933, SSEC, feeling the effect of the depression, decided to consolidate their operations. Both ECO and the Bennett Pump Company were moved to the SSEC operations in Conshohocken, Pennsylvania. Before they moved, all the 39 Series and the 15 Series ECOs had the word ECO embossed on the front of the meter. During the time they were in Conshohocken, the letters SS were embossed on the front of the meter. 1934 saw the announcement of a new series of ECOs, the 33 Series Air Meter. These units contained the same mechanism that the previous series had.

In 1937, all SSEC operations returned to Muskegon, Michigan.

SSEC continued to sell the 33 Series through 1950, but they introduced the 90 Series ECO in 1947. This is the unit we are all familiar with. 1948 saw the introduction of the first ECO Islander, the 120 Series. These units were made for only four years and are very rare today. In 1952, ECO announced the 240 Series Islanders, which were made for many years. The ECO Model 97 and 98 are still being made today, but they are a great deal different than the older ones.

One more important thing about ECO. Every mechanism found inside a Gilbarco Air Meter was made by ECO, also it appears that most if not all mechanisms found inside the American Pump Company air meters were made by ECO.

*** The above is all courtesy of Jack Sim, author " An Illustrated Guide To Air Meters" Please note the Values as seen are several years old and are no longer valid.

So as previously mentioned, the ECO air meter unit that's on the outside wall of the old shop is an ECO Model 97 and the pedestal unit that's outside the barn is a ECO model 98. Both were manufactured in 1953. The wall unit needed a refreshment so the insides were cleaned...

IMG_3432.jpg


...new copper lines were fabricated....

IMG_3434.jpg


...internal parts cleaned, calibrated and refurbished...

IMG_3436.jpg


...then it was reassembled into the frame which along with the outside covers were all powder coated for durability.

IMG_3438.jpg


IMG_3437.jpg


IMG_3439.jpg


The springs were cleaned and painted.

IMG_3440.jpg


I used stainless steel hardware everywhere I could.

IMG_3451.jpg


Where you use stainless hardware you need to coat the threads with never-seize to prevent galling. Over time stainless can seize when threaded into dissimilar metals.

IMG_3441.jpg


The face plate is porcelain over steel...

IMG_3446.jpg


... and the edges of it had small chips that if not addressed would slowly rust.

IMG_3445.jpg


There were also spots on the back of the face plate as well as the cut outs for the numbers that need to be sealed to prevent further deterioration.

IMG_3447.jpg


I used "Rust Converter"...

IMG_3442.jpg


... applied with a Q-Tip to seal the rust.

IMG_3443.jpg


That will prevent the rust from slowly "bleeding" streaks down the face plate over time.

IMG_3448.jpg


The face plate was then hung out to dry.

To be continued...

Thomas
 
Last edited:
OP
B

BB767

Well-known member
Joined
Dec 24, 2009
Messages
3,724
Location
Philo, IL
Y MANIFOLD UPDATE
Hello race fans...
Today I went to Jacob's house to watch the Steelers game. While I was there, I took photos of the AL JERAULD Y Manifold. It has been cleaned up . The lettering has been highlighted with red paint & given a few coats of clear coat. The manifold has been mounted on a black marble base with 4 brass plates. One is a tribute to AL JERAULD & George Barber, another is a likeness of JERAULDS SPEED SHOP business card from back in the day, the third is a laser etched photo of the Jerauld Belly Tank dry lake record car & the fourth plate thanks Thomas & mself for getting the Y manifold to him
Here are some photos
The first two photos are Thomas' photos of the manifold when he found it
47617_1760471132530_1261594482_2006379_244139_n.jpg

68286_1760471332535_1261594482_2006380_5266958_n.jpg


This is what the manifold looks like today
167108_1805221091251_1261594482_2093867_1267488_n.jpg

168584_1805221211254_1261594482_2093868_3761816_n.jpg

165136_1805221851270_1261594482_2093869_8290981_n.jpg


Jacob isn't done with his manifold yet..
He plans on getting 2 Stromberg 97 Carbs ,2 velocity stacks & the carb linkage for his Y manifold
I will post more photos when the project is finished

AGAIN
Thank You Thomas , You have made an old gear head happy

Charles, many, many thanks for the great pictures and update on the manifold. It looks terrific and I can't wait to see it with the Strombergs on it. The display Jacob created is outstanding. When you look at that manifold in my first two pictures, who thought it would wind where it is today? :)

The brass plate acknowledgment is a nice touch. Please pass my best on to Jacob on behalf of myself and everyone here on this thread.

Thomas
 
OP
B

BB767

Well-known member
Joined
Dec 24, 2009
Messages
3,724
Location
Philo, IL
I have never seen this much interest--and it's great!!!!!!!!! As a sentimental, guy and a Johnson (no relation) I think is is great that you could, and would rework the shop into a work of art. Most folks would have ran a dozer through it and hauled it off. Thanks for bring the old gal back to life.
Mike J.

Thank you Mike for that kind thought. Calling the shop a work of art might be a bit much..............but then again maybe not. :bounce: It's been a grand adventure so far that I wouldn't have missed for anything! And the fun continues with all the new friends Chris and I have made as a result of this thread. :thumbup:

Thomas
 

hobbitss

Well-known member
Joined
May 31, 2010
Messages
341
Location
Southestern Massachusetts
Eco Air Meters:
So as previously mentioned, the Eco air meter unit that's on the outside wall of the old shop is an Eco Model 97 and the pedestal unit that's outside the barn is a Eco model 98. The wall unit needed a refreshment so the insides were cleaned...

IMG_3432.jpg


...new brass lines were fabricated....

IMG_3434.jpg


...internal parts cleaned, calibrated and refurbished...


To be continued...

Thomas

Hmmmm.... The internal Lines appear to be Copper with Brass fittings and it looks like you may have a kink in the one on the left with the wrap of black electrical tape....
It has been a few decades since I worked in an Electrical-Mechanical Lab but back then we used a soft metal with low melting point, in rod form, to fill thin wall plastic tubing before bending, to prevent kinking... After bending it was then warmed to remove by letting it flow out of the tubing... You might be able to use lead or old solder to perform the same function with the copper tubing if needed...
 
OP
B

BB767

Well-known member
Joined
Dec 24, 2009
Messages
3,724
Location
Philo, IL
Hmmmm.... The internal Lines appear to be Copper with Brass fittings and it looks like you may have a kink in the one on the left with the wrap of black electrical tape....
It has been a few decades since I worked in an Electrical-Mechanical Lab but back then we used a soft metal with low melting point, in rod form, to fill thin wall plastic tubing before bending, to prevent kinking... After bending it was then warmed to remove by letting it flow out of the tubing... You might be able to use lead or old solder to perform the same function with the copper tubing if needed...

Bless your heart Joe. I had just gotten home from my day job, flown over 5,000+ miles and had been up for over 26 hours without some long, proper sleep. Since I hadn't had a decent post on here for several days I decided to compose one before I was rested and that's what I get! :eek: I got up this morning, reviewed that post, saw that mistake and a couple other minor errors and hoped to get it edited before anyone saw it...... No such luck, you were right on top of it!! The post has now been edited to hopefully correct that and all other errors.

Those are indeed copper lines with brass fittings. The electrical tape is where the gray sub-cover passes by that line (see the 3rd and 4th pictures). It clears the line, but not by as much as I'd like. I'm just making sure that should it inadvertently contact the line in the coming years no dissimilar metal corrosion will occur, plus it might help slow or stop a hole from being worn through the line.

I've told you guys before........watch me like me a hawk!! :)

Sorry about that.

Thomas
 
OP
B

BB767

Well-known member
Joined
Dec 24, 2009
Messages
3,724
Location
Philo, IL
Let's try continuing with the air meter now that I'm better rested. (Nothing like making a goof up to start your day is there?? :sad:)

IMG_3841.jpg


Once the rust converter dries it's paintable. The converter turns black so where it shows around the edges of the number window cutouts I used a little Testors white enamel paint. Only on the sides of the cutouts, not on the face itself.

IMG_3845.jpg


The face plate is held on by screws that have white felt washers under the heads. This is to prevent cracking the porcelain on the face plate when tightening the screws. There were a couple of scratches on the face plate and I didn't think I could match the color close enough so I just waxed the the face plate. That should keep those scratched areas from rusting for a long time. (the screw heads won't show, no need to clock them)

IMG_3846.jpg


I don't know of any place to get theses special white felt washers, not being reproduced to the best of my knowledge. I'm just fortunate enough that my air meter still had the originals. A little cleaning and they were good to go.

IMG_3460.jpg


The word AIR on the front is illuminated and light from that spills down the front so the meter is legible and usable at night. You have to disassemble an awful lot of "stuff" to change that bulb. So I hunted down.....

IMG_3154.jpg


...2.5 watt LED bulb for it. GE says it's good for 12,000 hours so I should get a few years use before it needs to be replaced. :thumbup:

IMG_3865.jpg


The seals for the front and rear covers were also replaced. They are only at the tops of the frame. That's the black material seen around the edge of the frame.

IMG_3838.jpg


Here are the covers, newly powder coated.

IMG_3849.jpg


Since they were powder coated I ran a tap down the threads to clean them up before installing them.

IMG_3851.jpg


Some of the mounting hardware.

IMG_3857.jpg


IMG_3856.jpg


You can see that the screws for the face plate don't readily show.

IMG_3855.jpg


You have to look in the side to see them. That's a good way to check to see if those felt washers are there or not. If you're looking to buy one of these air meters and it's got those white felt washers there's a good chance it hasn't been "messed" with too much and the face plate is probably not cracked under the screw heads.

IMG_3858.jpg


IMG_3859.jpg


I waxed the data plate and used new stainless steel screws on it.....

IMG_3861.jpg


... and on the cover screws and washers also. If a piece of equipment is being used outside I really like using stainless hardware wherever possible. It's readily available anymore, and I find it's not all that expensive.

IMG_3866.jpg


The hose hook had to be installed before the front cover is fully installed. That's a fun trick to do by yourself and any of you who have done this, you know what I mean!!

IMG_3867.jpg


IMG_3868.jpg


Not completely done yet, to be continued....

Thomas
 
Last edited:

Amitygravel

Well-known member
Joined
Mar 26, 2010
Messages
1,188
Location
Claremont Illinois
Hello Thomas

The air meter is just plain beautiful. It looks like a jewel on the bench. Regarding the felt washers , I was thumbing through the Grainger catalog recently and they carry different grades of felt sheet in several thickness' if you ever need to replicate such an item.


Craig
 
Last edited:

ksp683

Active member
Joined
Oct 4, 2010
Messages
33
Location
Regina, SK
Wow!! I just read every page of this thread in the last 3 days. Simply amazing work and attention to detail. Chock me up as another Canadian fan of your shop.
 

FordExec

Member
Joined
Nov 21, 2010
Messages
13
If you ever refurbish another air meter and can't find the felt washers, you can also pick up a set of self-adhesive ring reinforcements from any office supply store. They'll protect the porcelin finish and won't shift when installing the screws.

bb
 
OP
B

BB767

Well-known member
Joined
Dec 24, 2009
Messages
3,724
Location
Philo, IL
This intrigues me,
why 2 different diameter barrels in what looks to be an ordinary oil can,

Now if it had a separate opening to the bigger barrel, as a separate chamber, You could just imagine a hot water jacket keeping the oil from getting more viscous on a cold day.:lol_hitti

There must have been a lot of oilers out there in the day, so economy of manufacture must have been an issue, why go to that expense?

Those heating oil tanks, were they converted later into tanker trailers for farmers use, or just for scrap steel sheet use, can see possabilities with those.
sorry for all the question but thats the way my mind works....

looks like one of the weights from your scales, the one with the wood upright, has got separated from home, or is that another scale, that one had a hanger on didn't it?

Edit, did a bit more searching
BTW the "Search this forum" button option is very useful)
this is the scale I remembered, but it is a balance arm type with the weights having key hole slots to fit on that wire hanger, looks like a replacement wire.
So, have you come across a second scale, probably with 2 platforms one for sacks, the other for the weights.
that weight with the cast in handle looks like it could be a 28 lb one, I also saw 56lb ones, most commonly. I suppose there were also 14lb ones but dont recall seeing them.
In Devon in the 1960-70s they were quite common still, as many Farmers used them to check weight their corn sacks to see the corn merchant gave them correct returns

Don, here's a follow up to some of those items you wondered about.

First about the two sized oil can...

IMG_3828.jpg


I was sure at first it was an oiler like this placed in a larger bottom can.

IMG_3825.jpg


But upon closer inspection it is indeed one can.

IMG_3826.jpg


It was obviously two cans that the manufacture combined to keep the tooling costs down and then were able to offer a can with more volume. When you unscrew the top, it has a long pickup tube the goes the length of the can. I wanted to take a picture, but it had oil in it and it would have been very messy to do so.

Next the heating tanks. They were never used for anything special that my friend can remember. He said his Dad was offered them and he kept them "in case" a need for them ever came up. It never did. My buddy did make a hog roaster out of one of them. He said they were the perfect size for that.

Now about that weight...

IMG_3835.jpg


...the one with the cast in handle. Here it is after I had it powder coated.

IMG_3833.jpg


It has US STANDARD cast into it. I could find no other marking on it. I believe it's a 50# weight. I don't know what it's original use might have been. There were no other scales on the property except for the one pictured earlier.

Lastly the stone bush hammer...

IMG_3824.jpg


That makes much more sense. What Mr. Johnson used it for...who knows? :dunno: Note from this view that the handle is off set. There were no markings on it. Once it's cleaned up. perhaps something will show up.

Now Don, don't get sun burned in sunny Devon, OK? Thanks for your interest.


Thomas
 
To avoid these ads, REGISTER NOW!
OP
B

BB767

Well-known member
Joined
Dec 24, 2009
Messages
3,724
Location
Philo, IL
Hello Thomas

The air meter is just plain beautiful. It looks like a jewel on the bench. Regarding the felt washers , I was thumbing through the Grainger catalog recently and they carry different grades of felt sheet in several thickness' if you ever need to replicate such an item.


Craig

Thanks Craig. Graingers' has just about everything doesn't it? Did it happen to mention color?

Thomas
 
OP
B

BB767

Well-known member
Joined
Dec 24, 2009
Messages
3,724
Location
Philo, IL
As they say...it's all in the details!

Amazed Tom!

Rich

Rich you are so right, it is all in the details. The problem is knowing when it matters and when it doesn't. There were times during construction I would find myself getting bogged down in a detail and my son kept me centered and moving forward. It's a balance really isn't it?

Thomas.
 
OP
B

BB767

Well-known member
Joined
Dec 24, 2009
Messages
3,724
Location
Philo, IL
Wow!! I just read every page of this thread in the last 3 days. Simply amazing work and attention to detail. Chock me up as another Canadian fan of your shop.

Thanks for checking in here and maybe for sacrificing some sleep during the read?
Welcome to the thread and consider yourself chocked. :thumbup:

Thomas
 
OP
B

BB767

Well-known member
Joined
Dec 24, 2009
Messages
3,724
Location
Philo, IL
You, and now all of us, will know they are not clocked!:lol_hitti

Ok the truth is I tried to clock them even though they wouldn't show....


IMG_3845.jpg


...but it would of had some of them either too loose or too tight. Since the face plate was porcelain I didn't want to chance cracking it so they were tighten to my satisfaction and I let it go at that. See it's just a habit pattern. It really takes no appreciable extra time, just effort. :)

THomas
 
OP
B

BB767

Well-known member
Joined
Dec 24, 2009
Messages
3,724
Location
Philo, IL
If you ever refurbish another air meter and can't find the felt washers, you can also pick up a set of self-adhesive ring reinforcements from any office supply store. They'll protect the porcelin finish and won't shift when installing the screws.

bb

Yes, that's a possible alternative. When the screw head contacts the reinforcement though it might bunch it up. I guess you'd have to experiment with it. Thanks Bill.

Thomas
 

Omphaloskeptic

Well-known member
Joined
Oct 11, 2008
Messages
2,346
Location
Ultima Ratio, Wa.
Thomas,

That ECO meter is such a fine piece and was given a primo restoration by yourself. You realize of course that people are going to come from miles around just to 'air-up' at the old Johnson place; and they won't have to feed any coins to do it! lol:bounce:
 

hobbitss

Well-known member
Joined
May 31, 2010
Messages
341
Location
Southestern Massachusetts
Ok the truth is I tried to clock them even though they wouldn't show....


IMG_3845.jpg


...but it would of had some of them either too loose or too tight. Since the face plate was porcelain I didn't want to chance cracking it so they were tighten to my satisfaction and I let it go at that. See it's just a habit pattern. It really takes no appreciable extra time, just effort. :)

THomas
Now you have a reason to order additional felt washers....

:deadhorse
 
OP
B

BB767

Well-known member
Joined
Dec 24, 2009
Messages
3,724
Location
Philo, IL
OP
B

BB767

Well-known member
Joined
Dec 24, 2009
Messages
3,724
Location
Philo, IL
Will have to get it recalibrated now you added weight to it... ;)

IMG_3833.jpg

Nice one Rick.............. would you believe me if I told you I calculated the amount of metal lost to rust and pitting and then calculated how much powder it would take to replace that metal so that it now weights EXACTLY 50 lbs?


And while we're at it, I've got this bridge in Brooklyn and some swamp land in Florida all for sale too........they both need a little work........but you could double your money in no time..........why you'll thank me later I'm sure........ just between friends of course........:D

Thomas
 

51rider

Well-known member
Joined
Dec 21, 2009
Messages
502
Location
London, England.
Actually its a bridge in London.................................................................Oh wait, did n't we sell it to you once before...:lol_hitti

& I for one do believe you would have restored the weight properly to ensure it was bang on the stated amount.

It reminds me of counter balance calibrating weights used when setting up lifts (elevators).
 
OP
B

BB767

Well-known member
Joined
Dec 24, 2009
Messages
3,724
Location
Philo, IL
Walker Floor Jack update:

IMG_3807.jpg


We have mixed about a dozen different powder color combinations trying to find the magic one. It seemed the colors were always in between two colors that were mixed. The sample paint chips were pretty small.

IMG_3808.jpg


We think we've got the color now so I cleaned up the cover plate and we're going to powder coat it as a test run. Before we do that there were some minor dents in the cover that have now been removed. Overall the cover was in amazingly good condition. It needed very little attention.

IMG_3809.jpg


This is the back side prior to cleaning, still with it's original paint. With a larger area now to look at painted, I think it'll be easier to make sure the color will work. The problem we ran into is there are several slightly different colors on the jack in different places. I'm satisfied the area we're trying to match is pretty representative of the jack overall. I'll get the coated cover posted on here as a preview.

BTW...Chris and I finally got to see "American Pickers" for the first time. Now I know why everybody brings that program up when they see pictures of the shop just after we bought it. Nice guys but I am soooooooooo glad I got the shop before they descended on it. Imagine what was historical to the shop that would have been carted off only to wind up 1,000 miles from here. All context would have been lost. I could just see a chain saw coming out and the Terraplane being trailered off onto the sunset............:hellobye:

Thomas
 

Motown 454

Well-known member
Joined
Sep 25, 2008
Messages
1,359
I'm like a bad penny I keep showing up. lol I enjoy seeing all the new stuff your finding.
 
OP
B

BB767

Well-known member
Joined
Dec 24, 2009
Messages
3,724
Location
Philo, IL
Do you do you own powder coating or do you take it somewhere in Chambana?

A man's got to know his limitations. I don't do body work, I don't do major automotive painting and I don't do powder coating. I use two places. The company in Charleston, R & B, has an enormous oven. You could drive a school bus into it and I'm not kidding. They can do production runs of 10,000 pieces or more if need be. They did all the seats at the Lucas Oil Stadium in Indianapolis for example. A company with a smaller oven and much closer in Villa Grove, Creative Dust Powdercoating, can do some incredibly detailed, close tolerance work. They can powder coat the signature on an aluminum beer can for example. Depending on what needs to be done determines where I go. Great guys at both and now with their names being mentioned here, I fully expect ...ahem....a Christmas card as someone mentioned earlier. :)

And speaking of powder coating...

IMG_3805.jpg


...I just had the shelves on these units in the barn storage room done. They came out of a warehouse and were not too bad but they are absolutely like new now. Powder coating shelves makes so much sense, as you slide stuff on and off it will hold up over the years.


Thomas
 
Last edited:
OP
B

BB767

Well-known member
Joined
Dec 24, 2009
Messages
3,724
Location
Philo, IL
I'm like a bad penny I keep showing up. lol I enjoy seeing all the new stuff your finding.

There are two corners, one in the tool shed and one in the lean-to that are unexplored as yet. I see some interesting "items" lurking about back there and I'm working my way in. With the additional shelf space now opening up in the barn I've got a place to put some of it once it's sorted out.

I'd hoped to get that done last summer. Turns out that was a little ambitious but I did manage to finish the 2 car garage. Honey house just has one cabinet full of old car radios and dash instruments. That should go pretty quick. It's going to be 2 degrees F (-16 C) tonight. I'm not real motivated to scrounge around out there right now.

Thomas
 
To avoid these ads, REGISTER NOW!
Top Bottom