To avoid these ads, REGISTER NOW!

Between 265 & 485 SQ/FT Nick's Two-Car Detached Vdub Garage

Workspaces sized between 265 and 485 squarefeet.

Unruh

Well-known member
Joined
Aug 12, 2017
Messages
1,431
Location
Silverdale, Washington
I think bdbecker and some others commented that there are better true baltic birch options at Menards vs. the PureBond stuff I get at Home Depot. I would agree with that and next time I do a furniture-y project I'll definitely be looking at a different source.


I listen to the Wood Talk Podcast (You should check it out, it is great). It has three guys, Matt Cremona, Marc Spagnuolo, and Shannon Rogers, they all talk about how Home Depot/Lowes plywood is awful. They have all experienced open voids and Shannon said he once got a piece that wasn’t glued all the way through. I still use it, but only because Home Depot is about 5 minutes from my house.
 
To avoid these ads, REGISTER NOW!
OP
N

nicholam77

Well-known member
Joined
Dec 18, 2016
Messages
2,659
Location
Minneapolis, MN
I listen to the Wood Talk Podcast (You should check it out, it is great). It has three guys, Matt Cremona, Marc Spagnuolo, and Shannon Rogers, they all talk about how Home Depot/Lowes plywood is awful. They have all experienced open voids and Shannon said he once got a piece that wasn’t glued all the way through. I still use it, but only because Home Depot is about 5 minutes from my house.

Cool, thanks for the reco! I'm familiar with Matt and Marc. Sounds up my alley.

:beer:
 
OP
N

nicholam77

Well-known member
Joined
Dec 18, 2016
Messages
2,659
Location
Minneapolis, MN
A few small projects and shop improvements

I often take off the front rail guide off of my tracksaw bench because it sticks up over the surface and gets in the way of large items, as well as vertical clamping. But I want to put it back in the exact same spot so my kerf line doesn't get messed up. Previously I had drawn a pencil line on the bench and would line it up by eye. But today I had the genius idea of adding a stop screw.

IMG-2750.jpg


The nice square edge of a Kreg screw head worked perfect for this. Now the rail guide butts right up to it and clamps down, I can take it on and off with perfect repeatability.

IMG-2751.jpg


Next I had been to Home Depot to pick up some materials for a drill press clamping table. I decided to laminate 3/4" melamine for the top with some 1/4" MDF on the bottom, for a total thickness of 1". I don't know if I'll end up regretting melamine, I've never used it before, but it was cheap and I was curious to try.

Worried about chip out I dimensioned it on the track saw station:

IMG-2754.jpg


IMG-2755.jpg


The Makita saw has a "scoring" feature that locks the blade depth to 2mm. You cut through the material backwards at 2mm, at then make a full depth forward pass. After all the chip out horror stories I've read about melamine, to my utter shock both the workpiece and the off cut came out with perfect edges!

IMG-2752.jpg


One PITA about the track saw station is there's no good place to set the saw in between cuts. It has to come off the rail to switch in a new piece of wood. A lot of track saw users make "holsters" to set it in in-between cuts. So I found a design I liked on Pinterest and more or less copied it. Didn't take photos of the "build" as it was a quick scrap project, but pretty easy with a jig saw.

It's just screwed together but one thing of note is I drilled recessed holes for the screw heads on the drill press. No real reason, just thought it would look cool and wanted to get some practice in.

IMG-2765.jpg


IMG-2766.jpg


IMG-2767.jpg


It attaches to any of the T-Track with 1/4 20 hardware. I'm going to pick up some proper knobs for it instead of nuts.

IMG-2768.jpg


IMG-2769.jpg


IMG-2771.jpg


The design angles the platform of the holster nose down, to prevent it from accidentally getting pulled out (especially important when the power cord and vacuum hose are hanging out!

Pretty happy with how it came out!

:beer:
 

Grumblebum

Well-known member
Joined
Aug 10, 2015
Messages
1,940
Location
Wollongong Australia
That’s gold Nick. I was not really content placing mine down on the ground the other day when ripping some sheets, will have to make one too now :bowdown:

GB
 

Unruh

Well-known member
Joined
Aug 12, 2017
Messages
1,431
Location
Silverdale, Washington
Nick that looks great! Those are the kind of projects I really enjoy seeing. I’m always looking for ways to make my garage more efficient and often it’s the little things that save the most time.
 
OP
N

nicholam77

Well-known member
Joined
Dec 18, 2016
Messages
2,659
Location
Minneapolis, MN
That’s gold Nick. I was not really content placing mine down on the ground the other day when ripping some sheets, will have to make one too now :bowdown:

GB

Thanks GB! Haven't been able to test yet, but ya, it's awkward not having a place to set it!

Nick that looks great! Those are the kind of projects I really enjoy seeing. I’m always looking for ways to make my garage more efficient and often it’s the little things that save the most time.

Very true. I think that's true both in the shop and in everyday life, that the small, oft-repeated tasks can benefit the most from efficiency. My wife would disagree but honestly little shop improvement projects are usually more fun for me than the "real projects". :bounce:
 
OP
N

nicholam77

Well-known member
Joined
Dec 18, 2016
Messages
2,659
Location
Minneapolis, MN
You do realize that your "ooop's" cost the rest of us a lot of money, right?


:D


:beer:

This! Almost all of my Christmas list is from someone’s “whoops”!

Oh Great!

Bret

Ha, I take no responsibility! :lol::lol::lol:

And Bret I've been fighting the urge on that Paolini Pocket rule ever since it showed up in your thread :)

I like to think we all encourage each other. GJ can definitely be a dangerous place to hang out.

Okay, now you're out of line... over 24 hours from the teaser pic and no follow up unboxing pics? That's just not nice.

LOL! Not intentional I swear, just busy. I'll try to grab a pic tonight. But to spill the beans and not keep you in suspense any longer, it's just some kit for the drill press clamping table :D
 
OP
N

nicholam77

Well-known member
Joined
Dec 18, 2016
Messages
2,659
Location
Minneapolis, MN
Here’s a little preview:

aa124d390df7df14848aac7abd7a0be8.jpg

T-tracks and fence for drill press, a flip stop, and a hold down clamp. Basically their cheapest drill press setup w/o the table.

I’ll try and share more tonight. [emoji16]


Sent from my iPhone using Garage Journal
 

Attachments

  • aa124d390df7df14848aac7abd7a0be8.jpg
    aa124d390df7df14848aac7abd7a0be8.jpg
    73.8 KB · Views: 0
OP
N

nicholam77

Well-known member
Joined
Dec 18, 2016
Messages
2,659
Location
Minneapolis, MN
Drill Press Clamping Table - part 1

Going to make up for the lack of pics you guys are requesting. :lol: Got off work early and had some time in the garage. Some of this was done previously, too.

As seen in post #883, I had dimensioned the melamine top for the drill press clamping table on the track saw station. After that, I cut a slightly oversized 1/4" MDF sheet and laminated the two together. This was just to increase the thickness a bit to 1".

Knowing wood glue wouldn't stick to melamine, I wasn't sure what to laminate them with. I didn't have contact cement or anything like that, so I ended up using 3M spray adhesive. I hope it adhered well enough.

IMG-2795.jpg


Worried about the adhesive, in addition to clamps, I sunk a bunch of screws in the middle and around the edges for additional strength and clamping force.

Here you can see the finished melamine-MDF sandwich:

IMG-2883.jpg


After the "glue-up" I had flush trimmed the MDF to the melamine at the router table, but forgot to take a pic.

Next was edge banding the sides, which I've documented before for plywood -- same process and used the vertical clamping on the MFT to make this easier:

IMG-2885.jpg


IMG-2886.jpg


Next was routing dados for the Woodpecker fence T-Tracks. They are 1 3/4" wide and 1/2" thick so I had to take many passes at the router table.

IMG-2890.jpg


I used a trailing backer board to try and prevent chip out.

IMG-2887.jpg


For the final pass I set the cutter height using the actual T-Track as reference for depth.

IMG-2891.jpg


It went pretty well.

IMG-2894.jpg


Some small defects but for my first time working with melamine I'm not too mad.

IMG-2895.jpg


The T-Tracks attached from the underside with nuts and bolts so I drilled those holes and countersinks on the drill press.

IMG-2896.jpg


Got them attached and here are some pics of the finished assembly:

IMG-2910.jpg


IMG-2909.jpg


IMG-2912.jpg


Flip stop:

IMG-2913.jpg


Hold down clamp:

IMG-2917.jpg


IMG-2915.jpg


So there you go. My thinking on getting the Woodpecker stuff was

1) to save time building everything from scratch
2) I would have to buy T-track and some hardware anyways, which can add up

I've made a lot of "custom" DIY solutions that end up being more expensive than just buying a product. In this case the base fence and t-track kit was $59 which I thought was pretty reasonable, and then build my own table surface. Of course there's tax, shipping, and I added the flip stop and hold down clamp, so it got ramped up a bit, but I'm still feeling good about it.

Before it's usable I still need to create the mechanism to fasten it to the built-in drill press table. And add a replaceable tearout insert like the real Woodpecker (and many other commercial) drill press tables have.

:beer:
 

loganb

ALLIANCE MEMBER
Joined
Dec 29, 2011
Messages
5,532
Location
Omaha, NE
Top notch work as always and thank you for slowing down to take pictures and share!

Another thing on the list I need to do now... after I make the mobile base for the drill press that wouldn't be on the list except for the bad influences found here on GJ!

Sent from The Garage Journal mobile app
 

Unruh

Well-known member
Joined
Aug 12, 2017
Messages
1,431
Location
Silverdale, Washington
Very nice! That “T” track looks great. I’ve been thinking about building a miter station ever since Brett built his (thanks GJ) and I was looking at some colored MDF for the top. The stuff looks kinda cool. I’ll for sure take a closer look at those “T” tracks though if I do ever build the station!
 
To avoid these ads, REGISTER NOW!
OP
N

nicholam77

Well-known member
Joined
Dec 18, 2016
Messages
2,659
Location
Minneapolis, MN
Top notch work as always and thank you for slowing down to take pictures and share!

Another thing on the list I need to do now... after I make the mobile base for the drill press that wouldn't be on the list except for the bad influences found here on GJ!

Thanks, and happy to contribute to your projects :lol:

Very nice! That “T” track looks great. I’ve been thinking about building a miter station ever since Brett built his (thanks GJ) and I was looking at some colored MDF for the top. The stuff looks kinda cool. I’ll for sure take a closer look at those “T” tracks though if I do ever build the station!

That sounds cool, I like the idea of colored MDF. Woodpeckers does sell the dual T-Tracks separately from the drill press kit with no scale engravings... but sadly not in the anodized red (they are just plain aluminum). I suppose you could use the ones in the DP kit but some of the parts that come with it might be a waste. Another very similar and snazzy option is Incra's TT+, which is fitted with their Lexan scale, both adjustable and removable.

Looks nice. A suggestion: using the shorter arm on the material will grip better, since the lever end is closer to the fulcrum.

Good tip, thanks!
 
OP
N

nicholam77

Well-known member
Joined
Dec 18, 2016
Messages
2,659
Location
Minneapolis, MN
The snow reached us yesterday :wtf:

IMG-2975.jpg


Not thrilled about it because it's going to stay cold this week, and I have a ton of yard, house, and car chores to prep for winter yet. Our 3 gigantic Silver Maples have most of their leaves still.

GTI got a sloppy drive in. Now it needs a wash even more.

IMG-2973.jpg


Because of warm ground temps the snow was VERY wet and heavy, so I broke out Big Red (the new Toro) and am happy to say it had no qualms! Started right up and performed respectably.

giphy.gif


:dunno:
 

Unruh

Well-known member
Joined
Aug 12, 2017
Messages
1,431
Location
Silverdale, Washington
That is the kind of snow we get here. I grew up in Montana and went to college in Minnesota, I moved out by Seattle because I was tired of the cold. Hey how do you like that woodpecker flip stop? I’m needing one for my router table.
 
OP
N

nicholam77

Well-known member
Joined
Dec 18, 2016
Messages
2,659
Location
Minneapolis, MN
That is the kind of snow we get here. I grew up in Montana and went to college in Minnesota, I moved out by Seattle because I was tired of the cold. Hey how do you like that woodpecker flip stop? I’m needing one for my router table.

Yeah, winter is no fun here!

The woodpecker flip stop is pretty good. It has the tiniest amount of deflection when locked down. Realistically nothing to be worried about. It does have some play/rotation when locking it down, so if you need extreme precision it will come down to how accurately you lock it in place. But I haven't found a better commercial solution for a T-Track stop, so no complaints.

I will say if you do get one from them, get the stainless steel one like in the drill press kit, NOT the molded plastic one. That one is less accurate.
 
OP
N

nicholam77

Well-known member
Joined
Dec 18, 2016
Messages
2,659
Location
Minneapolis, MN
Drill Press Clamping Table - part 2

I got some more shop time tonight to work on the drill press table, but a number of little things were annoying. The biggest of which is for some reason the auxiliary table doesn't lay perfectly flat on the built-in table. And taking a square to the bit on either -- it's not perfectly plumb. I think I need to do some adjusting on the drill press, but I don't have a socket large enough to adjust it. :mad:

A day or two ago I had laid out where the drill bit center should plunge to make use of the laser engraved scales on the Woodpecker track (I wanted it centered with the "0" mark.

IMG-2964.jpg


Temporarily clamping the table down I drilled a hole that the bit could index taking it on and off.

On the bottom, I had an idea to make some MDF cleats that fit in the drill press tables clamping slots, so with the auxiliary table aligned the way I wanted I traced out the slots in pencil:

IMG-2966.jpg


Through two of the slots will go 1/4 20 threaded star knobs, so I installed some threaded nuts on the underside. I guess I didn't use a big enough bit because they mushroomed out at the top. The other two slots I planned to glue some MDF strips to to index it in the same position for easy on-off, but this didn't go as planned.

IMG-2967.jpg


I wanted to pin nail them in place while the table was mounted, but I didn't have the right length pins on hand. I also had trouble realigning the table just how I had it before. I dimensioned the MDF strips, and tried to glue in place with spray adhesive, but it just wasn't accurate enough. So I abandoned that idea.

I had gone to the hardware store the other day to get the star knobs that will hold the table down, but forgot to get large washers so I couldn't install it tonight. Grrrrrrr.

Last task is to make the replaceable zero clearance insert, which required routing a "tray" in the table. To do this I ordered some cheap guide bushings and centering cone on Amazon. And made a quick plywood template:

IMG-2992.jpg


I used a 1" OD bushing with a 3/4" cutter, meaning the template needed to be 1/4" wider than the final cutout.

IMG-2996.jpg


IMG-2993.jpg


IMG-2994.jpg


It worked pretty well. I got a few edge chips in the melamine because yet again I forgot to tape edges. I like my stuff to look tidy and it's frustrating to put a bunch of work into something and then get little defects. But they are lessons to do better next time.

I made the recess a bit deeper than 1/2" so I could install some leveling screws to level the future inserts:

IMG-2998.jpg


One last tidbit, I found this plastic accessory for my DeWalt plunge base and never knew what it was for (the plastic guard sandwiching around the top of the bit. Turns out it's a dust guide/cover for the built in dust collection.

IMG-2997.jpg


And holy **** it's like night and day!! The dust collection with the guard is actually quite good!

You'll see in some future shop projects but getting better dust collection is something I'm really focused on.

I really want this project to be done so I can actually use it when I need to, but... looks like there will be another post on it.
 
OP
N

nicholam77

Well-known member
Joined
Dec 18, 2016
Messages
2,659
Location
Minneapolis, MN
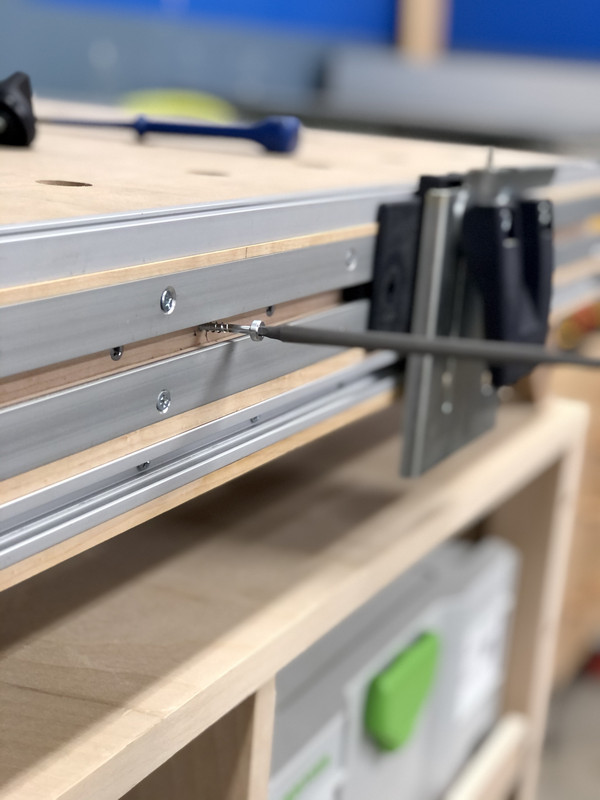
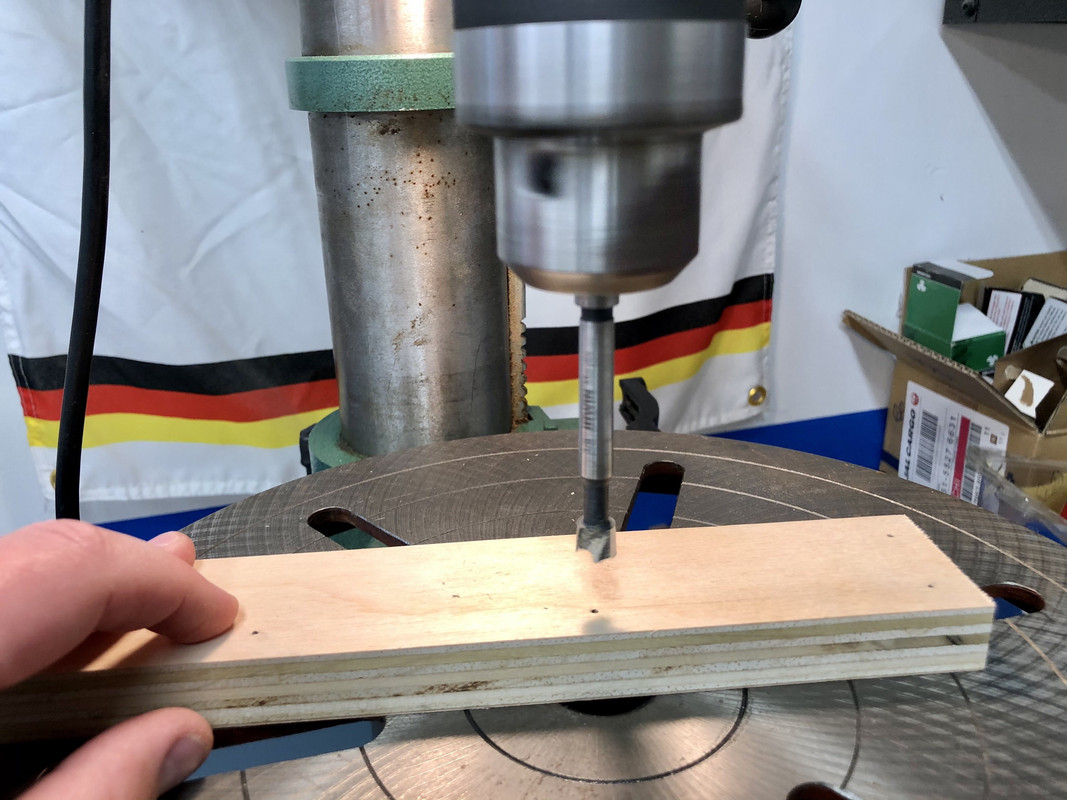
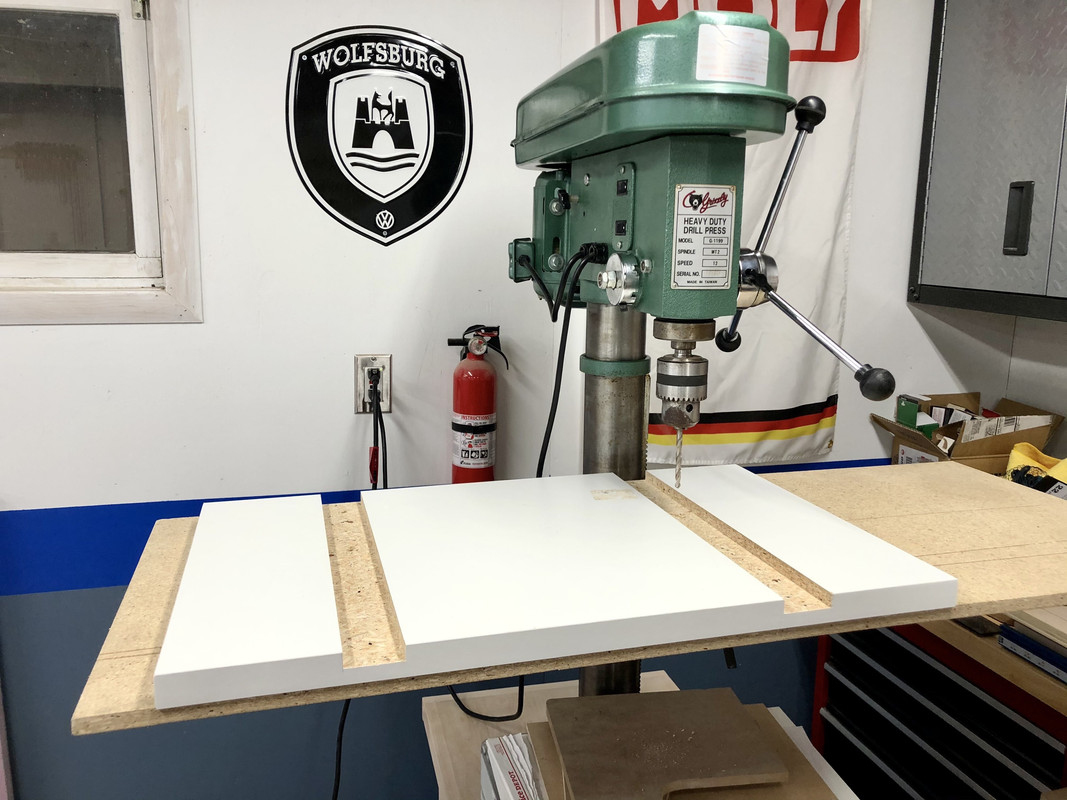
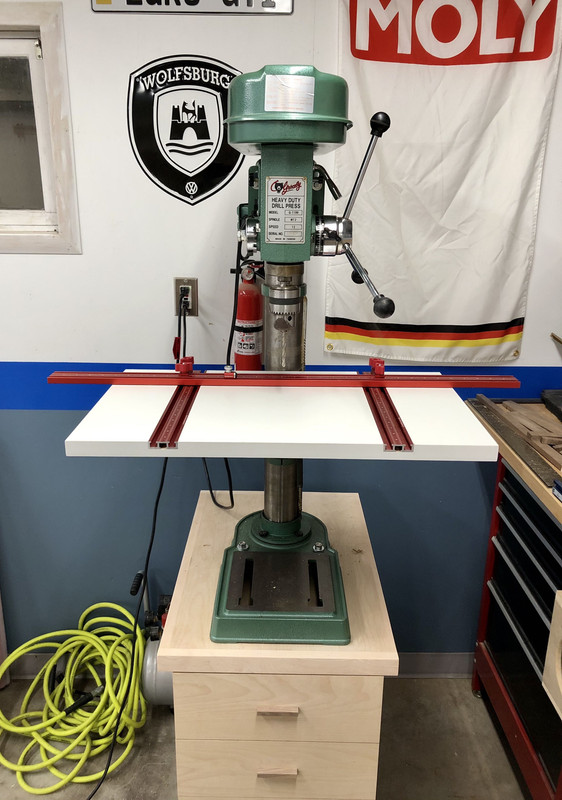
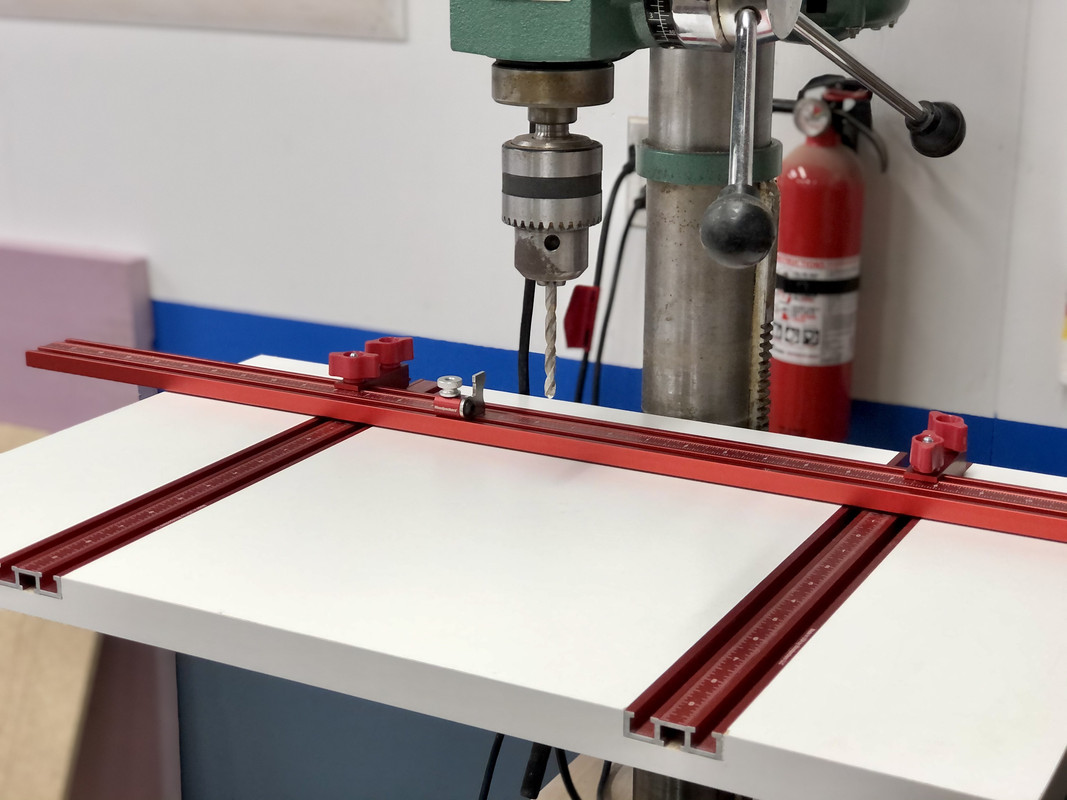
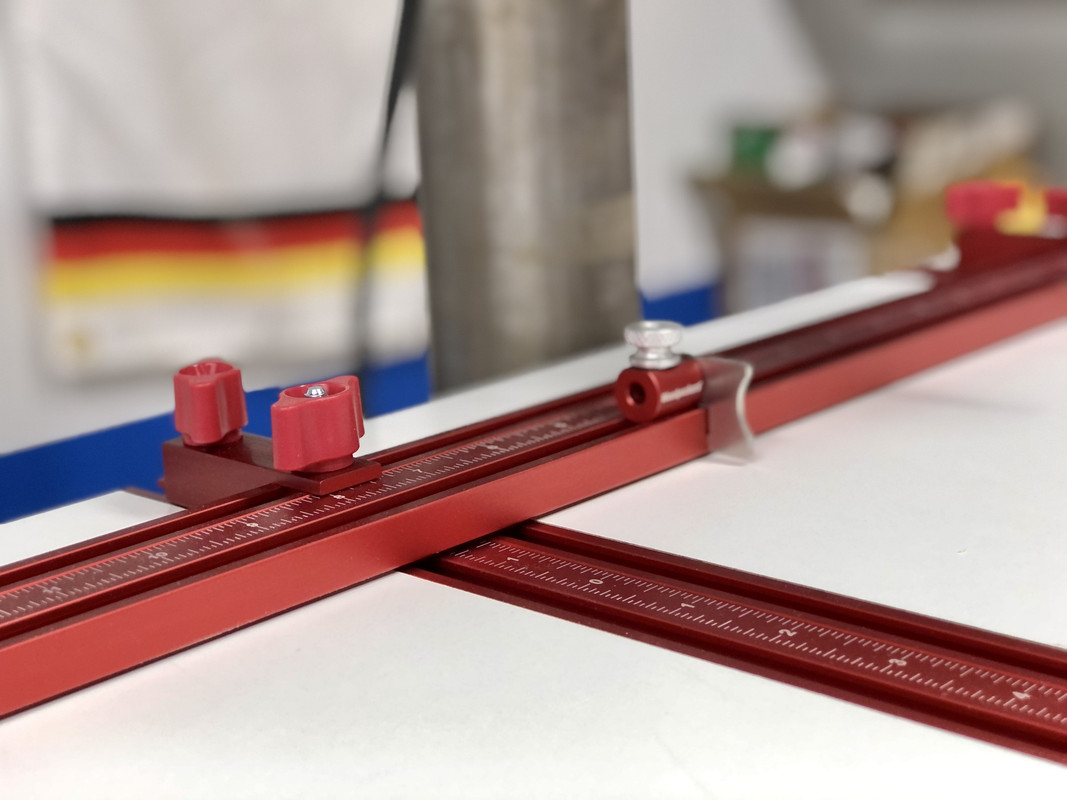
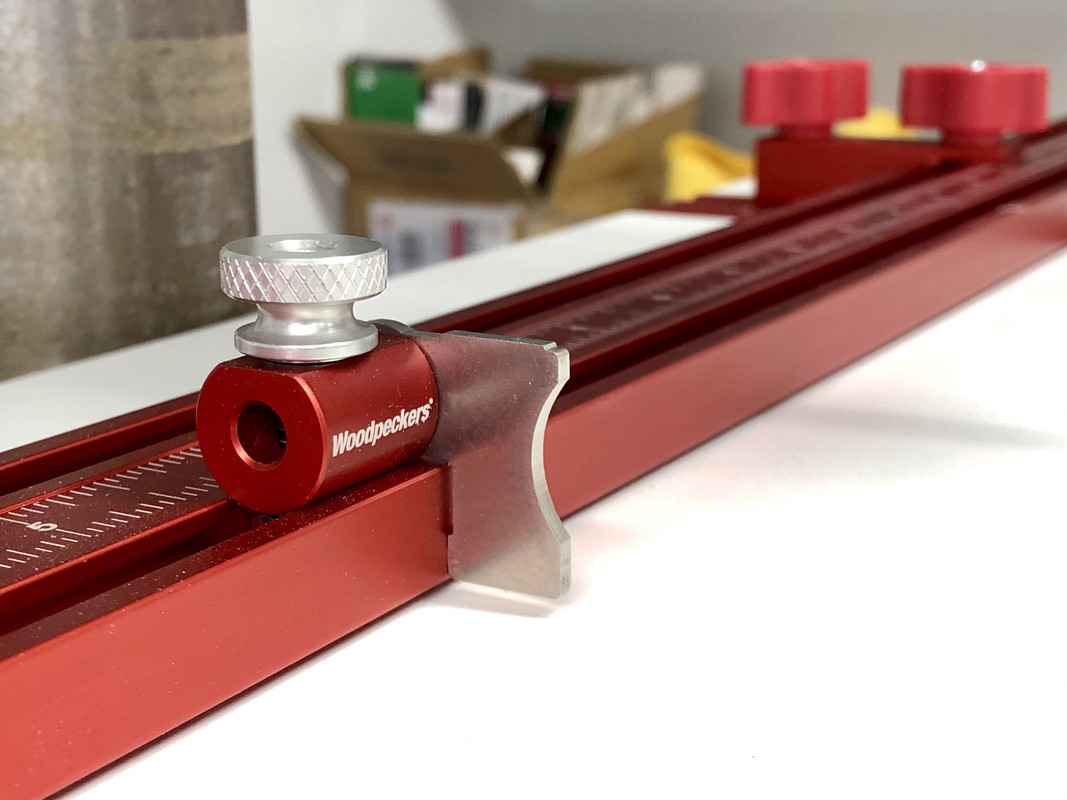
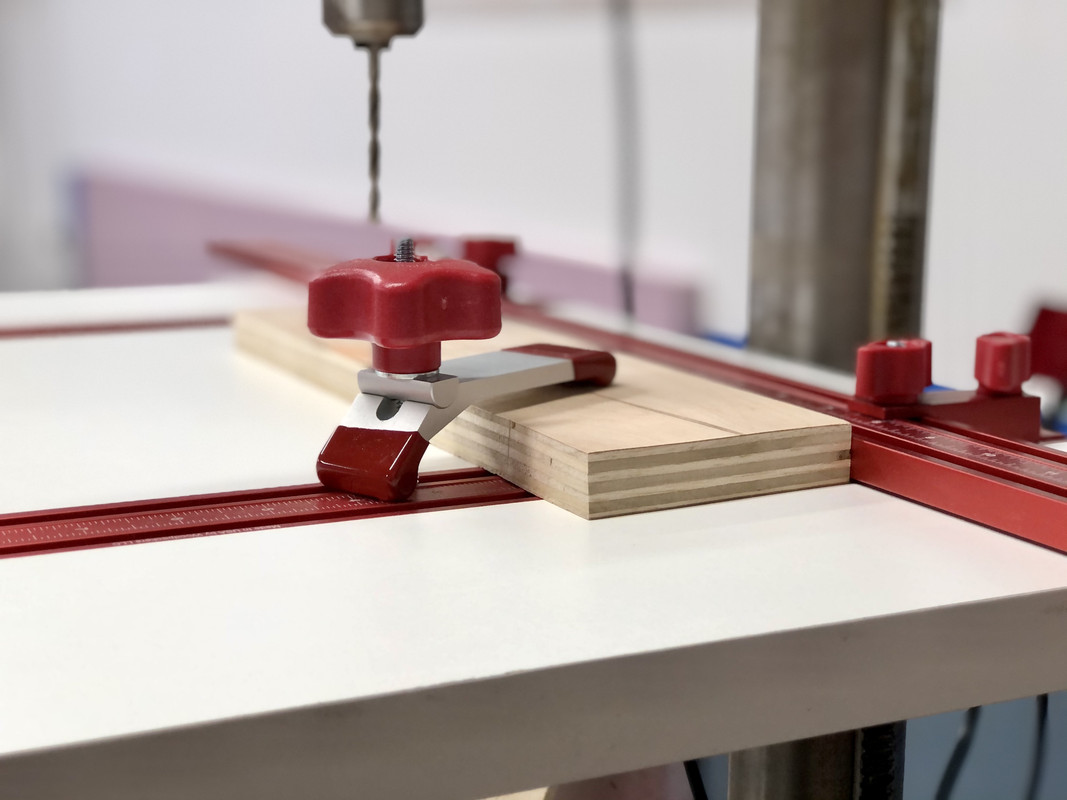
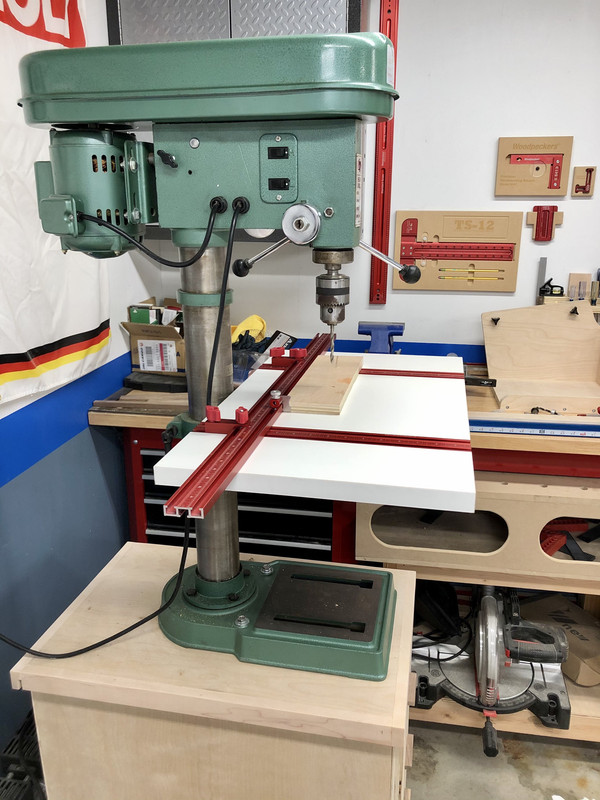
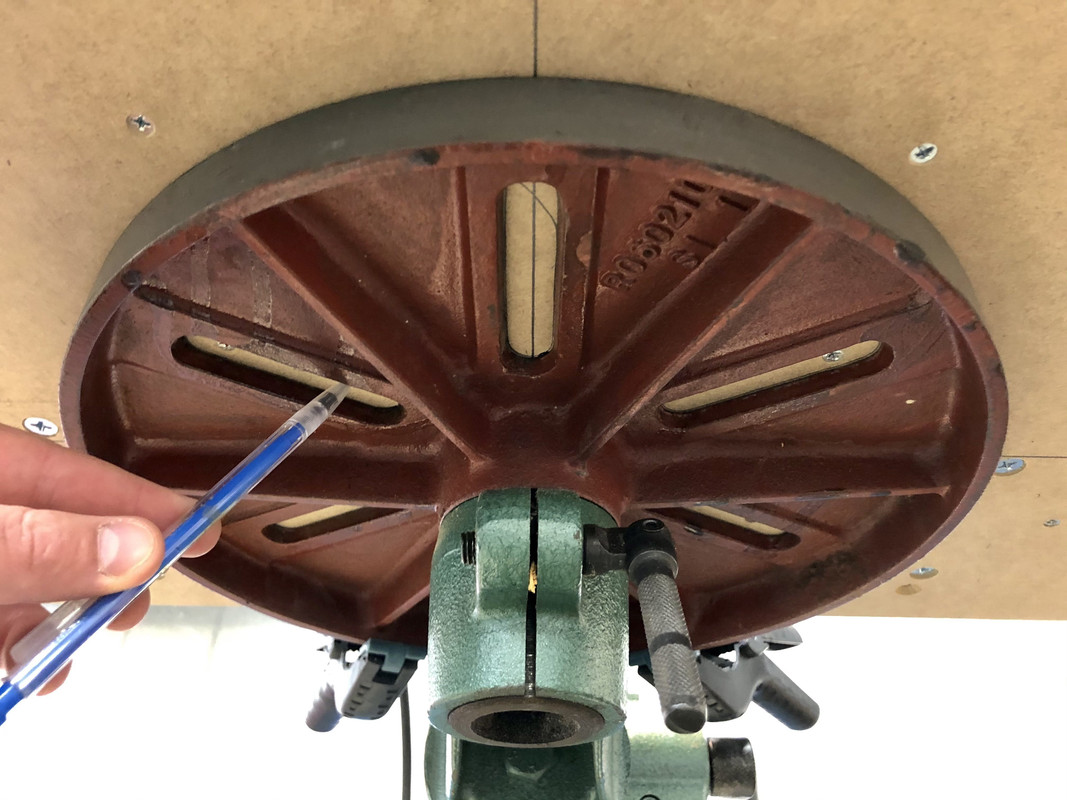
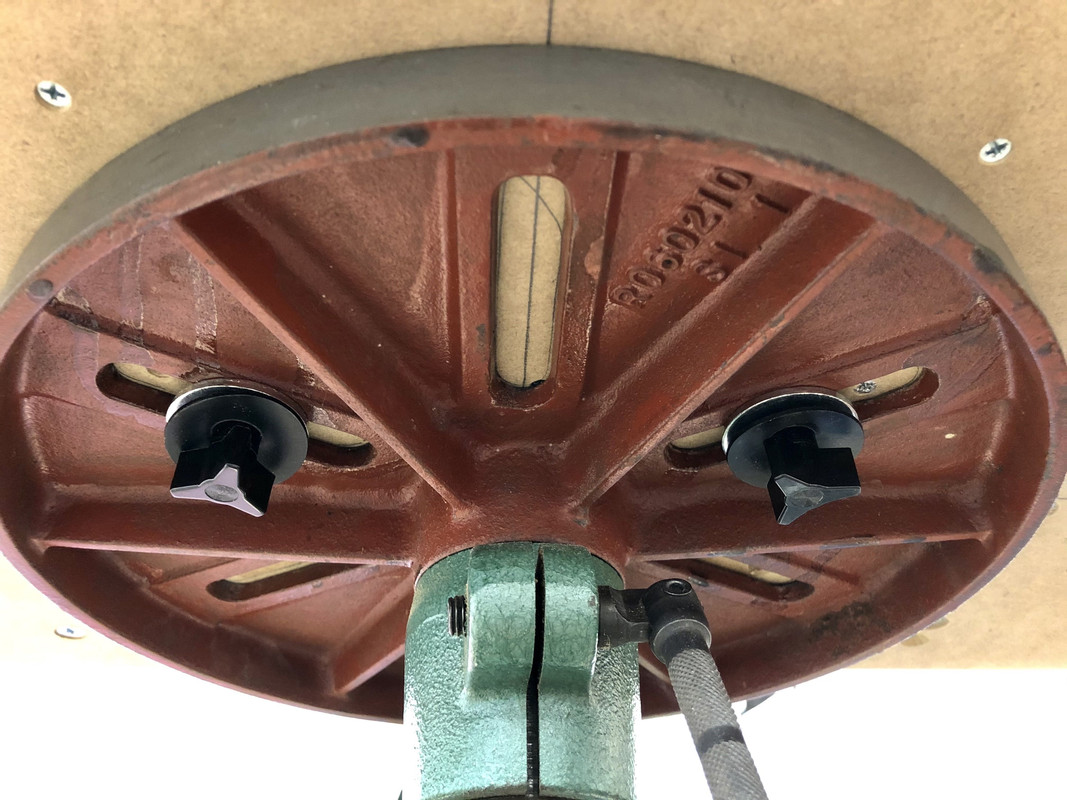
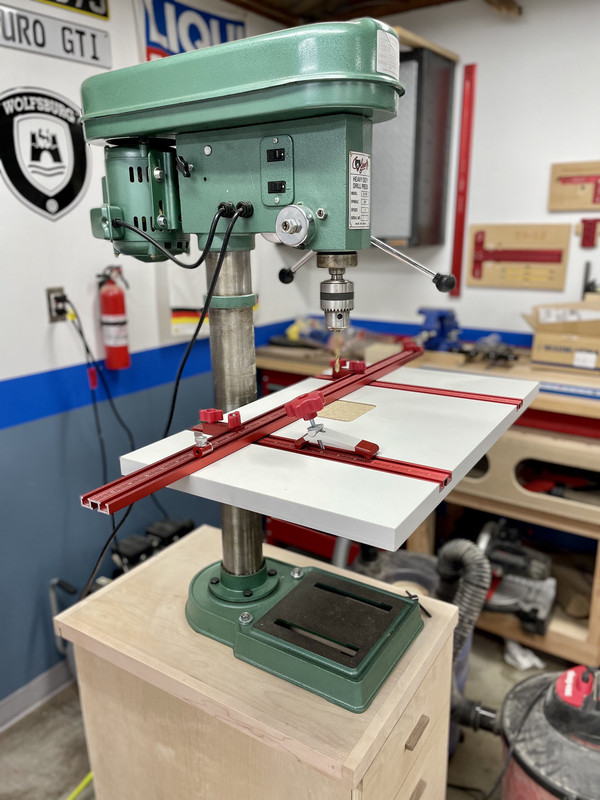
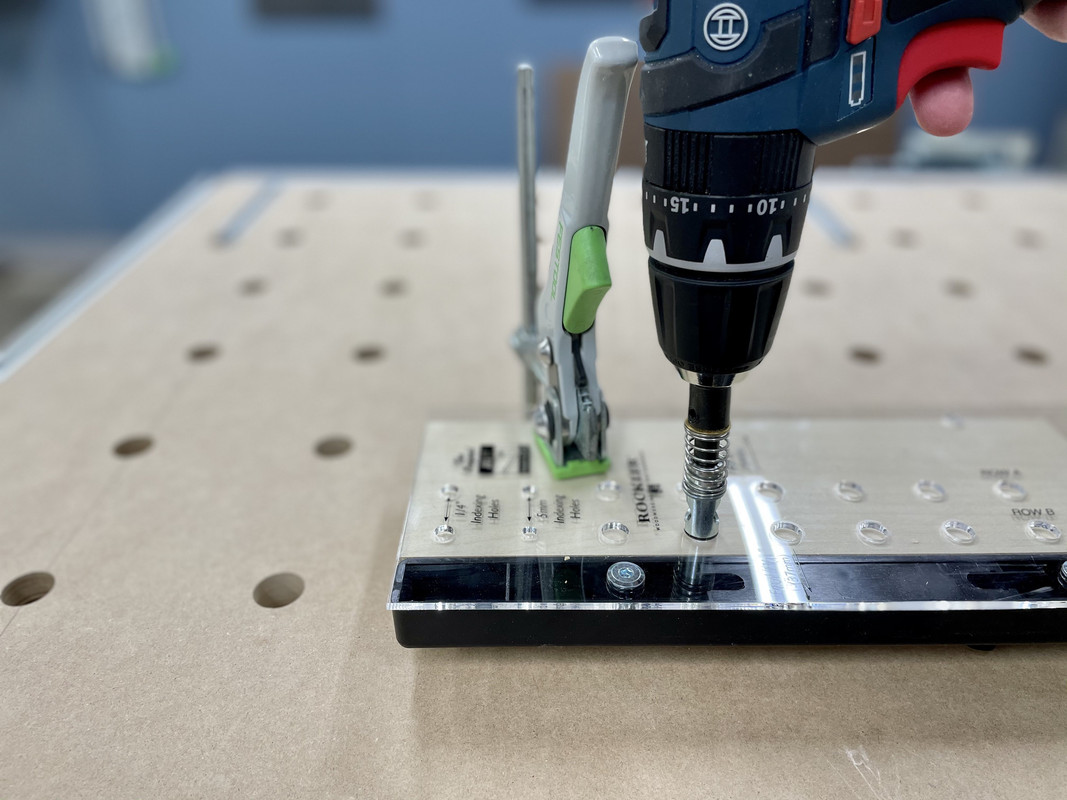
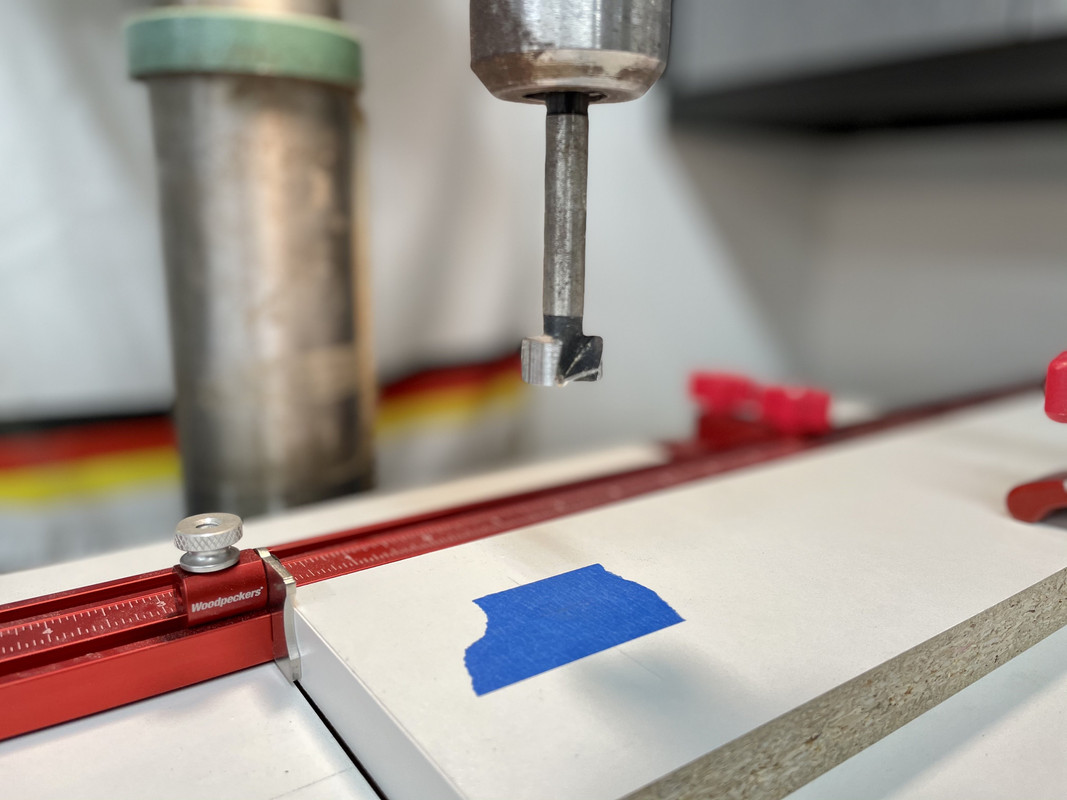
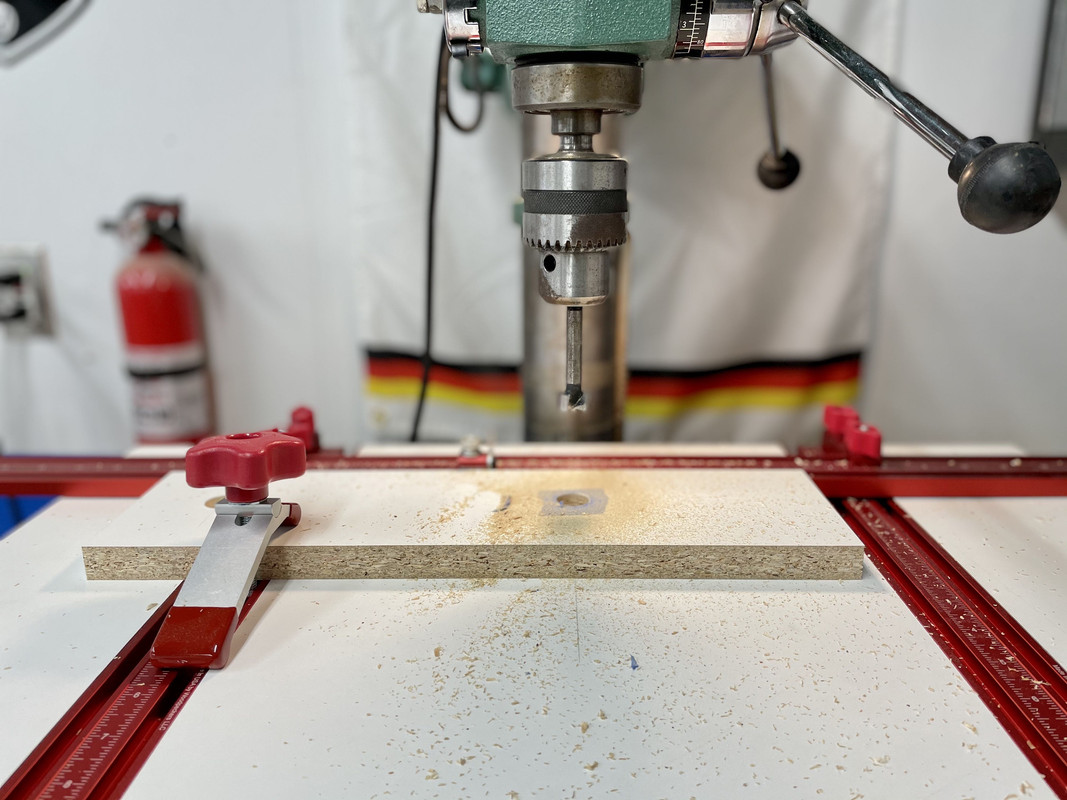
Well I got the washers to mount the drill press clamping table:

IMG-2999.jpg


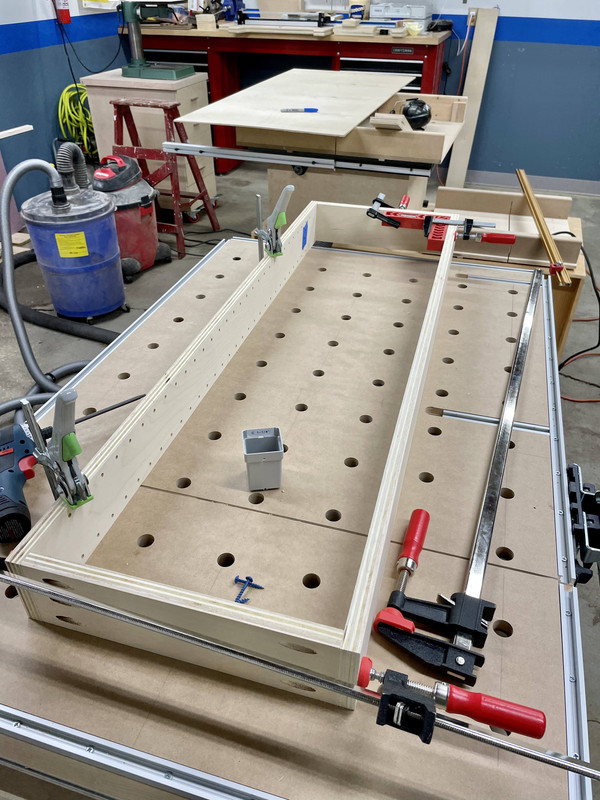
For now I'm just going to hope I don't need to take it on and off much. I think for now I can call this project done.
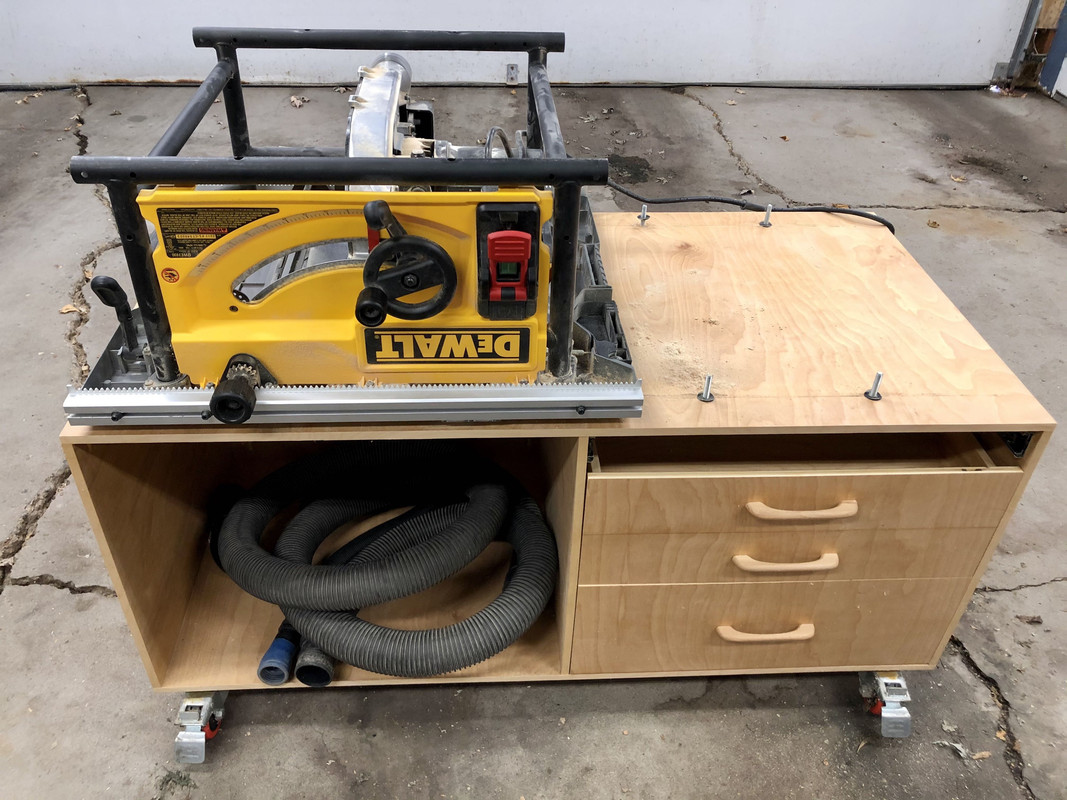
IMG-0014.jpg


Table Saw Tune-Up:

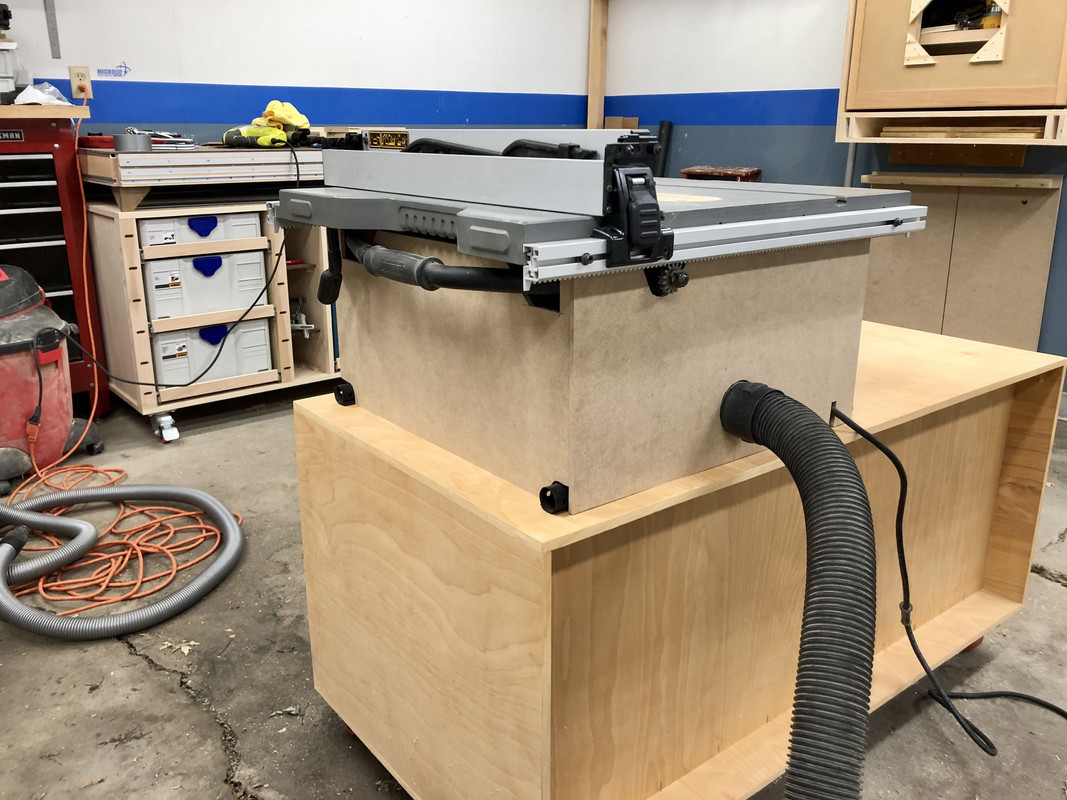
Today I cleaned up the table saw, which hasn't been properly cleaned since it was mounted to this cart:

IMG-3004.jpg


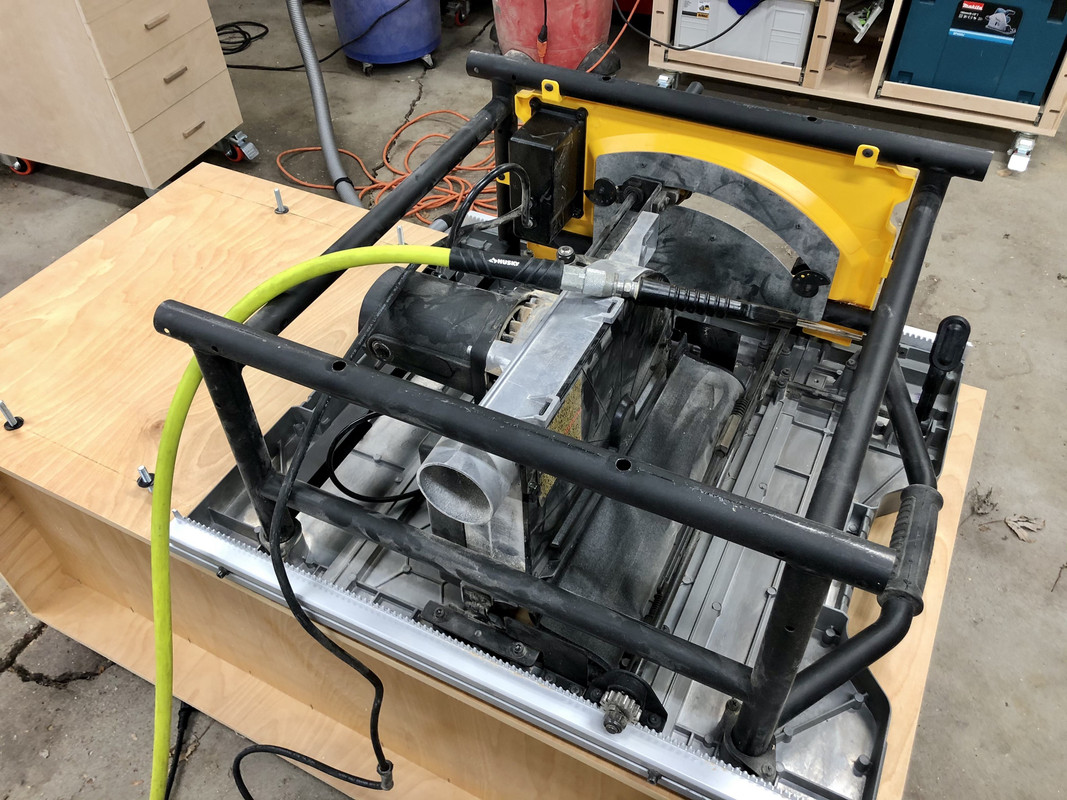
Vacuumed and blew out the motor and all the crevices with compressed air... a lot of dust has built up over time.

IMG-3005.jpg


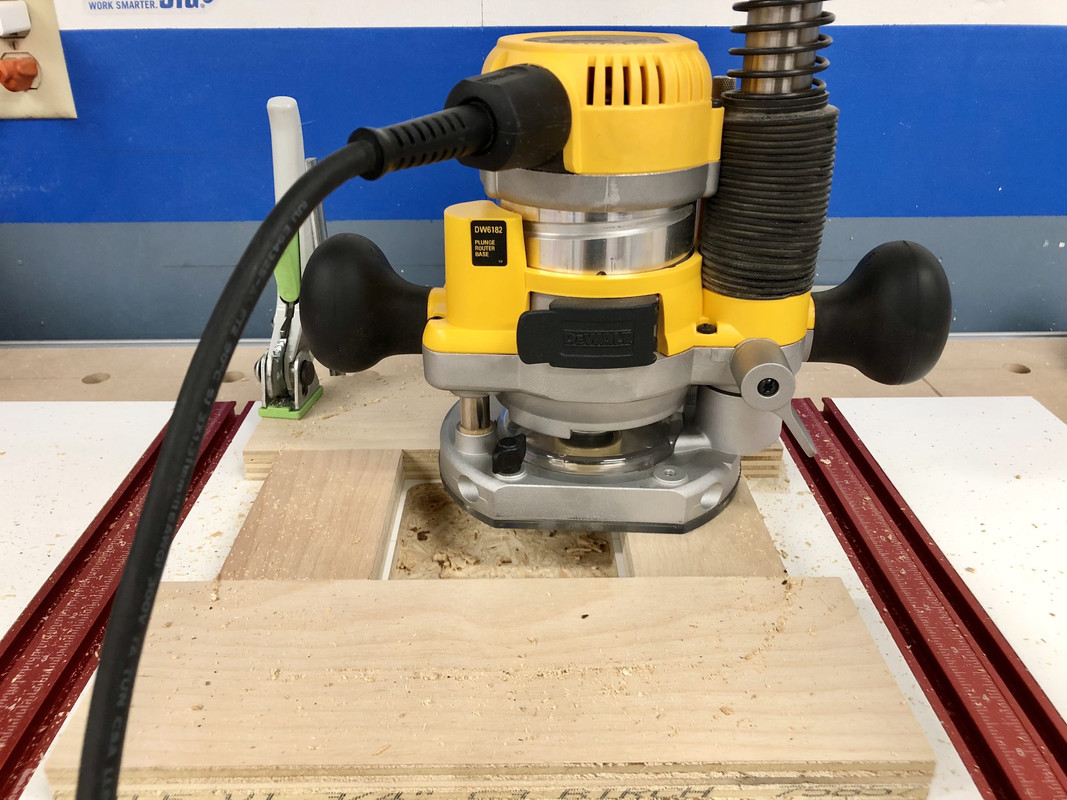
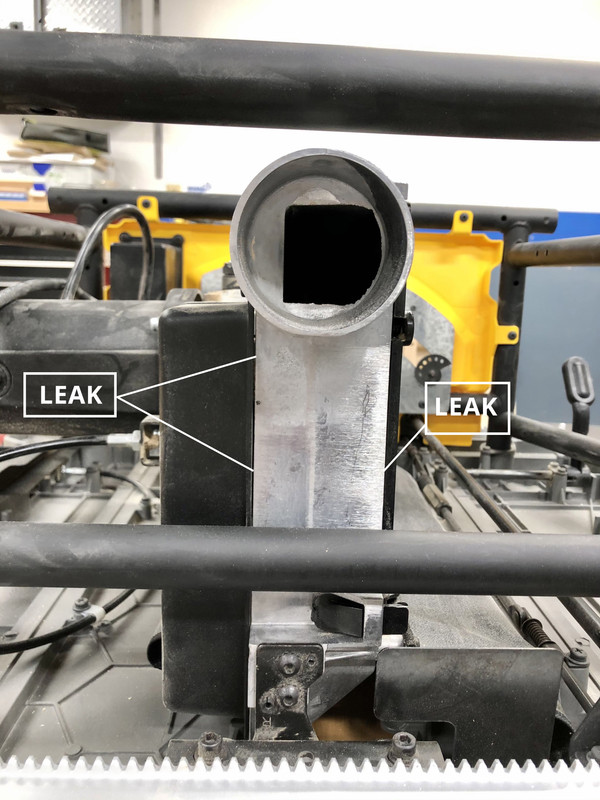
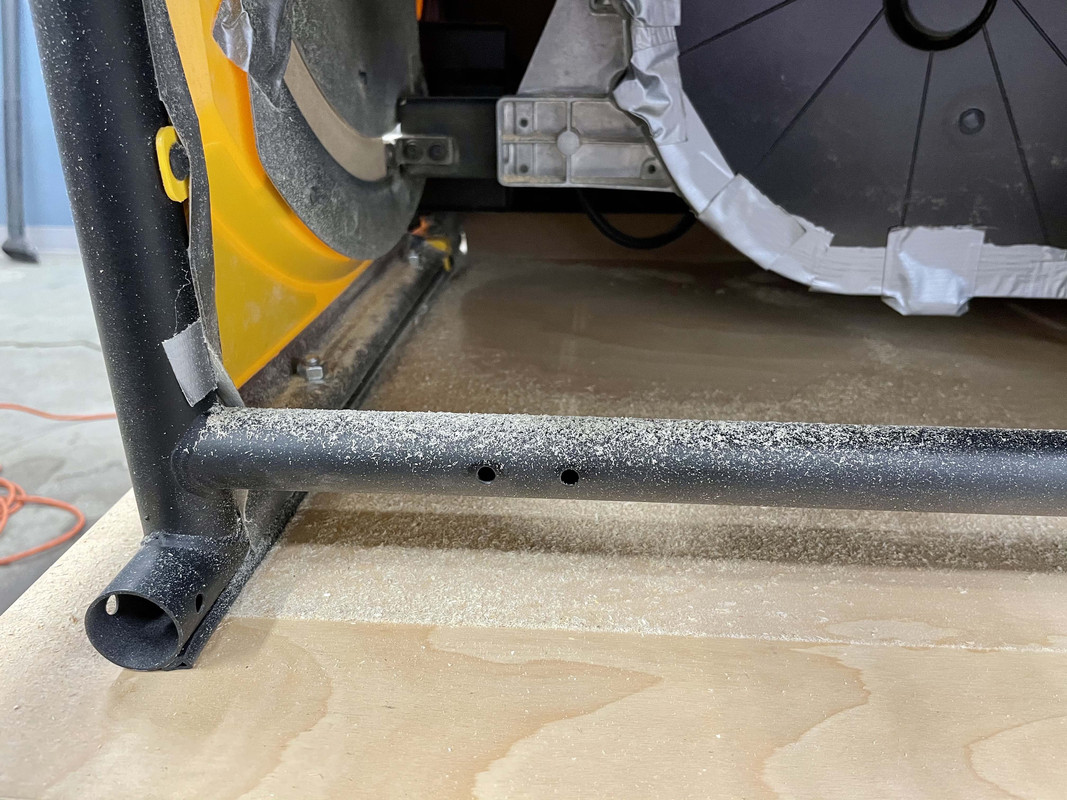
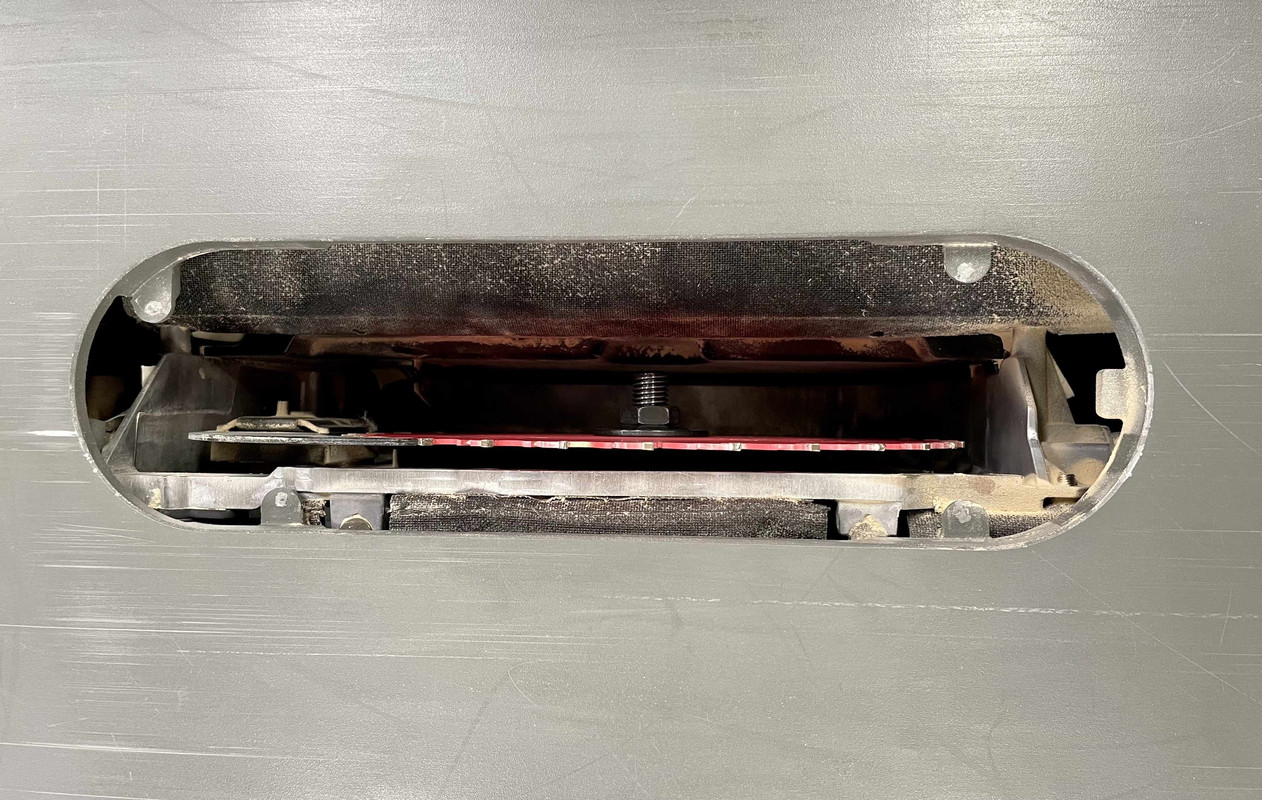
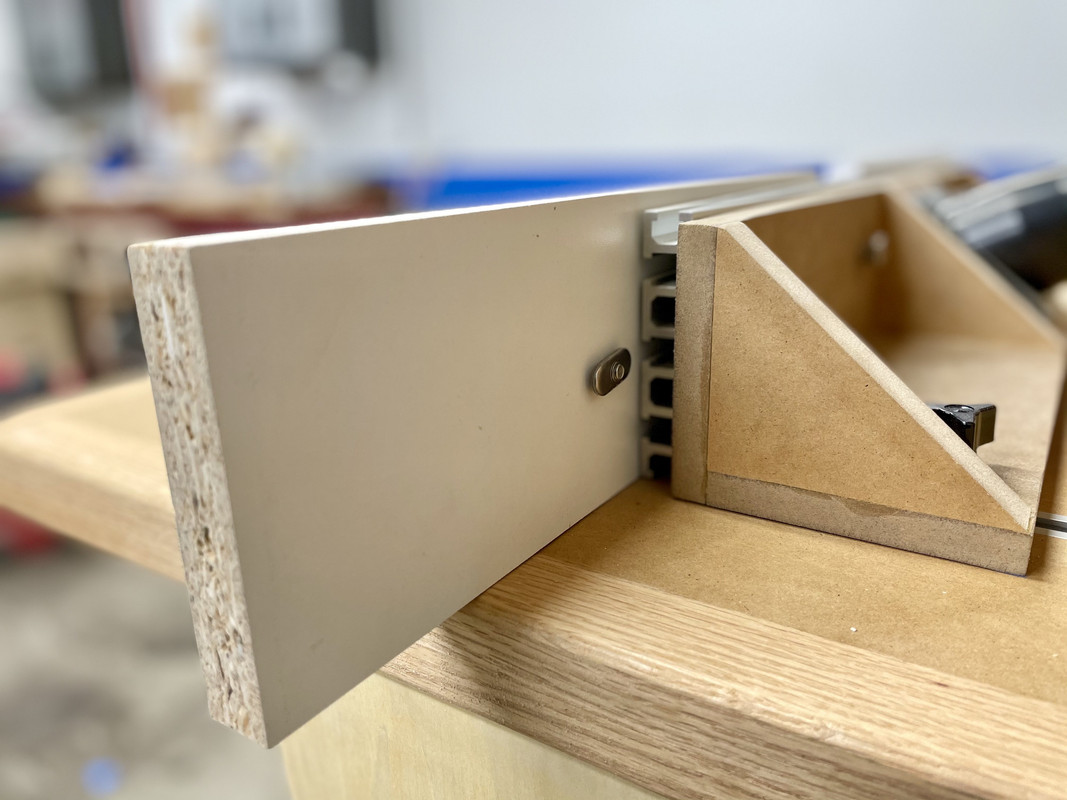
I've been struggling with dust collection in the shop on a few tools, namely the router table and table saw. But especially the table saw. Due to the open framework of the job site saw design, dust goes EVERYWHERE, despite there being a 2 1/4" dust port on the blade enclosure. After every use it's accumulated all inside the saw and on the cart, and during use it shoots fine particles into the air. So, I've set out to remedy these issues.

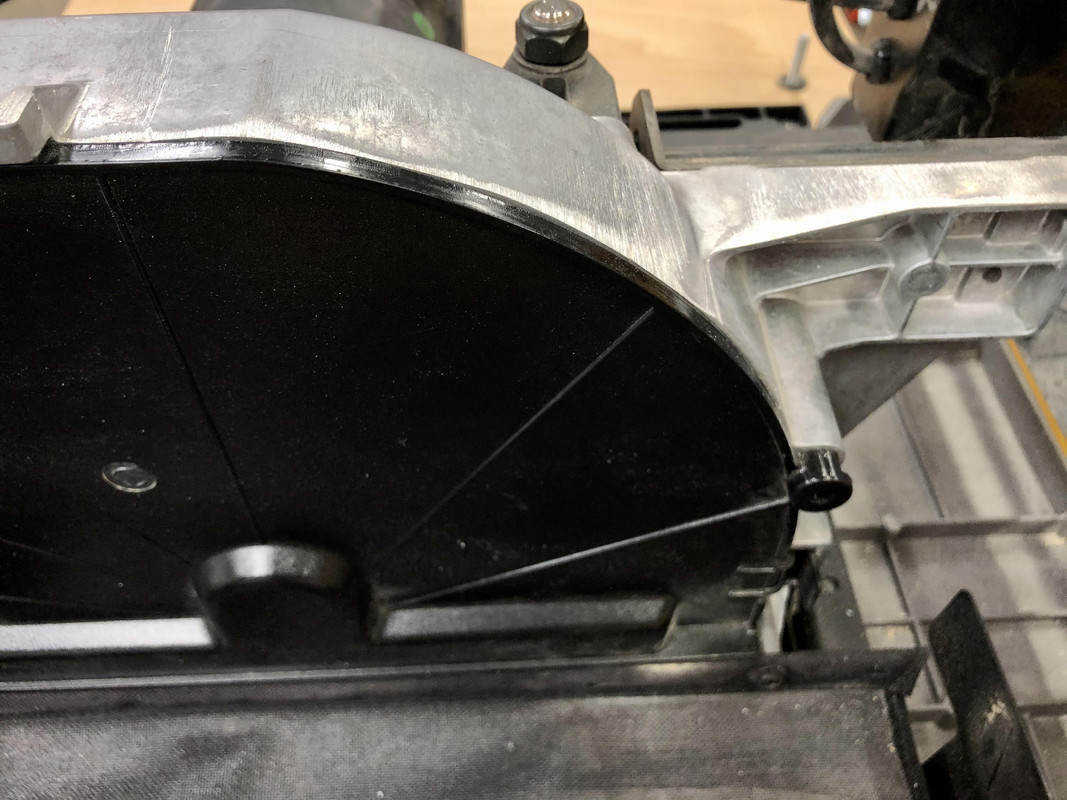
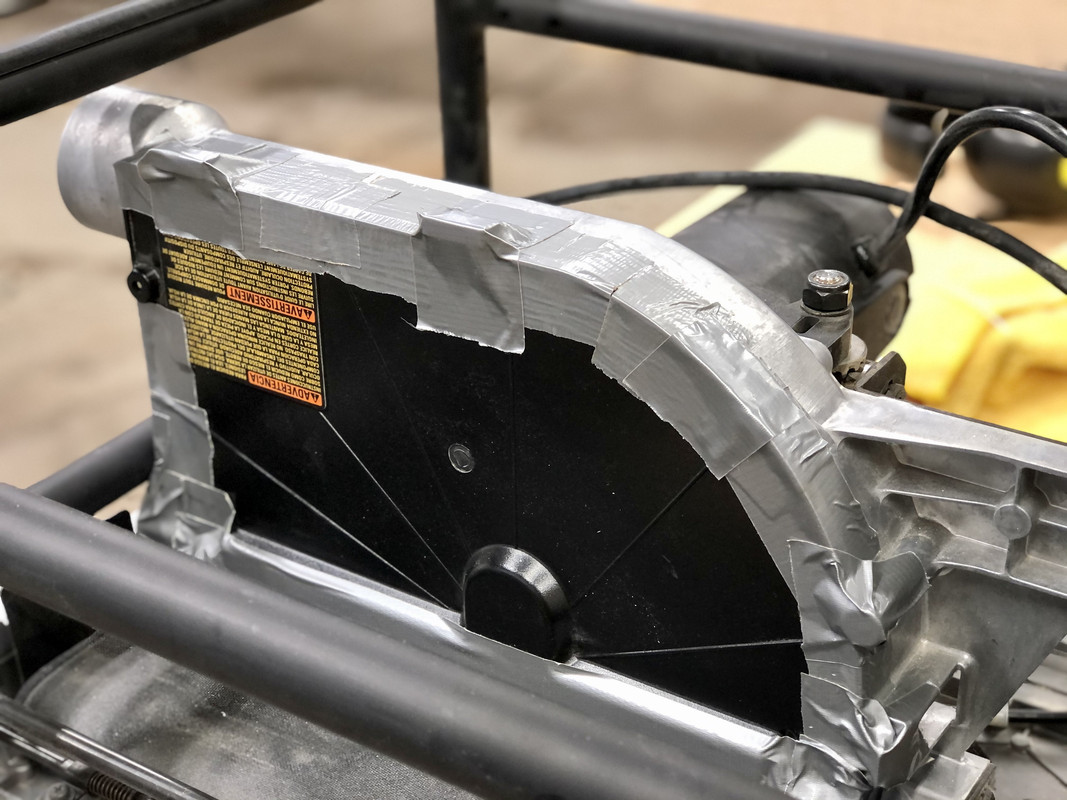
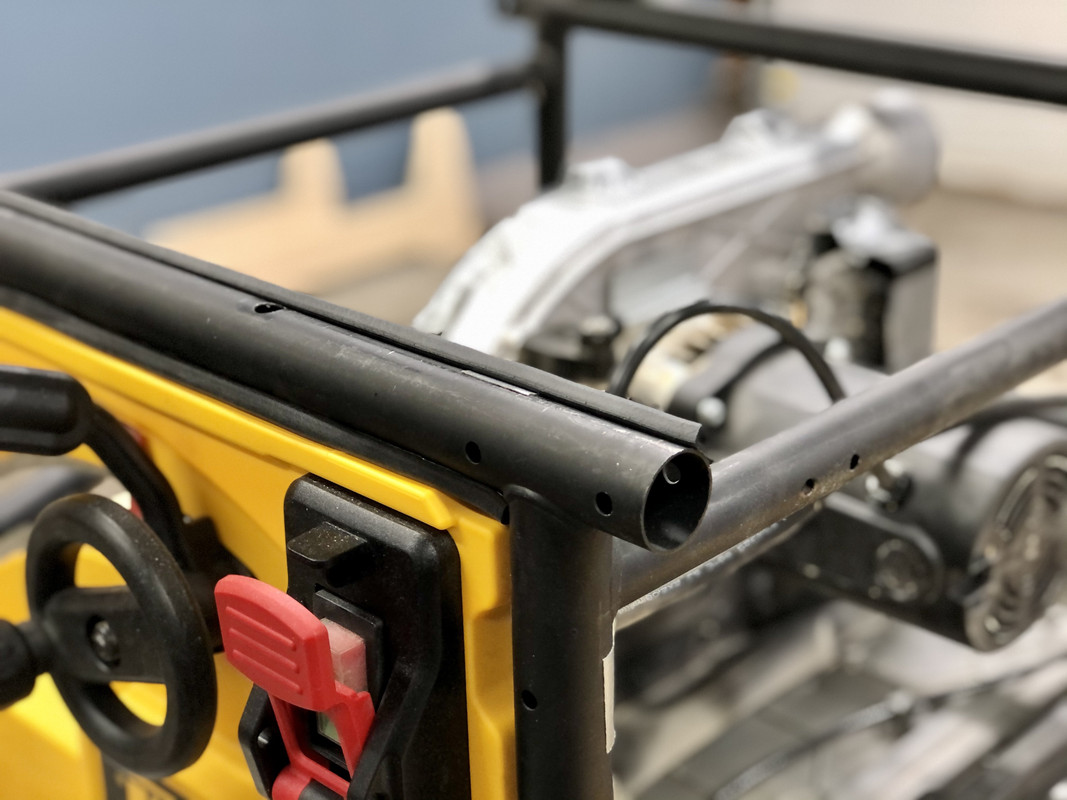
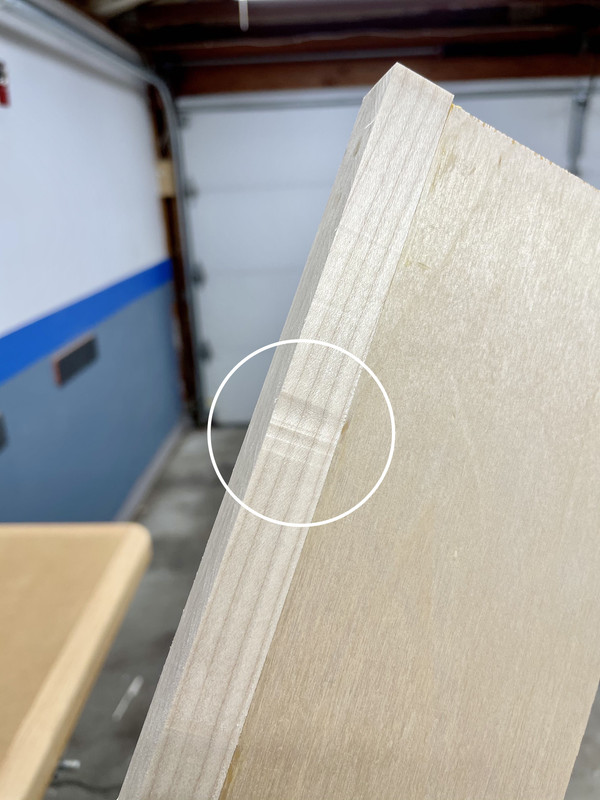
Firstly, the side of the blade enclosure has a black plastic cover, that appears to be missing some screws that hold it tight:

IMG-3006.jpg


This results in a crevice that might not leak a ton of sawdust, but certainly must effect the shop vac extraction efficiency.

IMG-3007.jpg


To fix this... duct tape. :thumbup:

IMG-3010.jpg


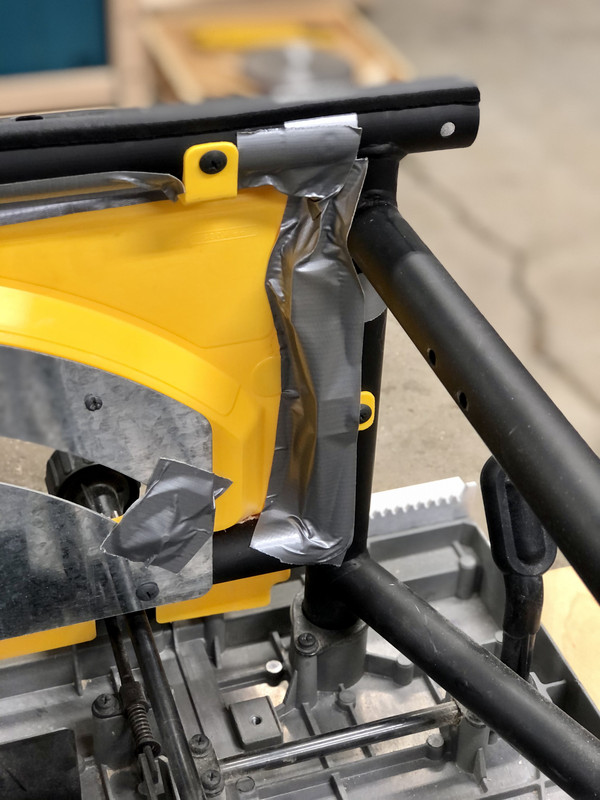
I also closed off some gaps between the plastic yellow front panel and the frame:

IMG-3011.jpg


Not exactly pretty, but it's on the inside so who cares.

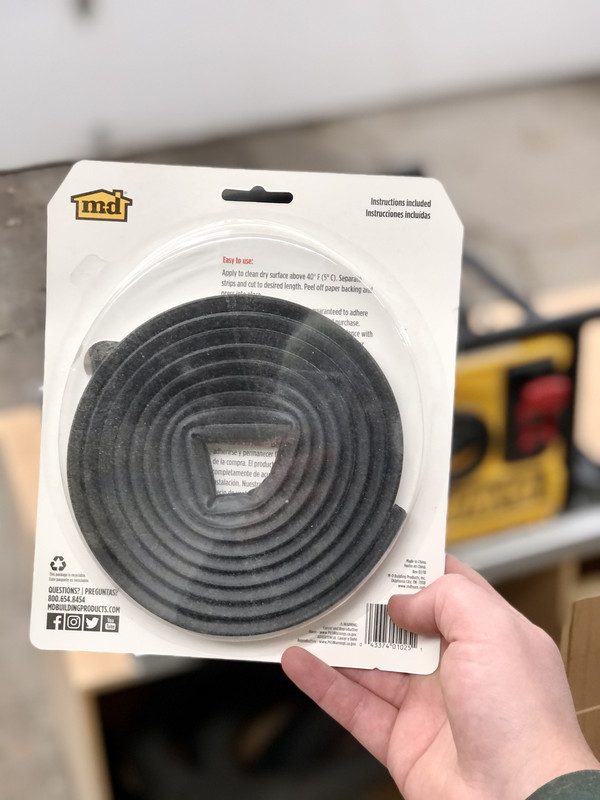
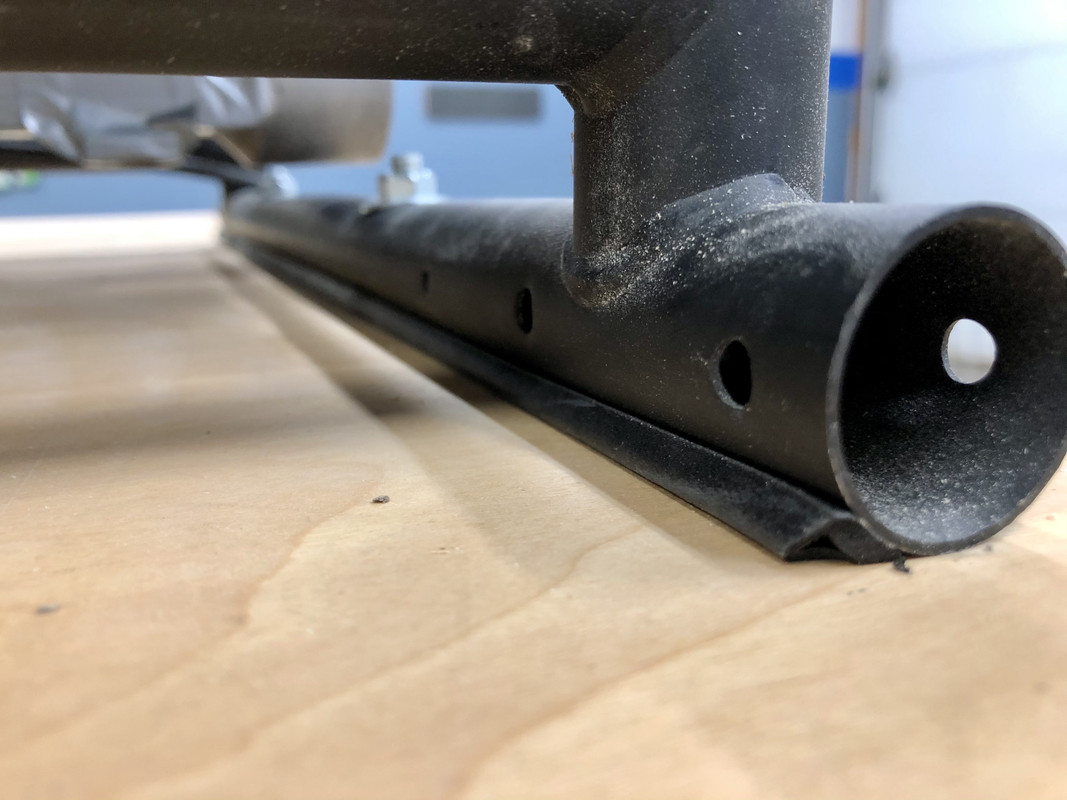
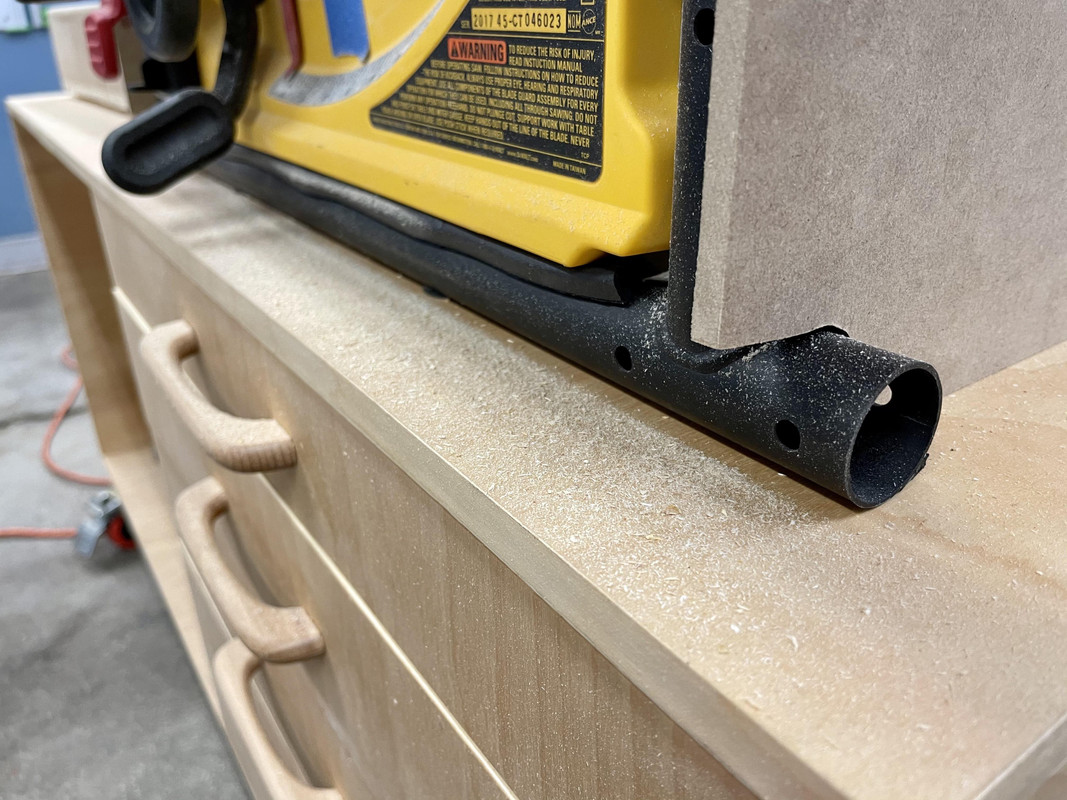
Believe it or not, saw dust even shoots out underneath the bottom of the frame! So I got this adhesive weatherstripping at the hardware store and stuck to the bottom supports to form a seal:

IMG-3008.jpg


IMG-3009.jpg


IMG-3013.jpg


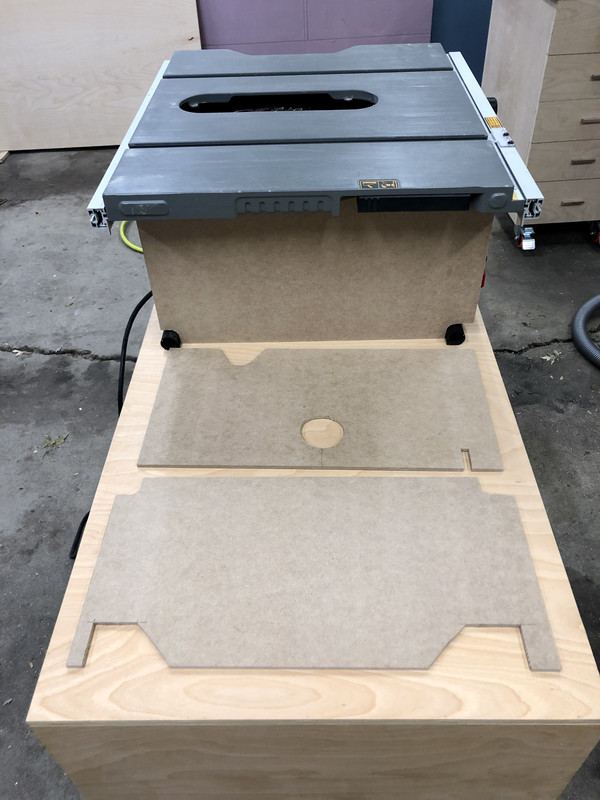
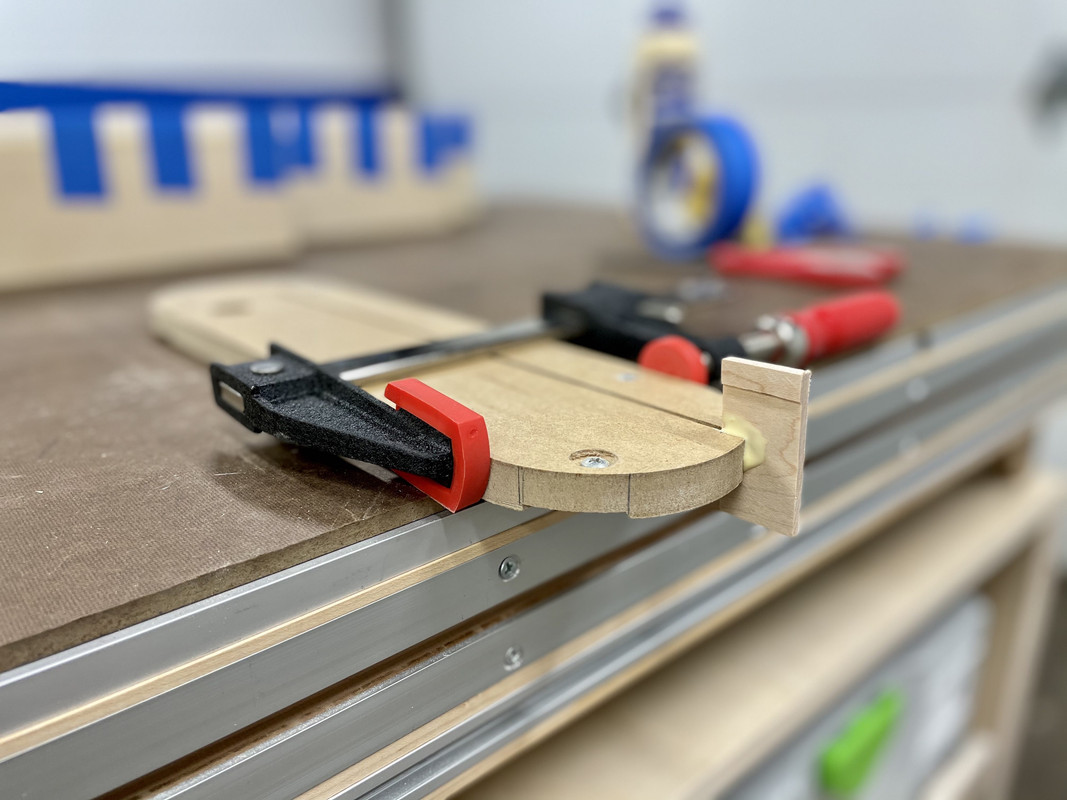
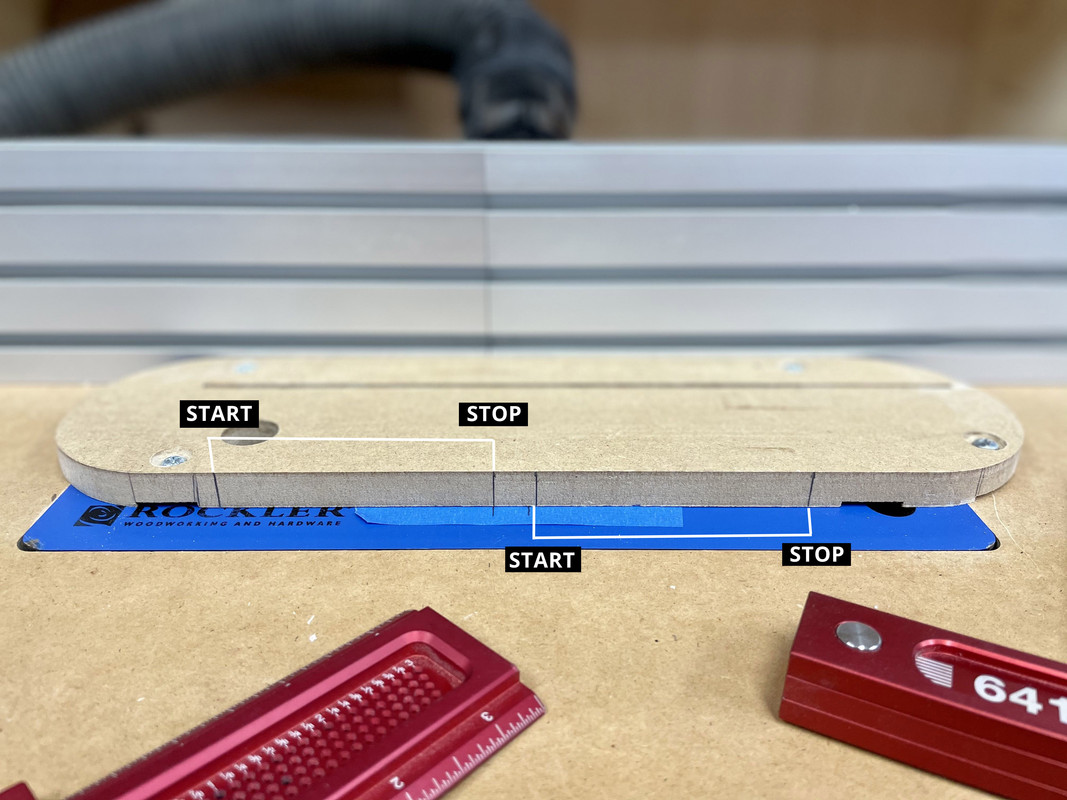
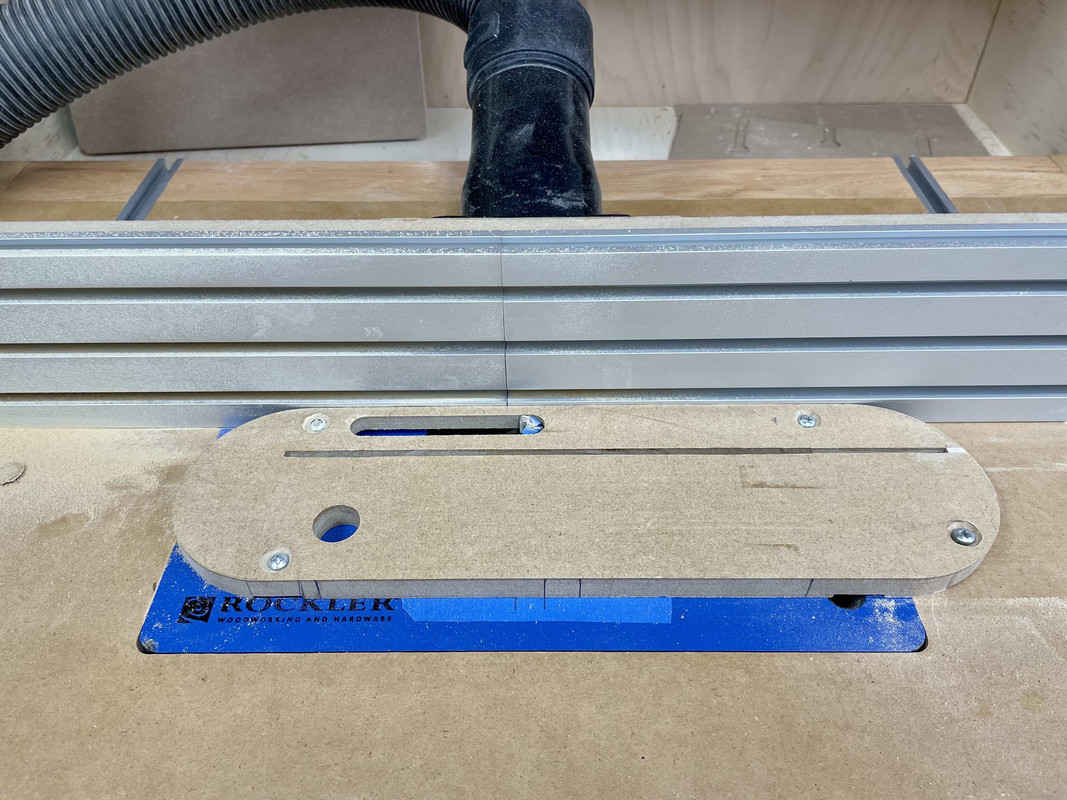
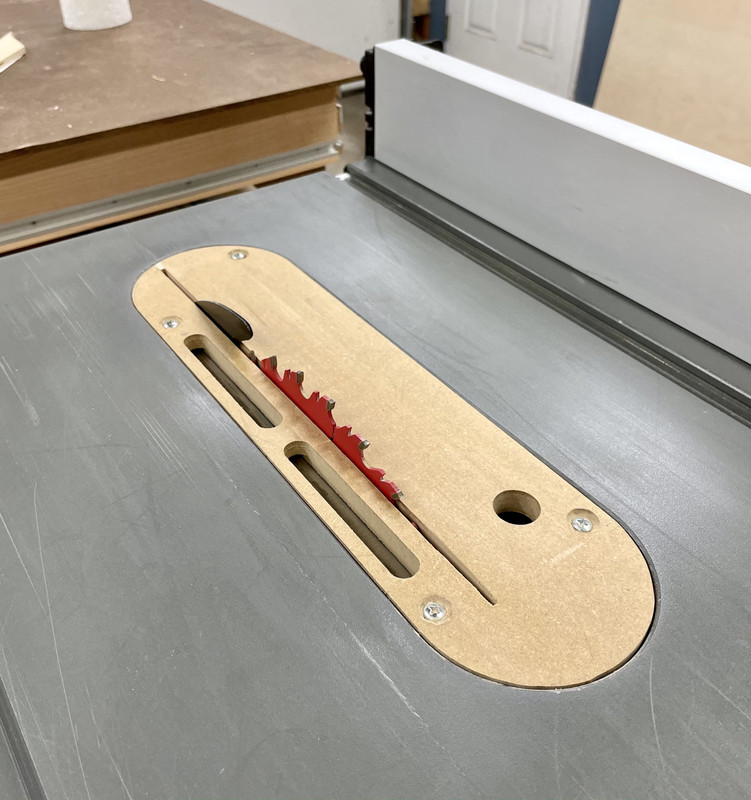
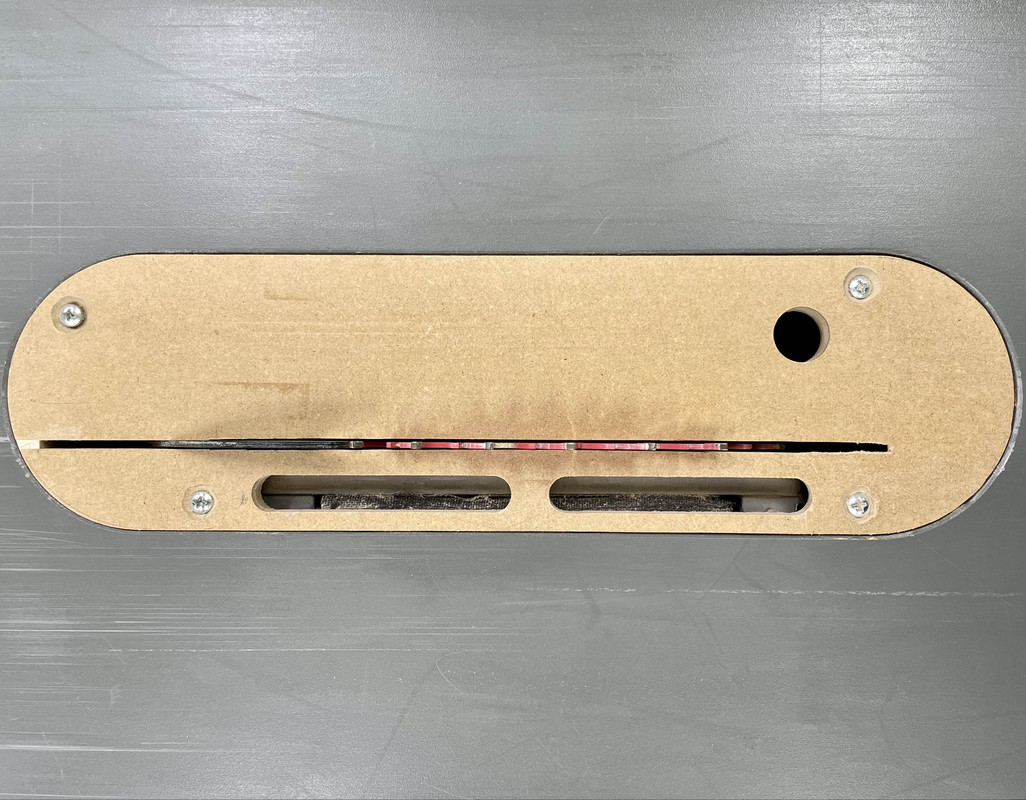
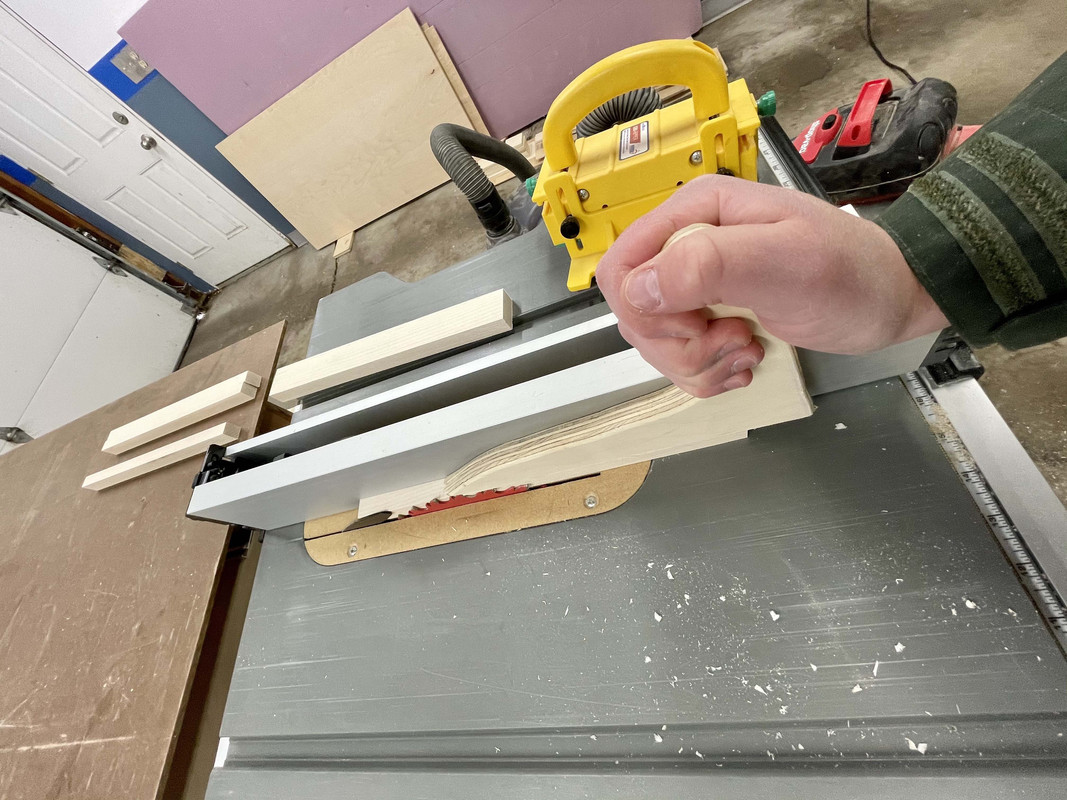
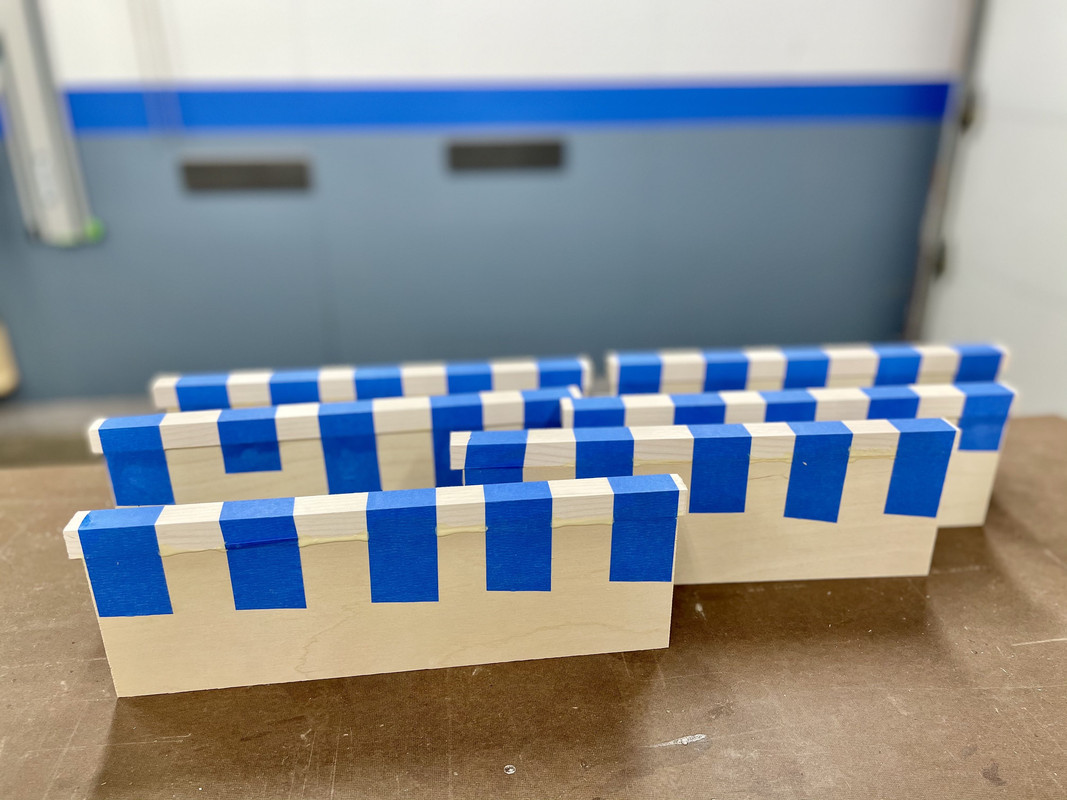
The final piece of the puzzle which I worked on some time ago, was cutting some 1/4" MDF cover plates for the sides and back of the saw:

IMG-3014.jpg


IMG-3017.jpg


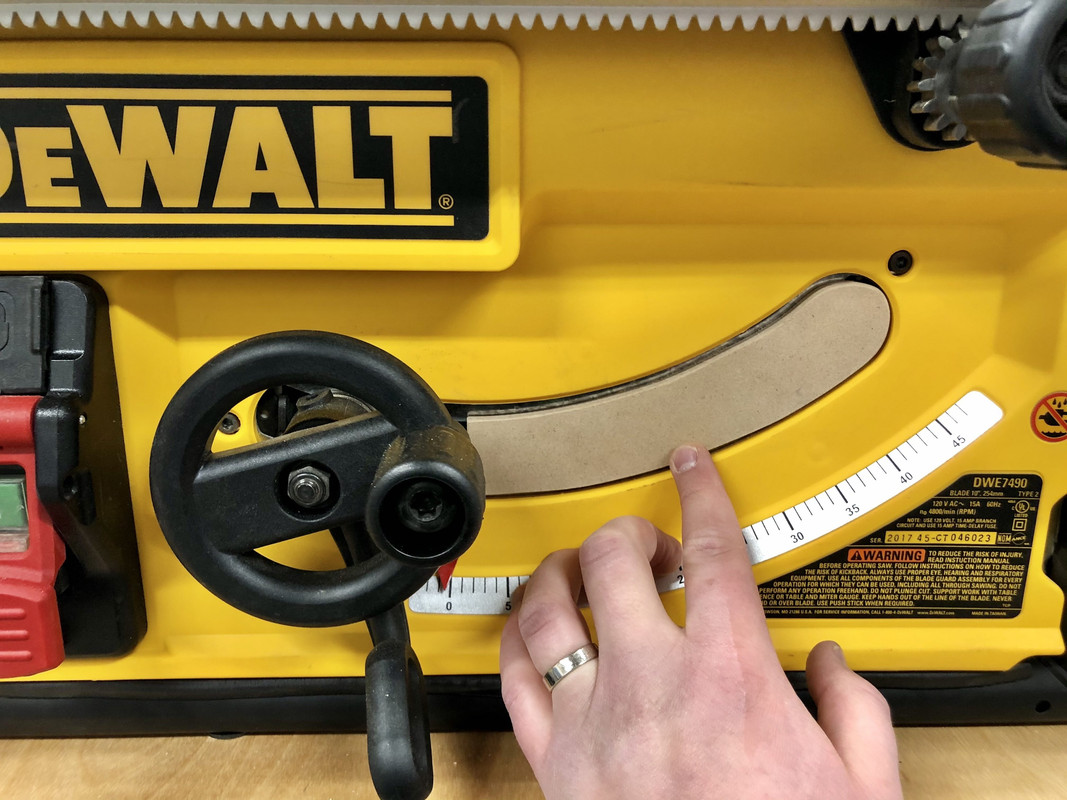
I even built a phallic-looking insert :D 
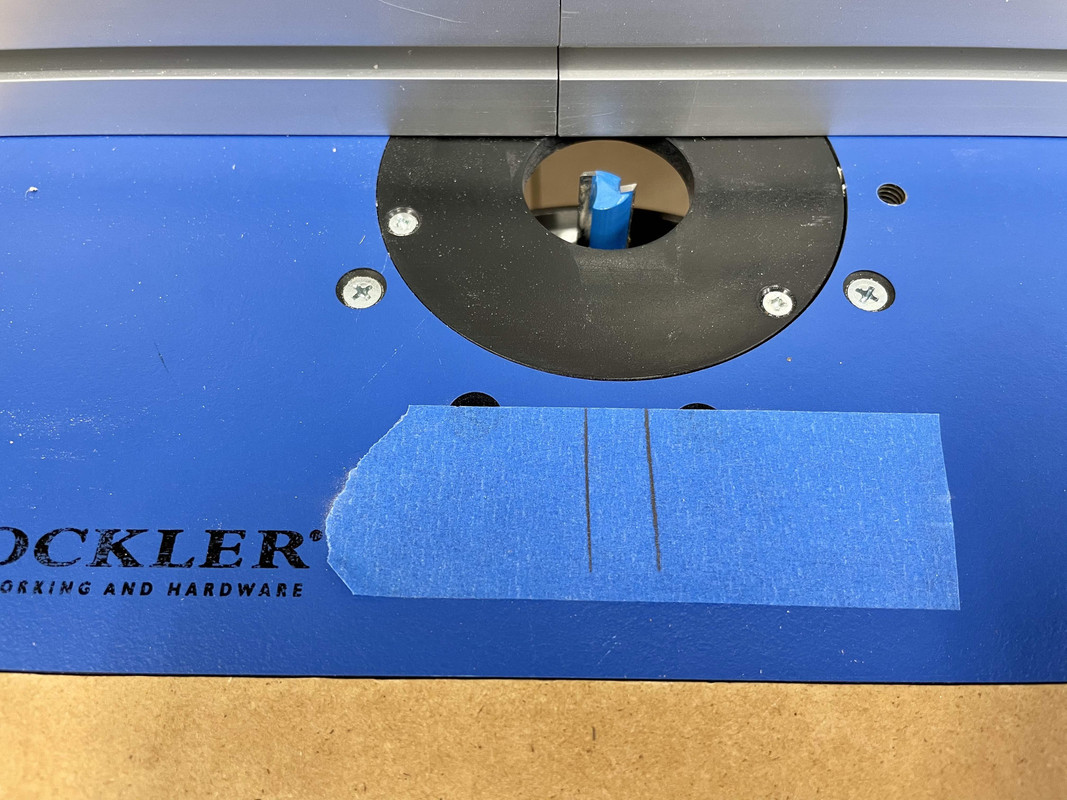
for the blade-tilt cutout:

IMG-3016.jpg


These took some fiddling and time to perfect, but they fit pretty snug and tight, forming a solid box around the saw. They will be held in place by small neodymium magnets. The thought being... all the dust that doesn't go out the shop vac connection (which is somehow a lot of dust!) will just collect inside the saw on the top of the cart, and I can remove the side panel periodically to clean it out.

Due to weather, privacy, proximity to neighbors, noise control, etc, I almost always have the garage overhead door closed when working. The WEN air filter is helpful but it simply can't clear a bunch of fine particulate instantly. As I often work with MDF and plywood, I'm trying to be more careful about my health.

I'm debating cutting some ventilation slots for the motor, and possibly painting the MDF cover plates, but not sure what color yet.

In other somewhat garage-related news, I got a new phone today (source of my journal pics), and the camera is a big improvement. I'm excited to have better dynamic range and better pics for the journal, as well as a wide angle lens option.

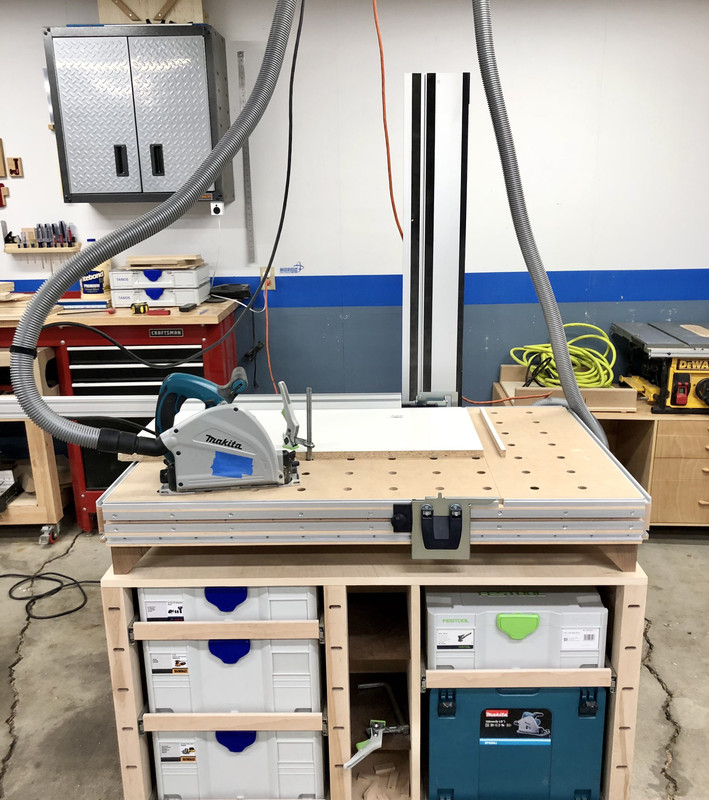
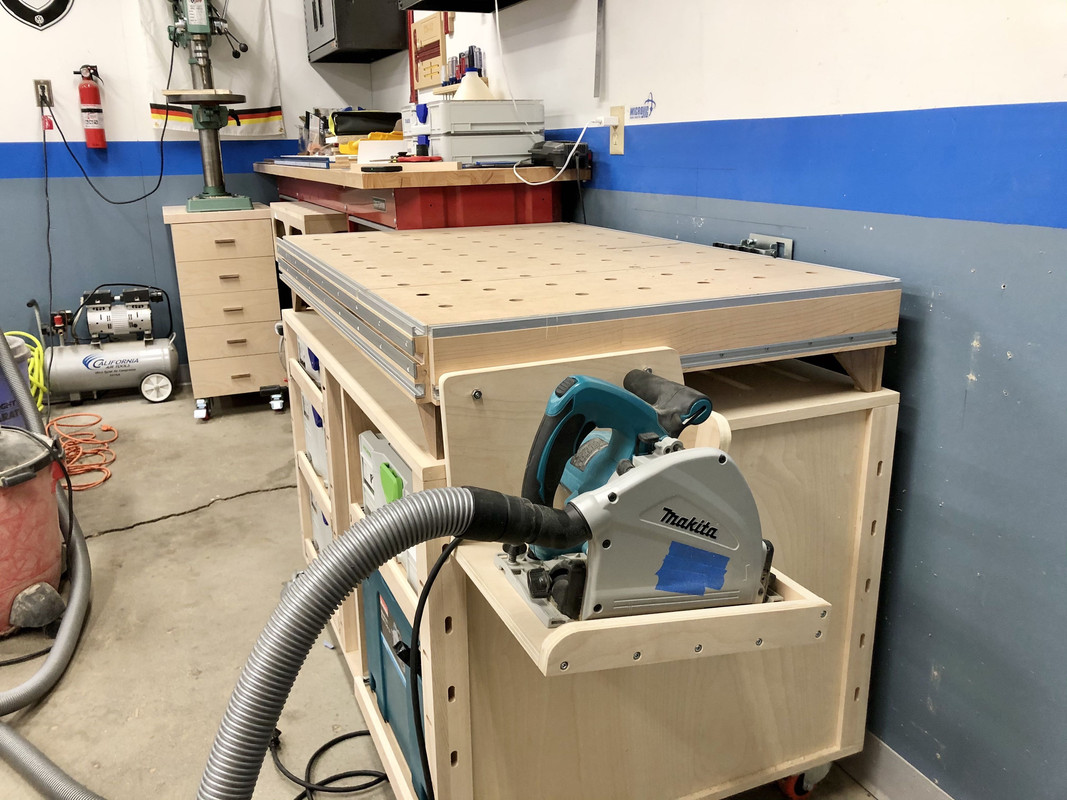
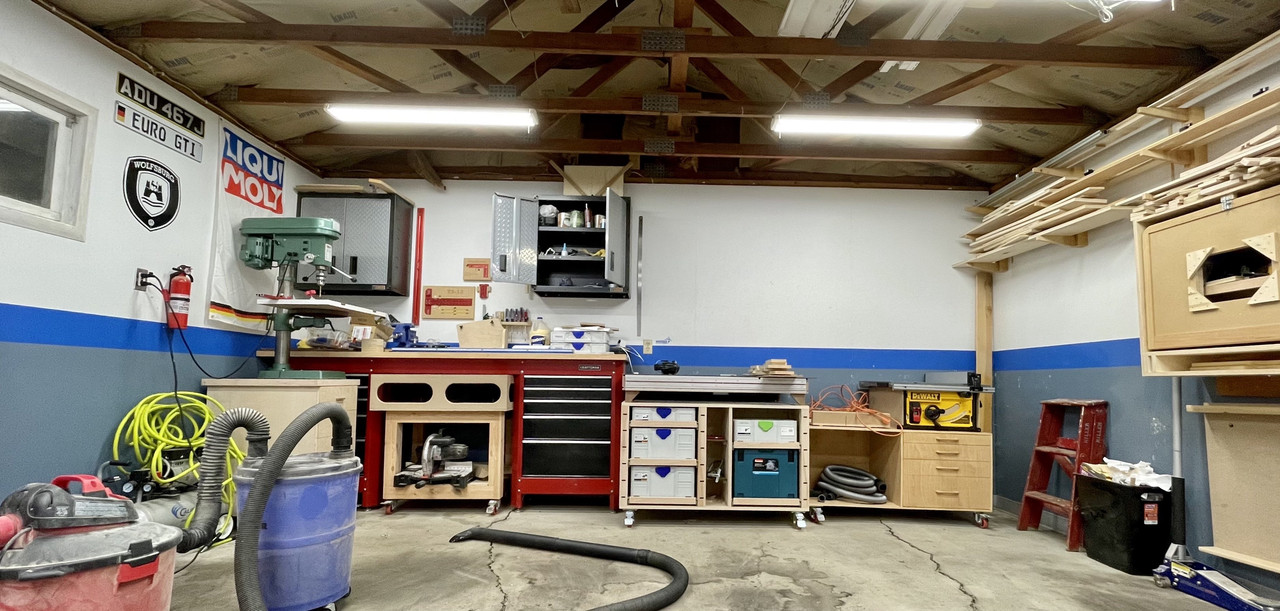
Here's a quick wide angle grab of the back wall, a view you don't often see all together!

IMG-0021.jpg


:beer:
 
OP
N

nicholam77

Well-known member
Joined
Dec 18, 2016
Messages
2,659
Location
Minneapolis, MN
Parents' Medicine Cabinet - part 1

Little bit of a different project today. My parents are doing a bathroom remodel and asked me to build a recessed medicine cabinet for them. The way the walls are angled there is only a tall sliver of space between two studs, where a tall and skinny (4' tall!) cherry framed mirror currently is. My dad wants to use the mirror as a door, with a birch + maple cabinet inside the wall, with adjustable shelving.

I have my own shelf-pin jig plan in the works, but I didn't have time to whip it together for his timeline, so we got the cheapest Rockler option.

IMG-0037.jpg


It worked well enough for these purposes, but definitely has it's downsides.

I didn't document the cutting and assembly since it's the same stuff I've been doing. Repeatable cuts. Pocket screw joinery.

IMG-0030.jpg


IMG-0031.jpg


IMG-0032.jpg


It's 13 3/4" by 44" tall. 3/4" birch plywood (from Menards this time!) with a 5mm underlayment plywood backing, stapled in place.

My dad took it home to shim out the studs and get a nice snug fit, and then will bring it back to do the maple face frame, and edge band the shelves.

Fairly simple stuff but after having my dad lend me tools and help me make stuff and give me design influences my whole life, it feels good to finally be able to contribute something back.


------------------------------------


On a separate note, the table saw enclosure seems to be working:

IMG-0035.jpg


Dust still gets in front of the saw somehow... but I don't think it's coming from underneath.

IMG-0034.jpg


It might be from lack of overhead collection. I'd like to have a solution for that eventually, too.
 

Unruh

Well-known member
Joined
Aug 12, 2017
Messages
1,431
Location
Silverdale, Washington
Wow! You need a YouTube channel! I would have loved to watch those last four or five builds. This may help with your dust coming from up above.
This guy does a really good job showing where some of that dust is coming from and why. If you make a zero clearance insert like that, take a bunch of pictures!
 
OP
N

nicholam77

Well-known member
Joined
Dec 18, 2016
Messages
2,659
Location
Minneapolis, MN
Wow! You need a YouTube channel! I would have loved to watch those last four or five builds. This may help with your dust coming from up above.
This guy does a really good job showing where some of that dust is coming from and why. If you make a zero clearance insert like that, take a bunch of pictures!

Ha! I've thought about making videos before... I'm actually a professional creative video editor in advertising so it's something I could tackle for sure, but it mostly comes down to time. Between work and family it's already hard to fit in projects without having to film them. I'd also have to invest in some equipment, as right now I only have my iPhone for content. Maybe someday if I have an extra special project.

I actually subscribe to "Hooked On Wood", although I don't remember seeing that zero clearance video. Thought it was interesting and made sense so I gave it a shot!

Zero-Clearance Insert Modification

Due to the riving knife I sliced my kerf all the way through the back end, which is not very stable. I loved Hooked On Wood's idea of glueing a little spacer in the back!

IMG-0078.jpg


To make the vacuum relief slots I used a trick on the router table I learned from Guy Woodshop's YouTube channel. Make a "start" and "stop" line on a piece of blue tape that mark the leading and trailing edge of the cutter:

IMG-0081.jpg


Then mark your workpiece where the mortise, slot, whatever, should start and stop. I am doing two separate, here:

IMG-0080.jpg


Then perform a plunge-cut on the start line, move workpiece to the stop line, and repeat until desired depth (or in this case through-cut) is achieved.

IMG-0083.jpg


It was very dusty -- I need to make that down draft box!

Here it is in place:

IMG-0085.jpg


IMG-0087.jpg


Now here's the big bummer -- I failed to notice that right under where the slots go my DeWalt saw has a metal indent inside the blade enclosure, effectively covering up the slots. :mad:

IMG-0088.jpg


So, I don't think this is going to produce results for me. But in the process I also noticed I can feel very little vacuum suction with my hand. I think Hooked On Wood had a much more powerful dust collector hooked up. I might need to pursue an overarm solution.

But on the upside -- it looks kinda cool :D
 
OP
N

nicholam77

Well-known member
Joined
Dec 18, 2016
Messages
2,659
Location
Minneapolis, MN
Parents' Medicine Cabinet - part 2 - shelves

After cutting some plywood for adjustable shelves, I ripped some maple edge banding into relatively thin strips.

This is for you, Unruh, my Heisz push stick in action:

IMG-0069.jpg


It's almost cut through, I really need to make another :D

IMG-0070.jpg


The pieces:

IMG-0072.jpg


To attach I used wood glue and blue tape:

IMG-0073.jpg


IMG-0076.jpg


IMG-0077.jpg


After they dried, my plan was to flush trim the edge banding at the router table (It was slightly thicker than the plywood), for a perfectly flush transition. This did not go so well:

IMG-0105.jpg


The workpiece was just too skinny to hold upright against the bit / bearing. I accidentally gouged the banding in multiple areas.

In order to due it more accurately and safer, I made an auxiliary fence for the router table out of some leftover melamine, by drilling some recessed holes for 1/4 20 hardware:

IMG-0091.jpg


IMG-0092.jpg


So far what I've learned about the drill press table -- melamine may have not been the best choice. It is so slippery the hold down clamp has a tough time doing it's job.

Nevertheless I added some bolts and oval T-nut washers which are so much nicer for T-Track applications than hex nuts, and slide them on the router table extrusions:

IMG-0097.jpg


IMG-0095.jpg


Because the aluminum extrusions have multiple T-Tracks on the front face, by placing the auxiliary fence in the top T-Track, I can raise it off the table surface:

IMG-0103.jpg


Which is perfect for flush trimming edge banding. Just line the auxiliary fence faces with the bit's bearing, and the excess to be trimmed rides underneath:

IMG-0104.jpg


One got some tear out, but 4 out of 6 turned out great. Hopefully 4 will be enough. :D
 

Matt Johnson

Well-known member
Joined
May 2, 2014
Messages
59
Location
Washington State
...
So far what I've learned about the drill press table -- melamine may have not been the best choice. It is so slippery the hold down clamp has a tough time doing it's job.
...

I've not used the Woodpecker holds, but I've used others that have smooth plastic with little contact edge.
I found success with either blue painters tape (less aggressive) or low tack double sided layup type tape (more bite) adhered to the work surface.
Both can provide the needed texture/tack, but can be removed from the surface easily.

Hope that helps.

Matt
 

Unruh

Well-known member
Joined
Aug 12, 2017
Messages
1,431
Location
Silverdale, Washington
That stinks about those metal indents; however, that insert does look great. Putting the spacer in the back worked pretty slick. Thanks for sharing.
 

ricketycricket

Well-known member
Joined
Jan 28, 2019
Messages
57
Location
Saint Louis
For a second there I thought this was yours [emoji23]

d5281a320f2aba375244cc458bd7cdaf.jpg


Sent from my iPhone using Garage Journal
 

Attachments

  • d5281a320f2aba375244cc458bd7cdaf.jpg
    d5281a320f2aba375244cc458bd7cdaf.jpg
    90.1 KB · Views: 0
Last edited:
OP
N

nicholam77

Well-known member
Joined
Dec 18, 2016
Messages
2,659
Location
Minneapolis, MN
I've not used the Woodpecker holds, but I've used others that have smooth plastic with little contact edge.
I found success with either blue painters tape (less aggressive) or low tack double sided layup type tape (more bite) adhered to the work surface.
Both can provide the needed texture/tack, but can be removed from the surface easily.

Hope that helps.

Matt

Thanks for the tips Matt, I'll keep that in mind.

That stinks about those metal indents; however, that insert does look great. Putting the spacer in the back worked pretty slick. Thanks for sharing.

Thanks! I've since sanded the back side of the slots to make a little relief -- didn't get too far with sandpaper but if I had a file I think I could wear the material away on the back side and make some airflow possible. We'll see.

For a second there I thought this was yours [emoji23]
[/IMG]

Ha, so true! I could've saved myself a little $$$. :lol:
 
OP
N

nicholam77

Well-known member
Joined
Dec 18, 2016
Messages
2,659
Location
Minneapolis, MN
Parents' Medicine Cabinet - part 3 - face frames

Was working with my dad last night, 7-10pm, cuz that's when you do stuff when you have a kiddo.

:lol_hitti

With someone else there I forgot to document everything, but it's nothing I haven't shown before. I cut some 1x2 maple face frame material to exact length for the horizontal bits, and oversized for the vertical bits.

Then everything got biscuits. I don't get 100% perfect alignment with biscuits, but it's very close.

IMG-0114.jpg


IMG-0116.jpg


I didn't have enough clamps to do it all at once, so I glued the vertical face frames first, then the horiztonal.

IMG-0117.jpg


IMG-0119.jpg


Before work this morning I took the clamps off and quickly trimmed up the extra length on the vertical pieces.

IMG-0127.jpg


I prefer to do it this way vs. cutting to exact size first, because biscuits allow some longitudinal play and things can slide around with glue and clamps. This ensures they end up nice and flush.

Did some light sanding and glue clean up and this is how it sits before my dad comes to pick it up today:

IMG-0128.jpg


IMG-0129.jpg


IMG-0132.jpg


He is going to do the final sanding / finishing / installation.

I'll have to get some pics of it at their house when it's all finished.

:thumbup:
 

Mr. Roboto

Well-known member
Joined
Dec 11, 2012
Messages
2,160
Location
New Hampshire
Awesome... an in wall medicine cabinet is something on my build list someday. We also want to re use our current mirror as the door too. What style of hinge are you planning to use? Nice job so far. That’s one well made piece!
 
OP
N

nicholam77

Well-known member
Joined
Dec 18, 2016
Messages
2,659
Location
Minneapolis, MN
Awesome... an in wall medicine cabinet is something on my build list someday. We also want to re use our current mirror as the door too. What style of hinge are you planning to use? Nice job so far. That’s one well made piece!

Thanks! I am not sure on the hinge... I think just a normal hinge? My dad found the hardware, I think it will be 3-4 hinges overall. I probably would've done Euro soft-close if building from scratch but I don't think the existing mirror can accommodate. I might go over to their house and help install it this weekend. If so I will take some pics.
 
OP
N

nicholam77

Well-known member
Joined
Dec 18, 2016
Messages
2,659
Location
Minneapolis, MN
For any Systainer fans out there, I've grabbed a T-Loc Sys4 for the track saw:

:eek:

IMG-0199.jpg


With a slight modification the original MakPac tray insert fits nicely.

IMG-0202.jpg


My biggest beef with the MakPac boxes are the latches. They are fiddly and often get stuck, especially in cold weather, which I was reminded of recently. Usually requires both hands which is sometimes annoying. Bit of a steep price to pay... but the T-Loc system is just so much nicer to use in practice.

Also, the T-Locs have the feet which fit in my drawer cutouts so the box doesn't slide around.

I'll have to draw up a label for it in Photoshop, but I don't have a color printer at home.

:eyecrazy:
 

Denwood

Well-known member
Joined
Sep 22, 2014
Messages
4,191
Location
Thunder Bay, Ontario, Canada
Jeez Nick, not sure if I've posted here before but I should have. You've done some really great work on the dust collection mods. Nice cabinet build too. I see you've got yourself a Makita track saw as well. It's easily the favorite tool in my own shop with the long and short track.
 
To avoid these ads, REGISTER NOW!
Top Bottom