
You are using an out of date browser. It may not display this or other websites correctly.
You should upgrade or use an alternative browser.
You should upgrade or use an alternative browser.
Show us your welding projects
- Thread starter neonnblack
- Start date
64Trvlr
Well-known member
Nice job.I really like the docking lights on the sides as well.
Mike.
Thanks!
They come in handy out in the sticks where I like to camp.
toomanytoyzz
Well-known member
I have several projects going on at once but I will start with my two brawler rigs in this post. I did all the work on these myself
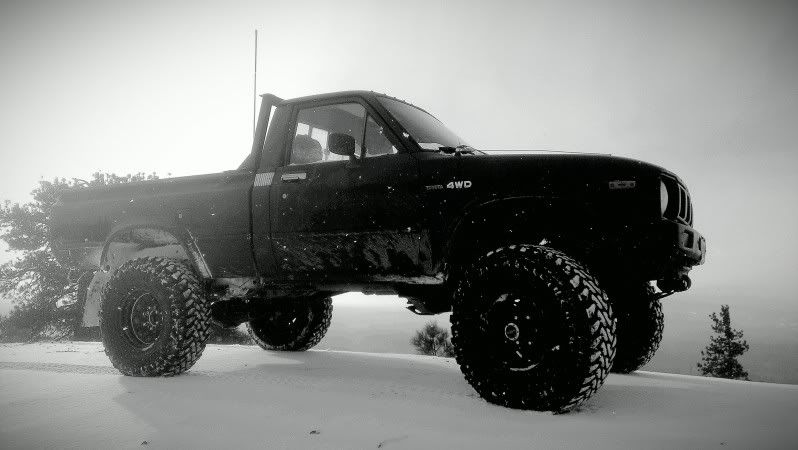
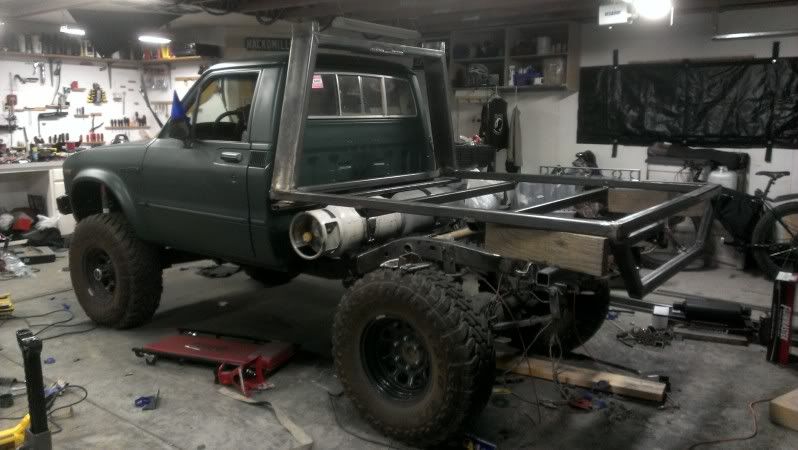
the other big project I have started with a plain stock 1980 toyota hilux pickup. in this pic I threw on a 4 inch lift, 33x10 toyo mud terrains and new 15 inch wheels and converted it to propane.
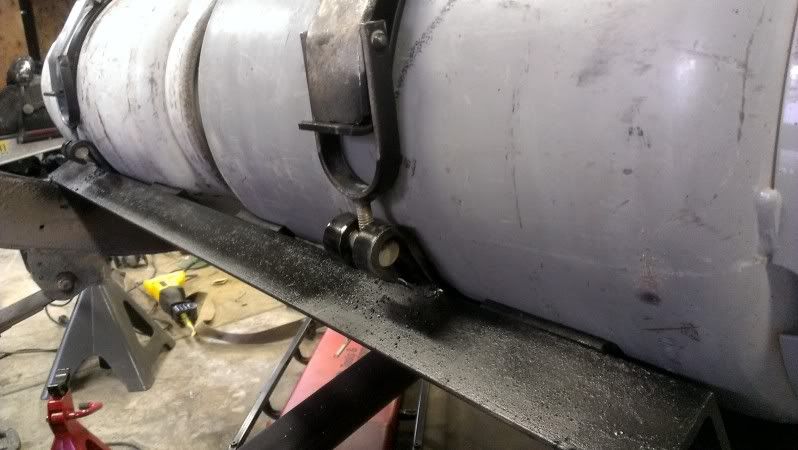
I use this rig for hunting and firewood cutting and really liked the way it got around in the woods so I decided to throw some money into it. I decided to fab up a flat bed and mount the tanks inbetween the frame and bed.
took several hours to cut and grind off all the mounts and get rid of the nonsense.
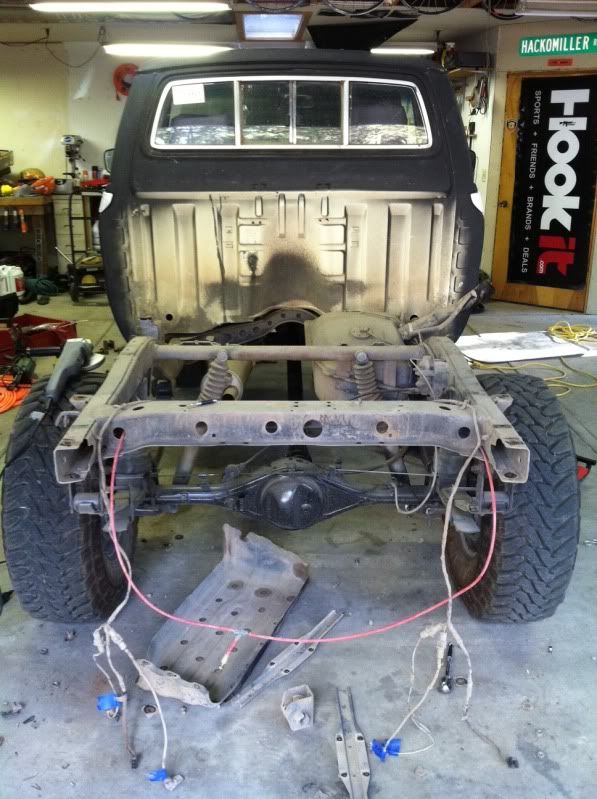
I blocked and channeled the frame since I was going to put a 12k lb winch on both the front and back.
I made mounts and used forklift brackets to mount the tanks solid to the frame and used stall mat riveted to the rails to absorb vibrations and dampen sound on the bottles

I had just enough room to put in dual tanks in the mounts
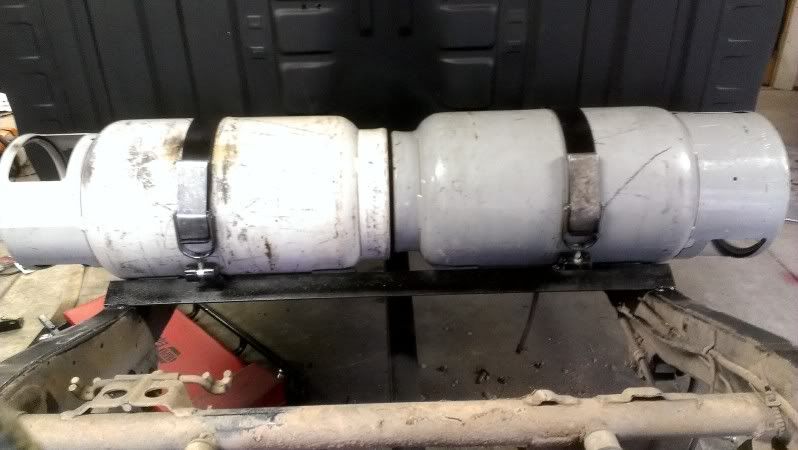
once the cam locks are tightened they dont move or make a sound
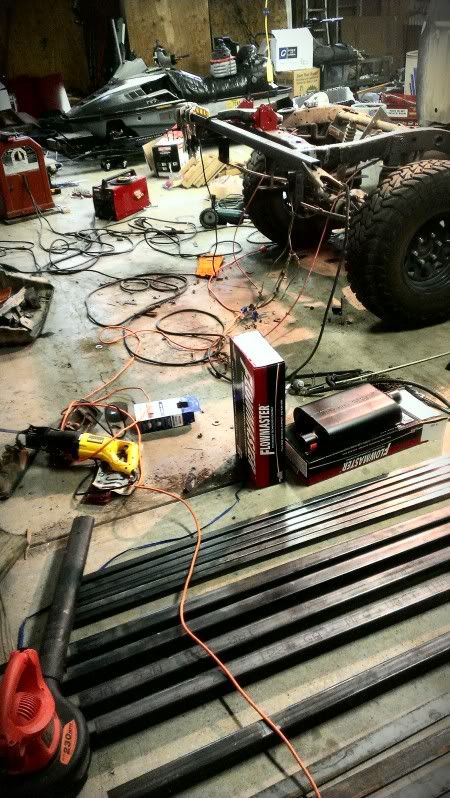
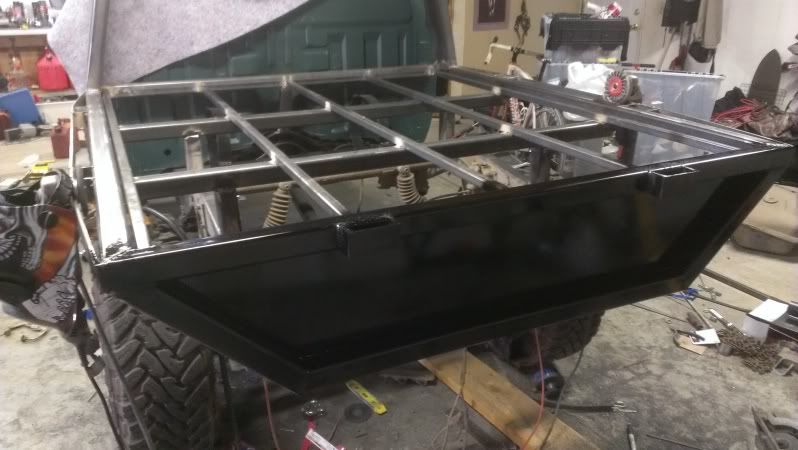
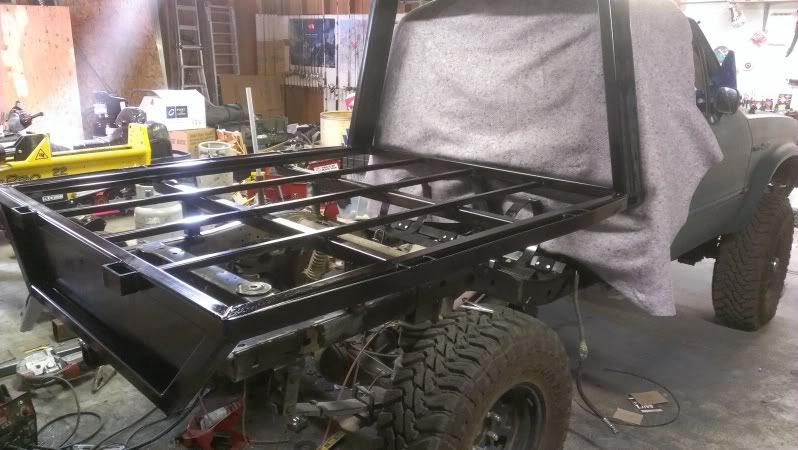
I used 2x2 square tube for the flatbed frame and 2x6 for the headache rack since I will mount a 2000lb atv winch in the top for lugging logs and elk onto the bed. I only had to raise the actual bed surface 2 inches in order to accommodate the propane cylinders and still have enough clearance for wheel travel and tire clearance.
I used 1 inch square for the rest of the bed surface and pretty heavy sheet for the rear drop panel
I slapped in a fresh 22r and made room for dual 31 series batteries tethered to a 500 amp dual switch that will be mounted on the dash in order to isolate the batteries during heavy winching. these batteries barely fit after a ton of cutting and fabbing trays. each battery is rated to 1250 cca at 32 degrees.

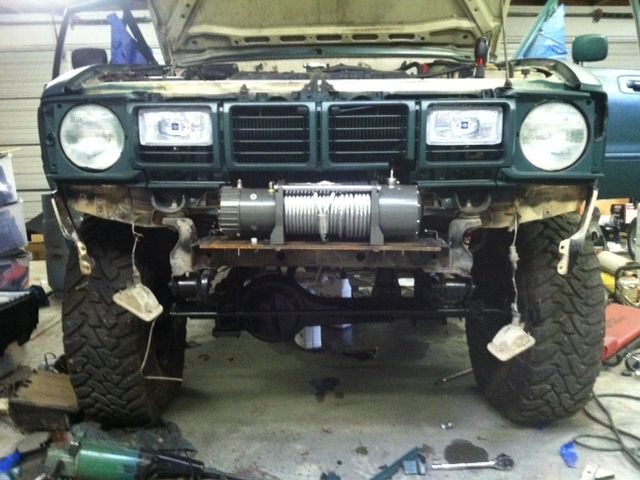
i capped and channeled the frame on the front and recessed the front winch clear back to the radiator in order to increase my approach angle. I will finish off the rest of the front bumper with 1/8 steel to contour around the sides. you can see the old bolt holes from the stock bumper and how much clearance I gained. I also found some hellla lamps and recessed them in the grill that are wired to the brights.
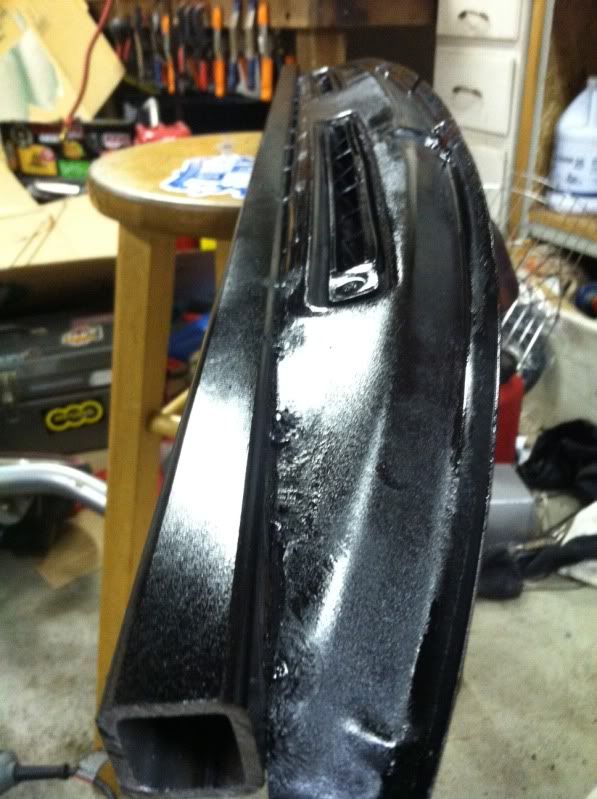
I gutted the interior and am making a complete sheet metal dash. I cut down the old dash in order to keep the stock defroster set up since space is a premium. I cut down the defroster to the vents and stitch welded it to the 1 inch tube at the angle for the dash.
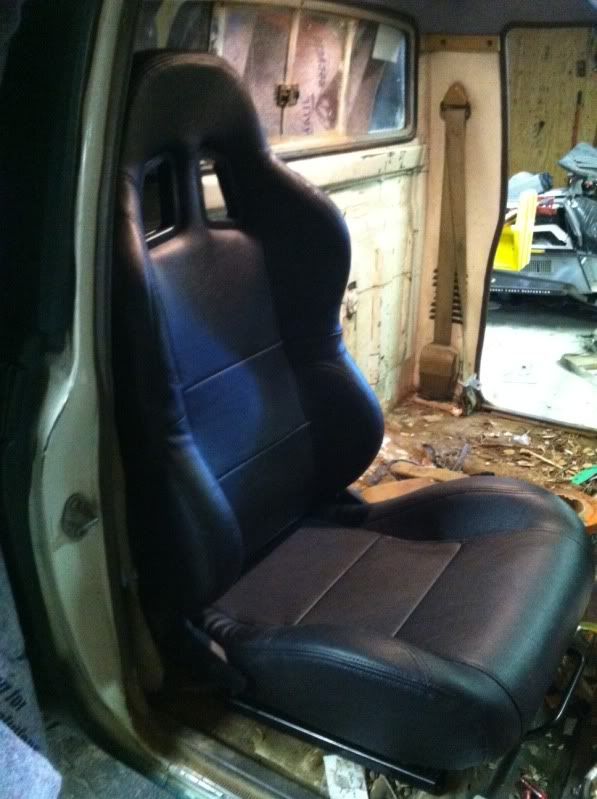
I found some cheap buckets on amazon for 99 bucks a piece and found they will fit perfect and leave me plenty of room for a steel center console for electronics and firearms.
should have this wrapped up by the end of the month, pics to follow shortly.
I feel like I should send you my sign when I'm finished. You're speaking my language with your build. Dual cases and lockers in the future? It goes together like peanut butter and jelly when building TOY mini trucks.

gonefirefighting
Well-known member
I feel like I should send you my sign when I'm finished. You're speaking my language with your build. Dual cases and lockers in the future? It goes together like peanut butter and jelly when building TOY mini trucks.
air lockers front and rear with an atlas t case married to a swapped 5 speed.
gonefirefighting
Well-known member
Gne firefighting, got a dedicated build thread somewhere? I'm loving your mini truck thread and would like to follow it till you wrap it up.
Drew
A way more detailed thread is here on pirate 4x4

Last edited:
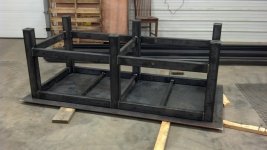
Yet another welder cart underway. My new Miller 211 will sit on the top shelf, and my plasma cutter will sit on the bottom shelf. Middle shelf will be for all the misc stuff that I always have sitting on top of the welder. I'll upload more pics when it's done in a couple days.
Finished it up over the weekend. Just need to get some paint on it...
Attachments

Nice stand and nice welder. I have the same Miller myself and I love it!
Thanks. I love it so far too. Now that I've got the cart done, I can get started on some of my cooler welding projects...
My combination sander stand...
http://garagebulletin.com/2013/10/harbor-freight-combination-sander-stand/

Cool stand. I need a sander like that....
Duct Tape Man
Well-known member
I am about half way done with the blazer. it started as you see below, a plain stock 1984 K5. About to start cutting and welding on this beast
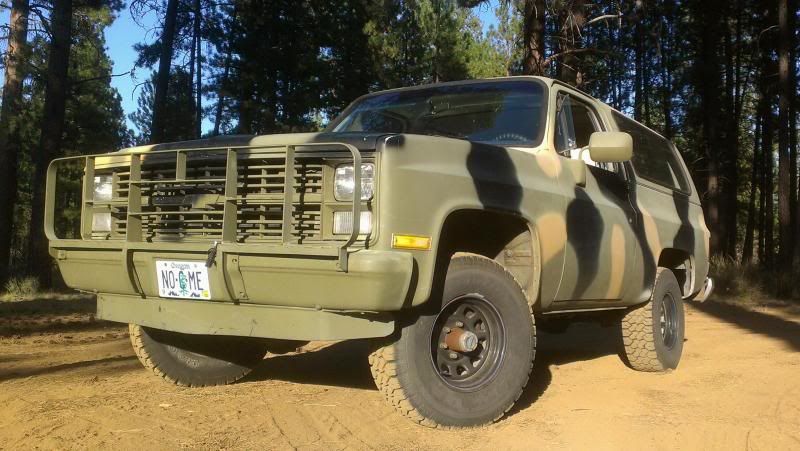
I wanted a rig that I could use as a tow pig for the snowmobiles for ice fishing and getting the boats into the high country when the lakes aren't frozen. I started by slapping in a spanking fresh balanced and blueprinted 400 short block with an rv cam, roller rocker arms, eldebrock performer package, gear drive time set, and a new 700R4 trans with corvette servos and drag bands with a husrt shift kit.
https://scontent-b-sjc.**.fbcdn.net/hphotos-ash4/1000133_10151536965183737_1488240306_n.jpg
Just curious -
I have built several M1009 Blazers for customers before, they were originally diesels (GM 6.2 liter), and got pretty good mileage in the M1009, between 20 and 24 mpg. Most of the folks out there into military type vehicles like a diesel powerplant. One we even yanked a burned-out stock motor and dropped a 4BT Cummins into it. I'm curious as to why you went the opposite direction, from diesel to gas. A lot of offroaders I know like dropping the gas motors and going to a diesel powerplant...
Hot Chop shop
Well-known member
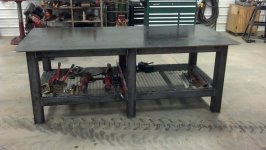
All done with the welding table... At the last second I changed my mind from going miller blue to red... Figured the other two benches are red better stick with the theme? Still got the blue so guess I'll use it to make a new welding cart? I'm just so happy to to start welding on a table instead of on the ground... Still going to mount a power strip to it and the angle iron on the sides seems to hold plenty of c-clamps and grinders so don't think I'll need to add any additional hooks but well see. I just set the vise on there to see if I wanted to mount it or use a hitch mount.


Last edited:
Vegaman_Dan
Well-known member
I vote for the hitch mount since you can remove the vise with a single pin and have the full table top unobstructed for builds when needed.
fredybender
Well-known member
- Joined
- Apr 16, 2012
- Messages
- 141
Just finished making a jig, to adapt a Toyota pick up diff housing, onto a first generation RX7. Axles flange being larger (and housing too...) I had to use centerline as the reference point. I also machined some centering rings for the larger Toyoata diff.
Housing being 0.078" shorter, a 0.039" shim is used to center the new diff housing.
Not all that pretty, but everything lines up within a few thou.
All brackets are to be laser cut & welded in the Toyota diff in the near future.
I will only retain the sway bar, and spring brackets off the old RX7 diff.


Hot Chop shop
Well-known member
I vote for the hitch mount since you can remove the vise with a single pin and have the full table top unobstructed for builds when needed.
That's what I was thinking... It's the reason I staggered the frame so that I had a hole on every side of the table... But I gotta find a way to make a good fitting one... Might try harbor freights hitch and then play with it?
I have heard bad things that it has a lot of play in it but maybe I could weld some plates on it and just keep grinding down till I get a good solid fitment into the bench.
steel 35
Well-known member
Or drill and tap, then tighten in place.
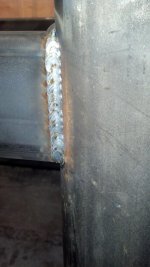
I've only posted here a few times so I'm excited to here thoughts and opinions. Here is my 4x8 welding table with a 1/2 thick top. I plan on mounting a vice to a receiver tube welded to one of the legs to keep it lower to the ground yet. I learned to weld in high school nearly 20 years ago and finally have a place and equipment to use the skills. My welder is Miller 212 Auto set. All the structural pieces are 1/4 walled tubing. The legs are 4x4 and the rails are 2x4.
Attachments
stonewellmark
Well-known member
golfnut....that bench is sweet. Did you put any cross braces under the 1/2" top to help with warping?
Mark
Mark
I did put some 2x2x1/4 on the bottom side of the table to keep the top flat. The table turned out real nice but I somehow got about 1/16 to 1/8 crown in part of it. I'm not sure if it because my shop floor is crappy or if I didn't have the bottom of the top clean when I positioned the frame.
Attachments
WakonTonka
Well-known member
That's what I was thinking... It's the reason I staggered the frame so that I had a hole on every side of the table... But I gotta find a way to make a good fitting one... Might try harbor freights hitch and then play with it?
I have heard bad things that it has a lot of play in it but maybe I could weld some plates on it and just keep grinding down till I get a good solid fitment into the bench.
Possibly a more efficient use of your time would be to weld a few beads on the "tongue" and grind them to get that fit, "just sayin' "
Rhyno
Well-known member
I've only posted here a few times so I'm excited to here thoughts and opinions. Here is my 4x8 welding table with a 1/2 thick top. I plan on mounting a vice to a receiver tube welded to one of the legs to keep it lower to the ground yet. I learned to weld in high school nearly 20 years ago and finally have a place and equipment to use the skills. My welder is Miller 212 Auto set. All the structural pieces are 1/4 walled tubing. The legs are 4x4 and the rails are 2x4.
That's a nice, and HEAVY table.
Can I make a suggestion of "softening" or "rounding" the corners?
The table won't move, (and soften the blow) if someone or something falls into the edge....
I have seen it happen, too many times....

Last edited:
I made some brackets to hang both of my 24' ladders on last night. Nothing fancy but they'll be hanging instead of standing up.


zmotorsports
ALLIANCE MEMBER
While servicing my Jeep on Friday night, I noticed how exposed the EVAP canister is under the Jeep to damage from rocks. I know there are many, many companies out there building protection/skids for these canisters but I simply cannot bring myself to buy one, I have to fabricate one of my own.
Here is where I started. I bent a piece of 4" wide by .250" plate and drilled a mounting hole that will fit directly under the EVAP canister mounting bracket using the same bolt.

I drilled a 1.250" diameter hole to create a large radius where one of the lines need to clear.

The hole opened and radiused for clearance as well as the other two pieces ready for welding that will complete the rear mounting bracket.

Rear mounting bracket welded.


Rear bracket completed and ready for paint.

Rear bracket painted.

Start of the front mounting bracket. This will sit on top of the EVAP canister mount and use the two bolts that secure the canister to the crossmember.

Front bracket tacked together and ready to remove for welding.

I decided to angle this front piece upward slightly.

Completely welded and ready for a quick coat of paint.


Installed and ready for the trail.


Here is where I started. I bent a piece of 4" wide by .250" plate and drilled a mounting hole that will fit directly under the EVAP canister mounting bracket using the same bolt.
I drilled a 1.250" diameter hole to create a large radius where one of the lines need to clear.
The hole opened and radiused for clearance as well as the other two pieces ready for welding that will complete the rear mounting bracket.
Rear mounting bracket welded.
Rear bracket completed and ready for paint.
Rear bracket painted.
Start of the front mounting bracket. This will sit on top of the EVAP canister mount and use the two bolts that secure the canister to the crossmember.
Front bracket tacked together and ready to remove for welding.
I decided to angle this front piece upward slightly.
Completely welded and ready for a quick coat of paint.
Installed and ready for the trail.
MP&C
Well-known member
That fresh paint needs some mud on it! 
Nice fab...
Nice fab...
zmotorsports
ALLIANCE MEMBER
That fresh paint needs some mud on it!
Nice fab...
Probably this weekend. Our Jeep club is heading out on a trail run Saturday. I hate mud but this time of year when going off road, beggers can't be choosers.
I was actually rushing this job a bit more than usual and got a big ugly finger print on the one upper corner that you can see in the picture. Once it was completely installed I grabbed the can of spray paint and touched it up but the pictures were taken prior.
Mike.
Hot Chop shop
Well-known member
I've only posted here a few times so I'm excited to here thoughts and opinions. Here is my 4x8 welding table with a 1/2 thick top. I plan on mounting a vice to a receiver tube welded to one of the legs to keep it lower to the ground yet. I learned to weld in high school nearly 20 years ago and finally have a place and equipment to use the skills. My welder is Miller 212 Auto set. All the structural pieces are 1/4 walled tubing. The legs are 4x4 and the rails are 2x4.
Nice table that's a big boy. You could make lots of fun projects in the future with it!
Sent from my iPad using Tapatalk HD
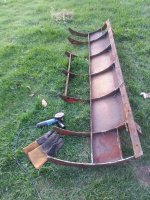
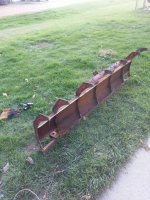
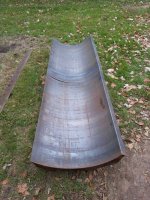
New moldboard on my Boss RT3 Smarthitch 1 7.5 ft. Superduty straight blade.
-Pat
sent from somewhere in Minnesota...
-Pat
sent from somewhere in Minnesota...
Attachments


Hot Chop shop
Well-known member

Trying to figure out how to make the receiver hitch to mount my vise and grinder... I don't think I have any scrap that will fit tight into the 2in tubing frame... Tried 1.5in and angle iron but it's real lose even with some beads down the sides... Might make a run to get the harbor freight one.
A**holes Garage
Banned
Trying to figure out how to make the receiver hitch to mount my vise and grinder... I don't think I have any scrap that will fit tight into the 2in tubing frame... Tried 1.5in and angle iron but it's real lose even with some beads down the sides... Might make a run to get the harbor freight one.
I welded flat stock like your top picture, then ground it down until it fit snug.
great white tj
Well-known member
I've only posted here a few times so I'm excited to here thoughts and opinions. Here is my 4x8 welding table with a 1/2 thick top. I plan on mounting a vice to a receiver tube welded to one of the legs to keep it lower to the ground yet. I learned to weld in high school nearly 20 years ago and finally have a place and equipment to use the skills. My welder is Miller 212 Auto set. All the structural pieces are 1/4 walled tubing. The legs are 4x4 and the rails are 2x4.
Great Job!!!
steel 35
Well-known member

.. Might make a run to get the harbor freight one.
If your going to use more then one tube in it; Grinder, saw, vise, ect. your going to have several tubes to fit and it ***** to do it.
Drill and tap or weld a nut over a hole and tighten as needed, this works best for me
 Good luck and that table is very nice.
Hot Chop shop
Well-known member
Hey thanks for the tip it's perfect with flat stock welded to each side but would be a pain to do for all of them as suggested bellow... But it's a cheap solid solution which I like.I welded flat stock like your top picture, then ground it down until it fit snug.

If your going to use more then one tube in it; Grinder, saw, vise, ect. your going to have several tubes to fit and it ***** to do it.
Drill and tap or weld a nut over a hole and tighten as needed, this works best for me
That's probably the way to go...I knew I was over excited to paint it and I should have kept is bare metal to see what works and what needs adjustment like welding on a nut for the receiver and maybe adding addition hooks for storage that need to get welded on.
Example today spent way too long figuring out how to bolt a power strip to one of the legs... I started making a bracket and then took apart the powerstrip to try to drill through the back it into the legs but no luck... Duct tape is starting to look real tempting
zmotorsports
ALLIANCE MEMBER
zmotorsports.....good stuff man. I like it.
Thank you. Boy did I fabricate that just in time. We went wheeling Saturday with our Jeep club and I got hung up a little in a rock garden that I decided to go through. The skid did exactly what it was supposed to do, protect the EVAP canister. Although it did get a nice dent in it.
I had to pull it off yesterday and flatten it back out in the press and throw some fresh paint on it.Mike.
joe49
Well-known member
Trying to figure out how to make the receiver hitch to mount my vise and grinder... I don't think I have any scrap that will fit tight into the 2in tubing frame... Tried 1.5in and angle iron but it's real lose even with some beads down the sides... Might make a run to get the harbor freight one.
build the box for the smaller tube to fit out of 2 pcs of angle.
Hot Chop shop
Well-known member
build the box for the smaller tube to fit out of 2 pcs of angle.
Thanks for the idea looks like it would work great...
I am going to weld on a nut with a big old bolt for a set screw and see how that works out... But I think it might vibrate a lot with the grinder on so I might go buy some 2inx2in square tubing in a thinner gauge so it slides right in then grind down the channel where the weld line is.
I should have done my homework cause there are a few threads around here that give some great ideas... Like getting tubing from mcmaster Carr that doesn't have the welded line inside etc.
Thanks for all the help I'll try not to junk up my favorite thread with noob question and just stick to posting my bad weld bead pics
mountainman72
Well-known member
Hello all,
Here's a project I completed recently.
I have a lot of books and wanted to weld up a bookshelf for them. I wanted the shelves to look like they were floating, so I planned to top mount the brackets. To complete the floating look, I made the brackets one inch shorter than the depth of the shelf so when books were on the shelf, you wouldn't be able to see the bracket. The bottom shelf is 12" deep, and each shelf above steps back one inch, and gets one inch closer to the shelf below it. It all started with a 5x10 sheet of 1/8 plate...
Here's the plate cut into shelves:

Most of the 49 brackets needed for the shelves:

Detail of the bracket:

Next the brackets had to be welded to the shelves, 16" O.C.:

Shelves piling up:


I took the shelves to a body shop for paint. Here they are coming home:

Here they are mounted:

You can see how the depth steps back here:

Loaded up with books:

Thanks for looking, Brett
Here's a project I completed recently.
I have a lot of books and wanted to weld up a bookshelf for them. I wanted the shelves to look like they were floating, so I planned to top mount the brackets. To complete the floating look, I made the brackets one inch shorter than the depth of the shelf so when books were on the shelf, you wouldn't be able to see the bracket. The bottom shelf is 12" deep, and each shelf above steps back one inch, and gets one inch closer to the shelf below it. It all started with a 5x10 sheet of 1/8 plate...
Here's the plate cut into shelves:
Most of the 49 brackets needed for the shelves:
Detail of the bracket:
Next the brackets had to be welded to the shelves, 16" O.C.:
Shelves piling up:
I took the shelves to a body shop for paint. Here they are coming home:
Here they are mounted:
You can see how the depth steps back here:
Loaded up with books:
Thanks for looking, Brett
koditten
Well-known member
Very, very nice. I wish I could have got off going that route. SWMBO wanted built in wood book shelves. I really like the built in book ends. Those angles must work great for keeping the books from tipping over.
KO
KO
Hot Chop shop
Well-known member

Took the table for a test run today. Mounted the powerstrip and made some hooks to hold the extension cord... Used the plastic one as a template.

Last edited: