To avoid these ads, REGISTER NOW!

New House, New Shop

MrQuinn

Well-known member
Joined
Dec 17, 2014
Messages
86
Location
Coeur d'Alene, ID
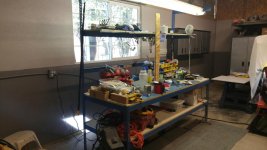
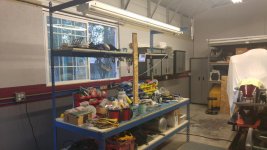
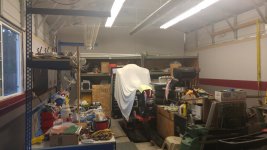
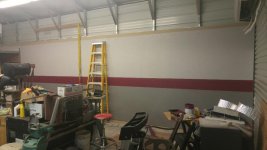
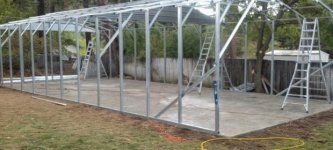
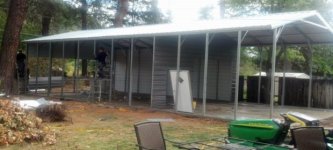
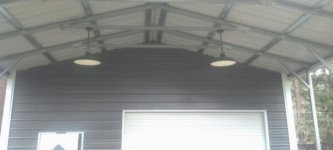
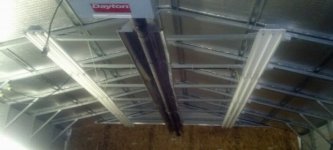
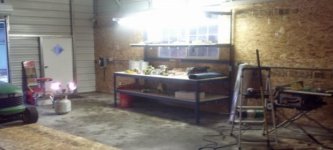
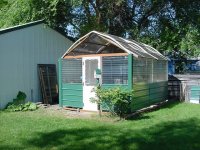
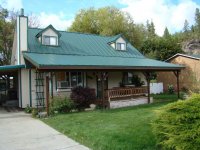
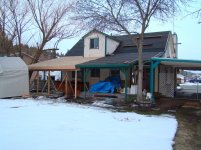
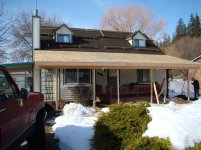
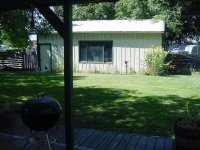
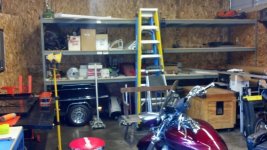
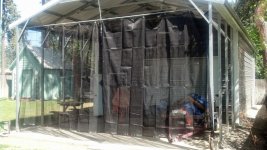
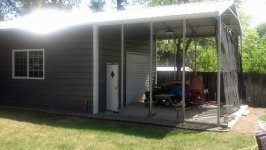
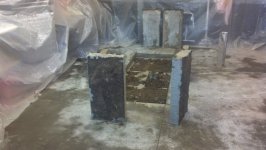
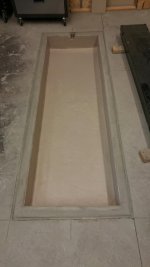
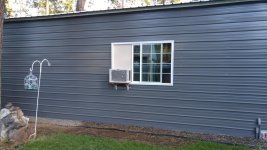
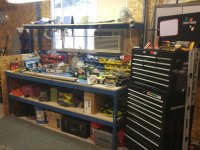
We moved over the border from Spokane to a newer home in Coeur d'Alene Idaho last Fall. It has a 2 car attached garage but no shop to work on the bikes and store their trailers and all the collective accessories. So I spent the summer putting in the slab and racing to finish the 20x30x11 building before Winter sets in. I am closed up but needing to get the heat & electrical in yet. I have the power run underground and the panel in so we have some power inside. Running PVC and #12 solid singles for the circuits. I had no shade in the back yard to wash & wax the machines so we put a 16' in front of the shop.

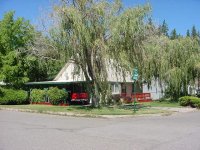
I left the boards out of the fence on purpose so my neighbor can come over and visit. He rides too so we are good neighbors and plan to put in a gate for him to use.

Starting over...

KNxF8xqqH6a7EJACQs-lXaFYxlNNMQXMLj62Cc9zSZk=w367-h207-p-no
 

Attachments

  • formed up & ready for mud.jpg
    formed up & ready for mud.jpg
    44.2 KB · Views: 264
  • poured & sealed.jpg
    poured & sealed.jpg
    39.5 KB · Views: 245
  • all backfilled and curing.jpg
    all backfilled and curing.jpg
    42 KB · Views: 245
  • day 1 - building started.jpg
    day 1 - building started.jpg
    46.2 KB · Views: 280
  • day 2 - almost done.jpg
    day 2 - almost done.jpg
    40.7 KB · Views: 277
  • school-lites.jpg
    school-lites.jpg
    25.2 KB · Views: 276
Last edited:
To avoid these ads, REGISTER NOW!

drivesitfar

Well-known member
Joined
Oct 23, 2013
Messages
36,004
Location
Pacific Northwest
MrQ: i love a stick built garage especially when the sticks are steel. only thing i can see so far that i might be concerned about or change is the ground level on the side or maybe sides is right at the level of your pad. can you drop the dirt level a few inches so you don't have to worry about the steel plate getting rusty? or is there no possibility that water will ever crawl into your garage and on you cement?

nice looking with the covered carport area in front too. again welcome to our forum and happy to have you.
 
OP
M

MrQuinn

Well-known member
Joined
Dec 17, 2014
Messages
86
Location
Coeur d'Alene, ID
Looking good. How much did that building set you back?

The concrete work and permits were 10.5k and the building was another 10k delivered and setup! They took a day and a half to put up the building after 2 weeks of waiting for the concrete to cure.
 
Last edited:
OP
M

MrQuinn

Well-known member
Joined
Dec 17, 2014
Messages
86
Location
Coeur d'Alene, ID
MrQ: i love a stick built garage especially when the sticks are steel. only thing i can see so far that i might be concerned about or change is the ground level on the side or maybe sides is right at the level of your pad. can you drop the dirt level a few inches so you don't have to worry about the steel plate getting rusty? or is there no possibility that water will ever crawl into your garage and on you cement?

nice looking with the covered carport area in front too. again welcome to our forum and happy to have you.

Thank you for your comments. The building actually sits on the edge of the concrete and the steel siding extends down 4 inches past the slab. I plan to pull the dirt back and replace it with gravel eventually so that the roof run off doesn't splash dirt all over the sides... maybe gutters with a dry well at the corner too.
 

Attachments

  • siding detail.jpg
    siding detail.jpg
    15.1 KB · Views: 92
Last edited:
OP
M

MrQuinn

Well-known member
Joined
Dec 17, 2014
Messages
86
Location
Coeur d'Alene, ID
Doing the inside work now... I ran 12awg solid in PVC conduit for all wall circuits on 20amp breakers - each quad box has 2 separate circuits, top and bottom. All circuits are in PVC conduit for the lights as well. I wired the florescent lights separately with each side on it's own switch and the center tube on both together. So I can run just the center tubes on both for minimal lighting or just the outer tubes on either side. All lights makes it daylight at midnight in there! Now to get the gas to the shop for the overhead radiant heat... and paint this spring!
 

Attachments

  • Lights & heater.jpg
    Lights & heater.jpg
    30.7 KB · Views: 258
  • upload_100000C669C1A9_2014.12.jpg
    upload_100000C669C1A9_2014.12.jpg
    33.5 KB · Views: 261
  • shop1.jpg
    shop1.jpg
    27.1 KB · Views: 268
  • shop5.jpg
    shop5.jpg
    32.3 KB · Views: 295
  • shop3.jpg
    shop3.jpg
    29.2 KB · Views: 287
  • shop4.jpg
    shop4.jpg
    29.1 KB · Views: 299
  • bikes are home.jpg
    bikes are home.jpg
    34.8 KB · Views: 316
Last edited:

xtremek

Well-known member
Joined
Apr 13, 2012
Messages
11,603
Location
St. Johns, Mi
I'm not usually one for new builds, I really like the looks of your shop. I agree with Sunbimmer in that the carport really adds to the look. I also like the big window on the side. I'm looking forward to seeing how you finish the inside.
 

1/2 Cup

Member Emeritus
Joined
Apr 28, 2012
Messages
19,283
Location
Shepparton. Victoria. Australia
Your build is looking fantastic, I like the all steel aspect.

Its very much like typical shed out here, we don't normally see timber frame sheds any more.

Keep up the good work.

Regards
 
OP
M

MrQuinn

Well-known member
Joined
Dec 17, 2014
Messages
86
Location
Coeur d'Alene, ID
I'm not usually one for new builds, I really like the looks of your shop. I agree with Sunbimmer in that the carport really adds to the look. I also like the big window on the side. I'm looking forward to seeing how you finish the inside.

Thanks for the reply and looking at the new project. I read your thread with delight and believe we have a lot in common in regards to thrifty and re-purposing materials. I really had no choice but to go new after the move. We were paying $170. a month to store what was in the old shop in a 17' POD's container and I hated to waste those resources so time was not on my side with winter coming fast. After almost a year we had a shell of a shop to work with.

At the old place I had a hot tub cover made from a Costco carport then turned it into a greenhouse made with windows from a hospital that replaced their windows with new ones. The old shop had a picture window in the side from the front of the house after we put a bay window in...
 

Attachments

  • rockway (3).JPG
    rockway (3).JPG
    39.9 KB · Views: 138
  • lites_two (1).JPG
    lites_two (1).JPG
    37 KB · Views: 145
  • greenhouse_III.jpg
    greenhouse_III.jpg
    39.4 KB · Views: 141
  • greenhouse (2).JPG
    greenhouse (2).JPG
    37.7 KB · Views: 136
  • hottub 2.jpg
    hottub 2.jpg
    32.3 KB · Views: 139
  • greenhouse_II (8).JPG
    greenhouse_II (8).JPG
    37.3 KB · Views: 126
Last edited:
OP
M

MrQuinn

Well-known member
Joined
Dec 17, 2014
Messages
86
Location
Coeur d'Alene, ID
The old house had weeping willows in the front that were infested with bugs that ate it from the inside and only the swarms of bees liked them so they had to go. I pulled them down one weekend and started on the roof extensions and steel roof.
 

Attachments

  • House_front 001.jpg
    House_front 001.jpg
    148.1 KB · Views: 187
  • DSC00064.jpg
    DSC00064.jpg
    147.6 KB · Views: 166
  • DSC00063.jpg
    DSC00063.jpg
    147.4 KB · Views: 170
  • MVC-011S.JPG
    MVC-011S.JPG
    39.7 KB · Views: 168
  • summer_02 (1).JPG
    summer_02 (1).JPG
    37.6 KB · Views: 171
Last edited:
OP
M

MrQuinn

Well-known member
Joined
Dec 17, 2014
Messages
86
Location
Coeur d'Alene, ID
I borrowed the idea from the old 20x30x10 shop for the carport since it had an overhang but almost useless for anything when it came to staying dry and in the shade. So when we had the chance to start from scratch, we went with the long 16' carport.
 

Attachments

  • summer_2k2.jpg
    summer_2k2.jpg
    38 KB · Views: 89
  • house-2.jpg
    house-2.jpg
    38.9 KB · Views: 90
Last edited:

drivesitfar

Well-known member
Joined
Oct 23, 2013
Messages
36,004
Location
Pacific Northwest
MrQ: your garage with the carport looks great and happy to hear you already have plans for the ground around the perimeter. you might want to draw up or use a computer program to organize your garage because it will fill up fast. i like commercial racks with a lot of metal and plastic organizers. i'll post up a few pictures as i can if you can use some.

nice job and thanks for sharing.
 
OP
M

MrQuinn

Well-known member
Joined
Dec 17, 2014
Messages
86
Location
Coeur d'Alene, ID
MrQ: your garage with the carport looks great and happy to hear you already have plans for the ground around the perimeter. you might want to draw up or use a computer program to organize your garage because it will fill up fast. i like commercial racks with a lot of metal and plastic organizers. i'll post up a few pictures as i can if you can use some.

nice job and thanks for sharing.

Thanks for the suggestion, I have a "use" plan but the lil woman has more uses than I do for it.... actually I have to finish moving all the stuff in the corner to the garage and garden shed then get the concrete cut to pit set the bike lift and that will make a lot of room too. The industrial shelving was purchased (used $200.) as 4 separate sections with 3 shelves each 2 for the shop and 2 for the garage... I just need time to organize more of it. Got to go to the habitat for humanity store for some organizers.
 

Attachments

  • shelves_3.jpg
    shelves_3.jpg
    81.9 KB · Views: 99
  • shelves_1.jpg
    shelves_1.jpg
    137.7 KB · Views: 105
Last edited:

drivesitfar

Well-known member
Joined
Oct 23, 2013
Messages
36,004
Location
Pacific Northwest
McQ: in case Habitat is out of organizers Costco has the black storage bins with yellow lids that hold a ton for about $9 each.

good luck with the organizing. my wife says i'm swearing at her when i use that word because I've been doing it for almost 30 years since we moved in.
 
OP
M

MrQuinn

Well-known member
Joined
Dec 17, 2014
Messages
86
Location
Coeur d'Alene, ID
Added some shade

I have been laid up for the past few months and doing therapy on a torn up shoulder. Haven't done much around the shop as you could guess. But, I did manage to put up some heavy duty tarps for shade across the front. It allows airflow and blocks the afternoon sun nicely. I found these at Harbor Freight to put over the truck bed when heading to the dump and decided to get a few 12x10's for the shop. I had 2 steel antenna masts and mounting hardware laying around that worked out great for the job. A piece of chain for center support and we're in business.
 

Attachments

  • sun_shade02.jpg
    sun_shade02.jpg
    152.8 KB · Views: 157
  • sun_shade.03.jpg
    sun_shade.03.jpg
    149.9 KB · Views: 134
  • sun_shade.jpg
    sun_shade.jpg
    149.4 KB · Views: 125
  • sun_shade04.jpg
    sun_shade04.jpg
    147.7 KB · Views: 119
Last edited:
OP
M

MrQuinn

Well-known member
Joined
Dec 17, 2014
Messages
86
Location
Coeur d'Alene, ID
The Bike Lift Pit Set started today!

After a few months of bad weather and shoulder therapy I finally pulled the trigger on the Bike Lift pit set job. The cutters showed up and were gone in a few hours. This is going to be not too hard on the shoulder... famous last words. It looks like I have a personal Stonehenge going but I'll post a few pics as I progress...

Finally managed to get a few friends together the other day. We poured it and I tore out the forms today! Glad that messy part is done. Dust everywhere...

Finally got the pit painted and the lift in the hole. Today was a good day!
 

Attachments

  • bikelift_pit_set.jpg
    bikelift_pit_set.jpg
    96.7 KB · Views: 140
  • 12.0 deep.jpg
    12.0 deep.jpg
    147.6 KB · Views: 121
  • formed up.jpg
    formed up.jpg
    140.6 KB · Views: 114
  • poured_mud.jpg
    poured_mud.jpg
    100.4 KB · Views: 115
  • painted_pit.jpg
    painted_pit.jpg
    145.1 KB · Views: 113
  • Bike-Lift_Table.jpg
    Bike-Lift_Table.jpg
    90 KB · Views: 130
  • its in the hole.jpg
    its in the hole.jpg
    146.8 KB · Views: 128
Last edited:
OP
M

MrQuinn

Well-known member
Joined
Dec 17, 2014
Messages
86
Location
Coeur d'Alene, ID
I had this AC unit that was needing a window to sit in... it sits right over the work bench too! When I got it installed the lil woman said the spacer panel needs to match the window so I taped off the grid and sprayed grey paint over it to make it simulate the window.
 

Attachments

  • 2015-07-23 19.05.50.jpg
    2015-07-23 19.05.50.jpg
    151.7 KB · Views: 104
  • 2015-07-23 19.06.10.jpg
    2015-07-23 19.06.10.jpg
    151.4 KB · Views: 113
  • AC in the window.jpg
    AC in the window.jpg
    145.2 KB · Views: 117
  • ac_over the bench.jpg
    ac_over the bench.jpg
    146.4 KB · Views: 149
  • another view.jpg
    another view.jpg
    144.7 KB · Views: 122
Last edited:
To avoid these ads, REGISTER NOW!

xtremek

Well-known member
Joined
Apr 13, 2012
Messages
11,603
Location
St. Johns, Mi
;)Excuse me sir, but you ****!! So, how did the shoulder fair? Did you get the bike lift in? Do you have trouble with mosquitoes? Would mosquito netting work as shade?
 
OP
M

MrQuinn

Well-known member
Joined
Dec 17, 2014
Messages
86
Location
Coeur d'Alene, ID
@xtremek...Yes, I ****. So... I guess I have been a bit slow in my updates... sorry. I had the MRI done and finally found a good sports doctor to evaluate my shoulder. He said he wouldn't do surgery on it since the rotator cuff isn't torn 50% only a bit frayed. All he wants me to do is exercise therapy.

The shop faces west and takes the afternoon sun full on which makes the shop unbearable to work in the evenings. so I used the sun screen to keep the temperature down, I know it seems a bit over the top but I thought artificial shade was a good thing.

I finished the bike lift last week after I used tan concrete floor paint in it. I didn't want to seal the concrete just keep liquids from staining the concrete. I have one of the bikes up on the lift and love the height for the ease of accessing everything.

Now to I plan to primer and paint the shop walls before the weather turns cold...
 
Last edited:
OP
M

MrQuinn

Well-known member
Joined
Dec 17, 2014
Messages
86
Location
Coeur d'Alene, ID
I just noticed the spacer grid, very nice detail.

Thanks for noticing...

The "Boss" said it should look like the window. So I got some blue tape and grey paint, measured it off over the tan and sprayed it. Made some major points for that since she only asked for it a few days before...
 
OP
M

MrQuinn

Well-known member
Joined
Dec 17, 2014
Messages
86
Location
Coeur d'Alene, ID
Sure it will look better when it's done... then I can finally clean up the bench. The lil woman said I should paint the bench to match the cabinets while I'm at it. She doesn't like the blue rails. So I added that to the ToDo list, thanks dear!

Anyway, since I used OSB for the paneling I had to do the Kills primer to seal the board. Sure does soak up a lot of primer but at least it has a good base now... I had designed the electrical to be flexible so I can modify it as needed. So dropping the whole wall's conduit to the ground to paint is working out nicely.

We managed to get the top & bottom colors on the wall today. Waiting for the paint to dry before we tape it off for the electrical & air band on the middle of the wall... Also, removed the AC unit from the window for the winter too.

Finished the north wall with the maroon accent band for the air lines and power.
 

Attachments

  • paint_north wall.jpg
    paint_north wall.jpg
    147.2 KB · Views: 108
  • painted top-n-bottom.jpg
    painted top-n-bottom.jpg
    145.1 KB · Views: 97
  • North Wall done.jpg
    North Wall done.jpg
    148.5 KB · Views: 96
Last edited:

xtremek

Well-known member
Joined
Apr 13, 2012
Messages
11,603
Location
St. Johns, Mi
I agree with SWMBO on the blue. Is there any way to cover the seams in the OSB? I like it how it is, just might look better if you could cover the seams.
 
OP
M

MrQuinn

Well-known member
Joined
Dec 17, 2014
Messages
86
Location
Coeur d'Alene, ID
I agree with SWMBO on the blue. Is there any way to cover the seams in the OSB? I like it how it is, just might look better if you could cover the seams.

We think alike. I had the same idea. I plan on caulking the joints before I paint it... I don't like the gaps either... Picked up the paint today, It's gonna look awesome!

Taking the bench apart and getting it powder coated is another project...
 
OP
M

MrQuinn

Well-known member
Joined
Dec 17, 2014
Messages
86
Location
Coeur d'Alene, ID
The 3 main walls are done! I got the air line and the electrical back on the bench wall today. The tall cabinet back in the corner. Now I start running the electical on the other wall while I have everything stacked in the middle of the shop.
 

Attachments

  • 0912151821.jpg
    0912151821.jpg
    145.6 KB · Views: 96
  • 0912151820.jpg
    0912151820.jpg
    141.5 KB · Views: 93
  • upload_-1.jpg
    upload_-1.jpg
    55.6 KB · Views: 96

xtremek

Well-known member
Joined
Apr 13, 2012
Messages
11,603
Location
St. Johns, Mi
A wise man once told me, "in order to fix something, you have to make a mess first". True, but I still hate this part of the process.
 
OP
M

MrQuinn

Well-known member
Joined
Dec 17, 2014
Messages
86
Location
Coeur d'Alene, ID
A wise man once told me, "in order to fix something, you have to make a mess first". True, but I still hate this part of the process.


Thank you xtremek. So true... on both points. I hit the cold of winter just after we put up the building last fall. I was happy to just get the insulation and OSB up. No steady heat source to speak of (only a propane blaster) to paint so it was put off until we had the temps and time... as the year went by and my shoulder healed I had to do it now! The OSB was so dark and dingy, almost depressing to look at. i'll be busy for the next few weeks just getting back to where I was... but we must endeavor to persevere!
 
Last edited:
OP
M

MrQuinn

Well-known member
Joined
Dec 17, 2014
Messages
86
Location
Coeur d'Alene, ID
I'm almost finished with the south wall electrical and air lines. I also managed to finish the trim on the wall, 11 mil vinyl tape, Diamond Plate!
finsihed_south-wall.png
 
Last edited:

MPOWERD

Well-known member
Joined
Jun 7, 2011
Messages
578
I had this AC unit that was needing a window to sit in... it sits right over the work bench too! When I got it installed the lil woman said the spacer panel needs to match the window so I taped off the grid and sprayed grey paint over it to make it simulate the window.

I really like this building... You are doing a great job. I would love to have shop space like this but I have to wait on that... About the window mounted AC... Couldn't you have simply cut a new opening for the AC to fit into in the siding and kept the window intact?
 
OP
M

MrQuinn

Well-known member
Joined
Dec 17, 2014
Messages
86
Location
Coeur d'Alene, ID
I really like this building... You are doing a great job. I would love to have shop space like this but I have to wait on that... About the window mounted AC... Couldn't you have simply cut a new opening for the AC to fit into in the siding and kept the window intact?

Thanks for dropping by MPOWERD, I appreciate the comments. It has been a job, that's for sure. After a year it is almost done. Still a lot to do though. I need to run gas to the building for the radiant heat but winter is coming fast.

We debated putting the AC unit in a wall but couldn't decide on a practical place. The steel frame building doesn't lend itself to just cutting in an opening without supporting it somehow. For the few months it is is in use I really don't mind it in the window.The window was planned and framed in as the building went up.
 

xtremek

Well-known member
Joined
Apr 13, 2012
Messages
11,603
Location
St. Johns, Mi
So, staying on the AC topic, how well does work work on your shop? The shop really is starting to come together.
 
OP
M

MrQuinn

Well-known member
Joined
Dec 17, 2014
Messages
86
Location
Coeur d'Alene, ID
So, staying on the AC topic, how well does work work on your shop? The shop really is starting to come together.

Thank you xtremek, it seems that it has been a long time coming together. The building has been up 1 year next month, 10/1. How time does fly...

The AC did very well to keep the shop comfortable with the help of a box fan blowing on low from the back corner of the shop along the window wall. Circulating the cool air is the trick. I used my tall roller tool box to direct the fan across the AC unit & bench. I have 2 industrial ceiling fans (still in the box) that need to be put up above the radiant heater that will work great for the circulation. Of course having a large shade tree between the shop and the mid day sun helps too...
 
Last edited:
OP
M

MrQuinn

Well-known member
Joined
Dec 17, 2014
Messages
86
Location
Coeur d'Alene, ID
Ilikethecolor scheme. Mine isverysimilar.

Hello dcmus, thanks for stopping by and looking at my shop project. I had a hard time deciding on the colors to use so it would be bright and clean looking. Being a grey building outside I wanted to keep it in the grey but not as dark. So we went lighter 2 shades of grey with the maroon accent.

We found the vinyl diamond plate tape to tie into the Gladiator wall & roller cabinets. That was just a dumb luck find by my better half. She was a lot of help in the whole process of painting the shop. I owe her big time for giving me so much of her vacation time to paint the shop.
 
Last edited:
OP
M

MrQuinn

Well-known member
Joined
Dec 17, 2014
Messages
86
Location
Coeur d'Alene, ID
Finally, all done with the paint for now on 3 walls. Just putting things back together again.

I have to replace the roll up door with a real garage door then finish the west wall around the doors.
 

Attachments

  • north-wall_finished_2.jpg
    north-wall_finished_2.jpg
    143.4 KB · Views: 39
  • north-wall_finished.jpg
    north-wall_finished.jpg
    148.1 KB · Views: 34
  • south-wall_done.jpg
    south-wall_done.jpg
    72.5 KB · Views: 42
Last edited:
To avoid these ads, REGISTER NOW!
Top Bottom