To avoid these ads, REGISTER NOW!

Motorman55's Garage...The Beginning

Motorman55

Well-known member
Joined
Apr 10, 2016
Messages
2,611
Location
South Jersey
Motorman55's Garage

Well our move to the new house is almost complete. One big push tomorrow will get us 99% in and then completely in by the end of this month.

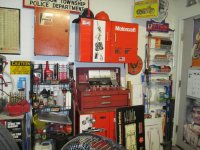
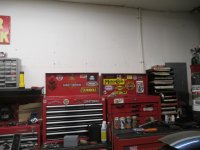
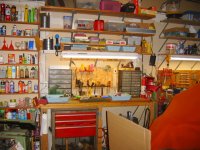
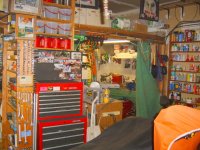
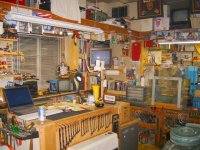
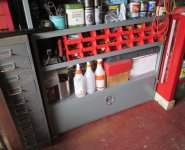
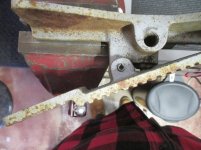
The house only has a single attached garage but its big enough for my personal Harley shop. Fortunately I also have a spare room that'll serve as my office and house all my vintage motorcycle stuff. Right now its about shoving all the tools and equipment into it. Once we're in F/T I'll start to set it up for wrenching.

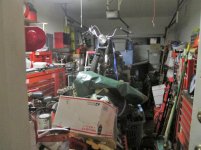
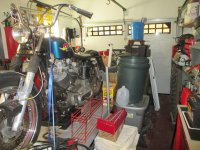
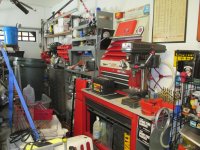
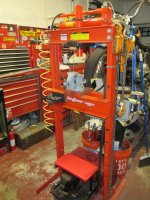
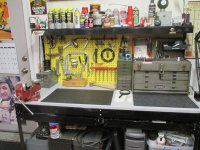
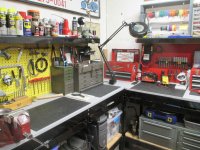
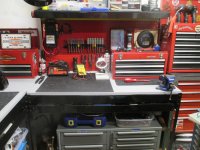
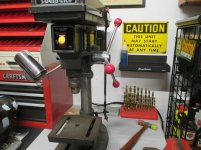
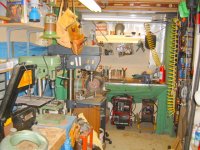
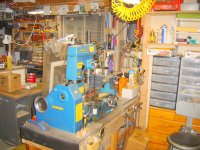
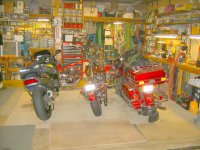
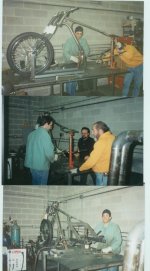
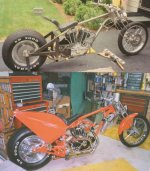
The Harley Shop... Nothing fancy, but it needs to be clean and dry, so heat and a/c are on the list. Computer, T/V and radio also. Has to be able to hold a couple bikes and be able to nose in a car or truck for general maintenance when needed. I think some equipment will have to be mobile. I'll see what I can make out of it.

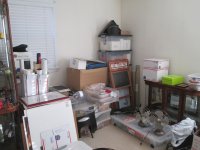
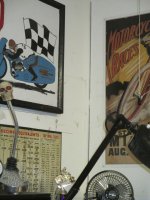
The Office... Here I can make it a bit nicer. In addition to the usual office desk, computer and necessities, it'll house a couple display cases for all my old M/C collectibles, a small drop down desk to work on models, and my favorite wingback chair for reading.

I couldn't ask for more. :cool:

I'll post additional pics along the way as I set things up.
 

Attachments

  • IMG_2350.jpg
    IMG_2350.jpg
    154.9 KB · Views: 814
  • IMG_2358.jpg
    IMG_2358.jpg
    117 KB · Views: 595
Last edited:
To avoid these ads, REGISTER NOW!

Hatman52

Well-known member
Joined
Mar 11, 2008
Messages
59
Please keep posting! While the big 2,000 sq. ft. shops are fun to look at, I really love seeing the ingenuity that many members utilize to set up efficient workspace in small spaces. :thumbup:
 
OP
M

Motorman55

Well-known member
Joined
Apr 10, 2016
Messages
2,611
Location
South Jersey
Re: Motorman55's Garage

Please keep posting! While the big 2,000 sq. ft. shops are fun to look at, I really love seeing the ingenuity that many members utilize to set up efficient workspace in small spaces. :thumbup:

I'll keep posting more pics as I set the shop and office up. I've laid out some drawings and made several changes since the first one already, mostly based on the equipment I already have.
 
Last edited:
OP
M

Motorman55

Well-known member
Joined
Apr 10, 2016
Messages
2,611
Location
South Jersey
Re: Motorman55's Garage

The Office...

Today, I managed to carve out a couple hours to put the tall display case in what I think will be its final position and carefully reinstalled its curved and flat glass panels.

Also unpacked a couple boxes of my vintage M/C toys and stuff and put some of them into the case. Managed to open up a bit of floor space in the process.

Then race back up here to North Jersey to load more stuff in the trailer for tomorrows run...:3gears:
 

Attachments

  • IMG_2361.jpg
    IMG_2361.jpg
    114.5 KB · Views: 339
  • IMG_2360.jpg
    IMG_2360.jpg
    122.7 KB · Views: 293
Last edited:
OP
M

Motorman55

Well-known member
Joined
Apr 10, 2016
Messages
2,611
Location
South Jersey
Re: Motorman55's Garage

Finished moving in the new house completely. This really packed in the garage and shop office.

So after a good nights sleep I decided to attack the shop office some more. Basically just unpacking more of my stuff, setting up a couple of the display cases and moving in the desks.

It all looks jumbled right now, but I have a basic plan on how I want to set it up. Probably change things as I go along. :)
 

Attachments

  • IMG_2389.jpg
    IMG_2389.jpg
    129.5 KB · Views: 359
  • IMG_2388.jpg
    IMG_2388.jpg
    147.1 KB · Views: 357
  • IMG_2369 (2).jpg
    IMG_2369 (2).jpg
    149.8 KB · Views: 400
Last edited:
OP
M

Motorman55

Well-known member
Joined
Apr 10, 2016
Messages
2,611
Location
South Jersey
Re: Motorman55's Garage

Made a little headway this month in the garage and the shop office.

Unpacked a lot more boxes and started sorting the tools. Hung up my old shop sign over the motor bench in the garage.

Today I stole a little time and connected the yellow pegboard motor bench to the red pegboard electric bench with 2'x2' corner board. Perfect fit for my vintage Sears/Craftsman Tap & Die/Drill Bit display case.

The shop office is coming along also. Got the desk set in place and set up the computer. Installed new wood blinds on the windows and hung up a couple things on the walls. Also unpacked a lot of boxed goodies and put them in the display cases. Obviously a long way to go.

Have to share the time with the wife too which means shopping for new furniture, dealing with delivery guys and setting up the rest of the house and all while getting ready for the holidays.

More to come....
 

Attachments

  • IMG_2409.jpg
    IMG_2409.jpg
    158.1 KB · Views: 436
Last edited:
OP
M

Motorman55

Well-known member
Joined
Apr 10, 2016
Messages
2,611
Location
South Jersey
Re: Motorman55's Garage

Ok so I got a little time in the garage shop today.

Mounted some parts cabinets on the walls and moved the shop around some to make better use of the limited space in my 1 car garage.

Also moved my main tool box enough to one side to enable me to slide in a new HF side locker between my electric bench and main tool box. (I still have to pick-up the side locker.)
I'm going to go with a black HF side locker to match the black work benches.

Pics to follow soon..
 
Last edited:
OP
M

Motorman55

Well-known member
Joined
Apr 10, 2016
Messages
2,611
Location
South Jersey
Re: Motorman55's Garage

Life and a bunch of interior work on the new house has limited the amount of time I have to spend on the garage. However I did manage to get some things done.

So far I've hung up four HF Bauer lamps which give beaucoup light in the shop. Further refinement to be made on hanging the power cords for them.

Also, I'm pretty much done with moving the tool cabinets, shelving, etc. into their final placement. Of course I've yet to bring in my blast cabinet and a couple other pieces of equipment, but pretty much they'll remain as they are.

I'm hanging stuff up here and there and will likely add more pics, posters and signs a as I go along. That stuff always changes over time.

The shop/garage walls and floor will get painted this summer. There's a lot of hole filling and taping/mudding to do yet, but that can be done later because right now its all about getting the shop up and running so I can get the Harley ready for riding season.

So here's some pics. Don't mind the mess as I've got a lot of stuff to put away and yes that's a 4x8 trailer behind my M/C lift. Its full of stuff like bicycles, table saw, generator, etc., that has yet to be put into the outside shed (once I buy it.)

Well, back to tasks at hand.
 

Attachments

  • IMG_2595.jpg
    IMG_2595.jpg
    143.6 KB · Views: 429
  • IMG_2601.jpg
    IMG_2601.jpg
    155.9 KB · Views: 464
  • IMG_2600.jpg
    IMG_2600.jpg
    156.9 KB · Views: 494
  • IMG_2599.jpg
    IMG_2599.jpg
    155.8 KB · Views: 492
  • IMG_2596.jpg
    IMG_2596.jpg
    155.4 KB · Views: 500
  • IMG_2597.jpg
    IMG_2597.jpg
    158.4 KB · Views: 491
  • IMG_2598.jpg
    IMG_2598.jpg
    156.6 KB · Views: 511
Last edited:
OP
M

Motorman55

Well-known member
Joined
Apr 10, 2016
Messages
2,611
Location
South Jersey
Re: Motorman55's Garage

A couple more pics..
 

Attachments

  • IMG_2603.jpg
    IMG_2603.jpg
    153.7 KB · Views: 256
  • IMG_2602.jpg
    IMG_2602.jpg
    149 KB · Views: 275
Last edited:
OP
M

Motorman55

Well-known member
Joined
Apr 10, 2016
Messages
2,611
Location
South Jersey
Re: Motorman55's Garage

As for the office, I've been getting some of that organized too.

A lot of my stuff has been unboxed and put into their display cases and I've managed to pick out just some of the many items I have in my collections to hang up. There will be little actual wall space left after hanging up more of my vintage M/C photos and stuff. Still a long way to go in here, but I'm making some progress.

I've yet to hang the new ceiling fan, but at least the new blinds are up on the windows to keep out the direct sunlight when needed.

Also temporarily holding all the paints and painting equipment for working on the other interior rooms. What a mess to try and navigate thru. Forget about finding anything that I need right away. Well at least its just temporary until all the painting is done in the house.


Keep on trucking...
 

Attachments

  • IMG_2552 (2).jpg
    IMG_2552 (2).jpg
    121.4 KB · Views: 277
  • IMG_2550.jpg
    IMG_2550.jpg
    147.4 KB · Views: 262
  • IMG_2549.jpg
    IMG_2549.jpg
    150.2 KB · Views: 277
Last edited:
OP
M

Motorman55

Well-known member
Joined
Apr 10, 2016
Messages
2,611
Location
South Jersey
Re: Motorman55's Garage

Plodding along...

Today I added a magnifying lamp to the corner bench board that connects the motor bench and the electric bench. The corner section is kind of a dead zone as far as useable work space so it seemed like the best place to mount it.

Because the lamp was missing the mounting clamp, I had to make a couple mods to the base of the lamp so I could bolt it to the bench. The way its mounted allows it to extend in either direction nearly the full length of both work benches. When not in use it folds up and back on the side of the gray Craftsman machinists box.

Should work out well.
 

Attachments

  • IMG_2606.jpg
    IMG_2606.jpg
    138.1 KB · Views: 217
  • IMG_2608.jpg
    IMG_2608.jpg
    119.1 KB · Views: 219
  • IMG_2609.jpg
    IMG_2609.jpg
    150.1 KB · Views: 251
  • IMG_2611.jpg
    IMG_2611.jpg
    155.3 KB · Views: 252
Last edited:
OP
M

Motorman55

Well-known member
Joined
Apr 10, 2016
Messages
2,611
Location
South Jersey
Re: Motorman55's Garage

Back on post #10 I mentioned I planned to put a black HF locker in between the electric bench and the big roller tool cabinet. Well I nixed that idea and instead I put my vintage gray Craftsman bottom tool box with the later red top box in that space for now.

I may still get the HF locker later down the road, but right now I needed to get the gray Craftsman box out from in front of the Handy Lift for a couple reasons, one being that I'll be bringing in the blast cabinet from my storage unit and that will have to go where the hydraulic press is now and the hydraulic press will likely end up in front of the lift.

Both the hydraulic lift and blast cabinet will be getting the wheel mods added to their bottoms for future portability.
 

Attachments

  • IMG_2644.jpg
    IMG_2644.jpg
    147.7 KB · Views: 184
Last edited:
OP
M

Motorman55

Well-known member
Joined
Apr 10, 2016
Messages
2,611
Location
South Jersey
Re: Motorman55's Garage

Today I finally got to take down the old 6' long wood shelf that was hanging on the wall over my main tool boxes and filled in some of the many nail/screw holes. This really opened up the wall.

Main reason I wanted that old shelf off the wall, besides just being a piece of ****, is that I'm really considering removing the wheels on the main roller cabinet to lower it to the same work surface height as my two corner work benches. Finally I would install a smaller shelf about 10 to 12 inches above the now lowered roller cabinet height just big enough to set the old 6 drawer Dayton top box on.

The overall clear work surface would measure 25" D x 63" L. That's a lot in this small 1 car garage. Add to that I would mount my large vise to one end.
 

Attachments

  • IMG_2602 (2).jpg
    IMG_2602 (2).jpg
    147.7 KB · Views: 203
  • IMG_2643.jpg
    IMG_2643.jpg
    128 KB · Views: 189
  • IMG_2645.jpg
    IMG_2645.jpg
    155.5 KB · Views: 203
Last edited:
OP
M

Motorman55

Well-known member
Joined
Apr 10, 2016
Messages
2,611
Location
South Jersey
Re: Motorman55's Garage

The house was built in around 1979. It still has the original electrical panel with the inspection approval sticker dated 6/8/79.

I'd like to install a single ph. 220/240 outlet for an air compressor and small welder plus a couple more 120v outlets along the walls. Something I have to look into possibly upgrading soon.

Meanwhile, looking at the sheetrock on the walls and ceiling, I'm going to venture to say that although its obviously old sheetrock, the fit and finish (lacking any corner tape and mud) lends itself to a former home owner's DIY project.

I'm not interested in making the garage a show place, but I do want to make it relatively comfortable to work in. The good news is there is insulation on the outer and inner walls. The bad news its lacking any insulation above the ceiling.

So a little insulation for the ceiling and some taping/mud work is in my immediate future, topped off with a coat of fresh paint all around.
 

Attachments

  • IMG_2651.jpg
    IMG_2651.jpg
    91.6 KB · Views: 156
  • IMG_2650.jpg
    IMG_2650.jpg
    66.1 KB · Views: 148
  • IMG_2648.jpg
    IMG_2648.jpg
    62.1 KB · Views: 156
Last edited:
OP
M

Motorman55

Well-known member
Joined
Apr 10, 2016
Messages
2,611
Location
South Jersey
Re: Motorman55's Garage

Today I managed to get a few more things done as I continue to set up the garage.

1. I pulled out the Hein-Werner hydraulic press from next to the large roller cabinet and moved it to the front of the motorcycle lift. This makes it much more accessible and there's just enough room for the lift to clear in the up and down positions.

2. I removed the wheels from the bottom Motorcraft cabinet and then mounted on the wall under the top Motorcraft box. I like this much better because I can access the contents inside without having to bend down all the time. The space under the cabinet should hold all my mechanic seats.

3. I installed a couple of large hanger hooks on the wall next to the Motorcraft box to hang my creeper. But first I had to pull off the remaining old white wire shelf and fill a couple holes in the wall.

Also filled a few more hole in the wall and moved some stuff around to get the trailer back in the garage and made a run to the recycle/dump.
 

Attachments

  • IMG_2662.jpg
    IMG_2662.jpg
    125.5 KB · Views: 237
  • IMG_2663.jpg
    IMG_2663.jpg
    95.8 KB · Views: 227
  • IMG_2665.jpg
    IMG_2665.jpg
    91.6 KB · Views: 207
Last edited:
OP
M

Motorman55

Well-known member
Joined
Apr 10, 2016
Messages
2,611
Location
South Jersey
Re: Motorman55's Garage

The ceiling droops down in several places where it meets the walls. Adding more drywall screws only helps a little as they tend to go thru it before it can pull up the sheetrock to the rafters.

Since I don't wish to rip the old ceiling down and install new sheetrock right now my plan of attack is to pick-up some 8 ft. lengths of 1x2 or 3 pine and nail it up as a sort of crown molding. I'll nail it flat to the wall every 16" while pushing up as I go which will lift the slight droop up against the rafters. This will eliminate the need to tape and mud also.

As for the center area of the ceiling, the DIY work of some long ago earlier owner was not the best. There's random size panels and a few joints that leave something to be desired with a few starting to pull down away from the joists. The joists being 24" on center doesn't help either.

Its more lacking in visual then anything else so a T-brace will help push the few joints up while I add more screws for support. Some tape and mud work and a quick wipe with a sponge will finish it off.

Did I mention this is a working garage and not a showcase?
 

Attachments

  • IMG_2649.jpg
    IMG_2649.jpg
    61.2 KB · Views: 112
  • IMG_2650.jpg
    IMG_2650.jpg
    66.1 KB · Views: 116
Last edited:
OP
M

Motorman55

Well-known member
Joined
Apr 10, 2016
Messages
2,611
Location
South Jersey
Re: Motorman55's Garage

Today I put a fresh coat of paint on all the bench tops and the corner connecting board. Of course that meant removing all the boxes, drill press and vises, etc. Bit of a pain in the back but I wanted a clean surface to start with in the new garage. Also started to cut some felt and rubber mats to put on top. I'll finish those up tomorrow and take a some pics.

Also the two mechanics seats fit perfect under the Motorcraft box. Got tired of tripping over them and now they have their own space out of the way. I even slipped the Snap-On foam mechanic mat behind the HF creeper. Fit perfect between the wheels.

There's still some space between the Motorcraft cabinets and HF creeper for a couple small narrow shelves. More storage. Maybe put the First Aid kit there too.

Last thing I did was to pick up the old worn large mat in front of the inside door and put down a smaller heavy rubber backed one. Then it was back to patching some more holes in the wall.
 

Attachments

  • IMG_2672.jpg
    IMG_2672.jpg
    64.5 KB · Views: 130
  • IMG_2673.jpg
    IMG_2673.jpg
    151.9 KB · Views: 160
  • IMG_2670.jpg
    IMG_2670.jpg
    92 KB · Views: 139
  • IMG_2669.jpg
    IMG_2669.jpg
    93.5 KB · Views: 149
Last edited:
To avoid these ads, REGISTER NOW!
OP
M

Motorman55

Well-known member
Joined
Apr 10, 2016
Messages
2,611
Location
South Jersey
I took a lot of stuff with me when I moved to this new house last December. Much of it was thrown into boxes upon boxes. Its been slow going pulling stuff out and deciding what to keep.

I know I've collected a lot of misc. stuff from bolts, screws and nuts to electrical outlets, fans, parts for the house and just stuff I really will never use. Not to mention I still have a lot more stuff in a rental garage near the old house that needs to come down here this month including my large blast cabinet and truck.

So I decided to just heave-ho some of the junk starting tomorrow. Just too much for this 1 car garage.

Did I mention I have a trailer full of bikes, a/c unit, generator, table saw and some plastic bins full of magazines and garden stuff sitting behind my motorcycle lift in the garage?

I need a shed. :D
 
OP
M

Motorman55

Well-known member
Joined
Apr 10, 2016
Messages
2,611
Location
South Jersey
Today I got a couple hours in the shop.

Finished cutting the mats for the top of the motor and electric benches. Had enough material left for one of the two drawers on the motor bench also.

I cut them from a black yoga mat. I think they look good, so I'll pick up another and finish the second drawer and cut one for the single large drawer in the electric bench this week.

Also did a little more sheetrock patching and unpacking of supplies.
 
Last edited:
OP
M

Motorman55

Well-known member
Joined
Apr 10, 2016
Messages
2,611
Location
South Jersey
Today, among other things to do around the house, I got some time in the garage.

Used one of the free HF magnetic bars to hang up a set of SAE and Metric Craftsman nut drivers. The magnetic bar's mounting holes lined up perfect with the pegboard holes, so a couple short straight peg hooks to hold it in place and done. Cool thing is the bar tilts a little forward on the hooks which in turn makes the nut driver handles tilt out.

Also emptied out the small red electrical box installed new felt liners, then loaded it back up.

Also hung up one of my Blue Point magnetic shelves over the drill/tap bench. There are two small holes on the bottom edge that enable you to mount it on a wall with screws. You just have to run a drill bit thru the holes because the magnetic material on the back covers them. I Bought 2 sets of these shelves when I was working F/T. They come in a set of 4 different sizes. One just happen to fit perfect under the old yellow warning sign. It'll serve to hold safety glasses and misc. smalls.


Making small steps...
 

Attachments

  • IMG_2681.jpg
    IMG_2681.jpg
    155.6 KB · Views: 213
  • IMG_2680.jpg
    IMG_2680.jpg
    157.5 KB · Views: 200
  • IMG_2679.jpg
    IMG_2679.jpg
    153.6 KB · Views: 197
  • IMG_2683.jpg
    IMG_2683.jpg
    148.6 KB · Views: 183
  • blue point shelves.jpg
    blue point shelves.jpg
    9.9 KB · Views: 160
Last edited:
OP
M

Motorman55

Well-known member
Joined
Apr 10, 2016
Messages
2,611
Location
South Jersey
Wednesday, I finally got around to taking the 36 drawer parts cabinet off the moving dolly its been sitting on since I moved here. Once down on the floor, I leveled it off (this garage has a slightly slopping floor towards the garage door.)

Once the cabinet was leveled, I set my old red Kennedy 2-drawer tool box on top. This now holds most of my air sanders, drills, cut-off and grinding tools. This pretty much puts all my body work supplies and tools on one side of the garage.

After that I removed everything from my trailer, going thru several boxes of supplies and separating out stuff I no longer need or want. I have to clear the trailer for a run back up to North Jersey to get more tools/equipment.

Tomorrow I have a lot of stuff to bring to the recycler.
 
Last edited:
OP
M

Motorman55

Well-known member
Joined
Apr 10, 2016
Messages
2,611
Location
South Jersey
Last Thursday with my trailer in tow, I made a run up to North Jersey in our Chevy Cobalt, where I have my truck and some tools & equipment stored in one of those commercial rental garages.

With the exception of my truck and the blast cabinet that's sitting in the bed of the truck, I managed to get everything else loaded on the trailer and bring back here to the new house/garage in South Jersey.

Yesterday, I spent most the day unloading everything from the trailer and with a little re-arranging managed to get a lot of the tools/equipment stored away. This worked out well as I was able to finally level the two large gray shelving units and attach the drop down doors on the bottom of each one.

Next week I'll head back up North to get the truck and blast cabinet. Until then I'll be shifting things around the shop to get the remaining stuff put up or stored somewhere in the garage.

The hard part is yet to come as I try to arrange the garage to accept the blast cabinet and still have room to pull the trailer in at night. The HOA rules doesn't like trailers of any type/size on the property, even though we own the house and the lot it sits on outright.

Right now I move the trailer in at night. There's just enough room to park it behind my motorcycle lift. I keep some things on the trailer, like our bikes and various garden tools along with my large Craftsman table saw. Its a pain, but it works for now, at least until I find a place to store the trailer. I'm not looking to spend a lot of money every month to store it at a storage facility. Already spent too much money storing my truck and some equipment over the winter.

I plan on purchasing a small shed for the side of the house to store all the garden tools, mower and possibly the large HF 8500 generator. That will be a big savings to space in the garage.

Well, back to work. I'll post some pics later.
 
Last edited:

Robby321

Well-known member
Joined
Jan 22, 2015
Messages
607
Location
Olympia, WA
I went from a attached 10x24 foot small garage, but had my Bagger and Shovel AND a Sporty Dragbike I was building in there. Had heat from house going out there, so walk out the kitchen and in the garage! Moved 25 years ago, way bigger shop now. I don't have a scanner, but I have some old pix the shop before. Just have to see what I saved.

On the one I have too suffer with now? Not too shabby as it was just built when bought the house, it was framed and ready for me to finish! Did it all my way!
Lotta pix, so be a few post.........Trust me as it attached enclosed porch to house, and I simple live out here! My Sanctuary.............
 

Attachments

  • S5303096.JPG
    S5303096.JPG
    116.6 KB · Views: 175
  • S5303094.JPG
    S5303094.JPG
    124.3 KB · Views: 184
  • S5303093.JPG
    S5303093.JPG
    121 KB · Views: 186
  • S5303092.JPG
    S5303092.JPG
    125.6 KB · Views: 194
  • S5303090.JPG
    S5303090.JPG
    123 KB · Views: 194
Last edited:

Robby321

Well-known member
Joined
Jan 22, 2015
Messages
607
Location
Olympia, WA
More..
 

Attachments

  • S5303102.JPG
    S5303102.JPG
    123.3 KB · Views: 138
  • S5303101.JPG
    S5303101.JPG
    121.2 KB · Views: 135
  • S5303100.JPG
    S5303100.JPG
    119.3 KB · Views: 134
  • S5303099.JPG
    S5303099.JPG
    119.7 KB · Views: 124
  • S5303098.JPG
    S5303098.JPG
    116.4 KB · Views: 135
  • S5303097.JPG
    S5303097.JPG
    113.1 KB · Views: 131

Robby321

Well-known member
Joined
Jan 22, 2015
Messages
607
Location
Olympia, WA
More..
 

Attachments

  • S5302463.JPG
    S5302463.JPG
    143.5 KB · Views: 132
  • NorCal ride Me.jpg
    NorCal ride Me.jpg
    117.8 KB · Views: 122
  • S5302640.JPG
    S5302640.JPG
    80.5 KB · Views: 114
Last edited:

Robby321

Well-known member
Joined
Jan 22, 2015
Messages
607
Location
Olympia, WA
Dragbike I built..
 

Attachments

  • S5302836.JPG
    S5302836.JPG
    61.1 KB · Views: 104
  • S5302835.JPG
    S5302835.JPG
    119.2 KB · Views: 97
  • db build.jpg
    db build.jpg
    70.5 KB · Views: 97
  • Drag bike 98% done001.jpg
    Drag bike 98% done001.jpg
    91.5 KB · Views: 102
OP
M

Motorman55

Well-known member
Joined
Apr 10, 2016
Messages
2,611
Location
South Jersey
One of the items that I brought down from the rental garage was the Craftsman bench grinder stand. Today I mounted the Craftsman bench grinder to it. As I did, I noticed that the original power cord was damaged on the grinder and showing some bare wire. Of course it was way up on the cord. I don't know how or when the cord got damaged, but I trimmed it and put on a new male plug. The cord is half as long now, but no matter, that's what extension cords are for.

Also, I cleaned up the old Sears battery charger. I've had this for many years. One of the selector knobs broke off awhile ago and I kept it figuring I'd get around to attaching it sooner or later. Unfortunately there's not enough of the selector switch post sticking out to reattach the knob. I may have to pull the switch and repair or replace it completely.
 

Attachments

  • IMG_2700.jpg
    IMG_2700.jpg
    129.7 KB · Views: 96
  • IMG_2696.jpg
    IMG_2696.jpg
    130.7 KB · Views: 101
Last edited:
OP
M

Motorman55

Well-known member
Joined
Apr 10, 2016
Messages
2,611
Location
South Jersey
Here's a pic of the gray shelf lower drop down panels I mentioned earlier. They came with locks and keys. I got tired of moving them around so figured I'd mount them. One less thing in the way.

These gray shelves are from a new at the time, Chevy work van that my old boss ordered. He didn't want them so he just gave them to me. Good deal!

I also have the two small gray drawer units that came with them. They're under my electric bench right now. I'll probably store my motor tune up gauges in them.
 

Attachments

  • IMG_2698 (2).jpg
    IMG_2698 (2).jpg
    147.6 KB · Views: 91
  • 13582071_10204685729422595_2813661230399054539_o (2).jpg
    13582071_10204685729422595_2813661230399054539_o (2).jpg
    53.1 KB · Views: 83
OP
M

Motorman55

Well-known member
Joined
Apr 10, 2016
Messages
2,611
Location
South Jersey
I went from a attached 10x24 foot small garage, but had my Bagger and Shovel AND a Sporty Dragbike I was building in there. Had heat from house going out there, so walk out the kitchen and in the garage! Moved 25 years ago, way bigger shop now. I don't have a scanner, but I have some old pix the shop before. Just have to see what I saved.

On the one I have too suffer with now? Not too shabby as it was just built when bought the house, it was framed and ready for me to finish! Did it all my way!
Lotta pix, so be a few post.........Trust me as it attached enclosed porch to house, and I simple live out here! My Sanctuary.............

Nice set-up...packed like mine.
 
OP
M

Motorman55

Well-known member
Joined
Apr 10, 2016
Messages
2,611
Location
South Jersey
I needed to get my Harley down off the Handy-Lift motorcycle lift which was in the full up position so I could bring it outside in the driveway for washing before making repairs and maintenance to it.

But before I could lower the table, I needed to address the bad pneumatic valve in the foot control pedal which was not working due to a stripped/worn control valve.

After removing the pedal assembly from the hose, I disassembled the pedal from its base in order to get at the control valve, This merely required pushing out the roll pin that the pedal swiveled on. Once that was done I just pulled up on the valve assembly and with a couple twisting moves it came right out.

I shot some brake fluid into the bore to clean out the crud and then ran a plastic bottle brush thru the bore a few times. Gave it final shot of brake fluid then blow out with the air gun.

Next it was double checking the replacement valve measurements with the old one and then spray the the valve and the bore with silicone spray. The fit of the new valve is a little tight, so a push down by hand to get it started and followed up with some light taps from the rawhide mallet and it went right in.

I reassembled the pedal and then bench tested it by hooking it directly up to my small compressor and working the pedal up and down while putting my finger over each port.

On this pedal the pressurized air comes in from the right side port connected to the compressor. Pushing down on the 'UP' end of the pedal pushes the valve body down which allows the air to pass thru the main body and valve and out the left side port which then travels thru a hose and enters the large pneumatic cylinder located under the table lifting the table top up. Pushing down on the 'DOWN' end of the pedal pulls the valve body up which relieves the air pressure from the cylinder and blows out the bottom of the control valve via a small port hole located on underside of the pedal base. Test showed it worked great.

Then I finished off the rebuild by wire brushing the rust off pedal assemblies and applying several costs of bright orange and outlining the letters in black.
Hook up the hoses and the table was back to working like new.

After that I washed the Harley and the Chevy. All in all a long day, but not as long as it took me to write this post!
 

Attachments

  • IMG_2763.jpg
    IMG_2763.jpg
    146.7 KB · Views: 79
  • IMG_2768.jpg
    IMG_2768.jpg
    99.5 KB · Views: 73
  • IMG_2764.jpg
    IMG_2764.jpg
    153.7 KB · Views: 73
  • IMG_2769.jpg
    IMG_2769.jpg
    75.7 KB · Views: 75
  • IMG_2770.jpg
    IMG_2770.jpg
    148 KB · Views: 78
  • IMG_2774.jpg
    IMG_2774.jpg
    119.6 KB · Views: 118
Last edited:
OP
M

Motorman55

Well-known member
Joined
Apr 10, 2016
Messages
2,611
Location
South Jersey
Like the Handy-Lift pedal above, I'll be repairing and restoring several projects in the shop as I continue to get the garage set up like I want. Plus I'm still working on the shop office and the main house, so its going to be a busy season(s).
 
Last edited:
OP
M

Motorman55

Well-known member
Joined
Apr 10, 2016
Messages
2,611
Location
South Jersey
Today, I started the Harley for the first time since last December when I loaded it on the trailer for the move down here to the new house.

Its a kick start only and it started on the fourth kick. Not bad considering it sat for 4-1/2 months. I let it idle a bit (no revving) before shutting it down. Then it was back up on the Handy-Lift. Tomorrow I'll start polishing the bare aluminum side covers.

Also started sorting thru all the spray paints cans. I have to separate the dedicated motorcycle/truck paints from the general type ones for around the house/garage. I have two large plastic tubs to go thru.

Been neglecting the office somewhat lately so I got around to hanging up a couple more things on the walls too.
 
Last edited:
To avoid these ads, REGISTER NOW!
Top Bottom