To avoid these ads, REGISTER NOW!

Motorman55's Garage...The Beginning

Robby321

Well-known member
Joined
Jan 22, 2015
Messages
607
Location
Olympia, WA
I had a lot of fun moving 25 years ago, and now I'm doing it again! Not moving but tossing stuff had all these years (no tools of course, oiling machines, oil in all air tools, etc) that is no longer good to use, finding stuff didn't know I even had, lot of "why am I keeping this?" and a lot getting a "new spot" in the shop. I know damn well some stuff that sat here for years, will be needed just after the garbage pick up! And soon be 69, so now will be "OK, I know I had (whateve) right here, but moved it, but to where? Keep me busy well into the REAL old age!
 
To avoid these ads, REGISTER NOW!
OP
M

Motorman55

Well-known member
Joined
Apr 10, 2016
Messages
2,625
Location
South Jersey
Over the winter I loosely sorted items into groups of similar things and temporarily shoved them into any nook and cranny of the shop to get them off the floor and out of the way. This is one of the monsters I created along the way and is my current project to get organized.

This unit is made up of 3 separate pieces made from (1) Work Van gray shelving topped by (1) bottom section (which actually belongs 'under' the shelving unit itself) and (1) smaller shelving unit on top. Looks a little weird this way, but it actually affords me more storage. I'm pretty sure I'm going to leave it set up this way.

The object of this unit(s) is to hold all my automotive type spray paints cans, quart cans and general body work supplies. Plus a place to store my air brushes, pinstriping/lettering brushes and various sundries.

Before pics below...After pics to come.
 

Attachments

  • IMG_2781.jpg
    IMG_2781.jpg
    152.1 KB · Views: 97
  • IMG_2780.jpg
    IMG_2780.jpg
    155.4 KB · Views: 92
  • IMG_2779.jpg
    IMG_2779.jpg
    150.7 KB · Views: 94
  • IMG_2777.jpg
    IMG_2777.jpg
    97.3 KB · Views: 90

JAKE-THE-TOOL-MAN

Well-known member
Joined
Oct 20, 2010
Messages
1,157
Location
Bremerton, WA
I'm very interested in the progress of your shop. It's looking great so far! I too enjoy HD motorcycles and will be moving into a one car garage at the end of the year so I am taking notes on your organization. Keep up the great work
 
OP
M

Motorman55

Well-known member
Joined
Apr 10, 2016
Messages
2,625
Location
South Jersey
Spent the better half of today organizing the paint and body supply shelving as mentioned yesterday.

I started by clearing everything off the shelves on the lower unit. Then I put all the automotive type spray cans starting from High Temp/Engine Paints on the left and working my way to the right side with all the specialty types. Then I put all the general type spray paints on the 2nd and bottom shelves.

Next I cleared off the middle shelf unit. Here I put my Paasche air brushes, 1 Shot lettering/pinstriping paints, lettering brushes (red box). The large parts drawer holds everything from paint pens, markers, striping tapes, hot glue sticks and more. The smaller boxes on each side hold various specialty screws, razor blades, misc. Still more sorting to do with these.

Also added 2 battery powered led strip lamps to light up the small parts cabinets when needed.


Finally I cleared off the top shelf and reorganized it with the small Bondo cans, fiberglass gel coat supplies, various body supplies, sandpapers, cleaners, pads, etc. Still have more stuff to put on this part of the shelf.

Looks a lot better and best of all I can actually find stuff now.
 

Attachments

  • IMG_2792.jpg
    IMG_2792.jpg
    147.5 KB · Views: 80
  • IMG_2794.jpg
    IMG_2794.jpg
    154.4 KB · Views: 99
  • IMG_2787.jpg
    IMG_2787.jpg
    148.5 KB · Views: 76
  • IMG_2786.jpg
    IMG_2786.jpg
    152.6 KB · Views: 81
  • IMG_2788.jpg
    IMG_2788.jpg
    150.8 KB · Views: 85
  • IMG_2795.jpg
    IMG_2795.jpg
    135.6 KB · Views: 72
Last edited:
OP
M

Motorman55

Well-known member
Joined
Apr 10, 2016
Messages
2,625
Location
South Jersey
I've down sized a lot since retiring last year. I gave away a lot of stuff I really didn't need or want anymore. From tools and supplies to storage cabinets and workbenches. My neighbors were happy to take it for free.

The sorting thru boxes continues.
 
OP
M

Motorman55

Well-known member
Joined
Apr 10, 2016
Messages
2,625
Location
South Jersey
Ran to the recycle/dump today and chucked out some old metal cans and misc. metal items I no longer need. Also did some more storing away of parts, tools and material to make room for my Skat Blast blasting cabinet. I've put it off for a couple weeks now but I have to bring it down from the rental garage in north NJ.

After that I pulled out this old KW Brake Shoe Grinder that was given to me by a friend several years ago. I've never used it and as you can see by the photos, it needs a good restoration. It is one heavy SOB.

I have no real use for it the way it sits, but I thought it would make a good sanding wheel. So I'll remove the motor/sander section from the base and see if I can make use of it. I should be able to fit large self stick-on type sand paper discs.
 

Attachments

  • IMG_2829.jpg
    IMG_2829.jpg
    143.4 KB · Views: 46
  • IMG_2828.jpg
    IMG_2828.jpg
    151.2 KB · Views: 53
  • IMG_2827.jpg
    IMG_2827.jpg
    152.8 KB · Views: 60
  • IMG_2826.jpg
    IMG_2826.jpg
    151 KB · Views: 61
Last edited:
OP
M

Motorman55

Well-known member
Joined
Apr 10, 2016
Messages
2,625
Location
South Jersey
Finally after 5 months, my Skat Blast Cabinet is in the house, well the garage really.

After unloading it from the trailer today I put the cabinet in the spot I originally planned for it to go. Of course nothing is that easy, as I had to move a lot of things first.

Its going to require a lot more thinking and re-arranging some things to get everything in the garage like I want. I had to take off the side cabinet from my large roller box, but that's not a big deal as I have a couple ideas for it.

For now I stuck the small 2 door cabinet between the big roller cabinet and the Skat-Blast cabinet. This will likely change too. Also, I removed the old small corner shelf that the PO had hung up near the overhead door. This gave me a clean space to put my ladders and the Workmate bench. Nice to be able to get to them now without moving anything else.

Next step for the Skat-Blast cabinet is getting it set up to use. This will require some preliminary modifications like bolting on a set of wheels. LED lighting, general piping in of air lines, filters, etc.

But right now I'm glad to just have it in my shop and out of the rental garage it was stored in.

Well, back to work
 

Attachments

  • IMG_2841.jpg
    IMG_2841.jpg
    146.8 KB · Views: 78
  • IMG_2839.jpg
    IMG_2839.jpg
    91.3 KB · Views: 72
  • IMG_2840.jpg
    IMG_2840.jpg
    101.6 KB · Views: 77
Last edited:
OP
M

Motorman55

Well-known member
Joined
Apr 10, 2016
Messages
2,625
Location
South Jersey
Well I decided what I wanted to do with the Rem Line side cabinet. I turned it into a detail cart. It'll hold all my polishes and cleaners, etc for the truck. car and motorcycle.

I started out by removing the wood board from the top of the cabinet. I then drilled and mounted 4 small locking type swivel wheels that I got free at the recycle/dumb the other day to the board and then bolted that under the cabinet.

I grabbed three of my black Blue Point magnetic tool shelves and attached them to the left side. Next I attached a multiple hook strip under the shelves to hang some brushes.

After that I cut a piece of thick rubber matting to size for the top of the cabinet to replace the top board I used for the wheels. Next I added a HF paper towel holder and a HF glove holder to the right side.

Then it was just a matter of filling it up with some of my polishing/detailing supplies. The vac will sit on top and the attachments fit nicely in the shelves.

Rolls nicely. I'll probably make some changes and additions as I go along like changing the black magnetic shelves to red ones to match the cabinet.

Good thing also is it freed up the three shelf Craftsman cabinet that's hanging on the wall next to the Skat-Blast cabinet. I'm thinking maybe to hold the tire changing tools and supplies and a space for the blast cabinet's extra tips and air filter.
 

Attachments

  • IMG_2892.jpg
    IMG_2892.jpg
    80.2 KB · Views: 70
  • IMG_2894.jpg
    IMG_2894.jpg
    110.6 KB · Views: 66
  • IMG_2889.jpg
    IMG_2889.jpg
    97.8 KB · Views: 76
  • IMG_2886.jpg
    IMG_2886.jpg
    110.4 KB · Views: 70
  • IMG_2890.jpg
    IMG_2890.jpg
    95 KB · Views: 64
  • IMG_2882.jpg
    IMG_2882.jpg
    91.4 KB · Views: 62
  • IMG_2880.jpg
    IMG_2880.jpg
    149.8 KB · Views: 66
Last edited:

fourbyford

Well-known member
Joined
Aug 3, 2017
Messages
913
Location
North Idaho... almost Canada!
Hey MM55...
I'm following this with a great deal of interest... thanks for taking the time to post your progress. I can definitely identify with your situation... I've been in the process of moving, downsizing, organizing, etc for far too long (a long story). Seems that when we're moving, the tendency is to bring a load of whatever... and unload it into the garage "temporarily" until we can decide what to do with it... house stuff, garage stuff, lawn/garden stuff, name it... the goal is to get it out of the trailer and out of the weather. The garage gets so full that it's hard to even move. Then, the mountains of cardboard to deal with...
Anyways, my garage is a bit larger but I, like others, like reading about projects such as yours to "borrow" the great ideas on organizing. I'm working on organizing my tools by task/function, as you have done, but, like you, have had to deal with "utility" issues (electrical, air, communications lines) and "appearance/efficiency" issues (insulation, wall covering, paint, etc). I finally got organized to the point that I can find most of the things I need and have turned my focus to the "issues" I mentioned. It can be frustrating but, guess we just take it one day at a time...
Anyways, keep up the great work!
...D
 
OP
M

Motorman55

Well-known member
Joined
Apr 10, 2016
Messages
2,625
Location
South Jersey
Thanks fourbyford, and good luck with your moving situation. I've set-up, cleaned and cleared individual areas in the garage multiple times now as I sort thru all the stuff I brought from the old house. Slowly but surely I'm making headway. Lots of other tasks in the house and outside yard takes up a lot of my time.

Good thing is I've got my Harley up and running.
 
OP
M

Motorman55

Well-known member
Joined
Apr 10, 2016
Messages
2,625
Location
South Jersey
The move here to the new house/garage is officially done. :bowdown:

Last Saturday I finally got my 1994 Chevy P.U. '*********' out of its storage garage up in North Jersey and down here to the new house in South Jersey.

I have to fix the broken rear passenger side cab mount that broke just before I put it in storage last December. The misalignment it caused between the cab and the bed can be seen in the first picture. After that I'll begin addressing any other rust issues like that passenger side fender.

Nice to have a garage again to work out of and make working on these projects a lot easier.
I'll be posting projects start to finish on this Thread.
 

Attachments

  • IMG_2896 (2)_LI.jpg
    IMG_2896 (2)_LI.jpg
    148.2 KB · Views: 71
  • IMG_2899.jpg
    IMG_2899.jpg
    90.7 KB · Views: 68
OP
M

Motorman55

Well-known member
Joined
Apr 10, 2016
Messages
2,625
Location
South Jersey
Had to make an emergency repair to the broken passenger rear cab mount yesterday.

The broken mount caused the passenger side of the cab to dip down and tilt back towards the bed of the truck causing an eyebolt, that's bolted thru the top of the bed support bar that I use to strap down my Harley when its in the bed of the truck, was actually banging against the back of the passenger side cab whenever I went over a bump.

First thing I did was to try and see if I could get the mounting bolt that goes up thru the cab's rubber mount to turn. Nothing doing as it just snapped right off allowing the lower half of the cab mount rubber doughnut and its metal cap fall to the ground. I barely applied any torque in my effort to turn it. That bolt's diameter was rusted down to a thin 1/8" of its original thickness. Luckily it snapped right near the nut. Hopefully this will enable me to get a grip further up near the threads where it goes into the cab and allow me to unscrew it completely.

But that's for a later full repair when I have more time. Right now its make a quick patch fix. I'm just using the truck to go a couple miles now and then on the local streets. I have my car for everyday use.

Looking around for something to use as a temporary shim/plate, I came up with a flat metal cover plate from a two gang old work style electrical box. Clamped it on the drill press and drilled a 2-1/8" hole thru the center. Next I put the jack and a small block of 4x4 wood to take up the gap under cab near the rear mount and lifted the cab just high enough to slip the plate between the upper rubber doughnut and frame mount. I lowered the cab down slowly and gave it a last check to make sure the plate would hold.

Once I cleaned up all the rust and **** under the truck, I took the truck out on the back roads for 20 minutes of bumps and turns and returned and checked for any movement of the plate.

In the after pictures you can see that the cab to bed body alignment came back to good order and the gap between the cab and the bed restored to normal. I'll fix the damage to the cab from the eyebolt during paint touch up work later. Looks good to go.

Not the best repair, but hopefully it'll hold until I can do a better more permanent rust repair.
 

Attachments

  • IMG_2926.jpg
    IMG_2926.jpg
    68.1 KB · Views: 62
  • IMG_2925.jpg
    IMG_2925.jpg
    82 KB · Views: 63
  • IMG_2928 (2).jpg
    IMG_2928 (2).jpg
    121.3 KB · Views: 62
  • IMG_2922.jpg
    IMG_2922.jpg
    148.9 KB · Views: 62
Last edited:
OP
M

Motorman55

Well-known member
Joined
Apr 10, 2016
Messages
2,625
Location
South Jersey
Doing something a little different today in the garage. Working on an old sign I drew some time ago. Finally getting around to painting it with some of my old 1 Shot Sign paints.

Signs represents 'OMC' short for (The) 'Old Motorcycle Club' using the modified combination wrench box end as the 'O' and the open end as the 'C'.

Long way to go before its finished. Once the basic background painting is done I'll do the final outlining in black or gray lines or a combination of both. Then I'll finish with some ageing techniques to the paint and cut the board into its final shape. Thinking horizontal with a live edge treatment. Might even go with just the outline shape itself.
 

Attachments

  • IMG_2977.jpg
    IMG_2977.jpg
    123.8 KB · Views: 26
Last edited:
OP
M

Motorman55

Well-known member
Joined
Apr 10, 2016
Messages
2,625
Location
South Jersey
While the paint was drying on the OMC sign, I spent a little time today cleaning and polishing the Harley.

Picking up where I left off last week, I worked mostly on polishing the gear covers and repainting the motor sprocket red and some black for the primary cover.

The goal this season is to get the bike in reasonable shape for riding. I'll tear it apart next winter for a complete rebuild.
 

Attachments

  • IMG_2980 (2).jpg
    IMG_2980 (2).jpg
    125.9 KB · Views: 59
  • IMG_2988 (2).jpg
    IMG_2988 (2).jpg
    115.1 KB · Views: 49
Last edited:
OP
M

Motorman55

Well-known member
Joined
Apr 10, 2016
Messages
2,625
Location
South Jersey
Wow, a month has pass and I've accomplished very little in the garage. Just too busy with other family stuff, not to mention having gone thru a lot trouble to have a garage sale and which didn't pan out to well. Only manage to move a few things from the garage I didn't want anymore.

However, today I finally got around to painting the 'black' trim around the garage door 'white' to match the rest of the houses white trim. For some reason a lot of houses in our village paint their garage door trim the same color as their window shutters. I don't like that look.

Next up is a fresh coat of white paint on the outer garage door.
 
Last edited:
OP
M

Motorman55

Well-known member
Joined
Apr 10, 2016
Messages
2,625
Location
South Jersey
Well the summer went by like a flash. Nothing but hot humid weather for too many days that kept me out of the garage.

Work on the Harley took forever because most all my time was taken up working on the MIL's new house after moving her again for the second time in a year. And I still have a couple more things to do in her house to finish.

Anyway, I did manage to get some repairs done to the Harley and actually got out for a shakedown ride only to get a flat rear tire for my efforts.

And that's where I'm presently at in the garage. Removing the rear tire and tube, cleaning up the wheel and installing a new Avon MkII tire, tube and rim rubber band. Also cleaning up the rear brake parts and installing new brake shoe lining.

I took pictures and posted some of the repairs in the 'What did you do in your garage today' Thread. I'll repost them here over the next day or so to bring myself up to speed.

Back to work..
 

driftpin

Well-known member
Joined
Dec 22, 2016
Messages
11,250
Location
Miami-Dade/Broward Co. Florida
Your garage is full! But, isn't it rewarding to make-room for things that you want to-keep?

Hillbilly engineering on the old-work stamped-steel box for the truck cab. But, it works, and it probably will last, even-if you don't do anything-else to it. Man, am I glad I moved-out of the Rust Belt! I recall as a new driver, seeing my parents' bought-new VW beetle cabriolet turn-into a seriously-damaged structurally, vehicle in only six years. I recall having to change a flat tire, putting the OEM rocker panel socket car jack in-place, and watching the rocker panel just collapse as sheets of rust were dislodged during my attempt to raise the vehicle for the tire/wheel change. The wheels/tires on that side stayed on the ground, and the rocker panel collapsed like stepping on a shoebox.

Here in south Florida, I had a bought in-Florida a used, '93 Chevy WT long-bed (8') V6 & auto ******, like yours in the model year body series, I also used it for hauling my motorcycles, among other things. I had it about 10 years. I never had those rust problems, though. It was at about 140K miles, and it needed paint, work on the AC, and who-knows what-all else, I was going to spend about $3K on it taking-care of things, and my wife told me, "go look for a new truck." I went to a couple Miami area dealers looking at Chevy's & GMC's, and I bought a GMC Canyon crew cab w/the inline-5 engine, which made it a rocket, compared to my anemic GMC Sierra WT 1500. I had a friend's GMS Employee Discount code, which the dealer I was at, kept trying to tell me, "that code doesn't work, 'the computer won't accept it.'" I had to threaten to walk-out the door to get him to give me the employee discount. I called a Chevy dealer close-by and he had the Colorado crew cabs spec'ed the same (inline-5, SLE-2, tow package, etc) on the lot, while I was in the salesman's office, before he "went to speak (again) with the sales manager" about getting the GMS Employee Discount code accepted.

Now that truck has 120K miles on it, and it still looks great, it's much more fun to drive compared to that V-6 WT 1500 that might be capable of doing 79 mph, downhill. No rust repairs needed, thank god.

It's been many decades since I was living in a Rust Belt area, and I don't miss at-all the issues of a vehicle slowly disappearing as oxidation disappears the car.

I didn't start at the beginning of the thread, I see it's a Sportster you have, I have a friend who has a couple awaiting work, a '70 and a '76, he has a set of S&S stroker flywheels/crank for one, I keep telling him, "sell those, and put it together stock." He is a HVAC contractor, and has been accumulating parts for the two of those bikes for literally decades. He rides a Shovelhead LowRider he bought new in Palm Beach County FL when we go to Daytona Bike Week in the spring. My advice for years has been, "put at-least one of those Ironheads together so you can ride it to local shows, to enjoy it, and maybe someone will make-you, "an offer you can't refuse." After-all, he has another one.

What are your plans for yours? How has it been modded?

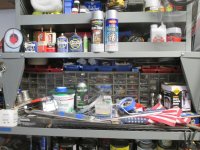
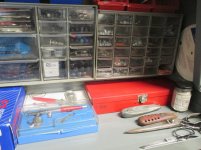
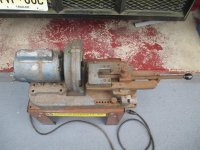
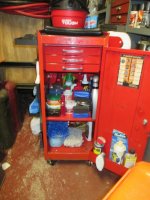
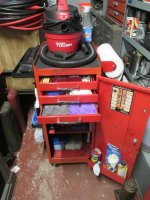
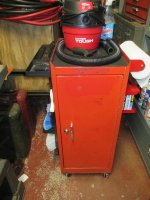
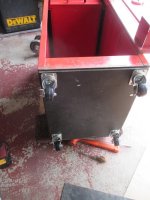
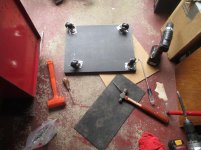
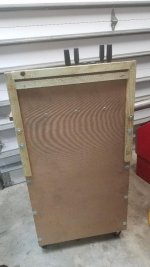
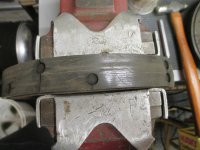
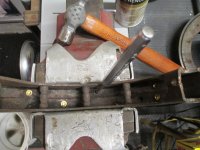
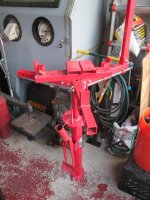
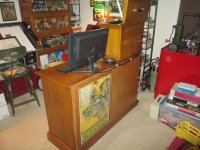
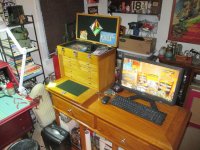
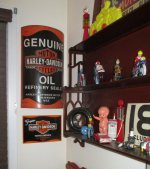
I had a 18 ga. steel cabinet I modded recently, I got it off a scrapper's truck, it was a cool roll-about w/a neat curved door and inside shelf. I added a back piece, a backsplash, another shelf, different casters and sold it. A bit bigger than your Rem Line sidebox. I need the space. I only have a 2-car, and one side is occupied by my Handy-Lift for my bikes. I sold the cabinet on Offer-Up and put the $ towards a TIG torch.

Maybe I'll start from the beginning of your thread, reading.

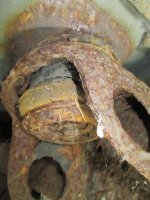
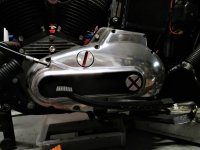
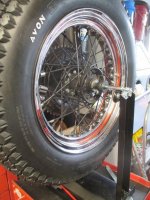
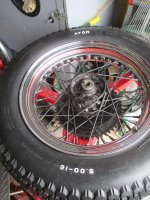
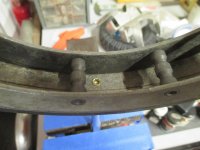
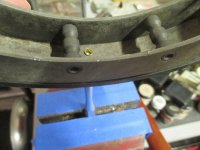
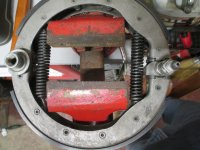
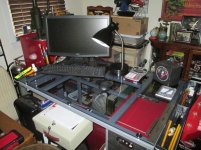
OK, I just breezed-through the pics, two-pounds in a one-pound container. Stuff on-top of stuff. And, I see you also have a Handy-Lift. Why I waited so-long to get mine, I dunno (maybe because I didn't have a good place inside for one). It looks like your Sportster is about a pre-1975? Not really-sure of the differences by years, I see it's got a front disc, and right-hand shifting. From my limited knowledge of Ironheads, that would make it a '73 or '74. I see it has aluminum fork sliders too. I had a roommate who had just bought a brand-new '72, the first year of the 1000 cc engine, and he had steel fork sliders, and a drum front brake. He wasn't happy that my older Kawasaki Blue Streak two-stroke triple 500 cc could walk-away from him in pretty-much any contest of acceleration, leaving him in a blue-cloud haze of two-stroke oil and gas fumes.

Being a 'motorman,' I'm sure you are familiar with the biker gangs. South Florida is Outlaws' territory, and a long-time ago, back when I had that Kawasaki 500 two-stroke, I was on I-95 and ahead I spotted a double-row of Outlaws, their jeans vest rockers indicating they were the local chapter. I dropped-down a couple of gears as I came-up behind them, and passed the lot of them in one fell-swoop, notching it up a couple of gears as the triple wound-out. About the time I got-by the lot of them, I looked in my rear-view mirror (not much-use if you were running-hard, as the mirror head shook furiously due-to the high-frequency, low-amplitude vibrations from the two-stroke triple) and saw some movement. I turned my head and saw one of the boys from the front of the pack, break-free and begin to pursue me as I rapidly was opening distance between the double-file and me. I did see that the Outlaws were having to ride-through the characteristic blue haze of two-stroke internal combustion. That probably gave them something to curse-about then and later.

I kept the throttle pinned, and it wasn't very-long before I noticed that the Outlaws member seeking to pursue gave-up, backed-out of the throttle, and re-joined the pack. I soon left the interstate, and didn't wait for some outraged Outlaw to notice the &^^#!!* two-stroke had turned-off the interstate, and was fair-game, waiting at the off-ramp intersection. "AMF," and I am-not referring to the owners of The Motor Company in the 1960's/'70's/early '80's!
 

Attachments

  • Lowrider-Softail.jpeg
    Lowrider-Softail.jpeg
    116.3 KB · Views: 28
  • roller cabinet.01.jpg
    roller cabinet.01.jpg
    44.9 KB · Views: 24
  • roller cabinet.02.jpg
    roller cabinet.02.jpg
    53.4 KB · Views: 24
  • roller cabinet.03.jpg
    roller cabinet.03.jpg
    64.6 KB · Views: 23
Last edited:
OP
M

Motorman55

Well-known member
Joined
Apr 10, 2016
Messages
2,625
Location
South Jersey
My truck has a lot of rust under it. I'm trying to save it since I bought it new back in 1994. It may be a lost cause, but we'll see.

The Harley is a 1974 XLCH kick-start only with some mods to the engine. I built back in early 2000's. Still runs strong.

The garage is a one car and needs some TLC. Namely some sheetrock repairs.
I will likely be making more changes as I go along.
 
OP
M

Motorman55

Well-known member
Joined
Apr 10, 2016
Messages
2,625
Location
South Jersey
So today I managed to mount the new Avon tire and tube on the rear rim.

After that I figured it was a good time to paint some of the raised lettering. I used a white paint pen. Just did the name Avon and the tire size.

After the paint dried, I set up the HF motorcycle balancing stand and balance the tire. Used original HD type wheel weights that just clamp on the spokes.
 

Attachments

  • IMG_3264.jpg
    IMG_3264.jpg
    114 KB · Views: 30
  • IMG_3260.jpg
    IMG_3260.jpg
    128.3 KB · Views: 32
  • IMG_3262.jpg
    IMG_3262.jpg
    103.7 KB · Views: 29
To avoid these ads, REGISTER NOW!
OP
M

Motorman55

Well-known member
Joined
Apr 10, 2016
Messages
2,625
Location
South Jersey
Back tracking now...

Last Tuesday I disassembled the rear brake assembly, knocked out the rivets and removed the old brake shoes pads from the shoes and put all the parts in the Evapo-Rust tank to de-rust and clean up.

Also cleaned up the brake drum and scuffed the brake drum surface. Lastly I cleaned the aluminum backing plate and gave it a quick polish with some Semi-Chrome polish.

I also ordered brake shoe pads and rivets in the mail which I got on Thursday.
 

Attachments

  • IMG_3226 (2).jpg
    IMG_3226 (2).jpg
    152.9 KB · Views: 44
  • IMG_3228.jpg
    IMG_3228.jpg
    144.5 KB · Views: 38
  • IMG_3229.jpg
    IMG_3229.jpg
    147 KB · Views: 38
  • IMG_3230.jpg
    IMG_3230.jpg
    131.9 KB · Views: 35
OP
M

Motorman55

Well-known member
Joined
Apr 10, 2016
Messages
2,625
Location
South Jersey
Still backtracking....

When I removed the rear wheel on the Harley and dismount the Avon tire and tube. I could see that there was some surface rust on the inside of the rim.

After setting up the wheel on the truing/balancing stand I proceeded to clean up the rust spots on the inner rim and spoke screws with the Hyper Tough Rotary tool I bought the other day at Walmart.

After that I wiped it down and treated the rust areas with Rust Mort. Then a final wipe down after it dried.
 

Attachments

  • IMG_3220.jpg
    IMG_3220.jpg
    79 KB · Views: 34
  • IMG_3216.jpg
    IMG_3216.jpg
    78.7 KB · Views: 33
OP
M

Motorman55

Well-known member
Joined
Apr 10, 2016
Messages
2,625
Location
South Jersey
So last night, Thursday, I pulled all the brake parts out of the Evapo-Rust bath and after washing them off and drying and giving them a once over check for any cracks or worn spots, I started the relining of the brake shoes.

I set up my make shift riveting anvil and proceeded to attach the new brake pads with the brass rivets. Its not hard to do and I've done them several times over the years. The trick is to not crack the pads by over compressing the rivets.

I use a an old center punch that I've ground down to a shallow point. When I strike the punch on the underside of the rivet, the rivet starts to mushroom out. I'll hit it light a few times until the pad material just slightly touches the brake shoe. After that I use the top flat side of the punch to flatten out the mushroom which brings the pad tight to the brake shoe but not so tight as to crack the pad.
 

Attachments

  • IMG_3249.jpg
    IMG_3249.jpg
    118.8 KB · Views: 35
  • IMG_3248.jpg
    IMG_3248.jpg
    114 KB · Views: 36
  • IMG_3247.jpg
    IMG_3247.jpg
    117 KB · Views: 33
  • IMG_3244.jpg
    IMG_3244.jpg
    66.4 KB · Views: 37
  • IMG_3243.jpg
    IMG_3243.jpg
    119.5 KB · Views: 35
  • IMG_3240.jpg
    IMG_3240.jpg
    142.9 KB · Views: 38
  • IMG_3254.jpg
    IMG_3254.jpg
    129.1 KB · Views: 35
Last edited:
OP
M

Motorman55

Well-known member
Joined
Apr 10, 2016
Messages
2,625
Location
South Jersey
Having already cleaned and polished the brake backing plate, I started the final assembly of the brakes.

The springs on these brakes are pretty strong and assembling these rear Harley brakes takes a little finesse or fumbling around to get them together.

Generally what I do is attach the spring to the ends of the brake shoes with the round pivot bolt. After that I attached the spring to the flat end of the shoes where the cam bolt goes.

Next I place the assembly over one of my smaller vices so that the inner side of the shoes lay behind the jaws of the vise. Then I just turn the vise out which pulls the brake shoes apart just enough to slip in the cam bolt. Turning the vise in and the springs pull everything tight.

Next I just drop the now assembled brake shoes into the backing plate and its ready to place into the brake drum.

Of note: The inside of the brake shoes have small rods where the springs hooks attach to have two grooves each. You have to make sure the spring hooks go over the groove that's closet to the brake plate.
 

Attachments

  • IMG_3235 (2).jpg
    IMG_3235 (2).jpg
    150.8 KB · Views: 30
  • IMG_3255.jpg
    IMG_3255.jpg
    149.5 KB · Views: 31
  • IMG_3256.jpg
    IMG_3256.jpg
    148.7 KB · Views: 29
  • IMG_3257.jpg
    IMG_3257.jpg
    101.1 KB · Views: 29
  • IMG_3258.jpg
    IMG_3258.jpg
    86 KB · Views: 30
Last edited:
OP
M

Motorman55

Well-known member
Joined
Apr 10, 2016
Messages
2,625
Location
South Jersey
Once I mated the brake assembly into the drum, it was time to put it in the swingarm, reinstalling the axle and adjusters and attaching the brake lever and rod. After that I temporarily attached the chain and aligned the wheel.

Right now I'm waiting for a new replacement master link for the chain. Once I get that I'll do the final adjustments and torqueing down the axle nut.

Then its out for a test run and any final adjustment of the chain tension.
 

Attachments

  • IMG_3265.jpg
    IMG_3265.jpg
    154.9 KB · Views: 44
OP
M

Motorman55

Well-known member
Joined
Apr 10, 2016
Messages
2,625
Location
South Jersey
One thing I actually did for the garage last week was to bolt the HF tire changer to the floor.

First I remove the bolt on metal foot extensions from the HF tire changer. After that I marked and drilled the four holes needed to mount the HF tire changer. I used drop in anchors and bolted the tire changer down to the floor which would allow for moving the tire changer if I needed to.

While it worked pretty good at first, when I really laid into removing the motorcycle tire from its rim with the mounting/dismounting bar, the downward pressure caused the tire changer to lift slightly and begin to pull up one of the bolts and drop in anchor from the floor.

I'm thinking I'll probably have to cement the anchors into the floor or drill larger holes and drop in bolts heads down with the threads facing up. Only problem with that is if I need to move the tire changer it would leave four threaded studs sticking up out of the floor.

Hmmm....I'll have to work that out.
 

Attachments

  • IMG_3188.jpg
    IMG_3188.jpg
    110.6 KB · Views: 50
Last edited:
OP
M

Motorman55

Well-known member
Joined
Apr 10, 2016
Messages
2,625
Location
South Jersey
The new replacement 530 chain master link from J&P Cycle came in the mail today. After installing it on the chain I made a preliminary chain adjustment to align the sprockets. I'll do the final chain adjustment after I take the bike down off the lift and putting some weight on it.

I wanted to lube it, but I couldn't find the large can of chain spray lube. I've no idea what happened to it. Then I remembered I had an old small blue PJ1 chain lube can in amongst my early collectible oil cans. I purchased it back in the late 1970's. Had a little pressure and lube in it enough to soak the new master link anyway.

After that the old can went back into my oil can collection and I spent the next hour just cleaning up the mess I managed to make changing out the tire and re-shoeing the brake pads, etc.

Pretty much an uneventful couple hours in the shop. Got to make a run to the store and get some chain lube.
 

Attachments

  • IMG_3293 (2).jpg
    IMG_3293 (2).jpg
    102.6 KB · Views: 16
Last edited:
OP
M

Motorman55

Well-known member
Joined
Apr 10, 2016
Messages
2,625
Location
South Jersey
A couple weeks ago I ordered a new metal and glass drafting/art table to replace the old desk in the shop office.

The old desk while it worked at first had become nothing more then a big storage container for a bunch of stuff that I really needed to go thru.

With the old desk gone to the wilds and the new drafting/art table set in place it opened up the small office.

Of course you can't tell by the photo because I still had to temporarily move all the stuff back into the office that I had to take out to get to the old wood desk to take that out.

What a cluster F...!

Anyway that's where I'm at today. In the shop office...sorting, filing, trying to decide what I can sell and/or THROW OUT.

That last part not so easy for a pack rat like me.
 

Attachments

  • IMG_3198 (2).jpg
    IMG_3198 (2).jpg
    85.2 KB · Views: 73
  • IMG_3299.jpg
    IMG_3299.jpg
    152.4 KB · Views: 78
Last edited:
OP
M

Motorman55

Well-known member
Joined
Apr 10, 2016
Messages
2,625
Location
South Jersey
Today I finally got started on replacing the rusted/leaking left front brake lines.
Removed both the hard line and rubber flex hose along with the mounting brackets. Of course I got started late in the day so tomorrow I hope to install the new lines.

No pics cause its not that much to look at.
 
OP
M

Motorman55

Well-known member
Joined
Apr 10, 2016
Messages
2,625
Location
South Jersey
After knocking off the heavy rust and wire brushing the immediate areas of connections I treated them with a couple coats of Rust-Mort rust inhibitor.

Removing the small parts from their overnight soak in Evap-o-Rust, I painted the bracket and bracket bolt semi-gloss black. I installed the new replacement hard stainless lines and the flexible rubber brake line with their brackets and a couple of new bolts with a dab of Never-Seize to their threads. Then a final overall shot of the same semi-gloss black paint to finish off this repair.

I'm holding off bleeding the brakes right now as I'm waiting for a new one-man type bleeder tool that I ordered from e'bay last night to try out.

I have a complete set of stainless brake and gas lines that are pre-bent to their correct shape that will be installed as I progress along with the much needed abatement of rust.

Lots more to do!
 

Attachments

  • IMG_3314.jpg
    IMG_3314.jpg
    154 KB · Views: 45
  • IMG_3315.jpg
    IMG_3315.jpg
    152.2 KB · Views: 40
  • IMG_3341.jpg
    IMG_3341.jpg
    135.4 KB · Views: 40
Last edited:
OP
M

Motorman55

Well-known member
Joined
Apr 10, 2016
Messages
2,625
Location
South Jersey
Just added a 1954 NJ motorcycle license plate to my collection. It came with a 1955 NJ plate (I already have a matched pair of NJ 1955 plates).

After a little cleaning, the '54 plate goes in the shop office and the '55 will get hung up in the garage.
 

Attachments

  • IMG_3466 (2).jpg
    IMG_3466 (2).jpg
    139.4 KB · Views: 35
OP
M

Motorman55

Well-known member
Joined
Apr 10, 2016
Messages
2,625
Location
South Jersey
I've been getting some overdue vehicle work done in the shop lately, so not much of any changes going on to the garage itself.

Rust abatement continues on the truck as I replaced the right side front brake lines and cleaned/de-rusted the bracket. Basically the same procedure as the left side. I still have to pick-up and install some 5/16 brake line hold down clamps to finish off the front brakes.

I also cleaned and wire brushed the battery mounting plate. Applied some Rust-Mort then painted it black. Installed a new battery and positive cable.

In addition to the above I installed a new starter. Used a 25% off discount code from Advance Auto. I went with a new starter rather then a rebuilt one.

Turned the key and the motor started right up so all looks good in that department.
 

fartymarty

Well-known member
Joined
Nov 9, 2012
Messages
1,348
Location
Fort Worth
One thing I actually did for the garage last week was to bolt the HF tire changer to the floor.

First I remove the bolt on metal foot extensions from the HF tire changer. After that I marked and drilled the four holes needed to mount the HF tire changer. I used drop in anchors and bolted the tire changer down to the floor which would allow for moving the tire changer if I needed to.

While it worked pretty good at first, when I really laid into removing the motorcycle tire from its rim with the mounting/dismounting bar, the downward pressure caused the tire changer to lift slightly and begin to pull up one of the bolts and drop in anchor from the floor.

I'm thinking I'll probably have to cement the anchors into the floor or drill larger holes and drop in bolts heads down with the threads facing up. Only problem with that is if I need to move the tire changer it would leave four threaded studs sticking up out of the floor.

Hmmm....I'll have to work that out.

You should not give up on the drop in anchors lightly, as bolts sticking up out of the floor are a pain and I'd consider and try all other options first.

Probably not what you're looking for,...but you could put the bottom foot extensions back on and just re-drill the floor at the new hole locations and put in the drop in anchors maybe this time with a little epoxy? The drop in anchors are a big advantage not only for relocating, but also If you only change tires 4 or fewer times a year like me, then you can keep the whole tire changer in an out of the way location until needed. I have large socket head set screws in my floor inserts just to keep out dirt when the changer is stored away. Space is also at a premium in my blivet garage.
 
OP
M

Motorman55

Well-known member
Joined
Apr 10, 2016
Messages
2,625
Location
South Jersey
You should not give up on the drop in anchors lightly, as bolts sticking up out of the floor are a pain and I'd consider and try all other options first.

Probably not what you're looking for,...but you could put the bottom foot extensions back on and just re-drill the floor at the new hole locations and put in the drop in anchors maybe this time with a little epoxy? The drop in anchors are a big advantage not only for relocating, but also If you only change tires 4 or fewer times a year like me, then you can keep the whole tire changer in an out of the way location until needed. I have large socket head set screws in my floor inserts just to keep out dirt when the changer is stored away. Space is also at a premium in my blivet garage.

Yes, good idea. I'm going to re-drill and then epoxy the anchors this time. I relied on just the anchors alone without any cement or epoxy.
 
OP
M

Motorman55

Well-known member
Joined
Apr 10, 2016
Messages
2,625
Location
South Jersey
Made a mess in the garage while working on the Harley and now my Chevy truck. Have to spend some time in getting it cleaned up and organized over the winter.

Meanwhile, I made and installed a temporary shelf for over the closet doors in the shop office to display some oil cans and things. While this was just a test to see if I liked it, and I do, I will now go with a little deeper shelving and of course some real black painted brackets instead of the little angle brackets in the picture.

In addition to a shelf over the doors, I am thinking of building cornices (example shown in second pic) for over the windows to display even more oil cans and stuff and possibly do some type of Harley or gas related design in the front panel of the cornice.
 

Attachments

  • IMG_3503.jpg
    IMG_3503.jpg
    95.8 KB · Views: 44
  • th.jpg
    th.jpg
    18.1 KB · Views: 32
OP
M

Motorman55

Well-known member
Joined
Apr 10, 2016
Messages
2,625
Location
South Jersey
Getting some work done in the garage today. Worked on the truck as I continue replacing the old brake lines with the new stainless steel pre-bent set.

Continued with some more rust abatement also. Still lots more to do on that, but made a little headway today on the front end.
 
Last edited:
OP
M

Motorman55

Well-known member
Joined
Apr 10, 2016
Messages
2,625
Location
South Jersey
Made a few changes in the shop office also over the last couple weeks.

My MIL gave me her old oak china cabinet which I immediatley junked the upper shelving/display case and modified the cabinet's bottom section for use as a bench and storage unit in the shop office. It has two drawers and storage space underneath. I set the HF oak tool chest on one end and placed the computer on the other end.

As for the new glass top drafting table that I originally purchased a few weeks ago to replace the old desk, it now sits against one of the office walls and is set up just for doing drafting layouts, drawing, sign painting, arts/crafts etc. Basically what it was originally designed for.

Pics to follow...
 
Last edited:
OP
M

Motorman55

Well-known member
Joined
Apr 10, 2016
Messages
2,625
Location
South Jersey
Back in the garage today.

I started replacing all the drawer liners in the large roller cabinet with HF's 18"x72" non-slip tool box solid drawer liner. The drawers were all previously lined with that little checkered board type liner. I didn't like the way the stuff tended to stick to my tools, so they had to go and I've been meaning to replace them.

The HF drawer liner works pretty good. Having previously used a roll in my electrical workbench drawer, I found that the tools stayed put when moving the drawers in and out.

So far I've gone thru 4 rolls of the HF drawer liners and was able to use some of the smaller cut-off scraps to line the top of the Craftsman and Dayton top boxes.

Looks like I'll need another 5-6 rolls for the big roller cabinet and another 3-4 rolls to finish all the other smaller tool box drawers.

So I'll have to make a run to HF. Good excuse to buy some other stuff and also stop off at AC Moore's to pick up a couple things for the shop office on the way there..
 

Attachments

  • image_16447.jpg
    image_16447.jpg
    55.2 KB · Views: 22
Last edited:
OP
M

Motorman55

Well-known member
Joined
Apr 10, 2016
Messages
2,625
Location
South Jersey
Changes to the shop office to make it more multi task useable are moving along.

I'll transfer most of the sign/lettering/airbrushing tasks from the garage to the office which will free up some much needed space on the shelves in the garage. Some mods yet to be made to the new drafting table for that purpose.

Also I now have a dedicated modelling desk to build some of my old motorcycle models. Something I've always enjoyed doing since I was a kid.

I also hung up some more of my vintage motorcycle memorabilia on the walls. And as always, I still have a lot of stuff on the floor to be sorted, put away or sold.
 

Attachments

  • IMG_3562.jpg
    IMG_3562.jpg
    150.3 KB · Views: 68
  • IMG_3560.jpg
    IMG_3560.jpg
    155.6 KB · Views: 66
  • IMG_3558.jpg
    IMG_3558.jpg
    153.3 KB · Views: 71
  • IMG_3567.jpg
    IMG_3567.jpg
    152.6 KB · Views: 64
  • IMG_3570 (2).jpg
    IMG_3570 (2).jpg
    98.3 KB · Views: 64
Last edited:
OP
M

Motorman55

Well-known member
Joined
Apr 10, 2016
Messages
2,625
Location
South Jersey
My New Year Resolution of Decluttering my garage in January began yesterday
starting with cleaning out the old 30 drawer cabinet for an upgrade.

This requires going thru all the drawers and scraping a lot of stuff that's accumulated over the past several years which I should have scrapped last year before I moved everything down here to the new house.

Part of the process is cutting and installing new drawer liners in each of the 30 drawers. Beginning last night I emptied 6 drawers and lined 2 of them with a couple of left over drawer liner.

This cabinet will end up mostly containing all my body shop supplies, grinder discs, wire brushes and some smaller tools and related parts.

Looks like I can fit up to six of the HF supply kits neatly into each drawer if I choose to double stack them.

I'm planning to refinish the outside of the cabinet and drawers later in the summer.

But for today I'm off to HF to get a few more rolls of drawer liner to complete this 30 drawer cabinet and some other things.
 

Attachments

  • IMG_3647.jpg
    IMG_3647.jpg
    88.3 KB · Views: 44
  • IMG_3648.jpg
    IMG_3648.jpg
    151.2 KB · Views: 45
  • IMG_3649.jpg
    IMG_3649.jpg
    153.1 KB · Views: 49
Last edited:
To avoid these ads, REGISTER NOW!
Top Bottom