Well years in the making I finally pulled the trigger on adding to my garage. I basically started the work last May. Took a year to get a variance and install a retaining wall along the west side of my property. Currently have a 2 car garage with a 13'x17 ' workshop on the back side. Moving forward I will be adding a 12' x50' long wall with a bump out on the west side of the garage the back will be blown out to 24' x 24' addition. Basically will be an L shaped addition. Walls will be 13' high so I can get an RV inside and a Lift that I have in my shop now. I will be doing away with a covered porch and adding a small family room off the kitchen. The 2nd floor of the garage will have 4 dormers and will be unfinished for the time being. Heat in the family room and the garage addition will be radiant. Currently have electric solar on my house that I will also be adding another couple thousand watts to along with a solar hot water heater. Will be posting pics in the near future.


You are using an out of date browser. It may not display this or other websites correctly.
You should upgrade or use an alternative browser.
You should upgrade or use an alternative browser.
69 GP Garage Addition
- Thread starter 69gp
- Start date
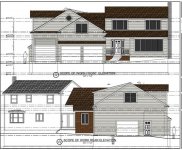
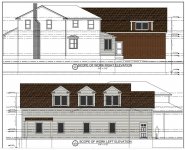
Drawings showing scope of work.
Attachments


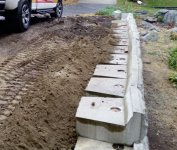
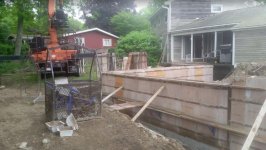
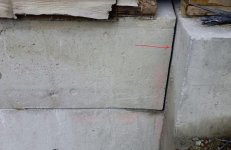
Installing the block wall consisted of 140 2x2 wall base blocks and 44 top cap blocks. Back fill was 3/4" stone
Attachments

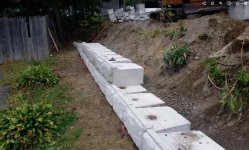


More of the wall going in. Had to do it in sections. There is 18" of stone below the first course of block. The top block only has about 4" of concrete exposed on the top and then drops down 6". I wanted this look so that I have more green area between the house and the wall. some of the blocks are a little off but I tweak them as I go along to get them straight.
Attachments
-
 need more stone.jpg146.4 KB · Views: 131
 -
 need to go back another 30'.jpg153.2 KB · Views: 120
 -
 slow but sure the wall gets built.JPG126.7 KB · Views: 129
 -
 top row of block.jpg120 KB · Views: 138
 -
 wall going in.jpg152.6 KB · Views: 128
 -
 wall going up 2.jpg159.7 KB · Views: 127
 -
 wall going up.jpg158.5 KB · Views: 126


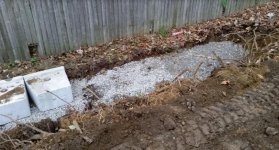
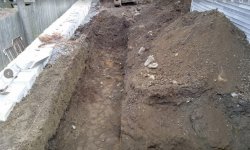
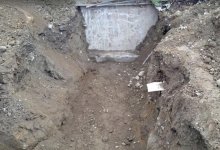
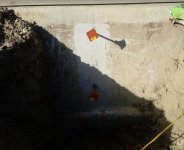
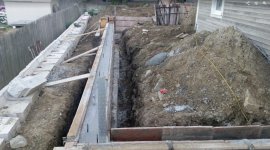
Digging the footing was a lot harder than I thought. I only have an 8000 pound machine and I was hitting a lot of ledge and stone. It was pretty depressing and I was ready to just cover everything up and not move forward. But a good friend of mine who is doing the concrete for me talked me into just getting it done.
Attachments
-
 i was so ready to stop building after hitting all this ledge.jpg147.1 KB · Views: 162
 -
 more ledge than I thought.jpg150.9 KB · Views: 148
 -
 more ledge but we can slide by it.jpg143.2 KB · Views: 154
 -
 ledge on the corner of the family room.JPG99.7 KB · Views: 157
 -
 starting the west wall along the propert line..jpg152.7 KB · Views: 150
 -
 its a freaking hole.. This is the front wall line facing the street.jpg152.3 KB · Views: 155
YukonXL04
Well-known member
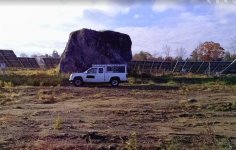
Now that's a boulder! Whew that looks rough, are you going to jackhammer through it? Or try to break the whole thing up and remove it?
Now that's a boulder! Whew that looks rough, are you going to jackhammer through it? Or try to break the whole thing up and remove it?
No that's not a boulder the picture has a boulder. In New England i once had a site contractor tell me the whole area is one big rock with a little bit of dust on it.
And to answer your question ended up pinning the rock. will load a few pictures later on.
Attachments
Stuart in MN
Well-known member
Looks like it will be a nice garage. So, do you have a 1969 Grand Prix that will be going in there? ")
Looks like it will be a nice garage. So, do you have a 1969 Grand Prix that will be going in there?
Yes I do street legal except no emergency brake. 582 bbc and i can land airplanes on my hood.
Looks like it will be a nice garage. So, do you have a 1969 Grand Prix that will be going in there?
Pic of the back of my 69 GP.
Attachments

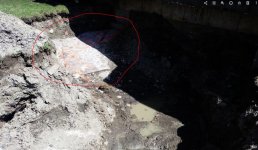
Found even more ledge and a large stump in the middle of the footing. This was buried 2' below grade. Could not pull the stump out so I made a ramp and had a stump grinder come in and made it disappear real quick. Best $150 I spent.
Attachments


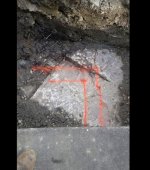
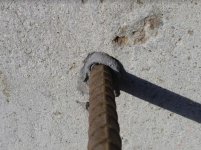
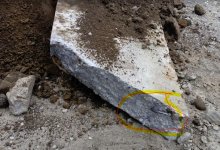
Dug all the trenches and exposed all the ledge. There was a lot. Called a friend to see if he could bring a machine up with a hammer and break it out. Once he looked at it he just said to meet with the inspector and see if I could get away with just pinning the ledge. I had my doubts if that would work but he was pretty cool with just pinning it. He said that you are not going to get a stronger footing. So it was just drill and pin the ledge.
Attachments
-
 secured its not pulling out.jpg148.1 KB · Views: 132
 -
 rod into the existing foundation.JPG131.5 KB · Views: 130
 -
 short rods into the footing and long one up into the wall.jpg148.6 KB · Views: 154
 -
 more rod in the ledge..jpg154.6 KB · Views: 136
 -
 dealing with the ledge. #6 rods epoxied into the ledge and the existing wall under the old porch.jpg151.3 KB · Views: 147
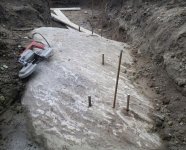
footing going in. Rained out on the first day.
Attachments


don long
Well-known member
Looks like your project is well under way. Congratulations.
My best car when I was younger was my 69 SJ Grand prix I loved that car
My best car when I was younger was my 69 SJ Grand prix I loved that car
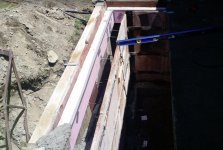
Walls formed up and almost ready for concrete. Stops need to be installed along with a few brick shelves. Concrete is a great construction material to work with.
Attachments
-
 forms cut to fit tight at the top and to tie into the existing footing.JPG125.4 KB · Views: 90
 -
 corner of the family room formed up. Panels cut to fit tight to the existing cantilevered patio.jpg128.3 KB · Views: 94
 -
 concrete its a great building material back wall of garage.jpg150.8 KB · Views: 100
 -
 back of garage rear door opening.jpg145.2 KB · Views: 105
 -
 back of garage east wall formed up.jpg149.4 KB · Views: 106

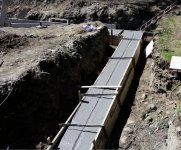
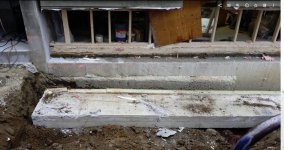
All walls poured, straight and level. No blowouts and no pump needed. Brick shelf installed all on the east and north wall for a stone veneer to be done at a later date. Inside of the garage I did install a brick shelf where I have the wall bumped out for storage. This was just to gain an additional 8" of floor space.
Attachments


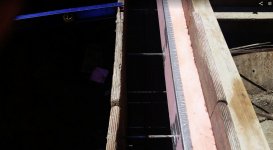

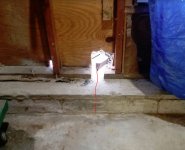
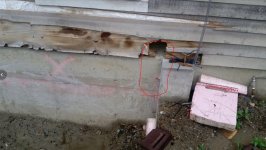
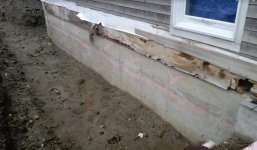
Forms removed from the wall. I scored a good deal on some used 3" and 4" Owens formula 250. I installed the 4" along back north and east wall. I installed the 3" on the inside. On both the inside and outside the insulation is sitting on the footing. I did include a picture of how I install electrical conduits when you use a Rapid style form. I use a 3/4" rigid 90 and then stub up with PVC to above the finish concrete height. Duct tape each end and secure the conduit inside the forms with wire to the form ties.
Attachments
-
 clean hole will foam fill for a tight seal.jpg147.3 KB · Views: 91
 -
 forms removed. You can see the foam used for the brick shelf..jpg152.2 KB · Views: 87
 -
 looking down at the electrical conduit emerging from the wall.JPG82.1 KB · Views: 92
 -
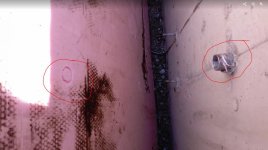 interior wall insulation going on. Red circles indicate where to hole saw a clean hole for futur.jpg95.4 KB · Views: 91
 -
 Forms removed, water proofing done and 3 inch insullation goin on the foundation.jpg155.1 KB · Views: 97
 -
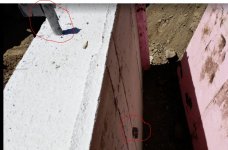 how to install electric conduit in a concrete pour. Red circles show both ends..jpg125.1 KB · Views: 83
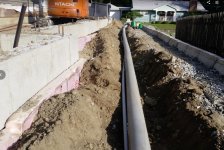
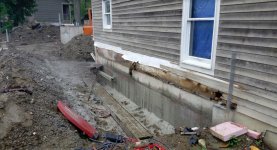
Few pictures of the existing garage foundation that is marked out for saw cutting & removal. I am also install a water management system to collect all rain water runoff from the roof. Will have 2-500 gallon tanks along the garage side with the capability to pump it to a 1500 gallon tank in the backyard. This will be used for lawn watering.
Attachments
-
 side of new garage with elec installed for outside landscape lighting.jpg152.8 KB · Views: 85
 -
 sidewall of old garage wall that is marked out for saw cutting.jpg149 KB · Views: 97
 -
 Back of old garage marked out for saw cutting.jpg155.7 KB · Views: 91
 -
 4 inch pvc conduit for water storage managment..jpg139.8 KB · Views: 92
 -
 .75 inch electric and 4 inch conduit to be used for water storage.jpg150.5 KB · Views: 95
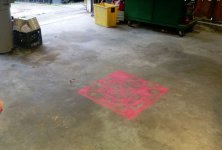
Getting ready to saw cut the existing garage floor in 2 locations and the garage walls.
Attachments
-
 1 of 2 existing garage floor locations that needs to be sawcut for a new post location.JPG107.5 KB · Views: 71
 -
 2nd locations of the existing garage floor that needs to be cut..JPG92.8 KB · Views: 70
 -
 Red line indicates where the existing wall will be sawcut..JPG98 KB · Views: 69
 -
 red circle indicates where the wall will be cut from the outside.jpg143.7 KB · Views: 67
 -
 5' c;ear area for sawcutting.jpg145.4 KB · Views: 66
Walls and piers were saw cut. I was going to do this work myself but decided to farm it out. I installed temp walls on the back of the garage wall and supported one beam on the side wall to lift all the weight off the concrete walls. I had to leave for a few hours and when I got back all the work was done. Fast clean and efficient. Only got one picture of the track saw doing the cutting.
Attachments
-
 Interior piers cut, excavated and steel installed..JPG92 KB · Views: 72
 -
 back and side of garage walls sawcut. Red arrow indicates where sawcut starts.jpg149.6 KB · Views: 70
 -
 back of garage wall sawcut.JPG138.1 KB · Views: 68
 -
 red arrow indicates where wall was cut with a diamond chain saw.jpg146.2 KB · Views: 69
 -
 wall being sawcut.jpg150.8 KB · Views: 76
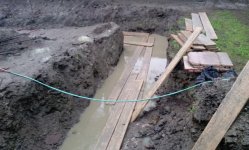
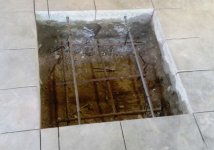
Well they always say measure twice and cut once. That works as long as the measurement is correct. After measuring the newly cut pier openings something did not look right. Come to find out I was off by 24" in one direction. Unsure of where it went wrong but had to make the fix. I did have an existing saw cut in the floor that was offset by 23". Just took my old Milwaukee skill saw and put a diamond blade on it to cut down a couple of inches to give me a clean line. After it was just drill a series of 6" holes with my Hilti core drill and then break it all out. It only takes about 2 minutes to drill each hole. Drill one anchor and keep pivoting off of that point. After completing the work it looked as if it was done at the same time as all the other cutting with the exception of the nice radius on the corners.
Attachments


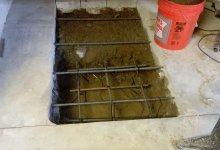
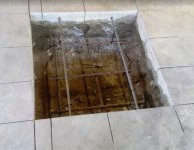
Steel installed for the piers and small area under family room ready for concrete.
Attachments
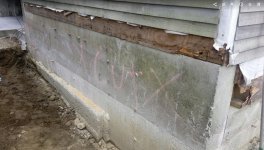
Removing the back concrete wall of the existing garage. Wedges can be seen that are supporting the wall after it was cut. I installed a temporary wall behind the one that is being remove. The area behind the wall is my old workshop. You can see the insulation under the slab. I did install radiant heat in this area but never used it. I plan on installing a sump pump in the garage so I did remove one end of the wall once it was pulled over. The wall section removed was 17' long by 36" high. Makes for a good solid base.
Attachments
-
 Sill removed, Temp wall installed behind wall to be removed. Opening cu7t to stick the bucket th.jpg152 KB · Views: 65
 -
 Wall pulled over..jpg153.5 KB · Views: 64
 -
 couple of adjustments to then its time to coverup.jpg151.9 KB · Views: 61
 -
 wall section being covered. Red circle indicates where sump pump will go..jpg153.6 KB · Views: 61
 -
 Snapped a section of wall off for future sump pump. Steel broke off.jpg155.2 KB · Views: 61
 -
 Wall section that is being removed. Area cleared for the wall to fall into..jpg146.6 KB · Views: 60
Demo started. Only took less than a day to demo the old garage down. Still some small items left to be removed.
Attachments


red
Well-known member
Don't know how I missed this. Any updates?


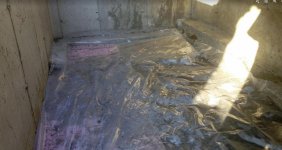
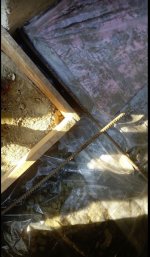
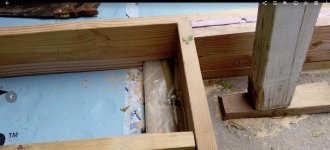
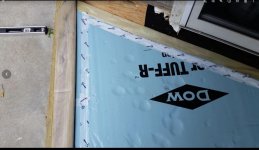
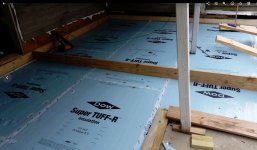
The new family room is being built over an existing concrete porch. Laid down 10mil poly followed by 1/2" Dow Tuff-R insulation over the whole area. 2x8 PT lumber was used for the floor framing. This was followed by 5" of foam insulation cut to fit between the floor joist. I then installed 1/2" pipe between the floor joist.
Attachments


Radiant heat installed. Will be installing concrete to encase the tubing.
Attachments
-
 4 inches of insulation and radient tubing installed..jpg148.1 KB · Views: 29
 -
 another shot.jpg157.4 KB · Views: 27
 -
 insulation and floor rafters installed.jpg119.8 KB · Views: 26
 -
 overall shot of the heated floor.jpg131.4 KB · Views: 30
 -
 poly laid down then half inch Dow Tuff insulation. All seames were sealed..jpg127.8 KB · Views: 30
 -
 Rep work for the family room in the floor heat.jpg130.2 KB · Views: 30
 -
 water service out to the garage for heat, domestic hot and cold, hot water return and feed to ta.jpg131.4 KB · Views: 31
Overall shot of the family room along with the garage walls in the back ground. Concrete was poured between the floor joist for mass heat transfer.
Attachments


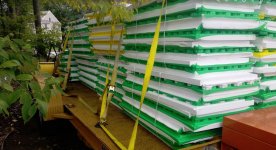
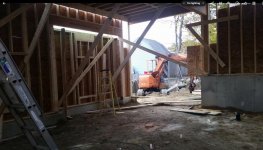
Have not posted for a little while have a ton of things going on. Received a nice big load of framing lumber to get things moving along. Lumber company did a great job laying the material out so you don't need to pick through everything. Also the radiant heat pressure is holding up great so looks like no troubles with that end.
Attachments
-
 Pressure holding for the floor heat in the new family room..JPG118.7 KB · Views: 36
 -
 backwall of the garage.jpg146.8 KB · Views: 32
 -
 Main beam going up on the backside of the garage..jpg153.4 KB · Views: 29
 -
 Primed trim boards out front.JPG95.1 KB · Views: 29
 -
 Framing stock spread out in the rear of the house.jpg132.9 KB · Views: 29
 -
 Nice big load of lumber to get things moving along.jpg143.7 KB · Views: 29
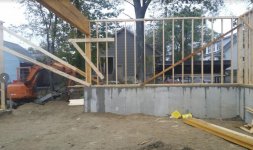
few pics
Attachments
-
 South wall up over the existing wall. New deck to the right will be for RV storage during the wi.jpg112.8 KB · Views: 36
 -
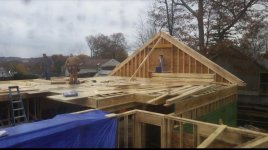 North wall up on the back of the new addtion..jpg146.8 KB · Views: 38
 -
 Upper floor aboue the new addtion.jpg150.5 KB · Views: 36
 -
 looking down at the floor that was is above the existing garage..jpg152.7 KB · Views: 37
 -
 Rear garage door framed. Small bumpout on the left wall that will have cabinets and a spot below.jpg142 KB · Views: 37
 -
 Front garage door opening partially framed in..jpg145.5 KB · Views: 37
Hi,
Its been sometime since I last posted. Too much going on. Thought I would try and catch up to where I am today.
Its been sometime since I last posted. Too much going on. Thought I would try and catch up to where I am today.
Attachments
-
 24 ft 2x12 for roof rafters heavy stuff.jpg149.9 KB · Views: 28
 -
 looking up at the upper room above the garage looking west.jpg158.9 KB · Views: 30
 -
 2 foot overhang over RV entrance.JPG145.2 KB · Views: 30
 -
 back of the garage looking south.jpg144.1 KB · Views: 31
 -
 back of garage looking southwest.jpg149.6 KB · Views: 33
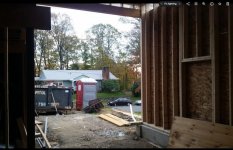
Few more pics. Framing still going on. We were getting a lot of rain when this work was going on.
Attachments
-
 standing above the existing garage looking west towards the new room above the garage.jpg137.2 KB · Views: 24
 -
 looking down at where the stairs will be going into the new mud room on the 1st floor level..jpg146.3 KB · Views: 23
 -
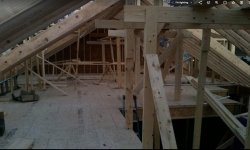 headroom here is about 9ft to the bottom of the rafters..jpg135.4 KB · Views: 27