regguy1
Well-known member
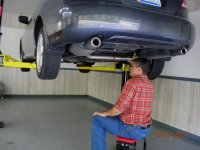
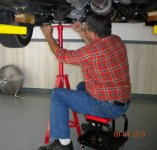
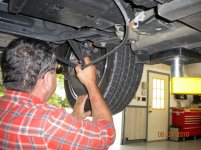
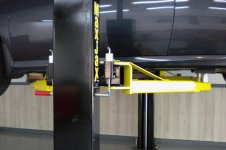
Finished the install today....the first car to go up on it. ")
Here's the MaxJax from GJ latest group buy:
Here's the MaxJax from GJ latest group buy:
Attachments


Last edited:


how much did that run you ? My big problem is my garage door. The rails come much lower. I need to get them to run it up to the ceiling.
What width did you set your posts at?
I picked my lift up Wednesday night. Bought it also with the last group buy. Now that my inspections are done for the garage I can get on with insulating and wall boarding. If things go well, maybe in 3 weeks I'll be installing my lift.
I've been researching the anchor issue. Your thread was part of my research. I'm not afraid of a mechanical anchor, just need to use the correct procedures. However, in researching, I came across some discussion at another forum.
Ponchopower was the person here who raised the cautions regarding procedures. I found he had posted at the other forum with additional info from Wej-it. They ended up sending him anchors specifically made for epoxy installation. I'm considering using those instead. Other sites have cautioned using epoxy with a none epoxy specific anchor.
I posted a message to Ponchopower hoping he could expound some more on those anchors. But, I have not heard anything back yet.
You can see the anchors here: http://www.g-machines.com/forum/showthread.php?t=65690&page=2
It is the 5th post down the page. They are Wej-it # PSS-58. Not inexpensive when you add the epoxy but, it would be a nice option for when one orders the Maxjax.
My floor was poured as a 6", 4000 lbs mix, so I'm not worried about depth. Just need to drill the hole without error.
One other thing Poncho noted at the other forum was leaks. He was having a problem with the fittings. Has anyone else had problems?
4", 3000 lbs mix.
hmm. I have no clue what my rating is. Its a new home. I wonder what the standard is out here in MN ?
how much did that run you ? My big problem is my garage door. The rails come much lower. I need to get them to run it up to the ceiling.
 I think that is the route I will have to go in my garage
So the epoxy anchors rely solely on the epoxy for the grip to the garage floor? There is no mechanical binding at all?
They actually sound like a better option than what comes with the max jax. Id like to see a close up shot of the standard anchors as well.

I've got three questions to throw out there.
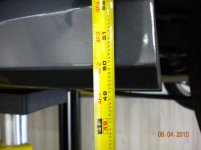
1) I would like to move one post further away than what it is at now. I may have screwed up the installation of the anchor bolts on this post. Any ideas on how far away the new set of five holes should be? I've got it drilled at 120" and I'm thinking about 5" further out.
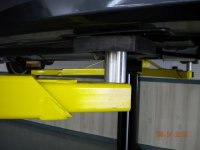
2) Instruction say use WD-40 to lubricate the post slides. I would think that a grease would be much better. Any thoughts on this?
3) I'm working with company on a problem of lift. I've got everything installed but one post lifts higher than the other by almost 2" at the top. So much so that when I raise the car all the way up, one post max's out but the other is short of where it is suppose to be and I can't get the safety bar in. If I continue operating the pump the low side comes up and I can insert the safety bar, but I'm wondering about the pressure on that other side that has max out. I've tried bleeding several times no help. When I switch hoses the problem just switches sides. I've removed the quick disconnects and connected direct to the splitter unit. Thinking that maybe it was a quick disconnect problem. NO help there either.
Thanks
Bill
Gabe,
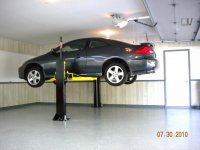
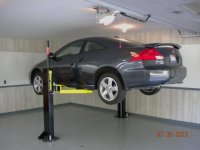
New Video, MaxJax in use:
You may remember this one featuring the MaxJax:
Sweet lift!!
I couldn't use it tho, I am 6'3" and only 17. at school I have to crouch when I use the full size lifts

No Worries Chromemagman.. Man I wish I had your height problem..
Please remind my GJ MaxJax cridicts that this lift is designed to be moveable and or for a 8' ceiling height. Most cars are 48" tall and that only allows you to lift the car 42-46 " and jack stands go how high ?!..
Upshift..
AKA
Gabe,
Dannmar
but I if not oh well