To avoid these ads, REGISTER NOW!

24X38 3 car with loft

mrzoop

Well-known member
Joined
Aug 24, 2010
Messages
63
Location
Niagara Falls, Canada
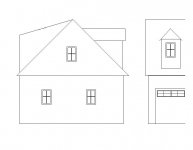
....so here my story begins. For years I lived with an old 22X20 block garage that you could easily see daylight through the mortar. The garage was built in the 50's directly on the clay surface with no footings for the walls or stone base for the concrete floor. I kept it looking nice with some fresh paint from time to time, however this season would be it's last.

IMG_8086.jpg

I had intentions of salvaging the roof to be used on the back of my property as a pole barn, but the dream was too difficult to be true. It was decided to just pull the roof off and demolish the block.

IMG_8094.jpg IMG_8093.jpg

I started by pulling down the back wall between the windows and knocked out the top row of blocks. The roof was just floating on a couple of the supports that we added to keep it steady.

IMG_8101.jpg IMG_8103.jpg

And now the fun begins.... I hooked up the big tractor to the main support beam inside with some chain and we had ourselves a tractor pull. After a couple pulls the roof fell taking out the walls. We cut up the roof into 5' widths and stacked it out of the way for later disposal. I was able to use the crushed block as fill.

IMG_8105.jpg IMG_8117.jpg

Everything cleaned up during 1 weekend and now here is the future site of the new Barn at the end of the driveway.
 
To avoid these ads, REGISTER NOW!
OP
M

mrzoop

Well-known member
Joined
Aug 24, 2010
Messages
63
Location
Niagara Falls, Canada
I had many pictures and a clear idea of what I liked in a garage, but not the talent to put it on paper. I passed this job off to my brother-in-law that was very capable with CAD. Here's what I started with.

Slide1.JPG Slide2.JPG Slide3.JPG Slide4.JPG Slide5.JPG Slide6.JPG Slide7.JPG

This plan allows me to have 2 parking spots in the front & a side garage door that will open to the 'shop'. Upstairs will eventually become the boys room that opens up to a large deck on the back. The intention of the deck was to act as a carport or shelter to park one more toy :)

The plans were reviewed & tweaked for almost a year. I also gave a copy to my neighbor for his review and hopefully lessen the shock when the construction started.
 

ghnl

Well-known member
Joined
Mar 27, 2009
Messages
1,372
Location
Mebane, NC
Looks nice. I suspect you'll love it after putting up with the old space for so long.

Question - looking at 'slide 1' I thought it was a full shed dormer along one side but the other drawings don't indicate that. IMO, you should consider more dormer space. It will add a good percentage of useable floor space upstairs along with light and ventilation (windows).
 
OP
M

mrzoop

Well-known member
Joined
Aug 24, 2010
Messages
63
Location
Niagara Falls, Canada
I did consider that but went with the small dormer for a couple reasons: I have a similar shed dormer on my house and wanted to mirror the roof lines of both buildings when looking from the street; and I am using engineered trusses that provide the floor and walls for the loft space. If I were stick framing, I would have considered this.
 
OP
M

mrzoop

Well-known member
Joined
Aug 24, 2010
Messages
63
Location
Niagara Falls, Canada
Next step was to bring in the big boys to dig a hole.

IMG_8122.jpg IMG_8127.jpg IMG_8130.jpg

Due to the size of the building with a loft, I had to build the footings and walls much like a house (4' deep). I had them pour the walls an extra foot out of the ground. Figured this would be nice for washing the floors inside and not get my walls wet.

IMG_8140.jpg IMG_8147.jpg IMG_8150.jpg
 
OP
M

mrzoop

Well-known member
Joined
Aug 24, 2010
Messages
63
Location
Niagara Falls, Canada
Once the concrete forms were removed and the backfill was complete, it was time to build. All the material was delivered and sorted. I planned a work party for the long weekend in July to start building. I was fortunate to have 8-10 people show up each day thanks to family & friends.

This was done on day 1 of building.

IMG_8204.jpg IMG_8210.jpg IMG_8213.jpg IMG_8217.jpg IMG_8221.jpg
 
OP
M

mrzoop

Well-known member
Joined
Aug 24, 2010
Messages
63
Location
Niagara Falls, Canada
On day 2 it was time to put up the attic trusses.... Uncle Tony had a great idea to build temporary scaffold on the side of the garage to assist with sliding the trusses along the top plate. My old faithful 1956 International was used to lift the truss up. The crew then dragged each one to the rear of the garage and stacked them up. Everything worked out perfectly.

IMG_8233.jpg IMG_8230.jpg

IMG_8229.jpg IMG_8232.jpg

Once they were all up there, we started standing them up and strapping them together. Thanks to the inventor of the air nailer!

IMG_8240.jpg IMG_8241.jpg

IMG_8246.jpg
 
Last edited:

m.james

Well-known member
Joined
Sep 27, 2010
Messages
230
Weird question was anyone else getting image not found icons but then refresh and all the pictures showed up? This has been happening a lot lately. Anyways nice build and destruction. I love the wood work on the trusses just an awesome site. What are you going to store in this place?
 
OP
M

mrzoop

Well-known member
Joined
Aug 24, 2010
Messages
63
Location
Niagara Falls, Canada
DAY 3

The plywood flooring was installed and the end walls were closed in.

IMG_8255.jpg IMG_8257.jpg


Because of the size of the truss, they were too wide for transport all in one piece. We then had to install the peaks on every truss as well.

IMG_8260.jpg IMG_8259.jpg

IMG_8261.jpg IMG_8262.jpg
 
Last edited:

Rockey

Well-known member
Joined
Jun 1, 2010
Messages
168
Very nice build! Obviously you have quite a delay between the progress and your postings of such. So I'm assuming that the sheathing and roofing is done. After having finished my 10 pitch roof a few months ago I can just imagine what it was like doing a 12 pitch. I'm sure it was quite an experience. I'm anxious to see more pics.
 
OP
M

mrzoop

Well-known member
Joined
Aug 24, 2010
Messages
63
Location
Niagara Falls, Canada
Very nice build! Obviously you have quite a delay between the progress and your postings of such. So I'm assuming that the sheathing and roofing is done. After having finished my 10 pitch roof a few months ago I can just imagine what it was like doing a 12 pitch. I'm sure it was quite an experience. I'm anxious to see more pics.

That's correct with the timing. I haven't had much time to play on the computer with all the building and nice weather we have been having...
 
OP
M

mrzoop

Well-known member
Joined
Aug 24, 2010
Messages
63
Location
Niagara Falls, Canada
12/12 pitch... what more can be said. Unfortunately I had to hand nail the roof. It was too much of a pain with the steep roof, safety harness, pulling the sheets up, etc.... to have an air line and a heavy gun with me. It was a long day, but worked slow & steady.

IMG_8263.jpg IMG_8265.jpg

IMG_8270.jpg IMG_8264.jpg
 

ghnl

Well-known member
Joined
Mar 27, 2009
Messages
1,372
Location
Mebane, NC
I think our dogs are siblings!

Yours:
attachment.php


Ours:
 

Attachments

  • D&D 003 em.jpg
    D&D 003 em.jpg
    59.5 KB · Views: 173
OP
M

mrzoop

Well-known member
Joined
Aug 24, 2010
Messages
63
Location
Niagara Falls, Canada
This was my favorite day, not just because it was Fiday..... RAIN DELAY DAY! It was well needed after 5 days of solid work. A nice afternoon was had at the local pub sitting under the covered patio, sipping a cold one. (or 5)

IMG_8266.jpg IMG_8268.jpg
 

SteelArt

Well-known member
Joined
Oct 11, 2010
Messages
228
Location
Brisbane, Australia
Great build, I am sure you will be very happy when it is done after all those years of putting up with your old one, keep up the good work
 
OP
M

mrzoop

Well-known member
Joined
Aug 24, 2010
Messages
63
Location
Niagara Falls, Canada
GHNL "I think our dogs are siblings!"

I think you're right! Remy is 1/2 golden retriever & 1/2 yellow lab. The parents were pure breed. He was with me every step of the way.

IMG_8139.jpg IMG_8253.jpg
 
To avoid these ads, REGISTER NOW!

Nick D

New member
Joined
Sep 16, 2010
Messages
4
Great looking garage. Would like to see how it all came together. Any more photos or progress? I am in Creemore, Ont. and I am planning almost the same project. Would also like to know a ballpark budget.
Cheers!
 

drmoonshine

Well-known member
Joined
Aug 17, 2010
Messages
327
Location
Oxnard, California
This was my favorite day, not just because it was Fiday..... RAIN DELAY DAY! It was well needed after 5 days of solid work. A nice afternoon was had at the local pub sitting under the covered patio, sipping a cold one. (or 5)

IMG_8266.jpg IMG_8268.jpg

Hardwork should always be rewarded.
 

purpony

Well-known member
Joined
Sep 26, 2007
Messages
348
Location
Columbia, CT
very nice!!!.... if and when i get the time to build another garage, id like to build something along the lines of this... probably have all 3 doors on the long side though.... either 24x38 or 26x40.....
 
OP
M

mrzoop

Well-known member
Joined
Aug 24, 2010
Messages
63
Location
Niagara Falls, Canada
With the plywood on and felt paper rolled out, it was time for the metal roof. I left a 24" opening at the peak so that I was able to stand inside on the trusses. This would allow me to support myself as I pulled the sheets up. As I worked across, I added plywood to the opening.

To pull the sheets up, I placed a ladder at the same angle of the roof pitch (12/12) and secured a rope to them. It was no problem pulling them up.

IMG_8295.jpg IMG_8297.jpg

IMG_8296.jpg IMG_8305.jpg

IMG_8299.jpg

The sheets were 19' long and 27" wide. They were not real heavy just awkward to work with. Be sure to do this type of work on a calm day... they do take off on you when the wind is blowing.
 
Last edited:

blackice

Well-known member
Joined
Oct 21, 2009
Messages
244
Location
Ontario Canada
I take it these are old pics you are posting, because I know it didnt look near that green ad sunny today in hamilton....
 

Corins

Well-known member
Joined
Feb 11, 2011
Messages
162
Location
Canada
Just found out today that the biggest I'm allowed to build is 900 square feet, which comes to 24'x37.5'. I asked about going 24'x38' and they said going that extra 6" isn't an issue. It will probably be another year before I start (gotta tear down my old 18'x26' first, the thing is about 25 years old, and has seen better days. If it wasn't for the lack of space I'd stick with what I have, but seeing all the room I would have with a 24x38 makes me :drool:.
 
OP
M

mrzoop

Well-known member
Joined
Aug 24, 2010
Messages
63
Location
Niagara Falls, Canada
Just found out today that the biggest I'm allowed to build is 900 square feet, which comes to 24'x37.5'. I asked about going 24'x38' and they said going that extra 6" isn't an issue. It will probably be another year before I start (gotta tear down my old 18'x26' first, the thing is about 25 years old, and has seen better days. If it wasn't for the lack of space I'd stick with what I have, but seeing all the room I would have with a 24x38 makes me :drool:.

Go as big and as tall as you can. You never have enough space.

I live in the country, therefore I was able to go as tall as 30'. This building is 28'

Look forward to seeing your project.
 

Corins

Well-known member
Joined
Feb 11, 2011
Messages
162
Location
Canada
Go as big and as tall as you can. You never have enough space.

Isn't that the truth lol. I checked on the size today, previously to that I was going by information given by people who recently built garages in my area. By there estimates I was only going to be allowed to go 24x30, the town has a measurement based off lot size, and max for a single lot is 900sq feet (main level). With their measurements my garage based off my lot size worked out to 967sq feet, but because it is only a single lot I'm limited by the 900sq feet rule. And I'm not allowed to build higher then my house or 6m, whatever is less. However after speaking with the inspector the rules aren't strictly enforced. Which is the reason I can go 24x38 for 912sq feet instead of being maxed at 24x37.5.

Also for height, I haven't measured the height of my house yet as it is a bit hard with so much snow, however I estimate around 18' high. If I go 18' high with my garage I should have a nice little storage area above my garage, I don't want a loft, more or less just a storage area that I don't need to shimmy around on my stomach to move around like I do now. I want a 10' ceiling height on my main level so somewhere between 4-6' on my upper level is fine with me.

I'll be happy with 24x38, considering my house is only 25x46.
 

00si2

Active member
Joined
Jan 29, 2009
Messages
41
Location
Pittsburgh, Pa
With the plywood on and felt paper rolled out, it was time for the metal roof. I left a 24" opening at the peak so that I was able to stand inside on the trusses. This would allow me to support myself as I pulled the sheets up. As I worked across, I added plywood to the opening.

To pull the sheets up, I placed a ladder at the same angle of the roof pitch (12/12) and secured a rope to them. It was no problem pulling them up.

The sheets were 19' long and 27" wide. They were not real heavy just awkward to work with. Be sure to do this type of work on a calm day... they do take off on you when the wind is blowing.

How did you attach the rope to the panels without it sliding through?

Also, is that a black metal roof? What do you plan on finishing the rest of the exterior with? I'm about ready to order my roofing materials and am debating black metal.
 
Last edited:
OP
M

mrzoop

Well-known member
Joined
Aug 24, 2010
Messages
63
Location
Niagara Falls, Canada
How did you attach the rope to the panels without it sliding through?

Also, is that a black metal roof? What do you plan on finishing the rest of the exterior with? I'm about ready to order my roofing materials and am debating black metal.

At the end of the rope I attached a 'V' shaped piece of wire. At each end of the 'V' there was a small S-hook.

I pre-drilled all the panels on the ground for the screws and also drilled 2 holes about 18" apart at the top of the panel for the S-hooks to go through. After this, it was very simple.... just attached each S-hook through the top of the panel and pulled it up the ladder to the roof. These holes are then covered with the peak.
(I highly recommend pre-drilling. It looks nice and is really easy to put the screws in afterward.)

IMG_8311.jpg IMG_8292.jpg

This is a chocolate brown roof. The rest of the building will be trimmed with a tan color and the siding will be white. This is the same scheme as the old house.
 
OP
M

mrzoop

Well-known member
Joined
Aug 24, 2010
Messages
63
Location
Niagara Falls, Canada
The next job (other than concrete) is the only job that I hired a contractor for. Siding, Soffit, Facia & Troughs. This was well worth it and was done to perfection.


IMG_8306.jpg IMG_8307.jpg

IMG_8310.jpg IMG_8303.jpg
 

00si2

Active member
Joined
Jan 29, 2009
Messages
41
Location
Pittsburgh, Pa
At the end of the rope I attached a 'V' shaped piece of wire. At each end of the 'V' there was a small S-hook.

I pre-drilled all the panels on the ground for the screws and also drilled 2 holes about 18" apart at the top of the panel for the S-hooks to go through. After this, it was very simple.... just attached each S-hook through the top of the panel and pulled it up the ladder to the roof. These holes are then covered with the peak.
(I highly recommend pre-drilling. It looks nice and is really easy to put the screws in afterward.)


This is a chocolate brown roof. The rest of the building will be trimmed with a tan color and the siding will be white. This is the same scheme as the old house.

Great idea, thanks.
 
OP
M

mrzoop

Well-known member
Joined
Aug 24, 2010
Messages
63
Location
Niagara Falls, Canada
Next on the agenda was vinyl siding. This was all new to me.... after a bit of coaching from a professional, I was well on my way. The tough parts were working on the scaffold up to the peak at 28'. It was a real pain when you dropped your cutters!

IMG_8426.jpg IMG_8428.jpg

IMG_8427.jpg

Also, installed coach style garage doors made by Richards Wilcox. 3" insulated with all the trimmin's. Very nice look for a country garage.

IMG_8451.jpg IMG_8450.jpg

IMG_8440.jpg
 

rinker1

Well-known member
Joined
Aug 30, 2008
Messages
289
Location
Ohio
This is a great build. A lot of work but your far enough along to enjoy it this summer.
 
To avoid these ads, REGISTER NOW!
Top Bottom