To avoid these ads, REGISTER NOW!

1/2 tubing layout plan?

line guy

Active member
Joined
Nov 9, 2015
Messages
41
Location
upstate ny
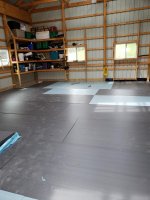
My tubing supply company will not give me a design layout unless I buy entire heating package. I will put that in later as the budget lets me.Planning on 5"of concrete 30x48 insulated slab,Need a layout design to get me started, plan on having heating unit in the middle of the 48ft side on wall. Overhead door and man door on the 30ft end.Any rcommended suppliers or web sites that could get me started would help? 1500 ft of 1/2 tubing, 5 zone manifold,2" foam board under and on edges, materials ready to go but no plan, need help?
 

Attachments

  • pole barn floor.jpg
    pole barn floor.jpg
    151.6 KB · Views: 83
  • 20200419_123259.jpg
    20200419_123259.jpg
    146.2 KB · Views: 73
  • 20200414_142853 (1).jpg
    20200414_142853 (1).jpg
    145.3 KB · Views: 93
To avoid these ads, REGISTER NOW!

Black Oak

Well-known member
Joined
Aug 6, 2013
Messages
161
Location
black oak arkansas
300 ft. loops , get some graph paper , start w/12" between the lines . see what that produces , adjust the spacing as needed . not that hard . a 5 zone layout is probably just right .
 

yeldogt

Well-known member
Joined
Jan 2, 2012
Messages
18,184
You lay out your piping based on use and load .... what's the BTU's needed ?

I need X number of BTUs ... water in tubes will provide X BTU at Y temp ...

More tubes = more BTU's at a lower temp to the slab and faster response.

Ask -- where will I be working .... will I have a bench along one wall. The first likes more heat and the second just generic heat. How are my doors --- Do I need some heat in front of the doors?

Think like heated water -- that's where the heat will be.

Doing a reverse loop along an area where you will be working all the time increases the heat in that area. If the second loop is on its own manifold loop -- you can easily control this area.

Most people make the mistake of 12" equal spacing and that's not always the best when doing a larger shop where you will be using areas in different ways. Take note of all the supply return pipes and boiler -- that's going to be the warmest spot.
 

stingry

Well-known member
Joined
Oct 14, 2006
Messages
732
Location
Western Nebraska
300 ft. loops , get some graph paper , start w/12" between the lines . see what that produces , adjust the spacing as needed . not that hard . a 5 zone layout is probably just right .

This is what I did. I tried to keep the hottest water (the loop inlets) toward the edges of the slab where the heat loss is the greatest but now question if that is necessary. Keep your loops as close to the same length as possible and under 300’. I have found radiant floor heat to be very forgiving. My shop is 3600 sq ft, is well insulated and has the loops spaced at 12”. I have seven separate areas, 12 loops and two zones. I use two air temp thermostats located at eye level set at 65 degrees. There are NO hot or cold spots in the whole building. Don’t over complicate this. You will truly enjoy radiant heat, it’s amazing!!

It is also very economical if designed right. I live the in Western Nebraska and my natural gas/electricity bill is around $100 for the coldest months.
 
OP
L

line guy

Active member
Joined
Nov 9, 2015
Messages
41
Location
upstate ny
yeldogt-I have seen alot of your post on this subject. thanks for sharing your knowledge.This barn will be used mainly storage during winter months ,with a small area for general homeowner work shop, bench top work, small projects, auto repairs on my teenagers junk first cars!!I will be putting closer loops around work bench area and auto parking area. Thanks again for making this forum so informative.
 

yeldogt

Well-known member
Joined
Jan 2, 2012
Messages
18,184
Radiant heat is forgiving -- as stringry notes. Give the slab heat and it will heat ... even an uninsulated slab will work ... it's just going to need more BTU's.

People who use constant circulation and maintain a temp will love radiant -- you can't go wrong. Same with adding outdoor reset .. all these things add to the mix to make a better system. That's not to say you have to do them to make for a comfortable shop.

Most people are not making a generic space -- maybe on a farm for storage of equipment? (i don't know -- I'm not a farmer) Most people with a hobby space will have a work area -- maybe a row of work benches along one wall. Ideally with a well insulated space you do want the hottest water towards the outside .. a bit more in front of a row of windows and by the big door. But -- with a row of work benches ... why not have the supply flow at 36" from the wall ... where you feet will be. No point in over heating under the work bench?

It's not complex and you can't really mess it up. I like to do a bit tighter loops. In my current studio (it's big) the very center of the building has it's own loop that unless it's very cold I have it off. When I'm working on a project I'm moving around and don't need the heat under me. I also have a double serpentine loop all around my desk and bench area -- when it's real cold I will turn on this second loop. It's nice to have it warmer -- I have in effect doubled the BTU's in that area.

All of the above become more noticeable as the space gets bigger -- you can keep the overall temp of the space down and play with the heat where you want it.

Pipe is cheap ... and so are extra manifold spaces. Even those with flow meters -- that eliminates issues -- even if you want to add a short loop to do something odd.
 

Flat Thunder Channel

Well-known member
Joined
May 4, 2020
Messages
402
Location
Ohio
I purchased my tubing from a supply warehouse online. It was pretty reasonably priced. They also provided insight on the boiler size and design without any obligations. I can add pictures of my layout once i get enough posts. I think? Mine build was 30'x32'
 
To avoid these ads, REGISTER NOW!

78SC4X4

Well-known member
Joined
Apr 21, 2018
Messages
370
Location
Port Orchard Wa
So here's a conceptual layout. It's bigger than yours but gives you an idea for routing and keeping all of your runs the same length.Pexlayout.jpg
 

Flat Thunder Channel

Well-known member
Joined
May 4, 2020
Messages
402
Location
Ohio
I made a theoretical layout in cad. I had it all theoretically planned out how I wanted to route all the tubing (see attached). I was unprepared for how difficult it was to unroll and route the tubing. Make sure you have buddy available to help. The large roll can get heavy and cumbersome to manage. I also recommend buying the stapler or borrowing one. I was lucky enough to be able to borrow a unit from my concrete guy. It takes a ton of staples to hold it in place. Don't forget to lay down foam insulation down first. I used 2" extruded foam board. The red marker lines are the modified route i used on the inner course due to forming/bending restrictions on the tubing. I hope this is helpful. I bought all my pex / manifold from supply house.
 

Attachments

  • 20151104_174138.jpg
    20151104_174138.jpg
    153 KB · Views: 72
  • 20151104_174150.jpg
    20151104_174150.jpg
    148.9 KB · Views: 58
  • 20151104_174301-PANO.jpg
    20151104_174301-PANO.jpg
    142.4 KB · Views: 59
  • 20151104_174230.jpg
    20151104_174230.jpg
    103.9 KB · Views: 64
  • 20151031_215214.jpg
    20151031_215214.jpg
    131.2 KB · Views: 55
  • 20151031_215141.jpg
    20151031_215141.jpg
    132.2 KB · Views: 53
  • IMG_20200506_125427.jpg
    IMG_20200506_125427.jpg
    98.8 KB · Views: 66

Jking24

Well-known member
Joined
Feb 27, 2018
Messages
258
Here is a picture of mine it was designed by the company i purchased everything from. 40x60 7/8 tubing 16 on center but it gives you the general idea
 

Attachments

  • 123_1.jpg
    123_1.jpg
    152.9 KB · Views: 81
OP
L

line guy

Active member
Joined
Nov 9, 2015
Messages
41
Location
upstate ny
Great ideas.bought my materials through same place. Do you put wire mesh down first or on top of pex tubing? Pic shows on top?
 

Attachments

  • 20200506_115325.jpg
    20200506_115325.jpg
    89.2 KB · Views: 64

Flat Thunder Channel

Well-known member
Joined
May 4, 2020
Messages
402
Location
Ohio
I too stapled the pex to the foam board and the mesh wire was laid on top. It helped position the mesh in the right spot in the concrete. I believe they lift it up when normally pouring a slab. You do not want it all the way at the bottom. Placing the mesh on top of the tubing positions it in a good spot and keeps the tubing from rising up too high in the slab.
 
To avoid these ads, REGISTER NOW!
Top Bottom