To avoid these ads, REGISTER NOW!

2 Sluggo's Garage

rmalkow2

Well-known member
Joined
Jun 26, 2009
Messages
4,087
Location
Brighton, MI
After following many a garage build, garage refurb, garage restoration, and other misc threads here on GJ that have given me great advice and ideas I've decided to also chronicle my changes to my own humble and very typical 2-car attached garage. It will be nice to review my own progress as I make changes and maybe get some additional ideas from anyone interested in checking this out from time to time. As I make changes to layout and equipment I find myself forgetting where things were before and why I moved them so if nothing else this will serve as my reminder and review of progress made.

Why do this now?
For a long time I've been complaining about my perceived lack of work space for various ongoing projects as well as normal vehicle maintenance. I had convinced myself that the only solution was I needed a separate bigger building for my tools, equipment and projects and I would then turn the attached garage back over to just parking two cars. My wife would be sooo happy and life would be good. Well a new outbuilding is still in the long term plans but some other issues have happened this year that prevent the funding from happening so that gets me back to making the most of what I have.
Then I read a few threads from folks that were creatively making the most of small sheds and one car space garages and I stopped feeling sorry for myself and decided to learn from others and help myself.
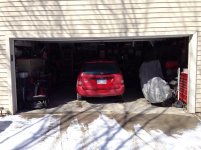
This first picture just sets the stage. Typical 2-car attached garage with one metal garage door to the outside world and one inside access door to the house. More details to come.
 

Attachments

  • Garage Door View.jpg
    Garage Door View.jpg
    139.9 KB · Views: 1,370
  • Sluggo's Logo.001.jpg
    Sluggo's Logo.001.jpg
    58.7 KB · Views: 783
To avoid these ads, REGISTER NOW!
OP
R

rmalkow2

Well-known member
Joined
Jun 26, 2009
Messages
4,087
Location
Brighton, MI
What's in a name?
Well, the name came about by just doing what you do naturally in a garage, namely some car repair. Except in this case is was repair on my friends car and was in my garage because where he lives currently he does not have a garage of his own. So we've come to just share mine whenever he needs an enclosed space to work. One day Dave just coined the phrase by remarking, "Hey, we're just a couple of Sluggo's" while we were trying to figure out some particular job or another. And it stuck and then since I can't leave things just there I decided we needed to make our partnership semi-official and we needed a logo.
Someday that logo will not just be on the garage computer screen but get painted onto a metal sign. I have the design, and the oval pattern. Just waiting for time and that perfect piece of metal to coincide.
So we share and help each other out as good friends do and for the fun of it I've created the name, 2 Sluggo's Garage.
 

Attachments

  • screen logo.jpg
    screen logo.jpg
    125.3 KB · Views: 654

Mr. 360

Well-known member
Joined
Nov 23, 2012
Messages
662
Location
Bowmanville, Ontario
Double garage? Decadent.

I hear ya on the metal sign idea. I've got lots of sign's I'd love to paint up for the shop. I seem to have the metal, the design, and the paint, just never seem to find the time ingredient.

I take it by the way you use the space that it's going to be done up more 'working garage' in nature than 'showpiece.' I like both, but there's something appealing about the honesty of a working space that makes it cool. Will be watching this one.
 
OP
R

rmalkow2

Well-known member
Joined
Jun 26, 2009
Messages
4,087
Location
Brighton, MI
Double garage? Decadent.

I hear ya on the metal sign idea. I've got lots of sign's I'd love to paint up for the shop. I seem to have the metal, the design, and the paint, just never seem to find the time ingredient.

I take it by the way you use the space that it's going to be done up more 'working garage' in nature than 'showpiece.' I like both, but there's something appealing about the honesty of a working space that makes it cool. Will be watching this one.

Thanks, it's definitely a work space. No special floor treatments for example. Not because I'm against them but mostly because I can't afford them. That said I do like a certain decorative "feel" so there will be room for display and some level of soul. But if I can get it efficient and functional that will be a win.

And your space is one of my inspirations so I'll be watching yours too!
 

metalhead140

Well-known member
Joined
Jan 15, 2013
Messages
1,456
Location
NSW, Australia
Hey mate,

Looks like somewhere with potential! I understand the whole 'more space needed' mentality and then reading here and re-thinking it, because that's exactly what I've done too. More space will be my ultimate long term plan, but rather than scraping every last cent together for a year or two to get a bare metal building up (and still only have a hot bare basics area to work, just larger), I'm going to make the most out of what I have, and try to improve the storage and functionality here so that it's better now. The other thing that helped tip the balance was a mate moving into a place with a lined, insulated, heated/cooled attached garage, even if it's only a long single. As soon as I saw it I thought that I would get more done there than I ever did in my previous large detached (metal, uninsulated and unlined) garage, just because it was comfortable and convenient. Keen to see what you do with your space!
 
OP
R

rmalkow2

Well-known member
Joined
Jun 26, 2009
Messages
4,087
Location
Brighton, MI
The other thing that helped tip the balance was a mate moving into a place with a lined, insulated, heated/cooled attached garage, even if it's only a long single. As soon as I saw it I thought that I would get more done there than I ever did in my previous large detached (metal, uninsulated and unlined) garage, just because it was comfortable and convenient. Keen to see what you do with your space!

Good point metalhead, the larger building still needs to get finished to some level where its comfortable and usable. A lot of that infrastructure already comes with my attached garage and I just need to make better use of it than I have in the past. Maybe if I do a better job in this small space I'll carry that mentality to the larger one when its affordable.
 

Attachments

  • Sluggo's Logo.001.jpg
    Sluggo's Logo.001.jpg
    58.7 KB · Views: 425
OP
R

rmalkow2

Well-known member
Joined
Jun 26, 2009
Messages
4,087
Location
Brighton, MI
True Confessions of a Garage Abuser
To be honest I've had these pics for awhile now but between the busyness of life and a bit of anxiety over showing the world my stuff piled up all over its kinda like exposing your sins. Lets face reality and admit that if you have an over cluttered work space it didn't get that way without your help. So yes I took what was an originally good intention and junked it up to the point where it has been really difficult to function and work on any one project.
The good news is that even with the initial improvements made so far I've accomplished more projects in the last month than I have in a year. But the details of all that will come in future posts.
We built this house in 1993 and have actually built this same plan once before when living if Georgia. On that property the attached garage was actually 3 car spaces wide which was luxury for a typical suburbia setting. Here I went with a basic 2 car design. It's 20' wide by 21' deep inside usable dimensions. When the house was being built I added extra circuits and wired in extra wall outlets for general power tool use and one separate 30amp circuit for an air compressor and I can also plug in my 110V welder. No 220 volt plug yet but that is on future plans.
Unfortunately there was no GJ for me back then and I only used my basic experience and stereotype of what a garage power layout should be so everything got centered around the back (west) wall of the space. This then dictated that my work benches would all line up on that back wall. Since then I've realized that was not the best choice for a space this size. Some changes have now been made and will be subjects of future posts.
All this to say to anyone else that may be starting out with a bare shell to take time and look at various layout choices and really plan your electrical and air drops according to the best choice for your specific needs or at least put in enough redundancy to allow for easier bench relocation in the future. Now with all my walls covered any new electrical drops will require more work or a new approach to make changes.
The following pics show the initial state of the problem that prompted this refurb.
1st: The south wall adjacent to the main wall of the house, with two rows deep of cabinets, tool chests, storage bins, snow blower (for the winter), barely room to open a car door when parked in there and the house access door with a shelf in the far corner that also has obstructions making it hard to access.beginning 1.jpg
2nd: Overall view of the back (west) wall starting from aforementioned shelf and going across with big server cabinet (now gone), work bench, storage cabs, drill press and fan. Hiding behind the fan is my block grinder on a stand that you can't see because it's so buried that it's almost impossible to use.beginning 2.jpg
3rd: The north wall with cabinets, another buried bench, motorcycle, tool chest and hot rod project parts crammed in front of the cabinets. This is the winter configuration just so I can get one car in the garage overnight.beginning 3.jpg
4th and 5th: Slightly different views of the west and north walls congestion.beginning 5.jpgbeginning 8.jpg
6th: Car pulled out showing an overall view of the stuff piled up around 3 sides rendering almost every side not usable or at least very difficult to use.beginning 9.jpg
This is no way for a guy to live in his castle (or garage)!!!! So there, I admit my failures and am starting to make changes and see the benefits.
 
Last edited:
OP
R

rmalkow2

Well-known member
Joined
Jun 26, 2009
Messages
4,087
Location
Brighton, MI
Making use of available storage options.
The firs order of business in this project was to analyze what really needed to stay close at hand in the garage and what could be moved to available storage spaces. My other storage options are, 1) a 10' x 14' shed at the back of my property that had been dedicated to lawn and garden as well as bigger items. Last year I cleaned that out and sold some stuff by holding a garage sale so many larger car parts and tools like pressure washers etc got put in the shed.
2) The next option is the basement of my home. Smaller car parts and some tools were sorted and put into plastic bins for re-location to the basement but in a storage room that would still allow me easy access. Once I crossed the mindset that not everything can stay handy in the garage it was easier to make choices to move things out.
3) The last storage option came via a Costco add for online sales. They offered an overhead storage rack system and discounted it $50. After some research it looked pretty durable and I ordered one 4' x 8' unit designed to fit in the wasted space above an open garage door.

This white powder coated kit attached to the ceiling joists with provided lag screws.overhead 1.jpg
It's pretty easy to assemble and us adjustable for height to fit in spaces like the area above an open garage door and the door track.overhead 2.jpg
The 4' x 8' size holds up to 600lbs and got a lot of parts and items I don't use often off the garage floor.overhead 3.jpg
Working under it has not been an issue and it even came in handy once to hang parts from that needed spray painting. I put the whole thing up in 1/2 day.overhead 4.jpg
 

metalhead140

Well-known member
Joined
Jan 15, 2013
Messages
1,456
Location
NSW, Australia
Looking good! I think we've all (or at least most) had that sort of 'before' picture, or worse. I know my previous place looked worse than that, and that's part of why I'm here planning out my new space! You've got lots of good stuff though! Just got to work out how best to store it (or make the hard choices not to store some things) so that you can make a good workspace around it. Good work so far, keep us updated!
 
OP
R

rmalkow2

Well-known member
Joined
Jun 26, 2009
Messages
4,087
Location
Brighton, MI
This may seem like a minor change but it will become more important as the project goes forward.
This is the before, cluttered front corner of the south wall.
South Wall Before.001.jpg
Everything had to move from this corner and in front of the storage cabinets to allow room to get on a ladder and install the overhead storage rack.
south wall 1.jpg
So it also seemed like a good time to clean up the entire corner and re-purpose.
South Wall 2.jpg
My original thought was to use this as a handy spot to install some wall track and hangers that are designed to hold bicycles up. Before measuring I thought it would be a handy spot for myself and the wife to store and get our bikes down near the main door. But that was not to happen as a quick check with the tape measure said the bikes would stick out too far into the normal walk path. So the bike hangers still await a better spot but I did get the corner cleaned out by moving the snow blower and other less used items to my storage shed and the new purpose here will become evident in future posts.
South Wall 3.jpg
 
OP
R

rmalkow2

Well-known member
Joined
Jun 26, 2009
Messages
4,087
Location
Brighton, MI
One additional thought I keep forgetting to add about this overall process. Some may ask why I'm not painting the walls like most garage refurbs would.
Answer: That is part of the overall plan but just not right now. Partly because all I know is I want some sort of two tone scheme with a slightly darker lower section and brighter upper part of the walls I just have not picked the final colors yet. Also I've decided right or wrong to treat this like a build that needs to go through mockup before paint and final assembly.
With all the various placement ideas in my head and new ones coming from GJ all the time I want to trial fit each wall possibly multiple times until I get it where I like (function before form) then, I will pull items away one wall at a time and do the final paint.
Maybe not the traditional approach but hopefully will keep me from scratching up newly painted surfaces.
 
OP
R

rmalkow2

Well-known member
Joined
Jun 26, 2009
Messages
4,087
Location
Brighton, MI
Happy Easter! No additional progress to report this weekend in changing the garage around as I'm in Boston to watch my son run his 7th Marathon here. But enough useable space has been created so far to allow my buddy to come over this weekend and use the garage to work on his car. And, that was one of the goals of this project in the first place as he has no inside space of his own right now. So I feel good that when he asked I was able to say heck ya, come on over there's room now to pull in and do some work.
 
OP
R

rmalkow2

Well-known member
Joined
Jun 26, 2009
Messages
4,087
Location
Brighton, MI
It's been awhile since my last real progress post but life has been busy between work, home and travels. I have made some additional changes and have been taking pictures to try and sit down to catch up when I have time to write and post. The south wall is now mostly functional and I'll try to catch up with pics in the following posts.
 
OP
R

rmalkow2

Well-known member
Joined
Jun 26, 2009
Messages
4,087
Location
Brighton, MI
If you remember this scene its the south wall and was always congested with two or three rows of things. Storage cabinets, tool chests, parts bins, show blowers, etc.
beginning 1.jpg
Initially I had moved the snow blower to storage and cleaned up a little on that wall while trying to decide what to do there next.
south wall 1.jpg
I had come to the conclusion that having my main work bench on the west wall (back wall) was maybe not the most efficient all these years as it was always in the way a little whenever I pulled a car in to work on and shut the main overhead door.
So the next job was to move all the storage cabinets, all the parts bins, tool chests, and clean out the front corner completely.
South Wall 3.jpg
During this exchange of places it required me to pull my bench from the west wall and basically swap places with the big storage/filing cabinets. Once the bench was out and in the middle of the garage it really showed its dirty condition so it got cleaned up and the frame got a new coat of gray paint. My dad had attached aluminum panels to the top surface many years ago so this got a good wire wheel treatment and then the vise stuck out like a sore thumb. So of course that needed cleaning and re-painting as well.
vise after 3.jpg
With the south wall floor area swept and vacuumed the refurbished bench went in and that allowed room for my main tool chest next to it. I was also able to move my garage computer over to the wall above the bench and now its totally accessible and has really been used for the first time in years. It used to be also on the back wall and set up badly with poor access to use.
4-24-1.jpg
So far I'm liking this arrangement and have found it much easier to work from for most small projects. I've not had to do much in there yet with a car pulled in but we'll see how that goes.
4-24-2.jpg
Minor adjustments my be required yet and while I did run a temporary power strip above the bench it will need some permanent outlets installed in the future.
It seems to present good access and not protrude into the walk path or where I would pull a car in for parking.
4-24-3.jpg
So far the results have been positive and I will test this over time as I work on various projects and repairs.
 
To avoid these ads, REGISTER NOW!
OP
R

rmalkow2

Well-known member
Joined
Jun 26, 2009
Messages
4,087
Location
Brighton, MI
I finally completed a small but important project today. One I've had in mind for a very long time. And that is making my generator more easily portable. Since it's something I rarely use but need when the power goes out I have always sacrificed garage space and kept it there. 4400 watts and very heavy to lift and it never came with wheels of any kind.
So using a couple extra HF 10" wheels, some scrap angle iron, scrap chrome tubing, and a left over long bolt as the axle I got busy.
generator 1.jpg
A couple small pieces of the angle iron drilled out for the axle and then welded to the generator frame. The chrome tube cut into two short pieces and one long piece to serve as spacers that keep the wheels in the right position. A little spray paint and the rear wheels are on.
gen1.jpg
Opening up some existing holes on the generator frame made it easy to attach the HF 4" casters with locks. Now this is easy to move around, and no longer taking up precious floor space in my garage. It's been moved to the storage shed and rolls easy enough to retrieve if necessary.
gen2.jpg
 

don long

Well-known member
Joined
Mar 31, 2012
Messages
8,841
Location
southern california
I'm intriuged by the way you are solving your space problems.

I can remember trying to work in a cramped space as a young man
It was a challenge to say the least

Great job
 
OP
R

rmalkow2

Well-known member
Joined
Jun 26, 2009
Messages
4,087
Location
Brighton, MI
I'm intriuged by the way you are solving your space problems.

I can remember trying to work in a cramped space as a young man
It was a challenge to say the least

Great job

Thanks Don, I just finished going through about 1/2 of your thread and as I pick my jaw off the floor I consider your comments high praise. What an awesome building you have. I love all the building fronts lining the interior walls and I don't think I've seen that done better anywhere. In fact you got me thinking ahead as I continue to steal ideas from GJ. Hmmmmmm, how could I do something like that on a much smaller scale. Food for thought on maybe a theme oriented wall that is behind my work bench area. Rather than just plain paint it could be an interesting 3D concept. I can't wait to finish going through the second half of your thread.
You are living the dream!
 
OP
R

rmalkow2

Well-known member
Joined
Jun 26, 2009
Messages
4,087
Location
Brighton, MI
Good job on the gen. Those things are a BIG PIA. Usually wheels are mounted on outside of frame but seeing yours mounted inside frame gave me a idea for mine.


Have a good one, Gerard

Thanks Gerard,
I definitely looked at other generators and yes they always seem to have the wheels on the outside of the frame which to me just takes up more footprint space. I looked at the the available space between the frame and decided this was a more efficient way to go. It still seems to give good support to the unit. If I ever need to run the unit I can easily block it up off the wheels as needed. But it sure made moving it so much easier.
 

HSpencer

ALLIANCE MEMBER
Joined
Nov 28, 2010
Messages
2,854
Location
South Central US
Getting caught up on your thread. Lots of great progress. I am really liking the overhead storage and your red vise has caught my eye. Looks like a really good vise. That generator mod is great, I need to keep that plan in mind. LOL--I lug my generator around on a two wheeler!! Good thing I don't use it much. Your moving very well on your shop and I am impressed!! Keep up the photos and great work!~!

Best Regards
Herb
 
OP
R

rmalkow2

Well-known member
Joined
Jun 26, 2009
Messages
4,087
Location
Brighton, MI
I found a few extra pictures from cleaning up my old work bench.
The bench emptied but still in the old location and still dirty from many years of use and abuse.
bench old.jpg
After taking a drill motor with wire brush to the aluminum plates dad has originally screwed to the wooden top. Just to give it a bit of a fresh look.
bench polish.jpg
This one after cleaning the steel frame and legs and painting in gloss gray. I also re-purposed an old piece of 4" base molding to become a back splash for the bench. It got the same gray spray paint.
bench paint.jpg

The original vise from this bench was then cleaned up, painted red and lubed up for continued use. Pics of that are in a prior post.
 
OP
R

rmalkow2

Well-known member
Joined
Jun 26, 2009
Messages
4,087
Location
Brighton, MI
GJ Thief?
At least I consider this the first of many stolen ideas direct from another garage here on GJ. Go big or stay on the porch as they say. So I'm giving humble credit to the 12 Gauge Garage for this thought. The first time I saw the front open door view of 12 Gauge I thought wait, he purposely blocked off half his opening with a work bench area and storage. What seems like a simple idea now seemed totally foreign to my brain at the time. But I soon saw the wisdom especially with the toys and projects I have stuffed into one 2-car space.
So I started to think about copying this same theme and what it could look like.
So here again is where if was before.
Garage Door View.jpg
I was in denial that the space on the right side of the entrance was not already blocked off. It basically only served as storage and was not very functional.
ne corner 1.jpg
I had a bench in there somewhere but it was buried from easy access and only used for piling up more stuff.
beginning 3.jpg
Even the tool chest at that time was hard to really get to and open drawers easily. Where it now resides on the south wall as shown in previous posts, I can easily get at any drawer without moving a motorcycle.

Conclusion to follow.
 
OP
R

rmalkow2

Well-known member
Joined
Jun 26, 2009
Messages
4,087
Location
Brighton, MI
GJ Thief - Part II
So the first goal was to get stuff and more stuff out of the way to rescue the small work bench on the north wall. As previously mentioned I've divided up some car parts and other items not needed immediately and sent them to either my back yard shed or the basement of the house for storage. The tool chest moved out and the bench was pulled out for the first time in years. Cabinets and top wiped off, floors swept and vacuumed and the new layout began.
First attempt was just to locate the bench at right angle to the north wall and free up wall space for my finger brake. It's not a long bench so it still left some room for more on the end.
ne corner 5.jpg
Then one of the early thoughts was to put the tool chest next to it but that presented other issues. It's just a little too long and too easily could roll away from its position. It would be hard to make the turn and pull a car into the open space for service.
ne corner 3.jpgne corner 4.jpg
The final (for now) solution was to free up yet another victim of clutter and give a total purpose to this bench area. My pedestal grinder has been trapped in the NW corner for years and barely usable. Typically I had to climb over other clutter just to grind some small project. This in the end was a reason to rarely use the grinder. So I rescued it from its burial corner and placed it in the open, right next to the bench.
ne corner 7.jpg
In the process it and the stand (Grandpa's old farm cream separator stand) got a good cleaning.
ne corner 8.jpg
And now I have a grinding/cleaning station with a view of the great out doors. And since its positioned just inside the overhead door closing position I can also use it in bad weather with the main door down. The bench has just enough room for my small parts washing tank, my portable wire wheel station, a portable air tank and, I can still pull a car in to work on it. In fact that happened this past weekend as Sluggo #1 brought both his vehicles over for oil changes.
ne corner 10.jpg
I've already used the grinder and the bench area more in the last few weeks that I have in multiple years. I even got bonus engine storage space under the bench.
Functional organization feels great!
 

taumac

Well-known member
Joined
Aug 30, 2011
Messages
8,104
Location
Brooksville, Fl
I don't believe your a thief as long as you give credit where credit is due. That being said with so many ppl on here there's bond to be many ppl with like ideas especially with a lot of ppl having 2 or 3 car garages. I put ideas that come up with so that ppl can use and possible take my idea modify is for their own use. I believe its that's the point of the whole GJ idea. Although, I think jacks garage is beautiful. That layout doesn't fit my needs,vision and hobbies I do. I myself only have one car in my garage now but soon ill have both back in there. Your garage is coming along but in truth is a process of what works for you. It takes time and you have to flexibility to move things as needed. Keep up the good work.


Have a good one, Gerard

Florida GJers ( FGJ)
http://www.garagejournal.com/forum/group.php?groupid=117

The 5 Stitches Garage
http://www.garagejournal.com/forum/showthread.php?t=211899
 
OP
R

rmalkow2

Well-known member
Joined
Jun 26, 2009
Messages
4,087
Location
Brighton, MI
I don't believe your a thief as long as you give credit where credit is due……... Your garage is coming along but in truth is a process of what works for you. It takes time and you have to flexibility to move things as needed. Keep up the good work.
Have a good one, Gerard
[/url]

Looks good, and glad you're getting more usability out of your space and tools. That's what most of us are here for!

Thanks for the encouragement guys. The Thief title was a bit tongue in cheek on my part but I understand the comments. Sometimes I look at my mess and can't see the forest for the trees but, I see an example from someone else on GJ and the idea just clicks. That's why I keep subscribing to more garage build threads.
 

taumac

Well-known member
Joined
Aug 30, 2011
Messages
8,104
Location
Brooksville, Fl
You'll get there, like I said its a process. I been at it for 8 years on current and now rearranging my workbench AGAIN LOL. I good tip for you is to go on the garage gallery and look for ppl with single and 2 car garage only and subscribe. I say singles cause with less room you get creative with things. I sure did when I had mine and a lot of things I carried over.


Have a good one, Gerard

Florida GJers ( FGJ)
http://www.garagejournal.com/forum/group.php?groupid=117

The 5 Stitches Garage
http://www.garagejournal.com/forum/showthread.php?t=211899
 
OP
R

rmalkow2

Well-known member
Joined
Jun 26, 2009
Messages
4,087
Location
Brighton, MI
Progress on changing the garage has been slow lately due to many other distractions of life around here. Although with some space to work combined with warmer weather it has allowed me to get some projects started and done in the garage. I can only expect better things to come when the re-org is more complete.

I did one small change a week ago that had been nagging at me for awhile. The NE corner, where I created the cleaning/grinding bench had one lone shelf on the wall and some banners etc decorating the wall area. Not very useful and the shelf was just crammed with some antique items I like to display. I had found a pair of vintage Pic-A-Nut display shelves on CL some weeks ago and had targeted one for this wall/corner.
Here is what it looked like before.
NE corner before.jpg
To make enough shelf height to hold a standard oil can I removed every other shelf and sprayed a little matte black paint where the original shelf was.
pic before 1.jpgpic before 2.jpg
The finished product with some of my oil can collection and a few other old tins I've saved.
pic after.jpg
And here it is up on the same wall where old shelf used to be. I spaced it up off the bench top an inch higher than my portable parts washer tank so it can slide underneath and still use that bench top space.
picnut 1.jpg
A couple days later I discovered this articulating lamp in storage and added it to the same bench to add some additional lighting to that work area.
picnut3.jpg
 

taumac

Well-known member
Joined
Aug 30, 2011
Messages
8,104
Location
Brooksville, Fl
There's no doubt life gets in way of projects. Glad to see your working on garage again. Nice work on the shelf. Imo I have issue with that bench coming out into useable floor space. I see you got a welder so is it possible to weld up a dollie out of bed frame to roll that whole thing to use it and back when not in use. I use small 2in casters on most everything. A welded frame on 2in casters might raise height maybe 3in at most not raising overall height too much.
I do like your turning garage into areas like your doing. I did same thing. I got storage, sink, clean bench and workbench wall. I can see updated pics of 3 walls and maybe ill see some opportunity to make things flow alittle better.

Have a good one, Gerard

Florida GJers ( FGJ)
http://www.garagejournal.com/forum/group.php?groupid=117
The 5 Stitches Garage
http://www.garagejournal.com/forum/showthread.php?t=211899
 
OP
R

rmalkow2

Well-known member
Joined
Jun 26, 2009
Messages
4,087
Location
Brighton, MI
There's no doubt life gets in way of projects. Glad to see your working on garage again. Nice work on the shelf. Imo I have issue with that bench coming out into useable floor space. I see you got a welder so is it possible to weld up a dollie out of bed frame to roll that whole thing to use it and back when not in use. I use small 2in casters on most everything. A welded frame on 2in casters might raise height maybe 3in at most not raising overall height too much.
I do like your turning garage into areas like your doing. I did same thing. I got storage, sink, clean bench and workbench wall. I can see updated pics of 3 walls and maybe ill see some opportunity to make things flow alittle better.

Thanks Gerard. So far I only have two real work areas and they are not perfect by any means but are at least usable with some minor effort. At least I can work at a bench now and grind at the grinder without climbing over other stuff. More work stations to come as I slowly figure this out.
I hear you on the roll around benches. I have given that consideration and it may fit more into the future plans. Cutting down the bed frame and welding to fit a bench is a great idea and once again a GJ bit of wisdom I had not thought of. My only problem right now is even putting a bench on wheels to make it movable means I need a space to move it to when not in use. Those spaces currently do not exist but, as I continue to make hard decisions about what to keep and what to get rid of some wall space may open up. The space it currently occupies is not really usable floor space right now anyway so it's currently serving the best it can for the interim.
Thanks for the good thoughts and tips. It's why I read GJ daily.
 
OP
R

rmalkow2

Well-known member
Joined
Jun 26, 2009
Messages
4,087
Location
Brighton, MI
Well, while this is not a physical garage space improvement I did tackle a job this weekend that required the usable garage space to complete. I've had a bicycle rebuild project in the works for a few weeks now and this nice warm holiday weekend proved perfect to complete it. I've had a hand me down mountain bike for years that I never really liked. Just not my style. So I finally decided to get rid of it and replace with an older single speed cruiser bike but re-build it with some hot rod flair.
I bought this old Raleigh Retroglide off CL and started ordering a few parts like the ape hangers.
complete bike before.jpg
Stripped it down to the bare frame and began sanding the old paint. It's not the scheme I had in mind and was pretty scratched up anyway.
bike frame before.jpg
Next was a coat of rattle can primer. BTW, the overhead storage rack I installed has also proven to be a great thing to hang items from for 360 degree spray paint access.
bike primer.jpg
And then a coat of matte black before re-assembly. Other mods were to bob the rear fender, chopper style and add a garage sale headlight to the front. The chain guard was left original color to preserve the original decal but just scuffed with 000 steel wool to remove the gloss and give it the compatible matte finish. The fenders were not original to the bike but work well enough and their gray color compliments the black. They also had thin off white pin stripes that tie into the chain guard. Finally an old Schwinn tank set also in gray.
bike 1.jpgbike 2.jpg
And except for a few little custom touches I have yet in mind it's done. It's now the little brother to my Harley and the wife and I got our first together ride around the neighborhood.
bike 3.jpg
 

taumac

Well-known member
Joined
Aug 30, 2011
Messages
8,104
Location
Brooksville, Fl
One way to create work areas is to nest things. Im certainly rearranging my work bench wall with a new updated post all about it maybe tonight or tomorrow about all the changes on my thread. You should be able to get a good idea of how to nest work spaces. Ive been doing it for some time now. Right now I only have 2 benches but when I pull out the welding table, both bottom rollers and my homemade cart each one turns into another work surface or area. My grinders aren't bolted down. That's not a popular thought on GJ but my thought is I can clamp them down anywhere. Nice job on the bike.

Have a good one, Gerard

Florida GJers ( FGJ)
http://www.garagejournal.com/forum/group.php?groupid=117
The 5 Stitches Garage
http://www.garagejournal.com/forum/showthread.php?t=211899
 
OP
R

rmalkow2

Well-known member
Joined
Jun 26, 2009
Messages
4,087
Location
Brighton, MI
taumac,
I'm now subscribed to your garage thread and enjoying the reading thru from the beginning. Lots of good ideas you used and I look forward to the newest changes. I've been also thinking about the nesting concept and where I could apply it myself so I will be studying why you've done. When I restored my main bench I took out a make shift shelf that was under it on purpose with nesting in mind. So far I have one short rolling tool box that fits under it and will make or buy another sometime in the future.
 
To avoid these ads, REGISTER NOW!
Top Bottom