To avoid these ads, REGISTER NOW!

2 Sluggo's Garage

OP
R

rmalkow2

Well-known member
Joined
Jun 26, 2009
Messages
4,087
Location
Brighton, MI
I love the feeling you get after a purge phase. Kind of like walking outside after a good rain. Everything feels clean and fresh. Good work, keep it up.

Amen and I agree with that feeling. And its always funny how I can look at stuff before purging it and create all kinds if reasons why it could be useful to keep. But after it's gone I can hardly remember what it was and why I was so attached. Out of sight, out of mind.
 
To avoid these ads, REGISTER NOW!
OP
R

rmalkow2

Well-known member
Joined
Jun 26, 2009
Messages
4,087
Location
Brighton, MI
Ultrasonic Cleaning Experiment - The Set Up

A few months ago, at a winter online auction I picked up one of these.
attachment.php

Your basic HF table top ultrasonic cleaner. I got it for about half price of a brand new one and it looked like it had been used once and put back in the box. I've never played with ultrasonic cleaning before but have been intrigued with the idea for small parts cleaning. So for small money I figured it was worth a try.

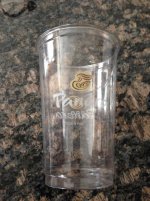
In discussion about the possible uses with a friend and co-worker we came up with a potential modification to the process that sounded great. He had heard of the idea to use a simple plastic cup to put the parts in and cleaning solution and then set this inside the cleaner filled with plain water. This would confine the dirt and grime to a disposable cup and save the clean up time afterward. The theory was the ultrasonic pulses would easily transfer thru the thin wall of the cup and still provide the cleaning action. Well that settled it and, I would have to try this experiment myself. And since this theory was hatched over lunch at Panera, they became the source of my parts cleaning cup for the experiment.
attachment.php


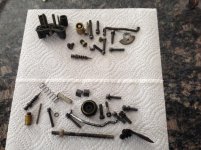
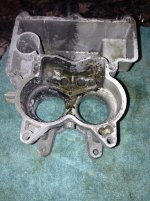
The subject of the cleaning experiment was at hand as part of my Jeep rebuild project I had been working to clean and rebuild the carburetor and using the tried and true (but slow) method of soaking parts in a gallon can of carb cleaner. Wanting to test a variety of parts and metals I separated the parts into different groups.
attachment.php

attachment.php

This way I would have brass, steel, plated, cast aluminum, etc.

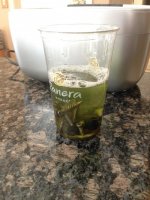
To add some additional variety to the test I chose to try three different cleaning solutions on a similar mixture of parts to see what difference that would make. And, I also chose to use hot tap water in the tub and also to use the heater function of the cleaner to keep the water hot.
1. A 50/50 mix of Simple Green and water.
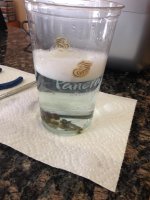
2. A few drops of Dawn dish detergent and water.
3. Full strength Carb Cleaner from the gallon can.
 

Attachments

  • IMG_2472.jpg
    IMG_2472.jpg
    135 KB · Views: 894
  • IMG_2475.jpg
    IMG_2475.jpg
    143.2 KB · Views: 892
  • IMG_2473.jpg
    IMG_2473.jpg
    147.9 KB · Views: 894
  • IMG_2474.jpg
    IMG_2474.jpg
    144.1 KB · Views: 893
OP
R

rmalkow2

Well-known member
Joined
Jun 26, 2009
Messages
4,087
Location
Brighton, MI
Ultrasonic Cleaning Experiment - The Test

For the first test I loaded up some misc small parts into the cup and filled with the 50/50 Simple Green and water mix to cover the contents.
attachment.php


Placed into the cleaner machine tub that was filled with plain hot water.
attachment.php


The machine has preset timer cycles you can choose and after one initial cycle of 2 minutes it did make a difference but I found that adding additional time and watching how dark/dirty the cup solution became was a good indicator of how long to run your parts. The correct assumption is the dirtier your parts the longer you run it. But even after a short time running it was clear that dirt and grime were being removed as a visible "oil slick" was starting to appear on the surface of the solution inside the cup.
attachment.php


It was also clear that the thin wall of the plastic cup was a pretty good transfer mechanism for the ultrasonic energy coming from the machine and tub of plain water. The solution in the cup had no issue with providing agitation as can be seen by the bubbles forming.

Top half of this picture are these first batch of parts after cleaning in this first test session. Dirt and grime are less and, most things are cleaner than when started. Not polished by any means but screw threads are clean and some lightening of material color can be seen.
attachment.php


The venturi assembly came out much cleaner than it's original blackish appearance when I started. Thee are still little bits of stuck on carbon that can be removed but overall it came out improved.
attachment.php


And last picture from this round of testing is the SG solution after the test. Quite dark and dirty as compared to the original green translucent color prior to the run.
attachment.php
 

Attachments

  • IMG_2484.jpg
    IMG_2484.jpg
    134.1 KB · Views: 890
  • IMG_2483.jpg
    IMG_2483.jpg
    134.5 KB · Views: 889
  • IMG_2482.jpg
    IMG_2482.jpg
    143.2 KB · Views: 892
  • IMG_2480.jpg
    IMG_2480.jpg
    145.1 KB · Views: 887
  • IMG_2478.jpg
    IMG_2478.jpg
    135.8 KB · Views: 884
  • IMG_2476.jpg
    IMG_2476.jpg
    143.2 KB · Views: 887
OP
R

rmalkow2

Well-known member
Joined
Jun 26, 2009
Messages
4,087
Location
Brighton, MI
Ultrasonic Cleaning Experiment - Test Cont'd

The next test was done with another group of small parts and using the mix of Dawn dishwashing liquid and water. As most everybody knows Dawn is the world favorite for safe cleaning of oil and grease especially on animals and also promoted as the best for breaking down grease on your dishes. So I wanted to see what another household product could do, especially one that is not toxic and could be inexpensive to purchase. No exact measuring of concentration here, just a few drops of Dawn to for the cup of water. It should have been plenty.

Here is the before look of the mixture and parts ready to go.
attachment.php


I ran this solution for many cycles and to be honest somewhat gave up on any further attempts. It definitely made things clean and removes the simple oil and grease but did not do much to attack the carbon build up or tougher residues formed by years of use.
You can see in the after picture the color of the water in the cup got darker but it basically just made everything "washed" but not really cleaned.
attachment.php
 

Attachments

  • IMG_2485.jpg
    IMG_2485.jpg
    137.9 KB · Views: 876
  • IMG_2488.jpg
    IMG_2488.jpg
    137.9 KB · Views: 878
OP
R

rmalkow2

Well-known member
Joined
Jun 26, 2009
Messages
4,087
Location
Brighton, MI
Ultrasonic Cleaning Experiment - Test Cont'd

The final tests were done using some of the actual carb cleaner dipped out of the gallon can and put into the trusty Panera cup. This is obviously the most toxic of the three solutions and should be used with appropriate ventilation. The color is already pretty dark as purchased and I did soak parts in it already so it is probably a little darker than new but still has potency to strip grease and carbon.
attachment.php


I loaded the cup with remaining small parts and ran it for a few cycles. As expected by using a stronger solution parts got pretty clean. It made quite a difference in the brass, aluminum and steel. All screw threads clean, the brass and aluminum parts are brighter and the chrome plated link was actually shiny again where original chrome remained. It should be noted that all these parts had been soaked once before in the carb cleaner but without any agitation and they remained pretty dirty. The Ultrasonic cleaning action really made the difference and did possibly the heat from the surrounding hot water.
attachment.php


I cleaned some additional small parts in this same cup of carb cleaner and they also came out very improved. Pictured here the top half are the parts cleaned in 50/50 SG and water, with the bottom half being parts cleaned using the carb cleaner.
attachment.php


The last and maybe toughest test would be on one of the carb housings. To do this I had to find a larger container than the Panera cup so a rectangular shaped thin plastic food storage container was used. This first picture is the housing selected and it's state is after considerable time soaking in the gallon of carb cleaner. It still has a lot of black carbon residue inside the float bowl area and elsewhere. Simple static soaking was not getting the job done and I would have had to scrub further with small brushes etc to get it really clean.
attachment.php


So it was placed in the food container purposefully on one side to hopefully see a result. The food container was filled as much as possible with the straight carb cleaner and everything placed into the cleaner machine of hot water. Given this part and the food container displace more area inside the cleaner itself I did have to adjust the hot water level to suit. This allowed the food container with carb housing to sit flat on the bottom of the machine and also prevent splashing over the side of the machine.
After multiple cycles you can see the result when I stopped the experiment. I could have kept going for even better results and will do so yet before this carb rebuild is finished but this was enough to prove the point. How many time cycles? I didn't keep count but its easy to check progress and just keep going until you like the result. One of the nice aspects is you set the timer and let it run while you go off and use your time elsewhere. Come back and check progress and let it run another cycle as needed.
For this housing it basically cleaned off in minutes what plain soaking could not do in many hours. The toughest areas will probably need a little scrubbing but much less than before.
attachment.php
 

Attachments

  • IMG_2492.jpg
    IMG_2492.jpg
    141.2 KB · Views: 878
  • IMG_2491.jpg
    IMG_2491.jpg
    142.5 KB · Views: 872
  • IMG_2490.jpg
    IMG_2490.jpg
    138.9 KB · Views: 877
  • IMG_2489.jpg
    IMG_2489.jpg
    139.5 KB · Views: 873
  • IMG_2494.jpg
    IMG_2494.jpg
    150.4 KB · Views: 876
OP
R

rmalkow2

Well-known member
Joined
Jun 26, 2009
Messages
4,087
Location
Brighton, MI
Ultrasonic Cleaning Experiment - Summary

What's my conclusion?

Overall I would call this ultrasonic cleaner a useful tool. This being a cheap model sold at Harbor Freight it's probably not meant for this type parts cleaning but yet, it did help the process along. I would most likely keep my eyes open for a more industrial version if I find a good deal at auction someday but, in the interim I will continue to use this one for small parts cleaning.

Use of a separate parts container was a super idea. It made the clean up so easy even with the stronger carb cleaner. I could just pour that small amount back into its original can and the machine needed nothing except pout out the clean hot water and wipe it with a towel.

What cleaner solution to use? Well they all worked to one degree. And they all benefitted from the heat and the sonic agitation. For all around cleaning I would probably choose the Simple Green mixture because it is a safe yet powerful cleaner. The Dawn dish soap could be used for the right job. If you want to just clean off oil and grease this could be the most simple solution to use but not for tough residue. It basically gave me nice smelling, and clean carbon residue but that's all. There could be other great solutions to use and I will keep trying others as they come up.

Maybe it's obvious to some but, this process will do nothing for rust and corrosion. Hmmmm, however I have not tried this with Evaporust yet. That might be interesting.

I really liked the easy set up, easy clean up and set it and forget it process. This is something you can do in your shop or garage while also doing other projects. Set it for max minutes and let it run in the background while completing some other project.

As my weather warms up and I can set this up in the garage more often I look forward to not only finishing the carb cleaning and rebuild but also to finding other cleaning projects and uses.
 
OP
R

rmalkow2

Well-known member
Joined
Jun 26, 2009
Messages
4,087
Location
Brighton, MI
Thanks for taking the time to read through it 1/2Cup. It was always a mystery to me as well but this was a fun exercise and helped make a cold winter day seem more productive. I learned some things myself in the process.
 
OP
R

rmalkow2

Well-known member
Joined
Jun 26, 2009
Messages
4,087
Location
Brighton, MI
Very thorough and well done sir. Thank you.

Thanks for taking time to read it through.

Great work. I always wanted a cleaner like that. Love the idea about the cup to keep it clean too.

I did too but was admittedly too cheap to buy one full price. Glad I got a deal on this one and was finally able to test it out. The extra cup idea was not mine. Full credit to my friend and co-worker. I was never going to see that myself. Sometimes the simple ideas are the hardest for me to find.
 

HSpencer

ALLIANCE MEMBER
Joined
Nov 28, 2010
Messages
2,854
Location
South Central US
That worked out very well. I was very interested in the experiment, and have thought of buying one for carburetor cleaning (small engines). I have seen it in shops, and some of the guys say they use them a lot. It was very nice of you to test and show the results.
I thought it did well.

Thanks and Best Regards
Herb
 
OP
R

rmalkow2

Well-known member
Joined
Jun 26, 2009
Messages
4,087
Location
Brighton, MI
That worked out very well. I was very interested in the experiment, and have thought of buying one for carburetor cleaning (small engines). I have seen it in shops, and some of the guys say they use them a lot. It was very nice of you to test and show the results.
I thought it did well.

Thanks and Best Regards
Herb

Thanks for checking this out Herb. I appreciate your comments. Glad to share my experience. I get so much from GJ and the work of others it makes sense to offer up what ever we have for all to read.
 
OP
R

rmalkow2

Well-known member
Joined
Jun 26, 2009
Messages
4,087
Location
Brighton, MI
After what feels like a long winter of not being able to use my garage for anything but storage it was nice to get a jump start yesterday and make some room to turn around and get ready for summer projects. I got a bit of a head start on this coming weekend by, pushing the Mustang out and calling for a tow truck to deliver it to my local repair shop. I think the fuel pump went bad and it's more than I can tackle right now at home. With that out of the way i could give half the garage a good sweeping and pull out the Sportster so it can be checked over good before any spring riding takes place. Tool boxes can now be accessed, more walk thru area and work space available.
I even got part of the driveway washed off from all the winter accumulation of road dirt. Organized some tools and performed the ceremonial storing of the car ice scrapers for another season.
More cleaning and organizing is required but it felt good to get started anyway.
IMG_2638.jpg
 
To avoid these ads, REGISTER NOW!
OP
R

rmalkow2

Well-known member
Joined
Jun 26, 2009
Messages
4,087
Location
Brighton, MI
rmalkow, the is nothing like a good spring clean from time to time.:thumbup:

Regards

Agreed 1/2 Cup. I was desperate to get it cleared out and a little cleaner.

That's a awesome statement....


Hmmmm..... I see a nice Lista style cabinet there?

That is a Lyon cabinet that I got for free! Weighs a ton but in great shape. I was helping a friend move into a rental home and the prior tenant did not want it. I got it in the back of my truck fast before they changed their minds.
 

taumac

Well-known member
Joined
Aug 30, 2011
Messages
8,104
Location
Brooksville, Fl
Agreed 1/2 Cup. I was desperate to get it cleared out and a little cleaner.


That is a Lyon cabinet that I got for free! Weighs a ton but in great shape. I was helping a friend move into a rental home and the prior tenant did not want it. I got it in the back of my truck fast before they changed their minds.


I'm learning Lista, Vidmars, Stanley, Lyons I can't tell the difference. Your a smart man and can't beat free no matter what. I can't believe they didn't want it.
 

Grumblebum

Well-known member
Joined
Aug 10, 2015
Messages
1,940
Location
Wollongong Australia
Hi RM, that's cool having the basement workshop area. How do you get projects in and out of there though ? Are the internal stairs wide'ish or is there a hatch or something ?

I see Gerard spotted that cabinet in the garage :lol:

How's the little F-truck going so far ?

Cheers GB.
 

taumac

Well-known member
Joined
Aug 30, 2011
Messages
8,104
Location
Brooksville, Fl
Hi RM, that's cool having the basement workshop area. How do you get projects in and out of there though ? Are the internal stairs wide'ish or is there a hatch or something ?


I see Gerard spotted that cabinet in the garage :lol:


How's the little F-truck going so far ?


Cheers GB.


LOL, I'm very observant. GJ has trained me very well. LOL
 
OP
R

rmalkow2

Well-known member
Joined
Jun 26, 2009
Messages
4,087
Location
Brighton, MI
Hi RM, that's cool having the basement workshop area. How do you get projects in and out of there though ? Are the internal stairs wide'ish or is there a hatch or something ?

I see Gerard spotted that cabinet in the garage :lol:

How's the little F-truck going so far ?

Cheers GB.

There are internal stairs in the house that allow some access to the basement. So I try not to move large heavy things often up or down. When that is necessary it requires help or moving things in pieces. But generally anything I can carry can go up or down. Most of the area is either recreation space or storage and I carved out a space for my inside work area. When my kids were young and home we used it a lot for gatherings etc.

My truck has been just great. This winter it was my main transportation and did well in the snow. Luckily I only needed 4WD a couple times but it was nice to have. I went on a long trip to Texas in March to see my oldest daughter and it ran perfect there and back. I actually purchased some "summer" wheels and tires today for it and if the weather is dry tomorrow they may get installed .

LOL, I'm very observant. GJ has trained me very well. LOL

Maybe I'll have to post up another eye test tomorrow for you guys. I still have to figure out what to do with that Lyon cabinet but I could not pass it up. Eventually I think it will be good for holding all heavy tools since it is built so strong.
 
OP
R

rmalkow2

Well-known member
Joined
Jun 26, 2009
Messages
4,087
Location
Brighton, MI
Today was the first real use of the garage for some maintenance. It was really nice to have the floor space to work on my lawn tractor. With the battery freshly charged and new gas I was able to start it and pull from the back shed where it hibernates for the winter. Once inside the garage all blades were sharpened, tires filled with air as needed, oil checked and then pulled out to thoroughly clean all debris in and around the belts from last season.
It ran like a champ and got all front and back yard cut before the evening rain started.
IMG_2641.jpg
 

taumac

Well-known member
Joined
Aug 30, 2011
Messages
8,104
Location
Brooksville, Fl
Actually, I have a idea what to use it for. This idea I've been working on haven't even post it on my thread yet.
 
OP
R

rmalkow2

Well-known member
Joined
Jun 26, 2009
Messages
4,087
Location
Brighton, MI
With newly sharpened blades my Cub Cadet always gives the grass a nice even cut. I love the look of fresh mowed grass.
IMG_2642.jpg
 

taumac

Well-known member
Joined
Aug 30, 2011
Messages
8,104
Location
Brooksville, Fl
Ok now you have my interest. I'll be watching your thread with great interest!

:confused::thumbup:


Well it's a work in progress but here's the concept. You know I got this mobile table.
67dae73525a80bf54ffc18c31762f055.jpg
Well what I did is made a table for it with 2x4 and 3/4 ply.
697fa14f126996b8f06d09679f9f01ad.jpg

This gives me a clamping area all the way around the table.
cf194fcc64494e7201a126285393ad3a.jpg

What I havnt done yet is drill the holes for the mounting system I have like I did on work bench yet.
759f7a0415fa9ed496c5a8570e58a315.jpg
Now I got mobile table I can mount stuff to and work. Something like this.
2d3a1048ccc7e42373a06427a11dca3e.jpg
I also can mount a vise, table saw, or chop saw. My space doesn't allow for me to leave top on but your cabinet is smaller so. I also planned to use different tops like maybe cement board for welding with my welding table I made up. That's still not finished yet either. Looking for 2 more sections of T angle.
017888627542bd3f23f0b0dbb40bbae4.jpg

Well that's my idea for my table and thinking might work for that too.
 
OP
R

rmalkow2

Well-known member
Joined
Jun 26, 2009
Messages
4,087
Location
Brighton, MI
Well it's a work in progress but here's the concept. You know I got this mobile table.

Well what I did is made a table for it with 2x4 and 3/4 ply.


This gives me a clamping area all the way around the table.


What I havnt done yet is drill the holes for the mounting system I have like I did on work bench yet.

Now I got mobile table I can mount stuff to and work. Something like this.

I also can mount a vise, table saw, or chop saw. My space doesn't allow for me to leave top on but your cabinet is smaller so. I also planned to use different tops like maybe cement board for welding with my welding table I made up. That's still not finished yet either. Looking for 2 more sections of T angle.


Well that's my idea for my table and thinking might work for that too.

Man, that is an awesome idea to have different tops that fit the rolling base. That will allow you to extend your work area to outside the garage door. To easily have all those various tools set up and available by using your mounting system will be a big help. I see you found a place to store the rolling cabinet when not in use and see how the table tops could be stored on edge or even hung from the ceiling possibly when not in use. Easy swap from wooden top to welding top. I think you have a winner there. Your limited space has really brought out the creative thinker. I know you have a day job but I could see you making these and selling them to average home owners.
 
OP
R

rmalkow2

Well-known member
Joined
Jun 26, 2009
Messages
4,087
Location
Brighton, MI
Here's my big CL purchase yesterday. I've been watching patiently for a set of F150 "take offs" for awhile now thinking I could take advantage of a cheaper deal on some like new tires. If I did nothing and kept driving on the tires that came on the truck I would wear them out before next winter and be forced to buy a new set. These are not cheap given the sizes used on the F150. Probably I could figure an easy $200 per tire mounted and balanced.
This past week a set turned up on CL that are very nice chrome plated aluminum 18" wheels and tires with a good 60% tread left. And the tread pattern is more for street driving like I wanted. My current tires are a more aggressive pattern that works good in snow but is noisy on dry road.
The good news is they were only $400 for the complete set of four but, the bad news is they were 2.5 hours away on the west side of the state. So I had to invest some time and gas money but it still saved me hundreds of dollars over buying brand new and I now have some nice looking wheels for summer use and can save the other set for winter use. The seller even saved the original lug nuts and included them with the deal.
IMG_2643.jpg
 

taumac

Well-known member
Joined
Aug 30, 2011
Messages
8,104
Location
Brooksville, Fl
Man, that is an awesome idea to have different tops that fit the rolling base. That will allow you to extend your work area to outside the garage door. To easily have all those various tools set up and available by using your mounting system will be a big help. I see you found a place to store the rolling cabinet when not in use and see how the table tops could be stored on edge or even hung from the ceiling possibly when not in use. Easy swap from wooden top to welding top. I think you have a winner there. Your limited space has really brought out the creative thinker. I know you have a day job but I could see you making these and selling them to average home owners.


Thanks man. The wood top is stored behind smaller craftsman rollers and welding top is stored next to fridge. I also do roll the table out by itself as a work table. It's so far worked out real good.
 
OP
R

rmalkow2

Well-known member
Joined
Jun 26, 2009
Messages
4,087
Location
Brighton, MI
In process of getting the new wheels/tires swapped out.

Before:

attachment.php


After:

attachment.php


One side done.

attachment.php


Sorry for the dirty truck but it's the rainy season here and I live on a dirt road so there's no keeping it clean just yet.
 

Attachments

  • IMG_2645.jpg
    IMG_2645.jpg
    142.6 KB · Views: 712
  • IMG_2646.jpg
    IMG_2646.jpg
    145.8 KB · Views: 719
  • IMG_2644.jpg
    IMG_2644.jpg
    140.1 KB · Views: 719

xtremek

Well-known member
Joined
Apr 13, 2012
Messages
11,603
Location
St. Johns, Mi
.....Sorry for the dirty truck but it's the rainy season here and I live on a dirt road so there's no keeping it clean just yet.

Considering the weather we've had lately, it's not dirty. It's just got a little dust on it.:lol: Especially if you live more than a 1/4 mile from the pavement.
 
OP
R

rmalkow2

Well-known member
Joined
Jun 26, 2009
Messages
4,087
Location
Brighton, MI
I picked up a couple vintage hand crank oil pumps this week at an antique auction. I really only had my eye on the smaller of the two.
IMG_2665.jpg

This was surely mounted to an oil tank back in the day but has been placed on a nice sturdy stand and base for display and still had the wood handle knob intact and the platform for filling an oil can with built in drain. Normally these go for well over $100 around here online so I was shocked when I got it for a bid of only $45. Someday it will get a strip and paint job and I will look for a suitable oil can to sit on display with it.
The larger one is a Bennett and has a brass cylinder and cast iron base. I was not expecting to bring this home but the bidding stalled at $55 so I jumped in for another $10 and won that too. Pretty much like 2 for 1 sale. This one also will get a re-paint, polish the brass and has room to add some branding for a little flair.
IMG_2664.jpg


Currently they reside in temporary places just outside the garage until I can get to the home center and pick up some cement bases for a flat dirt free surface. At least this keeps them from being two more things stored in my garage and I can enjoy seeing them each day I pull in the driveway.
IMG_2666.jpgIMG_2667.jpg
 
OP
R

rmalkow2

Well-known member
Joined
Jun 26, 2009
Messages
4,087
Location
Brighton, MI
Haha, No hiding on purpose. I actually got that gas pump about 2 years ago. I still intend to restore it. Life keeps getting in the way of the best intentions though.
 
To avoid these ads, REGISTER NOW!
Top Bottom