To avoid these ads, REGISTER NOW!

22'x26' Attached Garage

OP
M

Motown 454

Well-known member
Joined
Sep 25, 2008
Messages
1,359
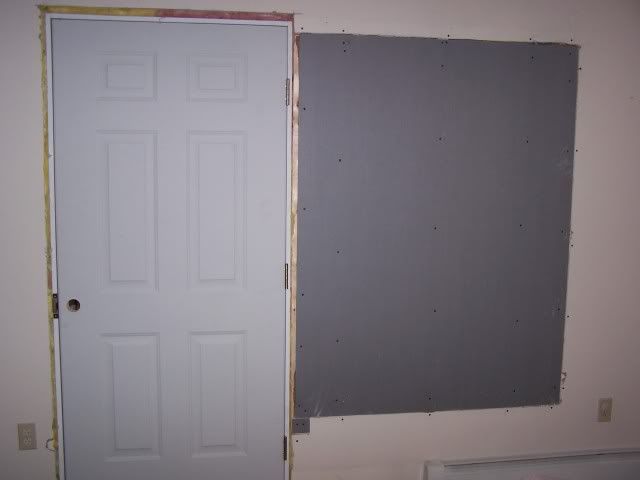
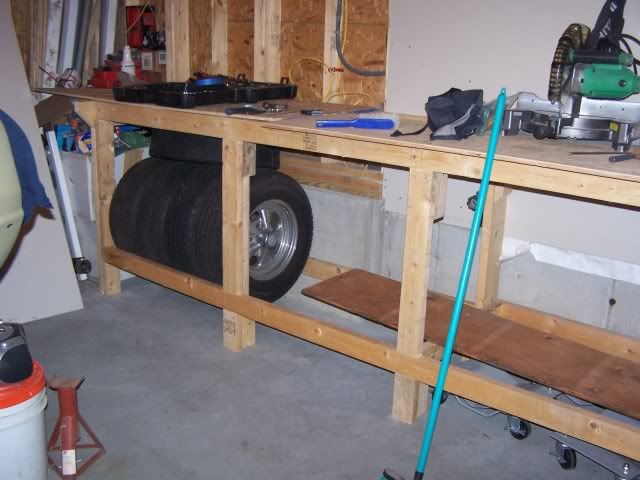
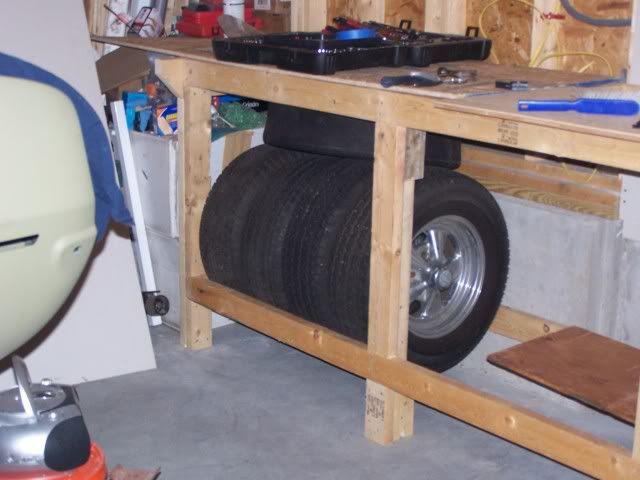
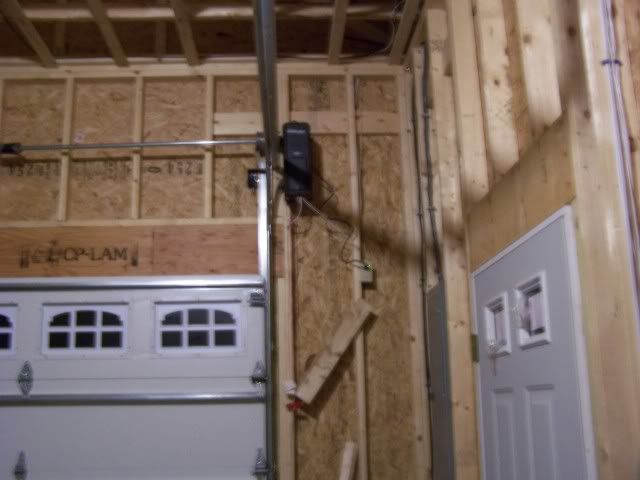
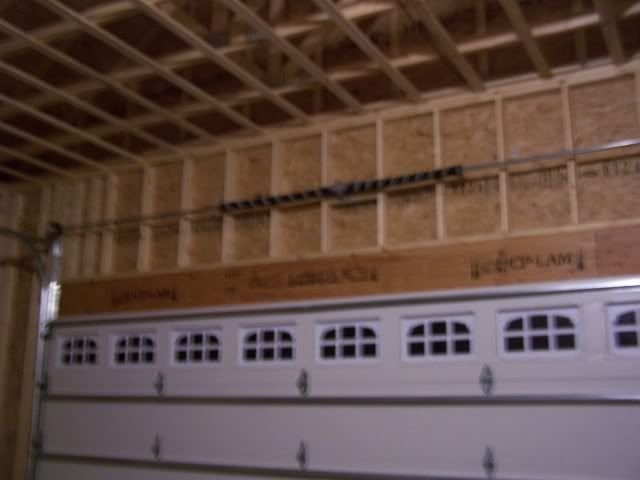
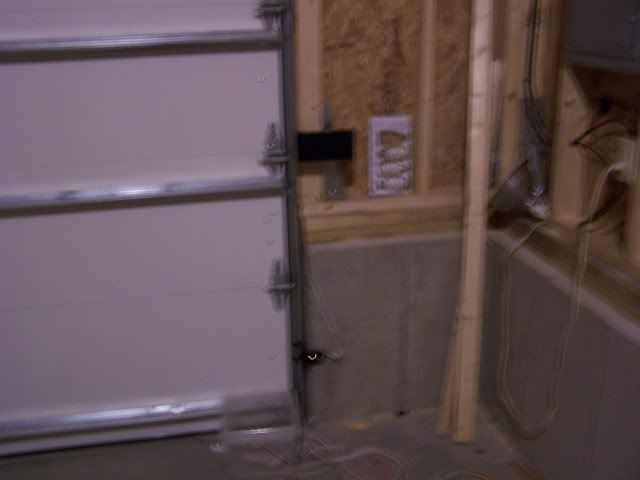
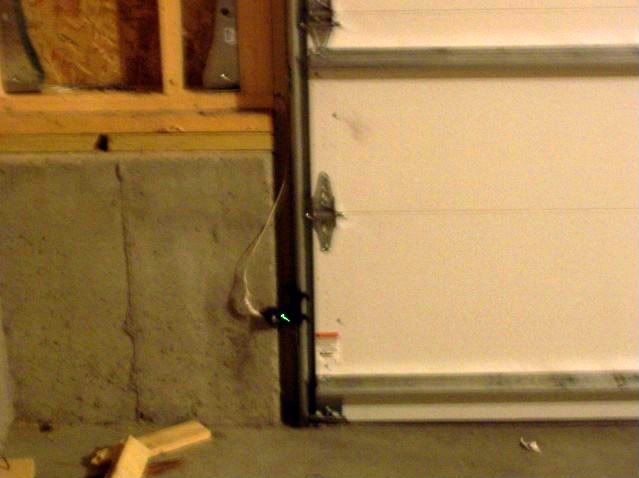
This has been a pretty good week for progress. The door guy called , the springs came in . He came down Monday and installed them and the LiftMaster 3800. The door is finnaly finnished and usable. The cable TV wire was attached to the temporary power pole and had to be run through the garage to the house. That got done too. I have some pictures that were taken with a only the 300 watt compact fuoresent that screws in a regular socket. Its pretty good it only uses 68 watts and is pretty bright.

Liftmasterinstalled001.jpg


Liftmasterinstalled002.jpg


Liftmasterinstalled003.jpg


Liftmasterinstalled004.jpg


All I need now is the final inspection so I can use the garage.
 
To avoid these ads, REGISTER NOW!

aqr81

Well-known member
Joined
Jul 20, 2010
Messages
1,127
Location
Central Valley, Ca.
That's awesome Wayne, congratulations. LiftMaster 3800's are great openers and everything works so quite. Almost time to bring that car home! I look forward to seeing the pictures. Great job Wayne. :thumbup:
 
OP
M

Motown 454

Well-known member
Joined
Sep 25, 2008
Messages
1,359
Thanks Larry Even got some good news on the car too. No pick up date but pictures of parts ready to go on.
 

Hit-By-Thunder

Well-known member
Joined
May 11, 2008
Messages
181
Location
Fort Saskatchewan
right on Wayne!!!!!!

That garage door is beautiful. Don't you just love the power door lock for the door, they work sweet.

Coming allong Wayne, coming along.

oh btw -37C today and the wife brand new car blew all power steering fluid it is soooo cold :lol: I love Canada

Rob/HBT
 
OP
M

Motown 454

Well-known member
Joined
Sep 25, 2008
Messages
1,359
OK today is inspection day The building inspector just left and passed the garage. Just need to cover one corner with either sheet rock or a corner bead and mud and he'll be good.

Housepictures018.jpg


Housepictures019.jpg


The fire department is coming this after noon to inspect the fire and heat alarms. When that passes we can use the garage. Just intime for this new snow ****! I'll post when they leave.
Stay warm !
Well the fire inspector just left and passed the alarm installation. We're good to go!
Wow I can't believe this is finnally done for now.

My big day The first use.

Housepictures022.jpg
 
Last edited:

aqr81

Well-known member
Joined
Jul 20, 2010
Messages
1,127
Location
Central Valley, Ca.
Wayne, congratulation on getting the final inspection behind you. No more jumping through hoops and worrying about the minutia that could arise. Big day with the first use. Great job Wayne. Stay warm.
 
OP
M

Motown 454

Well-known member
Joined
Sep 25, 2008
Messages
1,359
scheu Not much going on here, just got the patch from the window I removed for the garage, plastered last weekend. Called the guy a few times and it was I'll be there nothing for a week then I called him again and he said he would be there to check it out.. He came by I thought to look, but he did it while he was there. it needs another coat of paint but other than thats it good.
Here's what he did.

installblueboard001.jpg


Housepictures.jpg


And we got a new mail box. Cast aluminum, it looks good but it lets the rain in when its windy, and thats under the 6' overhang on the porch. I'll have to figure something out to keep it dry.
here's a long distance picture.

Housepictures026.jpg
 

z28dad

Well-known member
Joined
Jul 20, 2010
Messages
172
Location
VA
Its looking great Wayne. It won't be long and winter will be gone. Then you can get the inside done.
 

Hit-By-Thunder

Well-known member
Joined
May 11, 2008
Messages
181
Location
Fort Saskatchewan
Congrates there Wayne, long time coming hey? Nice to follow along with your build. Please keep going with the inside, your place is stellar.

You can keep that white stuff,....I've had just about enough for this year. Nice to see it melting up my way

Rob/HBT
 
OP
M

Motown 454

Well-known member
Joined
Sep 25, 2008
Messages
1,359
Thanks Rob.I'm all set with this white **** too. 45 today and sunny, I love it. This is my favorite time of year. Just when the trees start to show some green buds not too warm no polin and no snow! I got lucky and the paint I had left over matched the patch on the wall perfect. Just had enough to finnish. Put the molding on .
Here's a shot of it, nothing big but its done.
Housepictures-1.jpg


I have a question for you guy I need an opinion. I'm going to wire in my compressor and I'm not sure where to put it. I have it stored in this corner which is one location I could put it, but its right where I'm going to do most of my work on my Camaro.

Housepictures133.jpg


I could build a room around it but I still think it will be too much having it so close to where I'm going to work.
The other place I was thinking was right near the 16' door on my honeys side where she parks. It will stick out about 5" past the door opening. I don't know if that would be like putting a bulls eye on it. You know how sh@t happens.

Housepictures140.jpg


Housepictures139.jpg

I have no chance of putting it outside it would only be about 10' from my neighbors kids bed room. They're the ones that signed for me to get the variance. Any opinions?
 

IowaMercMan

Well-known member
Joined
Aug 10, 2010
Messages
58
Location
Hiawatha, IA
I don't know your wife but that sounds like a risky place to spot your compressor. if you must put it near the door, put it on YOUR side (or switch sides with her). At least if something happens you've only yourself to blame.

Looks like you've got a fair amount of headroom in that garage. Did you think about going up with it? I know that would be a king sized PITA, but when short on room....
 
OP
M

Motown 454

Well-known member
Joined
Sep 25, 2008
Messages
1,359
I went back and checked the dimension's of the compressor its only 28 deep which would put it about 2" past the door track. At 30" from the floor the wall steps back about 4" ( going from foundation to plaster wall ) which will give me room to plumb it in. Her mirror sticks out about 4" so it might be ok.
I'm really considering swapping sides. Then I could put it in the first place I suggested also I could run shelves down that side too. The side she on now has two windows which will eat up some of my room for shelves. Eventually I want to get a lift if the posts land between the windows would be great.
 
OP
M

Motown 454

Well-known member
Joined
Sep 25, 2008
Messages
1,359
Hi Just a few small updates on the garage. My back has been giving me problems. So it been limiting me from working on the ladder. Ten minutes up there kills me for a couple of days. But my chiropractor is happy. I think he's going to buy a new truck. lol Plus my replacement hip is making a funky clicking that I can feel up my spine. I did a little wiring, I installed some receptacles on both walls. Moved the door opener light to the center of the ceiling. I had it temporarily mounted over the man door. I also put an extra light socket for another CFL until I can afford other light options. Thats about it for the Garage.
Here are the CFL's, its amazing how much light they give.
000_0823.jpg

Recetacles
000_0825.jpg

Ii'm going to use this bay for a wire chase so I know where they are so not to damage them later.
000_0824.jpg

I'm going to extend the wall here to use as a wire chase also because I don't want to drill anymore holes in the top plate because it carries the roof truss. So I'll build the wall out an inch to run my wires. Maybe just at the top any suggestions?
000_0827.jpg

000_0826.jpg

The car is supposed to be home any time now. It was supposed to be here in May but got delayed . The body is done ready for paint and the bottom and firewall are both in final paint. The front subframe and sheet metal still need to be installed and gapped but they won't go on until its a roller. The axles for the Fab 9 came in with the wrong spline on them so a new set had to be ordered. When they arrive The rear will be put together and the sudframe will go on. Then he will gap the sheet metal and that should be it.
 

jimmie jam

Well-known member
Joined
Oct 16, 2005
Messages
490
Location
fort lauderdale, fl
This has been a great build so far. The "ground breaking" and "finishing" are the toughest part of these jobs - I know from experience. Hope you feel better and can get the interior finished asap!
 

Mmfh

MEMBER EMERITUS
Joined
Oct 8, 2011
Messages
1,423
Location
Portland Oregon
Hey Wayne,

Just picked up on this thread and couldn't stop reading it. I followed it all the way until today, I've got to say I'm very impressed at what you did in the space you had to work with.

I really love the way you attached the garage and went out over the front door and make a nice little porch. Makes the house look like it was built recently, instead of being what I would think is a older home.

Thanks for posting all the pictures, it really makes it fun to follow what you are doing.

Nice Job!

Mm
 
To avoid these ads, REGISTER NOW!
OP
M

Motown 454

Well-known member
Joined
Sep 25, 2008
Messages
1,359
Thanks Guys I ran some more wires for plugs and power for my work bench (when I put it in) plus wire for task lights above it when I get my storage built up there. Now that my car is in there plus the wood for the cabinets above the work bench its pretty tight.
I bought an IR 80 Gal compressor a while back, I just sold it to get some funds for a lift. I was under the car and my back went out. It took me almost an hour to crawl out from under it. 3 weeks of chiropractor visits and doing pretty good now. I guess Fate wanted to remind me I'm not 18 anymore. lol The lift is needed more in the immediate future the compressor can come later. I'll try to keep you posted when I get the lift.
 

z28dad

Well-known member
Joined
Jul 20, 2010
Messages
172
Location
VA
Wayne, Glad to hear your feeling better. Looking forward to seeing the details in the new lift.
 
OP
M

Motown 454

Well-known member
Joined
Sep 25, 2008
Messages
1,359
Scheu; Nothing new yet, I've been working on my Camaro and its tight in there with all the left over parts and building materials from the garage. I am going to take some time to either build a work bench or bring one I have in the cellar up to the garage. Right now I'm using two plastic saw horses and a piece of plywood for a bench. Its not very effective.
I have a bunch of receptacles wired and ready to tie into the main panel just haven't got to it yet.
I still need to pour the side walk and aproach apron infront of the garage too. My cousin has all the tools we need and he wants to give me a hand. So the two old laborer's will do it this spring. All though with the weather we've been having this winter we could probably do it now if we could get the mix. The grounds not even frozen.
 
OP
M

Motown 454

Well-known member
Joined
Sep 25, 2008
Messages
1,359
I've got a little up date. I started building a work bench along the back wall of the garage. I had some wood left over from the build so I put it to good use. The bench is 12' L x 32 W x 42 H it is attached to the wall with Hex Washer Head Tapcon's. I divided the length by three for the up rights and added a cross brace 2x4 at the 8' mark so I would have something to secure the plywood I'm using for a top. It will be two 3/4" pieces doubled up. I used cad plated deck screws to build it. I just threw some pieces of plywood on top for now so I can get back on the car. I'll get the plywood ripped and attach it after I'm done putting in some shelves and a few more up rights.
Here are a few pictures.
000_1094.jpg


000_1097.jpg


000_1095.jpg


000_1099.jpg


000_1104.jpg


000_1101.jpg


000_1105.jpg

The end bay ended up perfect to fit my old wheels and tires.
 
Last edited:

z28dad

Well-known member
Joined
Jul 20, 2010
Messages
172
Location
VA
The work bench looks great Wayne. It will really come in handy. Don't forget to add a few outlets. I have one work bench that I did forget about the outlets. Hope to fix that issue soon. Keep up the progress.
 
OP
M

Motown 454

Well-known member
Joined
Sep 25, 2008
Messages
1,359
Thanks Russ; I'm going to put two 20 amp circuits along the front 2X4 on the bench, that way the cords aren't run over the work area. You can see the 12/2 in the open wall in the last picture. I'm not sure how to make the transition from the wall to the bench with the wire. Its lagged to the wall but I would like to be able to pull it away from the wall if I ever need to. I was thinking a shielded cable from a 4" square box on both the wall and the bench up high enough so I can disconnect it from the wall if I need to.
 

Bustedwheel

Well-known member
Joined
Apr 8, 2009
Messages
127
Looking awesome. Out of Curiosity, whats up with the garage across the street in one of your pics (Behind the Dump Truck.) Looks like 4-5 bays or so?
 

Attachments

  • 039.jpg
    039.jpg
    95.2 KB · Views: 106
OP
M

Motown 454

Well-known member
Joined
Sep 25, 2008
Messages
1,359
It's L shaped and there are 9 garages. The people who live there don't rent them out. I don't think they want to put up with people pulling in and out all the time. I think three are in use for daily drivers.
 

tinbender 66

Well-known member
Joined
Mar 23, 2011
Messages
2,294
Location
Western Washington State
I foolishly followed your link to lateral g and spent about two hours looking at your Camaro build. That's gonna be one awesome ride!! I've only just begun on my Chevy II. I hope I live long enough to finish it:lol:. It looks like you are 'over the hump'. Looking forward to seeing it completed!!
 
OP
M

Motown 454

Well-known member
Joined
Sep 25, 2008
Messages
1,359
Thanks for the compliment. Maybe I should post a warning on the long read. lol
 

skully67

Active member
Joined
Nov 8, 2009
Messages
33
Location
PNW
Just went through this whole thread. Nice work. everything tied intogether nicely. looks great.
 

KCarGuy

Well-known member
Joined
Feb 5, 2009
Messages
2,075
Location
50 miles outside Chicago, illinois
When I first Checked out your Build Thread, I wasnt sure If I was going like the Garage in Front of the House Type of Look.
(no disrespect intended)
But as I kept going through it and it was getting farther and farther along...It really came together nicely.
I love how your Roof Lines came out and the careful Planning of the entire Design.
Alot of Hard work has been put into it so far...You have to be Feeling Proud!
Thanks For sharing.
And Good Luck.
 
OP
M

Motown 454

Well-known member
Joined
Sep 25, 2008
Messages
1,359
Finally some progress on the garage even if it is outside !
When I built the garage it took all my funds and fixing around the building went unfinished. Well this week we put the concrete in front and around the side and back. When I built the house the builder paved where he cut to put the water service and sewer, which promptly sunk. It was like that for many years until now.

This is what we drove over


Now for the work.

Before I retired I was a construction laborer and a grade forman but that was five years ago. Boy do I remember why I had to retire !
We got a machine and dump truck and I was on the shovel again, and got it ready for the concrete placement.
Here are few pictures of it going in. I put a small catch basin and I'm putting a Flo well to catch water from the down spout. so the side walk won't be covered in ice all winter.


And the finished product.


The part closest in the picture is where it was sunk in.
 
Last edited:
OP
M

Motown 454

Well-known member
Joined
Sep 25, 2008
Messages
1,359
Well I finally got the dry well for my down spout for the garage in this weekend.
Here's the catch basin going in.


Here is what I used for the dry well.


I dug a hole 4'x4'x almost 4' deep for it. Its been a long time since I used a pick and shovel, it took a little over 4 hours to dig. then I lined it with filter fabric, put small pieces for it to rest on with 3/4" stone.


Ordered 2 yards of 3/4 stone ( which was supposed to be washed ) back filled it trying not to get too many fines in with it.


Now it's to get some loam and new grass.

I'm going to put sod in should I kill off all the grass that's already there then rototill or just rototill and rake it all out? What should I use to kill it and then put sod in without it bothering the sod?
 
Last edited:
To avoid these ads, REGISTER NOW!
Top Bottom