To avoid these ads, REGISTER NOW!

30x48x12 Michigan Carr Garage

OP
C

chevyracer5613

Well-known member
Joined
Dec 16, 2014
Messages
149
Location
Brighton, MI
Stngfever - I did consider those type of baffles. Since my trusses are 4' OC it meant i'd likely need two side by side, which is fine I guess but because of my next reason, I opted to go away from that. Using the rigid insulation as the baffle allowed me to more easily (and maybe effectively) seal off the header area. I am hoping to keep as much cold (and moving) air away from the insulation (especially blow in) as reasonably (read cheaply) possible. In the end I don't know how much different it'll actually make, and it certainly is more expensive (my route). However, if I had 2' OC trusses I might have gone the same route as you.

The scaffolding was another idea that seems popular and much better than just my ladder :). My neighbor is building his 30x48x12 as we speak...maybe i'll get lucky and he'll get one I can borrow :).

Thanks for the pics and ideas, yours is looking good.

Looks like you went the ducted route for your heat. Are you using and home-style furnace (and or AC)? I heavily debated between ducted forced air (home style unit), hanging forced air and radiant. I ended up with radiant and I think my neighbor might do a hanging forced air.....it'll be interesting to see how they compare.
 
To avoid these ads, REGISTER NOW!
OP
C

chevyracer5613

Well-known member
Joined
Dec 16, 2014
Messages
149
Location
Brighton, MI
So if anyone is curious, I have been experimenting with different size cuts as I go....which has certainly left some gaps to fill....but that is OK (yay for scrap and foam).

The first picture shows what foam looks like from the can (I am a big fan of the "pro" gun)....the other pictures use the gun (as well as most of the garage).

The 2nd shows some rough dimensions.

The third shows the soffit baffle being sealed to the head and then the 4th shows the next horizontal panel being sealed also.

So I am taking 4x8' sheets of 2" polyiso, using a thin blade to trip ~2" off (from 48" to 46") to fit between the trusses. Each pair of trusses , "cavity" gets 4 total sheets. The first sheet is cut 30" long of the soffit baffle and sealed to the header, the remaining sheet is then installed and sealed to the other header (I guess they are both called headers). The next sheet is kept full length and should be installed to **** up against the first sheet. The same thing applies for the other side. Doing it this way will result in an appreciable gap in the middle. I'd rather deal with a gap in the middle (can more easily work from above or below) and will fill it in with insulation. This also, unintentionally, allows me to have a raised area going down the length of the garage for potential future pulls of wire. Not saying i'll ever use it for that....but I could I guess.

I don't know why some of my pictures show up upside down, but hopefully now having saved them rotated 180 deg shows them "right side up" now.
 

Attachments

  • 20150118_180937.jpg
    20150118_180937.jpg
    139.7 KB · Views: 117
  • insulation dimensions.jpg
    insulation dimensions.jpg
    150.4 KB · Views: 139
  • 20150117_183310 - Copy.jpg
    20150117_183310 - Copy.jpg
    121.7 KB · Views: 103
  • 20150118_180621 - Copy.jpg
    20150118_180621 - Copy.jpg
    135.3 KB · Views: 102
Last edited:

stngfever

Well-known member
Joined
Apr 2, 2013
Messages
89
Location
West Michigan
I went with forced air furnace. Found a brand new 85k unit at repocast for ~$400. Generic no frills unit (perfect for garage/man cave). Lucked out on ductwork via a killer craigslist add (along with insulation, lights, and some electrical components). Only had to buy the plenums.

For Air, I have a friend in the HVAC business that is providing a used split system for CHEAP, installed!

I'm located NE of Grand Rapids.

This PIC was early in the build of my garage. I placed the furnace on "loft" above my air/tool room. More can be found within my build thread in my signature.

furnace6.jpg
 
Last edited:
OP
C

chevyracer5613

Well-known member
Joined
Dec 16, 2014
Messages
149
Location
Brighton, MI
Stngfever - Looks like a nice setup, should give plenty of heat and quickly :). Getting deals can certainly help drive decisions....I know some of mine have been.
 

theoldwizard1

Well-known member
Joined
Feb 22, 2011
Messages
43,072
Location
SE MI
Not sure where in MI you are located, but with a 4:12 pitched roof, I hope they took into account the potentially heavy snow load !
 
OP
C

chevyracer5613

Well-known member
Joined
Dec 16, 2014
Messages
149
Location
Brighton, MI
Wizard, I am pretty positive they did. I don't recall the exact number but I think they accounted for a 20 or 25 PSF live load. I think a 4:12 pitch is pretty common though? Thanks for looking out though!

BTW I live near Chelsea, MI. I got the "kit" from Chelsea Lumber who are pretty well known around here and have supplied lumber for houses/barns and more for many years :)
 

theoldwizard1

Well-known member
Joined
Feb 22, 2011
Messages
43,072
Location
SE MI
Wizard, I am pretty positive they did. I don't recall the exact number but I think they accounted for a 20 or 25 PSF live load. I think a 4:12 pitch is pretty common though?
If you were further north (past Lansing) that would be kind of shallow. A metal roof helps shed the snow quick.

BTW I live near Chelsea, MI. I got the "kit" from Chelsea Lumber who are pretty well known around here and have supplied lumber for houses/barns and more for many years :)

Yep, Chelsea Lumber is known even a lot further east !

So out near the old Chrysler Proving Grounds ?
 
OP
C

chevyracer5613

Well-known member
Joined
Dec 16, 2014
Messages
149
Location
Brighton, MI
Wizard, hopefully it will be alright :). I remember looking at a few online recommendations based on zip code and for this area it seemed to be 20 or 25, I don't recall exactly. It did make it through last winter....so i'll take that as a good sign.

Yup, 15 minute drive to work each day. I work at CPG (Chrysler Proving Grounds) as a Dynamics Engineer.....although during this time of year most of my time is spent out west (headed back in the morning for 18 days).
 

drivesitfar

Well-known member
Joined
Oct 23, 2013
Messages
35,988
Location
Pacific Northwest
CR: care to share the reason why you are building this garage? your name indicates you might race cars and chevys which is sort of funny since you work for Chrysler. i think i saw an old Camaro in one of the pictures, but your layout had about 4 cars in the garage.

what kind of racing do you do and do you build your own cars? please do tell. also if you have any other questions for equipment or tools you might ask and maybe some of us can help or guide you to a good thread.

i'm getting ready to build a couple of these steel tables because i want to learn to weld if for now other reason than just to know how to repair a few things. i'm going to make 2 of them so i can use them like sawhorses if i get a huge project. it won't be as nice as having a 4 x 12 steel table, but i have no way to move a 4 ton table or the room for one now.

keep up the nice work and as far as huge snow like what they had in Buffalo earlier this winter i wonder if you can put some chemical on the roof or rig up a little heat up there if you know a big snow is coming so you don't have 10 or more feet of snow on your roof?

good luck and looks great so far.
 

Attachments

  • 2013-05-13-11-50-42.jpg
    2013-05-13-11-50-42.jpg
    51.3 KB · Views: 119
  • bench2.jpg
    bench2.jpg
    89.8 KB · Views: 132
  • bench1.jpg
    bench1.jpg
    97.1 KB · Views: 163
OP
C

chevyracer5613

Well-known member
Joined
Dec 16, 2014
Messages
149
Location
Brighton, MI
Drive: I am an open book :). I do race and have most of my life. I started when I was about 8 years old and continued into college. College "stole all of the racing money" but I still did some performance driving on the side. I now have a job that I get to do some "performance" driving, and my spare income from that is helping to fund me getting back into racing. I built the garage so that i'd have a place to work on my race cars, street cars and random projects.

My username is amusing based on where I work. I had other usernames in the past (mustangracer was another....) but this one kind of stuck around. I imagine it mostly stuck because I was using it during high school and college, since that is what I raced then (circle track, asphalt, late model). I have raced quite a few different vehicles (chevy, ford, dodge, bmw, gokarts) and driven a wider variety. I like all vehicle and am not partial to any one type....they all have pros and cons. Every vehicle, or really any compilation of decisions, is merely an assumed optimal set of compromises.

BTW that is actually my first car, 1969 Pontiac Firebird. Started life gold, with an inline 6 and a hole in the gas tank. "We" had/built it into what we thought would be a good selection of compromises :). Silver paint, black vinyl top, 400 CI engine, TH350 trans with shift kit, 9" ford rear end with Moser axles, disc brakes, bigger anti-roll bars etc. It was my daily driver for a while, went to car shows (won a few), local drag strip and where ever else. However, during college I had a little engine trouble and needed to save money (fuel and racing) so it wound up sitting for a while, while I tinkered with other projects. That roughly brings us to "today"...I am in the process of revitalizing the car and making it a worthy daily driver again. It is a slow process though, since most of my money is going into the house/barn/other cars and racing.

Well that was a long response on just a small part of your statement :)...might as well continue the trend......

To answer some other questions, I am trying to get back into racing. Circle track or road course (preferred), but its all a matter of finding whats "affordable" or sponsorship (funding). Last year I did a couple of ChumpCar races and will probably try and do a few this year. Trying to decide what racing to get back into seems to be a challenging decision for me, especially having previously lived in Charlotte, NC where there was a lot of competition and opportunity.

I do some fabrication on the side. I actually have a 92 Eclipse GSX that I got bored and built a roll cage for a while back. I can MIG and TIG, although the AC side of my TIG is acting up (going into thermal overload just after staring the arc). I really want a 4' sheet metal brake, shear and then a small shrinker/stretcher. I'd love to get a tubing bender, and a Smithy or similar (mill/drill/lathe). I pondered a simple CNC machine at one point but at the rate RP (rapid prototype) printers are improving, while the price is dropping, i'll probably just wait for one of those.

Welding is fun. MIG is a very easy way to get into it. My view on welding is that it is easy to pick up and be sufficient at with little (but good) direction and a fair amount of practice. Being great at welding takes a lot of time and skill, but most can get "good enough" without too much trouble. That statement is mostly geared towards MIG and steel, but it similarly holds true, IMO, for other forms. Personally I find TIG relaxing and fun, I enjoy having more control as well, but it is quite a bit slower. My first welder (outside of oxy-acetylene torch/welding kit) is/was a 110v Hobart MIG, I still use it to this day and have effectively had no problems with it. I like the portability and it has plenty of amperage to cover most items. If you do get into really heavy (thick) welds, you can always do multiple passes or both sides. For TIG I have a 220V Everlast machine......aside from the AC issue I am having, it seems to work fine but isn't as nice as the Miller Dynasty 200 DX I learned on :).

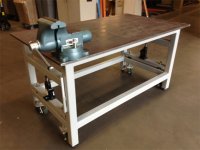
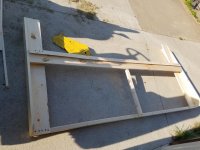
I think your table will be a fun project. A good sturdy and portable table is a great thing to have. Depending on the size (and how you finish), if you didn't want to weld on the main part, you could easily build a slide/fold out small mesh extension for welding. Beneath the mesh you can do a thin sheet of metal to catch sparks/slag.

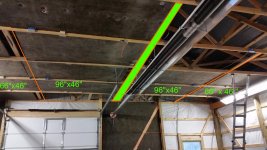
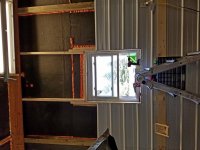
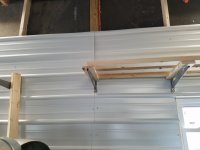
Thanks, I like the snow (but not the cold) but I am glad we don't get that much snow where I am at! If it seems to become an issue, there are a lot of ways to handle the snow. I don't anticipate any issues though. Last winter I don't think I ever saw more than maybe a few inches on the roof, the metal seems "slippery" enough to resist too much build up. I am more concerned with making sure I maintain a low amount of additional dead load to the bottom chord of my trusses, since I found out (after installation) that they were designed only for an additional 5 PSF. Which doesn't seem too atypical, it just means I have to use a liner panel (or something lighter than sheetrock) and be aware of the weight added with insulation.....but I am not concerned really, just aware as a finish the interior :)

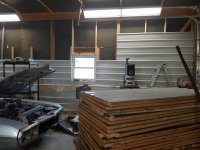
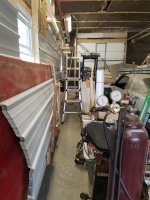
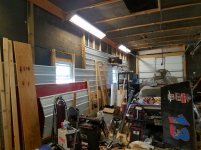
Thanks, I look forward to finishing the insulation, sealing up the heater condensation leak, building/creating/buying some shelving, organizing and installing a lift. I expect the latter part will take 1-2 more years before completion....but then again tax refunds aren't too far around the corner :)

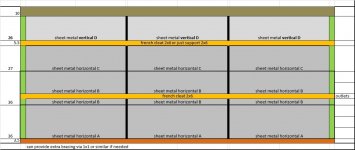
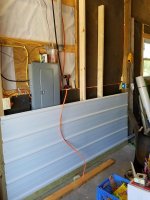
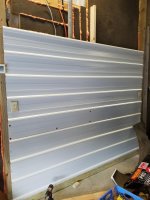
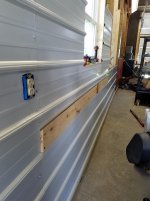
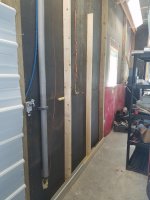
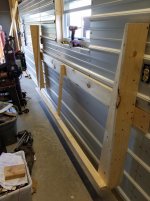
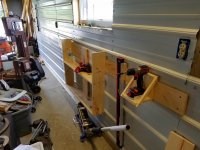
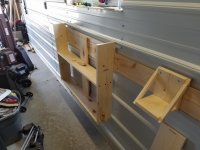
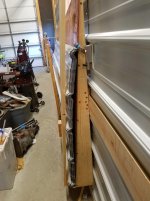
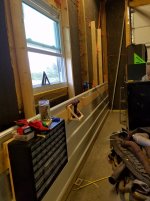
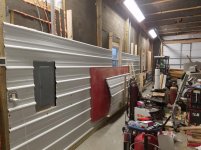
If anyone has opinions suggestions on some of the shelving ideas (page 2), or cabinets/storage ideas, i'd be happy to hear (read) them. Also any detailed installation of sheet metal on the interior would be helpful. I haven't decided how I want to do it yet.....

Lastly, anyone have any experience with the PowerLine adapters? I didn't run Ethernet with my electric and my wifi is sketchy. Although I could just get a better Router, I might opt for running a PowerLine adapter and then a router in the garage. The run from panel to panel is about 90 feet, but from the router (in the current location) is probably another 50'. I live in the country so my internet is overpriced and comparatively slow, so it doesn't have to be fast, just reliable :). I will also eventually do something for music...currently I just use my BT speaker (which does well)...ideas on that are welcomed also.
 
Last edited:

drivesitfar

Well-known member
Joined
Oct 23, 2013
Messages
35,988
Location
Pacific Northwest
CR: great post. i'm sure i'll re read that a few times as i start to weld and thanks for taking the time. if you were to buy a welder and you were starting out seriously to use it for 20 years what one or two systems would you buy and any particular brands better than others?

i'm guessing i just need to find a good source locally for wire and gas?

i like commercial racking and i think i posted a few pictures earlier. here's one of my storage unit and the bottom two shelves have had 3000 pounds on each of them and it's 3/4 pressboard on top of some steel supports about every foot.

i also like Costco's black and yellow top storage crates that are $9 each and hold a lot.

take care and thanks again, D
 
OP
C

chevyracer5613

Well-known member
Joined
Dec 16, 2014
Messages
149
Location
Brighton, MI
Drives: Honestly its budget and personal preference driven. If I had the money and wanted a nice TIG that'd do almost anything I wanted, i'd get a miller dynasty 200dx...great machine. However, I cannot justify that price....I ended up with a AC/DC tig by everlast for ~$1000, DC tig works fine but the AC goes into "thermal" overload almost immediately....so at some point I am going to have to pull it apart and figure out whats wrong (probably a sensor issue). My MIG is a Hobart from Northern tool, they had a sale going on and I wanted to 110 machine that I could move anywhere. I have welded with a few lincolns and I had no issues from them either.

Some machines are even dual voltage (accept 110 and 220) which can be nice. You can also find used stuff in good shape for reasonable prices. Since I am more familiar with Miller i'll talk about them again, they also sell a very simple AC/DC tig for a little over $1000...it only have a few adjustments but welds fine and is more than most hobbyists will ever need.

If you go the TIG route, and you use it frequency, aftermarket torches can be nice. For MIG, my factory hobart gun has lasted me years without issue.

Local supply of gas, wire and metal is great to have. It's one of the main things I miss about Charlotte, NC (where I used to live).

I'll look into costco's stuff. Commercial racks are nice although often bulky. Since I have a "small" space (compared to what I want in it, lol) I am wanting to be as space efficient as possible. Which probably means building something, which I am fine with.

Hopefully my next response wont be so delayed....travelling for business means 11-13 hour days 6-7 days a week. Only another week until I get back home and can finally start working on the garage again. My tax return really makes me want to block out my west wall and extend the garage from 30x48 to ~40x48.......but I don't think I can justify the expense.

BTW I just remembered a site I used to frequent and really liked for welding info:
http://www.weldingtipsandtricks.com/

Take care :)
 

drivesitfar

Well-known member
Joined
Oct 23, 2013
Messages
35,988
Location
Pacific Northwest
CR: I've been checking on all the welding stuff and actually watched my neighbor mig weld from about 6 inches away from the flame so i could see his method on a two inch long weld. My welding tables project is pushing forward, but at a snails pace because i didn't have all the materials and trying to coordinate with my neighbor (the welder) to get it done.

how have you been? anything new or just working to pay for more cool stuff to put in your shop and cars?

cheers
 
OP
C

chevyracer5613

Well-known member
Joined
Dec 16, 2014
Messages
149
Location
Brighton, MI
Hey Drives, that is a good way to learn :). One of the nice things about TIG (instead of MIG) is that it is very easy to see the metal "puddle", you can still see it with MIG but since it is a little faster it seems most people just do it based on experience (how long they spend at a spot and how quickly they move away for a given thickness and machine settings).

This has been one of the busiest travel seasons for me, things are finally slowing down....I think I have been gone about 80 days this year so far, hence progress being slow. To add to that, we had a pipe bust in the house and I have been redoing the floor, but hopefully i'll be getting back to the barn in the next month or so......perhaps even a lift this year or next....but that'll likely come after I figure out shelving/storage.


marsch

Member
Joined
Feb 18, 2015
Messages
22
Location
Gallatin, TN
Great build you have there. I am about to build the same size but with only 1 10ft door and a side entry door. If you dont mind me asking, how much did the building alone cost ya?
 
OP
C

chevyracer5613

Well-known member
Joined
Dec 16, 2014
Messages
149
Location
Brighton, MI
Hey Marsch,

Thanks :). I do not mind at all, going from memory I believe the "kit" was ~ $7500, I paid like $4500 for install. The of course you have the concrete, electrical, natural gas, windows, garage doors (~$700 each), insulation etc., it adds up but I am happy to have mine.........i'll be even more happy once I get the insulation done, shelving up and finally have a clean'ish floor :)
 

drivesitfar

Well-known member
Joined
Oct 23, 2013
Messages
35,988
Location
Pacific Northwest
Chevy: sorry i didn't post sooner to thank you for all the welding advice. i'll probably still have questions so hopefully i can ask some in the future. i'm not sure you know much about big old ford trucks, but i picked up one a couple weeks ago and since I'm not sure what i'm going to do with it I started a thread on it. feel free to click on the link in my sig line and make a few posts sharing your wisdom or asking me if i'm crazy if you wish.

take care and glad to hear the plumbing issues are repaired now because i had a similar issue with a bathroom a few years ago.

have a great weekend
 
OP
C

chevyracer5613

Well-known member
Joined
Dec 16, 2014
Messages
149
Location
Brighton, MI
Wow, it has been about a year since I last posted....or made any real progress on the barn....

Well I have finally started the next portion of my project (installing the wall/framing and still insulating). So I am in a typical struggle, wanting to be frugal, wise and have low labor since I am doing it myself.

My posts are 8' on center, which would make a 4'x8' sheet of 1/2" OSB a bit flimsy in the center, so I am wanting to add some bracing/framing to help support it. I see that many people actually frame a wall 24" OC or run support horizontally on the face of the main posts....this option does not easily work for me since I do not have enough slack in my outlets to account for that kind of spacing off the wall (originally was thinking of doing sheet metal, so I only spaced them out a little....and I hadn't fully considering the support it might need).

So, for me i'd rather not install horizontal support on the face of the posts as i'd have to recess all of my outlets and technically i'd lose come interior volume on a (as always) already limited space....and because my outlets are about 4' off the ground (oops)

That leaves vertical framing, or inset horizontal bracing (commercial/bookshelf girts might have been helpful here). Again since I happened to have installed my outlets about 4' off the ground, horizontal boards would have to be oddly spaced, so I decided to go vertical.

Here is where I am looking for some input from those more experienced. I am considering a 2x4x8' vertically mounted and spaced every 4' (halfway betwe posts) and screwed through 2" of PolyISO into the support (girts?) that the outside sheetmetal is attached to (6" screws that get countersunk as I screw them in, so at least 1/2 engagement). So the screws are in every 4' vertically.

I then have it resting on a pressure treated 5/4"x4"x6". I didn't want the OSB sitting on the ground in case water gets into the garage, so I am using that same 5/4"x4"x8' PT wood along the bottom (would I call that a sill plate?) as a "spacer" to raise the OSB. The screws for all of this are coated/exterior/acq rated. I bought a few 2'x4'x1/2 OSB sheets just to see if it felt like this would be supportive enough....it seems ok.

So, is this a good way, OK, or not so good way to do this? Using this method I could have walls up pretty quick and it'd be easy to avoid all of my windows and wiring chutes that I have (another reason inset horizontal supports would be a pain).

I do plan on have 16" (depth) shelving 8' up, I am thinking of power lagging (screwing) 2x6x8' into the main posts for this (and the new 2x4 supports 4' OC) and running it all the way down the sides of the barn (considering another around 4' off the ground with a 45' deg cut to make it a french cleat, maybe for the top part too).

Opinions?
 

Attachments

  • 20160515_190325.jpg
    20160515_190325.jpg
    144 KB · Views: 85
  • 20160515_185046.jpg
    20160515_185046.jpg
    139.3 KB · Views: 77
  • 20160515_184436.jpg
    20160515_184436.jpg
    138.4 KB · Views: 77
  • 20160515_184034.jpg
    20160515_184034.jpg
    142.9 KB · Views: 72
OP
C

chevyracer5613

Well-known member
Joined
Dec 16, 2014
Messages
149
Location
Brighton, MI
Using excel/paint, here is another way of looking at what I am thinking.

You can also see how I am debating to run the 2x6 across the entire garage to act as part of the wall covering (no overlap) or to put up the OSB and then install the 2x6 only where I want/need it (overlap).

Opinions?
 

Attachments

  • ideas.jpg
    ideas.jpg
    73.8 KB · Views: 54
OP
C

chevyracer5613

Well-known member
Joined
Dec 16, 2014
Messages
149
Location
Brighton, MI
So after another full day of thinking about the pros/cons and upcoming working I have come the the realization that:

For 1/2 plywood, it is recommended no more than 32" span....if I do pretty close to that (instead of 4' OC or 2' OC) I can actually partially box in two of my windows, plus the extra vertical supports are only a positive, outside of the (relatively minor) increase in time/labor/money.

I wish I would have done the commercial/bookshelf girts, or ran 2x4's horizontally every 2' (with outlets planned for that) so that I could easily run sheetmetal vertically. The cost difference between plywood and sheetmetal for the barn is a couple hundred total(after considering paint) and OSB is basically the same as plywood if you assume it'll need an extra coat of paint/primer. Sheetmetal definitely seems like the easiest options with the only downfalls being that you cant just randomly screw stuff into it (although you'd have plenty of support to hang stuff from) and then the potentially painful (since I have not done it) process of trimming out the windows/doors. Honestly if I were more familiar with the last part, i'd probably just go ahead and run the sheet metal horizontally. Which would work reasonably well since I have it spaced off the ground and the outlets line up with the flats/valleys. Also with it horizontal, it'd still be easy to surface mount my french cleats horizontally. The only hassles is that i'd have to rip a sheet at the top, or trim it and rotate it vertically the last ~ 21.5 inches.

So once I get my truck running (new battery) i'll run to the store and start one of these methods, likely plywood for simplicity (hanging stuff, easy trim, easy to rip etc.) but who knows.....stay tuned :)
 
To avoid these ads, REGISTER NOW!
OP
C

chevyracer5613

Well-known member
Joined
Dec 16, 2014
Messages
149
Location
Brighton, MI
So if I decided to do sheet metal, i'd go this route mostly likely....i'd have to try a sheet or two and see if it was stiff enough for my liking.
 

Attachments

  • metalinterior.jpg
    metalinterior.jpg
    101.3 KB · Views: 95
OP
C

chevyracer5613

Well-known member
Joined
Dec 16, 2014
Messages
149
Location
Brighton, MI
Ok so I decided to buy some sheet metal and give it a try...I do like it.

Quick research seems to suggest the trim work really is not that difficult, and not having to paint is a big bonus.

I did setup a quick experiment with 48" OC, 16" OC and 32" OC and although 48" is still actually reasonable, I think I am going to go with ~32" OC spacing

I think I will build up one of the walls completely this way, make sure I am satisfied and then buy a bunch of sheets....likely an inch or two oversized to make sure I have sufficient overlap.

With using metal, now I have to decide for the lower "shelf/cleat"....do I continue with my idea of a 2x6 french cleat, or do a metal cleat, or keep it cleaner and only install what I need? I will still likely install the 2x6 ~ 8' up for shelving regardless.

Opinions?
 

Attachments

  • 20160522_165000.jpg
    20160522_165000.jpg
    140.8 KB · Views: 90
Last edited:
OP
C

chevyracer5613

Well-known member
Joined
Dec 16, 2014
Messages
149
Location
Brighton, MI
So I still need to cut out the area for my electrical box, I think I am going to leave a relatively large area open to make it easy to pull wiring in/out of the box, if needed. I am also going to use red screws around the box where wires could otherwise accidentally get pierced if a really long screw were ever used by someone other than myself.

It does look like i'll need to move my outlets in about 3/8"....when the sheet metal is screwed tight, I have a gap around the outlet....I wonder if they sell a recessed "face" to make life easier?

It is kind of fun holding the sheet up with one hand, trying to make sure everything is lined up (b/c it moves when you do, to check), then hold it while screwing it in.....doable, but easier with another set of hands :)
 

Attachments

  • 20160524_194141.jpg
    20160524_194141.jpg
    138.9 KB · Views: 60
OP
C

chevyracer5613

Well-known member
Joined
Dec 16, 2014
Messages
149
Location
Brighton, MI
I cut out the electrical areas....I might have cut a touch too much around the main panel.....trimming should be interesting. After I cut out the area around the panel, the surrounding areas lost some stiffness (no surprise), so I screwed some extra blocking/bracing/wood in a few strategic spots to make it a bit more rigid.

I think my upcoming plan should work well, 2x4 around the windows to act as a frame which will also put the spacing ~32/36" on center (middle spacing 36, outer 30).

I still have to decide if I want to try and put some kind of gasket/backing around the outlets since they are sticking out a little too much.....I suppose I could take everything down and remove the nails and shift the boxes back too, but...... :)

Looking back, I wish I would have spaced the main panel out a bit more too.....live and learn I guess
 

Attachments

  • 20160525_204932.jpg
    20160525_204932.jpg
    144.7 KB · Views: 88
OP
C

chevyracer5613

Well-known member
Joined
Dec 16, 2014
Messages
149
Location
Brighton, MI
NWOhio, Thanks, I have certainly learned a few things during this build. All things to use towards my next build, if that ever happens :). I am liking the steel too and honestly after you considering painting wood (OSB or plywood) the cost is surprisingly similar. Down side is more difficult to screw stuff in the wall, plus side is I suppose I can just use magnets or find a stud, pro is simplicity, light, ease of install and replacement if ever needed. I am curious to see how much of a pain some of the trim work will be.

I am not familiar with Morenci, but I like Manchester, I almost lived there for a period of time before finding my current place. I used to cross through Manchester quite a bit when I first moved up here, since I was renting a garage/barn in Bridgewater ( a bit of a drive though).


As an FYI to people, I bought a cheaper ($25) HF nibbler, it actually works pretty well, however, it dispense the small and sharp half moon/crescent shaped pieces that easily get stuck in your shoes, on your skin etc.....I have seen other nibblers that ejects little squares, I might want one of those or just a set of better shears.
 
OP
C

chevyracer5613

Well-known member
Joined
Dec 16, 2014
Messages
149
Location
Brighton, MI
So more progress, i'll need to update my drawings as I have modified things a little, but things are progressing. I just ran the numbers to finish the interior (siding and ceiling) and it is a little over $2k :(........speaking of that I ran the numbers the other day for how much I have invested total......yeah I shouldn't have calculated that :p

Ah, I bought a drill attachment shear called a turbo shear as I didn't want to deal with the very sharp shavings from the HF nibbler. For bit cuts it is quite nice....I am supposed to be able to do tight cuts also but I am still using handheld shears for now.

BTW cleats are 1x6 pine from menards, top portion of the cleat is cut down to 2" total (45 deg angle on both side) which fits nicely between the 9" ribs (and allows for east install/removal). I am using treated lumber rated cabinet screws (2 in each support) but I am considering (and left room) for 1 "power lag" also. I am happy with the support spacing I am doing, but now trying some heavy weight on the french cleat (leaning on it) and I very glad I did not do 48" OC and certainly could see a benefit for 24" OC here.
 

Attachments

  • 20160529_171820.jpg
    20160529_171820.jpg
    133.3 KB · Views: 115
  • 20160529_171802.jpg
    20160529_171802.jpg
    134.4 KB · Views: 126
  • 20160529_163929.jpg
    20160529_163929.jpg
    134.3 KB · Views: 92
  • 20160529_160404.jpg
    20160529_160404.jpg
    136.1 KB · Views: 107
  • 20160529_113751.jpg
    20160529_113751.jpg
    138.5 KB · Views: 101
  • 20160529_111118.jpg
    20160529_111118.jpg
    139.3 KB · Views: 97
OP
C

chevyracer5613

Well-known member
Joined
Dec 16, 2014
Messages
149
Location
Brighton, MI
I made a 3' shelf, that will hold at least 260 lbs (I stood on it....) and a 4'x8' sheet metal rack. I suppose if I were more experienced i'd be quicker, but taking the time to make the shelving square and use proper screws/drilling pilot holes etc takes quite a bit of time.....none of it is hard, just time consuming.

Anyhow, whining is over.....I am pretty happy with how much this setup seems to be able to hold. I am probably going to add a few more vertical supports to my sheet metal rack and maybe something to prevent it from falling out accidentally.
 

Attachments

  • 20160530_191125.jpg
    20160530_191125.jpg
    142.1 KB · Views: 92
  • 20160530_185816.jpg
    20160530_185816.jpg
    148.2 KB · Views: 91
  • 20160530_141042.jpg
    20160530_141042.jpg
    142.1 KB · Views: 105
  • 20160530_133751.jpg
    20160530_133751.jpg
    133 KB · Views: 98
  • 20160530_134336.jpg
    20160530_134336.jpg
    136.4 KB · Views: 106

SiGmA_X

Well-known member
Joined
Aug 13, 2005
Messages
1,111
Location
Portland, OR
I really like the French cleats. I need to figure out how to incorporate them into my design! Keep up the posting of your progress, please.
 
OP
C

chevyracer5613

Well-known member
Joined
Dec 16, 2014
Messages
149
Location
Brighton, MI
Sigma, I am glad someone can learn from some of my experience (read mistakes/ trial and error) :). I am quite liking the French cleats also. I am not an experienced woodworker by any means, and I am sure I could research to find the following answers, but the only thing I do not like about the 1x6 pine is that I really do have to pre-dill (pilot hole) and even then if I over torque something, it has a tendency to split, perhaps other type of wood (apparently 3/4 plywood is popular) could be more forgiving.

I was debating between 2x6 or 1x6, from an engineering standpoint the 2x6 spaces the weight slightly more off the wall increase the moment/torque on the wall (through the cleat), but I imagine the extra thickness also helps it better distribute the load of the fasteners. Most of the bending strength in this configuration dictates that a taller board (1x6 instead of 1x4) is better (IH^3 and all), so for my steel which has 9" rib spacing, the 5.5" tall wood and a 2" cleat (both with 45's ripped into them) provide a nice fit and just misses the screws holding the sheet metal (so requires pre-planning). Ok so back to my original bit, the reason I did 1x6 instead of 2x6 is my ribs are 3/4" tall (sticking out), that means I can easily make the face (?....the part attaching to the cleat) engage the ribs to help supportsome of the lateral loading (lateral in the sense of supporting the moment created by having a force and a moment arm). Of course with a 2x6 I could do the same, but i'd need a 3/4" spacer just below the cleat, (which you could just notch a 2x for) which just seemed like a little extra work for potentially minor difference overall. If you look close at my larger shelves, you can see that they engage the cleat and multiple ribs of the sheet metal.

In short, I am quite happy I ran the sheet metal the direction I did, makes it easy to level the cleat, provides support for the structures attached to the cleat, doesn't require extensive painting (just a little touch up from goofs). I'd also recommend no more than 36" OC spacing and I am quite happy with the way I can do my studs, screwing through the rigid foam into the wood behind it (girt?).

Anyhow, I am figuring this stuff out as I go, but feel free to ask questions, I am sure i'll have some more photos as I continue to build this up.

The only other small bit of info, is you might notice (even with the sheet metal rack) I am attempting to keep everything off the floor. Of course the floor would give more support, but cleaning (air hose) could be a little more difficult and i'd have to be concerned/consider treated wood for the bottom portion, plus I think it looks more interesting "hanging".
 
Last edited:

cwarner

New member
Joined
Jun 16, 2016
Messages
1
Location
Michigan
Re: New member, 30x48x12 build in Michigan and some fun with my new thermal camera :)

Where did you buy Your Heater?
 
OP
C

chevyracer5613

Well-known member
Joined
Dec 16, 2014
Messages
149
Location
Brighton, MI
Re: New member, 30x48x12 build in Michigan and some fun with my new thermal camera :)

Al Gillespie, Superior Radiant in Flint, Michigan. I was and am quite happy with my purchase and dealing with him. He answered all of my annoying questions and I think even met up with me on the weekend of after hours one day so I could pick the unit up. Mine is 30' (plus another 12' of exhaust) 2 stage unit. I am quite happy I got the 2 stage unit also, the main stage feels nice when it first kicks on but as things warm up I like the 2nd stage being less intense (for when I am actually moving around). It has been well below freezing in the barn, only partially insulated, with it set to ~50 deg and I was in a T-shirt, very comfortable.

Note that I do plan to setup a fan to help blow some of the heat towards the back of the shop (away from the burner) and to encourage air flow because there is a temperature gradient in the barn (burner side is warmest). However, once I finish insulating things, I am sure the gradient will reduce.
 
Last edited:
OP
C

chevyracer5613

Well-known member
Joined
Dec 16, 2014
Messages
149
Location
Brighton, MI
So I am not sure how most people do the corners....so I am trying something and who knows.....i'll likely change it (like my sheet metal holder).

Speaking for the sheet metal holder, its got like 24 sheets of 3'x8' siding and 4 sheets of 4x10 sheet metal....even though I havent finished the end brace on one side it seems to be holding without concern :)

As a small update, again, the 36" center spacing (30" on either side of that) seems to be working well and without concern.

I am still debating if I want to do a 2' vertical section at the top , or take a full sheet and just cut ~2/3rd's of it off, but that just seems wasteful.....I suppose i'll run the #'s ($) to see if one version pushes me a specific way.

I still haven't fully decided how I want to handle the outlets....I am getting to a point of no return ( I probably should have just taken the first few sheets off and moved them to begin with, although now if someone ever goes back with 1/2 anything at least they'll be spaced right). The 1/2" raised outlet covers work well with minimal modification, however, the fit require a lot more care when cutting out the hole for it.
 

Attachments

  • 20160615_193319.jpg
    20160615_193319.jpg
    141.2 KB · Views: 71
  • 20160616_191842.jpg
    20160616_191842.jpg
    140.9 KB · Views: 77
  • 20160616_191853.jpg
    20160616_191853.jpg
    142.1 KB · Views: 76
  • 20160616_211403.jpg
    20160616_211403.jpg
    145.5 KB · Views: 99
OP
C

chevyracer5613

Well-known member
Joined
Dec 16, 2014
Messages
149
Location
Brighton, MI
Small update.....so I realized I was being a little special in the way I was installing the layers of sheet metal and making it more difficult on myself than I needed. So, lay down the bottom layer of sheet metal first (so bottom corner) that way each of your subsequent sheets are just laid on top.
 

Attachments

  • 20160619_185244.jpg
    20160619_185244.jpg
    142 KB · Views: 74
  • 20160619_154907.jpg
    20160619_154907.jpg
    162.3 KB · Views: 65
  • 20160619_144756.jpg
    20160619_144756.jpg
    141.1 KB · Views: 68
OP
C

chevyracer5613

Well-known member
Joined
Dec 16, 2014
Messages
149
Location
Brighton, MI
Here is a random question for everyone, I replied to a private message but I cannot find it in my sent/outbox. I tried sending another message and it does now show up either......I wonder if I am having a special moment........on that topic if anyone wants to contact me, it is my user with g mail at the end.
 
OP
C

chevyracer5613

Well-known member
Joined
Dec 16, 2014
Messages
149
Location
Brighton, MI
Another minor update....you can see the supports that I am installing (just above the window) for the upcoming shelving.....thinking 16" depth...maybe 18". I know it seems like it might be a little low, but with the way I have the lights angled, I want to keep the shelving low and short to minimize blocked light.....obviously while having it high enough to not feel crowded when walking by.

For the upper shelving, I am thinking about using joist hangers and building a simple frame than will then maybe have a cable/turnbuckle/gusset/brace above (maybe some below) but not into the truss as they were not designed for that....although I am sure it'd be fine if I did :p

So I am still deciding what I want to do for the top portion. There is 20" gap left to the sheet metal.....I could cut two sheets in half and then use J trim to hide the gap....or put something different up there.....or go with rotating it vertical but that has concerns b/c the shortest sheet menards cuts is 24" and my shears would leave the ends turned up a little (which I suppose would get hidden by J-trim.
 

Attachments

  • 13532840_10206535357559207_4849680180190180749_n.jpg
    13532840_10206535357559207_4849680180190180749_n.jpg
    99 KB · Views: 45
Last edited:

drivesitfar

Well-known member
Joined
Oct 23, 2013
Messages
35,988
Location
Pacific Northwest
Chevy: it looks like you have a question or two that isn't getting any response so thought i'd offer an idea. i don't know what to tell you myself because i've never used the metal siding yet, but i've seen a ton of GJ member's threads that have. you might go on one or more of those threads where the member did a nice job that you like and ask him how he did it.

i'd guess your cuts could be shaped a little with even a pair of vise grips and since you weld you can maybe weld a couple pieces of angle iron on the jaws to give it a longer area to flatten your steel if you don't already own that tool. i'd also guess you might not even need to bother if you have trim pieces that might cover the flaws.

good luck
 
OP
C

chevyracer5613

Well-known member
Joined
Dec 16, 2014
Messages
149
Location
Brighton, MI
Hey Drive,

Thanks for the response :). You make a good point about making a tool, I do have some "Wide" vice grips that I could make work.

Most of my thoughts are to try and minimize waste, while getting something done relatively easily and quickly....of course while wanting it to look reasonable also. I tried a few quick searches trying to get some detailed shots of other peoples works, but usually they are too far away to note the details. I probably could search around a bit more though.

Speaking of looking reasonable, I realized as I was laying the bottom sheet that I was extremely close to having a gap between two sheet with the way I was overlapping them. So i'd suggest for anyone doing this method to just plan ahead, bias the sheets one way and do minimal overlap....or order the sheets an inch or two longer and don't even worry about it :). For my 3rd layer, I decided to line the sheets up "better", which meant that they are not perfectly in line with the sheets beneath it....but I don't care so much about it looking flawless as I care about it looking "good" and functioning well, so I am satisfied.

As a random bit, in front of the firebird (picture above this comment) is where I place to put a lift eventually. I did have have thought of maybe putting a engine hoist and a track the 30' width of the garage so that I could potentially pull an engine, move it to my work area, then move it back with ease. Of course this has challenges with the span, preferring to not have a center support and the potential loads.....so I might not do it, or maybe i'll get bored and do the calculations to see what it'd take....but other thoughts are always welcomed :)
 
OP
C

chevyracer5613

Well-known member
Joined
Dec 16, 2014
Messages
149
Location
Brighton, MI
Ok, so I finally figured out how I want to do my shelving. Being undecided I built two different styles......in the end I suppose you can say i'll be doing a hybrid wood/metal setup.

The current pictures do not show the final design but give a good idea.

Basically I built a ladder frame (2x4) shelf (16" depth) and screwed it into my studs that are about 32" On center (actually 30",36",30" every 8'). Then I grabbed the end (because I want it strong enough to support my fluffy self getting on them) and the deflection for a single support was larger than i'd like. If I grabbed at the base (near the wall) it'd support all of my weight, but grabbing at the end was putting too large of a moment(torque) on it (and I do not want vertical supports going into my the bottom chord of the truss because they were not designed for that). Now of course I could put angled support above and or below at each stud, but i'd rather not have that every "32" inches.

So I decided to go to menards and buy some of the "heavy duty" adjustable metal shelf stuff. I cut a 48" section into ~6" sections and powerlagged them into the wall. Then I attached the 16" bracket and gave it the same "pull down" test. This showed to be significantly stronger. So I decided to try and support all of my weight on the end and I noticed the C-channel bracket starting to open up on the bottom.....so I decided to put a small wood block/insert behind it to help distribute the load.......I could have also welded a plate on the back to make it a box instead of a C....but I am wanting "easy and effective". Btw the brackets I am using say they are good for 400 lb a pair, so my weight is testing the limits of a single, but a pair should be solid for the weight I want to put on it.

The it was deciding on the top layer. I bought some 3/4" plywood and gave it a go, but with the spacing I had, I was not fully confident that it'd satisfy my weight requirements (again because of the spacing I had)....with shorter spacing I am sure it'd be great. Also, it kind of blocks off quite a bit of light, because of the way I have my lights hung. Then I thought about the wire shelving for ease and letting light through....but honestly once it gets a little saggy I think it doesn't look great, also the menards ones say they support 400 lb if supported every 16"...which I am not doing b/c of my stud placement, and they are not cheap.

Blah blah blah with testing and evaluating, the result is that I am going to do a few rows of 2x4's for the upper "deck". They are cheap, easy, let light through, with the thickness they are very stiff (comparatively) and I think it doesn't look too bad :)

I will likely end up attaching the end to a 2x4 and then adding an angled brace/gusset to the wall (every 8') to give it a little more support....but I expect this to work out well.
 

Attachments

  • 20160702_194130.jpg
    20160702_194130.jpg
    136.4 KB · Views: 41
  • 20160702_193634.jpg
    20160702_193634.jpg
    145.8 KB · Views: 36
  • 20160702_184523.jpg
    20160702_184523.jpg
    144.5 KB · Views: 35
  • 20160702_173126.jpg
    20160702_173126.jpg
    142.6 KB · Views: 39
Last edited:
OP
C

chevyracer5613

Well-known member
Joined
Dec 16, 2014
Messages
149
Location
Brighton, MI
So first shelf installed with stuff being loaded on it....and yes I did load test it in the middle of the supports with myself, so it seems to be sturdy.

Notes: I plan to brace it every 8' still. I wanted a good landing for the 2x4's where they join, the brackets provide very little, so I cut a 1x4 to broaden that area and distribute some load (slightly). The downfall is that means I have to do it on each support since it raises everything up.

If I add up the cost of the screws, wood, brackets and all it looks like this is costing about $3.35/foot for a 16" shelf....but one that is quite strong based on it being cantilevered.

I do wish someone would make a bracket, to do effectively what I am doing, but with a built in "tee" for the 2x4's to join in (with enough room to place a few screws of course).
 

Attachments

  • 20160704_165948.jpg
    20160704_165948.jpg
    131.3 KB · Views: 48
  • 20160704_170008.jpg
    20160704_170008.jpg
    131 KB · Views: 48
  • 20160704_173505.jpg
    20160704_173505.jpg
    140.4 KB · Views: 53
  • 20160704_170819.jpg
    20160704_170819.jpg
    133.8 KB · Views: 91
  • 20160704_175605.jpg
    20160704_175605.jpg
    145.5 KB · Views: 61
To avoid these ads, REGISTER NOW!
Top Bottom