Smiles79
Well-known member
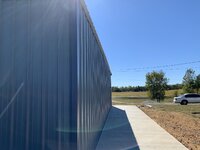
Looking good! How much of a pain in the *** is it to get the sheeting lined up properly and installed?
What did you go with for insulation?
What did you go with for insulation?


Looking good! How much of a pain in the *** is it to get the sheeting lined up properly and installed?
What did you go with for insulation?
") , the neighbors will probably appreciate it.
, the neighbors will probably appreciate it.Never thought of that, but makes perfect sense. I ended up doing the exact opposite (on both walls and roof), but if I ever build another one, I'll definitely keep that in mind.The insulation doesn’t look bad at all. I can’t tell from the pictures of the walls but when you get to the roof work from the door end to the back so you can’t see the laps in the insulation.
Good job so far.
Yep, I have the butyl (sp?) tape and have been using it on the roof laps and under the peak sheets according to their installation manual.The outside closures go under the ridge cap and behind the eave flashing on the walls. Did you get buytal tape for the roof laps and under the rake trim where it screws to the roof?
Yep, these are the crimped sheets and you're right-- they're not very forgiving. I'm installing the roof sheets in pairs (in other words eave to eave) and on the first run, I set the peak sheet over top to verify good fitment. That was at the suggestion of my Mueller rep. I then ran a couple more panels (eave to eave) and installed the peak sheets right way. If I could tell it was getting off a bit off, I adjusted the bottom of the roof panel like you mentioned, but it hasn't taken much; they've aligned pretty darn well for the first third of the roof that I have done so far.Getting it under the eave trim can be tedious especially if it has adhesive on it. You may have to install lap screws through the trim into the ribs to hold it in place.
It sounds like you have the crimped ridge sheets which are a pain. If you are doing one side of the roof at a time do not shrink or stretch the top of the sheets, only the bottom, and keep the top on layout. Start the other side from the same end. Figure out where the ridge sheets should land and snap a line on the first side to keep the ridge sheets straight. It is very easy to get the ridge sheets out of square. Install the ridge sheets as you go so everything stays on layout.
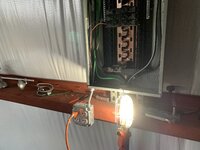
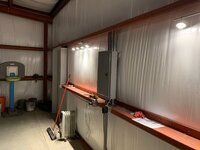
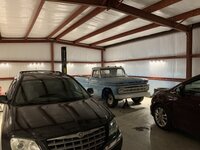
)Man, I'm jealous! What lift did you go with? Apologies if you mentioned it already.Got the lift finished today. Instructions were terrible and they had the chain routed wrong from the factory, the secondary safety locks wouldn't work. So I had to remove a lift cylinder after it was installed which was quite messy, in order to reroute the chain. The other side I figured out how to do it without removing the lift cylinder, but having the lift cylinder there bruised up my hands pretty good working in that tight space. Oh well it's done now and I can put cars in the air. Still don't have electric (probably tackle that in the next month or two), running it off a 240V generator for now.
Seems my math worked out, I can put my tallest vehicle over my head (I'm 6'2) and I still have 1-2' of clearance before I come close to the roof purlins, on a building with 12' eave height. Still a little apprehensive working with 4800lb of vehicle over my head, but I'm sure I'll get used to it
I was a bit uneasy about installing it since my garage door won't be coming in for another 4 weeks, but if somebody wants to steal this thing, they better bring a lot of help. It's not coming down without a fight.
I went with the Derek Weaver W-9KFP. It's their budget model, baseplate style, which doesn't really bother me as I mostly work on FWD vehicles, so the baseplate being in the way of transmission jacks and such really isn't an issue. I'm just a hobbyist and this suits me fine, just needed something to keep my back off the ground, tired of crawling under vehicles. My main criteria (with both lift and building) was lifting high enough that I wouldn't have to duck underneath things, and not run into the ceiling. Worked out fine.Man, I'm jealous! What lift did you go with? Apologies if you mentioned it already.
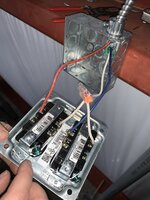
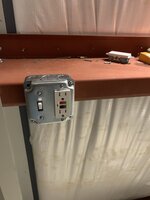
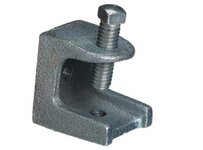
For the EMT, it depends. Anything exposed that I don't want fasteners showing on (like screws or bolts through the steel), or the larger framing members I'll probably use the little C-clamps that a normal conduit clamp attaches to (see photo). Anything way up high or out of view, I'll probably just use EMT clamps attached with self tapping screws or drill and use a through bolt.How are you mounting the conduit to the steel?
Nice, I wasn't sure if it was generally acceptable to drill and tap holes into that stuff.For the EMT, it depends. Anything exposed that I don't want fasteners showing on (like screws or bolts through the steel), or the larger framing members I'll probably use the little C-clamps that a normal conduit clamp attaches to (see photo). Anything way up high or out of view, I'll probably just use EMT clamps attached with self tapping screws or drill and use a through bolt.
It's not terribly different from wood. Don't go hollowing out huge holes in it and you shouldn't have any trouble.Nice, I wasn't sure if it was generally acceptable to drill and tap holes into that stuff.
I've been enjoying the building and space so much I've neglected this thread. In actuality, some of the later stuff I've done I split into different threads covering it, because I had questions.Great build, any updates?