To avoid these ads, REGISTER NOW!

31x58 UK barn conversion

lmb

Well-known member
Joined
Feb 13, 2013
Messages
164
Location
United Kingdom
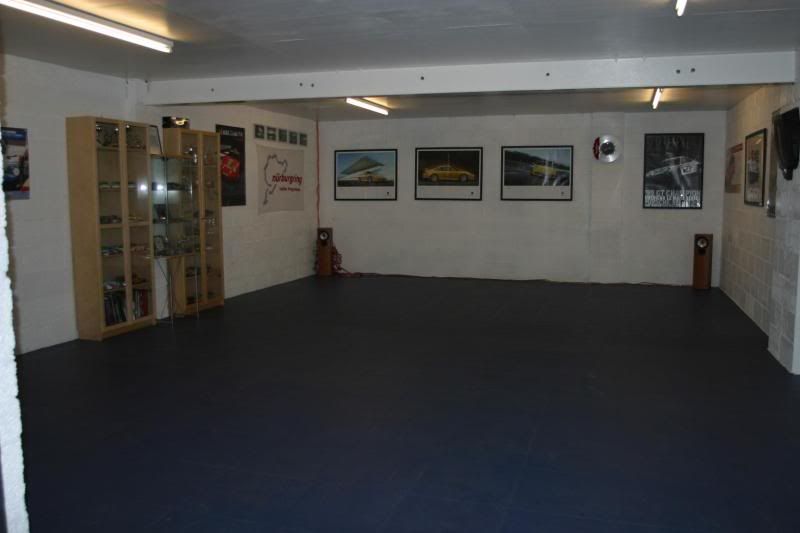
After some great inspiration from this site over the years I thought I should join up and share details of my own garage in case it is useful to anyone else. I see people often name the thread with a measurement, which I presume is in feet, and since my barn measures 9.34m x 17m I think this comes out as 31ft x 58ft.

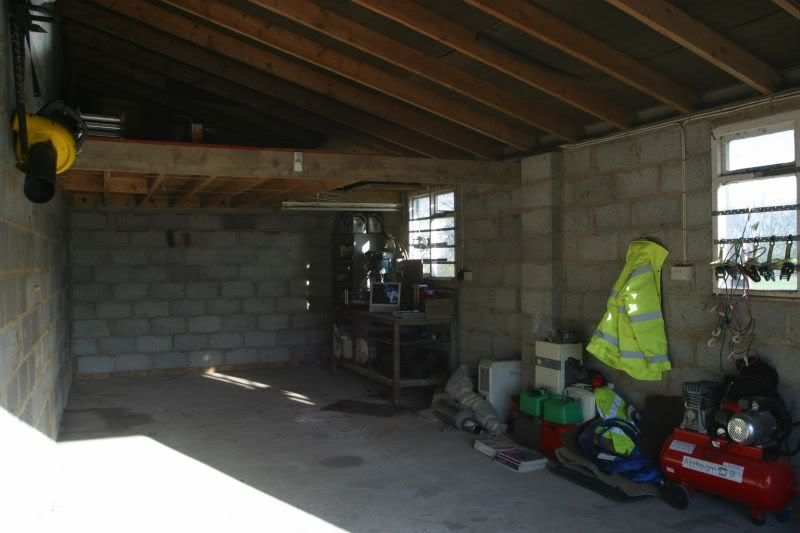
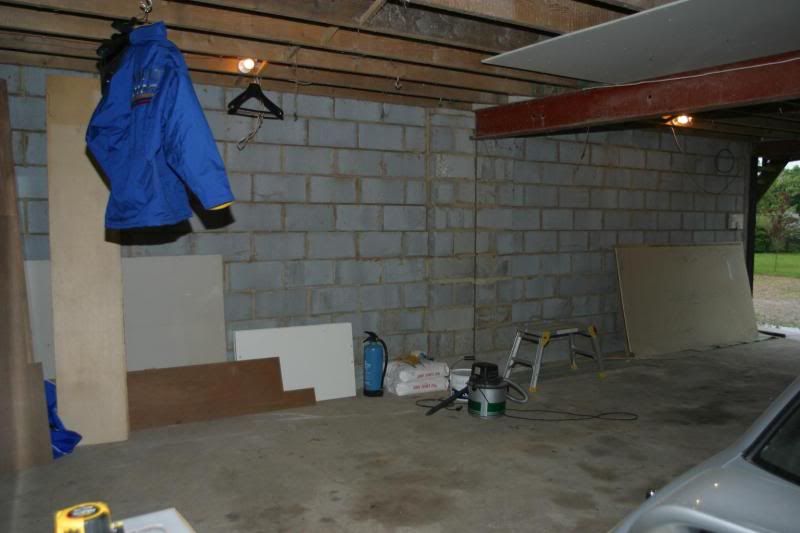
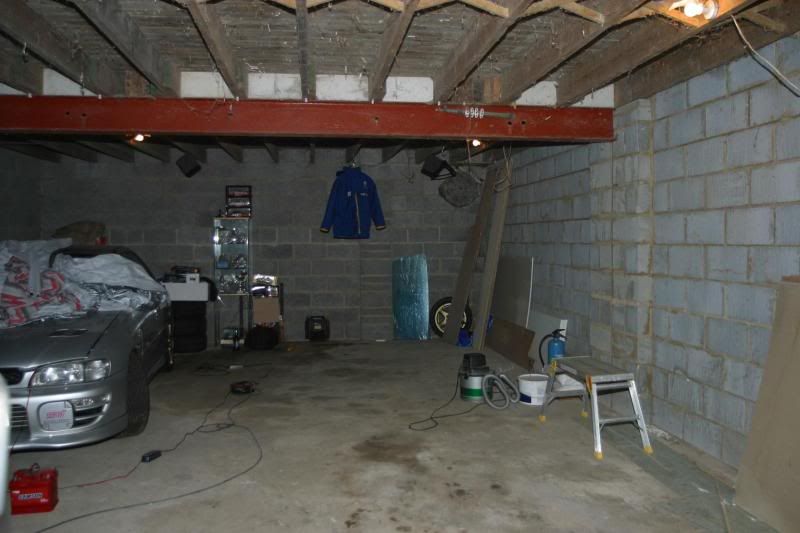
I had a pretty reasonable double garage at the old house but having outgrown it I was on the lookout for something more spacious if we were going to move home. It can be difficult to get planning permission to build from scratch here in the UK, so I was on the lookout for something that was already built, but there rarely seemed to be anything coming up for sale nearby that had any better garage space (even a triple garage is very rare here in the UK). In the end I started looking at farms as perhaps I could convert the exisiting barns and outbuildings to the garage of my dreams. I found and bought a place about 3 years ago that had an old livestock barn that was a great size but would need a fair bit of work to clean it up and turn it into a nice garage space.

This is a plan of the building I started with:

grg_sketch_zps2e7bdce4.jpg


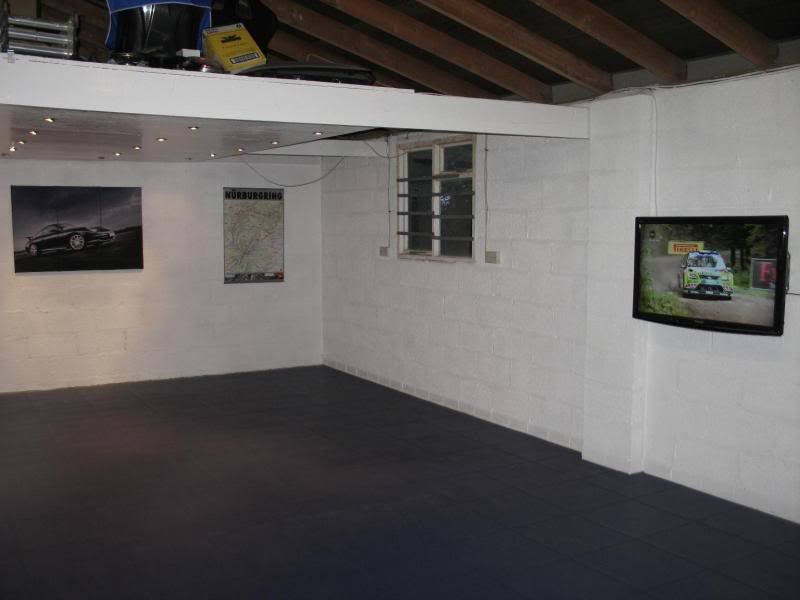
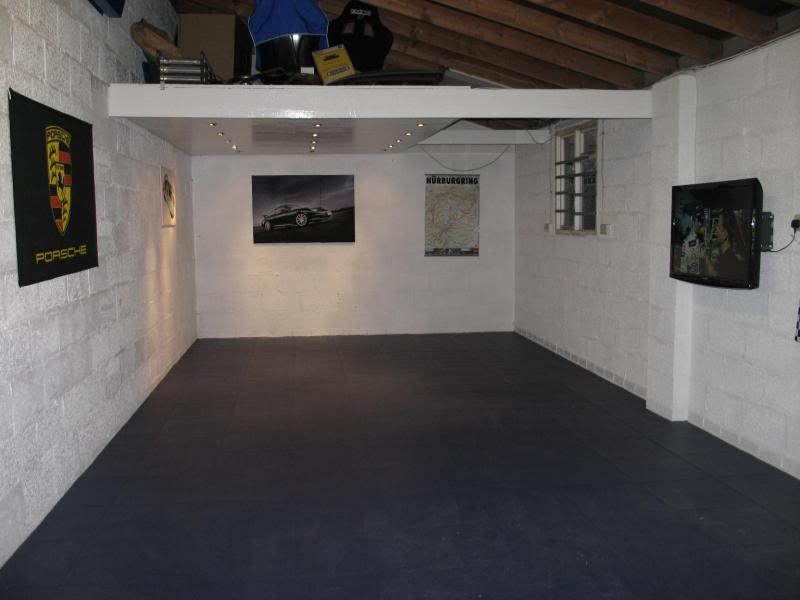
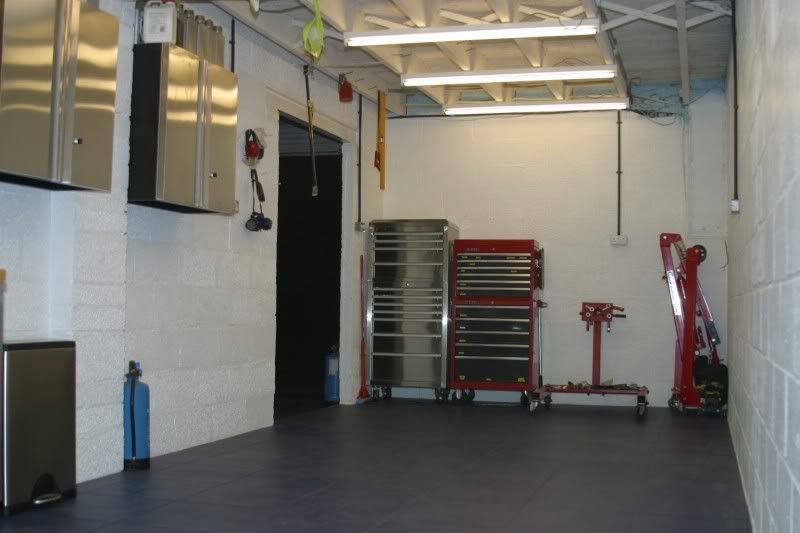
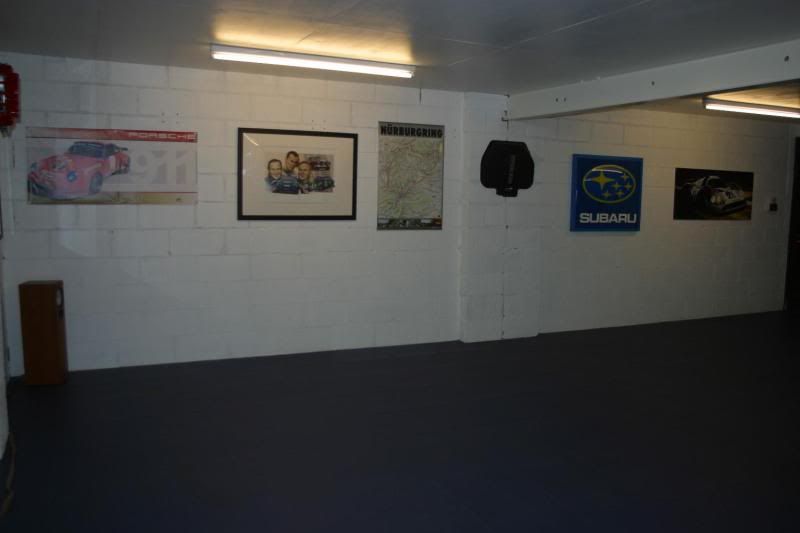
I have some photos of the interior before and after the work I did which I will prepare and post up shortly!
 
To avoid these ads, REGISTER NOW!

SpeedyGee

Well-known member
Joined
Oct 17, 2011
Messages
57
Location
Birmingham, UK
Hi Lmb,

I'm also from the UK and I know exactly what you mean about it being tough to find a large garage space with properties in the UK.

Really looking forward to seeing more of your garage
 

Grizz1963

Well-known member
Joined
Jan 7, 2010
Messages
11,967
Location
Rochester, KENT. UK
Welcome to the board, although it seems you have been here a while.

We are in Rochester, Kent and if you look at my thread on here, you will see that we got very lucky (paid a steep price for the house) when we got a 30x30 foot garage and a decent house.

I am planning on adding a carport to the front of the garage with tilting front fascade, and creating an old petrol forecourt type feel...... using Kiwi Kevs place as inspiration.

I have my own ideas too, but I love his frontage.

Looking forward to seeing what you post up.

Remember, we all love detail (well, most of us) and explanations of how and why you do stuff., so post away.
 

GBsnoopy

Well-known member
Joined
Sep 16, 2012
Messages
161
Location
Durham, U.K.
Know exactly what you mean. I don't think i have seen many triple garages in the UK.
Land, plot size, and planning sadly are the main restrictions.

I'm looking forward to reading your thread updates to see how it progresses.
 
Last edited:
OP
L

lmb

Well-known member
Joined
Feb 13, 2013
Messages
164
Location
United Kingdom
Aaargh. I just composed a long update and when I went to post it it said I had been logged out. I guess I spent too long doing it?!?! I'll have another go doing it in smaller bits once I have put the kids to bed and got over my frustration ;-)
 
OP
L

lmb

Well-known member
Joined
Feb 13, 2013
Messages
164
Location
United Kingdom
Remember, we all love detail (well, most of us) and explanations of how and why you do stuff., so post away.

Thanks Grizz. I've read your thread and know I won't get close to the detail you have put and all the great projects you have done but I'll do my best to fill you in on my conversion.

It was lucky I wasn't using one of those property search engine things as having at least a double garage would have been a 'must have' for me, along with space to add something else perhaps, so in the end it was a bit of a surprise to be buying somewhere that didn't have an official 'garage' at all, although I knew I could make the barn work for me with a bit of effort.

Since it was a farm it meant moving somewhere a bit more rural but I can still get the 5 miles to the station on my pushbike in about 15 mins so it hasn't added too much time to my commute. Although it isn't much fun riding both ways in the pitch black dark this time of year and having the cold, wind, wet and ice to contend with, but I do quite enjoy it the rest of the year and it keeps me fit :)
 
OP
L

lmb

Well-known member
Joined
Feb 13, 2013
Messages
164
Location
United Kingdom
To give you a bit of background on the barn... There are three stables on the left (of the plan above). I don't intend to keep any horses so will post up pictures at some future point to see if anyone has any good ideas of how best to make best use out of it. I could just knock it all into one and brick up the sides to create another garage area fairly easily I suppose. At the moment our chicken lives in one of the stables and the others are used to store the mowers, etc.

In the middle of the barn is an area about 7m x 9m. To the right of that there is a section 9m long and maybe 4m wide that is accessed via a gap in the wall to a similar-sized area on the far right. This is the area on the plan that has the garage door and is the only part that has any natural light as there are two windows along the wall of that section.

There is also an upstairs to the barn. That measures about 9m x 9m, and one corner is closed off as an office space. I just keep some paperwork up there and also my old hi-fi which allows me to play some music onto the speakers in the garage below. The rest of the space is currently just full of junk, old car magazines, etc. and also a 8x4 chipboard 'table' which we put my old childhood trainset on as it was somewhere to put it up again after all those years in my parents' loft, but it doesn't seem to work anymore and not high on my list of priorities to sort it at the moment! I decided to tackle each 'section' of the conversion in turn to give me some sort of light at the end of the tunnel...
 
OP
L

lmb

Well-known member
Joined
Feb 13, 2013
Messages
164
Location
United Kingdom
OK, time for some photos then... I started my project with the section on the far right. It looked like this when I started, after I had given it a clean and a brush out and started putting some of my stuff in it:

wshop_pre1.jpg


I liked the idea of the mezzanine level as it would allow me to store all my car spare parts out of the way and not use valuable floorspace. However, I wasn't so keen on keeping the steps that went up there as this caused an obstruction quite near the garage door opening so I decided that I would remove them and install a loft ladder that I could just flip down when I wanted.

garage.jpg


The underneath of the mezzanine I boarded over with sheets of plywood. I was planning on putting strip lights throughout so thought I'd try something different on this section, since it was lower height anyway, and put in a few rows of low voltage halogen downlighters:

grg3.jpg


After that it was just a case of splashing some white gloss on all the woodwork and white paint on all the walls (which took many hours due to having to work the paint into all the rough blockwork) but it left the place looking much brighter. I put some UPVC floor tiles down too to give me a nice floor to lay on when working on the cars and also keep all the concrete dust sealed in. Finally I bought a few flags and canvas prints on Ebay and after stapling them to a few wooden frames I had made it ended up looking like this:

grg2.jpg


grg1.jpg
 
OP
L

lmb

Well-known member
Joined
Feb 13, 2013
Messages
164
Location
United Kingdom
Is that the car that will call the garage home? :)

Ha ha. No dubber, maybe one day! That was just a car I found set up in the Sketchup 3D library that I thought would give it some scale. The person standing in front of the barn is no relation to me either :)
 
OP
L

lmb

Well-known member
Joined
Feb 13, 2013
Messages
164
Location
United Kingdom
After that section was complete I moved on to the bit next door and did more of the same. Before the purchase was completed I had agreed with the previous owner that I could use the barn to start moving early (our solicitor was not impressed with this arrangement when she found out!) so it had become a dumping ground for all the stuff from my old garage so that I could start emptying our old house into the then-cleared double garage there in readiness for the move date:

wshop_pre2.jpg


There was no direct natural light reaching this area so I put in a striplight every metre or so (8 in total) and with more UPVC flooring laid, the open joists boarded over (more done since the picture was taken) and all the walls painted white again it had been transformed to this:

wshop2.jpg


I bought the cabinets some years before when I saw them in Costco one day and then went to another store nearby to buy up all the others that that they had. There were too many to use in my old double garage but I just kept them in storage thinking that one day I would be grateful for having a matching set. For about 50 pounds for each of the 5 stainless steel lockable wall-mounted storage cupboards and not much more for the 3 work units on castors these seemed a bargain compared to using kitchen units or the specialised garage units from Dura or the like.

Looking from the other end of the section you can also see my two tool cabinets, which were also purchases from Costco over the years (but unfortunately not matching):

wshop1.jpg
 

EMC2

Well-known member
Joined
Nov 25, 2012
Messages
229
Location
Georgia
Great transformations. I love the stainless steel cabinets and the down lights. Very classy.
 

dubber

Well-known member
Joined
Dec 31, 2012
Messages
5,326
Location
Canada's Capital
Wow, great job, love the cabinets as well. Looks like the Porsche in your model wasn't a mistake, i see several memorabilia items. Keep up the amazing job!
 

Bib Overalls

Well-known member
Joined
Dec 4, 2006
Messages
3,318
Location
Jonesboro, Arkansas
That is quite a transformation. Will that I-beam support a trolley and chain hoist? I would most likely take the stalls down. Is that area of the building also masonry with a concrete floor?
 
To avoid these ads, REGISTER NOW!

Grizz1963

Well-known member
Joined
Jan 7, 2010
Messages
11,967
Location
Rochester, KENT. UK
Looooking gooood !!


Considering its the UK you are building an awesome place.

You have a lot of space there.

We live 3 miles from our nearest tiny village and 7 miles from town where Tesco and Morrissons are but the compromise of rural liveng outweighs all of that. And the schoolbus stops outside our house to take Tom the 10 miles to school.

Look forward to your further updates.

Are you on www.retrorides.proboards.com at all?
 
OP
L

lmb

Well-known member
Joined
Feb 13, 2013
Messages
164
Location
United Kingdom
The main space in the centre of the barn was next on my list. It started out like this:

grg019.jpg


grg018.jpg


Having left a car in there for a year or so I concluded that the woodworm I could see in some of the beams must still be active as the car was absolutely covered in fine wood dust. There wasn't any point putting the ceiling in whilst that was still an issue so I spent many hours in the evenings brushing in a woodworm killer liquid. Hopefully it has done the trick and killed them all off.

You are probably getting a bit bored of this by now as it's just the same format that I used on the other sections - paint the walls white and put some more of the tiles down:

grg022.jpg


I bought a few bits on Ebay to put up on the walls and make it a bit more interesting. The vinyl banners seem very good as no matter how damp the garage gets I know they will stay in good condition - I'm a bit more worried about the paper posters, but I have mounted those behind glass so hopefully that will give them some protection and stop them going crinkly.

grg021.jpg


After the workshop was ready I at least had somewhere nice and light to work to cut the plywood I was using the construct the ceiling. In the end it took 24 sheets of 8x4 plywood to cover it all. This took me several months to complete as I think the barn isn't quite square and so each piece needed cutting to unique shape. By the end I was getting quite good at managing to support them with Acrow props to get them up onto the ceiling and aligned before I screwed them to the joists. I added some glass fibre loft insulation into all the voids whilst I was at it, which was a bit tricky when working below, but I held it all up in place with masking tape before quickly putting in the sheet below it.

My brother was throwing out some Ikea bookcases so I popped round with my trailer to save him smashing them up to take to the dump as I thought I could probably use them somewhere. Luckily Ikea seem to keep the same designs they have used for many years so I was able to buy the glass doors for them which then gave me somewhere to keep the dust off my old trophies and model cars I had collected that the wife probably didn't want anywhere on display in the house:

grg023.jpg
 

K2sno311

Well-known member
Joined
Jul 12, 2012
Messages
62
Location
Southern CT
Wow, paint makes so much of a difference on block walls and old beams!!

Great transformation of the place here, can't wait to see some pics of the project cars next :)
 

Grizz1963

Well-known member
Joined
Jan 7, 2010
Messages
11,967
Location
Rochester, KENT. UK
Where in the UK are you ?

I am glad you insulated while you were at it, makes life a lot easier in winter.

Also what sort of tiles are you using on the floor, and how did you stick them down ?

I want to paint the inside of my garage white as well, and even though it is kinda settled now, I am planning on fitting a log burner, paneling the one garage door and fitting just a single garage door there, and then moving some tools about, but the white paint makes a huge difference, I did that at my old place, and also painted the roof beams and fibre cement sheets white.

Loving your build.
 

155'Ringman

Well-known member
Joined
Dec 10, 2012
Messages
103
Location
N.Ireland
That looks great, very tidy!
Are the tiles glued down? Just wondering how good they would be with tyres potentially sticking to them.. Doing an extension of my own this year and looking for ideas as that looks very smart. :D
 
OP
L

lmb

Well-known member
Joined
Feb 13, 2013
Messages
164
Location
United Kingdom
Also what sort of tiles are you using on the floor, and how did you stick them down ?

Are the tiles glued down? Just wondering how good they would be with tyres potentially sticking to them..

The tiles are UPVC from a place called Ecotile. I've got a picture of the edges of the tiles for you so you can see how they work:

DSCF1385.jpg


The one on the top is turned over so you can see the interlocking mechanism. So basically you just clip them all together, giving them a tap with a rubber mallet, so no gluing required. You could even take them all up again to move to a different garage when you move! They are pretty heavy (a pile of 10 tiles or so is all I'd want to shift around in one go when I needed to move them from where they were delivered to the garage) so once they are all linked together they don't move around at all and stay in place exactly without them having to be 'fixed' in any way.

Once they are clipped together the interlocking part is hidden under the tile so you just see a clean straight edge. They don't seem to suffer at all from tyres sticking to them. They did warn me that the lighter colours can actually transfer the blackness out of the tyre and into the tile, which is why I went for the darker blue tile as they said that this was less prone to happen with that colour. I do have a couple of areas where I can see a feint black tyre tread pattern in the tile but I'm guessing that must have been when I parked the car there with hot tyres perhaps after a blast as there are certainly other parts where the car has been left parked in one spot for many months and when I have moved it there is no sign of any discolouration anywhere, so it seems somewhat random as to why it has happened in a couple of spots. It's not very visible though.

They are easy to mop over once a year or so to get any dust/dirt out of the garage. It's also great for any spillages/leaks as it is easy to mop up the liquids with no sign of staining afterwards. Also I have left cars on axle stands in the same spot for many months and although when you remove the stands you can see a 'dent' in the floor this only remains for a number of days and then the tile 'springs' back to its original shape without any sign of damage/wear. If you drop a tool or anything it doesn't get damaged like it might if you dropped it straight onto a concrete floor. Also it is very easy to find that odd screw/nut you might drop when working on the car as it stands out against the texture of the tiles easily. They feel quite 'warm' to lie on when working under the car too. I'm very happy with them.
 

GBsnoopy

Well-known member
Joined
Sep 16, 2012
Messages
161
Location
Durham, U.K.
I agree, I got lots of samples from tile companies and the ecotile seemed the best quality.
I think I will go with the 500/6 in gray and black raised disc in a checkered pattern for my double attached garage and if I'm happy will go for the heavier duty 500/7 in a dark gray for the new detached garage I'm planning to build.
The tiles are not a cheap option though..
 
Last edited:

CNGsaves

Well-known member
Joined
Sep 26, 2012
Messages
13,233
Location
KS and OK
Great transformation on the barn sections to become garage.

Curious whether you have any heat or A/C is the sections since it looks like you insulated and sheetrocked the ceiling??

Also, what are upper sections of barn used for, if any? Any pics of whole barn to see what all space you are using?
 
Last edited:
OP
L

lmb

Well-known member
Joined
Feb 13, 2013
Messages
164
Location
United Kingdom
is it a Clio 16V that i see in your first picture ?
nice job whatever !

Oui! I have had that car over 15 years now! I used to run it in sprints and hillclimbs and then completely rebuilt it and turned it into a track car. It is much lighter than standard (fibreglass panels and stripped inside) and has a tuned individual throttle bodied 2-litre engine from the Williams in it - stats are about 800kg and 200bhp. I also have a Clio Williams, which I have left as standard as it is one of the original 400 made and sold in the UK, of which only about 100 are left today.
 
OP
L

lmb

Well-known member
Joined
Feb 13, 2013
Messages
164
Location
United Kingdom
OK, time to try and catch up with some of the questions that have been asked... I don't have a camera phone so I'm afraid it takes me a while to get photos off the camera, onto the PC and then to upload them, but I'll try to get there in the end!

Will that I-beam support a trolley and chain hoist? I would most likely take the stalls down. Is that area of the building also masonry with a concrete floor?

I guess it probably would, although perhaps I should check with a structural engineer! I do have an engine crane already but I guess it could be useful to hoist something from the beam one day.

When you say 'take the stalls down' do you mean demolish the whole section, or just the internal dividing walls? The stalls area is masonry to about 5 feet high and has a concrete floor, yes. This is the stalls area currently:

stalls1_zps8f7cf06e.jpg
 
OP
L

lmb

Well-known member
Joined
Feb 13, 2013
Messages
164
Location
United Kingdom
Where in the UK are you ?

I'm just over the other side of the river from you, in Essex ;)

Curious whether you have any heat or A/C is the sections since it looks like you insulated and sheetrocked the ceiling??

I don't ever think we'd need A/C here! As for the heat I don't have anything built in but do have this space heater:

heat_zpse8091560.jpg


I haven't used it much but it is nice to have something for emergencies. You never know when you are going to get an urgent project (a car breakdown was the case last year) that needs doing in sub-zero temperatures and it is nice to have a way of adding a little bit of heat to make things bearable then, but generally I am fine in there at anything over about 5 degrees C so find that I don't use it much.

I had to put the sheets up (is that what you mean by sheetrock? The sheets are just 8x4 4mm exterior ply which I cut to fit and painted white) as there were lots of gaps in the wooden floor above so all the muck from the upstairs was raining down and landing on the cars, so I wanted to 'seal' it as best I could. The idea of insulating the ceiling was that by the time I had lifted all the sheets into place I didn't want to have to take them down again in the future, so for the minimal cost of the fibreglass rolls it seemed worth sticking it in all the voids whilst I was at it. I thought it might also cut down the spread of any woodworm that survived. Finally, since the upstairs can be used I thought that if it cut down noise travelling from upstairs to downstairs then that too could be useful. If I was doing it more seriously with heating in the downstairs section then I think I would have gone for something like Celotex to get a better heat insulation. This would have cost more but probably been easier to install as getting the 'wool' to stay up in the void whilst I screwed the sheet in from below was a tricky and messy job (you get covered in all the fibreglass dust)!

Also, what are upper sections of barn used for, if any? Any pics of whole barn to see what all space you are using?

At the moment, not used for much at all. I have quite an extensive collection of car magazines going back many years, which you can see a stack of against the back wall of the workshop in one of the 'before' photos I posted earlier. There is also an 'office' section in the corner with some desks and cupboards. And a train set mounted to an 8x4 board. Other than that a load of junk that we don't bother storing in the house, like the children's old cot, some suitcases, etc. Nothing very exciting at the moment. I did consider putting up a projector or something to use it as an AV space but the fact it's not heated made me think it probably wasn't worth the bother until perhaps the kids are older and would use it with me.

Here's a pic of the whole barn that you requested to get a better feel for the space I am working with:

shop1_zps2ca3d347.jpg
 

CNGsaves

Well-known member
Joined
Sep 26, 2012
Messages
13,233
Location
KS and OK
Awesome big barn you've got there !! The picture with the snow and looks like maybe a small "Christmas tree" in front is way cool . . . love it!!

Having all that storage space on mezzanie level is terrific. My grandparents had smaller version of your barn and storing all lumber up there was great dry place for extra lumber. Rarely had to go to lumberyard for small projects, just open up top of barn and get what you needed.

I'd make that last picture of the whole barn with snow as your avatar!!
 
OP
L

lmb

Well-known member
Joined
Feb 13, 2013
Messages
164
Location
United Kingdom
The picture with the snow and looks like maybe a small "Christmas tree" in front is way cool . . . love it!!

That photo was probably taken a couple of years ago as I have changed the door since then. Either the Christmas tree was delivered and waiting to go in the house or had served its Christmas in the house and was moved outside ready for planting to try to get it to live on (it's never worked to date, but I keep trying!). I agree it looks quite twee though!

I'd make that last picture of the whole barn with snow as your avatar!!

Not a bad idea - I'll have to look into how I would do that. I guess I need to use a more recent pic instead though. I think I took some new ones in the snow we had the other week.
 
OP
L

lmb

Well-known member
Joined
Feb 13, 2013
Messages
164
Location
United Kingdom
Looks very nice, need to look into that ecotile product for mine but I have 30sq m to cover....

Ask them if they will do a bulk discount if you are buying a decent amount of it. I seem to recall that I managed to get some money off mine for volume, but it was about 200 sq m that I ordered.
 
OP
L

lmb

Well-known member
Joined
Feb 13, 2013
Messages
164
Location
United Kingdom
Following on from the 'Garages At Night' thread posting:

Awesome signs. Do you still have them set-up at your new place? Or did you get rid of them and the STI's :)

This is where they are now dubber. The small one is just up on the wall in the main 'square' area (non-close up pics already seen earlier in the thread):

subsign2_zps1825eb3f.jpg


I presume it is an ex-dealership sign. I bought it on Ebay and then constructed the wooden frame around it (the outside of the aluminium sheet was obviously mounted within something previously and was a bit beaten up) and then painted it with some paint I had left over from the front door (hence why the blues don't match at all, but I don't think it looks too bad - better than bare pine anyway).

The larger one was again found on Ebay. Only £30 but it was too big to get delivered and I had to drive quite a long way to get it. Also it was too large to fit inside my Clio (even though it splits in half) so I had to drive all the way home with the trunk open (quite noisy on a hatchback!). This is now mounted above the entrance from the garage area into the workshop:

subsign1_zpsc854e589.jpg


I'm afraid that neither of them light up anymore like they did at my old house :sad: 
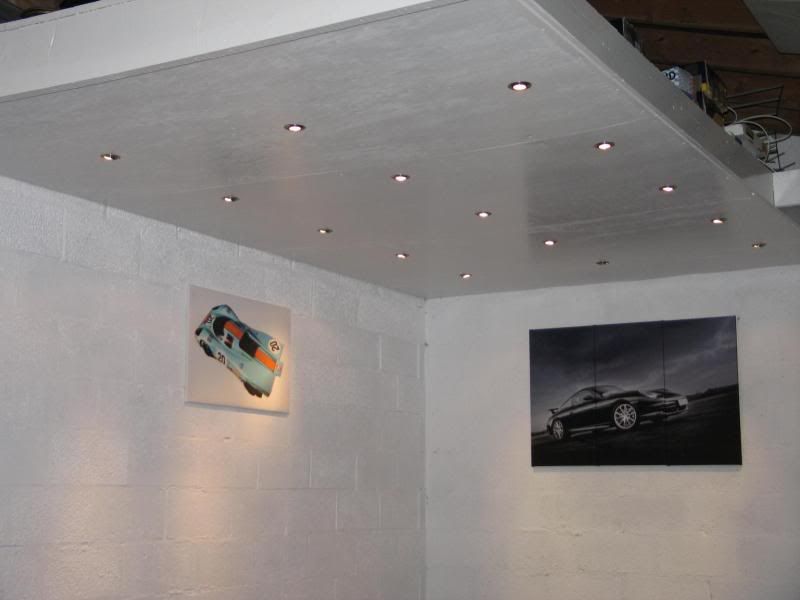
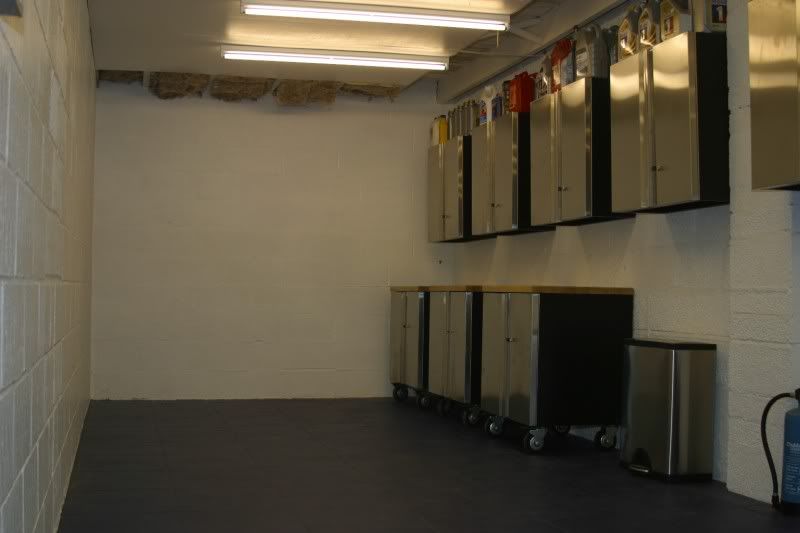
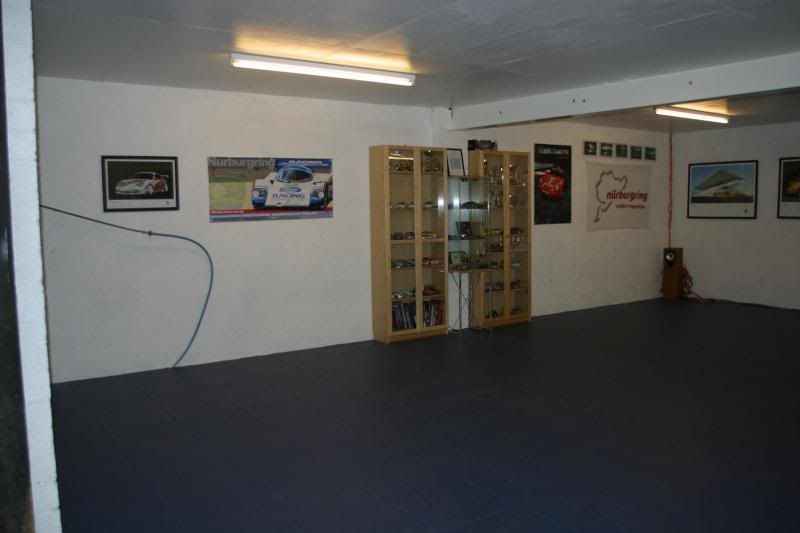
I re-used the strip lights that were inside them to light up other areas in the garage and also mounting the large one up there was tricky enough (needed a scaffold tower) without putting the electrics in. There are always so many other jobs that I need to get done, but I agree they do look pretty great when lit up so maybe one day I'll get back to them and sort it.
 
To avoid these ads, REGISTER NOW!
Top Bottom