To avoid these ads, REGISTER NOW!

32'x48 attached Garage Build

Sweet SVT

Member
Joined
Dec 6, 2010
Messages
24
Location
New Brunswick, Canada
Well as you'll see below, Im knee deep in the middle of a garage build and am really excited to get it finished. It took a while to get things going but once they did, its went along quite fast so far. As of right now it has the roof completely finished and is tied into the house. We finished it in the dark last wenesday night and I dont get home from work until after dark. I will update with new pics as often as I can.

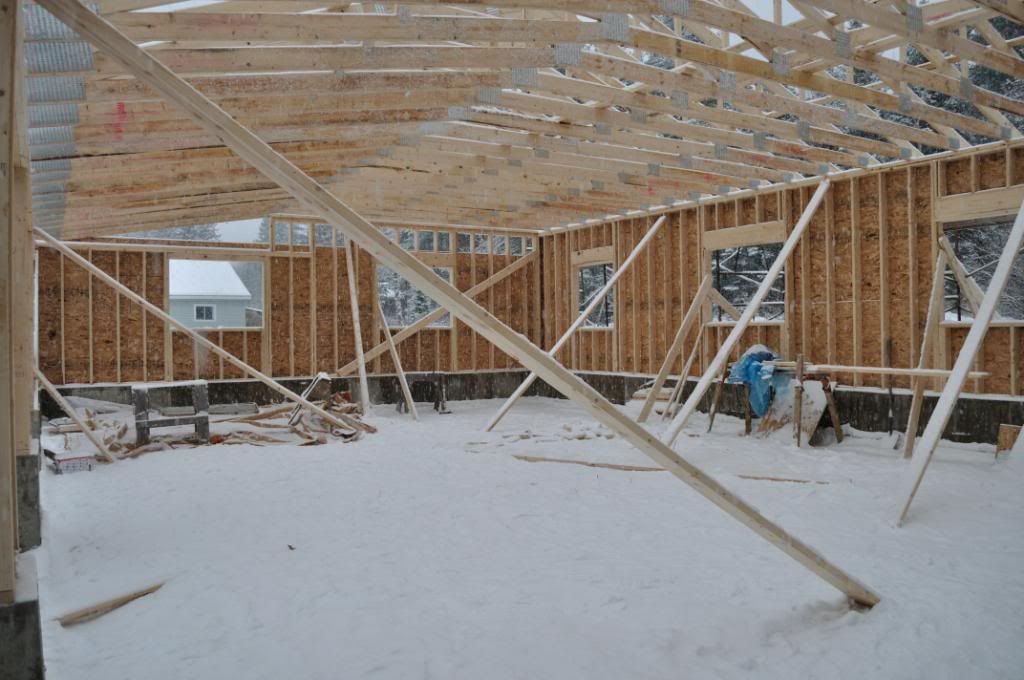
The garage has a 6 foot deep by 8 inch wide frost wall foundation, six feet is a bit of overkill I know, but I had to make it six feet at the rear because of the elevation change on my lot from front to back so I figured I might as well make it that height the whole way around. The overall dimensions of the garage are 32' deep by 48' wide, and will feature 3 bays (Doors are 9'x8') with a 12' ceiling for the back 20', the front wall is a little shorter so the cieling drops 2' in the front 12'. (You will be able to see what Im talking about in the pics).

The area you see open closest to the house will be a "Mud room" and it will take 10' out of the front of the garage (had to give the wife a little...lol), and will be 12' deep and sunk in to the front wall 1.5' just to break up the long front wall and give it a bit more character. The furthest bay from the house will feature a 2 post hoist.

The floor won't be done until things warm up in the spring, I don't want to risk it freezing before it cures properly. I could try and heat it after its poured, but I'll just be patient until spring. Speaking of the froor, it will feature radiant in-floor heat with glycol being pumped through a series of zones on a closed loop system. I havn't picked my heat source yet but I do have almost a year to make up my mind. I may even go with a ground source heat pump for my whole house and garage?

On with the pics you say???

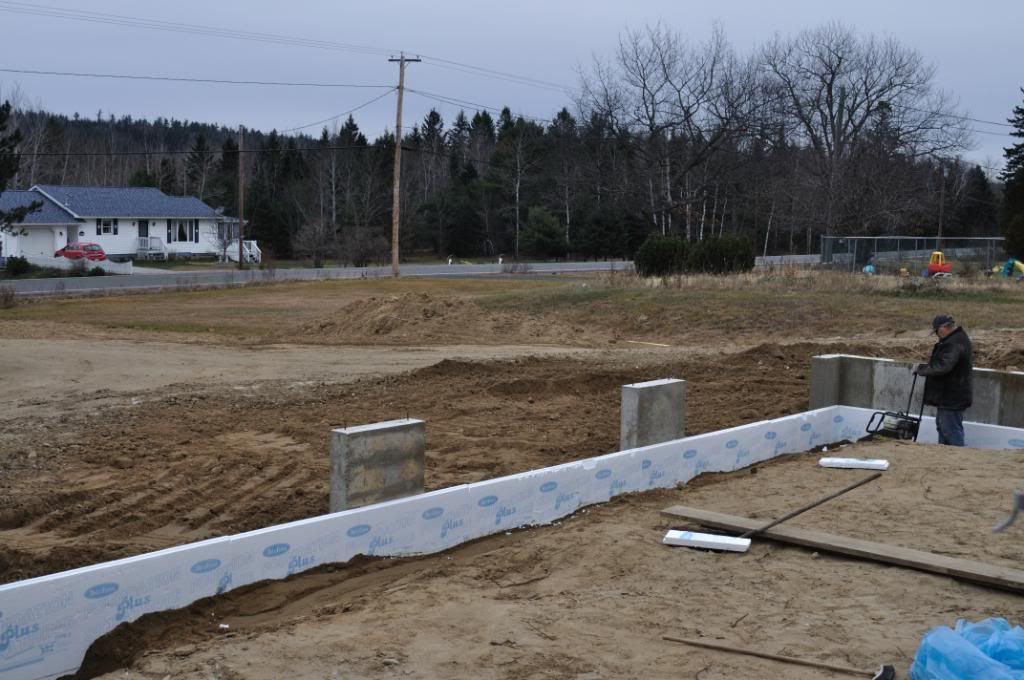
I was in such a hurry I only really got a couple of pics of the foundation before it was backfilled.
DSC_0476_015.jpg


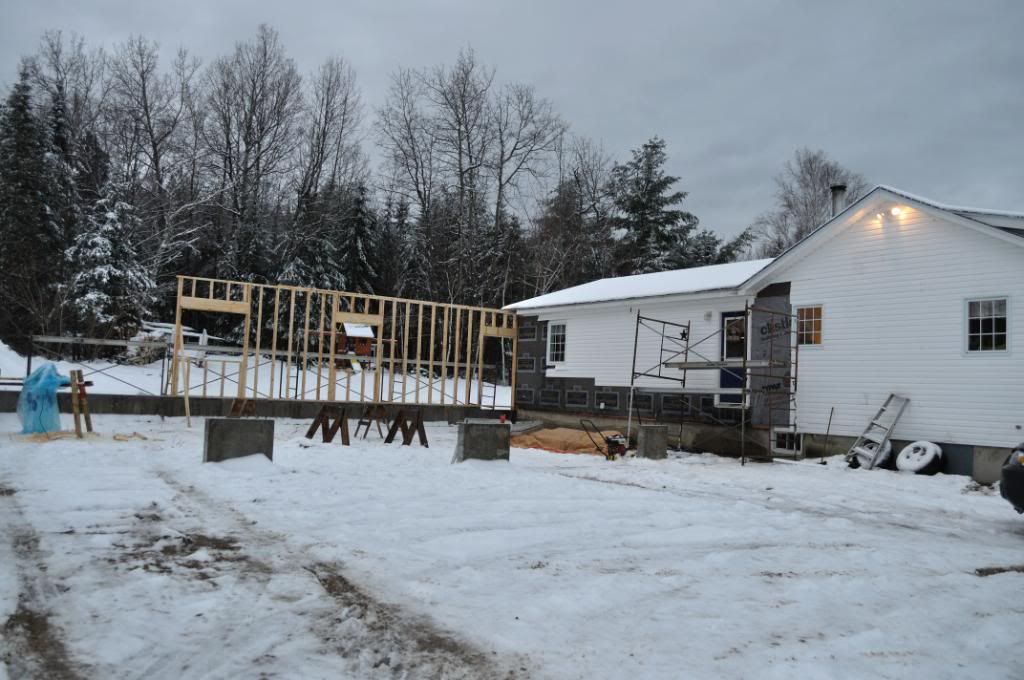
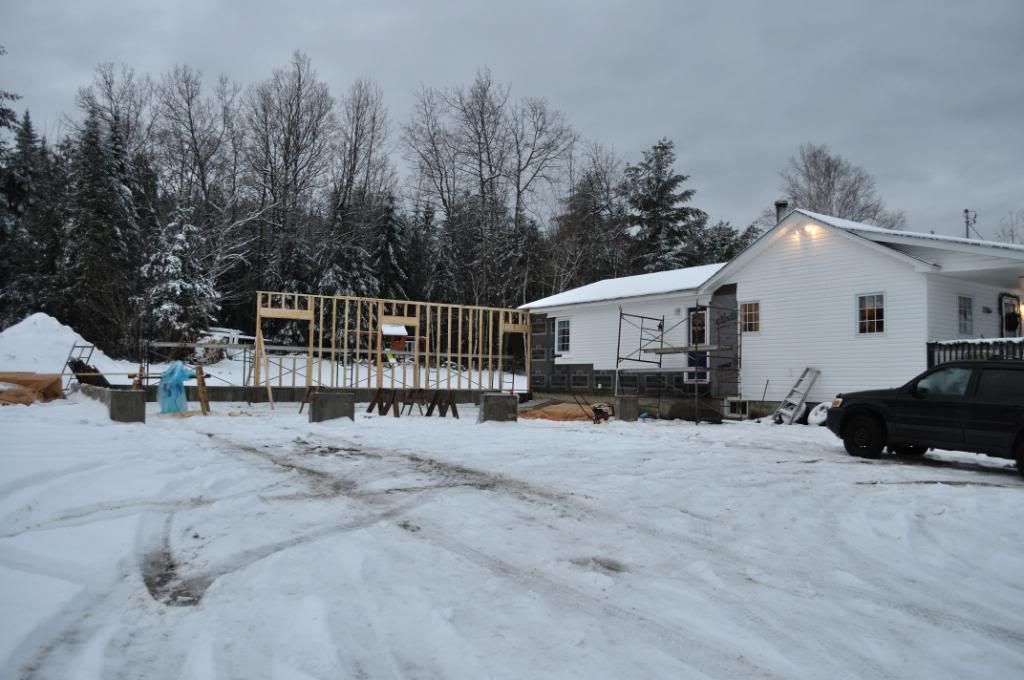
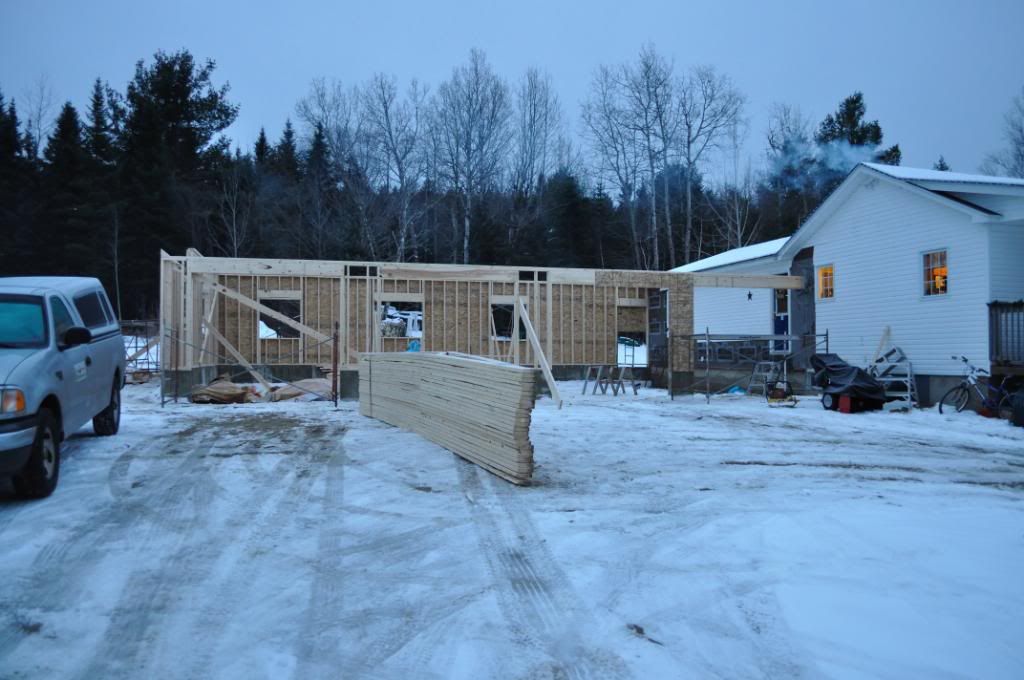
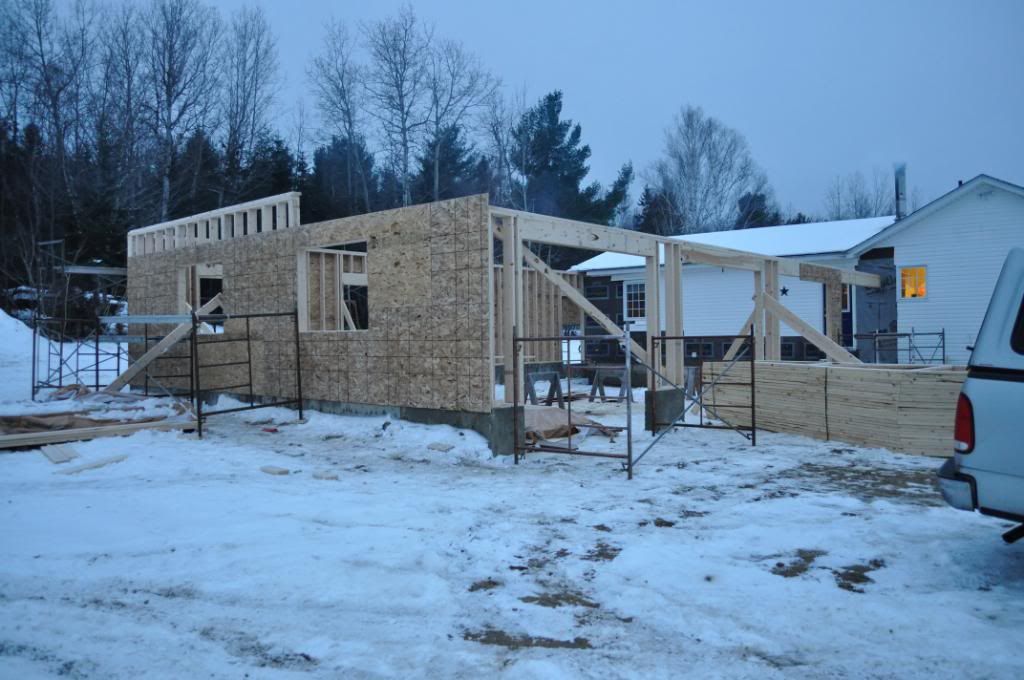
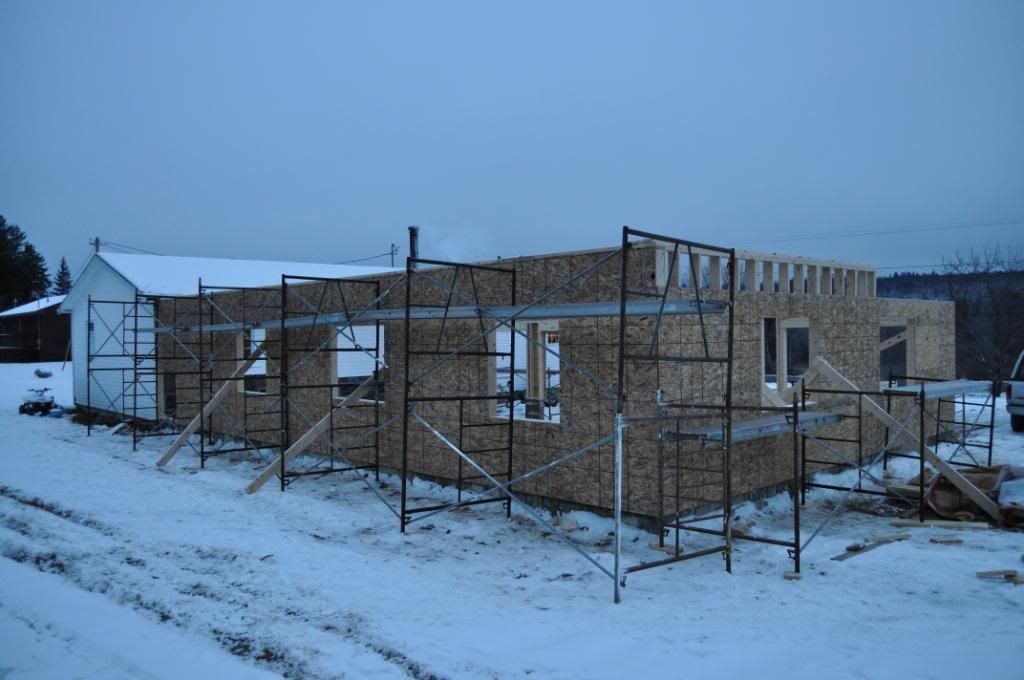
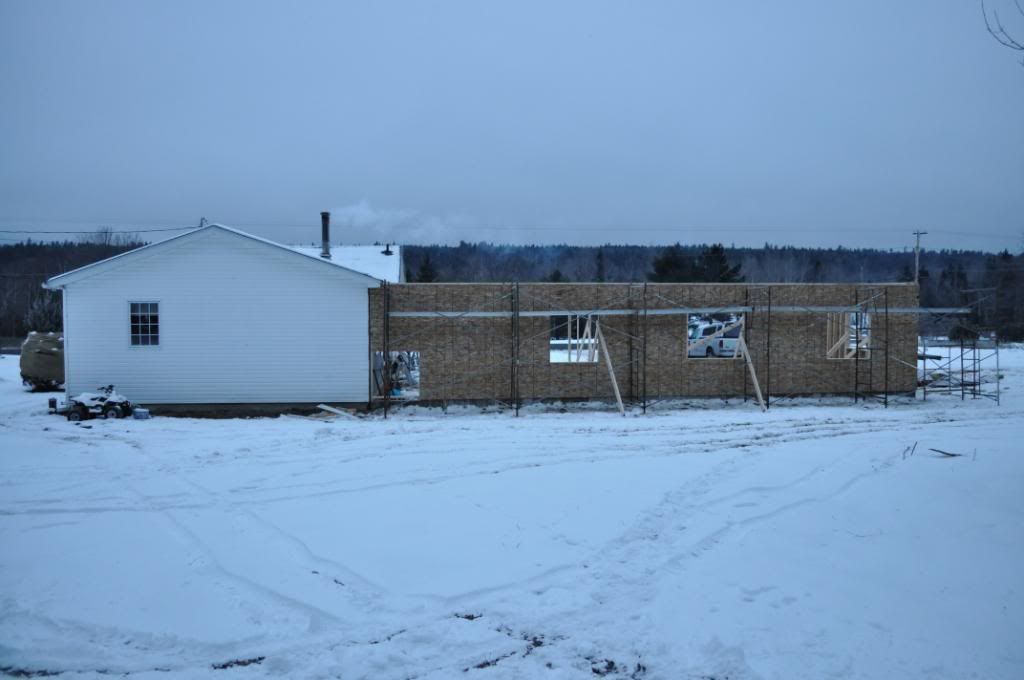
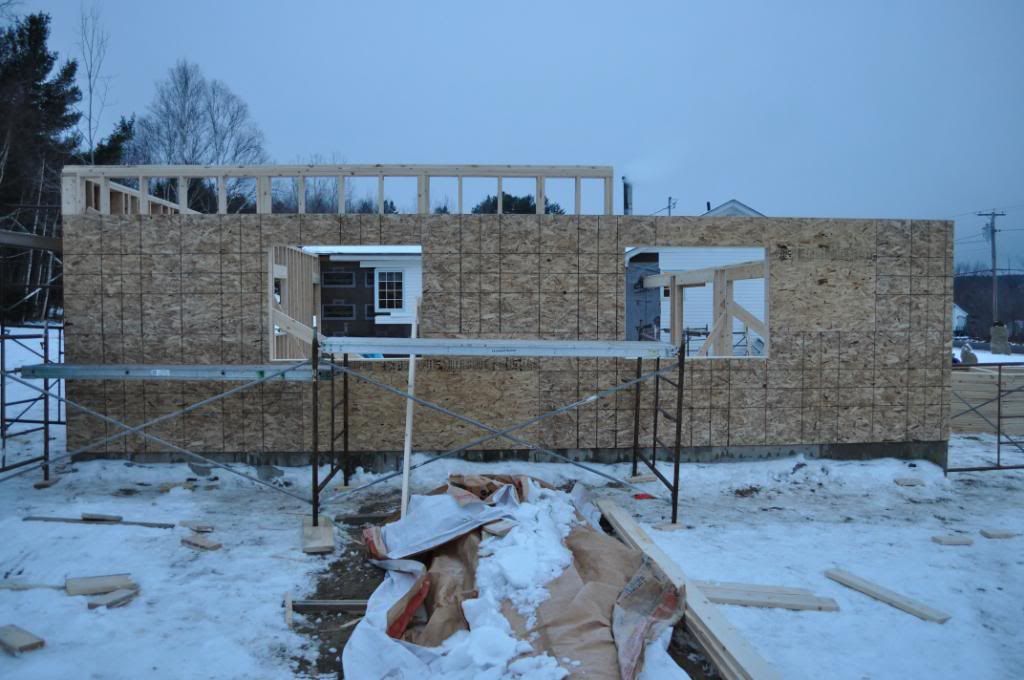
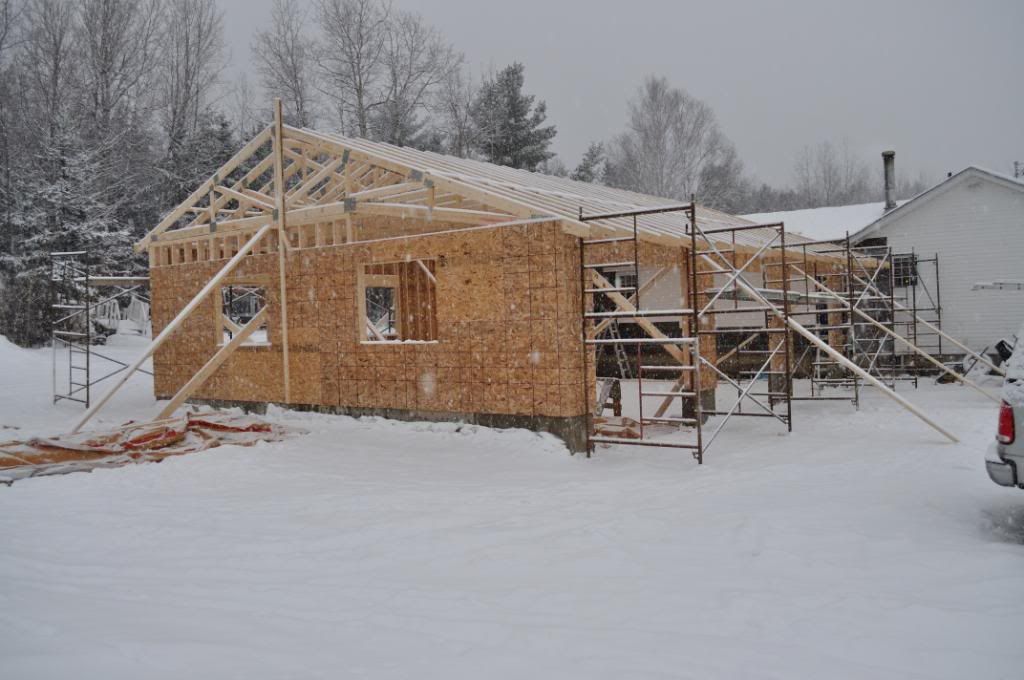
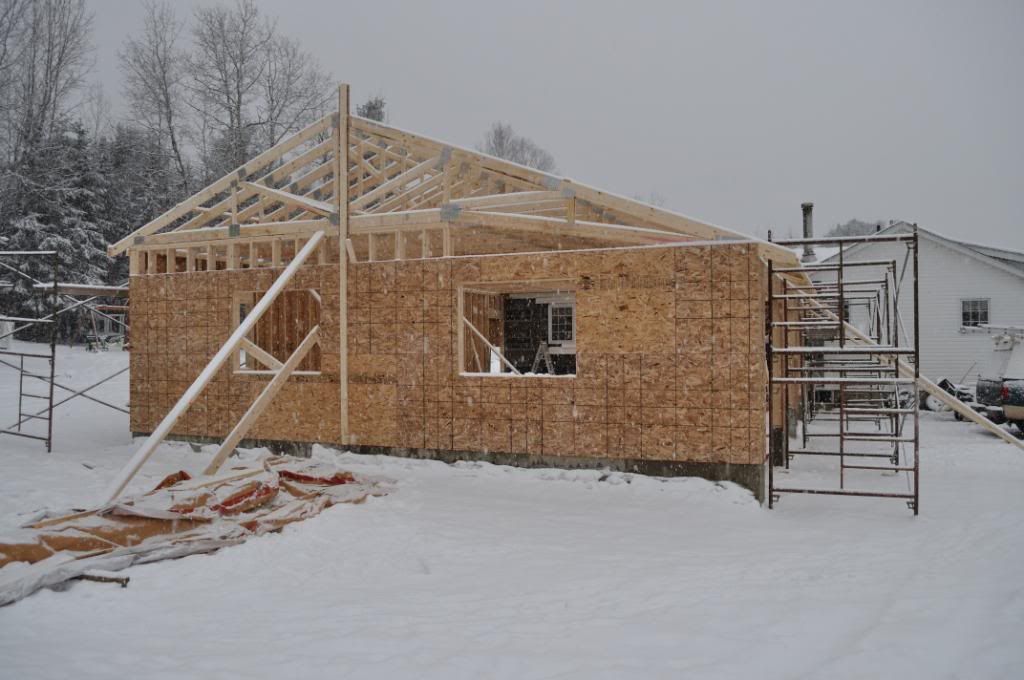
Please excuse my messed up yard while things are under construction, these are a few of the beginning stages of the frame up.
DSC_0478_017.jpg

DSC_0482_021.jpg

DSC_0486_025.jpg

DSC_0487_026.jpg

DSC_0488_027.jpg

DSC_0489_028.jpg

DSC_0490_029.jpg

DSC_0492_031.jpg


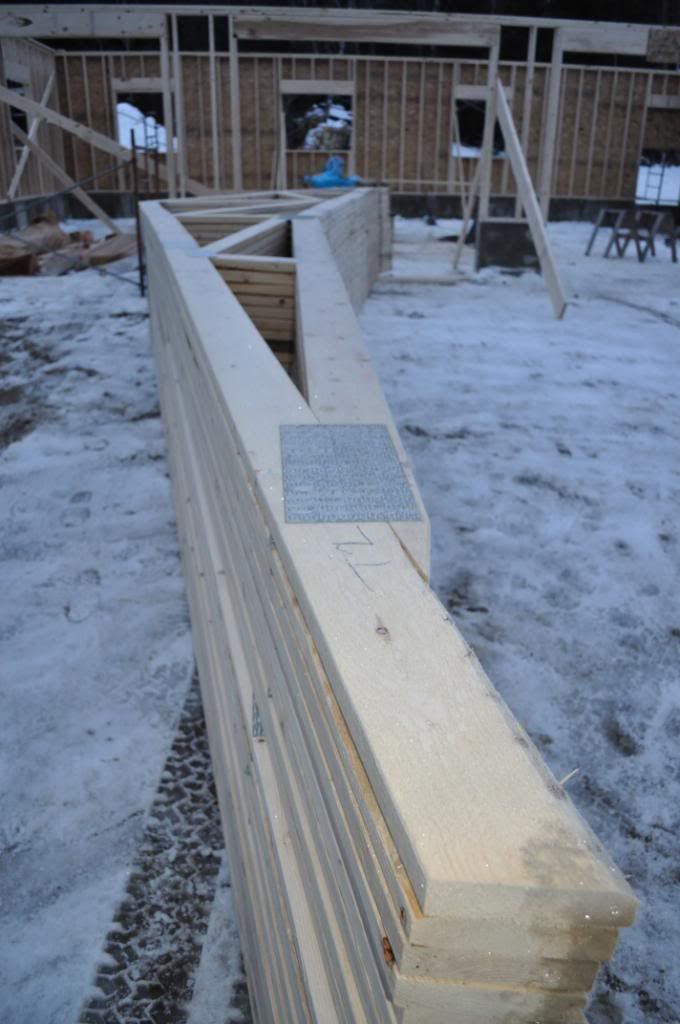
Here are th custom build Truss's
DSC_0493_032.jpg


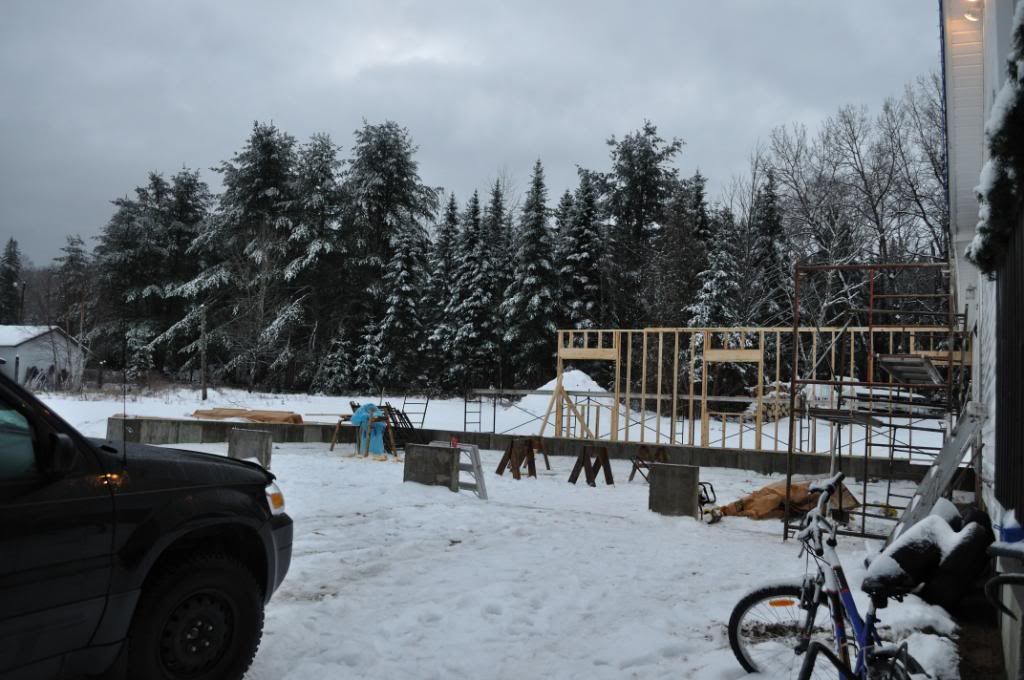
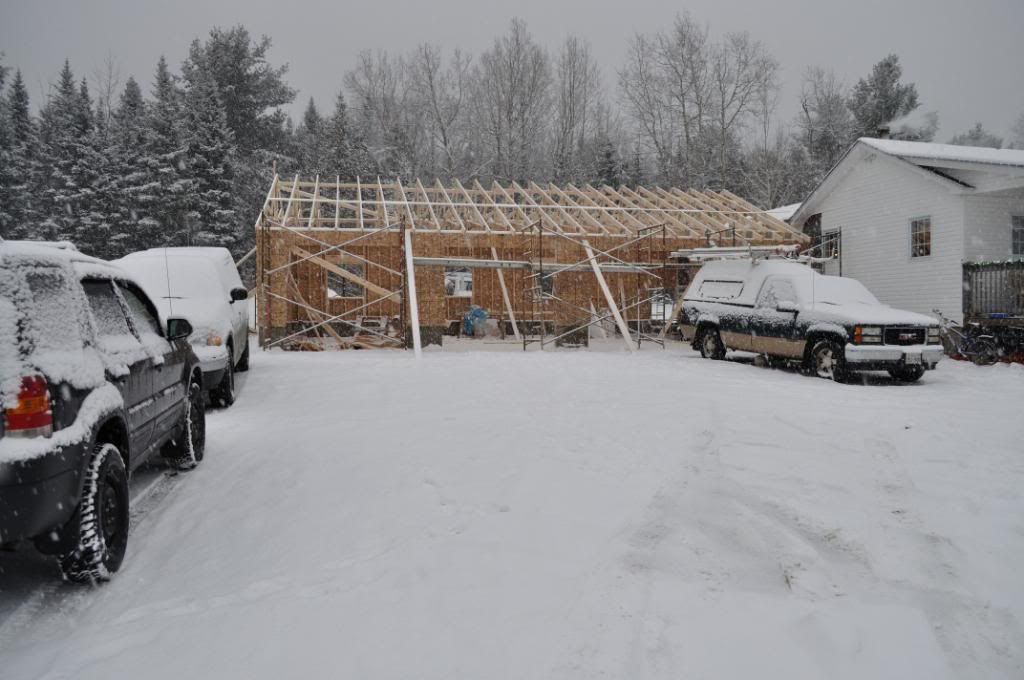
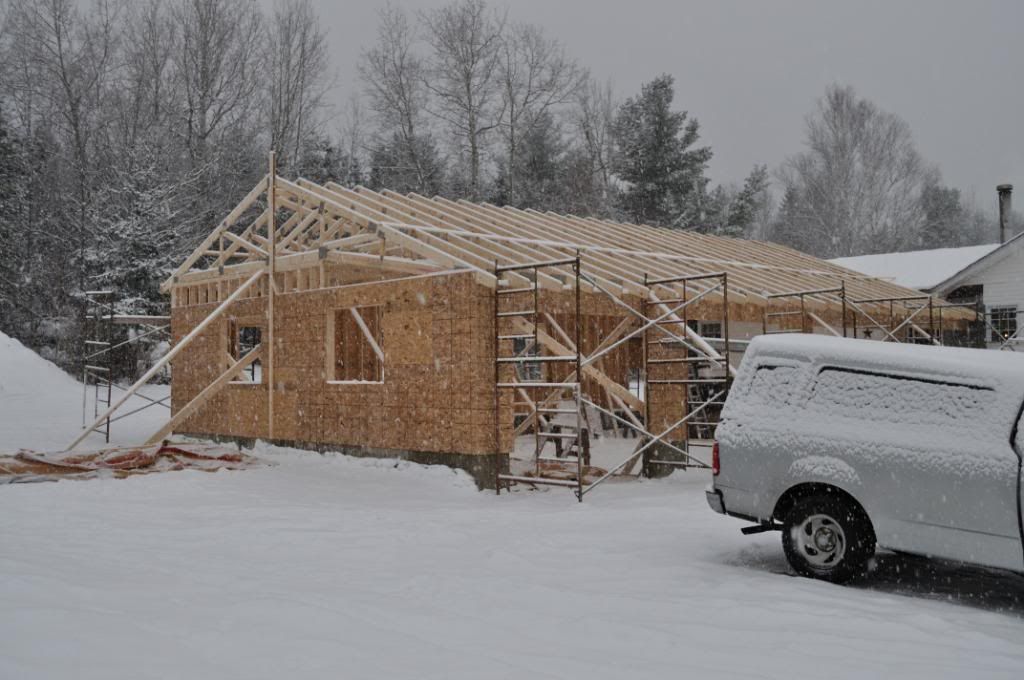
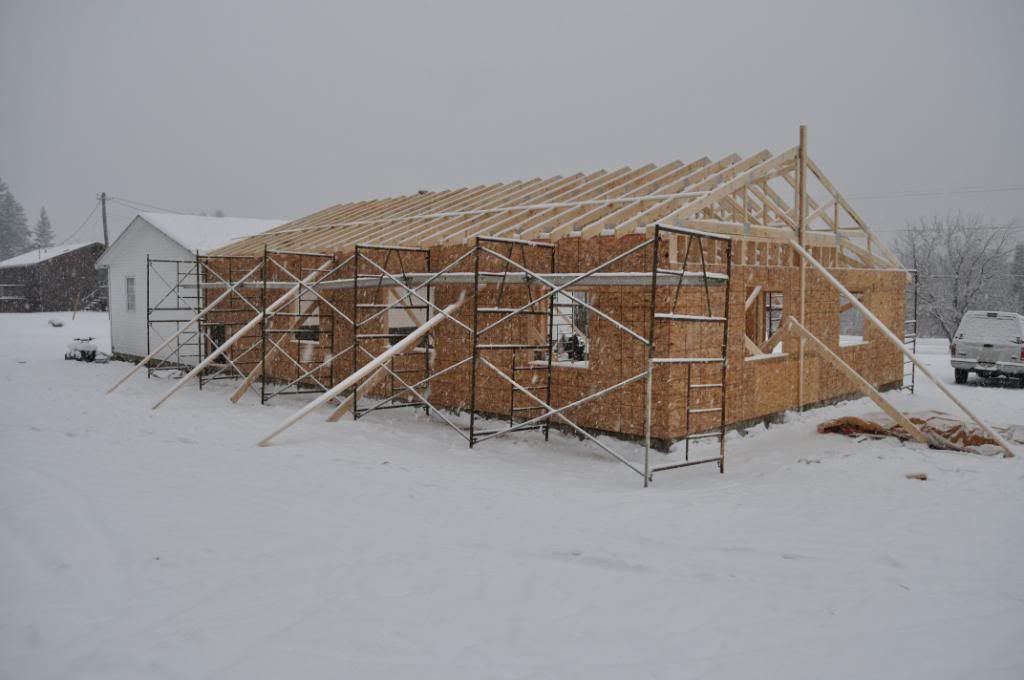
Look at the weather I've had to deal with..
DSC_0494_033.jpg

DSC_0495_034.jpg

DSC_0497_036.jpg

DSC_0498_037.jpg

DSC_0499_038.jpg

DSC_0500_039.jpg


More pics to follow soon....
 
To avoid these ads, REGISTER NOW!
OP
S

Sweet SVT

Member
Joined
Dec 6, 2010
Messages
24
Location
New Brunswick, Canada
Please excuse my messed up yard in the pics...

So, we finished up the roof in the dark last wednesday night and I got a chance to get some pics on sunday. As you can see the snow is pretty much gone again now with all the rain and mild weather we had the last 4-5 days. The windows and doors will start going in tomorrow along with the house wrap.
DSC_0502_041.jpg

DSC_0503_042.jpg

DSC_0504_043.jpg

DSC_0505_044.jpg

DSC_0506_045.jpg


More pics to follow in the coming days..
 

bighammer

Well-known member
Joined
May 4, 2010
Messages
81
Location
Mt Olive MS
What is the sq footage of the original house and the new addition? Looks like you've built on way more than you started with. Great pics so far please continue posting.
 

WANTSOM

Active member
Joined
Mar 31, 2010
Messages
28
Location
Sydney, Australia
Impressive. Can I ask what State you are in to be getting all that snow. (It intrigues me to see such climate and landscapes given where I live.) Its probably a nuisance to live and work in when its snowing but makes for a nice picture card to my eyes anyway.
 

E.rodz

Well-known member
Joined
Nov 11, 2009
Messages
2,434
Location
st.paul MN.
nice job on the build. looks like you have a bit more sq. footage in the garage out weighs the sq. footage of the house. this is the way it should be. is the slab poured in the garage? is there going to be in floor heat? think we got you beat on the snow though. have a couple of feet already.:thumbup:
 
OP
S

Sweet SVT

Member
Joined
Dec 6, 2010
Messages
24
Location
New Brunswick, Canada
Impressive. Can I ask what State you are in to be getting all that snow. (It intrigues me to see such climate and landscapes given where I live.) Its probably a nuisance to live and work in when its snowing but makes for a nice picture card to my eyes anyway.

I live in New Brunswick (Province in Canada) on the east coast.

nice job on the build. looks like you have a bit more sq. footage in the garage out weighs the sq. footage of the house. this is the way it should be. is the slab poured in the garage? is there going to be in floor heat? think we got you beat on the snow though. have a couple of feet already.:thumbup:

Thanks E.rodz!

The slab is not poured yet and yes there is going to be in-floor heat, Im waiting untill it warms up in the spring to pour the floor. As for the snow, its all gone now again as we got a lot of rain and milder weather over the last few days. :beer:

My house is 26'x 54' so its roughly 100 sq/ft less than the garage, but keep in mind Im building a room in the front corner of the garage for an entry way into the house. (10'x12) So it will be almost identical in square footage to the house.
 
OP
S

Sweet SVT

Member
Joined
Dec 6, 2010
Messages
24
Location
New Brunswick, Canada
Just a quick update:

The windows were all installed yesterday along with the house wrap. Im hoping that early next week my doors will be installed.

I will update with more pics very soon...Thanks for looking!
 
OP
S

Sweet SVT

Member
Joined
Dec 6, 2010
Messages
24
Location
New Brunswick, Canada
that is going to be a very nice shop!
also that scaffholding wouldnt pass standards over here lol

It was just sitting that way for a bit and no one was up on it that way, the ground thawed out and we got a lot of rain for a few days so it settled down in places making it uneven. Not to mention just days before the scaffolding was setup the foundation was backfilled. Its all good now though.

Thanks for the compliments though! :beer:
 
OP
S

Sweet SVT

Member
Joined
Dec 6, 2010
Messages
24
Location
New Brunswick, Canada
Sorry for such a delay with an update. To make up for it, I've finally got some updated pics that I took this afternoon. First off, all of the the windows except for the one on the front side have been installed along with the garage doors. You'll notice in the pics that the bottom of the doors are resting about 6 inches above what appears to be the floor level. Remember though, I haven't poured the floor yet and wont be untill it warms up in the spring and the floor will come right up to the bottom of the doors.

Things will also change quite significantly once I can build that 12" wall permenently which will be set back in 16 inches on the floor. There will also be a nice "Man door" and another identical window to the rest on the garage installed on that front wall.

On with the pics...

DSC_0574_104.jpg

DSC_0575_105.jpg

DSC_0579_109.jpg

DSC_0580_110.jpg

DSC_0581_111.jpg


I got a great deal on these doors because they were almond in colour, but they wont be staying that colour. I'll be painting them white in the spring and they should look 100% better esspecially with the "Antique yellow" siding we are putting on the house and garage.
DSC_0583_113.jpg


Also keep in mind that this area below where the step is going into the house will be an entry room or what some might call a "Mud room" which will be 12"x12".
DSC_0584_114.jpg

DSC_0585_115.jpg

DSC_0586_116.jpg
 
OP
S

Sweet SVT

Member
Joined
Dec 6, 2010
Messages
24
Location
New Brunswick, Canada
I just skimmed through the pics, congrats on the new garage, it way bigger than the house :thumbup:

BTW, are you on the Corral ?

Thanks! Im a member there but I haven't logged on there in over a year and I probably only have about 20-25 posts there. Im also on svtperformance.com, mustangcanada.com and foureyedpride.com which are all mustang forums.

Are you on some Mustang forums?
 

NUTTSGT

Super Moderator
Staff member
Joined
Sep 14, 2009
Messages
50,949
Location
Northern Central Ohio
Thanks! Im a member there but I haven't logged on there in over a year and I probably only have about 20-25 posts there. Im also on svtperformance.com, mustangcanada.com and foureyedpride.com which are all mustang forums.

Are you on some Mustang forums?

Mainly just the Corral and a few local Mustang forums. I do use the same screen name everyplace.
 
OP
S

Sweet SVT

Member
Joined
Dec 6, 2010
Messages
24
Location
New Brunswick, Canada
*Quick update*

Im planning to pour the concrete floor the first of next week. Things are a little behind schedule, weather and family obligations are mostly why. Im not too concerned though, as I've got lots of time this summer and will be using 3 weeks of my vacation, weekends and evenings to work on it.

This weekend I've been leveling the area and preparing for all that has to go under the concrete. (2 inches of SM styrofoam which has an "R" value of 10, floor drains, and last but certainly not least the 2000 feet of 1/2" pipe for the in-floor heat. Oh and lets not forget more rebar and all the wire mesh which has to be put down last before the concrete is poured.

How much do you think it costs to cover 1536 sq/ft with the 2" SM Styrofoam? Well I needed 96 sheets which are 2'x8' and are $21 each. So if you do the math it comes to $2016+tax just for the styrofoam not to mention all the pipe and concrete. So as you can see its not cheap, lol. Oh well, I'll be nice and warm while working on various projects in the coming years. I will have so new pics to post later in the week.
 
OP
S

Sweet SVT

Member
Joined
Dec 6, 2010
Messages
24
Location
New Brunswick, Canada
Well, finally I have an update on my Garage build and pics as well! This past week was somewhat productive in that I installed my floor drains which took me 1 whole day to shovel out I finally finished leveling out the floor area in preparation for the styrofoam and in-floor heat lines. As of tonight I have everything covered with 2" of styrofoam and the footing shoveled for the "Mud Room" which is being built in the front right corner of the garage. Tomorrow I will lay out all the tubing for the "in-floor" and hopefully will be pouring concrete by wednesday.

To start, the floor drains!
May2011Garage130.jpg

My Stepfather doing what he does best...lol
May2011Garage132.jpg

May2011Garage133.jpg

May2011Garage135.jpg

May2011Garage137.jpg

My little Girl Calee looking pretty while I work
May2011Garage139.jpg


Here is the beginning stages of leveling up the floor area and compacting.
May2011Garage141.jpg

May2011Garage142.jpg

May2011Garage144.jpg

May2011Garage145.jpg

May2011Garage146.jpg

May2011Garage147.jpg

May2011Garage196.jpg

May2011Garage197.jpg

May2011Garage198.jpg


The area you see dug out is the footing area for our entry room or "Mud room" Including the floor thickness the concrete will be 10" thick there.
May2011Garage199.jpg

May2011Garage203.jpg

May2011Garage202.jpg


Below are the 2 areas where Im pouring the concrete 12" thick for the hoist install later. They are 3'x3' each.
May2011Garage204.jpg

May2011Garage206.jpg

May2011Garage207.jpg

May2011Garage208.jpg


May2011Garage209.jpg

May2011Garage210.jpg


Here is my work for tomorrow, pulling and stapling this tubing down to the styrofoam.. :)
May2011Garage211.jpg

May2011Garage212.jpg


Below are pics of the floor drains I picked out and installed, they are great and are very easy to maintain. When they fill with sand/silt or what ever, you just scoop it out of the bottom or vacuum it out. They are 14' deep and about $45 each, well worth the money if you ask me..
May2011Garage213.jpg

May2011Garage214.jpg


Thats it for now, might have an update again tomorrow if all goes well...Thanks for looking :)
 
To avoid these ads, REGISTER NOW!

Motofixxer

Well-known member
Joined
Oct 10, 2009
Messages
681
The snow pics remind me of building mine. The freezing cold temperatures, the nailers freezing and jamming, the frozen lumber. AAAAh the good old days.

It always amazes me how much smaller everything looks when you start pulling vehicles in and filling it. I knew I should have doubled the size of mine. Oh well maybe next time.
 
OP
S

Sweet SVT

Member
Joined
Dec 6, 2010
Messages
24
Location
New Brunswick, Canada
Sorry for the long delay on the latest update Guys. We finshed the floor about 2 weeks ago and Im finally posting the pics of the prep work for the in-floor piping and whatnot. I will see if I can get some time tonight to take pics of the finshed floor and post them tonight as well.

This is where I mounted my manifolds for the piping, they are not in this pic but trust me they are mounted :) I will upload an up to date pic of it tonight.
June2011GaragepicsandGoprovideos003.jpg

June2011GaragepicsandGoprovideos009.jpg

Below are the areas that are 12" thick for the 2 post hoist to be installed.
June2011GaragepicsandGoprovideos010.jpg

June2011GaragepicsandGoprovideos011.jpg

June2011GaragepicsandGoprovideos012.jpg

June2011GaragepicsandGoprovideos015.jpg

June2011GaragepicsandGoprovideos016.jpg

June2011GaragepicsandGoprovideos017.jpg

June2011GaragepicsandGoprovideos014.jpg
 
OP
S

Sweet SVT

Member
Joined
Dec 6, 2010
Messages
24
Location
New Brunswick, Canada
As promised earlier today, here are the up to date pics i took this evening with the finished floor and the start of framing up our entry room "Mud room".
June2011GaragepicsandGoprovideos040.jpg

June2011GaragepicsandGoprovideos039.jpg


Here are the '83 GT and '03 Cobra all nestled in the corner together..
June2011GaragepicsandGoprovideos042.jpg

June2011GaragepicsandGoprovideos043.jpg


Here are the supply and return manifolds for the in-floor heat piping temporarily mounted up..
June2011GaragepicsandGoprovideos044.jpg


Below is where I started framing up our entry room on tuesday, hopefully I'll have it all framed up this weekend.
June2011GaragepicsandGoprovideos045.jpg

June2011GaragepicsandGoprovideos046.jpg

June2011GaragepicsandGoprovideos047.jpg

June2011GaragepicsandGoprovideos048.jpg
 

E60_JACK

Member
Joined
Jun 22, 2011
Messages
12
Location
CA
Such a awsome transformation, that's my dream garage right there :bowdown:. I love the SVT too :drool:.
 

mjbdesigns

Active member
Joined
Jun 23, 2011
Messages
28
Very nice setup and great documention, I am within 30 days of starting my detached 30 x 40 shop and wondered how I was going to afford the Footings,Slab,and lumber package all at once. I never thought of pouring the slab after the whole thing was roughed in? that gives me a whole new direction and hope of completion before winter, Thanks
 
OP
S

Sweet SVT

Member
Joined
Dec 6, 2010
Messages
24
Location
New Brunswick, Canada
Very nice setup and great documention, I am within 30 days of starting my detached 30 x 40 shop and wondered how I was going to afford the Footings,Slab,and lumber package all at once. I never thought of pouring the slab after the whole thing was roughed in? that gives me a whole new direction and hope of completion before winter, Thanks

This comment above made this entire thread and all the time invested worth while! Its nice to know that I was able to help you in some way, thank you very much for letting me know!
 
OP
S

Sweet SVT

Member
Joined
Dec 6, 2010
Messages
24
Location
New Brunswick, Canada
Well its been a long time since I had an update on my build so I figured with some of my recent progress in recent weeks I'd take a few minutes and post some pictures with a brief description.

So whats been done since the last update you ask? Well I've pretty much got all the wiring done, the foyer is all framed up just waiting for the finish work and I've almost completed the siding project which included the house as well. It's taken a lot longer to complete these tasks than I had planned but I guess that's always the way, right? All the work in recent months has been done by my 12 year old Son and I on evenings and weekends when there wasn't anything else going on...lol

On with the pics...

Here is one reason its taken longer than expected, I bent flatstock white aluminum for around all the windows and doors on the house except for the ones on the back of the house and garage. You'll notice that there are a few somewhat tricky bends
299453_10150872570135440_857265439_21311800_224224209_n.jpg

Here is what it looks like once mounted permantly
319166_10150834786195440_857265439_21058512_1420707405_n.jpg
November2011019.jpg

And here's my Boy helping me out :)
November2011001.jpg

November2011003.jpg

November2011010.jpg

November2011007.jpg

November2011006.jpg

These pics below were taken just shortly before dark, the siding is a lot bighter in the daylight
November2011071.jpg

November2011072.jpg

Here is what the "Mud room" looks like as of now, I have to put the crown molding and the rest of the aluminum around the window and door. Also Im putting on siding that looks like stone on the entire wall. Its the same stuff thats on the bottom on the garage.
November2011075.jpg

November2011076.jpg

Heres another of the Boy on our new 2011 Can Am 800R Max XT
November2011079.jpg


What do you all think of the "Almond" color garage doors? At first I was planning to paint them white, but now that the siding is on the color is growning on me...What do you guys think?
November2011081.jpg

November2011082.jpg
 

slush

Well-known member
Joined
Sep 6, 2011
Messages
46
Awesome build!

I also posted over on SVT/Corral/Modmustangs etc... I built a few fox bodies and had an 03 cobra, and an 01 Lightning.
 

Nighttrain

Well-known member
Joined
Aug 6, 2009
Messages
2,682
Location
Dripping Springs, Tx
Very Nice! I missed the build from last year. I like the color of the doors. I have always heard you should have 3 colors for the house and not just two. I makes since in your build. I am very impressed with your detail in all of the build.
 

Mr. Welsh

Well-known member
Joined
May 21, 2007
Messages
1,425
Recessing the mudroom a foot or two really improves the look between the house and garage. Nice work!
 
OP
S

Sweet SVT

Member
Joined
Dec 6, 2010
Messages
24
Location
New Brunswick, Canada
Very nice build and documentation! The almond color looks perfect with the house color and white trim; complimentary colors. Subscribed.

Thank you very much for the kind words.

Very Nice! I missed the build from last year. I like the color of the doors. I have always heard you should have 3 colors for the house and not just two. I makes since in your build. I am very impressed with your detail in all of the build.

Im a guy who is always all about the detail and its nice to see someone acknowledge that, Thanks! :)

Recessing the mudroom a foot or two really improves the look between the house and garage. Nice work!

Thank you, thats what I was thinking when I designed the layout. :beer:
 

gdmclnh

Active member
Joined
Jun 9, 2010
Messages
26
Location
Central New Hampshire
I like the doors. Extremely nice build. Good job.

We can't install floor drains in garages where I live. Those are very nice units you used. The tree huggers.... eeer, environmentalists, think it is bad for the environment.

I grew up in northern Maine near Houlton. My grandfather and I used to fish the Miramachi. He was from Canterbury NB originally, but moved to Maine about 90 years ago. I'm over 60 now. I still have some distant relatives there in NB.
 
To avoid these ads, REGISTER NOW!
Top Bottom