To avoid these ads, REGISTER NOW!

Between 485 & 705 SQ/FT 3rd time's a charm with a 3 car workshop

Workspaces between 485 and 705 squarefeet.

Boostingaz

Well-known member
Joined
May 21, 2018
Messages
3,698
Location
Indiana
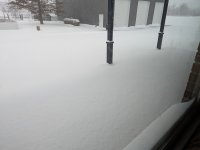
At least looks like enough for kids to play in if it warms up a bit!

High of 13 and another 4-6 in the forecast for today. The kids and wife however have a flight out later this afternoon. They are headed to PHX for the week and I'm holding down the fort. ** Pre-planned, business related stuff and the kids want to see friends, cousins and Nana/Pops.

It will be here when they get back as we are low teens all week.
 
To avoid these ads, REGISTER NOW!
OP
L

loganb

ALLIANCE MEMBER
Joined
Dec 29, 2011
Messages
5,589
Location
Omaha, NE
High of 13 and another 4-6 in the forecast for today. The kids and wife however have a flight out later this afternoon. They are headed to PHX for the week and I'm holding down the fort. ** Pre-planned, business related stuff and the kids want to see friends, cousins and Nana/Pops.

It will be here when they get back as we are low teens all week.

I hope the flight is able to make it out! A week of no kids means lots of time for your own projects!
 

Boostingaz

Well-known member
Joined
May 21, 2018
Messages
3,698
Location
Indiana
I hope the flight is able to make it out! A week of no kids means lots of time for your own projects!

Flight made it out and I followed a plow truck right down my piddly street which doesn't happen very often. Maybe I should go buy a lottery ticket 🤣. We are at almost 10" and still going hard. There is a whole back deck under that last picture!

1000015779.jpg
1000015780.jpg
1000015783.jpg
 
OP
L

loganb

ALLIANCE MEMBER
Joined
Dec 29, 2011
Messages
5,589
Location
Omaha, NE
Been a bit of a slow time in project land here....but not dead just unproductive on fun garage ****

Got out of the house a bit and caught a concert with the wife

20260124_211627.jpg

Been trying to work on a printing project...1:64 scale grain bins as we are evaluating a pretty significant upgrade to the farm bins. The printing of the bins is easy....have to do some modeling of the potential upgrades but the more challenging part has been getting the scale aerial imagery plotted accurately but think I'm almost there.

20260129_082931.jpg

In that box is a new high temp filament dryer/AMS unit for the printer. Have some forms to fill out online for some upcoming printing projects but will need that high temp drier to help with printing some materials that are resistant to higher temps(and spendy)

Found the frequently out of stock HF magnetic tool mat in stock...haven't used it yet but it sticks to the fridge well

20260129_082836.jpg

Weather this weekend has another chance of snow and I've got a cold so Nova ain't coming out to play. CNC should be pretty close to take for a spin though so that may be the goal instead
 

jar944

Well-known member
Joined
Jul 26, 2010
Messages
5,942
Location
Northern VA
The printing of the bins is easy....have to do some modeling of the potential upgrades but the more challenging part has been getting the scale aerial imagery plotted accurately but think I'm almost there.

20260129_082931.jpg

Do you have raw or orthorectified images?
 
OP
L

loganb

ALLIANCE MEMBER
Joined
Dec 29, 2011
Messages
5,589
Location
Omaha, NE
Do you have raw or orthorectified images?

Honestly no idea.

I put the task to ChatGPT for recommendations on how to do it and went down the path of using QGIS open source mapping software. Initial problem was the first imagery source I was using didn't allow plotting at that close of resolution, so just got 50 GB of USGS aerial imagery from 2023 downloaded and loaded in. That seems to be working and allows it to render in screen at the desired resolution which it wouldn't before. Right now I'm working thru how to generate the layout I want split across dual 36 x 72 plots. The plot is just to give some referencebfir where to place the printed parts and a better understanding of scale so the fact it'll be pixelated at this resolution is fine

I'm an utter babe in the woods in this software but AI is working pretty well as a guide giving me customized step x step instructions so that's been super helpful.
 

jar944

Well-known member
Joined
Jul 26, 2010
Messages
5,942
Location
Northern VA
Honestly no idea.

I put the task to ChatGPT for recommendations on how to do it and went down the path of using QGIS open source mapping software. Initial problem was the first imagery source I was using didn't allow plotting at that close of resolution, so just got 50 GB of USGS aerial imagery from 2023 downloaded and loaded in. That seems to be working and allows it to render in screen at the desired resolution which it wouldn't before. Right now I'm working thru how to generate the layout I want split across dual 36 x 72 plots. The plot is just to give some referencebfir where to place the printed parts and a better understanding of scale so the fact it'll be pixelated at this resolution is fine

I'm an utter babe in the woods in this software but AI is working pretty well as a guide giving me customized step x step instructions so that's been super helpful.

QGIS is popular, unfortunately I can't help there as I've never used it. I spent my career using ESRI products. Do you recall which image type you downloaded?
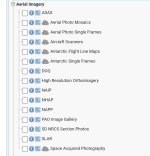
Screenshot_20260130_080155_Chrome.jpg

The high resolution orthophoto would be the ideal option, as it's already processed for what you are trying to do, and should be in a tiled/chipped format.
 
OP
L

loganb

ALLIANCE MEMBER
Joined
Dec 29, 2011
Messages
5,589
Location
Omaha, NE
QGIS is popular, unfortunately I can't help there as I've never used it. I spent my career using ESRI products. Do you recall which image type you downloaded?
Screenshot_20260130_080155_Chrome.jpg

The high resolution orthophoto would be the ideal option, as it's already processed for what you are trying to do, and should be in a tiled/chipped format.

NAIP
 

XJSuperman

Well-known member
Joined
Jan 26, 2018
Messages
3,088
Location
Central Iowa
Ah, so that should be ortherectified already
Had to look that up, pretty neat. I was wondering about angles from imagery just from picturing the aerial farmyard photo that so many seem to have hung up in the shop or house. This term apparently covers that and more.
"Orthorectified imagery (or orthophotos) refers to aerial or satellite photographs that have been geometrically corrected to remove distortions caused by terrain relief, camera tilt, and sensor perspective. By adjusting images to a uniform scale, they accurately represent the Earth's surface, allowing for direct, precise measurements of distances, angles, and areas, making them suitable for GIS mapping."
 

jar944

Well-known member
Joined
Jul 26, 2010
Messages
5,942
Location
Northern VA
Had to look that up, pretty neat. I was wondering about angles from imagery just from picturing the aerial farmyard photo that so many seem to have hung up in the shop or house. This term apparently covers that and more.
"Orthorectified imagery (or orthophotos) refers to aerial or satellite photographs that have been geometrically corrected to remove distortions caused by terrain relief, camera tilt, and sensor perspective. By adjusting images to a uniform scale, they accurately represent the Earth's surface, allowing for direct, precise measurements of distances, angles, and areas, making them suitable for GIS mapping."

Mapping air photos are shot straight down at a specific elevation and speed with specific overlap between individual photos and rows at a 0 degree angle (nadar). The father off nadar (distance from the center of the photo) the more distortion and "layover" of items with elevation you have.

The typical farm photo from a plane is a oblique image which gives a nice perspective, but isn't used for mapping purposes.

If you want ro have more fun download a few pairs of adjacent images and if you set them side by side you have a stereo pair where you can see exaggerated elevation in 3d.
 
OP
L

loganb

ALLIANCE MEMBER
Joined
Dec 29, 2011
Messages
5,589
Location
Omaha, NE
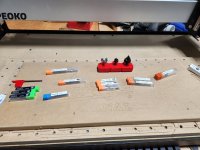
Laid out the bits I've got intending to try and do something

20260201_113243.jpg

Realized the spoil board was bowed up a bit, held down by 5 screws so zipped them off...some of the threaded inserts are pushed out a bit and I was going to try and hold off on redoing this but it's not full sized so the first project here is going to be a new board. Will likely just recreate what I've got here but do it in halves so I can easily cover the full bed. Current hole centers are about 1-5/8 apart, will just move it to 2"

20260201_113506.jpg

New threaded inserts will be flush style so all it takes is a thru drilled hole and don't need to mill a pocket in the backside to recess the flange.

Screenshot_20260201_123203_McMaster.jpg

Will need to get some MDF but gives a project to start learning the digital workflow
 
Last edited:

jake28

Well-known member
Joined
Aug 28, 2018
Messages
488
Location
SF, CA
FWIW, I quite like the brass threaded inserts. When I’ve used them in softwoods, I add a dab of epoxy (or titebond in a pinch) to the exterior threads. The goal is to reduce the likelihood of tearing out the hole in case of over tightening by reinforcing the wood that is directly in contact with the threads. I don’t have any empirical evidence that it makes a meaningful difference, but I rarely have to deal with a stripped fastener. Since MDF is basically just sawdust and glue, I suspect that a little adhesive would help the installation.
 
OP
L

loganb

ALLIANCE MEMBER
Joined
Dec 29, 2011
Messages
5,589
Location
Omaha, NE
FWIW, I quite like the brass threaded inserts. When I’ve used them in softwoods, I add a dab of epoxy (or titebond in a pinch) to the exterior threads. The goal is to reduce the likelihood of tearing out the hole in case of over tightening by reinforcing the wood that is directly in contact with the threads. I don’t have any empirical evidence that it makes a meaningful difference, but I rarely have to deal with a stripped fastener. Since MDF is basically just sawdust and glue, I suspect that a little adhesive would help the installation.

I've never tried epoxy but will have to give it a try. Frequently used superglue/CA for this or when tapping threads in wood, sounds like same thought though to support/strengthen the material immediately around it. Drill the hole, put a bit of thin or medium super glue around the hole and let it soak, then drive in the insert.
 
OP
L

loganb

ALLIANCE MEMBER
Joined
Dec 29, 2011
Messages
5,589
Location
Omaha, NE
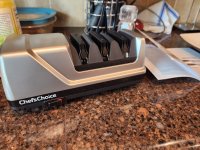
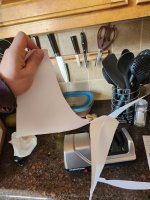
New tool to help keep sharp cutty stuff sharp

20260207_124215.jpg

So far impressed... definitely faster and easier then stones

20260207_141822.jpg

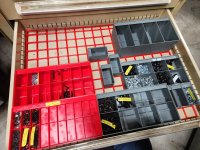
Trying to get back to hardware organization
20260207_145930.jpg

Don't love the joints in the larger grid plates but it is what it is...some super glue helps

20260207_150814.jpg

Need to spend some time with the label maker and get some more containers going to fill out the drawer and move to the next
 
OP
L

loganb

ALLIANCE MEMBER
Joined
Dec 29, 2011
Messages
5,589
Location
Omaha, NE
I need one of those electric knife sharpeners.
I got this one:


Was recommended from one of the woodworking podcasts I listen to(Woodtalk) so I figured it's at least someone who understands sharp. Haven't figured out where it will live yet...somewhere in a kitchen drawer or cabinet...but in 30 minutes it did 5 kitchen knives and a similar number of pocket knives and future sharpening will be faster as it'll be fewer passes thru the coarse grit to set the angle. So far don't regret it
 
To avoid these ads, REGISTER NOW!
OP
L

loganb

ALLIANCE MEMBER
Joined
Dec 29, 2011
Messages
5,589
Location
Omaha, NE
Logan...stop putting things in my Amazon list

Just trying to help keep this site afloat with the nickel or two they will get via the affiliate link!

To apologize for my sins....I spent $100 bucks on a babysitter so I could go downtown to spend even more money to drink this double Four Roses

20260207_181521.jpg

Then eat this rather delicious double pork chop which was very well cooked(and I need to learn how to do the same). More then I needed to eat but wasn't about to try and take it home...

20260207_183438.jpg

Before seeing this show

20260207_195122.jpg

We saw him(Dude Dad)a couple years ago when he was last thru town...if you're in the age range of say 30 to 50 with at least one kid in teenage years or younger and haven't heard of him, feel free to look him up on any of the socials. Personally he's very relatable and we like his stuff....this show was probably 30% recycled from the prior show we saw maybe 2 years ago but still a good night out. But I remind the wife when she comments "we don't go out that much" that it costs us $100 to leave the house without the kids ....and she agrees and suddenly a rental movie on Amazon Prime or Netflix looks like a bargain!
 
OP
L

loganb

ALLIANCE MEMBER
Joined
Dec 29, 2011
Messages
5,589
Location
Omaha, NE
The buzz box lives!

buzz1.jpg

Burned thru so got some work to do to learn some settings but once I figured out how to get the spool gun off it fired up. Being a multifunction it's more complicated then if I had just gotten their straight MIG but progress!

buzz2.jpg


Now to figure out where my welding gloves are.....
 
Last edited:
OP
L

loganb

ALLIANCE MEMBER
Joined
Dec 29, 2011
Messages
5,589
Location
Omaha, NE
I understand the babysitter sturggle.... but that drink and chop looked worth it to me!

I will agree...the chop was exceptionally done....and growing up on a hog farm I'm a bit of a snob when it comes to cooked pig! There is a butcher shop not far away I can probably get double chops at...will have to give them a try one night.

We have been trying different restaurants when we go downtown ...for the price it was good but not memorable so it won't go back on the must revisit list.
 
OP
L

loganb

ALLIANCE MEMBER
Joined
Dec 29, 2011
Messages
5,589
Location
Omaha, NE
Nice weather forecast so Nova came home tonight

20260213_185253.jpg

Want to get LED turn signals in and seatbelts at least partially in....if I got subframe bushings installed as well that would be stellar but not getting too ambitious here as wife works Saturday and there is apparently a kids play date at my house on Sunday

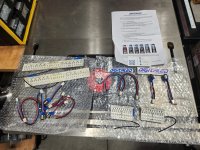
Started on the LED kit

20260213_204949.jpg

Appears to be a nicely made kit, communication was all thru WhatsApp as seller is in South America but well packaged

20260213_212144.jpg

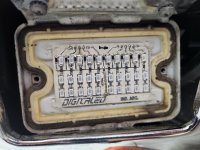
Using hot glue in the corners to keep the board in position....and it didn't work. Naughty words were said...popped it out and found out front passenger turn signal didn't work with the original bulb either! Well hell....so moved over to driver's side and got that installed instead. Tomorrow will see if I can chase down why the front signal isn't working.
 
OP
L

loganb

ALLIANCE MEMBER
Joined
Dec 29, 2011
Messages
5,589
Location
Omaha, NE
Mess of tools on floor boards means progress right?

20260214_174609.jpg


Excuse the messy back seat....but front passenger seatbelt mounted

20260214_174607.jpg

Went with the airplane style pull up latches instead of push button so it'll be easier for small fingers to get unbuckled

20260214_174541.jpg

Also in the midst of the signal swap

20260214_101013.jpg

Working on some 3d printed mounts for the led panels on the rears. LED turn signal flasher should be here tomorrow...maybe will have the conversion done before the flasher module arrives.

Also pulled out the 3d scanner and got a good scan of the driveshaft tunnel and surrounding interior to start working on an interior center console cupholder. Biggest learning curve there will probably be learning how to work with the scan data
 
OP
L

loganb

ALLIANCE MEMBER
Joined
Dec 29, 2011
Messages
5,589
Location
Omaha, NE
20260214_211954.jpg

That escalated quickly.....

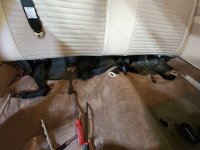
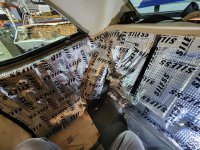
Behind backseat had the basic foil bubble sheet...but appears to be no sound deading or insulation on the floor....with the back seat out for seat belts I just said screw it and bought some sound deadening/insulation and the rollers on Amazon...next day delivery is amazing.

Not intending to pull front seats at this time, so the back seat and floor up to front seats so at a future date I can pull the fronts and do from where I stopped forward to firewall. I'd rather do it all at once but the wife is literally agahst I have it "torn apart" as she thought it was all done and didn't need anything....she has much to learn lol.

Also found out why I couldn't hear any music from rear speakers ....there aren't any lol. Wires are there but never got installed. Probably enough scope creap right now to not add a pair of 6 x 9's...in the future
 
Last edited:
OP
L

loganb

ALLIANCE MEMBER
Joined
Dec 29, 2011
Messages
5,589
Location
Omaha, NE
Some progress

20260215_112442.jpg

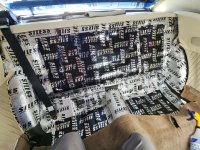
Working to get it stuck on then will rolled out this afternoon. It's not the best stuff out there, but hopefully will make a significant improvement here. Trunk is completely unlined so after I recover from this will add to the project list doing the trunk then getting some trunk carpet installed to cover it up
 
Last edited:
OP
L

loganb

ALLIANCE MEMBER
Joined
Dec 29, 2011
Messages
5,589
Location
Omaha, NE
Well close...

20260215_151207.jpg

The black pad is their "hybrid" multi material product....cause why not?

20260215_131144.jpg

Another layer of butyl rubber, then foam, then a supposed mass loaded vinyl. One of those "well I'm here so why not" type of things

20260215_161418.jpg

Mostly back together. Seat bottom is not latched in yet as I'm struggling to get the seat belt reels to unwind so I can stretch them out to the top of the rear deck. May be tonight's project after kids are in bed as it's time to pay more attention to supper
 
Last edited:
OP
L

loganb

ALLIANCE MEMBER
Joined
Dec 29, 2011
Messages
5,589
Location
Omaha, NE
Nice, any roller to install it or just peel and stick?

Peel and stick then roll out, I got this 3 pack of rollers


It doesn't take a ton of pressure to get it rolled out. Biggest issue I had was trying to keep where the holes/punch outs on the back wall were and not roll those areas out.

Once seats were out, I cleaned with the vac, did a quick scrub with soap and water, follow up scrub with just water and then final wipe down/rub with 90% isopropyl alcohol. Probably 2.5 hours or so in the insulation/sound deadening effort which doesn't feel bad to me.
 
OP
L

loganb

ALLIANCE MEMBER
Joined
Dec 29, 2011
Messages
5,589
Location
Omaha, NE
And cause I totally needed it....a baby 3d printer will be joining the family tonight

Screenshot_20260216_081103_Facebook.jpg

Voron v0, preassembled and used by a local printing nerd who didn't need it on his desk anymore. The print area is tiny ..roughly 4" cubed but it's hella fast and "fun sized" making it easy to travel with if necessary. Comes with the side panels to enclose it to print higher end filaments.... definitely going to need to rework my home office and make a better home for the growing ragtag collection
 
OP
L

loganb

ALLIANCE MEMBER
Joined
Dec 29, 2011
Messages
5,589
Location
Omaha, NE
Nova is looking great, that is going to be such a cool cruiser/date night car!

Thanks sir, been fun working on it though not having it in the garage to work on more when I want is a significant bummer....but not a big enough one I'm going to move or get rid of most of the garage stuff so I can make room for it! To help combat that I'm going to put together a basic tool kit for the trunk which to no surprise doesn't require me to buy a damn thing and see if I can figure out some smaller "intermediate" things I can do to it over my lunch break while it's in storage. I can be at the storage unit in probably 5 minutes from work...so I've got the time for bite sized projects if it's warm enough and the right project exists. Hopefully this will give me a bit more time to work on smaller projects while also giving some breaks from the day job that I should be more consistent on taking.

As mentioned wife was really "taken back" by the rear seats out on Saturday afternoon as she legit thought that everything that could be done to it had been done....ha. Her stepdad was working on this when she was in high school and she wasn't super interested in it but saw it come together over a couple years....well maybe more then a couple as I think it was "finished" after she left for college. Sunday evening after kids were in bed and I was fussing with the rear seat belt reels (not solved yet) she came back out and was looking at it and saw it "mostly" back together she started to put some pieces together in her head and got a little emotional when she realized cars like this are never "done" but just move on to a new round of updates and she's excited to see what we(me) does and for her stepdad to get some time to putz on it again when they visit.

Let me help you spend your money.....for these cheap speakers....

So speaking of "intermediate thing projects"....

Didn't go with the linked ones but spent another 10 bucks for a pair of JVC's that showed up on Sunday....and while I was "pondering" on it this weekend and playing with the radio it reminded me it doesn't work just right and was a known issue when it showed up. So another pile of money disappeared to Classic Car Stereos this morning for this:

stereo.png

And a new front dash speaker which was their recommended one for a system without an amplifier:

speaker.png

Forecast is changing to more seasonal on Wednesday so that's when it goes back to storage which means radio will get done either from the storage unit or on the next excursion back to the garage. Given it's already past Valentines day....6 more weeks or so and may have it back in the driveway full time so it's not that far away.
 
OP
L

loganb

ALLIANCE MEMBER
Joined
Dec 29, 2011
Messages
5,589
Location
Omaha, NE
So where was I....

Oh yeah...a multitude of projects, none of them completed.

Nova: LED signal/tail light issues appear to be (hopefully) driven by a failed alternator(rectifier bridge). It's a 37amp unit so I just opted to replace it entirely with a Tuff Stuff unit in a discreet black color...like this:

tuff stuff alt.png

Should be here by the end of the week. Hopefully with that fixed I can then get the LED's working right and move onto the stereo project

No progress on seatbelts or additional sound insulation. Gathering PN's as I can for existing components to do fluid changes in March. Oil, diff, coolant, brake fluid...also planning both Vbelts and both radiator hoses at a minimum right now. New radiu head unit and front deck speaker are in a box by the front door.

Question: Mechanically this build is 20 years old and likely hasn't seen any new parts since then..maybe 10k miles since then but that's probably on the high side. What would you add to the replace list just due to age? Tires are new so can scratch that, and it's now got new battery and alternator :)

While I'm at it....not loving the fuel line look here and the multitude of hose clamps:

novaenginebay1.jpg

Leaning strongly to just removing the pressure gauge(no history of fuel issues) and replacing the whole thing from pump to carb with a braided line and -AN fittings....as this is pretty unfamiliar territory for me...are there other options I'm missing?

Garage projects
Main one here is the hardware organization efforts....gaining slowly. Metric hardware is done, standard/imperial is getting closer...still lots of labels to print but getting tired of the mess all over the bench

garage table.png


3D printing: Other then making organizers, nothing there. Haven't had a chance to even fire up the new baby printer. Getting more frustrated with the current home office mess and where the printers are (1 in office, 2 in basement) so may try and totally blow that all up and reorganize them into a single room ....see how that goes. I think another shipment of material from SchoolHouseSpools shows up tomorrow....so that'll be another 12 kg of red and gray for hardware storage and other misc stuff and should keep me at least in that filament for a couple weeks
 
To avoid these ads, REGISTER NOW!
Top Bottom