To avoid these ads, REGISTER NOW!

40x50 garage-shop

toomanyrocks

Well-known member
Joined
Jan 20, 2019
Messages
190
Location
Ohio
In 2010, after finishing the garage for my daughter and son-in law, I finally decided to start on my project.

We have lived in our home of about 25 years and having recently retired, I was really bored. I previously routinely worked 60 hour weeks and needed something to keep me out of my wife's hair. Hence the Michigan garage. See the link below for that story. (By the way did I mention that that project took about a year and it was an 8 hour drive from my house to theirs each week?)

Anyway, my project came from a couple of issues. Our house had run out of garage space basically the day we moved in. I am pretty sure that I had not parked all of the vehicles in the garage once since we moved in. (I managed to make space in the winters for my wife's small car just to prevent divorce.) But the bottom line was that I had a 5 car garage with room for maybe 1/2 a car.

The original garages were a double door with 2 car deep parking and a single door with space for 1 big car. By the time I put all the shop equipment in the garage, ( do a lot of woodworking) I had taken up 2 full spaces. I also owned an old Case 580CK backhoe from a previous property that I couldn't justify getting rid of, as it just came in handy....which with its trailer, took up all of the rest of the space in the garages except for the small spot for the wife's car. (my neighborhood frowns on having trailers parked in the yard.)

The other issue was that I never liked the layout of our kitchen, and while I was at it, didn't think the architect ever had a spouse that cooked or did laundry. Those areas were not what I would have designed....though 3 years without a kitchen, my wife was not convinced of the need. The kitchen was a long, narrow galley type that stretched along the back of the house. The stove was on an Island with a Jennair for exhaust, no overhead fan, so naturally any cooking in the kitchen was accompanied by the smoke alarm which was conveniently placed, you guessed it... in the kitchen.

The laundry was only big enough for the washer and dryer, no counter space, so laundry days had clean and dirty laundry piles scattered all over the house.

So here were the prerequisites: Bigger footprint for the kitchen, with proper exhaust and some room to entertain since cooking is the family social event, laundry room with room for sorting clothing...not on the floor...and a garage\shop that would house the wood shop, all the other trailers and leave room in the original garage to actually park cars. Plus I wanted plenty of storage, and by the way it would be nice to have a bathroom in the garage to keep the dirt out of the house. Oh, and I really wanted a lift in the garage, as I hate crawling under the vehicles...and might as well add heat to the garage, since the torpedo heater tends to burn my ankles and just takes too long to heat up a large space.

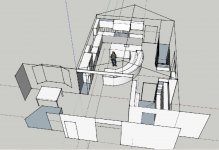
All that said, we thought about it for 6 months or so, sis a lot of preliminary sketches and figured that it would have to be done in 2 parts, the kitchen first and then the garage, as our lot is narrow enough that the garage would block access to the kitchen part of the project...so kitchen first.

kitchensketchup1.jpeg


My previous project:
My Michigan garage build
 

Attachments

  • kithensketchup1.jpg
    kithensketchup1.jpg
    65.1 KB · Views: 109
To avoid these ads, REGISTER NOW!
OP
T

toomanyrocks

Well-known member
Joined
Jan 20, 2019
Messages
190
Location
Ohio
I Promise I will eventually get to the garage part of this, but I felt you need to follow the entire , long, drawn out story, so that your projects don't seem so bad.. but do note that the sketchup above was an early one, there are stairs tot he basement, that we later deleted and went for an outside entry stairwell for easier access to the basement.

For the newbies out there, since we live in the city there were a few preliminaries: permits and inspections. First the planning and zoning permit from the city. So once I had drawn up all the blueprints (took about a month), took these down and met with the zoning guy. Since this was the kitchen addition, I knew it fit within the setbacks from the property lines, as it wasn't any closer to the property line than the rest of the house. OK from him.

Next, since we are not on a sewer line, but have an on-site system, need ok from the health department...they want to make sure that the addition will not be on top of any septic lines or fields. Well I knew that the lines all were on the opposite end of the building, so no problems there, staked it out, and OK from them.

Then it gets more fun....Building, electric and plumbing permits. Three separate government agencies by us. Lots of copies of blueprints and a few trips downtown, actually not too bad. I have dealt with building permits in the past and those departments are particularly unhappy to deal with homeowners who do their own blueprints. I had one plan reviewer actually tell me to take my blueprints for another project to is brother (who was an architect) to have him sign off the plans. I reminded him that it was his job to do that as the blueprints met his county's specifications. He gave me the permit.

I digress. Building department ok'e the plans after a couple minor revisions, and actually the reviewer this time was quite helpful, met with me and advised on the corrections I would need, I think they took pity on me....

Next up plumbing. By us the plumbing permits are pretty easy, unless you are doing it yourself...the permit requires a licensed plumber. Well I've done a lot of plumbing in the past, and I signed the homeowner waiver..If you are the homeowner and you swear that you are doing all the work yourself, and not hiring anyone to help, well then you can have your permit...

Electric. Electric permit and inspections here are done not by the county but by a private inspection company. I thought this was going to be a problem, but they were again, quite nice and understanding. I filled out the forms and did the load calculations (you have to list every load on the current system and then list all the new loads...every appliance and electric motor) apply the load percentages, and .....oops Not enough service for the intended load. :(

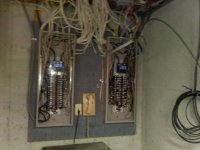
I had thought that I had 400 amp service to the house( I had 2 boxes in the basement that looked to be 200 amp each, but upon further inspection, 160 amp each....) When I looked in the meter box, turns out the service wires to the street were only sized for the 320, not the higher amperage.

We had a problem a few years earlier with the underground service sinking(no expansion joint) destroyed and blew out the meter, so the meter had been previously replaced with a 400 amp one.

so, new wiring from the street, and new boxes....fun pic of the boxes.

Problem: no commercial contractor was interested (project too small), and smaller contractors either never showed up to bid, or flatly stated that the job was too big (not really residential type work. One guy gave me an estimate, but planned to reuse the old boxes, clearly he was incompetent, as I knew they were the wrong size.

So, just have to do it myself.

elec1.jpeg


ele2.jpeg


ele3.jpeg


boxes.jpg
 

Attachments

  • elec1.jpg
    elec1.jpg
    61.8 KB · Views: 80
  • ele2.jpeg
    ele2.jpeg
    87.2 KB · Views: 72
  • ele3.jpeg
    ele3.jpeg
    106.3 KB · Views: 79
  • boxes.jpg
    boxes.jpg
    32.9 KB · Views: 73
Last edited:
OP
T

toomanyrocks

Well-known member
Joined
Jan 20, 2019
Messages
190
Location
Ohio
Well coordinated nicely with the electric company and the inspector, so the power wasn't out too long for the switch-over. This time the generator worked, we camped in the dark a couple days while putting in the new boxes. At least we had enough power for the refrigerator and freezers.

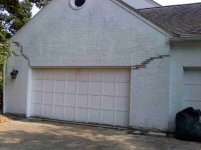
next problem to pop up: I noticed a few cracks in the brickwork...hmmm

garagecracks.jpg
 

Attachments

  • garagecracks.jpg
    garagecracks.jpg
    39.5 KB · Views: 68
OP
T

toomanyrocks

Well-known member
Joined
Jan 20, 2019
Messages
190
Location
Ohio
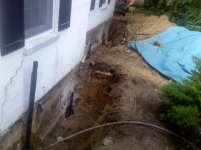
Turns out the garage portion of the house was built on the fill from the basement excavation, and undoubtedly not too well compacted, so that entire half of the house had settled...call in the foundation repair folks...jack up the garage...don't even ask what this cost.

foundationrepair.jpg
 

Attachments

  • foundationrepair1.jpg
    foundationrepair1.jpg
    89.7 KB · Views: 63
OP
T

toomanyrocks

Well-known member
Joined
Jan 20, 2019
Messages
190
Location
Ohio
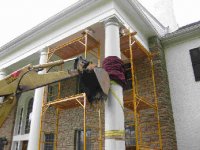
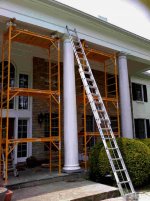
Now for a little more distraction. While thinking about plans and blueprints, I decided to address the wood rot I had been messing with for a few years. Our house has wonderful wood columns on the front porch. In fact, they are pretty much the focal point of the house. The ones on the ends are exposed to the weather and rotted at the bottom, as they were oak. I had repaired them once before, but decided to give up and replace with fiberglass.

These are about 2 ft around and maybe 22 ft high. They are structural, not decorative, so one needs to replace them without knocking down the front of the house.

house2.jpg
 

Attachments

  • house2.jpg
    house2.jpg
    27.8 KB · Views: 59
OP
T

toomanyrocks

Well-known member
Joined
Jan 20, 2019
Messages
190
Location
Ohio
OK, so it is a big house, I got it in a divorce sale...great price.

After hunting around found an architectural supplier in Chicago, and was able to match the columns, so one big check and a week on a truck:

1.jpg
 

Attachments

  • 1.jpg
    1.jpg
    32.7 KB · Views: 54
OP
T

toomanyrocks

Well-known member
Joined
Jan 20, 2019
Messages
190
Location
Ohio
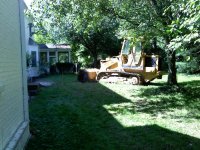
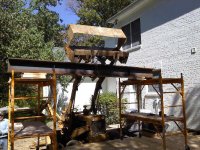
A little scaffolding and gentle jockying...I told you that old backhoe comes in handy....

96.jpg

16.jpg

18.jpg

22.jpg
 

Attachments

  • 22.jpg
    22.jpg
    31.5 KB · Views: 56
  • 18.jpg
    18.jpg
    54.2 KB · Views: 57
  • 16.jpg
    16.jpg
    72.7 KB · Views: 59
  • 96.jpg
    96.jpg
    79.8 KB · Views: 57
OP
T

toomanyrocks

Well-known member
Joined
Jan 20, 2019
Messages
190
Location
Ohio
a few more pics, just for fun.

45.jpg

41a.jpg

103.jpg
 

Attachments

  • 45.jpg
    45.jpg
    94.8 KB · Views: 46
  • 41a.jpg
    41a.jpg
    68.9 KB · Views: 45
  • 103.jpg
    103.jpg
    59.6 KB · Views: 47
OP
T

toomanyrocks

Well-known member
Joined
Jan 20, 2019
Messages
190
Location
Ohio
Four of the pillars were in perfect condition, and the local Re-Store was happy to take them....(no one wanted them on craigslist.) The other two...firewood.

Next up: finally some construction. I hired a contractor who assured me he could get the foundation in in 30 days, contract stated that. He hired this excavation company, great guy, did great work.

excav1.jpg

excav2.jpg

excav3.jpg
 

Attachments

  • excav3.jpg
    excav3.jpg
    64.5 KB · Views: 56
  • excav2.jpg
    excav2.jpg
    81.4 KB · Views: 49
  • excav1.jpg
    excav1.jpg
    52 KB · Views: 49
OP
T

toomanyrocks

Well-known member
Joined
Jan 20, 2019
Messages
190
Location
Ohio
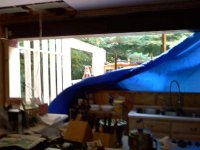
Next problem, notice the air conditioner condenser in the last photo. Well, would have not been a problem, but....rain....

So out comes the HVAC guy again to disconnect the AC. I would have done it, but EPA...can't vent freon, plus I would have to pay for the freon again later.

rain1.jpg

rain2.jpg

rain3.jpg
 

Attachments

  • rain1.jpg
    rain1.jpg
    38.2 KB · Views: 46
  • rain2.jpg
    rain2.jpg
    58.2 KB · Views: 46
  • rain3.jpg
    rain3.jpg
    41.7 KB · Views: 44
OP
T

toomanyrocks

Well-known member
Joined
Jan 20, 2019
Messages
190
Location
Ohio
I should have seen the red-flags here, when the contractor kept failing to show up on the nice days, and my hole kept filling with water. When he would show up, his crew was apologetic, but the guy was full of excuses. Finally got some forms in place and some dryer weather, but a month behind schedule, what can one do?

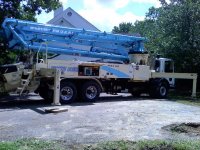
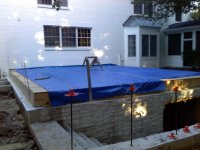
Finally some cement. We had to pump to the foundation over the top of the house, as they couldn't get any closer to the job site. This was the best $500 bucks II spent on the project. Note they were pouring these footers in the mud, I was none too happy about this, and as far as red flags went, the contractor had forgotten to call the inspector for the footers, so we sat with pumper, cement trucks and crew all on the clock while he hunted down an inspector. Point to take home: Make sure you know at which points inspections have to be done, no matter who is responsible for calling to arrange.

pump1.jpg

pump2.jpg

pump3.jpg
 

Attachments

  • pump3.jpg
    pump3.jpg
    62 KB · Views: 38
  • pump2.jpg
    pump2.jpg
    47.8 KB · Views: 40
  • pump1.jpg
    pump1.jpg
    69.2 KB · Views: 40
OP
T

toomanyrocks

Well-known member
Joined
Jan 20, 2019
Messages
190
Location
Ohio
Finally got the rest of the foundation poured and found out the contractor never paid the excavator, so he didn't want to come back until he got paid....red flag? Also a little problem with the foundation pour, the contractor apparently did not have much experience with textured forms, and how to brace them, or apparently nearly as much experience with foundations as he had led me to believe....stupid me. Well this foundation was 12 inches thick and 9 feet deep so there was a whole hell of a lot of cement behind those forms...well initially behind the forms. Mid way he blew out a form and lost a couple yards of cement into my basement. Turns out he didn't understand hydrostatic pressure.

We were able to stop the leak, close up the form, and complete the pour, but this is the result:

found6.jpg
 

Attachments

  • found6.jpg
    found6.jpg
    28.4 KB · Views: 38
OP
T

toomanyrocks

Well-known member
Joined
Jan 20, 2019
Messages
190
Location
Ohio
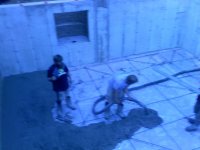
He disappeared again for another week, so I spent my time with a jackhammer removing all the hardened concrete from my basement. I paid the excavator, got the site backfilled and dug the trench for the foundation drains.

I hired a different contractor to do the flatwork in the basement and that went much more smoothly, this guy I liked.

floor1.jpg

drain1.jpg
 

Attachments

  • floor1.jpg
    floor1.jpg
    27 KB · Views: 33
  • drain1.jpg
    drain1.jpg
    59.6 KB · Views: 33
Last edited:
OP
T

toomanyrocks

Well-known member
Joined
Jan 20, 2019
Messages
190
Location
Ohio
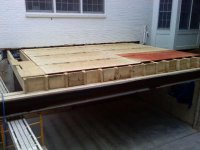
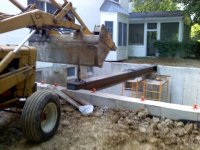
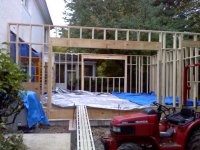
While waiting for the contractor to show up again to finish the stairwell, I finally got to work. Set the main floor beam and started the decking. I still wasn't sure how much marble countertop I was going to have in the kitchen, but with this beam, I had a clear span and no basement poles, with dead load rating on the kitchen floor of well over 150psf. Nothing shakes when you jump up and down.

beam1.jpg

beam2.jpg

deck1.jpg
 

Attachments

  • deck1.jpg
    deck1.jpg
    35.5 KB · Views: 35
  • beam2.jpg
    beam2.jpg
    46.1 KB · Views: 37
  • beam1.jpg
    beam1.jpg
    44.3 KB · Views: 37
OP
T

toomanyrocks

Well-known member
Joined
Jan 20, 2019
Messages
190
Location
Ohio
So, my wife goes out of town, and I'm pissed at the vanishing contractor, by the way the entire foundation came out more than an inch out of square, and that makes one hell of a bother trying to install cabinets and counter tops, so I may as well start on some of the decking, well out of the contractor's way...

Of course the wife is out of town.....and I tried out the new cement on the basement floor. Just one long step off the unfinished decking....

arm1.jpg

arm2.jpg
 

Attachments

  • arm1.jpg
    arm1.jpg
    33.2 KB · Views: 39
  • arm2.jpg
    arm2.jpg
    36 KB · Views: 42
OP
T

toomanyrocks

Well-known member
Joined
Jan 20, 2019
Messages
190
Location
Ohio
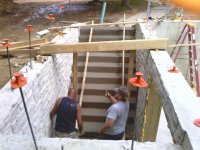
Two surgeries later I was able to get the foundation contractor back and he agreed the stairwell was too much for him, so my floor guy came back and did a great job. That was the last time the foundation guy showed his face. I paid him minus what I had paid all his subs, and threw him out. It took a week or so until I got one of his employees to show up to take his tool boxes away. (I should have kept them.)

stair1.jpg

stair2.jpg
 

Attachments

  • stair2.jpg
    stair2.jpg
    48.3 KB · Views: 36
  • stair1.jpg
    stair1.jpg
    44.8 KB · Views: 35
OP
T

toomanyrocks

Well-known member
Joined
Jan 20, 2019
Messages
190
Location
Ohio
OK, so you are thinking, "What can a guy with 2 broken arms do?"
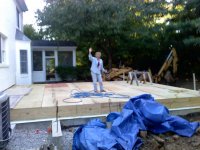
Well, my ever-patient wife...at least got the decking finished before winter.

Since I really wasn't supposed to do much construction for the next 12 weeks, we went to see the daughter and finish the Michigan Garage Project

deck2.jpg

deck3.jpg

deck4.jpg
 

Attachments

  • deck2.jpg
    deck2.jpg
    49 KB · Views: 37
  • deck3.jpg
    deck3.jpg
    39.7 KB · Views: 34
  • deck4.jpg
    deck4.jpg
    50.8 KB · Views: 32
OP
T

toomanyrocks

Well-known member
Joined
Jan 20, 2019
Messages
190
Location
Ohio
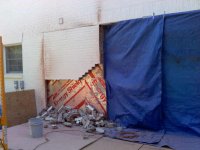
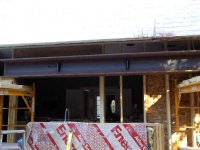
Painting all done at the daughter's, back to work. Finally demo. Luckily the house was well built, I was able to cut out the old brickwork without even cracking what was left standing, I was worried I would end up having to take down all 2 stories....I'll support that facade later. (The inside view is actually after the stud wall was removed hence the temporary supports and header.)

demo1.jpg

demo2.jpg

demo3.jpg
 

Attachments

  • demo2.jpg
    demo2.jpg
    45.2 KB · Views: 32
  • demo1.jpg
    demo1.jpg
    41.1 KB · Views: 32
  • demo3.jpg
    demo3.jpg
    35 KB · Views: 33
OP
T

toomanyrocks

Well-known member
Joined
Jan 20, 2019
Messages
190
Location
Ohio
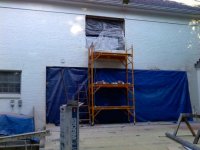
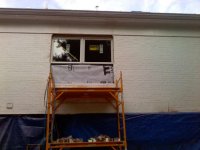
Finally could get a good measurement on the rooflines. The new addition had a 4/12 pitch, meaning it was too high for the old second story window....so out it comes, a little brickwork, and viola! (Actually not quite so easy, I had figured this was going to be a problem and knew the window would have to be replaced, but setting the correct height was harder to figure before construction, as this was a bedroom and had to meet fire code for a egress. Size and height of the sill off the floor. Lesson: measure more than twice.)


window1.jpg

window2.jpg

window3.jpg
 

Attachments

  • window3.jpg
    window3.jpg
    31.6 KB · Views: 32
  • window1.jpg
    window1.jpg
    39.1 KB · Views: 32
  • window2.jpg
    window2.jpg
    33.4 KB · Views: 33
To avoid these ads, REGISTER NOW!
OP
T

toomanyrocks

Well-known member
Joined
Jan 20, 2019
Messages
190
Location
Ohio
OK, you noticed, I bricked it all back up even though the roof of the new addition butts up to it. Ill just cut into the mortar to set the flashing when I finally do the roof, since I have no idea where it will end up.

I told you I would support that wall that currently is hanging in mid air?

I love these really heavy beams, they have low web height, so maximum ceiling below.


beam3.jpg

beam4.jpg

beam5.jpg
 

Attachments

  • beam5.jpg
    beam5.jpg
    57.1 KB · Views: 31
  • beam4.jpg
    beam4.jpg
    43.3 KB · Views: 31
  • beam3.jpg
    beam3.jpg
    86.1 KB · Views: 32
OP
T

toomanyrocks

Well-known member
Joined
Jan 20, 2019
Messages
190
Location
Ohio
I knew there would be some plumbing issues, as I was not sure where in the walls the upstairs bathroom plumbing ran. The rooftop vents were of no location help, as they were not situated above the stacks. I found the first project when I opened the rest of the back wall:


plumbing1.jpg


had to move the stack over about a foot, and bring it out in front of my beam, this made the final beam soffit about 4 inches wider than I wanted, but it worked. I still am not sure where the copper is for that bathroom...it wasn't in this wall.
 

Attachments

  • plumbing1.jpg
    plumbing1.jpg
    27 KB · Views: 30
OP
T

toomanyrocks

Well-known member
Joined
Jan 20, 2019
Messages
190
Location
Ohio
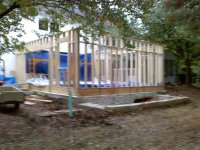
Some framing.

frame1.jpg

frame2.jpg

frame3.jpg
 

Attachments

  • frame1.jpg
    frame1.jpg
    35.8 KB · Views: 28
  • frame2.jpg
    frame2.jpg
    57.2 KB · Views: 28
  • frame3.jpg
    frame3.jpg
    53.9 KB · Views: 27
OP
T

toomanyrocks

Well-known member
Joined
Jan 20, 2019
Messages
190
Location
Ohio
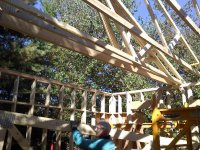
A few trusses


truss4.jpg

truss5.jpg

truss6.jpg
 

Attachments

  • truss6.jpg
    truss6.jpg
    46.2 KB · Views: 27
  • truss5.jpg
    truss5.jpg
    51.5 KB · Views: 27
  • truss4.jpg
    truss4.jpg
    95.6 KB · Views: 28
OP
T

toomanyrocks

Well-known member
Joined
Jan 20, 2019
Messages
190
Location
Ohio
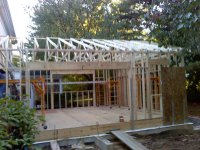
Trusses, these went up really fast, so much lighter than those huge attic room trusses in Michigan.

Notice the drop truss on the gable end with the 2x6 stubs, this allowed me to put a full 2 foot eve to protect the stairwell below from rain.

truss2.jpg


truss3.jpg
 

Attachments

  • truss2.jpg
    truss2.jpg
    59.3 KB · Views: 30
  • truss3.jpg
    truss3.jpg
    71.9 KB · Views: 29
OP
T

toomanyrocks

Well-known member
Joined
Jan 20, 2019
Messages
190
Location
Ohio
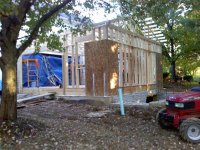
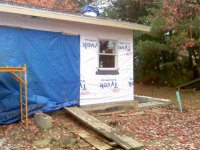
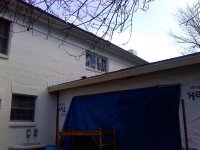
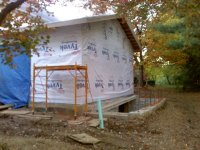
A little wrapping paper...( the window on the second floor does just barely clear the peak of the roof.)


wrap1.jpg

wrap2.jpg

wrap3.jpg
 

Attachments

  • wrap3.jpg
    wrap3.jpg
    56 KB · Views: 28
  • wrap2.jpg
    wrap2.jpg
    45.1 KB · Views: 29
  • wrap1.jpg
    wrap1.jpg
    51.7 KB · Views: 27
OP
T

toomanyrocks

Well-known member
Joined
Jan 20, 2019
Messages
190
Location
Ohio
Before the doors, the centerpoint of the kitchen goes in.You may have noticed the roof and gable end ventilators, yes they are for an industrial hood for the stove. That had to be put in before closing up the shell. Since it hangs from the ceiling and is mounted on the roof, lots of engineering for the trusses on that end of the building.

The original framing inspector saw it in there and went nuts. He insisted that my roof was going to collapse, of course I will give him the benefit of the doubt, as it was below zero the day he came and he didn't spend more than 5 minutes on the inspection, I don't think he bothered to look up at the trusses to see how beefy the ones at that end of the building were.

He insisted the he had to take it all back to the plan reviewers and make sure it was ok. Well, obviously it was, no peeps from in after that.


hood1.jpg

hood2.jpg

doors1.jpg
 

Attachments

  • hood1.jpg
    hood1.jpg
    62 KB · Views: 26
  • hood2.jpg
    hood2.jpg
    42.6 KB · Views: 26
  • doors1.jpg
    doors1.jpg
    47.7 KB · Views: 26
OP
T

toomanyrocks

Well-known member
Joined
Jan 20, 2019
Messages
190
Location
Ohio
a little plumbing and electric....

The kitchen was to be on its own service, electric, heat, plumbing, so utility room with as small a footprint as possible necessitates high efficiency water heater with outside air and low temp exhaust. (be aware that you have to have enough square footage in your utility area for gas appliances or they will need to be sourced from outside air.) Tight fit for the water heater...

The HVAC contractor hasn't put his stuff in yet (this was the only other subcontracting that I did, and spent a week trying to get the duplicate permits removed, since he applied for his own, not realizing that I had him covered already.)

inter1.jpg

inter2.jpg

inter3.jpg

inter4.jpg
 

Attachments

  • inter4.jpg
    inter4.jpg
    36.8 KB · Views: 26
  • inter3.jpg
    inter3.jpg
    27.7 KB · Views: 25
  • inter2.jpg
    inter2.jpg
    36.3 KB · Views: 25
  • inter1.jpg
    inter1.jpg
    45.8 KB · Views: 25
OP
T

toomanyrocks

Well-known member
Joined
Jan 20, 2019
Messages
190
Location
Ohio
After finally getting the ductwork fabricated for the hood...they did it wrong the first time and had to re-do...no I wasn't paying for their mis-reading of the blueprint...this huge air intake manifold turned out to be about 1 inch too wide to get between the trusses..

Again no cutting allowed, lots of heave ho, partial dismantling of the duct and a come-along to spread the truss members...


duct.jpg

duct2.jpg
 

Attachments

  • duct.jpg
    duct.jpg
    34.2 KB · Views: 27
  • duct2.jpg
    duct2.jpg
    35.7 KB · Views: 27
OP
T

toomanyrocks

Well-known member
Joined
Jan 20, 2019
Messages
190
Location
Ohio
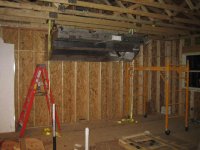
lots more insulation...the HVAC work is done framing around the ducts.

A little boo boo here that the inspector picked up...plastic on the ceiling plus faced ceiling insulation...a mold inducing scenario between the two....had to remove the plastic.


insul1.jpg

insul2.jpg

insul3.jpg
 

Attachments

  • insul3.jpg
    insul3.jpg
    30.8 KB · Views: 25
  • insul2.jpg
    insul2.jpg
    32.7 KB · Views: 25
  • insul1.jpg
    insul1.jpg
    38.2 KB · Views: 27
OP
T

toomanyrocks

Well-known member
Joined
Jan 20, 2019
Messages
190
Location
Ohio
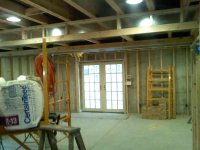
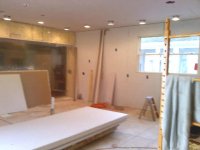
Finally, passed all rough inspections and ready to drywall.

upstairs
dry1.jpg

dry2.jpg


downstairs...the opening is a cut-through the old foundation into the original basement of the house.
dry3.jpg
 

Attachments

  • dry1.jpg
    dry1.jpg
    27 KB · Views: 24
  • dry2.jpg
    dry2.jpg
    34.8 KB · Views: 24
  • dry3.jpg
    dry3.jpg
    19.8 KB · Views: 24
OP
T

toomanyrocks

Well-known member
Joined
Jan 20, 2019
Messages
190
Location
Ohio
A little more demo in the house...out goes the old kitchen and laundry. Turns out more hidden plumbing, the water to the master bath and the sewer stack to the master were in these walls, just not where I figured they might be, a little artistic plumbing and rerouted everything. Lots of drywall to patch in the basement where I had to access all this. I don't have any good pics of the swiss cheese ceiling, as it was a finished basement.


demo4.jpg

demo5.jpg

demo6.jpg
 

Attachments

  • demo6.jpg
    demo6.jpg
    38.9 KB · Views: 24
  • demo5.jpg
    demo5.jpg
    35.4 KB · Views: 24
  • demo4.jpg
    demo4.jpg
    35.8 KB · Views: 24
OP
T

toomanyrocks

Well-known member
Joined
Jan 20, 2019
Messages
190
Location
Ohio
Did you notice the kitchen sink and stove, with dishes...my angel of a wife always loves me when I start to demo and forget to remove all loose items. This was not the first time....She also is very patient with me in that she did not have a fully functioning kitchen for almost 2 years during this construction.

Our last house I did a kitchen demo in also and she was without a kitchen for about 6 months, stove out on the back porch, hillbilly style, with the drain out the back window...so this wasn't quite so bad, I think.

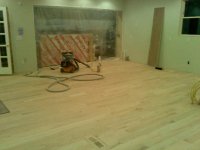
Floors are in and walls painted.


backsplash.jpg

floors1.jpg

floors2.jpg
 

Attachments

  • backsplash.jpg
    backsplash.jpg
    19.7 KB · Views: 24
  • floors1.jpg
    floors1.jpg
    23.5 KB · Views: 24
  • floors2.jpg
    floors2.jpg
    24.1 KB · Views: 24
OP
T

toomanyrocks

Well-known member
Joined
Jan 20, 2019
Messages
190
Location
Ohio
Finally got everything closed up and heated, got the flooring in up and down, time to turn on the water and move the kitchen into the kitchen...but...

it seemed a little squishy downstairs....****...water under the brand new rug. Well, lots of running around, but at least the new plumbing was isolated from the rest of the house and could be shut off while looking for the source of leaks.

A few holes in the wall and ceiling later I found it. Turns out one sweat joint was leaking. I figured it was on the hot line, since I was able to test the cold side before I put up the drywall, but it was the middle of the winter and no heat yet, so I did not want to fill the hot water heater and hot lines to test...stupid me, should have at least air pressure tested it. I got lucky and found the leak rather quickly, but now have a permanent stain on the carpet that is still there after multiple washings... :(


boobooplumb.jpg
 

Attachments

  • boobooplumb.jpg
    boobooplumb.jpg
    20.7 KB · Views: 24

Riley

Well-known member
Joined
Feb 18, 2007
Messages
398
Wow!!

Please tell me you're not just an expert DIY'er.....How much of this have you sub'd out? I'm impressed with the breadth of your efforts, despite the tumble....:eek:

Really a great project. Looking forward to following along.
 
OP
T

toomanyrocks

Well-known member
Joined
Jan 20, 2019
Messages
190
Location
Ohio
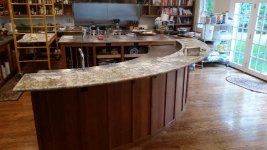
I won't bore you with the details, but will put up pictures of the cabinetry. I bought a truckload (Literally) of rough quarter-sawn oak, and spent the entire winter building cabinets. here are some pics. I jobbed out the counter tops, stainless steel and granite, with matching granite in the pantry and for the china cupboard in the dining area. I found a great guy that was willing to work with me for the stainless, which was not easy since I wanted the sinks to be integrated with the counter tops. Other fabricators I talked to wouldn't guarantee that they could do that without it leaking. This guy did commercial work and had a huge press, and had no problems, he even apologized that he was unable to put a raised edge on the curved counter because of the radius...not a problem for me.


cab1.jpg


cab2.jpg


cab3.jpg
 

Attachments

  • cab1.jpg
    cab1.jpg
    38.1 KB · Views: 27
  • cab2.jpg
    cab2.jpg
    38.5 KB · Views: 27
  • cab3.jpg
    cab3.jpg
    35 KB · Views: 25
OP
T

toomanyrocks

Well-known member
Joined
Jan 20, 2019
Messages
190
Location
Ohio
finally, some doors. I think all together there are about 75 doors and 100 drawers that I built for this. All the cabinets have sliding drawers in them for access, as I hate bending over into cabinets.


cab4.jpg
 

Attachments

  • cab4.jpg
    cab4.jpg
    35.9 KB · Views: 24
OP
T

toomanyrocks

Well-known member
Joined
Jan 20, 2019
Messages
190
Location
Ohio
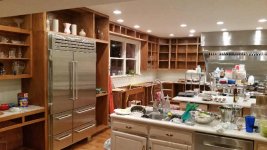
Finally to the finished project. What you can't see is the island which measures 4ftx10ft, with integrated sink. It houses a microwave and warmer on the side opposite the stove. The stove is a 60 inch wolf with griddle and charbroiler...reason for the big hood. To the right of the stove is a roll about cart with butcherblock top that parks in a cubby, but can be pulled out to service the kitchen.


finkit.jpg


findin.jpg


finlongview.jpg
 

Attachments

  • finkit.jpg
    finkit.jpg
    44.1 KB · Views: 24
  • findin.jpg
    findin.jpg
    28.2 KB · Views: 22
  • finlongview.JPG
    finlongview.JPG
    35.2 KB · Views: 22
OP
T

toomanyrocks

Well-known member
Joined
Jan 20, 2019
Messages
190
Location
Ohio
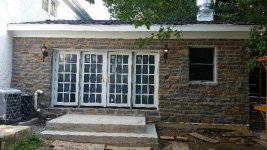
Time to finish up the exterior facade. I'll just post a couple of pics here, but you can guess the origin of my screen name. The building is sheathed in 6 inch thick field stone. I believe this building had around 20 tons, but I don't recall now. It took most of the summer, one wheelbarrow load of mortar at a time.

Originally, I had wanted a more dressed appearance, but I found out with the first rocks, these are damn hard and impossible to dress by hand, so we have a more rough look. I think it works fine. I did not want brick, like the house, since that would have required painting, and I have always hated the painted brick, but that was how the house came. (Also, I am not a very good brick mason, I could never get the lines straight and level.)


ext1.jpg


ext2.jpg
 

Attachments

  • ext1.jpg
    ext1.jpg
    48.6 KB · Views: 24
  • ext2.jpg
    ext2.jpg
    64.9 KB · Views: 28
To avoid these ads, REGISTER NOW!
Top Bottom