To avoid these ads, REGISTER NOW!

40X64 in Kansas

jrb2

Well-known member
Joined
Feb 21, 2009
Messages
150
Location
Lincoln, Ks.
Hello to all,

I have been lurking here a while, only posted a few times, but it is time to start a thread of my own.

Recently, after about 20 years, we moved to a new house. This is a smaller house in my home town and is where I will retire in a few years. It is also the house that my dad and I built in 1974. At the previous house I had a 30 X 40 shop that I built in 1996. The new house had nothing that resembled a shop, not even a much of a garage.

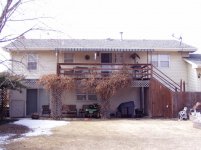
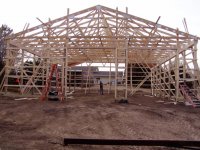
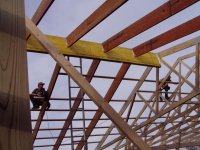
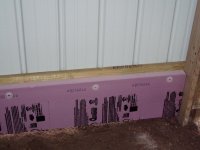
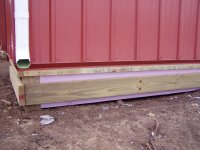
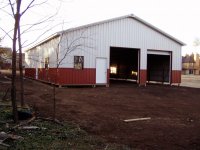
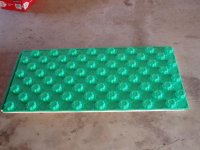
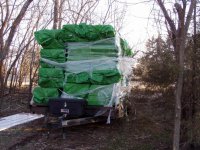
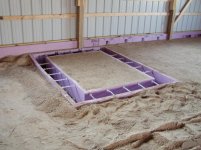
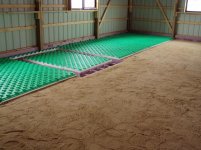
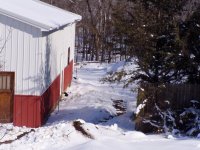
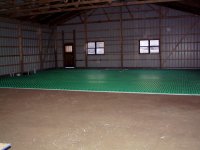
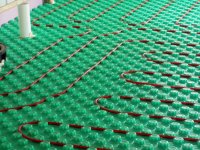
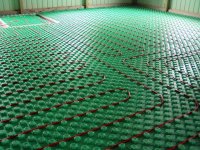
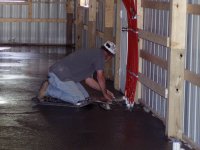
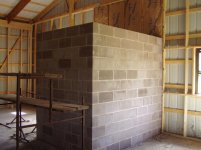
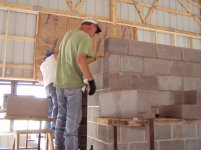
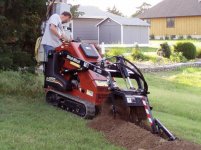
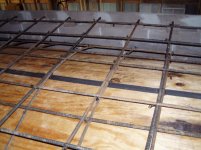
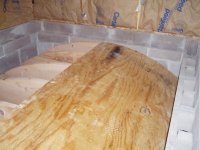
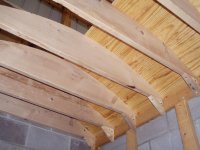
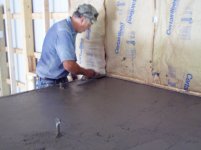
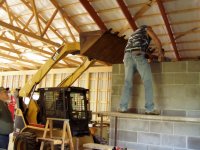
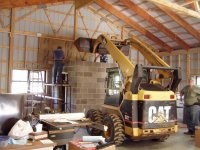
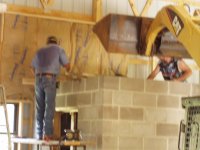
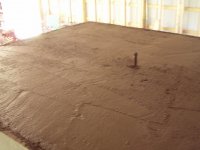
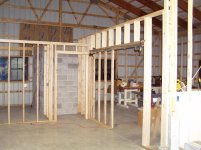
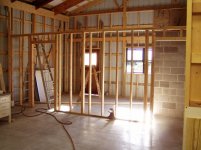
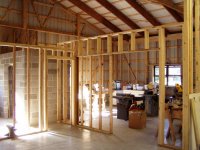
In anticipation of a new shop I carefully measured my stuff and determined that a little bigger one would be needed. I also carefull measured my lot and determined the biggest building that would fit. The final determination was that a 40X 64 with a 12 foot sidewall would have to suffice. Just a few details: It will have a heated floor, a 12X16 office, and a 20X24 woodworking shop that will be partitioned off from the rest of the shop, and of course a lift. Here are some pictures. The first two are of the old shop, then a couple of the new house and then on the the new shop.
 

Attachments

  • Old Shop 001.jpg
    Old Shop 001.jpg
    144.1 KB · Views: 471
  • New Shop Build 004.jpg
    New Shop Build 004.jpg
    151.3 KB · Views: 377
  • New Shop Build 001.jpg
    New Shop Build 001.jpg
    149.3 KB · Views: 370
  • lincolnhouse 007.jpg
    lincolnhouse 007.jpg
    152.1 KB · Views: 368
  • lincolnhouse 010.jpg
    lincolnhouse 010.jpg
    146.1 KB · Views: 432
  • lincolnhouse 008.jpg
    lincolnhouse 008.jpg
    141.4 KB · Views: 433
  • Old Shop 002.jpg
    Old Shop 002.jpg
    145.5 KB · Views: 438
To avoid these ads, REGISTER NOW!
OP
J

jrb2

Well-known member
Joined
Feb 21, 2009
Messages
150
Location
Lincoln, Ks.
I ordered the building in the first week of September, and was told that the build date would be December 14. A bit later they called back and said they had moved the build date up to November 14. That was great news, but then the wind started to blow here in central Kansas and that slowed them down on buildings that were ahead of mine. They finally got here on December 4. It took about six working days to build it. I supplied the windows. They are aluminum frame doulble pane windows that I got for free. They were originally installed in a low income housing project and were replaced recently. There are three walk-in doors, one of which is an antique that I salvaged out of a 1920 Craftsman style house that had been destroyed by fire. This door is the front door, and I also have the matching back door which I will use on the interior of the building.
 

Attachments

  • P1010015.jpg
    P1010015.jpg
    149.4 KB · Views: 363
  • P1010014.jpg
    P1010014.jpg
    148.3 KB · Views: 367
  • P1010018.jpg
    P1010018.jpg
    146.9 KB · Views: 409
  • P1010013.jpg
    P1010013.jpg
    138.6 KB · Views: 391
  • P1010012.jpg
    P1010012.jpg
    141.8 KB · Views: 364
  • P1010010.jpg
    P1010010.jpg
    146 KB · Views: 353
  • P1010008.jpg
    P1010008.jpg
    150 KB · Views: 344
OP
J

jrb2

Well-known member
Joined
Feb 21, 2009
Messages
150
Location
Lincoln, Ks.
The pictures in the previous post show that the east 44 feet of the building is built with standard trusses. For the west 20 feet we used a 4X24 inch gluelam beam and 2X14 inch rafters. This end of the building will house the office and woodshop partitioned areas. I will floor the top side of the ceiling joists and use the loft area for storage. The last few pictures here show the foam around the perimeter that will insulate the slab.
 

Attachments

  • P1010028.jpg
    P1010028.jpg
    145.7 KB · Views: 593
  • P1010027.jpg
    P1010027.jpg
    151.6 KB · Views: 497
  • P1010026.jpg
    P1010026.jpg
    146.1 KB · Views: 539
  • P1010022.jpg
    P1010022.jpg
    145.7 KB · Views: 523
  • P1010021.jpg
    P1010021.jpg
    145.9 KB · Views: 484
  • P1010020.jpg
    P1010020.jpg
    144.4 KB · Views: 413
  • P1010019.jpg
    P1010019.jpg
    146 KB · Views: 445
OP
J

jrb2

Well-known member
Joined
Feb 21, 2009
Messages
150
Location
Lincoln, Ks.
It will probably be slow going from now on. I am doing the floor prep myself and the weather has not been cooperative for the past couple of weeks. Also I am waiting on the plumber to get a water line, gas line, and a toilet flange roughed in. Yesterday he told me that it would be after the first of the year. As that is only six days away and the forcast is for below freezing till then, I guess I will have to live with it.

Should be getting some sand tomorrow so I can start the floor prep.
 
OP
J

jrb2

Well-known member
Joined
Feb 21, 2009
Messages
150
Location
Lincoln, Ks.
Well, its been a while since I posted. We are experiencing the worst drought in Central Kansas in decades. However, on my build site, we have had just enough rain and snow to keep things muddy, and the ground frozen. So, progress has been painfully slow. I have just this past weekend started to get sand placed in the building to prepare for concrete.

I also took delivery on a trailer load of Crete-Heat. This is a foam product that will be under floor insulation as well as holding the pex in place as the concrete is poured on top.

Tomorrow the plumbers will be here to place the water and gas lines so we can proceed with the placement of the rest of the sand.
 

Attachments

  • P1010039.jpg
    P1010039.jpg
    138.9 KB · Views: 531
  • P1010037.jpg
    P1010037.jpg
    152.6 KB · Views: 487
  • P1010034.jpg
    P1010034.jpg
    142.6 KB · Views: 481
  • P1010032.jpg
    P1010032.jpg
    146.9 KB · Views: 438
  • P1010033.jpg
    P1010033.jpg
    146.6 KB · Views: 692
Last edited:
OP
J

jrb2

Well-known member
Joined
Feb 21, 2009
Messages
150
Location
Lincoln, Ks.
Todays Carnage! Plumbers came today and dug a trench with a backhoe about 140 feet through the back yard for water and gas. They didn't think they could use a trencher and get two trenches in the available space. So they used a backhoe and made a wide trench. They put the water line about 4 feet deep on one side of trench and the gas line about two feet down on the other side. They also installed two outside hydrants. Tomorrow they will come back and install the sump inside the building for the sewer.

I don't have access to a sewer line that will drain naturally so I will have to install a lift pump. I am not going to do that now but the sump will need to be there before we pour concrete.

The box in the floor is a footing that will support a 6 by 8 concrete block fireproof room. There will be a lift but we are not that far yet.
 

Attachments

  • P1010046.jpg
    P1010046.jpg
    151 KB · Views: 226
  • P1010045.jpg
    P1010045.jpg
    154.1 KB · Views: 225
  • P1010043.jpg
    P1010043.jpg
    148 KB · Views: 243
  • P1010044.jpg
    P1010044.jpg
    148.5 KB · Views: 220
  • P1010042.jpg
    P1010042.jpg
    152.2 KB · Views: 239
  • P1010041.jpg
    P1010041.jpg
    155.6 KB · Views: 237
  • P1010040.jpg
    P1010040.jpg
    155.4 KB · Views: 250
OP
J

jrb2

Well-known member
Joined
Feb 21, 2009
Messages
150
Location
Lincoln, Ks.
Well, again I am taking credit for some much needed moisture. The big snow storm that swept the country gave us almost 12 inches of show. I was able to move some sand inside the building so it didn't get wet, but I was still shut down until this weekend. I did manage to get sand placed in all but the last 16 feet of the building on Saturday. Also, I started to place the foam floor insulation and today was able to complete half of the building. Here are some pictures.

First are three pictures of the show. We really needed it but it sure made a mess. Next are a couple of the first of the foam going down. Lastly a shot of the site supervisor.
 

Attachments

  • P1010052.jpg
    P1010052.jpg
    149.6 KB · Views: 306
  • P1010051.jpg
    P1010051.jpg
    134.8 KB · Views: 475
  • P1010050.jpg
    P1010050.jpg
    146.3 KB · Views: 454
  • P1010049.jpg
    P1010049.jpg
    145.8 KB · Views: 220
  • P1010048.jpg
    P1010048.jpg
    147.9 KB · Views: 209
  • P1010047.jpg
    P1010047.jpg
    143.7 KB · Views: 251
OP
J

jrb2

Well-known member
Joined
Feb 21, 2009
Messages
150
Location
Lincoln, Ks.
Here are a few more from this weekend. It was still frozen early this morning, although just barely, so I tried to move some of the snow. More than anything I just made ruts in the mud. I did however manage to get half of the foam placed.
 

Attachments

  • P1010058.jpg
    P1010058.jpg
    149.1 KB · Views: 336
  • P1010057.jpg
    P1010057.jpg
    146.4 KB · Views: 276
  • P1010056.jpg
    P1010056.jpg
    146.7 KB · Views: 287
  • P1010055.jpg
    P1010055.jpg
    149.5 KB · Views: 205
  • P10100054.jpg
    P10100054.jpg
    149.5 KB · Views: 197
OP
J

jrb2

Well-known member
Joined
Feb 21, 2009
Messages
150
Location
Lincoln, Ks.
The Crete Heat is a cool product. It is more expensive than regular foam. The pink foam that I used for the sides at the base of the wall I got from Menards for about 90 cents per square foot. The Heat Crete is about $1.37 per square foot.

There are some other considerations however. The Crete Heat foam is white just like a styrofoam cup. The green that you see is a fairly heavy plastic film that acts as a vapor barrier so there is no need to place plastic sheeting beneath the foam. Also the panels snap togather so there is no need to tape the seams as you would need to do for regular foam.

The best thing though is the placement of the pex tubing. The knobs (Crete Heat calls them flowers) are spaced to whatever size of tubing your application calls for. From what i have seen, most people secure the pex by either putting plastic staples in the foam, or they use rebar and zip tie the pex to the steel. With this you don't have to puncture the form. Also I will be using 8 X 20 sheets of mesh in my concrete and not rebar which will be cheaper.

Lastly, I bought the foam and the pex from JM O'Connor company in Wichita. They have engineers there who did all of the calculation for my heating system and designed the loops for the tubing layout.
 
Last edited:

sfd524

Well-known member
Joined
Oct 26, 2012
Messages
123
Location
Clay, NY
Great build, glad to see the Heat Crete in real life. Only saw it once before on a TV show years ago. It may be a little more upfront, but should save you time.
 
OP
J

jrb2

Well-known member
Joined
Feb 21, 2009
Messages
150
Location
Lincoln, Ks.
Thanks for the encouragement! No progress today, I commute about 40 miles to work each day so I don't have much time after work to get anything done. Next week that will change with the time so that should be better. Also it is raining again. Not any measurable amount yet but that means it is not drying out. It is supposed to be warmer throught the rest of the week, but then there is a chance of rain for the weekend. Very frustrating considering it hasn't rained much at all in the last year!
 
OP
J

jrb2

Well-known member
Joined
Feb 21, 2009
Messages
150
Location
Lincoln, Ks.
Made a little more progress here today. Since I last posted we have finished the placement of the sand. I might pause here to explain that when I say sand that isn't realy what it is. Just south of our town there are deposits of Quartzite stone which is extremely hard. We have one of the largest permenantly installed rock crushing plants in the nation to process this stone and it is shipped all over the country for use in water filtering plants. We do not have any deposits of natural sand. So instead of sand we use the fine screenings from the crusher. When put down damp and packed with a plate ******** it sets up very solid. We can walk on it now and hardly leave footprints. Our concrete is also made with this material instead of regular sand and is rated at about 4000psi.

I had my two sons here today and we put down the pex in the half of the building where there is foam. It is a little tricky walking on the foam but we put down four loops in about two hours. Actually the fourth loop crosses into the other half of the building so we had to quit in the middle of it.

We will not put down any more foam or pex until I can get some mesh for the first half of the building. I don't want to walk over the foam any more than I have to. Here are some pictures that my wife took today. Apparently she didn't want any of us to actually be identified!
 

Attachments

  • P1010059.jpg
    P1010059.jpg
    143.9 KB · Views: 357
  • P1010061.jpg
    P1010061.jpg
    151.1 KB · Views: 362
  • P1010063.jpg
    P1010063.jpg
    151 KB · Views: 414
  • P1010062.jpg
    P1010062.jpg
    159 KB · Views: 383
  • P1010068.jpg
    P1010068.jpg
    147.6 KB · Views: 382
To avoid these ads, REGISTER NOW!
OP
J

jrb2

Well-known member
Joined
Feb 21, 2009
Messages
150
Location
Lincoln, Ks.
Well, its been a long time since i posted any progress on this build. It has been frustrating to say the least. The middle of the country where I live is in the middle of the worst drought in decades, but that did not stop us from being delayed by rain many times. Access to the east end of the building over about 3 feet of fill and any rain kept is from getting concrete from getting there. Finally we were able to get everything to come togather about a week ago.

The pour went fairly well except for the part about the pump truck company calling the day before and telling us they couldn't do the job unless we moved up our start time from 10:00 am to 6:30 am. We got the ready mix plant to agree to 7:00 am and then they were late! We put down about 32 yards and with about 8 yards left in the last truck the pump truck driver shut down the truck and told us he was leaving!

I won't dwell too much on the yelling, threats, phone calls to the company, near heart failure suffered by the building owner (me), he finally agreed to pump the rest of the concrete. It may have had something to do with the fact the he couldn't get the truck out with the ready mix truck moving first and I told him I was prepared for the last 8 yards to be poured on the ground all around the back wheel of his truck Way more drama than i signed up for! With all of the panic going on i didn't get very many pictures of the actual pour, but here are some of the latest
 

Attachments

  • P1010100.jpg
    P1010100.jpg
    164 KB · Views: 462
  • P1010098.jpg
    P1010098.jpg
    146.2 KB · Views: 633
  • P1010091.jpg
    P1010091.jpg
    146.7 KB · Views: 508
  • P1010090.jpg
    P1010090.jpg
    147 KB · Views: 516
  • P1010089.jpg
    P1010089.jpg
    148.6 KB · Views: 435
OP
J

jrb2

Well-known member
Joined
Feb 21, 2009
Messages
150
Location
Lincoln, Ks.
Its been a while since I updated my build. My frustration continues but it is mostly due to not being able to get people to show up to do things I cannot do myself. Since my last update I have gotten the electrical serivce commected, the block laid up for the fireproof room, and some other minor things started.

I trenched the line for the electrical and before I could get the wire in the trench, it rained so I had to virtually redig it by hand. It was only about 60 feet so it could have been worse.

The block guys came and laid the block. It took two days, but of course the days were about a week apart. The room is made of 6 inch block and is 6 X 8 feet on the outside. The next step is to build a form and pour a barrell vault ceiling.

I also built the first partition wall and installed some lights,
 

Attachments

  • P1010124.jpg
    P1010124.jpg
    144.6 KB · Views: 220
  • P1010123.jpg
    P1010123.jpg
    137 KB · Views: 227
  • P1010122.jpg
    P1010122.jpg
    139.2 KB · Views: 265
  • P1010117.jpg
    P1010117.jpg
    144.9 KB · Views: 231
  • P1010116.jpg
    P1010116.jpg
    145.3 KB · Views: 225
  • P1010109.jpg
    P1010109.jpg
    153.7 KB · Views: 218
  • P1010106.jpg
    P1010106.jpg
    148.6 KB · Views: 231
OP
J

jrb2

Well-known member
Joined
Feb 21, 2009
Messages
150
Location
Lincoln, Ks.
Although we are in tornado alley, and I have seen my share, it is not really designed to be a tornado shelter. The main purpose of the room is to be a storage area that is fire proof. I will get a couple of fire rated lateral files to put papers in. I'm not really a gun collector but I have a couple of antique guns that are family heirlooms that will go in there. The total cost so far is just a little more than the largest gun safe at Cabella's.

I'm not really sure what I will do for a door yet, but I will probably build one out of steel.
 
OP
J

jrb2

Well-known member
Joined
Feb 21, 2009
Messages
150
Location
Lincoln, Ks.
I will probably make it hollow but I don't know about filling it with concrete, sounds awfully heavy. Maybe I can find some surplus space shuttle heat shield tiles! Lots of other things to do before I get to that.
 
OP
J

jrb2

Well-known member
Joined
Feb 21, 2009
Messages
150
Location
Lincoln, Ks.
Some small progress to report. I finally got the block guys to come back and finish the block to its full eight foot height. Also, I lost the storage space where I had most of my tools stored so I had to move in a bunch of stuff before I was really ready.

Here's some pictures of the small progress. First an underside shot of the barrell vault forms and then some shots of the rebar that will be in the concrete.

The next thing to figure out is how to get one yard of concrete up there. How many 5 gallon buckets of concrete are there in a yard?
 

Attachments

  • P1010133.jpg
    P1010133.jpg
    141.2 KB · Views: 115
  • P1010130.jpg
    P1010130.jpg
    150 KB · Views: 131
  • P1010129.jpg
    P1010129.jpg
    150.5 KB · Views: 136
  • P1010132.jpg
    P1010132.jpg
    143.3 KB · Views: 136
  • P1010131.jpg
    P1010131.jpg
    145.1 KB · Views: 143
  • P1010128.jpg
    P1010128.jpg
    145.5 KB · Views: 138
  • P1010127.jpg
    P1010127.jpg
    147.3 KB · Views: 164
Last edited:

thammel

Well-known member
Joined
Oct 3, 2005
Messages
2,243
Location
Maryland
Great work! Well, a cubic yard is 27 cubic feet. A 5 gallon bucket holds only about 2/3 of a cubic foot, so that would be about 40 buckets full. A yard is a lot of sacrete bags if that's how you plan to do it!!
Tom
 
OP
J

jrb2

Well-known member
Joined
Feb 21, 2009
Messages
150
Location
Lincoln, Ks.
Merc66 us right. I need this building to hold and use all of my tools. I guess you could say my hobby is building cool stuff...of all kinds. Why not let the building be a part of that?
 
OP
J

jrb2

Well-known member
Joined
Feb 21, 2009
Messages
150
Location
Lincoln, Ks.
Again, its been a long time since I posted but a lot has happened. I retired from the job I have held for the last 27 years, took a week off and started a new job. I'm making a little more money but now I have had to start over on leave time so I have had less time to work on the building. Also it is very frustrating to get anyone to do anything in a timely manner. (I've probably complained about this before, but it continues to be a problem.)

Anyway, I finally got all things to come togather to get the ceiling poured in the fireproof room. It didn't take long to do (about an hour), and now that it is done, other things can move forward.

Here are some pictures of the pour.
 

Attachments

  • P1010147.jpg
    P1010147.jpg
    148 KB · Views: 198
  • P1010141.jpg
    P1010141.jpg
    141.3 KB · Views: 201
  • P1010139.jpg
    P1010139.jpg
    144.2 KB · Views: 217
  • P1010138.jpg
    P1010138.jpg
    133.7 KB · Views: 206
  • P1010148.jpg
    P1010148.jpg
    146.7 KB · Views: 210
OP
J

jrb2

Well-known member
Joined
Feb 21, 2009
Messages
150
Location
Lincoln, Ks.
The last picture in the last post didn't look too impressive did it? I guess I took that picture before we finished trowelling the wet concrete. It looks much better than that now! My concrete guy told me to let it cure for at least 12 days before I took the forms down from beneath. I will do that next Saturday. We vibrated it when we poured it but I am anxious to see if there are any voids that we missed/

After that concrete placement was finished I was able to make some progress on framing the wood shop and the office. I will be able to make a lot of progress in the next few days now that I am not relying on anyone else to get stuff done. Here is the progress I have made this weekend.
 

Attachments

  • P1010161.jpg
    P1010161.jpg
    143.4 KB · Views: 163
  • P1010160.jpg
    P1010160.jpg
    144.5 KB · Views: 170
  • P1010159.jpg
    P1010159.jpg
    144.5 KB · Views: 156
  • P1010158.jpg
    P1010158.jpg
    144 KB · Views: 173
  • P1010149.jpg
    P1010149.jpg
    134.7 KB · Views: 160

Bib Overalls

Well-known member
Joined
Dec 4, 2006
Messages
3,318
Location
Jonesboro, Arkansas
Make sure your local Emergency Management agency knows about your storm room. Most keep a registry so they will know where to search if you get hit. Particularly important if you put one under your garage, something that is becoming a common retrofit here.
 
OP
J

jrb2

Well-known member
Joined
Feb 21, 2009
Messages
150
Location
Lincoln, Ks.
A little progress made in the last couple of days. Last night after work I took the form down from the concrete block room There were some small bubbles in the concrete, but otherwise it looks great.

This morning we started to prepare and form for the approach slab. The slab will be approximately 24 foot square and we will do it in two pours. Got the first half formed but it was tough as it got to 105 here today.
 

Attachments

  • P1010162.jpg
    P1010162.jpg
    159.9 KB · Views: 201
  • P1010163.jpg
    P1010163.jpg
    169.3 KB · Views: 178
  • P1010164.jpg
    P1010164.jpg
    145.7 KB · Views: 174

TurboCup87

Well-known member
Joined
Mar 26, 2010
Messages
160
Location
WV
Looks like a great build! Keep us posted. How are you going to insulate the fireproof room?
 

MacTexas

Well-known member
Joined
Mar 25, 2005
Messages
1,673
Location
Granbury Texas
Now you have a place for Dorothy and Toto to go if there is a tornado.

Good progress, I grew up in Kansas and nothing is hotter than than Kansas when it is 105 because the humidity is still present.
 

VRP62

New member
Joined
Jul 31, 2010
Messages
4
Very nice building.I'm in baldwin city.Hoping to build a new building like this soon.
 
To avoid these ads, REGISTER NOW!
Top Bottom