To avoid these ads, REGISTER NOW!

44 Bikes Frame Shop

To avoid these ads, REGISTER NOW!
OP
F

fortyfour

Well-known member
Joined
May 9, 2011
Messages
537
Location
Lyndeborough, NH
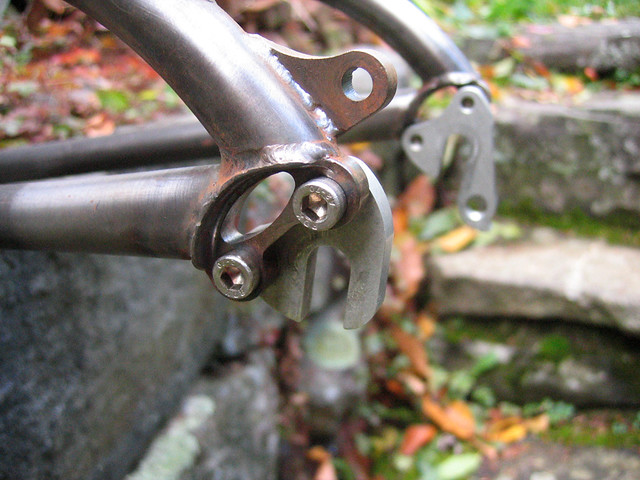
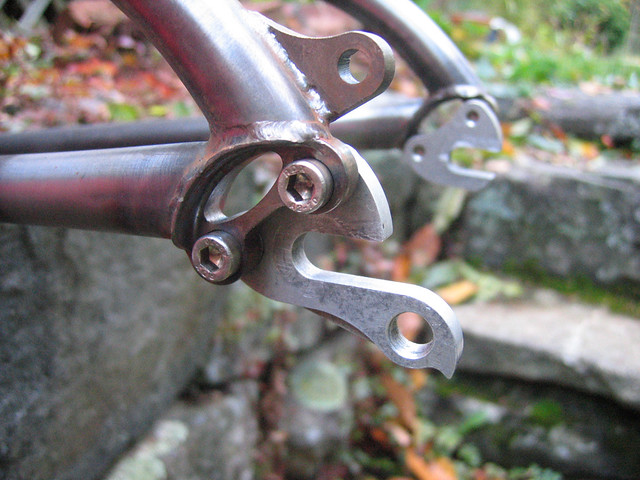
the back part of the bike, why is it curved? is it for strength?
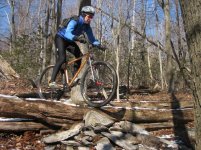
Two reasons: The black bike it adds a little bit of vertical compliance. More importantly the trails in New England tend to be very rooty, rocky and can be very technical. So lots of stand over is key. This enables me to build a bike with a lot of stand over so if you have to put a foot down, the boys will thank you. The double swoop allows the lines of the frame to line up / triangulate. So part of it is strength, another part is function, and of course some is aesthetic. The trick is balancing all of this so all the lines flow.

With regards to the red bike, it allows me again to build a bike that is big enough for me (I'm 6'1") but maintain standover in a more traditional looking frame. The loops help to keep that strait line look of the top tube flowing into the seat stays.

The loops also have a more functional sense as during welding, it allows more space for my hands, and the torch to fit into that tight space. Especially on the ISO disk mount side (non-drive side) where you have several elements all converging:


IMG_0032 by BLACK CAP Studio, on Flickr

I find it one of the more tricky places to weld, so this helps ease that tight space. Hope that helps!
 
Last edited:

N8

Well-known member
Joined
Dec 2, 2006
Messages
314
Location
In a house
Fantastic space and incredible skill!
I love to see other Industrial Designers work.
Hell maybe we should start a social group to discuss projects if there isn't one already.

I love your independent attitude and your obvious "HARD WORK" ethic.
 

Trey T

Well-known member
Joined
Aug 3, 2011
Messages
3,749
Location
Houston, TX
I see, but I would think those bends would weaken the frame. the axial compression on those two individual tubes, I would imagine, is not as strong as straight ones.

if I were to bend it, I would size it larger.

good job with setting the jigs
 
OP
F

fortyfour

Well-known member
Joined
May 9, 2011
Messages
537
Location
Lyndeborough, NH
Correct. I want the seat stays to 'move' vertically for more compliance. If the tubes were in a straight line, the ride would be very harsh / stiff. I most likely didn't explain this as well as I could have in my above comment.
 

Trey T

Well-known member
Joined
Aug 3, 2011
Messages
3,749
Location
Houston, TX
I see. Whats the approximately weight of the frame w/ and w/o the fork?

All the materials/parts made up the frame, where did you source it or is all custom?
 

tmoneyr007

Well-known member
Joined
Jan 8, 2009
Messages
121
Great design work, little comment on the tig work though, faster travel, more filler. Some of those welds are hot and mildly undercut. The bracket above is already broken down the center, a little thicker tab may be appropriate.
 
OP
F

fortyfour

Well-known member
Joined
May 9, 2011
Messages
537
Location
Lyndeborough, NH
Great design work, little comment on the tig work though, faster travel, more filler. Some of those welds are hot and mildly undercut. The bracket above is already broken down the center, a little thicker tab may be appropriate.

Thanks for the tips! I agree - I have a lot of practice ahead of me. Still have a lot to learn and a lifetime of skills to hone. The photo's from a while back and I've since learned to move quicker and add more filler. For the record, the tab's cut was welded/wrapped after this shot was taken.
 
OP
F

fortyfour

Well-known member
Joined
May 9, 2011
Messages
537
Location
Lyndeborough, NH
44 RAW POWER Update - 8.23.2011

My buddy stopped by yesterday and we both took the day to run the lines and wire everything up at the house. We'll be wiring up the shop's panel tomorrow (8/24) bright and early.

Shot of things finally coming together up at the house:


Positive. Negative. Neutral. Ground by BLACK CAP Studio, on Flickr

The lines pulled very easily. We expected the worst with 160ft to push / pull. But somehow luck was on our side and we didn't break a sweat. If all goes according to plan, the panel, power for the mill and power for the tig welder should be all set by the end of the day tomorrow. Fingers crossed.
 
OP
F

fortyfour

Well-known member
Joined
May 9, 2011
Messages
537
Location
Lyndeborough, NH
44 Bikes Frame Shop - Update 8.25.2011

It's official :shocking::


Power is ON. by BLACK CAP Studio, on Flickr

Two friends who are electricians have been helping me finalize all the electrical for the shop. One just scored a bunch of loot and passed a bunch of goodies on to me for the shop effort. Super stoked. All the power will be run outside the walls. I want a bit of an "modern industrial" look to the shop space. So all the exposed galvanized boxes, conduit and switches will remain raw. The walls will be a nice bright yellow with natural trim. Ceiling will be galvanized corrugated roofing material.

Here's a shot of the panel (inside and outside) all finished up:


44 Power Supply :: Outside / Inside by BLACK CAP Studio, on Flickr

We ran power from the top as this wall is up against a hill and I need to constantly rake the roof during the winter. Large piles of snow accumulate on that side of the hill-so we wanted to keep the elbow up and protected under the soffit from snow accumulation. Something you have to really think about here in NH. Our house is situated a bit higher than our town center and we're in a bit of a "snow belt". We'll have 2 feet of snow while the town center which is approximately a mile down the road will only have 2 inches of snow at times. Funny what a bit of elevation gain can do.

A shot of the north wall almost finished up:


44 Frame Shop :: North Wall by BLACK CAP Studio, on Flickr

Sockets for extension cords, drills, lights etc. on the left and the 220 source for the Bridgeport. The center junction box is ready for when we run more conduit up and out across the ceiling for the lights. Most likely some simple galvanized pendants. To the right under the panel we included a twist lock socket for my Tig Welder (Miller Dynasty 200DX). This is temporary until we can run power over to the south side of the shop. The far corner on the south side will be my welding area. But it will be nice to have two of these at either corner/ends of the shop if I have certain projects and need the welder on different sides of the shop. Thinking ahead.

Next up is wiring the bridgeport and phase converter. Once that's finished up we'll rotate the head, support with the table and get her into the north west corner so I can make some chips! Can't wait...
 

PeteMoore

Well-known member
Joined
Jan 25, 2011
Messages
453
Location
N.Ireland
Certainly getting there dude

Love the shop and LOVE the titled and logo'd photos.

Have been trying to do my own in a similar fashion for other forums and simply dont have the ability to get the awesome fonts and logos that you do. But i guess thats why you do it for a living.
 
OP
F

fortyfour

Well-known member
Joined
May 9, 2011
Messages
537
Location
Lyndeborough, NH
Have been trying to do my own in a similar fashion for other forums and simply dont have the ability to get the awesome fonts and logos that you do.

Thanks for the kind words. The font's you want in your arsenal to get that real "American Industrial Manual" look are "Trade Gothic" and "Futura". A good place IMO to get half decent (and free) fonts is www.dafont.com. In PC and MAC types too. Adobe Illustrator is the software you want to create logos. Some other paid fonts to look for are offered by "House Industries". "FINK" and "Sign Painter" are great font sets. Esp. for custom car looks. You can get some inspiration from House's blog. Some amazing hand drawn lettering going on over there. Paper and pencil still work the best as always which can be scanned and traced. Hope that helps!
 

PeteMoore

Well-known member
Joined
Jan 25, 2011
Messages
453
Location
N.Ireland
Cheers dude.

dafont has been scoured many many times and unfortunately illustrator is just a tad out of reach £££ wise. But I shall endeavour to replicate (flattery remember ;) )

As said before, best of luck with the shop and keep the updates coming, its an awesome wee space and one that I could see myself owning someday. Keep up the good work
 
To avoid these ads, REGISTER NOW!

frank1380

Well-known member
Joined
Dec 1, 2008
Messages
148
A more affordable (translation: free), but similar program you may want to try is Inkscape.


Beautiful bikes there fortyfour and the shop is coming along nicely. I'm definitely looking forward to more updates.


Cheers dude.

dafont has been scoured many many times and unfortunately illustrator is just a tad out of reach £££ wise. But I shall endeavour to replicate (flattery remember ;) )
 

Thruxton

Well-known member
Joined
Dec 30, 2010
Messages
767
Location
Virginia
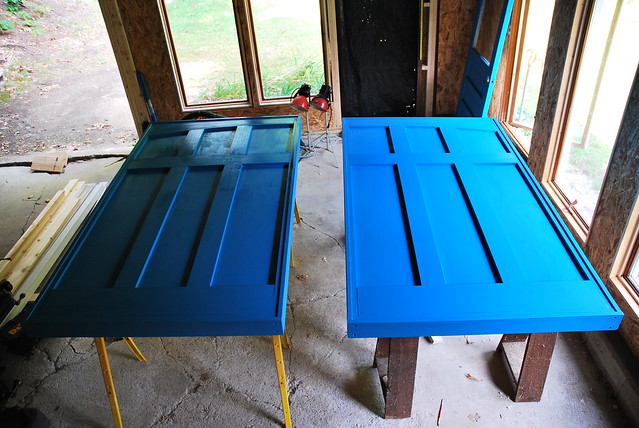
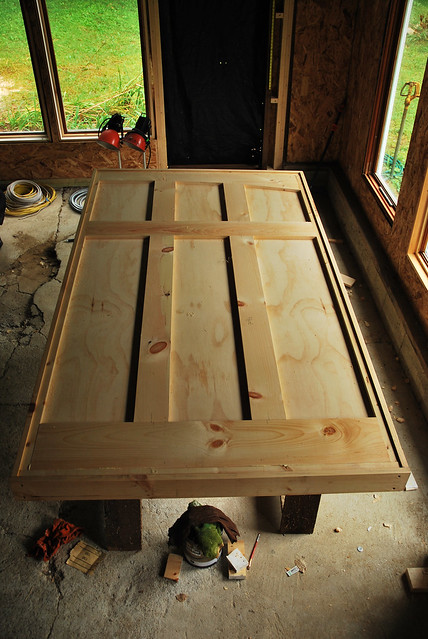
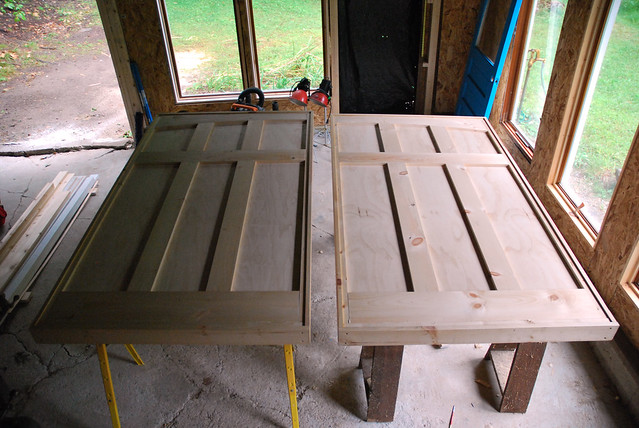
Thanks - the old boards are really nice and wide. It would be a shame not to reuse them I agree. Still noodling the two large doors. Anyone have a good source for strap hinges with pintles that don't cost an arm and leg? Preferably the lift off type. Thanks in advance.

Fortyfour,

Try www.hooverfence.com for your 'lift-off' door hardware. Specifically, I used these on some 400lb oak gates, they worked great, easy install and no sag at all: http://www.hooverfence.com/woodfence/8307.htm

Also, shop looks great.

Cheers!

Tractor Supply is a good local source if you have one in your area, o/w carnegie03's link looks good. I used these on my shop's carriage doors. Your place looks great, btw. I think bike fabrication is real art- I have a Serotta from way back, took it to his shop (this is years ago of course) and got to see some of the really beautiful work there.

Shop=3 4-10-11 033a.jpg
 
OP
F

fortyfour

Well-known member
Joined
May 9, 2011
Messages
537
Location
Lyndeborough, NH
Thanks for the suggestions on the strap hinges. We have a Tractor Supply right down the road - I have never been so it will be fun to have an excuse to explore. Gettin' closer day by day... Starting on the doors tomorrow afternoon.
 

Red Leader

Well-known member
Joined
May 15, 2011
Messages
2,688
Location
Denver, CO
This is a great thread.

As a fellow mtb enthusiast, I figure I'd throw up a picture of my steed:

p8253791.jpg

By daveamy at 2011-08-25

'98 Schwinn Homegrown XT, with a few more modern components. The bike is amazing:D

However, I'd love to get into a steel hardtail one day...maybe just copy the geometry of the homegrown.

I actually haven't been out riding (mtb) in forever, but your thread prompted my to get the bike down and dust her off. Now I might just have to go riding soon:thumbup:

Keep up the great work on the garage!

-Dave
 

notstevieray

New member
Joined
Aug 27, 2011
Messages
3
Location
Sydney, Australia
Love the garage, love fat tyred bikes too ;)

Will take some pics of my shed and bikes tomorrow and post up an intro, but will certainly be watching this post with interest.
 
OP
F

fortyfour

Well-known member
Joined
May 9, 2011
Messages
537
Location
Lyndeborough, NH
44 Bikes Frame Shop :: 9.7.2011 Update

Started in on the Carriage Doors late last week before the rain started. The sides are T shaped with a ripped groove for the plywood. They will be insulated with 2" yellow foam. Here's a quick shot of the parts after they were laminated up, ripped and finished:


Pieces Parts by BLACK CAP Studio, on Flickr

The grooves made sliding the parts onto the sheets of plywood a snap. Dry fit went well so I glued things up nicely and got to work. I simply propped them up on a pair of saw horses and used ratchet straps to hold things together while I drove in large stainless screws (3.5"). Sorry I did not take any shots of that stage.

Next up was starting on the details. I wanted a slight arc on the top. Here's a quick shot of the matched tops. I used my japanese rip saw to make the cuts and then tuned things up with a spokeshave and sanding block:


Twins by BLACK CAP Studio, on Flickr

Where the strap hinges will be placed, I ran 1" x 2" pieces so they have something to be mounted to. I'll take a shot of the backsides in the future. So screwed / glued them on from the front, but then screwed and glued the details on from the backside so the screw heads are hidden. Here's a quick shot of the first one completed:


One Down... by BLACK CAP Studio, on Flickr

Once the first one was done, I had that system down pat so I just marched through everything. As I was making the first one, I cut all the other parts for the second door at the same time to make things go together much faster for the second one. Running out of light for today but luckily finished before the sun goes down. It's raining like crazy here right now-so the natural light isn't as good as it normally is:


Carriage Doors Finished! by BLACK CAP Studio, on Flickr

Pretty tickled by how they turned out. I had the paint store match a blue paint in stain. It will be pretty much identical in color to the door in the upper right hand corner of the above shot. That door also is coming along nicely and was free. I was headed out last week for a ride after work and spotted it next to a dumpster. A quick knock on the door and a short conversation and I had it in my trunk. Free is good! More on the way soon.
 
Last edited:
OP
F

fortyfour

Well-known member
Joined
May 9, 2011
Messages
537
Location
Lyndeborough, NH
Why no EBB or sliding drop outs?
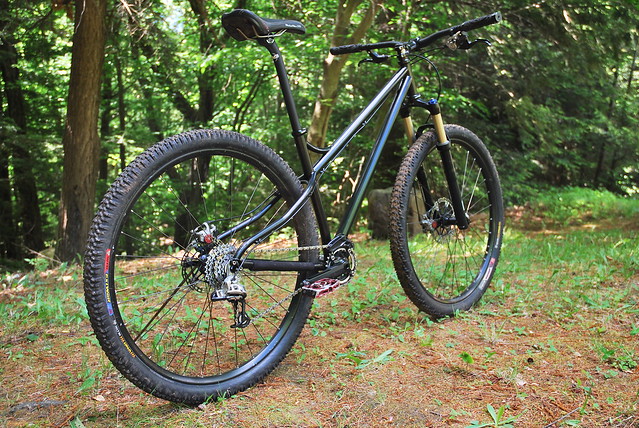
The black bike can be run as an ss by flipping / switching the dropouts (pics are from an earlier prototype):


44 f1 Drops - Geared mode by BLACK CAP Studio, on Flickr


44 f1 Drops - Single speed mode by BLACK CAP Studio, on Flickr

The red bike uses a bushnell EBB:


44 Snake Driver - EBB by BLACK CAP Studio, on Flickr


44 Snakedriver - Paint #3 by BLACK CAP Studio, on Flickr

The sky is the limit with a custom build - if the customer wants sliders or an EBB I can build to their requests. I just personally don't like sliders. I do however like how the Bushnell version of an EBB works with the expansion bolt vs the set screw types.
 

tweidman

Well-known member
Joined
Dec 1, 2009
Messages
503
Location
Ackermanville, Pa.
Both my SS bikes are set screw EBB. I have never had a problem with either. My fixed road bike uses a ENO hub, that has been working well too.
 

Attachments

  • 3282589185_f67b343899_b.jpg
    3282589185_f67b343899_b.jpg
    155.2 KB · Views: 475
Last edited:

A1an

Well-known member
Joined
Sep 25, 2010
Messages
1,095
Location
Tampa, FL
The black bike with the switchable dropouts is such a simple yet genious idea. Horizontal 'track style' dropouts is all I have personal experience with on my singlespeed rigid. Never wanted to even try a bike with an EBB due to the slight changes in position when you retension to compensate for different gearing.
 
OP
F

fortyfour

Well-known member
Joined
May 9, 2011
Messages
537
Location
Lyndeborough, NH
44 Bikes Frame Shop :: Update 9.13.2011

Just a quick update. Got the first coat done for the doors over lunch today:


Behr: "Brilliant Blue" by BLACK CAP Studio, on Flickr

I think I need a phase converter just for the color. I'm pretty happy with how these are turning out. Scored the hardware too which is good. I'll post up pics of that when I have a chance. More soon. Also received all the goodies to wire up the Bridgeport properly. Can't wait. I'm getting darn close to "Go Time"...
 
To avoid these ads, REGISTER NOW!
Top Bottom