To avoid these ads, REGISTER NOW!

44 Bikes Frame Shop

OP
F

fortyfour

Well-known member
Joined
May 9, 2011
Messages
537
Location
Lyndeborough, NH
@moto367: Here is my temporary alignment beam with bottom bracket tower:


And the tower:


I'm going to turn two parts that get pressed into these critters so I can take a reading directly off of the threads in the bottom bracket (they are two parts from a Park Tool BFS-1 Facing tool):


These two parts thread into the bottom bracket (Left/Right hand threads). I'll eventually have a chuck of steel blanchard ground that is 36" x 48". Feel free to "drop ship" that chunk of metal with the 1/2 tapped holes anytime.

@studlyrs: The curved part you are seeing is quite functional and indeed adds support for running the seat post. Typically I recommend running a 410mm seat post where the very tip of it does not exceed the top tube. The seat tube is reamed and a precision aluminum shim is added to prevent the tube from marking the post - it also enables me to build with a larger diameter tube which makes for mitering / fitup of the top tube a bit easier at that spot.

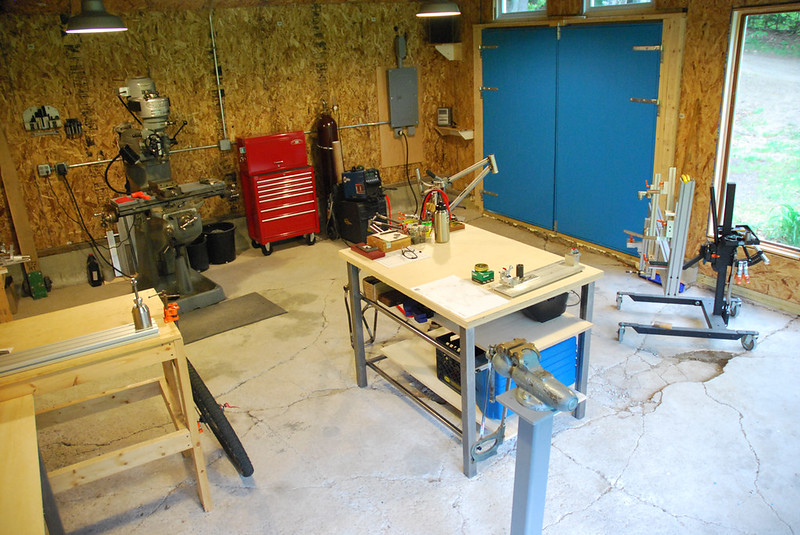
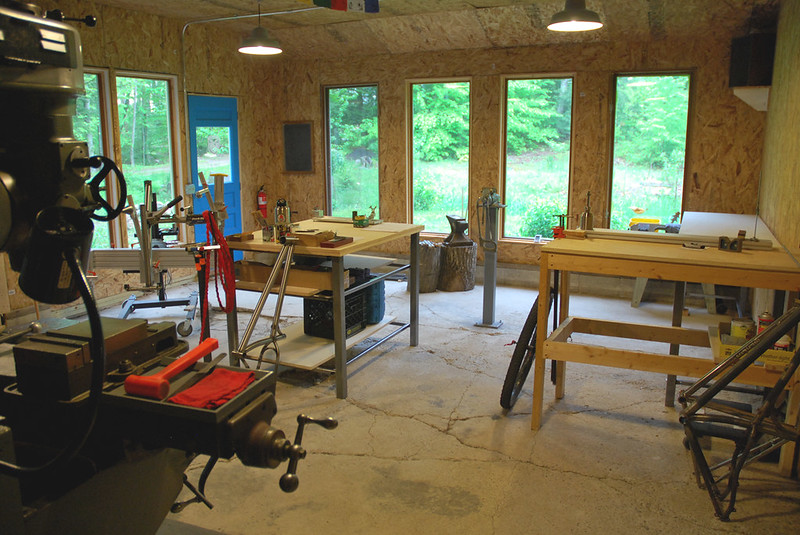
Really diggin' the shop setup/workflow. Steel arrives on friday to build tables. Can't wait... From today's work:

 
To avoid these ads, REGISTER NOW!

fastzr1

Active member
Joined
Jan 1, 2007
Messages
40
Location
Eastern NC
Let me know if you want to unload that fat bike. I need one for the sandy beaches and been looking at the Pugsley for some time. Your skills are great. Love the bikes.
 
OP
F

fortyfour

Well-known member
Joined
May 9, 2011
Messages
537
Location
Lyndeborough, NH
So steel arrived bright and early this past friday morning. Good folks from Choice Metal out of Goffstown, NH were great to work with. First step was to "formalize" some details:


I already knew basically the dimensions of the tables I'll be making and had things worked out in my head. This was more just to make some notes for where to make cuts and get some exact lengths down. First table will be a 36"x48" layout table that will eventually be the base of an alignment table. I will most likely beef it up a bit after I get the new top blanchard ground. But until then, we'll be using 2"x2" (1/16" wall thickness) legs and 1"x1" (1/8" wall thickness) for the connections. Getting files cleaned up and at the ready:


Now that I had all my measurements down on paper, it was time to get to work. Spent the better half of the afternoon on the horizontal band saw:


One thing that is driving this whole project is the ability to take these apart for when I eventually have a new floor poured. One of the 3 will be on wheels but the other two will not be moved once in place. The 2 without wheels will have leveling feet integrated into the bottoms. So it will be nice to have the ability to disassemble them and perhaps modify them too. So the next step was to pull tooling and get things centered on the mill and create a stop so I can automate all these 1/2" holes that need to be drilled 1" from each end of these tubes:


Measured and marked one piece, squinted once to get things nice and tight, then drilled pilot holes on each side. Since the stop was set and the table was locked down in the X/Y axis, I went to town:


Fast forward and I've got all my 1/2" through holes drilled, each has been chamfered too. I also hand filed all the ends of these so that there were no burrs left over from the saw:


Wiped all the grease off of them, washed them good and finished with an acetone wipe down. These are ready for a dry setup to see how things fit:


Since I'm tig welding these, and the heat is very localized the only thing I had flat enough was a piece of 3/4" baltic birch plywood. (I wouldn't recommend this at home as fire can start pretty quickly.) Here you can see the tacks - notice things are clamped down tight but my weld area is not in contact with anything flammable:


And all welded up. I had it easy today - strait lines, flat surfaces? Unheard of on 99% of my welds with round tubes!


Here's the business end of the cross members. Nice little trick I picked up along the way. So a 1"x1" square tube with 1/8" walls has an approximate .75" I.D. A 1/2-13 nut is about .7" in width. If you file just a bit off of two opposing sides, you can thread in a bolt and tap them into the bore nice and tight with a hammer. Unthread the bolt and weld them up and you've got a pretty killer setup. One note: Make sure you use stainless bolts though. Do not use any galvanized, dipped, etc. Very important. I'll run a 1/2-13 tap through just to clean the threads.


And an action shot...


McMaster-Carr should be delivering the remainder of my 1/2-13 stainless nuts and bolts Monday first thing. I had just enough to get the 36" x 48" table welded up but not assembled. I'll be using a similar design for the adjustment feet too. I'll finish up the 24"x96" table once I get the remaining materials. Until then thanks for looking. Stoked to finally be putting some work tables together!
 

machine_punk

Well-known member
Joined
May 14, 2011
Messages
2,540
Location
Napa Valley, California
As always, your work, and the story you tell about completing your work, is fabulous. I like the way you build the things you need...makes me think I need to get a decent mill and lathe soon.

M_P
 

Omphaloskeptic

Well-known member
Joined
Oct 11, 2008
Messages
2,346
Location
Ultima Ratio, Wa.
Slick trick on the cross-member tube nuts! In the pic, it looks like the nut is just proud of the tube end; is this intentional to provide good weldment? Great documentation and photos; your skills are evident every step of the way. Thanks for taking us all along for the ride.

Considering the precision work you do, are you going to take special care to have the new floor finished 'dead flat and level' with a polished surface so that you never have to shim a piece of equipment?
 

Heifer Boy

Member
Joined
Apr 6, 2012
Messages
13
Location
Woollamia, NSW, Australia
I've just read your whole thread from start to finish and I'm very, very impressed with your workshop, your fotos, your bikes and your life philosophy. Your eye for detail and design is wonderful and a couple of things you have said or shown over the length of the thread really hit home. I'm just getting my workshop together (more woodworking than metalworking although welding is on the "must learn" list) and I hope I will get the same enjoyment out of it as you do out of your. I have nowhere near the same kind of location atmoshpere (although I am in the country a bit) and it's just a basic steel garage but I hope to make a place of great work like yours.

I'm a bike guy too since the very early days when steel was all you could get. After all types of bikes over the years a couple of Salsa's fit under me very well at the moment (a rigid ss and a geared race bike, both 29'ers of course) and my younger rivals just don't get steel. They don't know what they are missing. Great stuff :beer:

A couple of thoughts crossed my mind while reading your story though...

First, you are riding your new fatbike unpainted. Have you just laqured it and are keeping it that way or is it only a temp solution because it's a prototype? I love the look as you can really see where the bike came from and I've stripped a few frames over the years to get that look. It actually made me think of your workshop floor with all the cracks and holes in it (not that your frames are old and cracked!!). How about just filling these "features" with clear epoxy to remove the trip hazards, stop the crumbling and give you a smooth, flat surface. I think it would look great and really suit your industrial look. I know it's not a level floor but your tables will have adjustable feet anyway.

Second, do you really have a bike frame as an additional support for your vise? I spotted it in one of your workflow fotos.

Thanks for letting us in to your workshop and business and I'm looking forward to your updates.

HB
 
Last edited:

slickgt1

Well-known member
Joined
Oct 11, 2010
Messages
1,674
Haven't commented in a while. Wanted to come back and say holy wow. Great work, and nice progress on the shop. You really should do something with that floor. The longer you wait, the more of a pain in the *** it will be when you get around to it.

I still say tile it.
 
OP
F

fortyfour

Well-known member
Joined
May 9, 2011
Messages
537
Location
Lyndeborough, NH
Thanks to all for all the kind comments and great suggestions.

@Omphaloskeptic: When the floor is eventually poured, it will be finished as flat as they can get it and I will have it polished/sealed with stress relief / reinforcement. I will most likely add leveling feet to the mill and to the future lathe when it arrives. I don't do Nasa type precision, but having things level will be really nice.

@Heifer Boy: As stated, the floor will be poured in the near future. For now, it is workable and I've decided not to spend any money in the interim as I think I'll just be throwing it away to try and solve a problem that will just reoccur over time since the floor was not poured correctly the first go. Good suggestions though! Regarding the fat bike: with proto's often I will ride them a few times unpainted so I can go through the build process, ride it and see if everything is where I want it regarding brazeon's and finishing touches. Also if things are really out of whack with geometry/sizing, there is no point in painting it as it will not be ridden (been there... done that!). This should be off to paint actually some time this week. And regarding the bike frame / vise, I believe you spotted a proto leaning up against the vise's stand. I do however, have an old mill vise that is not usable serving as a stand for a frame clamp. It was in rough shape when I got it with the mill (Free along with some collets) and I spent some time cleaning and tuning it up along with paint. My best effort and it still wouldn't hold work flat when tightened down. So I replaced it and it was more or less a boat anchor until it found it's new purpose in life.

@sbhockey: Just keep in mind that Tig demands patience and you're in for a bell curve for learning as there is a bunch of stuff going on with both hands, feet and eyes. If you do pick up a tig torch, just know that practice is what it takes to get good. I've been tig welding since 1996 and I just feel as though in the past 4 years, I'm finally getting the "hang" of it! Keep in mind that also saw spans of time where I could not weld due to access to welding equipment. So I've only been welding again consistently in the past say 5 years. Also it really helped to be under the watchful eye of a tig master who has seen it all. That really helped by leaps and bounds actually. It's a great challenge and really gratifying when things are "just so".

@slickgt1: Tile is a good idea-but that floor needs a good pour first! I agree, the longer I wait the more of a pain it will be. But the good news is I've anticipated this pain, so both the internal doors can be removed so I can swing the mill right out that opening and all the tables and such can be taken apart so I can store them in the back room while the new front half is poured. It may even be a reality this year (my fingers are crossed) as work seems to be really flowing nicely on the design side of things. Economy seems to be recovering regardless of what the talking heads are stating otherwise. Just slow and steady for me. I'm not in a rush.

It is nice working in the space finally. This sunday was a perfect example of how little it takes to make me happy: Breakfast with my wife and pup. Stroll out in the garden, drink some coffee. Well, correction - drink a lot of coffee... Get to it at noon building out in the shop till 5. Get suited up for a ride and at the trailhead by 5:30. Tear sh!t up on dirt. Back at home to relax and make some grub. White eyes and white teeth. Couldn't be happier.

Older photo from about 2 weeks ago, but you get the idea:

 
OP
F

fortyfour

Well-known member
Joined
May 9, 2011
Messages
537
Location
Lyndeborough, NH
Got about an hour in today at the end of the day to work on tables. Here's one of the 24" tables leg assembly cleaned, fitted and clamped up ready to be tacked:


Got most of this one finished today before cleaning up for the day and heading out for a ride. Here's one of the welds finished. My pace has increased recently - no bluing and the welds are nice and shiny. If anyone wants to know, this is one pass with these settings:

90 Amps @ 1.4 PPS / Peak @ 60% / Background @ 20%
.0625 Lanthanated Tungsten, Gas Lens with No. 8 cup. (CK130 Torch)
.035 ER70s2 filler.


More tomorrow with some assembly pics hopefully.
 
OP
F

fortyfour

Well-known member
Joined
May 9, 2011
Messages
537
Location
Lyndeborough, NH
Ok - making some headway today. The 36x48 assembled. I will be adding two cross members to give the top/shelf some extra support. Will have some 3/4 baltic birch ply cut and doubled up for the top most likely in the next few days and will be welding the adjustment feet in most likely tomorrow afternoon. Note how I will skillfully cover up that sink hole. Here's a quick assembly shot:


You can see the "boat anchor" in this pic making good use of itself as a base for my bike stand. The mobile version was good but the wheels took up too much floor space and that vise needed a purpose in life. It's found a good home in a menial task of permanent work holding...

And a corner detail. I should have ordered the 1/2-13 low head bolts. But I kind of like the "bossness" of these plain socket head caps. Maybe I'll turn them down a bit when I get a lathe...


Should be welding up the 24x96 table tomorrow first thing along with mitering up the mainframe for a client and friends 29er destined for the mountains of NC. Here's the top tube ready for the first cut:


And a detail of the seat tube badge before it's formed. Only the important stuff on this one: Lucky number pad (in this case it will be #13) and country of origin...

 
To avoid these ads, REGISTER NOW!
OP
F

fortyfour

Well-known member
Joined
May 9, 2011
Messages
537
Location
Lyndeborough, NH
Hey thanks guys. Much appreciated on the welds! I try and make each one better than the last.

So here's a "State of the 44 Metal Shop" as of 5.15.2012. I had been working in the space now with the mocked tables for a week and built up the 36"x48" table as well as getting the main frame of the 24"x96" together this past weekend. Today before I started my work day, I decided that the 36x48 needs a second shelf for more storage. I'll be adding some cross braces now that I have settled on this layout in this table. There will be a long storage bin on one of the sides (hence the 24"x48" pieces of ply). I'll see if I can build these either this weekend or next. But took some shots so you can see how things are shaping up. From south side looking north:


I am pretty happy with having my vise separate from a work bench and up on a pedestal. I can work 360* around it and I find this really helpful especially when filing / cleaning parts. Workflow feels good too with the anvil close by and the tables to my left/right.

Another shot looking south from the north wall. Check out that light coming from that side of the shop! Love this as it lets me pause and take in what's going on outside. I'll often do some finishing work right in front of the windows utilizing that light:


The third table I may end up making 36x24 as a smaller dedicated tooling cart on wheels. I thought perhaps a 48x24 but perhaps a slightly smaller "elbow" may be nice. That may enable another smaller tool chest to be placed in front of it. Don't know. More soon. Till then, one shot from today's work finishing a main triangle for a client:


machine_punk

Well-known member
Joined
May 14, 2011
Messages
2,540
Location
Napa Valley, California
Looking good! I know it is nice to get the workbenches sorted out and put things where they need to be. I'm trying to sort out where to put a piece of equipment in my garage right now.

You do good work!

M_P
 

iancoletx

Member
Joined
May 16, 2012
Messages
24
Joined to say that you have done an outstanding job, and what you have there is a workshop anyone would be proud to call the product of their work. Good luck in everything.
 

fergus

Well-known member
Joined
Oct 4, 2009
Messages
1,620
Location
Yolo County CA
Man, I would love to have just 1/2 of the natural light in my place that you have in your shop. I'd ditch any wall cabinets in a half minute. I've got to go find some windows...
 
OP
F

fortyfour

Well-known member
Joined
May 9, 2011
Messages
537
Location
Lyndeborough, NH
Update for 5.20.2012:

Saturday was work around the house "responsibilities" day. Followed by a bicycle ride naturally. Sunday however, was "my day" for doing what i wanted to do. Followed by a bicycle ride as well. So today (sunday) I took some time to fabricate and weld up the first set of leveling feet for my 36x48 table. This kind of was a moving target and I decided to solve the problem on the fly. I basically created a set of "T's" to press into the legs that had a nut welded to them to accept a 1/2-13 leveling foot. Here's the steps. First up is a quick, down and dirt sketch to get my ducks in line:


Next up was to start drilling some holes:


Drilled, countersunk and deburred. I then milled a bit off each side leaving a wing so that when the part was lightly pressed into the table leg, it created a stop as well as a nice platform to run a weld across. Test fit up before I do the rest of the parts:


Then it was time to line all the parts up and weld a 1/2-13 nut in place. Notice the hole goes all the way through-I used a 1/2-13 bolt to hold them in place. Worked well while welding them:


And finally, welding up the legs one at a time. The 1/2-13 bolt was rethreaded into the nut and worked very nicely as a perch for my palm while welding. I simply flipped the table upside down and got to work:


Action shot:


Once this was done I took the time to sand up the top and get 2 coats of water base polyurethane on both tops (36x48 and 24x96). I'll take some shots tomorrow with the table reassembled. I'm using the 1/2-13 bolts as the leveling feet in the time being until the actual leveling feet arrive from McMaster.

And this past week was a weldfest building a clients frame. Some shots from this weeks effort. Mitering the seat stays:


Fit up looks nice:


Welding:


Getting really close to being done:


Fitting up the bridges:


And a nice shadow cast about 8am from my anvil:


markf4e

Well-known member
Joined
Oct 25, 2010
Messages
87
Location
Delaware
First, let me say amazing shop and amazing work! I have been following along since I saw your shop in the featured section.

On your floor, I was wondering if you had entertained (or found) any other options besides a complete re-pour (I saw you mentioned this as your solution)? I have similar cracking conditions in my garage from water getting under the slab, but I want to avoid ripping it all out at the moment. Thanks in advance!
 
Last edited:
OP
F

fortyfour

Well-known member
Joined
May 9, 2011
Messages
537
Location
Lyndeborough, NH
@markf4e: Thanks for the kind words. Regarding the floor, the trouble is that the ground below was never prepped correctly. So anything that I do, it's going to continue to heave. If it was a woodshop setup, I'd most likely just put a floating sub floor on top of it. But since I have machinery that should sit on a level chunk of concrete, it's unfortunately what needs to be done.

If you have water getting under your floor, you're going to want to try and redirect any future water flow away from your floor and potential new floor. A friend who does a lot of foundation work recommended that when I do re-pour, I take the time to dig a ditch around the north side, filling it with gravel and a pvc pipe with holes in it that funnels the water around the shop (the shop sits at the foot of a large hill - so runoff may also be part of the floor problem). But so much of a floor's longevity has a lot to do with the care and effort in preparing the ground before you pour and the steps you take to reinforce / insulate too from what I have been reading and hearing.

The good news is that I am finding I can still work in there despite the floor.
 

markf4e

Well-known member
Joined
Oct 25, 2010
Messages
87
Location
Delaware
Thanks for the response, I am sure you are right about needing a re pour lol. Oh well! I will have to look at diverting the water with the gravel / PVC and then go from there.

Thanks again!
 
Last edited:
OP
F

fortyfour

Well-known member
Joined
May 9, 2011
Messages
537
Location
Lyndeborough, NH
@Markf4e: I have been thinking of pouring one side where the machines will be and then building a raised subfloor on the other side. My only question though is will that just buckle and distort over time. Best to just wait and do it right though.

Quick shot of the table top. Nothing too special. 2 coats water based polyurethane, 600 grit finish sanding and then a top coat of clear butchers wax. Buffed out with a cloth and then shined with some fine steel wool to give it a really hard / shiny feel. That should help protect it a bit from all the metal/dirt it's going to see.


In other news, I have an inside line on a SB heavy 10... Will be checking it out in short order. Maybe if the planets align she'll be mine. Fingers crossed.
 
OP
F

fortyfour

Well-known member
Joined
May 9, 2011
Messages
537
Location
Lyndeborough, NH
@billyvray - I have not attached them yet. They are floating for now. I will share how I attach them though. I'll be using some 1/4-20 inserts on the bottoms of the table to accept a 1/4-20 cap screw. I'll be sure to share when i finish those.
 

automobiliben

Well-known member
Joined
Jan 9, 2012
Messages
181
Location
Greenville, SC
Good luck with the Heavy 10! I was trying to keep my eyes out for one as well, and ended up getting a 13" Sheldon for free. Looks very similar to a Heavy 10 though.
 

Thedoc14

Well-known member
Joined
Mar 4, 2012
Messages
259
Location
Melb, Australia
Love the simple idea of the vice free standing, it does make working around simpler.

On the inside of the lower rear fork @ the pedal hub, how and why do you indent the tube. or is that caused when you bend your tube?

Great work and love the atmosphere of your shed.

Nick
 
OP
F

fortyfour

Well-known member
Joined
May 9, 2011
Messages
537
Location
Lyndeborough, NH
Thanks all for the kind words.

@Tman: Bending over to tighten/loosen the toe straps is something I know all too well. These are my "Framebuilders 3rd Hand"!

@Thedoc14: Bends are done manually on a JD2 Model No. 3 bender. I then put the stays into a separate piece of tooling to form that indent for tire clearance. I also take into account that when I form them, the stays close up some too at that end so the bend is not final until I form the indent.

The freestanding vise is really nice. If you have the room I highly recommend it. It enables you to work 360* without having to take the part out to readjust. I have been finding myself working more from 2 o'clock diagonally to 7 o'clock actually.

Off to paint:


And some cool shadows:


To avoid these ads, REGISTER NOW!
Top Bottom