To avoid these ads, REGISTER NOW!

Above 1200 Sq/FT 48x32 Shop

Wokspaces above 1200 squarefeet.
To avoid these ads, REGISTER NOW!
OP
C

Chilliwack Murray

Well-known member
Joined
Dec 10, 2012
Messages
1,501
Location
Chilliwack BC
Concrete is super hard, shrinkage is minimal, most of the movement has been at the edges with a few minor cracks elsewhere in the slab. I've done quite a lot of overdue work on the family vehicles and spilled lots of oil WRC and cleans up well, nothing soaks in.
 
OP
C

Chilliwack Murray

Well-known member
Joined
Dec 10, 2012
Messages
1,501
Location
Chilliwack BC
Second floor framed up and windows in. Have to start thinking about finishing the wall now. Maybe corrugated metal and old wood.
 

Attachments

  • image(4).jpg
    image(4).jpg
    69.5 KB · Views: 315
  • image(5).jpg
    image(5).jpg
    52.2 KB · Views: 304
  • Interior Corregated Weath Wood 2.jpg
    Interior Corregated Weath Wood 2.jpg
    69.4 KB · Views: 366
OP
C

Chilliwack Murray

Well-known member
Joined
Dec 10, 2012
Messages
1,501
Location
Chilliwack BC
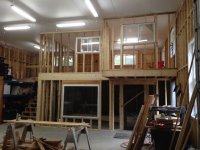
One set of interlocking carriage doors. I made similar doors in the past which turned out well but were insanely heavy. I also had trouble sealing them up as they were flush with the inside and outside. These have 1" inset on the inside so they can close into a frame and weatherstrip and 2 3/4" inset on the outside to keep the weather off the top of the doors.

This time I used 2x4 for the outer frame with 1x4 reinforcement and 3/8 plywood sheathing screwed every 8". They are about 60 lbs now without the insulation, inner skin and outside finish

Also made them interlock/overlap 2" to give me a place to seal the space between the doors and allows a smaller gap for the swing radius. There is a 1/2" gap (front to back) for weatherstrip in the overlap and 1/4" between the doors for swing clearance. I can increase that if needed or preferably, radius the inside corner of the overlap door and keep it tighter on the outside. Either way, kept my options open for fitting them.

IMG_1849.jpg
IMG_1851.jpg

IMG_1845.jpg

IMG_1846.jpg

IMG_1847.jpg

IMG_1848.jpg


Looks like they fit well, the edges are plenty thick to allow for removing material if required. Next challenge is to find hinges. I found the hinge the type of hinge I need - raised barrel hinge but they are tough to get. An easier solution is likely to bend some in the press to get the "raised barrel" effect, then weld on another hinge plate to get the required distance for the thickness of the doors. The raised barrel (pin) spaces the fulcrum away from the wall so the pin doesn't need to protrude past the door frame - my doors are inset over 2".

Thinking about a new signature line: Measure twice, cut once, buy extra materials.
 
Last edited:
OP
C

Chilliwack Murray

Well-known member
Joined
Dec 10, 2012
Messages
1,501
Location
Chilliwack BC
Hinges built and doors installed Weatherstripping installed all around and cozy warm for the Model A. Will put in some cane bolts tomorrow.

Now to finish the outside to match the cedar siding.

100.jpg

101.jpg

104.jpg

107.jpg
 
Last edited:
OP
C

Chilliwack Murray

Well-known member
Joined
Dec 10, 2012
Messages
1,501
Location
Chilliwack BC
Finally got this installed after storing and moving it numerous times in the past 10yrs. Before everyone gets excited, I'm putting a heat shield behind it and moving the stuff beside it. I was just burning some cardboard to check for leaks etc in the chimney.

And the fire box is 19" off the ground... 21 1/2 if you count the brick liner.

127.jpg

128.jpg
 
Last edited:

ADSR

Well-known member
Joined
Jan 12, 2013
Messages
10,713
Just read the whole thread. Love the hard work! Looks like it's paying off.
 

stephan191

Active member
Joined
Mar 9, 2013
Messages
30
Location
Perth, West Australia
There are too many threads to read on here...lol...just kidding...I love the ease with which the initial building went up! If it wasn't for the termites here, I would have liked to use a similar system for my shed...but I went with bricks instead..
Great looking shop! Keep the updates coming!
 

Hounddog

Well-known member
Joined
Nov 3, 2013
Messages
386
Location
NW Florida
7b00201eff4b3a8ebdb1c8d957135208.jpg


And the fire box is 19" off the ground... 21 1/2 if you count the brick liner.

So for myself, being a stove novice...is getting that fire box up preventing getting that slab too hot or ? I'm nearing my install and am trying to learn. Thanks nice shop.
 
OP
C

Chilliwack Murray

Well-known member
Joined
Dec 10, 2012
Messages
1,501
Location
Chilliwack BC
Getting it up off the floor is to prevent ignition of any fumes that may collect on the floor in a shop. Any furnace, waterheater etc needs to be 18" off the floor here, different in every area I suspect.
 
OP
C

Chilliwack Murray

Well-known member
Joined
Dec 10, 2012
Messages
1,501
Location
Chilliwack BC
e55134a2eff523d28c6c924db65e457a.jpg


One set of 9'W x 7 1/2'H doors. Haven't finished the outside yet.

We have a cold snap (for here... 5-10 degrees below freezing) and the little electric heater on the 500W setting is keeping it around 10C and only runs about 10 minutes per hour from what I've noticed. All the insulation and weatherstripping must be working because it's windy as heck outside.
 
To avoid these ads, REGISTER NOW!

rarebreed

Well-known member
Joined
Jun 26, 2013
Messages
146
Location
Clover, SC.
Chill, is that a Ford Fiesta in those pics? My dad had one in the late 80's and I learned to drive stick in that car. Wish I still had it, it was great on gas.
 
OP
C

Chilliwack Murray

Well-known member
Joined
Dec 10, 2012
Messages
1,501
Location
Chilliwack BC
Looking more like walls now. A question for those more in the know... The poly on the outside of the walls (facing the unheated shop) is there right now to hold the insulation in place. I plan to put vapour barrier on the inside of the walls. When I do, should I slice the temporary poly so it doesn't trap moisture? This is not really a living space, there will never be cooking or bathing in there (unless I get kicked out) so I don't think it would matter either way.

I'd like to make it as dust proof as possible so I thought the outside poly would reduce the dust further if it's intact.

181.jpg

192.jpg

196.jpg

199.jpg

200.jpg
 
Last edited:
OP
C

Chilliwack Murray

Well-known member
Joined
Dec 10, 2012
Messages
1,501
Location
Chilliwack BC
Picked up some used metal roofing today. One of the more entertaining projects so far. Probably look around the yard for some old weathered wood to trim out the windows and corners.

258.jpg

263.jpg
 
Last edited:

1/2 Cup

Member Emeritus
Joined
Apr 28, 2012
Messages
19,283
Location
Shepparton. Victoria. Australia
Your mezzanine looks great and a fantastic use of space, well done.:thumbup:

Unfortunately I don't have the height in my garage to put a mezzanine like yours but I do try take advantage of what height I do have.

Regards
 
OP
C

Chilliwack Murray

Well-known member
Joined
Dec 10, 2012
Messages
1,501
Location
Chilliwack BC
Now that I look at it, I should made that corner railing post longer and used it to strap the bottom post to the floor joists. Have to go out and figure another way, or cut new corner posts.
 
OP
C

Chilliwack Murray

Well-known member
Joined
Dec 10, 2012
Messages
1,501
Location
Chilliwack BC
Picked up some used 1/2" plywood real cheap. Seems to look pretty good on the walls after a quick pressure wash. Still a little damp, might stain it if it lightens up too much. It's rustic!

90dc84badc59c9500681fb53ee4578c3.jpg
 
OP
C

Chilliwack Murray

Well-known member
Joined
Dec 10, 2012
Messages
1,501
Location
Chilliwack BC
Thanks for the compliment, it's not bad for 86 years old and almost 50 since it was restored. For one reason or another we never seem to make it to that one. Usually go to the Hougan Park show and Ft Langley though.
 
Last edited:
To avoid these ads, REGISTER NOW!
Top Bottom