
You are using an out of date browser. It may not display this or other websites correctly.
You should upgrade or use an alternative browser.
You should upgrade or use an alternative browser.
48x36 garage/apartment
- Thread starter jopickens
- Start date

Press_Corpse
Well-known member
This looks awesome! I love your second rendering of house - hallway - guest house. All the foam should make this puppy cheap to heat/cool! Keep us up to date, I know I'm subscribed 
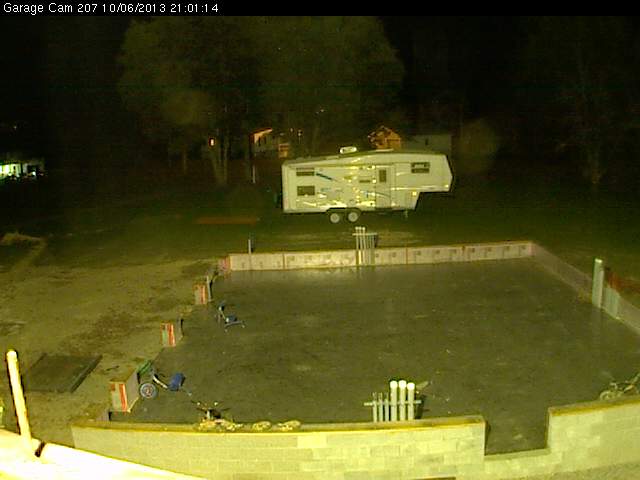
I've since attached 2x8 plates on top of the 2x12 PT sill plates the 1st. floor SIP walls will attach to. The boys have been keeping me busy as of late with soccer, flag football, cub scouts, and 4-H (air rifle team as well)... so progress has been slim. None-the-less I'm planning a SIP wall party for this weekend... we'll see how many of them we get set. Any last minute tips from those who have installed SIP panel walls? I have them stored in my shop at the moment...
Josh
Josh
Finally got to stand some SIP panels up today, 22 of them to be exact. 1st. floor far wall, back wall, and one panel around the corner on the near wall. Have to house wrap and cover it tomorrow, showing rain for the next couple days starting Tuesday. Shouldn't take but another day to finish up the near wall (man door opening) and get a good start on the stick built front wall. I'll take some pics tomorrow and post. Once we (four of us) got in the groove and figured out the process they went up quite easily and rather quick. I'm impressed with how solid they are once flange nailed to the bottom 2x8 and to one another. You must have them plum before nailing because they don't go anywhere afterwards! Also, don't skimp on the panel adhesive... the more you have in there the easier they slide together.
Josh
Josh


55cadillacking
Well-known member
Hauled some plywood and foam sheeting home on Friday in my Nissan Leaf... haha
Try to save burning fuel in my diesel trucks whenever I can...
There's a fair amount of beauty and irony in that statement!
Your garage looks like one of the most solid buildings I've seen constructed in a while! Great work.
Yes there is...
Well thank you - yes, the front wall is framed out of 2x8 to match the 8.25" thick SIP walls. I'll fill it full of EPS/XPS etc. etc.
I don't know how much it holds true for the 2x6 and 2x4 SIP panels... but when these walls are set up on the 2x8 plate and then double capped they are EXTREMELY sturdy. Sturdy as in those that check them out in detail tap, knock, smack, and eventually give them a good push and usually just shake their head in disbelief.
Josh
Well thank you - yes, the front wall is framed out of 2x8 to match the 8.25" thick SIP walls. I'll fill it full of EPS/XPS etc. etc.
I don't know how much it holds true for the 2x6 and 2x4 SIP panels... but when these walls are set up on the 2x8 plate and then double capped they are EXTREMELY sturdy. Sturdy as in those that check them out in detail tap, knock, smack, and eventually give them a good push and usually just shake their head in disbelief.
Josh
Did I miss it or is it not mentioned, what's the R-value of those walls ?
R-32 for the EPS filled 8.25" thick SIP panel. Out of that 8.25" total is an inner and outer layer of 7/16" osb. Obviously that is a nice amt. of insulation to have in your walls... but I'm sure where the building system really shines is the lack of thermal bridging and overall air tightness. Foam or panel adhesive goes between every two 'parts' that get connected. I'm even gluing the entire stick built front wall together. Dimensional to dimensional and dimensional to sheathing etc.
Last edited:
michaelmjc
New member
- Joined
- Oct 20, 2013
- Messages
- 2
More pics!
Things are looking very good. I do think that it may have been a waste all that pex because what I see so far, a good fart will warm that building. I have the heated floor in my building and personally think there is no better heat for a working shop. Warm feet and cool air to work in.
lg
no neat sig line
I have the heated floor in my building and personally think there is no better heat for a working shop. Warm feet and cool air to work in.lg
no neat sig line
Last edited:
katotter
Well-known member
In for updates.
Great job so far.
Great job so far.
Worked on building the overhead door headers this afternoon. Using up some 2x10 (1.5" x 9.5") sized Ijoists I have been saving for quite a few years... I glued and ring nailed 4 of them together with 5/8 plywood to achieve a 7-1/4" thickness matching the 2x8 stick built front wall. Layered within' them polyiso insulation in 1" and 1/2" variants. I assume (please chime in) this will provide adequate support for the roof above the 10'x10' overhead doors.


Josh
Josh
Last edited:
Cutting 5 columns out of scrap pipe/tube I've gathered up over the years. These will be in line with divisions between the front wall doors (& one on each end) and placed ~1/2 way back in the garage to support the 2nd story floor. I have four ~14' 12"x4" wbeams that I will cut down appropriately and place atop these columns. Those will support the 35 12" ijoist running from the back wall forward out over this support structure.


Josh
Josh
Garage Coffee Roaster
Well-known member
Looking good. Subscribed.
R-32 for the EPS filled 8.25" thick SIP panel. Out of that 8.25" total is an inner and outer layer of 7/16" osb. Obviously that is a nice amt. of insulation to have in your walls... but I'm sure where the building system really shines is the lack of thermal bridging and overall air tightness. Foam or panel adhesive goes between every two 'parts' that get connected. I'm even gluing the entire stick built front wall together. Dimensional to dimensional and dimensional to sheathing etc.
R-32, that's awesome.

theoldwizard1
Well-known member
Some how I have missed this thread to date. Great example of top quality, energy efficient construction !
That "home made" beam is AWESOME ! The only downside would hanging anything off of the face of that beam, like a typical joist hanger. Hangers that go "over" the top would probably work just fine as long as they attach into the top of the I joist.Worked on building the overhead door headers this afternoon. Using up some 2x10 (1.5" x 9.5") sized Ijoists I have been saving for quite a few years... I glued and ring nailed 4 of them together with 5/8 plywood to achieve a 7-1/4" thickness matching the 2x8 stick built front wall. Layered within' them polyiso insulation in 1" and 1/2" variants. I assume (please chime in) this will provide adequate support for the roof above the 10'x10' overhead doors.
theoldwizard1
Well-known member
I am just learning about SIPS and if I ever build I WILL use them !
From reading, I notice there is a choice of splines that can be used. From simply "letting in" a 4-6" wide piece of OSB immediately behind the "skin" OSB, to a full SIP spline to single or double "2 by".
What are you using and why ? (Or am I over thinking this issue ?)
I can't wait to see you setting the roof !
Buddy Bill wearing out the caulk gun...

From reading, I notice there is a choice of splines that can be used. From simply "letting in" a 4-6" wide piece of OSB immediately behind the "skin" OSB, to a full SIP spline to single or double "2 by".
What are you using and why ? (Or am I over thinking this issue ?)
I can't wait to see you setting the roof !
rmckee
Well-known member
Looks great so far!
I am just learning about SIPS and if I ever build I WILL use them !
From reading, I notice there is a choice of splines that can be used. From simply "letting in" a 4-6" wide piece of OSB immediately behind the "skin" OSB, to a full SIP spline to single or double "2 by".
What are you using and why ? (Or am I over thinking this issue ?)
I can't wait to see you setting the roof !
theoldwizard1 - yes, and from my experience early this am I'll continue using them in my future construction projects! Let me briefly explain... I've not followed general construction practice of bracing these SIP walls because of how sturdy they 'felt'. No professional or scientific reasoning or explanation - simply my gut. And coupled with my DIY garage/apartment construction slow progress schedule I put myself at great risk not getting the building under roof quickly like a regular construction crew would etc. Well @ 4:30am we had a storm front come through that produced 10-15 minutes of 50+mph wind gusts... some reports in my area of 70mph at times. I was awaken by a call from our NOC (telecommunications is my line of work) at 3:55am - power was out and some manual intervention from my team was needed. Well, at that point I knew what was in store for me. I live ~25mi. East of my office. By the time I got outside and started gathering up supplies to put some bracing on the rear wall I was blindsided by wind and rain. WOW! I've never rode out a hurricane or anything 'life threatening'... But trying to get something productive done is almost futile. I ran into the garage and realized the loud banging/crashing I was hearing was 7/16" OSB blowing off a couple sheets at a time from a stack on my trailer in front of the garage. They were flying through the 10x10 overhead door openings and busting into pieces when coming in contact with the scaffolding rigs I have set up in the garage. Now I'm REALLY concerned about the rearmost wall of the garage - 48' of un-braced SIP wall standing 10' tall in this wind storm. Of course I quickly run back out of the garage near side man door with OSB missiles on my tail... I circle around the front to the relief that all the sheets had been put air born and no other life threatening projectiles should come my way post re-entering the structure. I head directly for the rear wall (very bright LED headlamp on, stayed on my head somehow throughout the storm) to place both hands upon it to determine whether it was 'flapping' or even still there... Whew - it was. And for what seemed like minutes (probably was more like 15 seconds) I stood there with both hands on it, rain and wind pelting my back, and determined it was as solid as I had hoped. It had actually blown the scaffolding rigs with all 4 wheels locked across the floor... As well as peeled off 1/2 of my plastic sheeting on the inside and house wrap on the outside. Can't imagine living in the tornado belt and dealing with wind like this (and beyond) on a regular basis. Changed clothes and headed off to the shop to fire up the generator. Power was restored a few minutes ago...
Josh
BlackSheepSpeedShop
Well-known member
Very nice! I will be following your build. Thank you for sharing.
From reading, I notice there is a choice of splines that can be used. From simply "letting in" a 4-6" wide piece of OSB immediately behind the "skin" OSB, to a full SIP spline to single or double "2 by".
What are you using and why ? (Or am I over thinking this issue ?)
Good question. Basically if you relieve the panel for a window or door opening you spline with 2x dimensional lumber to each side to give back support to the area you 'weakened'. Then you relieve the foam in the opening and lay in 2x dimensional lumber there as well. For instance, my rear 1st floor wall has four 2'x4' windows in it. I offset the windows entirely to one side of the 4'x8' SIP panel. Then used vertical 2x8s on that side as well as 'framed in' the window opening with 2x8s etc. Otherwise for long wall runs that have no openings - you simply spline with 3" strips of osb. I'll try and capture some detailed pics as I erect the 2nd floor walls next weekend to show what I'm attempting to explain.
Josh
Productive weekend of work... Completed the steel erection and 80% of the 2nd story floor. Thanks goes out to all my friends that stopped by at various times to lend a hand. Constructing this alone would be an arduous journey...
Hauling more material home Friday afternoon

Outside/inside shots this am before heading to work


View from above - time to trim off the ijoists, install the rim board, and finish off the sheeting.
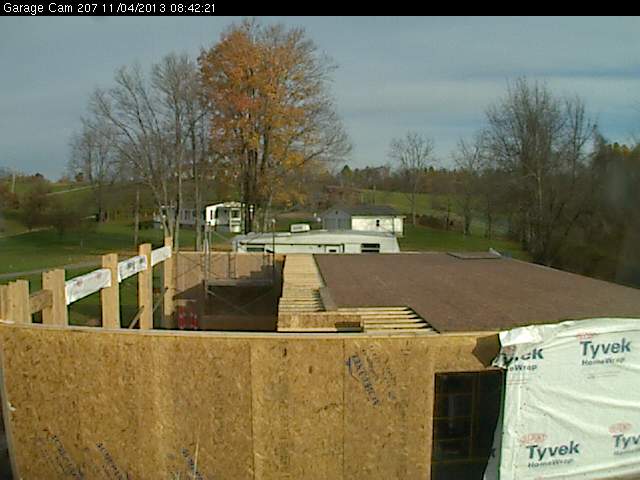
Josh
Hauling more material home Friday afternoon
Outside/inside shots this am before heading to work
View from above - time to trim off the ijoists, install the rim board, and finish off the sheeting.
Josh
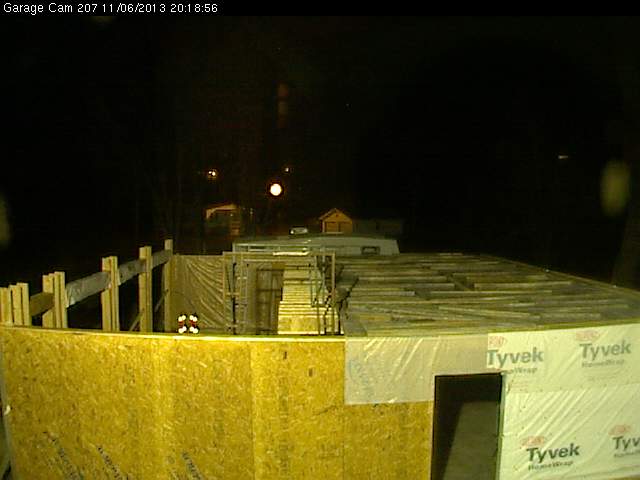
Ready for the rain... I hope.

Josh
I just checked the radar, zoomed out and saw about the same damn pic. I thought what the heck, I thought I was back on Weather channel.com
You have made a leap in progress.
Haha - yes, quite a wide swath of precipitation...
Yes it is and it's been raining practically all day here. Not a heavy rain but a light rain or heavy mist. I'm about to your 10 or 11 o'clock on that map, See Bucyrus ? That's close enough.
timtim2008
Well-known member
Slathered on some waterproofing for the drain pipe etc.

how you apply the waterproofing? spray? brush/roller?
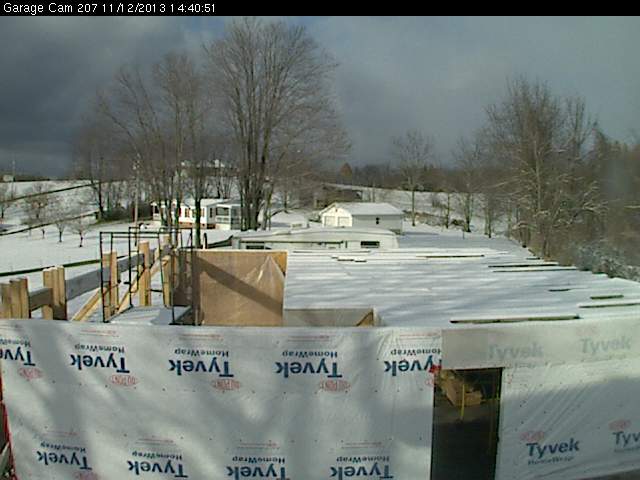


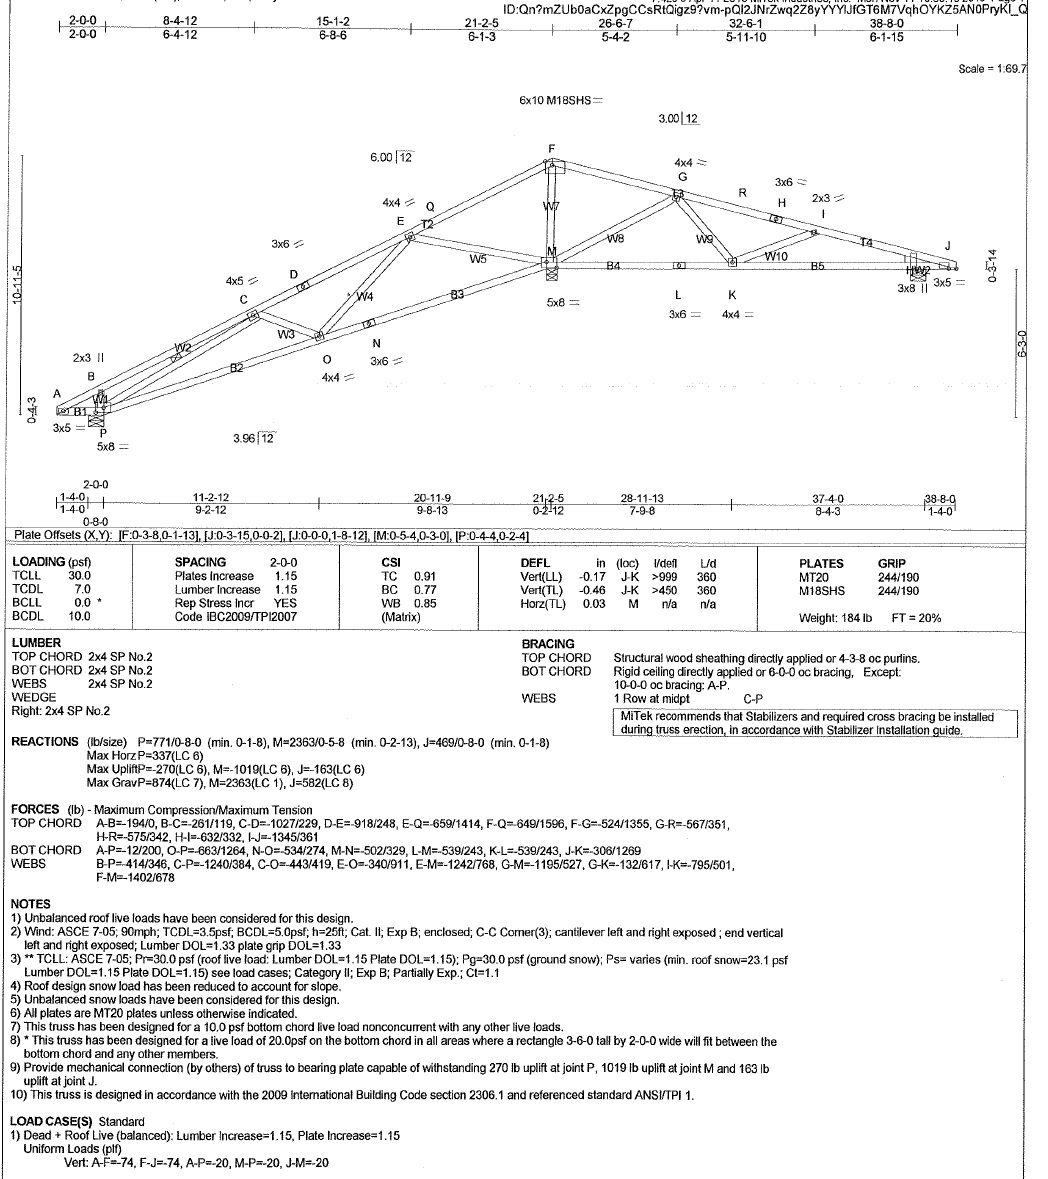
Anyone see anything out of the ordinary with this truss diagram? I've ordered trusses before for my other projects... but am always apprehensive when approving the design because if you miss something, it's not a good time to resolve it when the crane truck is setting them.
Josh
Josh
katotter
Well-known member
My first design had asymmetric trusses. Read all the horror stories about it and decided to raise the floor and make it level.Anyone see anything out of the ordinary with this truss diagram? I've ordered trusses before for my other projects... but am always apprehensive when approving the design because if you miss something, it's not a good time to resolve it when the crane truck is setting them.
Josh