To avoid these ads, REGISTER NOW!

Between 265 & 485 SQ/FT 5 acres and a farmhouse

Workspaces sized between 265 and 485 squarefeet.
To avoid these ads, REGISTER NOW!

tj675

Well-known member
Joined
Apr 9, 2019
Messages
905
Location
The Mitten
How many birds does she have? Our coop is 15x15, original to the barn (1926), and is more than enough room for our 10 birds (could probably double the number of birds). The one thing that I really like about our coop is that it has a concrete floor. It does a good job of keeping the critters out. It is also really nice when it comes to the annual cleaning.

If you wanted to siding and sheeting in one look at T111.
 

Bert_

Well-known member
Joined
Dec 24, 2016
Messages
9,775
Location
NW Iowa
Alrighty,

I need some insight on this. My wife really loves her birds. She loves them so much, in fact, that she wants to build them a 20'x20' coop. I've put together a general price list for everything and it looks like the sheathing and roof are the most expensive part of this. I'm trying to do this as budget oriented as possible, so I'm curious to hear some thoughts.

First decision is pole shed vs traditional framing. She wants a floor in it so I figured we would probably frame it like a normal shed. 2x6's for the joists and 3/4 inch plywood for the floor. 2x4 framing. Gable roof with metal roofing.

The other question is siding. If we sheath it with OSB first, we will still have to put siding on it. This option is considerably expensive. My thought was we could do board and batten siding right on the 2x4's. That way it looks good, and there's only one layer to worry about putting up and paying for.

This is a chicken coop, so it needs to breath anyways. Thoughts? Just looking for some ways to make it a bit more budget friendly without sacrificing too much!
How many chickens? 20x20 is pretty big.

Bad thing about a floor is cleaning it out. Best thing I've found is build it just sitting on the ground with no floor. Then you just move the building and scoop it up with a loader. Works good with a small building. Built one for my mom quite a few years ago, about 6x8. She keeps 6 or so chickens.
 
OP
N

NBraun

Well-known member
Joined
Sep 14, 2020
Messages
158
How many birds does she have? Our coop is 15x15, original to the barn (1926), and is more than enough room for our 10 birds (could probably double the number of birds). The one thing that I really like about our coop is that it has a concrete floor. It does a good job of keeping the critters out. It is also really nice when it comes to the annual cleaning.

If you wanted to siding and sheeting in one look at T111.
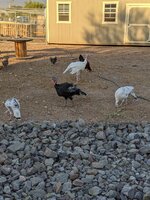
Part of the reason it's so big, is we plan to wall off part of it for feed and hay storage for our goats. She currently has 3 turkeys and a couple of guineas. I know she wants more guineas, as well as 10-15 chickens, So she wants the size big enough to be future proof for any future birds.

That siding looks like it would work out well!
 
OP
N

NBraun

Well-known member
Joined
Sep 14, 2020
Messages
158
How many chickens? 20x20 is pretty big.

Bad thing about a floor is cleaning it out. Best thing I've found is build it just sitting on the ground with no floor. Then you just move the building and scoop it up with a loader. Works good with a small building. Built one for my mom quite a few years ago, about 6x8. She keeps 6 or so chickens.
I'm on team no floor, because of this reason, but she's pretty certain she doesn't want to deal with that.
 
OP
N

NBraun

Well-known member
Joined
Sep 14, 2020
Messages
158
Well, I spent some time on the Menards builder tonight getting a better idea of materials and cost. I was way off with my rough estimates. Lumber is going to be expensive enough that it may make more sense to hold off and put that towards a larger garage, and just hold off on the large coop for now.
 

landlord30

Well-known member
Joined
Mar 19, 2014
Messages
508
Location
Pittsburgh, PA
Nice piece of property!!

The thing I don't understand is that over 40 posts in and nobody has asked where on the 5 acres the 100' x 200' shop is going to be built.
 

tj675

Well-known member
Joined
Apr 9, 2019
Messages
905
Location
The Mitten
Well, I spent some time on the Menards builder tonight getting a better idea of materials and cost. I was way off with my rough estimates. Lumber is going to be expensive enough that it may make more sense to hold off and put that towards a larger garage, and just hold off on the large coop for now.

Add the coop as part of the new build.
 

jollygreengiant

Well-known member
Joined
Nov 10, 2013
Messages
2,368
Location
Ontario, Canada
Alrighty,

I need some insight on this. My wife really loves her birds. She loves them so much, in fact, that she wants to build them a 20'x20' coop. I've put together a general price list for everything and it looks like the sheathing and roof are the most expensive part of this. I'm trying to do this as budget oriented as possible, so I'm curious to hear some thoughts.

First decision is pole shed vs traditional framing. She wants a floor in it so I figured we would probably frame it like a normal shed. 2x6's for the joists and 3/4 inch plywood for the floor. 2x4 framing. Gable roof with metal roofing.

The other question is siding. If we sheath it with OSB first, we will still have to put siding on it. This option is considerably expensive. My thought was we could do board and batten siding right on the 2x4's. That way it looks good, and there's only one layer to worry about putting up and paying for.

This is a chicken coop, so it needs to breath anyways. Thoughts? Just looking for some ways to make it a bit more budget friendly without sacrificing too much!
I would go with board and batten as you suggest. Or I would keep an eye open for some used steel roofing sheets. You could use them for the walls and the roof.

For framing I would go with a pole shed style. With a 20x20 building your going to want it anchored pretty well, so the posts could be set deep to accomplish this. Also, the horizontal girts would be perfect to attach either B&B or steel sheets to. If you do stick framing you'll have to add nailing strips before you add the siding.
 

jollygreengiant

Well-known member
Joined
Nov 10, 2013
Messages
2,368
Location
Ontario, Canada
One thing I forgot to add: It's a chicken coop, it doesn't need to be a presidential palace. I'd keep an eye out for used lumber or even custom sawn lumber. It can always be painted later.
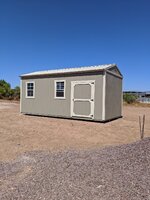
 
OP
N

NBraun

Well-known member
Joined
Sep 14, 2020
Messages
158
Add the coop as part of the new build.
Definitely thinking about doing this.
I would go with board and batten as you suggest. Or I would keep an eye open for some used steel roofing sheets. You could use them for the walls and the roof.

For framing I would go with a pole shed style. With a 20x20 building your going to want it anchored pretty well, so the posts could be set deep to accomplish this. Also, the horizontal girts would be perfect to attach either B&B or steel sheets to. If you do stick framing you'll have to add nailing strips before you add the siding.

One thing I forgot to add: It's a chicken coop, it doesn't need to be a presidential palace. I'd keep an eye out for used lumber or even custom sawn lumber. It can always be painted later.
One of the biggest expenses was the green treat 2x6 and plywood for the floor. But we probably wouldn't have to do that. I hadn't realized lumber has been going up again. We are going to look into trying to find some reclaimed lumber. We have a sawmill near us, but I don't think rough sawn stuff from him would be much cheaper. Though it's worth looking into.

Things would be so much easier if there was just a barn already built!
 

csp

Well-known member
Joined
Mar 23, 2010
Messages
5,720
Location
Franktown, CO
Our coop started out as a dog kennel. It was an 8x16 loafing shed (pole barn type construction) with steel siding for the roof and three sides. Now it's sided on all four sides with a chain link dog kennel gate for a door. Half of it has a trex deck type floor (was done when it was a dog kennel) and that side houses the nesting box, perch and water. This side is well sealed for drafts and insulated with foam covered with luan plywood. We use wood shavings on this side. The two halves are separated by a partition. The entry half has a dirt floor.
 

Boostingaz

Well-known member
Joined
May 21, 2018
Messages
3,701
Location
Indiana
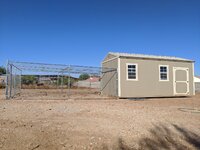
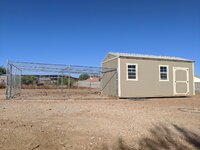
Our coop is a 10x20 pre-built shed. I poured a concrete pad for the driver to drop in on. I then put up a partition wall making the coop side 8x10 which left us with a 12x10 feed room. We keep 5-6 bales of hay for the goats and all the chicken feed extra in there. I then built a 20x20 fully enclosed run on the outside so the still have room to walk around at night. During the day they free range. We lock them up at night as we have tons of coyotes around. We have had at times almost 60 birds (chickens & turkeys mixed) in this set up. Granted they free range, so it's only for sleeping but it works well.

IMG_20190912_131155.jpg

IMG_20190912_205523.jpg

IMG_20190914_075733.jpg

IMG_20191006_160116.jpg

IMG_20190929_154644.jpg

IMG_20191201_191937.jpg

PXL_20201016_235816812.jpg

PXL_20210501_011705431.jpg
 
OP
N

NBraun

Well-known member
Joined
Sep 14, 2020
Messages
158
Our coop is a 10x20 pre-built shed. I poured a concrete pad for the driver to drop in on. I then put up a partition wall making the coop side 8x10 which left us with a 12x10 feed room. We keep 5-6 bales of hay for the goats and all the chicken feed extra in there. I then built a 20x20 fully enclosed run on the outside so the still have room to walk around at night. During the day they free range. We lock them up at night as we have tons of coyotes around. We have had at times almost 60 birds (chickens & turkeys mixed) in this set up. Granted they free range, so it's only for sleeping but it works well.

IMG_20190912_131155.jpg

IMG_20190912_205523.jpg

IMG_20190914_075733.jpg

IMG_20191006_160116.jpg

IMG_20190929_154644.jpg

IMG_20191201_191937.jpg

PXL_20201016_235816812.jpg

PXL_20210501_011705431.jpg
Thanks for sharing! 60 birds is way more than we plan on so 20x20 may be a bit overkill. My wife also some turkeys, (which took over the current guinea coop), not my favorite, but she loves them.
sGGbs8zl.jpg

I did some messing around in Sketch up tonight. This is something I'm not very good at, but I'm trying to learn, because I plan on designing my shop/barn eventually. We ended up changing some things. New size is 16x16, Post frame construction, no floor, lean to roof instead of a gable. Posts are 6x6, girts and purlins are 2x4's, the roof trusses are 2x6. Inner wall is all 2x4. I got a little lazy and didn't add everything in 100%, but I think I got the bulk of it. Anything touching the ground will be green treat, otherwise I just plan on using regular lumber. Please critic it! I would love to hear feedback if something isn't quite right, (even if it is just a chicken coop).

5DN1HxEl.jpg
gXevRbXl.jpg
9iegl1Fl.jpg
 

Boostingaz

Well-known member
Joined
May 21, 2018
Messages
3,701
Location
Indiana
Coop looks great!

Nice looking turkey. Do you raise them for meat or just as "pets"? We breed and butcher them for meet.

PXL_20210611_135744611.jpg

PXL_20201109_235352128.jpg

PXL_20210611_024232560.jpg

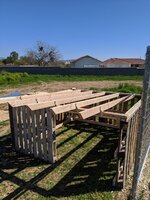
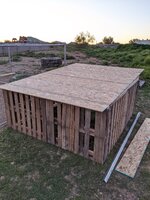
I built a little house for the goats out of pallets. They love it. Goats chew on everything! so this way I'm not to upset when the do. Easy enough to pop the board off another pallet and replace it if need be.

IMG_20200215_182113.jpg

IMG_20200216_121941.jpg

IMG_20200216_181903.jpg

IMG_20200221_184312.jpg

IMG_20200216_181933.jpg
 

Boostingaz

Well-known member
Joined
May 21, 2018
Messages
3,701
Location
Indiana
You might also want to think about a window or at least some wall vents of some kind to keep some air moving through there as that tin does get a little hot.
 

larry_g

Well-known member
Joined
Apr 28, 2007
Messages
16,893
Location
oregon
1641598210241.pngTwo thing I see here that I don't like and changed in our coop. Put an angled roof on the nesting boxes so the chickens will not roost up their and cover it with ****. Second is you have to wade through the coop to get the eggs. In ours I have a door on the back of the nesting boxes so that we can gather eggs from the 'clean' side of the building. I also agree with the venting to keep things cool when necessary. Also give some thought to cleaning the roost area. We only have a 30" door for access and it is a pain to haul out the waste. Consider a larger door in the roost to directly outside so that you can pitch the waste out and directly into whatever you haul it away in.
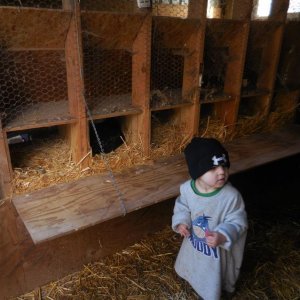


You can see the door on the chicken boxes and somewhat the angled roof on top in the above picture. This is from the 'clean' side. We figure 3 chickens per nesting box, they share.
 
Last edited:
To avoid these ads, REGISTER NOW!

Boostingaz

Well-known member
Joined
May 21, 2018
Messages
3,701
Location
Indiana
1641598210241.pngTwo thing I see here that I don't like and changed in our coop. Put an angled roof on the nesting boxes so the chickens will not roost up their and cover it with ****. Second is you have to wade through the coop to get the eggs. In ours I have a door on the back of the nesting boxes so that we can gather eggs from the 'clean' side of the building. I also agree with the venting to keep things cool when necessary. Also give some thought to cleaning the roost area. We only have a 30" door for access and it is a pain to haul out the waste. Consider a larger door in the roost to directly outside so that you can pitch the waste out and directly into whatever you haul it away in.


You can see the door on the chicken boxes and somewhat the angled roof on top in the above picture. This is from the 'clean' side. We figure 3 chickens per nesting box, they share.

Valid point on the angled roof to the top box. I may eventually change to that! We have lots of chickens that like to be up high. There is a whole little group of them that perch and sleep up in the rafters.

The eggs aren't that bad to collect. Just walk in and pick them out. That picture is taken from the door so you can't see it but there is a 36" x 6 ft door there that opens for cleanup.

There is a both a front and back door on the shed. The front door goes in the clean storage side, then there is a man door that separates the two sides and leads into the coop side and then a back door that goes out of the coop side for cleanup. The back door stays closed when not cleaning to keep the larger animals out of the coop. All of our animals free range during the day and have access to that door but can't actually get into the coop.

I can easily fit a wheelbarrow in the coop for clean up.

I know this may not be everyone's ideal set up, but this has worked well for us for years. We have to have the ability to easily lock everyone up as we have lots of predators around. We have separate night time pens for the goats, etc. Fence panels and tin make for super easy reconfigurable pens. I have tons of these panels that we can add, take away and make all shapes and sizes of pens as needed.

IMG_20191006_160116.jpg
IMG_20191006_155603.jpg
image.jpg
PXL_20210606_153534964.jpg
PXL_20210606_153609919.jpg
 
OP
N

NBraun

Well-known member
Joined
Sep 14, 2020
Messages
158
Coop looks great!

Nice looking turkey. Do you raise them for meat or just as "pets"? We breed and butcher them for meet.

PXL_20210611_135744611.jpg

PXL_20201109_235352128.jpg

PXL_20210611_024232560.jpg

I built a little house for the goats out of pallets. They love it. Goats chew on everything! so this way I'm not to upset when the do. Easy enough to pop the board off another pallet and replace it if need be.

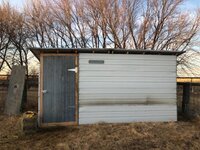
IMG_20200215_182113.jpg

IMG_20200216_121941.jpg

IMG_20200216_181903.jpg

IMG_20200221_184312.jpg

IMG_20200216_181933.jpg
Thanks! The turkey pictured is Ernest. He showed up at a neighbors and they didn't want him around. My wife took him in so he's a pet. She brought home 2 other hens to keep him company. If we end up getting some chicks the plan is to raise them for meat. But we'll see! I've heard they taste really good, so i'm hoping that's the case.

We plan on having a few windows, but we need to do more looking at what we need to do for ventilation.

Love the goat pen! A buddy of mine works at a garage door company and sourced us some insulated doors. We built a goat shed for them. I think we might have $300 into ours. We closed that opening up top with some OSB once it stopped being $60/sheet.
oCwp5JMl.jpg
0gwbUiwl.jpg

and goat tax

6E4zGVcl.jpg
 

4 FN 27

ALLIANCE MEMBER
Joined
Oct 19, 2015
Messages
4,635
Location
Minnesnowta
We got lucky and the inside is in pretty good shape. Not perfect, but when you're talking a 100 year old house lots of things can go wrong. 10 years ago, the daughter of the original builders moved out and had all the plumbing, electric, kitchen, and bathroom updated. I'm not enough of a perfectionist to be bothered by some of the things that come along with a house like this, so it's all good.

u3Q6oSNl.jpg
601w9bTl.jpg


I absolutely love your house!!! That is my style!!!

You wouldn't happen to have a neighbor with say 5000 acres of Prairie Dogs and another Craftsman House would you?
 

Boostingaz

Well-known member
Joined
May 21, 2018
Messages
3,701
Location
Indiana
Thanks! The turkey pictured is Ernest. He showed up at a neighbors and they didn't want him around. My wife took him in so he's a pet. She brought home 2 other hens to keep him company. If we end up getting some chicks the plan is to raise them for meat. But we'll see! I've heard they taste really good, so i'm hoping that's the case.

We plan on having a few windows, but we need to do more looking at what we need to do for ventilation.

Love the goat pen! A buddy of mine works at a garage door company and sourced us some insulated doors. We built a goat shed for them. I think we might have $300 into ours. We closed that opening up top with some OSB once it stopped being $60/sheet.
oCwp5JMl.jpg
0gwbUiwl.jpg

and goat tax

6E4zGVcl.jpg

That's a great idea on using old insulated doors! I might have to steal that idea eventually for something!

We have ducks too. If you have kids they are a hoot! They lay good eating eggs as well. My oldest daughter carries the babies around in her dress pockets when they are first born lol. They also love putting them in the tub and watching them play, they are funny. We have Peking ducks and they get just as big as the chickens.

PXL_20210614_145216816.jpg
PXL_20210731_211327592.jpg
PXL_20210626_234015467.jpg
PXL_20210822_152325610.jpg
 

ybnormal

Well-known member
Joined
Jan 3, 2016
Messages
5,002
came across this idea a couple weeks ago when looking for a cheap floor alternative for my temporary shed....MDO. not MDF, MDO

what is MDO? plywood product impregnated with resin and has paper backing so it will withstand outside weather. typically used for roadside signs, like advertising a new subdivision. when the advertising is done they pull the sign down with the vinyl graphic on the side and sell it off as scrap. Perfect for my use at $15 per 4x8 sheet! bonus from my source: as many 4"x4" 12-ft posts I want for free since I'm buying used MDO!

here's an example:
1641615758319.png
 

jollygreengiant

Well-known member
Joined
Nov 10, 2013
Messages
2,368
Location
Ontario, Canada
That's a very good point about the venting. I'd definitely put that in, but I'd make sure its something you can seal off in the winter.

For you guys with free range chickens, how far do they roam? I've always liked the thought of having chickens but we are on a corner lot and one of those roads is a county road.

OP you must have a lot more patience than I do. I hate goats.
 

Boostingaz

Well-known member
Joined
May 21, 2018
Messages
3,701
Location
Indiana
That's a very good point about the venting. I'd definitely put that in, but I'd make sure its something you can seal off in the winter.

For you guys with free range chickens, how far do they roam? I've always liked the thought of having chickens but we are on a corner lot and one of those roads is a county road.

OP you must have a lot more patience than I do. I hate goats.
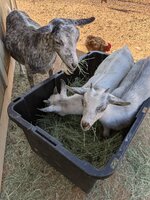
The chickens and turkeys don't go to far, they stay pretty close to the coop. We have maybe 3/4 an acre that is fenced in that they roam and they rarely reach the edges.

The goats however go anywhere they dang please lol. They would be in the neighbors yard if it wasn't for the fences.

IMG_20200222_173546.jpg

PXL_20210823_145725999.jpg
 
OP
N

NBraun

Well-known member
Joined
Sep 14, 2020
Messages
158
I absolutely love your house!!! That is my style!!!

You wouldn't happen to have a neighbor with say 5000 acres of Prairie Dogs and another Craftsman House would you?
Thank you!

Unfortunately, that may be hard to come by on my side of the state! I wish though!
 
OP
N

NBraun

Well-known member
Joined
Sep 14, 2020
Messages
158
came across this idea a couple weeks ago when looking for a cheap floor alternative for my temporary shed....MDO. not MDF, MDO

what is MDO? plywood product impregnated with resin and has paper backing so it will withstand outside weather. typically used for roadside signs, like advertising a new subdivision. when the advertising is done they pull the sign down with the vinyl graphic on the side and sell it off as scrap. Perfect for my use at $15 per 4x8 sheet! bonus from my source: as many 4"x4" 12-ft posts I want for free since I'm buying used MDO!

here's an example:
1641615758319.png
That's an interesting thought. I'll definitely look into this!
That's a very good point about the venting. I'd definitely put that in, but I'd make sure its something you can seal off in the winter.

For you guys with free range chickens, how far do they roam? I've always liked the thought of having chickens but we are on a corner lot and one of those roads is a county road.

OP you must have a lot more patience than I do. I hate goats.
Luckily ours are dwarfs, generally too small to get into too much trouble!
 

xtremek

Well-known member
Joined
Apr 13, 2012
Messages
11,603
Location
St. Johns, Mi
I wouldn't have a wood floor in it. Vinyl on the wood, yes, dirt, or cement. Reclaimed board and batten, or tongue and groove would be the way I would go for the cheap siding. Reclaimed metal for the roof.

That's a sweet house. Love the dark varnish on the woodwork.

I like your choice of equipment. I can totally relate. I love my 8n.

As far as a future shop/garage, with was much as you have going on, I think you'll out grow it very quickly. We have a 30'x40' that is barely big enough. But I get the money thing all too well. I think a 32'x48' would be the right size for you, but not enough moolah. So what about a 32'x28', instead of the 28'x32', that you can easily expand to 48' (or larger) in the future?

One more thing, YOU ****!!! lol. I'm extremely jealous of your woodworking skills. Anyway, count me in for the ride along.
 

xtremek

Well-known member
Joined
Apr 13, 2012
Messages
11,603
Location
St. Johns, Mi
Any collapsed, or collapsing sheds/barns in your area? They're a good source of quality lumber, siding, and roofing. Even nails, if you're super cheap.
 
OP
N

NBraun

Well-known member
Joined
Sep 14, 2020
Messages
158
Well, I'm terrible about taking pictures. I always think to myself I need to take more, but then I get into a project and I completely forget. I also always forget to update anything.

Anyways, we left off in the fall of '22, we'll give a cliff notes version since i can't honestly remember everything.

I spent the month of october looking out of this thing. Going .7 MPH, I gets old after the first week. It gets REALLY old after the 5th.
LIda4djl.jpg

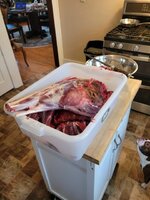
After that I shot my first buck. I cant say i'm into hunting the way some people are, but I do enjoy hunting/eating deer. Up until now i've just had doe tags but this was the first year with a buck tag. It's actually kind of a funny story about this buck. Opening morning I watched two really nice bucks walking in the slough I was near. However they never did get close enough to take a shot. Around 9:30 I see my neighbor walking in from the road. Talking to him, it turns out he had shot at a deer, and was fairly certain he hit it in the leg, but it got away and came my direction. So he walked through the slough trying to push it out so I would have a shot on it. This whole time i'm watching it, popping up, and then disappearing again. Eventually it beds down not to be seen again. I called it a morning after that because I didn't want to bump it again.

The next morning I watched a buck walk in from my neighbor place, come towards me, again dipping in and out of the reeds so I can barely him. Eventually he came close enough to me, while also being out of the reeds enough I was able to see his chest and get a shot on him. He's no monster, but I was pretty ecstatic about it. However, this story reminds me I need to call the taxidermist, as he still has my skull....

C5mbhv5l.jpg

And this was a little bit later...
hSg2jSKl.jpg

I cut the backstrap and loins into steaks, and turned the rest into burger.

After that work calmed down and I was able to start thinking about things around the house. I had my 5.0 ranger project, as well as framing in a closet upstairs.

The ranger is a 94 that I put an explorer v8 in. For something that was supposed to be done in the fall of '21 It sure still seems to be a project. I swapped in a 5 speed out of an f150, and the 8.8 out of the explorer. Unfortunately I don't really have many pictures of that. Swapping the axle was just welding new perches on, and running new brake lines. After that I started trying to figure the wiring out. Eventually coming to the conclusion that I wasn't going to get it figured out. I ended up paying a guy to wire the ranger harness into the explorer harness. Money VERY well spent, as it was eons better than anything I could have done. During the winter I spent a couple weeks building an exhaust for it. Only to find out once I went to put it on for good nothing lined up the way I had built it. I was so over it at that point I just said screw it and decided to redo it in the future. I needed to get the truck on the road just to get some test drive miles in. This spring I spent a bunch of time getting all the little stuff you don't think about buttoned up and put the first 100 or so miles on the truck. It sounded good and was great fun but the exhaust leaked (Expected) and I had a coolant leak I just couldn't find. Eventually Work got busy and it sat some more.

Which brings us to now (for the truck anyways). I pulled the exhaust with the goal of doing it 100% correctly. I think I mostly accomplished that. I'll preface this, that I am a terrible tig welder, but i'm trying to learn and get better.

g0Kzp5tl.jpg Here is one down pipe. The other looks similar. This time they bolted up exactly the way I planned!
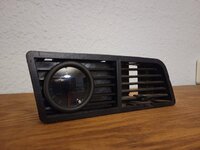
At some point I 3D printed this gauge pod holder.

kZ5n09il.jpg

I'm fairly new to 3d printing in general, but I tried this in PLA and it worked great. Printed it in PETG and it turnout out perfect. Tried to make a second one and never could get it to turn out after that. I was printing on an ender 3 v2, and after messing with slicer settings, drying the PETG, verifying components on the printer, I was never able to get a good print of. I'm not saying its not my fault, but I eventually just gave up.

I also Designed and made the SS box to hold the ECU for the ranger. This was me trying to learn fusion 360 a little better. Being able to get laser cut parts through the mail opens up a whole new world. I would rather spend 3 hours on the computer and get it right the first time, as opposed to what I normally do, which is struggle day trying to do something. Eventually getting it figured out, but never being super happy with it.

PXHuxDvl.jpg

That brings us up to date on the ranger. I need to put some more miles on it, and get some of the kinks worked out yet but we're almost to the end.

Back to the house now. Our upstairs was completely open with no walls. We thought we could put a small closet in to help brake the room up, as well as find some storage.

This is a sketchup model,
y8RCs1Sl.jpg

But again, no build photos. I'll have to grab

The next winter project. Our house was build with a cistern in the basement. It hasn't been used for a long time. I had the bright Idea of cutting the rest of the doorway out, pouring a level floor and having some more space. I very much so under estimated the scope of this project.

PMrocOMl.jpg

Cutting the rest of the wall out. This is a whole story, but i'll keep it short. I started at 9pm thinking it would take an hour tops. Eventually I realized my mistake, but I was committed then. I think I finally got to bed at 3am after a very long and frustrating process.

kEZWr18l.jpg Breaking it up. The concrete wall was probably 14 inches thick. That's A LOT of 5 gallon pails to carry upstairs.

We poured the floor by mixing sacrete in the basement, a pallet full. Not so sure that was a good plan but no going back and changing it now.

With that project behind us, I think I called it for winter projects. I was pretty done after that.

In June of '21 a neighbor had this huge maple log that was too big for his sawmill. I offered to take it and slab it up with a chainsaw mill.

WshFEGll.jpg

It sat for a while. But a Black Friday deal made me pull the trigger on this..

5RY5Al1l.jpg

This is a Farmertec G660, a knockoff of a Stihl, and a 56" bar. Say what you will about import stuff, but I've had 7-8 gallons of fuel through this going WOT and not had a single issue. I built the milling guide as well. I went into this project thinking I'd knock out the log in a day. I was very wrong. Chainsaw milling is both time consuming and labor intensive. The 660 is a 92 CC saw and it had just barley enough power to pull a 56" bar. I have probaly 4-5 days into milling this log. Between having to learn how to mill. How to Sharpen chains, all of the different types of chains ect, I finally got it milled. Now to let the log sit and air dry for a couple years. I hope to eventually build a work bench out of it.
tvuOOtzl.jpg
PkXLMVll.jpg

Moving on...

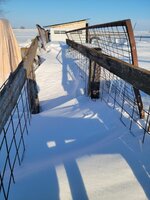
This winter was an absolutely brutal winter for SD. We did not have one nice snow falll. Every week was a new blizzard (I really wish i was over exaggerating) We we're snowed in for at least a day or two a week for a month stretch there. Our township plow driver decided that our 1 mile stretch of road was less important than the roads around us. Literally plowing a mile stretch with no houses on it, turning off our road and then plowing on the other side of us. Eventually our neighbor called the Board and got them to actually plow our road within 5 days of a storm, but that was the end of winter so....

FUj2csAl.jpg

Anyways, after the first storm our tractor decided it didn't want to run. I went through the carb again (in - degree weather) and the ignition system. To no real avail. The tank needed to be cleaned out as rust was clogging the carb, and the carb needed a new valve and seat.

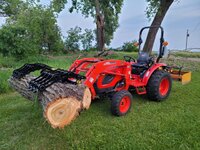
I was done with it. I borrowed a tractor from work for the rest of winter but had decided we were buying a new tractor. Tractor prices we're all over the place since covid. I didn't want a big farm tractor since it would be too big for cleaning out the goat pen, and used CUT prices we're still very high. Eventually though I decided we would just buy new. I settled on a Kioti CK2610, which after 50 hours i'm still very happy with. Though the dealer I bought it through had me less than thrilled. It's already been worth its weight, and i'm jazzed to having something reliable for winter.

YoTX6rol.jpg

I bought a grapple for it, as well as found a used box blade for it. I've cleaned up a huge cottonwood, put in a gravel pad for our hoop barn, and all sorts of other things. Should have just bought something like this when we moved out here.

I think we're all caught up now!

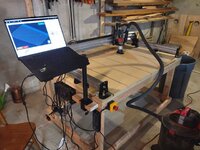
Recently I picked up a sienci longmill CNC. I've been wanting to build a rocking chair for my wife for a few years now. I hope to use the CNC to cut those parts out. Until then, I have all sorts of shop organization projects to use it for and my wife wants to use it for some signs.

I do wish the longmill was a little beefier and had ball screws, but the Value of the machine is very good. We'll see once I start cutting hardwood, but so far i'm pretty happy with it.

ks9epGnl.jpg
Table all set up.

OKDYBr5l.jpg

Tramming the router in. The table is very similar to a torsion box top, and throughout building it i made sure to try and keep it as flat as possible. I'm pretty happy with .006, especially on a wood table.
 
Last edited:
OP
N

NBraun

Well-known member
Joined
Sep 14, 2020
Messages
158
One of these days I'll start taking more pictures and updating things weekly...

Around the beginning of November, after harvest finally settled down, I started planning out my wife's Christmas gift. She LOVES rocking chairs, and ever since we've moved in and I started taking more of an interest in wood working I've wanted to make her a Maloof style chair. I decided this year was going to be the year. Let me preface this, I am a pretty mediocre wood worker. However, everybody says if you can follow directions, you can build a chair (their not wrong, but some experience certainly helps!). I started buying the lumber sometime in September, as well as buying/collecting tools I needed. The last big thing I needed to do is build a wood vise. A few years ago I bought a "Twin Turbo Vise" for a wood working bench build. Well that hasn't happened yet, and I still needed a vise! So I built this moxon adjacent type of vise that I can put on top of my work table.


I made it with a piece of 8/4 cherry I had and some scrap walnut. It ended up take way more wood than I figured, but at that point I was committed! I think it came out pretty good. It's already got some dings and gouges, but it's a "workbench" after all.

With that out of the way, I can finally get started on the chair.

First up was the seat..

This is five pieces that you "preshape" and then glue together. You cut angles on the glue faces so the seat face isn't flat. I spent hours going through all my stock and trying to layout all of the pieces so the grain and colors would look nice. Eventually I said F*** it and started cutting boards up. I'm not 100% happy with the middle board in my seat, but it is what it is. I've made a lot of mistakes! After you glue it together you shape the seat with burr wheels on an angle grinder. I didn't love this, as i'm not very artistic and trying to mirror everything is a test of my patience. The seat is still not done, but I wanted to get the chair together for the final shaping.


After that was the legs, and gutting the joinery. I'm glossing over A Lot of what was needed. There we're plenty of cuts where I took a few hours just to set up and make two cuts. I've also learned that I don't love routers. Part of the way you make the legs is you use a template bit to get the shape. Well it doesn't take very long for the bit to grab some crazy grain and ruin your part!

After the seat and legs were cut and joined, the next big step was the back slats. Cut them out on the band saw, sand all of the curves fair, had rasp the top and bottom shoulders, curve and round the front and back. Use a tenon cutter to hand fit each spindle into a hole in the seat. I have 10-15 hours into them now, and probably have another 10 before i'm completely done with them.


As of now, the next piece to finish is the arms for it. Will probably not get it done this spring, but I got pretty burned out on woodworking/this project I needed to do something else for a bit. Plus the weather was getting much nicer outside so I was finding reasons to not be in the house!


The next Project Was more of a forced one. I was helping my father get some of their things down to their new house, which is a 5 hour drive away. We made it about 3.5 hours when I heard the dreadful "POP" of an early aughts Ford triton motor blowing out a sparkplug. I had brought a bunch of tools, in case something like this were to happen. Even an extra plug and coil. However, the Plug and completely stripped the threads out and I had brought no quick fix for that. Being a Saturday, and not wanting to pay for a tow truck, I pulled the injector clip and drove the next 20 miles without a plug. I sounded...concerning, but we did make it to the napa in the next town over. I installed one of those quick fix plug adapters, and while we waited for the loctite to cure, ate lunch. On the road again, feeling good, and then 10 miles later, another pop! So I reinstalled it and we're off again. This time we only made it few miles before it failed. Previously, I was trying not to strip out the threads in the head or the new plug, but this time I cranked on it as hard as I could, and that seemed to do the trick. 4 coils and a few plugs and we made it back home without too much of a fuss.

Once home I used the Cal-van kit to fix it correctly, and while nerve racking, it seemed to do the trick. The worst part about all of this, is when I put plugs in it two years ago, I thought that that plug didn't tighten up the way the others did. I figured I'd order the kit and if it became an issue I would fix it. Of course it ran fine for two years until it didn't! A lesson learned I suppose.

Onto the next one...

I have a 5.0 swapped ranger I've been working on the last few years. I had it on the road last spring, but I hated the exhaust I had built for it, so decided to take a weekend and build a new one. Well that worked great until life got in the way and it sat some more until a few months ago. I decided I needed to get it on the road and start working the kinks out of it. There honestly wasn't much to do. Bolt up the exhaust, finish a housing for the pcm and then install some lift pucks. I got insurance and Plates on it and started driving it around. Unfortunately, now that I have some miles on it, I'm finding out is has a bit of an oil consumption issue. When I had done my first test drive a year (or two) ago, I noticed that it had lost some oil. It had a leaking rear main, so we pulled the engine and put a new one in. Well that won't fix it if it's burning it...It seems to burn about a quart per 200 miles. Not a smoke screen while driving, but if it sits and idles for a few minutes and I hit the throttle it will billow smoke.

I'm pretty bummed about this one. I was excited to finally have it going, and not sure I want to take it apart again right now. So I guess i'll just deal with that for now....

I also worked on a couple router projects..

I'm finding I really love the router. I wish I had done some more research on which one to get, as I probably wouldn't have bought the one I did. That being said, the long mill is very affordable, and definitely worth what they ask for it.

I drive an F150 with a fuel tank and a tool box in the bed for work. During planting/harvest I carry all my tools in the box but I also have a bunch of aerosol cans that tend to roll around and get lost. I was possibly looking for an excuse to make something on the router and this fit the bill. I realize I could have just put them in a milk crate and it would have accomplished the same thing, but this looks nicer!


Not pictured are some 3d printed clips that fit in the crate and hold the organizer in place.

I also tried my hand at aluminum. I had my wife, who is a very talented graphic designer (though its not her job, and she hates computers) make me a logo just to put on personal projects and such. I just wanted something that would be related to our family. So she came up with our boston terrier wearing sunglasses. I think it's great.


For some reason, we call him Mr. Runkulous, which is the explanation for the name...

But anyways, I loved the image of him, so I thought it would be fun to make a branding iron with it. I also had a chunk of aluminum laying around...
1HFIbQL.jpg

Turned it and put a hole in the center so I can tap it.

Started cutting it,

RCKjiXj.jpg

Finished...
2tmRrv5.jpg
and Final result.
x8YOYSu.jpg


It actually didn't go too bad. I was nervous running aluminum for the first time, but managed to do pretty well with my 1/8 EM. However I wasn't as conservative as I thought on my 1/16th EM, so I snapped that one. Oh well, I kind of figured i'd break one.
 
Last edited:
OP
N

NBraun

Well-known member
Joined
Sep 14, 2020
Messages
158
And what i've been working on recently.

We have a fair amount of landscaping to do this next year. Everybody talks about how great power rakes are, but to rent a skid steer and rake is 4-500 for the day. I generally try to avoid that if I can.

So anyways here's my power rake project.

My neighbor had some scrap steel for the frame that I could use, so that's what kicked this off.

Here's a terrible fusion model of it.

The roller is 6" sch40 pipe, with 3/4" rod as the tines. I spent last weekend getting it mocked up and welded.


And this week was spent getting the frame tacked up..


I have some laser cut brackets coming this week, and hope to get it finished up before planting. I currently have about $700 into it, and if I can keep it under $1000 i'll be jazzed. Much cheaper than anything I can get around here, just as long as it works!
 
OP
N

NBraun

Well-known member
Joined
Sep 14, 2020
Messages
158
Well I managed to finish the Power Rake, and it actually works! That being said its not perfect. I immediately bent my gauge wheels. I kind of figured that would happen at some point, just thought I might have more a bit more time before it actually happened! To fix the wheels, I had some side pieces cut out of 1/4 steel, and used 2x2 tubing as a spacer. They work much better.

The other issue was chain tension. Originally I planned on using a chain guide to tension, but it did not work as intended. I printed it out of PA-6 I believe but the chain really chewed it up. Right now I'm using an idler sprocket with a bolt to push it into the chain. It still needs a little refining, but I was able to finish my project I Had planned for it.

I really understand why guys prefer them on skid steers though. Being able to switch the drum direction is super nice, where as on the tractor I had to keep flipping around.

20241201_154326.jpg
20240504_165438.jpg
My $10 failed print.

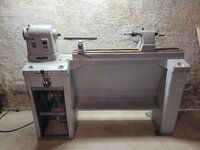
I Picked up a Delta 46-450 wood lathe off a state auction too. After turning the legs for my Maloof chair I decided I enjoyed it enough that if a good deal came along I'd pick one up. This was on a state auction, but I was quite surprised when I called to setup pickup and it was the State Pen! They had a fair amount tools on the auction and if I had more space I would have been coming home with a Monarch lathe. Not sure how that would have fit in the basement though..

20240804_230843.jpg

I paid around $400 which I thought was pretty good for a heavy duty lathe in good shape. I did a few test pieces to get the hang of it, but the first real project was a salt cellar.
20240813_081346.jpg
My SIL asked me to replicate a spindle for a chair she's fixing. This was my first foray into spindle work, and trying to duplicate something. It did not go as well as I hoped, but do think it was a good first try.
20241130_144917.jpg

I also "finished" the arms of the Maloof project. At least most of the way. I can't believe how much time I have into these. Probably 20-30 hours? So much time trying to get the curves to match. I'm still not totally happy with them, but at some point I had to do something else!
20240924_213442.jpg

I also started trying to really get the basement organized. I realized that as I've acquired tools I'd just find a spot for them that they'd fit, but never really put into thought how to best setup the space. Add to that, most drawers had everything just thrown in, I needed to do something.

I started off by building a new outfeed table.
20241201_205311.jpg

I have two sets of drawers on the front, with varying sizes of drawers. One side has the router in it, and the other holds my shop vac for the boom arm. I still have to finish this, but I plan on building a miter station, and when I do that I'll edge band everything and build drawer fronts.

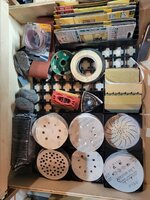
I started printing some Gridfinity bins for the drawers. While i'm not done, i'm getting there.

20241203_230053.jpg
20241203_230044.jpg
20241203_230032 (1).jpg
 
OP
N

NBraun

Well-known member
Joined
Sep 14, 2020
Messages
158
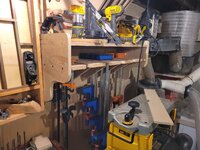
I also built a clamp rack..
20241203_230110.jpg

Anyways...Other things I've done. I plan on building our exterior door for the porch rebuild. I figured I needed to go through my jointer and tune it, if I was going to be jointing those long boards. I spent a week trying to get it perfect, and I think I somehow made it worse? boards have a corner to corner twist of .003-.006. Not enough you can see it, but enough they will rock on a cast iron surface. I need to go through it again.

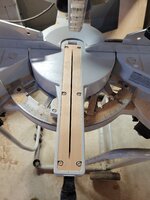
I made some zero clearance inserts for my table saw and the miter saw
20241126_160354.jpg
20241126_160343.jpg

Our goat shed was in serious need of a new door. My wife asked that it be a dutch door. In an effort to familiarize myself with jointing long boards, I am building them a door from 4/4 cherry using a sandwich method. This is about as far as I got before I ran out of Cherry, right before thanksgiving so no ability to get more! I vastly underestimated what i'd need!
20241126_100816.jpg

That's about it. I need to finish this goat door first, but then I'll be building a miter saw station, and i'll continue on this shop organization project.
 
To avoid these ads, REGISTER NOW!
Top Bottom