To avoid these ads, REGISTER NOW!

Between 265 & 485 SQ/FT 5 acres and a farmhouse

Workspaces sized between 265 and 485 squarefeet.
To avoid these ads, REGISTER NOW!
OP
N

NBraun

Well-known member
Joined
Sep 14, 2020
Messages
158
Thanks guys!

In September I took a timber framing class in Northern MN at the Grand Marais Folk School. It was a bunch of fun and I learned a lot! I even remembered to take some photos. I hope to start building a timber framed barn within the next year or two. It's something I've wanted to do since we moved out here, but need to see how much we can get done on the house this next summer.
20240913_151442.jpg
20240914_145829.jpg20240915_134527.jpg20240915_101740.jpg20240914_125738.jpg20240915_155404.jpg20240917_175154.jpg

And this was Saturday. Part of the shop organization means I need to find a place for my small metal lathe. I went ahead and cut up some of my Maple slabs in preparation of becoming a base for the lathe, which will sit on my HF toolchest.
20241201_150629.jpg
 
OP
N

NBraun

Well-known member
Joined
Sep 14, 2020
Messages
158
And todays project. My lovely wife went on a short road trip to pick up a new tool with me.

Ever since I found out about radial arm drills, I wanted one. For no other reason than I think they're cool. I don't have much use for a 3,000lb drill though. That being said, I picked up this Walker Turner radial drill, and it's small enough I can at least justify having it! I'm not 100% sure what the plan is, but it does need a little TLC. I'd like to take it apart, replace bearings, clean it up and paint it.
20241204_141358 (1).jpg
 
OP
N

NBraun

Well-known member
Joined
Sep 14, 2020
Messages
158
Friday I took off work early to run down and grab my lumber order. 30bf of cherry for the dutch door. Some 6/4 Sapele for window sashes and some 4/4 Sapele for a T+G Panel for the front door. I'm using this cherry door as a practice project before I build a door for our house.
20241207_191200.jpg

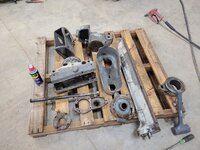
Saturday was spent tearing down the drill press. It came apart pretty easy actually. I figured it would give up more of a fight. It certainly needs some TLC though. Most of the bearings are shot. The quill had .004-005 of runout, so that probably needs new bearings as well.

Motor pulled
20241207_133737.jpg
Head Pulled
20241207_134855.jpg
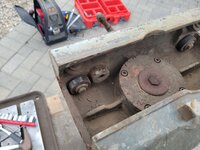
Arm Pulled, inside the carriage.
20241207_140022.jpg
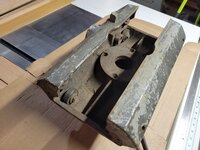
Carriage Pulled
20241207_143136.jpg
Inside the gearbox for raising and lowering.
20241207_145635.jpg

Using a Packout to keep track of the parts. I 3D printed some organizer bins for the pack out bins.
20241207_190255.jpg
20241207_190714.jpg
20241207_190719.jpg
 
OP
N

NBraun

Well-known member
Joined
Sep 14, 2020
Messages
158
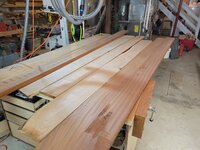
Saturday night was spent milling cherry boards down for the door.

There aren't a lot of options for buying hardwoods around me. Basically private sale, or there was one dealer a little over an hour away. I found another one that's a bit closer, that's about half the price of the other guy. Unfortunately, they cater to businesses and contractors, so I'm unable to pick boards out. Which means lots of waste and I'm never quite sure what I'm going to get. It's not the end of the world, the price makes it worth it.

But all that to say, I spent a bunch of time going through the lumber figuring out how to get all the pieces I needed and I think I just barely have enough. So far I bought about 50 BF to do this door.

Getting the router setup.
20241207_215654.jpg

And the panel
20241208_144434.jpg
I didn't quite have enough cherry, so I had to use some of the sapele for it. I'll just call it an accent piece.

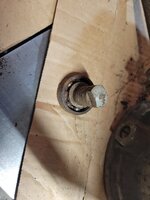
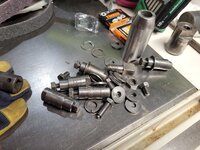
I also started tearing into the carriage for the drill. Five of the 8 bearings were solid. It came apart fairly easy, given the circumstances. I removed all the bearings and eccentric bolts for adjustment. The only thing that I wasn't able to get was one half of the locking bolt for the swivel of the carriage.
20241208_201537.jpg
20241208_204929.jpg

The plan is to have it done by the end of my time off in December. So that means I need to order bearings for it, figure out what VFD i'm going to use and decide on paint before the holiday gets here.
 

PhantomEB

Well-known member
Joined
Feb 6, 2006
Messages
6,821
Location
Medicine Hat, AB, Canuckistan
My wife would actually be head over heels with your place, the little farmhouse, chickens and goats…

.me still surprised you still working out of your basement.

I can only imagine you building an Amish quality timber frame garage!
 
Last edited:
OP
N

NBraun

Well-known member
Joined
Sep 14, 2020
Messages
158
My wife would actually be head over heels with your place, the little farmhouse, chickens and goats…

.me still surprised you still working out of your basement.

I can only imagine you building an Amish quality timber frame garage!
It really is a dream come true! We both had hopes to live on an acreage sometime down the line, we just didn't think it would happen so quick. In our area, there aren't many options for places like ours. So when the opportunity to buy came up, we decided we didn't need to use the wedding fund for the wedding after all!

I keep changing my mind on what I want for a shop, so it keeps being put on the back burner. It will happen one day I hope!
 
OP
N

NBraun

Well-known member
Joined
Sep 14, 2020
Messages
158
Very nice house. I recently purchased a walker turner radial drill like that. completely tore down and undergoing refurbishment.

BTW, my best friend lives outside Langford SD.
Thanks!

I've been trying to keep busy, but somehow life gets in the way.

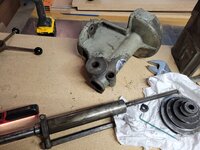
I continued pulling the drill apart.
20241209_211317.jpg
20241214_225539.jpg

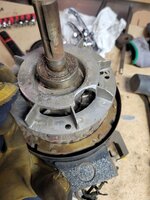
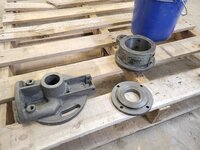
Everything came apart pretty ease. I pulled the bearings from the quill and the spindle pulley. I bought new ones before I tore the old ones out, and might have jumped the gun. The old ones seem fine. I kind of wanted to put new ones in regardless since I pulled the drill apart. I then started pulling the motor apart. I was able to get one side off and get the bearing out but the other side is putting up a fight. I also managed to break part of the motor fan, which is a bummer, because I was being especially careful while pulling it.
20241210_221545.jpg

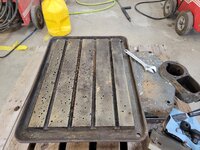
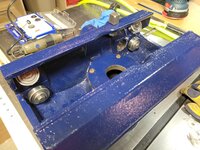
Work has a hot water Pressure washer, So I took all the big parts there to clean up. I'm still working on the base, but everything is degreased. The next step will be paint stripper.

20241216_162748.jpg

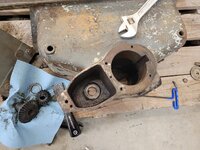
And getting the table lift gearbox cleaned out...
20241216_162753.jpg

and the rest of the parts all clean
20241216_162759.jpg
 

loganb

ALLIANCE MEMBER
Joined
Dec 29, 2011
Messages
5,642
Location
Omaha, NE
Merry Christmas sir! Love the Radial drillpress too! I've always had a similar love for them...don't really need it but just super cool and if I ever get a big enough shop would love to have one!
 
OP
N

NBraun

Well-known member
Joined
Sep 14, 2020
Messages
158
Merry Christmas sir! Love the Radial drillpress too! I've always had a similar love for them...don't really need it but just super cool and if I ever get a big enough shop would love to have one!

Thanks! Knowing that I will eventually have a larger shop to store some tools made my decision a little easier. It is a large footprint for what it's used for!


Some more progress though.
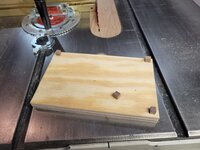
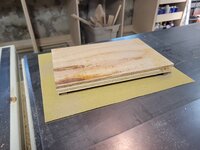
In preparation for building my miter station, I needed to find a better home for my small metal lathe. I used a slab from the maple that I milled. Cut the slab down so I can mill it with my 6" jointer and then glued it back together. I know that soft maple may not be the best material for something like this, but it was free, and to be honest, probably stiff enough for the lathe that's bolted to it. I finished it with shellac, because it's easy.
20250101_212248.jpg

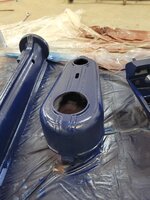
More progress on the drill as well. It's been slow just because of the slow nature of the products, but progress is progress. I've been using citri-strip to remove the paint. It was painted again at somepoint, and that paint is coming off very easy, but whatever they used from the factory is ON there. I figured if it's lasted this long, and still on there after using a stripper, it's probably fine to paint over. After that it gets dipped in Evapo-rust, cleaned and then primed. The base is what is taking most of the time.

20250105_155456.jpg
20250103_160959.jpg
20250105_155437.jpg
20250105_170925.jpg

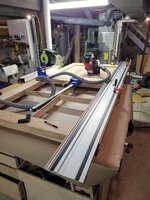
More progress on the door as well. Cut and assembled the muntins, and have got the lower panel glued in. At this point, I need to figure out what we are going to do for the lites. Since it'll be a door for the goats, I'm weary of using non safety glass, though safety glass will be expensive. I also am not sure I want to use something like plexiglass, because it'll look bad with the rest of the door.
20241229_203517.jpg
 

dmittz

Well-known member
Joined
Dec 2, 2016
Messages
1,298
Thanks! Knowing that I will eventually have a larger shop to store some tools made my decision a little easier. It is a large footprint for what it's used for!


Some more progress though.
In preparation for building my miter station, I needed to find a better home for my small metal lathe. I used a slab from the maple that I milled. Cut the slab down so I can mill it with my 6" jointer and then glued it back together. I know that soft maple may not be the best material for something like this, but it was free, and to be honest, probably stiff enough for the lathe that's bolted to it. I finished it with shellac, because it's easy.
20250101_212248.jpg

More progress on the drill as well. It's been slow just because of the slow nature of the products, but progress is progress. I've been using citri-strip to remove the paint. It was painted again at somepoint, and that paint is coming off very easy, but whatever they used from the factory is ON there. I figured if it's lasted this long, and still on there after using a stripper, it's probably fine to paint over. After that it gets dipped in Evapo-rust, cleaned and then primed. The base is what is taking most of the time.

20250105_155456.jpg
20250103_160959.jpg
20250105_155437.jpg
20250105_170925.jpg

More progress on the door as well. Cut and assembled the muntins, and have got the lower panel glued in. At this point, I need to figure out what we are going to do for the lites. Since it'll be a door for the goats, I'm weary of using non safety glass, though safety glass will be expensive. I also am not sure I want to use something like plexiglass, because it'll look bad with the rest of the door.

20241229_203517.jpg
Awesome work on the door and the drill press!
 

Dagny

Well-known member
Joined
Jul 25, 2014
Messages
3,022
Location
Northern Wi.
Be careful with the farmall keep the bucket low especially when in reverse. also chickens dont like concrete floors.
 
OP
N

NBraun

Well-known member
Joined
Sep 14, 2020
Messages
158
More Progress..

Basically at a stand still with the goat door. I've squared it up, cut the hinge mortises and cut it in half. Right now the plan is to paint it with a golden yellow linseed based paint. We'd like to see how we like that paint before we decide if we're going to use it for the house. Unfortunately, It really likes UV light and warm temps to dry well, so until it starts to warm up we're done working on it.

20250109_215747.jpg
Squaring up the door

20250115_213303.jpg
Router Jig for the mortise's

20250116_210553.jpg
20250115_214001.jpg
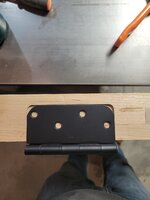
Good thing I got the round corner hinges so I don't have to chisel them out....

20250116_212427.jpg
And cutting in half. When I hang the door I will trim the bottom half, but I will wait until I hang it to decide what to cut it to.

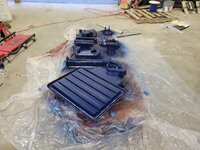
The drill project is coming along. I have most parts primed and painted. I'm going to start cleaning the hardware and get all the other misc things cleaned up. I should be getting it together pretty soon. I'm mostly happy with how the paint turned out. I wasn't going to use filler or anything to hide the cast imperfections, but I probably should have used a filler primer or something to help smooth them out just a little bit more. You can really see all of the imperfections of the casting. Not the end of the world, it's a tool at the end of the day.

20250131_174715.jpg
20250201_105129.jpg
20250201_105150.jpg
 
OP
N

NBraun

Well-known member
Joined
Sep 14, 2020
Messages
158
Curious to hear some thoughts on this.

20250203_221839 (1).jpg

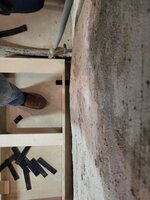
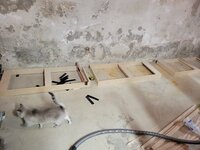
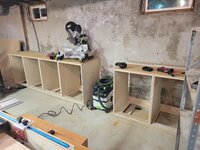
I started laying out and leveling the cabinet bases last night. My 107 year old basement walls are not exactly straight. To avoid the boxes hitting parts of the wall they have to be spaced away 2-3".

1. Do I need to attach the base to the wall? I suppose I could shim it, but it's getting to be a pretty large gap.
2. Should I Fur out the wall? I'm trying to maximize space, Since I don't have a whole lot down here. If I furred them out, I would feel more comfortable hanging upper cabinets though. I obviously wasn't planning on this, but the more I think about it, it does seem to be the answer.

Thoughts?
 
OP
N

NBraun

Well-known member
Joined
Sep 14, 2020
Messages
158
I ended up deciding not to frame out a wall. I wanted to keep as much space as I could. I spend quite a lot of time getting the bases perfectly level and in the same plane as each other. Unfortunately somewhere along the line I messed up another measurement and after I hade Drill and screwed the bases down I realized my short base was about 1.5" too close to the wall, so the cabinet would hit. So I had to start over and reposition all the bases. Luckily the shimming didn't change too much from before.

20250203_221859.jpg
Somewhere along the line.

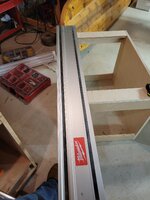
The tracksaw has quickly become my favorite tool. Using it to notch out the cabinet for a waterline.
20250221_223247.jpg

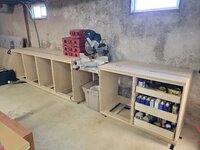
This weekend I was able to finalize the bases, get the cabinets on them and cut the first layer of MDF for the top.
20250223_224331.jpg

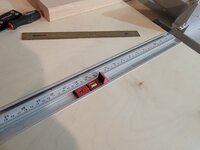
I am planning on using the woodpecker stop stealth stop. So the next step is gluing some formica to a 1/2" sheet of plywood and cutting that for the top, as well as build a shelf for the saw to sit on. Also, I realize the cabinets don't have bottoms. I had zero Scraps from the material that I bought left over from building these, and I wasn't about to make another special trip just so they could have a full bottom. Right now the plan will be drawers for all of them, but If i change my mind I can always add a bottom in after the fact.

I also decided to give in and picked up a refurbished Festool dust extractor. I honestly didn't think it would be that much of an upgrade compared to my shop vac but it does seem to do a very good job when using it with my track saw. My current shop vac will be dedicated to the miter saw, and the Festool will be used for everything else.
 
To avoid these ads, REGISTER NOW!
OP
N

NBraun

Well-known member
Joined
Sep 14, 2020
Messages
158
More Progress!

Ended up deciding not to go with the Formica top for the miter station. I may end up going that route down the line, but I kind of like the wood top for now. I got the 1/2 plywood cut and the stop system mounted. I know people say you really don't need an expensive miter saw and stop system, but man is it nice to use for batching out parts. I also built 3 drawers with the left of 1/2" ply I had. Which holds all of the misc fluids/glues/finishes I have down in the basement. I need to make the face frames yet. I'm planning on using the sapele I have for the door, just need to see how much is left over.

20250315_142539.jpg
20250324_215343.jpg
20250324_215411.jpg

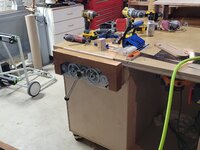
I also got my Twin turbo vise mounted and running on the side of my outfeed table. I ended up just gluing three sheets of 3/4 MDF together which I mounted the screw blocks too. Then using some #10x3 Screws mounted that to the underside of the top. It worked Quite a bit better than expected.

20250316_215549.jpg

I spent a day starting to get the Drill back together. I got the new stepped bearings pressed into the drive pulley. Then got the spindle bearings pressed into the quill, then everything assembled into the head. It was this time that I realized I still needed a base for the drill. Not wanting to sink a bunch of time into it, I looked for something off the shelf that would work. I could not find anything, so I ended up building a wood base from cut down 2x6. The sides are half lapped together, and then I used dominos to attach the stretchers. Still need to add the top, some wheels and leveling feet. I think it should be enough for the drill. Once it warms up, I may build a metal base, but this should work for now.

20250324_214058.jpg
20250324_214250.jpg
20250324_213917.jpg
20250324_213903.jpg
 
OP
N

NBraun

Well-known member
Joined
Sep 14, 2020
Messages
158
Driving back from a trip to Iowa today I saw there was a Kennedy tool box with some misc tools and a vise for sale. It had a QC tool post that I thought should fit my craftsmen lathe, but unfortunately that's not the case. That being said, the tool box is in pretty decent shape, and the vise looks to be good as well.

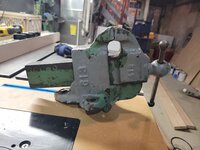
The vise is an Athol 613. A little 3" machinist vise. I've been keeping my eye out for an American made vise, and while this isn't a very large vise it will hold me over until I can find another.
20250324_200827.jpg
20250324_195917.jpg
20250324_195911.jpg
 
OP
N

NBraun

Well-known member
Joined
Sep 14, 2020
Messages
158
Just curious, are you something under your base cabinets to keep moisture wicking up from the basement floor?

Good work on your projects.
No, but now that you mention it, that would have been a very good idea.

Luckily our basement stays very dry through the year. The only time I've seen moisture down there was when we got 2.5" within an hour, and that was on the other side.
 
OP
N

NBraun

Well-known member
Joined
Sep 14, 2020
Messages
158
My goal to finish my Wifes 2023 christmas present by march didn't pan out. So I need to get some work done on it before busy season starts. (Luckily her 2023 present for me is still not finished either)

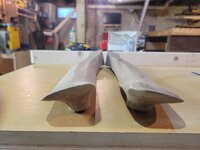
There is not a straight line on these maloof rockers, and I have quite a bit of time in these arms already. Now that I have my vise mounted again I can continue picking away at them. I've been using a spoke shave and a burr bit on a die grinder, but picked up an M12 bandfile to help. I like it much better than the die grinder.

Shaping the arms is less about having them be an exact shape, and more so that they match. I'm trying to match the left to the right. Still plenty of work to do , but getting closer.
 

Attachments

  • 20250326_222310.jpg
    20250326_222310.jpg
    419.2 KB · Views: 26
  • 20250327_071724.jpg
    20250327_071724.jpg
    602.3 KB · Views: 26
OP
N

NBraun

Well-known member
Joined
Sep 14, 2020
Messages
158
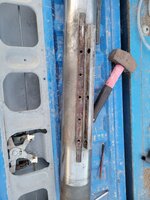
I took Friday off since the weather was so nice, with hopes to get some work done on the drill parts. I spent the afternoon outside with the bench grinder and a wire wheel cleaning up the hardware that I had left. I also cleaned up the column using a tubing polisher. I tried to do it by hand, using WD-40 and scotchbrite earlier, but never could get it completely cleaned up. Using the tubing polisher and some scotchbrite belts made quick work of it and it looks great.

Here's a "before" picture. This is after I tried to clean it up by hand.20250327_193849.jpg
20250328_211318.jpg

I started putting the bearings back in the carriage. The bearings were a little tight on the adjustment lobes, so getting them on was fun. I ended up using a C clamp like a valve spring compressor to push the bearing on while they were in the housing.
20250328_221937.jpg

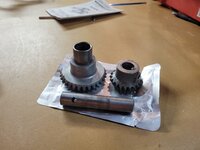
After that, I started assembling things from the base up. I realized I forgot to clean the gears for the lifting mechanism when I degreased it initially. They were completely caked in dried on grease. I soaked them in some simple green for a few hours it did nothing. So, after that I soaked them in some WD-40 and that worked much better. Now clean, they went into their home.

20250329_205020.jpg
20250329_205559.jpg

Cleaning up the bar that lifts the head I noticed something interesting. You can definitely tell where it spent most of its travel.
20250329_204912.jpg
20250329_204918.jpg

With the bar installed, it was time to install the lifting collar.
20250329_211210.jpg

Then the ball bearings, and a light coat of grease on the underside of the carriage.
20250329_213556.jpg
20250329_213559.jpg
 
OP
N

NBraun

Well-known member
Joined
Sep 14, 2020
Messages
158
Keeper bolt installed
20250329_215206.jpg

And the adjustment screws installed
20250329_215221.jpg

Stopping point for the night
20250329_215520.jpg

and couldn't help but put the slide in the carriage
20250329_215742.jpg

It's not surprising, but the lifting mechanism works WAY better compared to before. It's a one hand operation now, where before it was almost a full body exercise.
 

mschoo92

Well-known member
Joined
Oct 2, 2023
Messages
79
Location
Sussex County, NJ
Just read through this thread, beautiful house and acreage. I like how that miter station came out, between that and your outfeed table looks like plenty of flat work space and storage too, nice layout!
 
OP
N

NBraun

Well-known member
Joined
Sep 14, 2020
Messages
158
Just read through this thread, beautiful house and acreage. I like how that miter station came out, between that and your outfeed table looks like plenty of flat work space and storage too, nice layout!
Thanks!

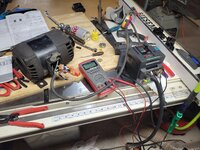
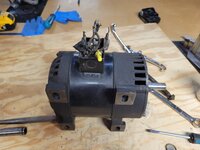
A bit more progress on the drill press. The motor did not get repainted, but I cleaned it up and it got two new bearings in it. The wires however were in rough shape. When I took it apart I didn't look to close at the wiring. I figured it's a 3 phase motor, so as long as I hook up the same 3 open wire I should be good. Well my VFD came in, and when I went to bench test it, I realized it was wired up for 440v, and about half of the wires didn't have any ID. So I spent a night Ohming everything out to figure out which wires were which. I also talked to a local motor shop who recommended I just run heatshrink over the existing wires instead of having them relead it. I did the best I could, without taking the rotor out of the housing. Anyways, I got the VFD wired up and was able to bench test the motor, and luckily everything works.

20250403_220005.jpg
20250403_203034.jpg
And Excuse the mess...
20250405_194834.jpg

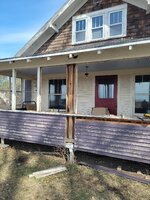
And now a different project...our poor porch.

I had full intentions of pulling this apart and fixing it last year, but wanted to hold off until work lightened up. Unfortunately that never really happened, and then I went to northern MN instead of working on house projects.

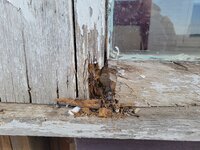
The first year we were here, I dug new footings for the two posts that were sagging the most. I also sistered the joists, put a new rim(?) joist, and installed a new storm door. Some of the window sash's were in poor shape, but they still held the weather out and without us knowing what we wanted to do, would work for the time being. Well, we lost a couple windows and the others continued to get worse. I decided today was the day to tear into it.

How most of the sash's looked.
20250406_102558.jpg

This was freshly painted in 2020. We Scraped it fully down to bare wood, used a high quality oil based primer. We then had a Deracho go through and sandblast the whole south side of the house. We got all the old sash's pulled.
20250406_110434.jpg

We pulled the siding, and tried to do it nicely, so it can be reused, but a lot of was just too far gone and rotted. The story was the same for the bead board on the inside.

Here's a picture of the dog. You can also see the interesting joist connection.
20250406_113406.jpg

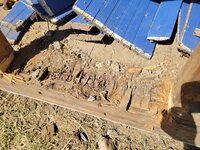
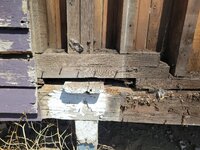
Here you can see how rotten the floor board were. Everything on the bottom was pretty well gone.
20250406_144541 (1).jpg

Here you can see my bandaid fix with some of the flooring gone.
20250406_161208.jpg

And the stopping point..
20250406_174447.jpg

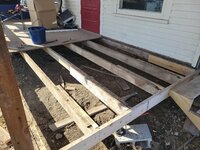
This is where we're at. I need to figure out where to go from here. The end goal is to enclose it again, and try and make it comfortable for most of the year. Even if we have to add heat or A/C. We both loved the room during the winter, and so the whole upper half being windows was great. The bad part of that, was it was only usable for like 2 weeks of the year. I'm debating just redoing the framing for the floor. It was not built strong enough and the floorboards had some spring to them. I'd almost feel better if we tore it out and built it the correct way. After that is windows. The easy button would be just be buying some windows, but I'm throwing around the idea of building them. Either casements or single hung.
 

Attachments

  • 20250406_122805.jpg
    20250406_122805.jpg
    1.2 MB · Views: 11

MegaVan

Well-known member
Joined
Dec 17, 2020
Messages
274
Location
Ohio
Thanks!

A bit more progress on the drill press. The motor did not get repainted, but I cleaned it up and it got two new bearings in it. The wires however were in rough shape. When I took it apart I didn't look to close at the wiring. I figured it's a 3 phase motor, so as long as I hook up the same 3 open wire I should be good. Well my VFD came in, and when I went to bench test it, I realized it was wired up for 440v, and about half of the wires didn't have any ID. So I spent a night Ohming everything out to figure out which wires were which. I also talked to a local motor shop who recommended I just run heatshrink over the existing wires instead of having them relead it. I did the best I could, without taking the rotor out of the housing. Anyways, I got the VFD wired up and was able to bench test the motor, and luckily everything works.

20250403_220005.jpg
20250403_203034.jpg
And Excuse the mess...
20250405_194834.jpg

And now a different project...our poor porch.

I had full intentions of pulling this apart and fixing it last year, but wanted to hold off until work lightened up. Unfortunately that never really happened, and then I went to northern MN instead of working on house projects.

The first year we were here, I dug new footings for the two posts that were sagging the most. I also sistered the joists, put a new rim(?) joist, and installed a new storm door. Some of the window sash's were in poor shape, but they still held the weather out and without us knowing what we wanted to do, would work for the time being. Well, we lost a couple windows and the others continued to get worse. I decided today was the day to tear into it.

How most of the sash's looked.
20250406_102558.jpg

This was freshly painted in 2020. We Scraped it fully down to bare wood, used a high quality oil based primer. We then had a Deracho go through and sandblast the whole south side of the house. We got all the old sash's pulled.
20250406_110434.jpg

We pulled the siding, and tried to do it nicely, so it can be reused, but a lot of was just too far gone and rotted. The story was the same for the bead board on the inside.

Here's a picture of the dog. You can also see the interesting joist connection.
20250406_113406.jpg

Here you can see how rotten the floor board were. Everything on the bottom was pretty well gone.
20250406_144541 (1).jpg

Here you can see my bandaid fix with some of the flooring gone.
20250406_161208.jpg

And the stopping point..
20250406_174447.jpg

This is where we're at. I need to figure out where to go from here. The end goal is to enclose it again, and try and make it comfortable for most of the year. Even if we have to add heat or A/C. We both loved the room during the winter, and so the whole upper half being windows was great. The bad part of that, was it was only usable for like 2 weeks of the year. I'm debating just redoing the framing for the floor. It was not built strong enough and the floorboards had some spring to them. I'd almost feel better if we tore it out and built it the correct way. After that is windows. The easy button would be just be buying some windows, but I'm throwing around the idea of building them. Either casements or single hung.
Your porch looks very - very familiar.

We had similar problems (see signature "the porch").

You can get a lot of opinions - but only you know what you need.
 

Bert_

Well-known member
Joined
Dec 24, 2016
Messages
9,780
Location
NW Iowa
Boiled linseed oil helps a lot on weathered, dry wood. I've done some basement windows sills that way. There was maybe a few flakes of paint remaining on them when I bought the place. I soaked them down with BLO, then primer and paint and they are holding up well almost 6 years later.

Seems like the porch floors were always built too light. Mine has 2x6's spanning 13 feet. I think the simplest solution for me is to break the current 2 spans into 3 spans, longest being about 9 feet.
 
OP
N

NBraun

Well-known member
Joined
Sep 14, 2020
Messages
158
Your porch looks very - very familiar.

We had similar problems (see signature "the porch").

You can get a lot of opinions - but only you know what you need.
I love what you ended up doing with the porch. It looks really good!

Boiled linseed oil helps a lot on weathered, dry wood. I've done some basement windows sills that way. There was maybe a few flakes of paint remaining on them when I bought the place. I soaked them down with BLO, then primer and paint and they are holding up well almost 6 years later.

Seems like the porch floors were always built too light. Mine has 2x6's spanning 13 feet. I think the simplest solution for me is to break the current 2 spans into 3 spans, longest being about 9 feet.
I'll be honest, we could have tried to harder to save it, but I just didn't want to deal with scraping the lead paint if we were able to reuse it.
 
OP
N

NBraun

Well-known member
Joined
Sep 14, 2020
Messages
158
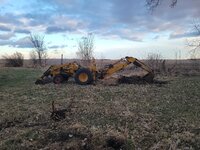
I've spent the last month staring out of a tractor, but things are finally starting to slow down.
20250508_134301.jpg

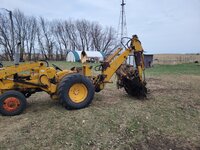
In April I was able to finally dig out some pesky stumps that have been in the way for a while. I underestimated how much digging it would take to get them out, but at the end of the day they were out. With only *Minor* repairs to the backhoe needed.


20250414_193720.jpg20250415_201806.jpg20250420_145527.jpg20250420_134054.jpg

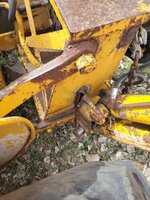
The out rigger mount broke on one side. As you can see this is not the first time it's happened. We're about halfway through getting it fixed now, but no pictures.

Cleaning up where the stumps were.
20250421_072934.jpg

Annnd, that's about as far as I've gotten with projects. I threw some grass seed down and planted the garden, but that isn't very exciting.

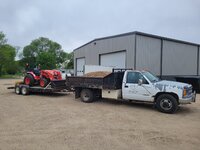
I also picked up a old 1 ton truck w/ a dump bed. MY BIL boss was looking to possibly sell it, and the price was right for the things I want to use it for. It's certainly been used, but it's in surprisingly decent shape. It's an HD truck so GVWR is 15,000lbs. PTO driven pump with a single cylinder in the front. Plan is to build some stake pockets and a tailgate and then just use for the miscellaneous stuff around the property.20250518_142748.jpg
 
OP
N

NBraun

Well-known member
Joined
Sep 14, 2020
Messages
158
some more Misc doings...

The dump truck is already coming in handy for the acreage and cleaning up the shelter belt.

20250523_174948 (1).jpg

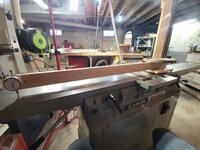
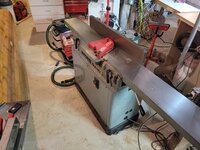
I ended up winning a DJ-20 jointer on a local auction for not a terrible price. It needed a little clean up but was in otherwise good shape. After getting it disassembled to fit in the truck, getting it down the stairs was a lesson in how heavy cast iron is. I didn't want to lift it by the beds, so I put it vertically on a appliance cart. We made it down with no major issues so I'll call it a win. I got it back together and calibrated with new knives and it works very well. I was looking for a jointer like this for my door project, so now I have no more excuses on not starting it!

How it came
20250527_205023 (1).jpg

Building a jig for the dial indicator for setting the beds.
20250601_165516.jpg
20250601_165742.jpg
20250601_175734 (1).jpg

20250602_205859.jpg

Also changed the blades in the planer while I was at it...
20250601_233714 (1).jpg

and Ted found an antler in the shelter belt that he was pretty excited about.
 
Last edited:
OP
N

NBraun

Well-known member
Joined
Sep 14, 2020
Messages
158
One thing I noticed about the jointer is the dust collection is worse than just not having dust collection. The ramp causes the shavings to build up under the head and then get thrown back at you. I used it twice and decided something had to be done.

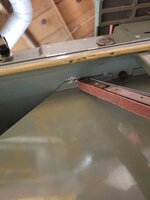
First step was removing the old Sheetmetal ramp. I used a band file to grind down the welds and was able to knock it out with a mallet.
20250609_223124.jpg
20250609_225523.jpg

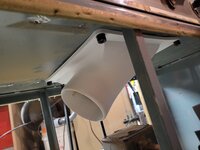
I was then able to 3d print a hose adapter that mounts directly under the head of the jointer. I put some window silicon seals on it to seal it to the bottom. I think it works pretty well. I know am printing an adapter for the side of the base where the current dust collection is.

20250611_174703.jpg
20250611_180429.jpg
 
To avoid these ads, REGISTER NOW!
Top Bottom