To avoid these ads, REGISTER NOW!

5wndwcpe's new coop.

To avoid these ads, REGISTER NOW!

egads74

Well-known member
Joined
Sep 1, 2008
Messages
87
new to this board... saw this (it looks great) and had a few questions.. I am looking to create a 2 story garage (barn like looking structure) 36 X 44. wood shop on 2nd story...

Few questions (if you dont mind...):
It looks as though you do the following...
footings... then block.. then waterproofing coating called Tremproof 250 GC.
Then rigid foam...
1) Does foam come in different thickness and what do you use based on what?

2) Does the waterproof coating and this foam also get done to inside block wall?

back fill dirt... pour stone and level inside...
3)what is used? how many inches?

then vapor barrier Stego, 15mil. thick (Looks to be placed up side wall from the floor...
4) Does the vapor barrier go vertical the floor thickness and is cement floor to be
6.75" in your case (what should floor thickness be?)?
Is the floor thickness 6.75 minus floor foam thickness?

Then tape seams of vapor barrier...

Install Expanded polystyrene (EPS) - Saw this website for info
http://www.epsmolders.org/3-sheathing.html
5) Inside - What thickness EPS on floor did you use? how fastened? Tape joints?

The radiant tubing will be 6 loops @ 300' each of 1/2" PEX
6) How to determine number of loops and lengths? Distance tubing sits apart?
Any special things to do pattern wise?

wire supports that come in different heights which act to suspend the
rebar (and/or wwr) in the middle of the slab.
7) how to determine distance apart and height?

Then cement....
8)thickness?

quote -
Not a very good shot, but I ran the (6.75") eps across the opening and backed it up with a 2x6 on the outside.
9) 2x6 is just so cement dont blow it out during pour?

quote -
I added a 1.25" thick piece of foam to the top of this and had them finish the floor to this height. When the floor has cured, I'll remove that piece and the overhead doors will sit down into the pocket.
10) Does this create an "L" shape (side view) where the doors sits against?
Or does this create a "U" (square corners - side view that the door sits down into?
The "U" doesnt seem right, but I figured I ask...

Generic questions:
11) What is the source - hot water heater? size? Who/what pump is used?
12) what is an estimate of cost for this entire system?
13) operational costs?
14) any other questions I should ask?
15) your overall experience (good /bad) with this set up?

I don't mind you not answering if you dont mind my asking...
 
Last edited:
OP
5

5wndwcpe

Well-known member
Joined
May 1, 2007
Messages
1,143
Location
Southeastern, PA
Thanks and welcome to the board. :thumbup:

In response to your questions:

1) Yes, I used 2" to balance R value, availability and affordability.

2) The coating, no. The foam, yes.

3) #2 modified, 10" to 16" worth, placed in 6" lifts, compacted with a vibratory roller, then topped with 4" of #2B (clean stone) as per the twp..

4) The slab is 6" thick, though most people only go to 4". The vapor barrier runs up the block, behind the EPS, which creates a "bathtub" effect.
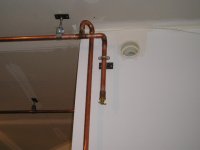
5) 2" dryfit for the floor. The edges are secured to the wall with Hilti fasteners and the resulting holes were backfilled with spray foam and trimmed flush.

6) Best bet is to get a hydronic heating design book. There are many factors that determine an efficient system, such as building insulation, area of the country, number of doors and windows etc. Here's the one I used :
http://zurn.com/images/pdf/ZPM02101.pdf

7) The method of placing the concrete will affect the amount and/or placement of the reinforcement. Pumping the mix will be easier on the wire than wheeling it. Think load distribution.

8) 6"

9) Yep

10) "L" shaped.

11) The system isn't finished yet, but the plans call for a Rinnai "on demand" type water heater and a medium head Grundfos pump. The cost comes in at $4000.00 or so including the EPS, which in itself was $1000.00

Overall, I'd say you're on the right track by doing the research first. Plenty of people just throw a system together. Do they work ? Sure they do. The question is do they work as well as they could have if more thought was put into the design. Also beware of some of these internet sights that want to sell your their "house brand" PEX. There is one sight out there that lists a 7/8" tubing. I can't imagine trying to work with that stuff. Personally, I think running more loops of a smaller tubing is a better way to go. Also, try to stick with the brand name stuff such as Watts or Zurn and be sure the fittings you use are compatible with the tubing.

Hope this helps.

Pete
 
Last edited:
OP
5

5wndwcpe

Well-known member
Joined
May 1, 2007
Messages
1,143
Location
Southeastern, PA
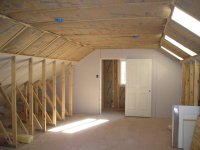
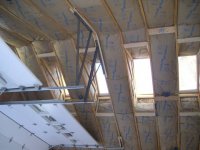
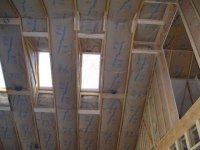
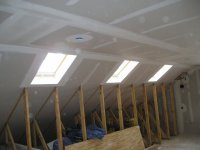
Well the insulation is finished as well all the nailers for the sheetrock and skylight tunnels. I think I'll be itching for a year.
 

Attachments

  • P1010069.JPG
    P1010069.JPG
    64.8 KB · Views: 572
  • P1010079-gj.jpg
    P1010079-gj.jpg
    41 KB · Views: 557
  • P1010081-gj.jpg
    P1010081-gj.jpg
    49.2 KB · Views: 623
  • P1010082-gj.jpg
    P1010082-gj.jpg
    45 KB · Views: 681
  • P1010078-gj.jpg
    P1010078-gj.jpg
    37 KB · Views: 502

JONESY

New member
Joined
Oct 31, 2008
Messages
2
WOW!!! I am new here and would like to say that is one heck of a build you have going there .I love all the detail about the floor heat as I am wanting that also.Also like to see you are a MOPAR man. I received a link to this site from the Moparts web board where I had posted about my potential build of a 40x60.I will have to bookmark your thread so I may refer to as a reference.By the way , you got any pics of those sweet 68 B-Bodies?Jonesy.
 
OP
5

5wndwcpe

Well-known member
Joined
May 1, 2007
Messages
1,143
Location
Southeastern, PA
WOW!!! I am new here and would like to say that is one heck of a build you have going there .I love all the detail about the floor heat as I am wanting that also.Also like to see you are a MOPAR man. I received a link to this site from the Moparts web board where I had posted about my potential build of a 40x60.I will have to bookmark your thread so I may refer to as a reference.By the way , you got any pics of those sweet 68 B-Bodies?Jonesy.


Thanks JONESY. If you have any questions about the progress (or lack thereof) of the build, just ask, I'd be happy to help. Oddly enough, I think I only have 1 or 2 pics of the fleet (none on this computer,sorry). In all honesty, the two convertibles are projects at this point and not much to look at. Hopefully I'll have the garage finished by January and be able to bring them home and get crackin' on the restos.
 
OP
5

5wndwcpe

Well-known member
Joined
May 1, 2007
Messages
1,143
Location
Southeastern, PA
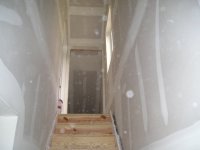
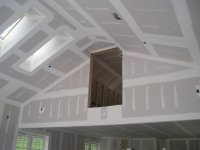
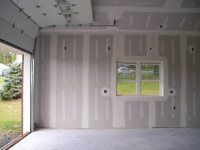
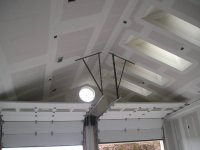
Sheetrock is up. WooHoo !
 

Attachments

  • P1010109.JPG
    P1010109.JPG
    58.4 KB · Views: 395
  • P1010108.JPG
    P1010108.JPG
    53.9 KB · Views: 377
  • P1010107.JPG
    P1010107.JPG
    66.1 KB · Views: 474
  • P1010106.JPG
    P1010106.JPG
    53.8 KB · Views: 424
  • P1010105.JPG
    P1010105.JPG
    51.8 KB · Views: 372
  • P1010104.JPG
    P1010104.JPG
    53.9 KB · Views: 367
  • P1010103.JPG
    P1010103.JPG
    58.1 KB · Views: 356

e-tek

Well-known member
Joined
Dec 19, 2007
Messages
10,690
Location
Saskatoon, SK
this is a massively cool projexct - u r very lucky! i'd love to b working in this one. looking forward to the decorating phase!
 
OP
5

5wndwcpe

Well-known member
Joined
May 1, 2007
Messages
1,143
Location
Southeastern, PA
this is a massively cool projexct - u r very lucky! i'd love to b working in this one. looking forward to the decorating phase!


Yeah, me too ! But I gotta tell ya - after a year of this construction ********, I'm kinda anxious to get back to working on the Mopars.
 
OP
5

5wndwcpe

Well-known member
Joined
May 1, 2007
Messages
1,143
Location
Southeastern, PA
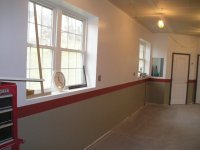
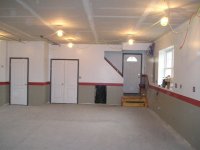
Update time. Sorry for not posting for awhile. Things move kinda slow working solo.

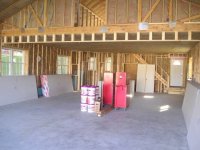
A few interior shots.
 

Attachments

  • P1010135.JPG
    P1010135.JPG
    60.5 KB · Views: 574
  • P1010133.JPG
    P1010133.JPG
    51.8 KB · Views: 566
  • P1010127.JPG
    P1010127.JPG
    54.1 KB · Views: 583
  • P1010126.JPG
    P1010126.JPG
    60.3 KB · Views: 619
  • P1010125.JPG
    P1010125.JPG
    61.3 KB · Views: 647
  • P1010132.JPG
    P1010132.JPG
    54.2 KB · Views: 596
Last edited:
OP
5

5wndwcpe

Well-known member
Joined
May 1, 2007
Messages
1,143
Location
Southeastern, PA
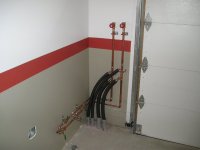
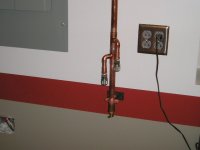
Plumbing in the corner where the sink and parts washer go. Verticle lines will run to a hose reel mounted high on the wall.
 

Attachments

  • P1010134.JPG
    P1010134.JPG
    54.6 KB · Views: 401
OP
5

5wndwcpe

Well-known member
Joined
May 1, 2007
Messages
1,143
Location
Southeastern, PA
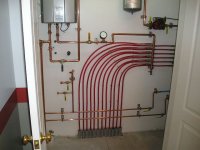
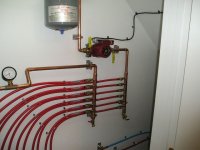
Radiant heat. A work of art, if I do say so myself. :deathmeta
 

Attachments

  • P1010128.JPG
    P1010128.JPG
    60.5 KB · Views: 563
  • P1010129.JPG
    P1010129.JPG
    65.7 KB · Views: 513
  • P1010130.JPG
    P1010130.JPG
    61.9 KB · Views: 460
  • P1010131.JPG
    P1010131.JPG
    58.8 KB · Views: 439
Last edited:

ProGun3400

Well-known member
Joined
Sep 16, 2008
Messages
460
Location
Will County, Illinois
Holy insulation. I know what you mean about the itching, just did a bunch myself. Did you sub out the drywall and taping or DIY it also? Everything looks top notch. I would be proud to call it mine. :thumbup:
 
OP
5

5wndwcpe

Well-known member
Joined
May 1, 2007
Messages
1,143
Location
Southeastern, PA
Holy insulation. I know what you mean about the itching, just did a bunch myself. Did you sub out the drywall and taping or DIY it also? Everything looks top notch. I would be proud to call it mine. :thumbup:


I did subout the drywall and mudwork. Probably the best decision I've ever made. :thumbup:
 

TopherGreen

Member
Joined
Feb 25, 2009
Messages
15
Location
Huntsville, AL (Harvest)
I would have no problem calling that home. Super nice work man, very inspiring. I noticed vents in the ceiling, do you have heat and a/c or just heat? I would never leave if there was a/c too.
 
To avoid these ads, REGISTER NOW!
OP
5

5wndwcpe

Well-known member
Joined
May 1, 2007
Messages
1,143
Location
Southeastern, PA
I would have no problem calling that home. Super nice work man, very inspiring. I noticed vents in the ceiling, do you have heat and a/c or just heat? I would never leave if there was a/c too.


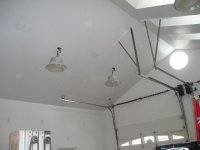
Thanks for the kind words. Actually those vents connect to a 6" trunk line and go to an exhaust fan on the roof. Theory is, with the skylites open, the vents will create a cross draft and (hopefully) pull any fumes out of the shop. Venturi effect.

No a/c .....yet.
 
OP
5

5wndwcpe

Well-known member
Joined
May 1, 2007
Messages
1,143
Location
Southeastern, PA
Is the boiler gas or electric?

Everything looks awesome!!

Will

Hey Will, it's propane. The yard has been so wet lately, if I get out there with the backhoe to trench the gas line, I'm just going to destroy the place. I only need heat for another month or two, so I figure I'll wait until the summer to install the tank and line.
 

Omphaloskeptic

Well-known member
Joined
Oct 11, 2008
Messages
2,346
Location
Ultima Ratio, Wa.
5WNDWCPE,
Congratulations on your well-built shop! Kudos to you! I too am looking forward to your posts as you put the finishing touches to the project.
What did you have to do about hillside/foundation drains; keeping the water from getting close to the block? Did you have to vent the voids adjacent to your skylights?
Where the heck is 'Radiator Springs' anyway? I grew up outside of Pittsburgh (Springdale), but I'm not familiar with your location. I come up with zilch when I Google/Maps your town.
 

sofob0909

Well-known member
Joined
Jan 25, 2009
Messages
81
any more updated pics? i love the building. What are the rooms at the back of the bottom for? do you have floor plan?
 
OP
5

5wndwcpe

Well-known member
Joined
May 1, 2007
Messages
1,143
Location
Southeastern, PA
5WNDWCPE,
Congratulations on your well-built shop! Kudos to you! I too am looking forward to your posts as you put the finishing touches to the project.
What did you have to do about hillside/foundation drains; keeping the water from getting close to the block? Did you have to vent the voids adjacent to your skylights?
Where the heck is 'Radiator Springs' anyway? I grew up outside of Pittsburgh (Springdale), but I'm not familiar with your location. I come up with zilch when I Google/Maps your town.

Thanks. :thumbup: I used a rubberized coating on the foundation, topped with 1" eps and then an acrylic coating. There are footer drains all the way around so any water that does run down the wall doesn't stay around long.

Not sure what you mean by "voids" adjacent to the skylites and Radiator Springs is the name of the town in the movie CARS. I live east of Reading, PA
 
OP
5

5wndwcpe

Well-known member
Joined
May 1, 2007
Messages
1,143
Location
Southeastern, PA
any more updated pics? i love the building. What are the rooms at the back of the bottom for? do you have floor plan?


I'll get more pics up when I get something else done. :lol_hitti

The room on the left is a small office and the one in the middle is a bathroom. The double doors under the stairs house the mechanicals. No floor plan, just winging it. :thumbup:
 

Omphaloskeptic

Well-known member
Joined
Oct 11, 2008
Messages
2,346
Location
Ultima Ratio, Wa.
Thanks. :thumbup: I used a rubberized coating on the foundation, topped with 1" eps and then an acrylic coating. There are footer drains all the way around so any water that does run down the wall doesn't stay around long.

Not sure what you mean by "voids" adjacent to the skylites and Radiator Springs is the name of the town in the movie CARS. I live east of Reading, PA

I was wondering if you had installed any perf pipe up the hillside to divert groundwater away from the block wall; kind of a 'belt and suspenders' approach to prevent water incursion.
:confused:In regard to my question about vents for the skylight voids, I mistakenly thought there would be boxed in areas around your trusses wherever you installed a skylight. My bad.
Really enjoyed your build!:thumbup:
 
OP
5

5wndwcpe

Well-known member
Joined
May 1, 2007
Messages
1,143
Location
Southeastern, PA
This one deserved the ultimate kids kudo's: UNREAL BANANA-PEEL!!!:beer::beer:

Gotta dig that. :thumbup:

Airlines are done. On to the low voltage stuff :drool:
 

Attachments

  • P1010147.JPG
    P1010147.JPG
    48.3 KB · Views: 364
  • P1010142.JPG
    P1010142.JPG
    54.1 KB · Views: 392
  • P1010140.JPG
    P1010140.JPG
    46.1 KB · Views: 394
  • P1010139.JPG
    P1010139.JPG
    53.9 KB · Views: 376
  • P1010138.JPG
    P1010138.JPG
    53.4 KB · Views: 385
  • P1010137.JPG
    P1010137.JPG
    52.2 KB · Views: 384
  • P1010136.JPG
    P1010136.JPG
    52.2 KB · Views: 406

dipper

Well-known member
Joined
Jun 27, 2007
Messages
759
Location
Rochester, NY
Excellent build 5wndwcpe! You have definitely done your homework and executing the plan. Your wall scheme is exactly like mine, gray/red/white. It takes a while working by yourself but keep up the good work!!
 
OP
5

5wndwcpe

Well-known member
Joined
May 1, 2007
Messages
1,143
Location
Southeastern, PA
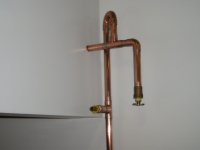
does copper normally need that many drains?

dan

Overkill ? Absolutely. I figured anywhere there was a verticle termination, I'd install a drip leg with a drain. It certainly can't hurt - and if they never collect any moisture, all the better. :thumbup:
 

CBR9Seadoo

Well-known member
Joined
Sep 22, 2009
Messages
52
Not a very good shot, but I ran the (6.75") eps across the opening and backed it up with a 2x6 on the outside. I added a 1.25" thick piece of foam to the top of this and had them finish the floor to this height. When the floor has cured, I'll remove that piece and the overhead doors will sit down into the pocket. I will lose some efficiency due to the concrete being exposed, but it was a trade off for having a positive seal on the doors.

Your garage is awesome. Is this done now? Do you have pictures how it looks done?


Tim
 
OP
5

5wndwcpe

Well-known member
Joined
May 1, 2007
Messages
1,143
Location
Southeastern, PA
Your garage is awesome. Is this done now? Do you have pictures how it looks done?


Tim


Silly rabbit, they're never done, but thanks for the kind words. I more or less dropped working on the inside right now and am concentrating on finishing around the outside (pouring the aprons, patching the driveway etc.) while the weather is still on my side.

I'll try to get some more recent shots up this weekend. Of course, as everyone will tell you, whatever size shop you build, it'll be too small in the end. I've got 4 cars and 1 motorcyle in there now and there ain't a whole lotta room left. :lol_hitti
 

CBR9Seadoo

Well-known member
Joined
Sep 22, 2009
Messages
52
Great, look forward to more pics. Can you snap some of where you garage floor meets your driveway? They pics and description didn't make sense. I would like to see the finished pour.

I am hoping to start my 24' x 48' build next week. Waiting on a variance from the township I live in to go over 1500 sqft (already have a 30x40 this it is being attached to.

A few Questions:

Where did you get your bridges for under your cement?
What size did you use?
Did you run rebar both directions and then put mesh on top of it?

Great work.
 
OP
5

5wndwcpe

Well-known member
Joined
May 1, 2007
Messages
1,143
Location
Southeastern, PA
Hey Tim,
See post #66 of this thread for more on the slab bolsters. I believe they were 2.5" high and yes, I ran the re-bar both ways on 12" centers with the wwr on top.

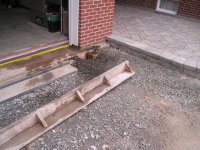
The pic on the left shows the bulkhead I made prior to the floor pour. Although it's hard to see, there's a drop of 1.5" from the finished floor (inside) to the top edge of the foam insulation, which is technically outside. This is what the overhead door sits on. From that point, the aprons (yet to be poured) will extend out about a foot to where the blacktop will join up. I'm on the side of a mountain and get a pretty stiff westerly wind. I did it this way so the the sealing edge of the door is actually a little below the floor and can't get rain, leaves and small barnyard animals blown under the threshold.
 

Attachments

  • P1010090.JPG
    P1010090.JPG
    72.5 KB · Views: 263
  • P1010091.JPG
    P1010091.JPG
    73.4 KB · Views: 288
Last edited:
OP
5

5wndwcpe

Well-known member
Joined
May 1, 2007
Messages
1,143
Location
Southeastern, PA
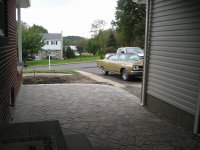
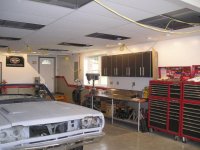
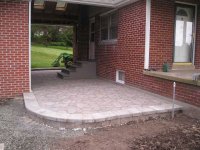
I've neglected to post many interior pics because the place is a bit of a mess yet. I have the 2x4 fixtures for the drop ceiling but am going to convert them to T8's before I install them. I spent most of the summer working on the outside and just recently finished the breezeway pavers. Next up are the concrete aprons, patching up the blacktop and digging the ditch for the gas line. After that, the weather should be sufficiently ****** to move back inside and finish up the interior.
 

Attachments

  • P1010093.JPG
    P1010093.JPG
    72.2 KB · Views: 514
  • P1010092.JPG
    P1010092.JPG
    54.3 KB · Views: 574
  • P1010089.JPG
    P1010089.JPG
    67.2 KB · Views: 604
  • P1010088.JPG
    P1010088.JPG
    69.4 KB · Views: 567
  • P1010087.JPG
    P1010087.JPG
    69.7 KB · Views: 555
  • P1010094.JPG
    P1010094.JPG
    64.9 KB · Views: 527
Last edited:
To avoid these ads, REGISTER NOW!
Top Bottom