To avoid these ads, REGISTER NOW!

5'x8' Trailer Build

zmotorsports

ALLIANCE MEMBER
Joined
Oct 20, 2009
Messages
21,332
Location
Northern Utah
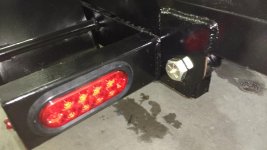
Turned out very nice. I am running the same LED lights on the 6x10 trailer that I built myself last year. I love them, they are much brighter than the old incandescent style plus they just have that "kool" factor.:thumbup:

Mike.
 
To avoid these ads, REGISTER NOW!
OP
F

f150skidoo

Well-known member
Joined
Dec 29, 2012
Messages
1,206
Location
Ontario, Canada
Thanks for the compliments and LED's are the only way to go nowadays. They've come down so much in price that they're only a little bit more then incandescent.

So I spent this morning tidying up the wires and plumbing up the hydraulics. the lower frame is now 99.9% done, I just need to get some misc stuff like grease zerk's, hydraulic hose clamps, and hydraulic oil. I was going to roll it out of the shop but didn't feel like lifting the heavy tongue while rolling it up hill, so just picked it up with the Deere with the 8' extension forks.
 

Attachments

  • IMG_20160215_115844553.jpg
    IMG_20160215_115844553.jpg
    145.3 KB · Views: 405
  • IMG_20160215_115907540.jpg
    IMG_20160215_115907540.jpg
    140 KB · Views: 431
  • IMG_20160215_131320158.jpg
    IMG_20160215_131320158.jpg
    149.8 KB · Views: 470
OP
F

f150skidoo

Well-known member
Joined
Dec 29, 2012
Messages
1,206
Location
Ontario, Canada
Very nice.

Just curious, do you have a day job?

Ya I'm a stone mason/ bricklayer. We only work a few days a week during the winter months, so I have a lot of spare time in Jan. and Feb. I could work more during the winter but in the summer i work mon-fri for my employer then sat-sun doing side jobs. So the down time this time of year is nice to have.
 

bullnerd

Well-known member
Joined
Sep 17, 2012
Messages
5,690
Location
Jersey
Ya I'm a stone mason/ bricklayer. We only work a few days a week during the winter months, so I have a lot of spare time in Jan. and Feb. I could work more during the winter but in the summer i work mon-fri for my employer then sat-sun doing side jobs. So the down time this time of year is nice to have.

Thats pretty cool ,and thanks for the explanation.
 
OP
F

f150skidoo

Well-known member
Joined
Dec 29, 2012
Messages
1,206
Location
Ontario, Canada
So here's the last bit of progress until the weekend, working the rest of the week. Spent a good chunk of the day plowing snow so I only got a little bit of shop time this afternoon. My 2-5/16" coupler arrived in the mail, started to build the sides. I'm leaving a space on top of the steel side so I can put a 2x10 in, the side also has a piece of 3"x4.1 channel as a stiffener to prevent oil canning of the 14ga sides. I cut the channel a little to long so i had to take a sliver off it and a band saw is the only way to go.
 

Attachments

  • IMG_20160216_142036796.jpg
    IMG_20160216_142036796.jpg
    142.6 KB · Views: 345
  • IMG_20160216_153907417.jpg
    IMG_20160216_153907417.jpg
    145.9 KB · Views: 364
  • IMG_20160216_153344647.jpg
    IMG_20160216_153344647.jpg
    150 KB · Views: 380
  • IMG_20160216_153601035.jpg
    IMG_20160216_153601035.jpg
    134.6 KB · Views: 393
OP
F

f150skidoo

Well-known member
Joined
Dec 29, 2012
Messages
1,206
Location
Ontario, Canada
Ending up being to cold to work today so i got some shop time instead. Ended up working on the dump body. When i welded the 14ga to the C channel it distorted the bottom of the sides so i'm going to have to do some clamping to get it good and straight so i can weld it to the floor plate. fortunately the top part of the sides stayed good and straight.
 

Attachments

  • IMG_20160218_145032358.jpg
    IMG_20160218_145032358.jpg
    146.8 KB · Views: 355
  • IMG_20160218_112331370.jpg
    IMG_20160218_112331370.jpg
    147.6 KB · Views: 327
  • IMG_20160218_112317489.jpg
    IMG_20160218_112317489.jpg
    145.6 KB · Views: 333
  • IMG_20160218_130450805.jpg
    IMG_20160218_130450805.jpg
    146.9 KB · Views: 337
  • IMG_20160218_095110630.jpg
    IMG_20160218_095110630.jpg
    146.3 KB · Views: 336
OP
F

f150skidoo

Well-known member
Joined
Dec 29, 2012
Messages
1,206
Location
Ontario, Canada
After i got the sides tacked on i was ready to start on the front part. Welded on a 1" tube to prevent the tarp from tearing on the sharp edge of the sheet metal. picked up my DIY tarp roller that i had a machinist friend turn down the 1" square bar to fit the bearings.
 

Attachments

  • IMG_20160218_172920984.jpg
    IMG_20160218_172920984.jpg
    147.6 KB · Views: 331
  • IMG_20160218_153633448.jpg
    IMG_20160218_153633448.jpg
    143.5 KB · Views: 357
  • IMG_20160218_153502452.jpg
    IMG_20160218_153502452.jpg
    148.7 KB · Views: 324
  • IMG_20160218_150308439.jpg
    IMG_20160218_150308439.jpg
    158.1 KB · Views: 304

bullnerd

Well-known member
Joined
Sep 17, 2012
Messages
5,690
Location
Jersey
Nice welds!

Would a bend on the bottom of the sides have helped keep them straight?
 
OP
F

f150skidoo

Well-known member
Joined
Dec 29, 2012
Messages
1,206
Location
Ontario, Canada
Nice welds!

Would a bend on the bottom of the sides have helped keep them straight?
Yes a bend would've helped keep them straight but also would make it harder to attach the side to the floor.

What's the purpose of having the side panels dip, versus being a continuous height?

If you want extra side height you can slide in a 2x10 if your hauling mulch.
 
OP
F

f150skidoo

Well-known member
Joined
Dec 29, 2012
Messages
1,206
Location
Ontario, Canada
First thing was I made the brackets for the tarp and added another channel stiffener on the front. On this project I was avoiding overhead welding like the plague but sometimes you just have to do them. I lifted the dump bed off my welding table and set it on axle stands to get it lower to the ground to weld the sides on. To fix the warp on the bottom of the sides i had to clamp the **** out of them to get it straight & square. I ended up stitch welding them on every 10" and will caulk the rest of the joint since welding all those joints continuously is not a way i want to spend my weekend.
 

Attachments

  • IMG_20160220_124558204.jpg
    IMG_20160220_124558204.jpg
    152.2 KB · Views: 329
  • IMG_20160220_090914887.jpg
    IMG_20160220_090914887.jpg
    147.3 KB · Views: 307
  • IMG_20160220_131941339.jpg
    IMG_20160220_131941339.jpg
    150.2 KB · Views: 422
  • IMG_20160220_164056201.jpg
    IMG_20160220_164056201.jpg
    143.3 KB · Views: 332
  • IMG_20160220_143014220.jpg
    IMG_20160220_143014220.jpg
    135.8 KB · Views: 312
  • IMG_20160220_143020845.jpg
    IMG_20160220_143020845.jpg
    142.2 KB · Views: 353
  • IMG_20160220_143034570.jpg
    IMG_20160220_143034570.jpg
    135.1 KB · Views: 321

CNGsaves

Well-known member
Joined
Sep 26, 2012
Messages
13,233
Location
KS and OK
Looking good !! :thumbup: That will be very useful when done.

I'd recommend instead to weld D-ring tie-downs on sidewalls just above the floor so everything has better chance of sliding out of box when dumped. I would not want to be constantly shoveling or sweeping around a tie-down on the floor of trailer.

You might even consider removable tie-downs that screw into threaded holes in sides. You could put a "plug" bolt in there when not in use.
 

readhead

Well-known member
Joined
Dec 8, 2012
Messages
6,175
Location
Durango, Co.
That is good looking work. It looks like you are going to put 2x wear boards on the sides. Excellent idea especially if someone borrows it. Is the tarp going to pull back and hook on the back corners? If you're going to put the tie downs on the floor how about recessing them into the floor.
 
To avoid these ads, REGISTER NOW!
OP
F

f150skidoo

Well-known member
Joined
Dec 29, 2012
Messages
1,206
Location
Ontario, Canada
Not a lot of progress today, was more of finishing odds and ends which **** up most of the day. Made the ratcheting lock for the tarp, welded the D rings to the sides. Made the rear door hinges and capped the vertical tubing and welded on two hooks for the tarps anti sail bar. But now i'm ready to prime & paint the dump body and will build the barn doors later this week.
 

Attachments

  • IMG_20160221_120910843.jpg
    IMG_20160221_120910843.jpg
    145.1 KB · Views: 315
  • IMG_20160221_142931598.jpg
    IMG_20160221_142931598.jpg
    133 KB · Views: 297
  • IMG_20160221_142835029.jpg
    IMG_20160221_142835029.jpg
    148.5 KB · Views: 306
  • IMG_20160221_155530687.jpg
    IMG_20160221_155530687.jpg
    134 KB · Views: 314
  • IMG_20160221_163347264.jpg
    IMG_20160221_163347264.jpg
    145.7 KB · Views: 335
Last edited:
OP
F

f150skidoo

Well-known member
Joined
Dec 29, 2012
Messages
1,206
Location
Ontario, Canada
After I took the last picture in my previous post i stepped back to look at my handy work and noticed something was off. I put the framing square on both rear tubes and they were out 1/4" in 24", I needed to straighten them or mounting the barn door would become a PITA. Normally I would beat them straight with a big f***ing hammer but this time i wanted to try flame straitening. I don't have a O/A torch but my hand held MAPP torch was getting the steel to glow red, once red hot I quenched it with a soaking rag and you can hear a subtle pop. I checked it again with the framing square and it was bang on square.
 

Attachments

  • IMG_20160221_170553439.jpg
    IMG_20160221_170553439.jpg
    145.2 KB · Views: 320
  • IMG_20160221_170503852.jpg
    IMG_20160221_170503852.jpg
    141.7 KB · Views: 318
  • IMG_20160221_170400097.jpg
    IMG_20160221_170400097.jpg
    147.8 KB · Views: 335
  • IMG_20160221_165621235.jpg
    IMG_20160221_165621235.jpg
    145.5 KB · Views: 326
OP
F

f150skidoo

Well-known member
Joined
Dec 29, 2012
Messages
1,206
Location
Ontario, Canada
After dinner today my dad and i primed the bottom part of the body and as I type this I'm waiting for it to dry so we can spray the gloss black on.
IMG_20160222_194057405.jpg


EDIT: back in black.
IMG_20160222_203342363.jpg
 
Last edited:
OP
F

f150skidoo

Well-known member
Joined
Dec 29, 2012
Messages
1,206
Location
Ontario, Canada
If i had to guess the body is around 800lbs and the lower frame is 600lbs. When its all done i'm going to run it across the scales.
 

Whiskeymike

Well-known member
Joined
Oct 31, 2013
Messages
775
Location
Austin, TX
Sorry if this is dense, but didn't you cap the c channel closing it up like tube, so therefore it would rust the same? Or did I misread?
 
OP
F

f150skidoo

Well-known member
Joined
Dec 29, 2012
Messages
1,206
Location
Ontario, Canada
Sorry if this is dense, but didn't you cap the c channel closing it up like tube, so therefore it would rust the same? Or did I misread?

Technically yes but I needed it to be capped to support the DOM tubing. If I just welded the tube onto the inside of the C it would be susceptible to cracking the welds on the DOM.
 
OP
F

f150skidoo

Well-known member
Joined
Dec 29, 2012
Messages
1,206
Location
Ontario, Canada
Got the inside of the dump body primed and painted today. Also sealed all the joints that I stitched welded with automotive seam sealer.
 

Attachments

  • IMG_20160224_202000839.jpg
    IMG_20160224_202000839.jpg
    141.3 KB · Views: 227

bullnerd

Well-known member
Joined
Sep 17, 2012
Messages
5,690
Location
Jersey
Yup, great job, I will build one someday.

I see me hooking my eye socket on those tarp hooks though!
 
OP
F

f150skidoo

Well-known member
Joined
Dec 29, 2012
Messages
1,206
Location
Ontario, Canada
Well here are the pictures you all have been waiting for. I still need to build the barn doors and finish some other small odds and ends. When I set the body on the frame it fit perfectly I was even able to slide the 1" pivot bolts in by hand.
 

Attachments

  • IMG_20160225_154848010.jpg
    IMG_20160225_154848010.jpg
    150.4 KB · Views: 357
  • IMG_20160225_162818322.jpg
    IMG_20160225_162818322.jpg
    144.4 KB · Views: 344
  • IMG_20160225_162756306.jpg
    IMG_20160225_162756306.jpg
    146.7 KB · Views: 436
  • IMG_20160225_162844946.jpg
    IMG_20160225_162844946.jpg
    138.4 KB · Views: 383

CNGsaves

Well-known member
Joined
Sep 26, 2012
Messages
13,233
Location
KS and OK
Wow, just WOW . . . . . Great result !!! :thumbup: . . :beer:
That will be highly desired . . . Can I Borrow Tool . . . . from your friends !! ;)

Curious to see how your rolling tarp works and "tie-downs" to sides ??

Do you have method to add side boards and tail board to enable FILLING up to the top if you have light-weight material like mulch, etc. ???

P.S. Can you show us PIC's of the dump process ??
 
To avoid these ads, REGISTER NOW!
Top Bottom