To avoid these ads, REGISTER NOW!

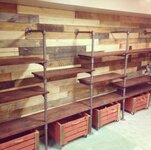
Between 485 & 705 SQ/FT A Garage Rehabbed

Workspaces between 485 and 705 squarefeet.

drivesitfar

Well-known member
Joined
Oct 23, 2013
Messages
36,055
Location
Pacific Northwest
Brent: i agree with FIO and everybody else that you took a space some of us might just include with the upstairs storage or just sheetrock and made it a masterpiece. WELL DONE SIR!!

i remember a couple years ago not grabbing some of those metal rusty panels that were practically free and saying what would i do with them and do i really need to store that. I wish i would have grabbed them now.

cheers and good luck with your compressor!!
 
To avoid these ads, REGISTER NOW!
OP
B

-Brent-

Well-known member
Joined
Dec 23, 2009
Messages
4,709
Location
Utah
So where are the pics of the Rod nestled below the vintage walls and roof? What a slacker...you give a guy a five minute break...... Looks great! :)

Forgot to add, if you do put a finish on it cut it really thin to take down any gloss as you want to keep the patina you have. Or if you want to age it a bit more a very lite cut of some Potassium Dichromate can do that as well.

Duker, I think the cleaning lady died, so I've been hiding the mess by some creative photo angles. :D When it's done, I'd love to have someone with a decent camera come in and take some shots with it all set up. Actually, now that it's in writing, that's what I'll do. Even if it costs me a few bucks, it'll be a neat thing to have in the future.

I love chemical talk. That's some good advice. I don't know if I will do it on the walls since I'm into how it looks, now. BUT I do have a couple projects down the road where this info is going to be handy. Thanks. Now, I need to go over to your part of the GJ and make sure your cleaning lady is alive and well! :beer:

That's a money shot, right there! :thumbup:

Well done!! :beer:

Thanks, Dan!

Brent: i agree with FIO and everybody else that you took a space some of us might just include with the upstairs storage or just sheetrock and made it a masterpiece. WELL DONE SIR!!

i remember a couple years ago not grabbing some of those metal rusty panels that were practically free and saying what would i do with them and do i really need to store that. I wish i would have grabbed them now.

cheers and good luck with your compressor!!

Thanks, Drives. I had the idea in my head for a while. It's nice to see it work out like I had pictured.

A girl at work saw a couple of the pictures and said something like, "You didn't have to buy all that wood? You're pretty lucky." and in my head I was calculating all the time it took to, collect, break the pallets down, prep them, and get rid of the leftover mess but I just said, "yeah, for sure." And, in a way, I do agree with her. This was a lot of work that only few knew about, but to make something, anything, that unknowing folks pass off as easy is a part of a completed project I always take some pride in.
 
OP
B

-Brent-

Well-known member
Joined
Dec 23, 2009
Messages
4,709
Location
Utah
I've had this 48-star flag for a number of years without a place to hang it. It needs some adjusting but it's nice finally having it up. I don't plan to overwhelm the walls but I do have a few more items to hang like a couple neat old signs and such. I ran out of nails or I would've gotten a few more items up. I didn't overly plan or measure anything. I did measure the flag but as you can see, I didn't get that right, haha.

To mount the corner of the flag without the grommet I cut apart a work-light bracket that has dimples in it for a ball that the light swivels on. I turned the pieces so they sat in one another and that clamps the flag without causing any damage or putting a hole in it.


burger

Well-known member
Joined
Jun 6, 2005
Messages
998
Location
Erf
Brent,

It just keeps getting better!

As far as my DeWalt table saw, I used it a few years ago to cut Hardi Siding and it hasn't been the same since. The concrete dust got into the slides and despite a thorough cleaning, it binds all over the place. It's a shame because it's still a nice saw otherwise.
 
OP
B

-Brent-

Well-known member
Joined
Dec 23, 2009
Messages
4,709
Location
Utah
Interesting that yours binds, too. When I have some free time I'd like to pull it apart and see if I can get it operating smoothly again. Mine is a bear to turn especially with the handle being as slick as it is.
 
OP
B

-Brent-

Well-known member
Joined
Dec 23, 2009
Messages
4,709
Location
Utah
Nothing substantial update-wise: I put the rest of my wall hangers up and wired an outlet.


I took the day off to play Mr. Mom and maybe if there's time I'll empty the left over pallet wood from the garage and pallet it up so it can move onto the next person.
 

drivesitfar

Well-known member
Joined
Oct 23, 2013
Messages
36,055
Location
Pacific Northwest
Brent: your vision has turned into a nice looking wall and ceiling. WELL DONE!!

if you didn't know already some stuff on Craigslist just doesn't sell or sometimes you just want to pass it on to a person that can use it for FREE so i use the FREE section and usually don't take the first email (a lot of spammers or commercial store's employees) and i'll take the one with a decent ask and phone # to come pick it up. maybe you might want to sell the pallets or maybe you can find a good home for the leftovers so you don't have to store them. or don't discount the idea that you might need some for another project.

good luck and have fun being MR. MOM. :thumbup:
 
OP
B

-Brent-

Well-known member
Joined
Dec 23, 2009
Messages
4,709
Location
Utah
Thanks, Drives. The pallets I'll give away. They'll go quick. The stuff that's already dismantled I'll ask 20-30 dollars just because there's a ton of it that I busted my backside dismantling and that's a pretty fair deal compared to what others ask for that stuff, locally. And, a small asking price keeps the oddballs from calling/texting. At least that's my experience.
 

bj383ss

Well-known member
Joined
Sep 29, 2011
Messages
3,166
Location
TX
Brent memorabilia is looking good. Glad to see you have the Lonestar plate up there.

As far as the BLO goes it definitely wouldn't take away. It wood "pop" the grain and give it some protection. But looking at the wall it would be a little more work now and you have already hung stuff up.

Not sure about that Dismantle Chevrolet sign :D

Bret
 
OP
B

-Brent-

Well-known member
Joined
Dec 23, 2009
Messages
4,709
Location
Utah
Brent memorabilia is looking good. Glad to see you have the Lonestar plate up there.

...

Not sure about that Dismantle Chevrolet sign :D

Bret

I'm a big fan of TX. I'd move out there if I had the chance.

My 30 Ford coupe is likely getting a 383 (2nd choice is a hot 327) backed by an M21 or M22 and my rear wheels are Chevy pickup steelies. Chevy parts make good hot rod parts! :D
 
OP
B

-Brent-

Well-known member
Joined
Dec 23, 2009
Messages
4,709
Location
Utah
This can can can yours? What's that from?

Not sure. I've never seen another one but an old-timer that I grew up down the street from used to call his Model T an "ol' can." I brought this by him after I found it and he chuckled, saying that you'd have to be pretty proud of your car [back then] to have a tag like that.

I've heard a lot of uses for can as a homonym (fired, ****, bathroom, etc.) but never used to refer to a car. This was like saying my car can beat yours... so he says. I've never heard it before but it makes sense, to me.
 

burger

Well-known member
Joined
Jun 6, 2005
Messages
998
Location
Erf
Not sure. I've never seen another one but an old-timer that I grew up down the street from used to call his Model T an "ol' can." I brought this by him after I found it and he chuckled, saying that you'd have to be pretty proud of your car [back then] to have a tag like that.

I like that explanation and story. I'd stick to it.
 
OP
B

-Brent-

Well-known member
Joined
Dec 23, 2009
Messages
4,709
Location
Utah
Oh the humanity!!! :willy_nil

Haha, Dan, the first choice is/was a Pontiac 389 but man-oh-man I could build a 327 AND a 383 for the cost of a built 389. When I was running a 32 chassis it was with a 292 y-block but that too is more expensive to play with... I know that because I have a shelf filled with expensive speed parts that combined still don't make a whole engine but I could part with them and pay for a 383 with 400hp and 400 ft lb of torque, easily. Lots of those 60s Model As were running SBCs so I don't have an issue with it. :beer: And dressed up - with 327 and vintage dress-up goodies - not many people would know the difference.
 
OP
B

-Brent-

Well-known member
Joined
Dec 23, 2009
Messages
4,709
Location
Utah
What a day. I got to hang out with my 2 y.o. daughter for the day, which was a treat. Usually it's she and her brother but after we dropped him at school, we got to hang out. We ran some errands, ate lunch (her choice was McDonald's) and it was bad enough the neither of us finished, and finished off the day picking up her brother at school and hitting a huge playground in town. It was a much needed recharge for me. More than anything, I love those dang kids.

The only thing I wanted to accomplish on the shop, tonight was getting the pallet wood out and organized in the driveway. Turns out, I probably have enough left to do the project all over again. An oversight on my part, for sure, way better than having to break more down to finish, though!

I took a few minutes and tossed some of my old parts overflow up onto the shelf. It looked pretty cool to me.


Then, this happened. I rolled in the Sammy for the first time in a long while. This thing isn't even running right now. It's also the big reason why I started tearing into this project, which was supposed to take me a 2-3 months. :dunno: :D


Obviously, I couldn't work in the shop the way it is, now. There's still too much **** and materials for in the space. The day I start working on finishing the Sammy, it'll be a clean shop, no **** anywhere. I'm really feeling like that time is coming up.

One nice thing is that with both vehicles in, I will be able to still work at the bench and access all the tools. That wasn't possible before.

That's it for today.
 

burger

Well-known member
Joined
Jun 6, 2005
Messages
998
Location
Erf
Hello Brent,

The Sugar House Spl is looking good.

I fully support your love of the small block Chevy. Don't tell other people this, but it's by far my favorite engine to own. The reasons are obvious: cheap, lots of power, vintage looks, and it's all easy to obtain. And if you love the ability to pick up cheap parts at an Autozone after you've broken down in some town you've never heard of...

Note that I'm a good resource for part numbers for cheap NGK replacement shorty spark plugs, factory mini-starters, etc. I've been putting SBC engines together for scanalously cheap for years and would be happy to share what I know. Some of it might be a little non-HAMB.

Regarding your Pontiac 389, I'm going through something similar with my 68 GTO. Every part is ridiculously expensive compared to my Small Block Chevy frame of mind. Fortunately I'm about to acquire a Bulter Performance engine that's been sitting in a stalled project car at a good price.
 

bj383ss

Well-known member
Joined
Sep 29, 2011
Messages
3,166
Location
TX
Looking good Brent. That's the only way I would run a deuce is a SBC or BBC. My dad had a 67 Tempest with a 389. He always talks about that was the best car he ever had. He also had a 72' Malibu with a 307. He loved that engine as well.

I love the choice of the 383 but then again I might be biased.

What is in my Caprice.

Caprice 003 by bjohnson388, on Flickr

The one before that I through a rod.

image0103 by bjohnson388, on Flickr

The first one.

388 stroker by bjohnson388, on Flickr

Notice a trend here.

Bret
 

Grumblebum

Well-known member
Joined
Aug 10, 2015
Messages
1,940
Location
Wollongong Australia
Looks awesome Brent. I have the same or very similar model dewalt saw also. The saw fence should move easily when adjustment needed. Is the lock lever at the front RH side ok ?

Cheers GB

Edit: lol was falling asleep last night trying to read the timber wall updates, just saving my post and had to refresh to find another whole page.

Just to add I hit my saw with the air compressor after use and periodically during use to keep the dust build up out of the fence tracks.
 
Last edited:

Duker

Well-known member
Joined
Sep 25, 2010
Messages
10,861
Location
Livingston, TX
........The only thing I wanted to accomplish on the shop, tonight was getting the pallet wood out and organized in the driveway. Turns out, I probably have enough left to do the project all over again. An oversight on my part, for sure, way better than having to break more down to finish, though!


I took a few minutes and tossed some of my old parts overflow up onto the shelf. It looked pretty cool to me.


First, enjoy that time with the kids, it goes by so fast....

Second, I think you need to keep the theme going so before you toss all of that wood....... I was scavenging around Pinterest looking for some ideas and this pic popped up and I immediately thought of your build. I could just see all of your car project build parts laid out these shelves....f68a4289c54446ae12c592089c812b43.jpg


Sent from my iPad using Tapatalk Pro
 

Attachments

  • f68a4289c54446ae12c592089c812b43.jpg
    f68a4289c54446ae12c592089c812b43.jpg
    50.5 KB · Views: 1
To avoid these ads, REGISTER NOW!
OP
B

-Brent-

Well-known member
Joined
Dec 23, 2009
Messages
4,709
Location
Utah
Hello Brent,

The Sugar House Spl is looking good.

I fully support your love of the small block Chevy. Don't tell other people this, but it's by far my favorite engine to own. The reasons are obvious: cheap, lots of power, vintage looks, and it's all easy to obtain. And if you love the ability to pick up cheap parts at an Autozone after you've broken down in some town you've never heard of...

Note that I'm a good resource for part numbers for cheap NGK replacement shorty spark plugs, factory mini-starters, etc. I've been putting SBC engines together for scanalously cheap for years and would be happy to share what I know. Some of it might be a little non-HAMB.

Regarding your Pontiac 389, I'm going through something similar with my 68 GTO. Every part is ridiculously expensive compared to my Small Block Chevy frame of mind. Fortunately I'm about to acquire a Bulter Performance engine that's been sitting in a stalled project car at a good price.

Man! I am jealous of the Butler score. I will have to pick your brain a bit when the time comes. It'll be a while, since there are two vehicles to be finished ahead of it.

Looking good Brent. That's the only way I would run a deuce is a SBC or BBC. My dad had a 67 Tempest with a 389. He always talks about that was the best car he ever had. He also had a 72' Malibu with a 307. He loved that engine as well.

I love the choice of the 383 but then again I might be biased.

...

Notice a trend here.

Bret

Rad! I am really going to pick your brain. I figured by the screen name you were the guy to ask, but... now... wow, I didn't expect that volume! :D Not to divert this thread, too much, but there are a few local used 383s for sale, one really interesting is an SP383 with all the right parts but I get nervous around stuff that's probably been driven hard. What do you think about buying used and going through it? I feel like if there's one thing wrong with it I could end up in the price-territory of going with a new build.

Looks awesome Brent. I have the same or very similar model dewalt saw also. The saw fence should move easily when adjustment needed. Is the lock lever at the front RH side ok ?

Cheers GB

Edit: lol was falling asleep last night trying to read the timber wall updates, just saving my post and had to refresh to find another whole page.

Just to add I hit my saw with the air compressor after use and periodically during use to keep the dust build up out of the fence tracks.

I am going to pull it apart before it gets put away. Now that I've read your post (and others) it's more of a priority for me.

First, enjoy that time with the kids, it goes by so fast....

Second, I think you need to keep the theme going so before you toss all of that wood....... I was scavenging around Pinterest looking for some ideas and this pic popped up and I immediately thought of your build. I could just see all of your car project build parts laid out these shelves....

Thanks, Duker. I took some time off work and we went to San Diego and stayed at this incredible place in Rancho Bernardo. It was just me and the kids while my wife was at a conference. She got some time in, at night, when her day was done but mostly it was all daddy time. It was probably the best trip of my life and that's measured against some pretty great adventures when I was single/younger.

Small recap, they both got so much pool time with just me that they no longer need to hold on and float around. They don't get lots of water time in landlocked, desert Utah (that will change) but I got them to the point where they're free and no longer worried about the water. They're both ready for swimming lessons, now. I was beaming with pride and, of course, that makes their day to see.

We explored the area a ton, found a great playground, some great breakfast spots, and they became known faces around the place. What's funny is that their highlight wasn't Sea World it was the little things for each of them. That, to me, is the best feeling to see them appreciate the little moments. We didn't even get to the ocean (something I wanted them to experience) and it was perfectly okay. We all had some much of a blast that there wasn't any time to fit it in.

Anyway, we got back and I had an additional day off and it just happened to be 70-something degrees so it was pretty much another San Diego day - in Utah. When the day was done I ventured out to the shop and hung out for a bit.

I took what Duker said into consideration and contemplated finishing off the underside of the shelves in pallet wood. I weighed the options and the remainder of the barn roofing won out for the deeper shelf. The shorter depth one (with the tool box on it) will get the same newer corrugated on it since it will flow right into the main ceiling. The deeper shelf is separated by the load bearing short wall.

I posted the wood up and I'm pretty sure it will be gone sometime today.

On that front, when piling it all up and organizing it, I realized I probably had enough to do the whole project again (and maybe then some).


This is nearly all the left over broken-down pallet wood. There's another 80-or-so linear feet not pictured.


And pallets... I cannot wait for these to go. I'm looking forward to a clean yard again.


Next up is one of the last large pieces of the to-do list - the lower ceiling. My hope is to have it done by Sunday.
 
Last edited:
OP
B

-Brent-

Well-known member
Joined
Dec 23, 2009
Messages
4,709
Location
Utah
20170315_194945_zpsv8okjw93.jpg


20170315_194959_zpstmqwongq.jpg


The shop mascots made their appearance, tonight. Yes, one of them is holding a wrench... he's also about to toss a grenade! :D
 
Last edited:
OP
B

-Brent-

Well-known member
Joined
Dec 23, 2009
Messages
4,709
Location
Utah
I'm inching by each time I'm out there, this week.


I figured it was time to get another accent light up and wired. I would have been successful except I've lost the outlets that go up on the wall. I wasted a bunch of time looking for them but after a while I decided to move on and get the light up. Out of the six, I have one new dock light. This one was never used and sitting in a warehouse getting re-purposed as an antique store. Since it wasn't an antique the owner sold it cheap.


No rewire needed. I just popped a plug on it and screwed a light in.

The last of the lights needs the most work. I need to grab a few bits to get it back together, tonight.


Here it is in place but not plugged in, unfortunately. I'll get that sorted this weekend, too.

Tonight, I'm starting on the lower ceiling. Hopefully all the J-channel will be installed so Saturday is all about getting panels fitted and up.
 
Last edited:
OP
B

-Brent-

Well-known member
Joined
Dec 23, 2009
Messages
4,709
Location
Utah
Welp... I didn't even touch the J-channel. I did, however, get all the upper wall outlets done and the accent lights up. I think if they weren't so bright they'd be a bit better. These two photos are with all the other lights off.

The other outlets are switched so if I ever put up a something lighted in the future, I can control power easily.


I'm sure any of you following along are pretty tired of the same ol' pics. I am too. Tomorrow is supposed to be an awesome day, weather-wise, and I'm hoping to get a lot done. The hope, too, is that I can get the compressor to play nice so I can utilize that a bit, also. We'll see!
 
Last edited:

fordaholic495

Member
Joined
Nov 19, 2014
Messages
9
Man this build is just awesome. I have such little patience for these kind of long project and end up moving onto something else, so I really respect what you've done here. Once my Bronco is back up and running and out of my garage, I will be tackling mine as well. Sounds like a good summer project, and I have saved your thread to refer back to! Thanks for the entertainment thus far and good luck with the remainder!
 
OP
B

-Brent-

Well-known member
Joined
Dec 23, 2009
Messages
4,709
Location
Utah
Man this build is just awesome. I have such little patience for these kind of long project and end up moving onto something else, so I really respect what you've done here. Once my Bronco is back up and running and out of my garage, I will be tackling mine as well. Sounds like a good summer project, and I have saved your thread to refer back to! Thanks for the entertainment thus far and good luck with the remainder!

Thanks, Fordaholic I really appreciate the kind words. I get you on the long projects being exhausting but I am too stubborn to give up on... well... anything, really. :lol:

I should be out there, right now, but I'm watching Dirt Every Day, instead. But you've got me motivated (and the show ended) so I'm getting out there.

More progress, soon.
 

NedNorton

Well-known member
Joined
Jul 14, 2012
Messages
608
Location
Colorado, USA
I took a few minutes and tossed some of my old parts overflow up onto the shelf. It looked pretty cool to me.


Then, this happened. I rolled in the Sammy for the first time in a long while. This thing isn't even running right now. It's also the big reason why I started tearing into this project, which was supposed to take me a 2-3 months. :dunno: :D


Obviously, I couldn't work in the shop the way it is, now. There's still too much **** and materials for in the space. The day I start working on finishing the Sammy, it'll be a clean shop, no **** anywhere. I'm really feeling like that time is coming up.

One nice thing is that with both vehicles in, I will be able to still work at the bench and access all the tools. That wasn't possible before.

That's it for today.

Brent, The place is looking great! The above statement made me raise a glass! :beer: It is a huge milestone and one that you have fought really hard to get to. Looking forward to seeing the next step.

Better still,
What a day. I got to hang out with my 2 y.o. daughter for the day, which was a treat. Usually it's she and her brother but after we dropped him at school, we got to hang out. We ran some errands, ate lunch (her choice was McDonald's) and it was bad enough the neither of us finished, and finished off the day picking up her brother at school and hitting a huge playground in town. It was a much needed recharge for me. More than anything, I love those dang kids.

Side note... you get the Samurai going and I'll get the 60 finished and we can meet up in Moab!

Great work as always!

Cheers,
Chris
 

250

Well-known member
Joined
Oct 16, 2014
Messages
537
Location
West of the Sierras
wow, there's been a lot of progress since I last stopped in. I think I'm going to make a point to stop by more often. Keep up the good work. :thumbup:
 

sublime68charger

Well-known member
Joined
Sep 9, 2014
Messages
5,415
Location
SW Wisconsin
Very nice work!
I like the shelf aspect and the lighting!

Don't worry about the same old pics!

It's a great reference for you when you look back on what you did in which order!
 
OP
B

-Brent-

Well-known member
Joined
Dec 23, 2009
Messages
4,709
Location
Utah
Brent, I don't know about anyone else but I am not tired of seeing these pictures. Keep 'em coming!

Thanks, Dan.

Brent, The place is looking great! The above statement made me raise a glass! :beer: It is a huge milestone and one that you have fought really hard to get to. Looking forward to seeing the next step.

Better still,

Side note... you get the Samurai going and I'll get the 60 finished and we can meet up in Moab!

Great work as always!

Cheers,
Chris

Thanks, Chris! The next project up is the Sammy. The list to get it back onto the road isn't horrible but it sat for nearly a year so, there'll probably be a few extra items to get it up and running again.

And, I'm game for Moab. What's your timeline on the 60? Is this a complete full frame off project?

wow, there's been a lot of progress since I last stopped in. I think I'm going to make a point to stop by more often. Keep up the good work. :thumbup:

Thanks, 250. I appreciate it.

Very nice work!
I like the shelf aspect and the lighting!

Don't worry about the same old pics!

It's a great reference for you when you look back on what you did in which order!

Thanks, Sublime. :beer:


Update coming...
 
OP
B

-Brent-

Well-known member
Joined
Dec 23, 2009
Messages
4,709
Location
Utah
The weekend is over and the ceiling is about 2/3rds done. I'm actually pretty satisfied with that.

Saturday’s excitement put me behind from the outset. Since spring is here in the valley and freezing temps are only remaining for those unfortunate east coasters I crawled under the house to turn on the water to the exterior spigots. Thankfully I went down there when I did as one of the valves was leaking. After attending to that I got onto the main task at hand, albeit 90 minutes later.

Since there was 80 linear feet, at least, of J-channel to put up (much of it with notches for the drops coming out of the ceiling) I decided to speed up the process of aging them. I went to Harbor Freight and picked up this weapon… err tool.


It’s finicky but I highly suggest one for the pyromaniac in your family! :D

I heated and sprayed 8 pieces and wiped them down in the time it would probably have taken me to do one and a half with the small torch. The noise it makes is great, it got my neighbor out of his house and looking at just what the hell I was doing. You’d think, by now, he’d know me. Haha.

After the leak, I figured my excitement quota was met for the day but that was just a primer, I guess. As I was working on the J-channel I went to wipe something out of the corner of my eye. You know that area where the sleepy dust is? Well, that’s a very sensitive area, especially when you have trace amounts of muriatic acid or whatever the devil was on the tip of my finger because as soon as I touched that area nature took over. The burning was only secondary to how dang tight my eye had shut. No tearing or anything. It just turned a bruise color and burned like hell. I went to the kitchen and splashed a bit of water in my eye and it helped a bit. I could open my eye but still no tearing or anything. It was a different feeling than when I once got a splash of gasoline in my eyes. Even after flushing my eyes teared, that’s what I expected. I attempted to actually go back to the garage but it was still uncomfortable to the point where I wouldn’t be able to focus. I figured I’d really need to REALLY flush it. I couldn’t figure that Instacare would do anything different so I hopped into the shower, fully clothed and pointed the shower head into my face. After 5-10 minutes I was good to go.


Eventually I did get back out there and got the perimeter of the ceiling and the attic door finished without any further event.

That pretty much sums up Saturday. :D

Sunday was mellower. My plan was to get all the panels up but after messing with the first one, I realized that it wasn't a realistic expectation. The panels are a little longer than 14 feet. I think they’re like 14’3” or a tad longer. I wanted to use them at their full lengths. The best way for me to achieve that was to rent a drywall lift. For $32 that was probably some of the best money I spent on help, so far.

The first panel there was a lot of double-checking and such since not only was it the first piece but one of the pieces with the most cuts and holes put into it. It was a good learning lesson. I made a small error where I mis-measured/mis-cut but it was a good mistake to make because I was aware of it from the outset and used a tape measure with a smaller end hook. The Milwaukees have a large end hook and it was interfering with the tight spaces by the J-channel. That and their tapes are too busy. The Lufkins and Stanleys are MUCH easier to read.


Here’s what I came up with to lay out the marks for the roller guides.


And it’s in. It took me the longest out of all the panels but it felt pretty good to have the hose and cord set up and working flawlessly.


Previously we talked about how to lay out the can lighting holes. This is what I came up with. After plotting two measured points locating the light, I traced the saw I use to install remodel cans. A couple needed a little extra trimming or massaging the holes but really, it worked perfectly. I’d do it like this again. Well, since I still have like 8 lights to cut in… I will be doing it again, ha.


Not only was I putting the panels up but I was finishing each one by installing the lights and such, as well. For some things, like the recessed light trim, the work it could have waited but for other like the 4’ LED, I had specific blocks layed out in the ceiling and it was easier to locate them with the joists exposed.


Here’s an example of how I prep the baffles. I removed the paint from the lip and left the white inside. It blends in much better, this way.


This is what I used. It makes quick work of the trim.


So, this isn’t exactly done but I wanted to mount the door rail with something other than that angle bracket stuff. Although that stuff just plain works and I’m reinventing the wheel a bit. This piece is from a 1928/29 Model A fender iron. I chopped, cleaned it up, heated and bent it.

Like I said, it’s still not finished. I ran out of gas for the torch.
I need another piece (the chopped off section from this fender iron) to give the rail more than one mounting point. Although this is sturdy it’s not as rigid as I’d want nor do I want only one lag screw holding this up.


The lift is pretty handy.


My neck and back are telling me that I need to get back into the gym. This thing is heavy when you have to get it in and out of the truck. Wait, I lifted it in and out – by myself – so I guess I’m okay with skipping out on the gym for a while. :D

After moving so much stuff out from this side of the shop, I was thinking, a lot, about getting rid of a couple boxes in the garage and keeping some more open space. I like the feeling of more wall space.


Here’s what I was left with by the end of Sunday. I’ll rip down a sheet I incorrectly laid a hole out (and cut :mad:) and do all the notches before renting the lift again.


The roughly 100 sq ft needing to be finished.


I like the dull look vs the shiny new panels.
 
Last edited:

bdbecker

ALLIANCE MEMBER
Joined
Nov 18, 2015
Messages
5,583
Location
Iowa
Garage is looking sharp!


Nice Vans! I need to get another pair... although I was always a black-on-black type guy, never felt I could swing the checkerboard.
 
OP
B

-Brent-

Well-known member
Joined
Dec 23, 2009
Messages
4,709
Location
Utah
Hahaha, I usually try to keep my ratty shoes out of the pics. I go through 2 pair of checkered Vans a year, probably. I've been buying them since the 90s (when they were cheap) and I never grew up, I guess. When they get beat up, like these, I use them for lawn mowing or dirty-job shoes. So there you go, my intimate shoe details. Haha.
 

Duker

Well-known member
Joined
Sep 25, 2010
Messages
10,861
Location
Livingston, TX
Brent, the roof is looking great!.... and I will also chime in on the Van's.... very stylish and retro like the garage!


Sent from my iPad using Tapatalk Pro
 

Bob Heine

ALLIANCE MEMBER
Joined
Oct 24, 2009
Messages
10,708
Location
Boca Raton, Florida
Brent, I fell under the fashion train a long time ago. When Kmart puts their canvas slip-ons on sale for $8 I buy a few. I bought all the 10.5 Wide pairs, which meant three different colors. I'm kinda cheap so I prefer to buy all the same so I only have to throw out one totally ruined shoe at a time. The pair on the left has a few years left (I'm wearing my favorite shoes for this shot).
Shoes%20for%20the%20Garage_zpsoxljfrtg.jpg
 
To avoid these ads, REGISTER NOW!
Top Bottom