To avoid these ads, REGISTER NOW!

Between 485 & 705 SQ/FT A Garage Rehabbed

Workspaces between 485 and 705 squarefeet.
OP
B

-Brent-

Well-known member
Joined
Dec 23, 2009
Messages
4,709
Location
Utah
I love this stuff Brent. You need to take me to some estate sales though and teach me the way...

Thanks man! Yeah it's changed a lot since the last time you've been in there. It's kind-of a real shop, now. Once the air and audio is done, I can get all the insulation out of the second bay and up into the ceiling and it'll be a real garage again.

As far as the estate sale goes, I just happen to live in an older neighborhood. So, when I see the unfortunate sign that there's a sale, I stop in. I used to get a call from an old timer in Lehi that would handle estates for all his buddies. But when I stopped buying and flipping equipment he stopped calling. Well, it's either that or he may have passed on, too.

I haven't seen an update on the vise, is it painted and mounted yet?
 
To avoid these ads, REGISTER NOW!

nnnnnate

Member
Joined
Dec 27, 2014
Messages
11
Location
West Valley City, UT
Its not painted but it is clamped down to my bench, and I used it twice in two days. Once to hold a 2x4 I was cutting to "fix" a closet accordion door, and second to hold a dowel I sawed to size for a hanging spool holder. Its nice to have a vise that works and opens large enough to hold a 2x4.

There was an estate sale in some Senior Living condos real close to my house that I saw last week. I drove into the complex but didn't go inside because I didn't know protocol which is silly.
 
Last edited:
OP
B

-Brent-

Well-known member
Joined
Dec 23, 2009
Messages
4,709
Location
Utah
There was an estate sale in some Senior Living condos real close to my house that I saw last week. I drove into the complex but didn't go inside because I didn't know protocol which is silly.

Nice on the vise!

"Senior Living Condo" screams there's nothing in there for you but moo moos and tchotchkes! Hahaha! I'd say have some cash on you and that's about it. You can make offers on stuff. You're a personable guy so there's no need to be intimidated.

The first time I went to an auction, I felt so unprepared but I made it through without overpaying with an item I wanted. It was fun.
 

bryson

Active member
Joined
Sep 18, 2014
Messages
42
Location
Utah
It certainly appears that I need to come by and visit again... Oh, and I'm shamelessly copying the air line water trap, and probably at least a dozen other things you've done. The garage is looking incredible!
 
OP
B

-Brent-

Well-known member
Joined
Dec 23, 2009
Messages
4,709
Location
Utah
It certainly appears that I need to come by and visit again... Oh, and I'm shamelessly copying the air line water trap, and probably at least a dozen other things you've done. The garage is looking incredible!

Yeah buddy! I didn't even know you had an account on the GJ! Thanks and you should come by, maybe during a day the Sammy is in so I have someone to wrench on it with. After all, you're more familiar with it than just about anybody!

Also, maybe you're the guy that could use what's left over of my RapidAir kit?

For anyone else reading, this is Bryson. He's a guy that seems to know a lot about a lot. As well, he's got the market cornered on barn and garage space, haha! I call his place the Rust Farm but since my last time there it seems like lots of the rust has moved on.
 
OP
B

-Brent-

Well-known member
Joined
Dec 23, 2009
Messages
4,709
Location
Utah
No pictures, doesn't exist. :rolleyes:

He does NOT corner the market on photos! :lol: He's pumped out some pretty cool work out of his 20x20 workshop like this:

IMG_20160326_213527_zpsschjcw5q.jpg
 

madison069

Well-known member
Joined
Nov 5, 2010
Messages
4,194
Location
Monroeville, PA
I tend to buy gramps old hardwares also. I'll look in the bins and cans, if I see something I think I can use I generally pick them up for cheap.
 
OP
B

-Brent-

Well-known member
Joined
Dec 23, 2009
Messages
4,709
Location
Utah
This past Saturday I was the only one around. My wife was in California, for work, and the kids were at their grandparents... for spoiling. :D On Friday night, I figured I'd be able to get up and hit the to-do list hard. I can see the light at the end of the tunnel and as every day gets closer to spring I'm even more eager to get a project vehicle back onto the road. But I'm not starting back on a project until this shop is done.

That's the type of behavior that gets me buried in projects.

All that said, when I woke up to 12 inches of heavy, wet snow in the yard the first words I spoke weren't about my excitement to shovel and snow blow when I looked out the window.

But, you do what it takes and you move on. However, the couch started looking like a really great plan B.

I could have fired up the snow thrower and got to work but it needed new auger paddles. I bought it used and the original owner hadn't ever changed them so it would get hung up when pushing it along. Now was a good time yo fire up the heater and get after it.

During the five minutes it too to pour 3-4 gallons of kerosene into heater I decided that these stupid EPA spouts were actually the one tangible thing I could prove came from a better time in American history. If any of you were wondering what YOU could do to make America great again, it would be to rid garages and sheds across the nation of these ridiculous contraptions.


It's nice to be able to get projects off the floor and onto the bench. I realized with this job that I should have given myself more room on either side to work from the bench sides. It was an oversight. I'm limited now due to outlet placement (specifically the one the doesn't allow the toolbox to be moved). Nothing is perfect.


The old set-up.


You can't get more wear than this.


Looking like new. This sucker tosses snow much better now, surprising for a little machine.


Tossed one of these skids on, too.


Odd that this is what was left over on the bench. Time to get clearing that snow.


I didn't use the side door all that much before I put a new door on. Now that it's my normal entry point there are some things I'd like to address. I'd like to put some sort of pavers or pathway down. As well, I want a gutter. They'll be a warm weather project.


At the end of the storm it warmed up and everything got heavy quick. This went from 12+ inches to 8+ of heavier snow. I cleared everything except the end of the driveway, which is usually the worst part. The city pluw guys don't even drop the plows it seems. They just spread chemicals and what melts or gets driven over ends up the the ends on the roadside as deep, thick, heavy snow for us to clean. It is frustrating to have a 8' stretch at the end of your driveway to have to remove. Luckily, the neighbor has a plow and he helps me with that. Speaking of, I need to buy him a 6-pack as thanks.

Here's our humble home.

 
OP
B

-Brent-

Well-known member
Joined
Dec 23, 2009
Messages
4,709
Location
Utah
So, no work on the garage, yet, because now that I have access to the outside world I was going to address those blasted can spouts.


Tractor Supply to the rescue. For $9 and some tax YOU can make life great again. :D


Now I can get some work done. Looking at the clock, I had already burned half the day.

Air lines are my only focus while I'm in here.


First up, neatening the hoses.


I'm going to make my way from here to the rest of the system. These two lines were set into place, earlier. But now I'm making things level and fastening them to the floor joist.


All the holes the line is running through east-to-west were already drilled so that the lines are dead-level.


This stuff is easy to work with. Everything is finger tight without tape or dope.


This is the intersection that will go toward the drop by above the bench and the other side goes to the hose reel in the attic. That's not set, yet.


Here's the drop at the bench. This, too, isn't 100% set. I have parts coming in, Wednesday, to mount the line. The pic is really just for this thread. Otherwise I would' have left it alone. I pulled it off after the pic so it wouldn't fall and break the gauge.


Full disclosure, it's still a mess! At least one side of the shop is. Once the air line and audio wiring is up. The insulation can be finished. This stuff has been sitting since before the Holiday. It's nuts how time flies!


Here is what I used to strap the air line into place. I already had this stuff. I'm going to put a few other straps in once it's all sealed and tightened and verified that it's leak free.

And, unfortunately, that's where it sits. What I thought was going to be a day of big progress, wasn't. I'm going to chip away at little things this week. There'll be more progress soon. 55 days and 18 hours until spring! I need to get hustling. :D
 
Last edited:

vr4joe

Well-known member
Joined
Jul 3, 2012
Messages
106
Location
Medford, MA
Great garage project!

I may have missed this but are you planning on insulating the CMU walls as well? If so, are you going to insulate the exterior side or interior side?

I only ask because I have a very similar garage as yours and was wondering the easiest way to insulate the CMU walls.
 
OP
B

-Brent-

Well-known member
Joined
Dec 23, 2009
Messages
4,709
Location
Utah
Great garage project!

I may have missed this but are you planning on insulating the CMU walls as well? If so, are you going to insulate the exterior side or interior side?

I only ask because I have a very similar garage as yours and was wondering the easiest way to insulate the CMU walls.

Unfortunately, no, I am not going to insulate the walls. I debated it prior to the remodel and ultimately chose the retaining space over the heat. The cost is that heat permeates the walls rapidly.

Easiest insulation solution would be radiant barrier, then framing, then an insulation of your choice. Anything would be better than nothing.

For me, I chose to seal things up where I could and leave the walls as the weak link. The insulation I've done has helped, although I spent a pretty penny on materials.

I considered doing the exterior. While there is a way to accomplish this, it would be more expensive.

Maybe I'll regret it down the road, who knows? It's funny because I'd usually always recommend the benefit of insulation over the 12 sq ft of space it would take. But with a shop this small space is what ultimately won out. And, I'm happy whenever I'm working in there. I'll spend more for heat, undoubtedly, but I'm just happy to be playing in a usable space again.
 
To avoid these ads, REGISTER NOW!

Grumblebum

Well-known member
Joined
Aug 10, 2015
Messages
1,940
Location
Wollongong Australia
Brent I know exactly the feeling of that precious day to yourself with wifie out and kids at grandparents only to have it not go the way you plan.

Air lines are looking good, hope to get mine sorted soon...

Cheers GB
 
OP
B

-Brent-

Well-known member
Joined
Dec 23, 2009
Messages
4,709
Location
Utah
With regards to garages, I have to live vicariously and obsessive compulsively through you, since I don't ever get to spend much time in mine. HAHA! :lol_hitti

Ha. Which is EXACTLY why I'm considering a roadster body over the coupe.

Good job!

You'll get there Brent, patience.

Thanks! And thanks for the reminder. Even though my wife says I'm the patient one, I don't think it's true! I'm completely that guy that has an inner dialog going on.

Brent I know exactly the feeling of that precious day to yourself with wifie out and kids at grandparents only to have it not go the way you plan.

Air lines are looking good, hope to get mine sorted soon...

Cheers GB

Thanks GB. Even though the snow bugs me, we need the as much as we can get for water purposes. Throughout much of the state we're above the average. So, that's good.

I gotta swing over to your Corner and see what's going on. It's been a minute.
 

NedNorton

Well-known member
Joined
Jul 14, 2012
Messages
608
Location
Colorado, USA
Brent, The lines are looking good. Amazing what can get done when the rest of the family is out and about and we are left to our own devices. On the Rapid Air system, what system did you go with? Is it the pex-alu-pex or the nylon? I'm looking at options for the shop and any feedback would be great.

Keep cranking!

Cheers,
Chris
 
OP
B

-Brent-

Well-known member
Joined
Dec 23, 2009
Messages
4,709
Location
Utah
Brent, The lines are looking good. Amazing what can get done when the rest of the family is out and about and we are left to our own devices. On the Rapid Air system, what system did you go with? Is it the pex-alu-pex or the nylon? I'm looking at options for the shop and any feedback would be great.

Keep cranking!

Cheers,
Chris

Thanks, Chris. Yes, it's pex-alu-pex (the RapidAir stuff). I'm using 1/2" and it's easy to work with. Planning and layout took more time. There is talk around the net about running the smaller sizes in a loop. But, after doing some reading I didn't see anything that really convinced me of the necessity to do so on mine. There are folks that have had leaking issues and solved them with both tape and dope. I'm going to try one or the other first and see my results, out of curiosity.

One thing I know, for certain, really look at the what you want and get a kit that fits it. Fittings are expensive on their own.

I can't wait to see what you do.
 

Finallygotit

ALLIANCE MEMBER
Joined
Jul 6, 2013
Messages
4,091
Location
Tucson, AZ
Brent, The lines are looking good. Amazing what can get done when the rest of the family is out and about and we are left to our own devices. On the Rapid Air system, what system did you go with? Is it the pex-alu-pex or the nylon? I'm looking at options for the shop and any feedback would be great.

Keep cranking!

Cheers,
Chris

Brent, small highjack.

Chris, I installed the 3/4" Rapidair lines (PEX-Aluminum-PEX). I love it! I'm going to assume that the 3/4" is a bit harder to work with but I was able to reasonably straighten out the coil. Having worked in the plastics world for most of my adult life, in my opinion, I would not go with the nylon lines and would stay with the multi-layer extruded tube. Nylon absorbs moisture and when it does it softens. FYI, I sealed the threads with blue Loctite thread locker on the advice from an industrial compressor installer. So far, zero leaks.

Back to Brent's thread.
 
Last edited:
OP
B

-Brent-

Well-known member
Joined
Dec 23, 2009
Messages
4,709
Location
Utah
Brent, small highjack.

Chris, I installed the 3/4" Rapidair lines (PEX-Aluminum-PEX). I love it! I'm going to assume that the 3/4" is a bit harder to work with but I was able to reasonably straighten out the coil. FYI, I sealed the threads with blue Loctite thread locker on the advice from an industrial compressor installer. So far, zero leaks.

Back to Brent's thread.

This is completely pertinent stuff, Dan. I can see how that could do the trick, too. Actually, I may go for that first. Thanks for the tip.
 

bj383ss

Well-known member
Joined
Sep 29, 2011
Messages
3,166
Location
TX
Brent progress is looking good! I hate those blasted gas cans as well. Fortunately I have 2 from before all that BS started and 2 old 5 gallon metal valvoline oil cans too. Might be able to find you one somewhere.

Bret
 

bdbecker

ALLIANCE MEMBER
Joined
Nov 18, 2015
Messages
5,577
Location
Iowa
I'm starting to get the feeling that I might be the only person on the face of the earth who doesn't mind those CARB compliant nozzles. The trick I've found is that you need to tip the can completely upside down before depressing the nozzle. Doing this gives you a fairly consistent pour because the air inflow and fuel outflow stay balanced. If you try to use it like a traditional nozzle/can where you tip it up and pour slowly, you get a rush of fuel, then it stalls out while it tries to **** air back in, and then another couple of rushes/splashes of fuel before it finally equalizes the air/fuel in the nozzle and flows consistently.
 

speedfreek1210

Well-known member
Joined
Mar 9, 2012
Messages
81
Location
Thurmont, Maryland
I took side cutters to all my carb nozzles. I butchered the white piece in the middle, then I drill a hole in the top of the container at the back for airflow. I use a screw to plug the hole when I go to fill the can. Not the best way to fix the problem, but it's better than throwing the can out through the yard.


Sent from my iPhone using Tapatalk Pro
 
OP
B

-Brent-

Well-known member
Joined
Dec 23, 2009
Messages
4,709
Location
Utah
So, no work on the garage, yet, because now that I have access to the outside world I was going to address those blasted can spouts.


Tractor Supply to the rescue. For $9 and some tax YOU can make life great again. :D


Brent progress is looking good! I hate those blasted gas cans as well. Fortunately I have 2 from before all that BS started and 2 old 5 gallon metal valvoline oil cans too. Might be able to find you one somewhere.

Bret

My post should have looked like the above quote but I didn't enter the pic in. Tractor Supply sells these (of course they can be found online, too) and it solves the issue. New spout, drill a half inch hole and pop in a vent and you're good to go.

Thanks for the offer, though. If I couldn't buy this fix, I'd be on the look out.


Know what gets me... if you live in one of these states it you're not allowed to buy these. Not like people aren't but there are much larger sources of pollution that we could go after. None of which you and I (or 99.9% of GJers) are creating.

I'm starting to get the feeling that I might be the only person on the face of the earth who doesn't mind those CARB compliant nozzles. The trick I've found is that you need to tip the can completely upside down before depressing the nozzle. Doing this gives you a fairly consistent pour because the air inflow and fuel outflow stay balanced. If you try to use it like a traditional nozzle/can where you tip it up and pour slowly, you get a rush of fuel, then it stalls out while it tries to **** air back in, and then another couple of rushes/splashes of fuel before it finally equalizes the air/fuel in the nozzle and flows consistently.

Oh, mine poured a nice even flow (because I had to do exactly what you do) but with this spout it was like pouring it out of a straw.

I took side cutters to all my carb nozzles. I butchered the white piece in the middle, then I drill a hole in the top of the container at the back for airflow. I use a screw to plug the hole when I go to fill the can. Not the best way to fix the problem, but it's better than throwing the can out through the yard.

Send me your address and I'll hook you up with one of these fancy set-ups.
 
Last edited:

bdbecker

ALLIANCE MEMBER
Joined
Nov 18, 2015
Messages
5,577
Location
Iowa
FWIW, even if you live in one of those (nanny) states, you can purchase those spouts online for use on all the bulk water cans you have around the house, you just can't legally install them on a fuel can.
 
OP
B

-Brent-

Well-known member
Joined
Dec 23, 2009
Messages
4,709
Location
Utah
FWIW, even if you live in one of those (nanny) states, you can purchase those spouts online for use on all the bulk water cans you have around the house, you just can't legally install them on a fuel can.

Good to know!
 

scootermcrad

Well-known member
Joined
Nov 26, 2011
Messages
405
Location
Concord, NC
Ha. Which is EXACTLY why I'm considering a roadster body over the coupe.

This is EXACTLY the same plan I had and even went so far as to put it up for trade for a roadster... I ended up deciding there was just as much work in the roadster as there was to just build the coupe, since a lot had already been done on my coupe. So now it gets put back up on its chains... :lol:
 

speedfreek1210

Well-known member
Joined
Mar 9, 2012
Messages
81
Location
Thurmont, Maryland
I just checked TSC's website, it says they are available at my local store. Surprising since I live in Maryland. Guess I'll be stopping at at TSC this weekend to check it out. Thanks for the offer though Brent!


Sent from my iPhone using Tapatalk Pro
 

slodat

ALLIANCE MEMBER
Joined
Feb 6, 2010
Messages
3,682
Location
Central-ish, WA


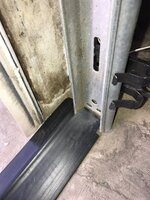
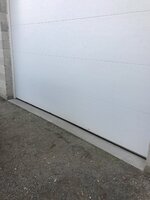
We've had a bunch of rain and warmer temps to melt the 2 feet or so of snow. This is about as bad as the seepage gets under the door. Still, I plan on doing something about it. It's something to put on the list. As well, see some bad habits creeping into the shot? That tool needs a home.

Brent- I think you might find this useful.. I solved this problem at my shop a couple months ago. Still zero water under my roll up doors.. Direct link to just that post

Every time it rains I get a bunch of water under my roll up doors. I replaced the door bottom seal. Then I added a 3/4" foam rod inside it thinking it would give the seal something to press on. Still water.

I bought some seal material a couple weeks ago. I saw a thread on GJ that helped with how to tackle installing it.

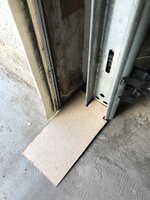
I made a chipboard template of the door track so I could fit it all the way into the track on both sides.

98918ed1c612706f7a107cc798e21b31.jpg

I cut the ends on the Delta bandsaw.

d49a2e3bb66f22749473be163b5e5e4a.jpg

Then I ground the surface of the concrete to expose fresh concrete, thinking this would help the adhesive bite and wiped everything down with acetone.

9a121ae7bcbabf668caad0369413b9c0.jpg

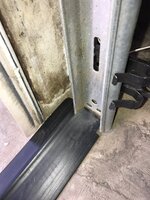
This is the trick I saw on GJ. I taped the strip in position with duct tape and then folded it back like a hinge to apply the adhesive. It worked well. I folded the ends up and did the center first.

c6af340e63a7750b3d17943543d49109.jpg

Time will tell if it works. Going to wait to do the other door until I see how this works out.

a5aff0cdd40367338eaf596057318fcb.jpg
 

Attachments

  • 98918ed1c612706f7a107cc798e21b31.jpg
    98918ed1c612706f7a107cc798e21b31.jpg
    349.2 KB · Views: 5
  • d49a2e3bb66f22749473be163b5e5e4a.jpg
    d49a2e3bb66f22749473be163b5e5e4a.jpg
    351.4 KB · Views: 4
  • 9a121ae7bcbabf668caad0369413b9c0.jpg
    9a121ae7bcbabf668caad0369413b9c0.jpg
    342.8 KB · Views: 5
  • c6af340e63a7750b3d17943543d49109.jpg
    c6af340e63a7750b3d17943543d49109.jpg
    252.8 KB · Views: 5
  • a5aff0cdd40367338eaf596057318fcb.jpg
    a5aff0cdd40367338eaf596057318fcb.jpg
    265.3 KB · Views: 6
Last edited:
OP
B

-Brent-

Well-known member
Joined
Dec 23, 2009
Messages
4,709
Location
Utah
Slodat! I'm sold. That looks like a perfect (and good looking solution). How does it hold up to being driven over and such?
 

jbmatth

Well-known member
Joined
Jun 3, 2013
Messages
5,686
Location
Northern Ok.
You have just made my day with that EZ-Pour nozzle. I've fought those for way too long and none of my old 1 gallon non-carb nozzles will fit on any of my newer 5/6 gallon jugs. I'm forever in your debt. :bowdown:

JB
 
OP
B

-Brent-

Well-known member
Joined
Dec 23, 2009
Messages
4,709
Location
Utah
Getting excited to get some work done in the garage this weekend. I had been waiting on some parts to get the air lines finished. I just need a coupler for the hose and that's all for parts.

As for the bench side of the air line drop, I came up with this:


These are parts from Wall Control. The vertical piece will fasten the air line and the two horizontal brackets I will cut of piece of steel and bolt it on and then fasten the drop to that.


These are pex snap-in clips. They work perfectly. The only thing I need to do is shorten the machine screws that were a tad too long.


So, not all that big of an update but I'll have more to share at the end of the weekend. I hope you all have a good one... and happy Chinese new year!
 
To avoid these ads, REGISTER NOW!
Top Bottom