To avoid these ads, REGISTER NOW!

A Humble Aussie Shed Build

Danshell

Well-known member
Joined
Jun 26, 2016
Messages
206
Location
Tasmania Australia
I have been a lurker around here for quite a while and I am in awe of the garages and the projects that are shown on here.

For many years I have longed to own my own garage that was large enough to do the small projects I under take. I have owned garages in the past but they have all been small, sure I have always made them work but this one will most likely be my last and even though it isnt as big as I wanted, its the biggest I have ever had.

This project has taken quite a while to date and will take quite a while still to complete but we are about to start the actual build.

I was somewhat hesitant to show my build because I do not think it is worthy but forums are made up of all sorts so I may as well document it and lets see what happens.

The first few posts will be rather pic heavy but will settle down as the shed goes up........ ;)

Firstly some back ground of me and our property.

I am married (25 years) with mostly grown up children and we live in the Island State of Tasmania, Australia.
Life has dealt us some highs and lows as it does with everyone but we are lucky enough to be building a new home and of course my new shed!

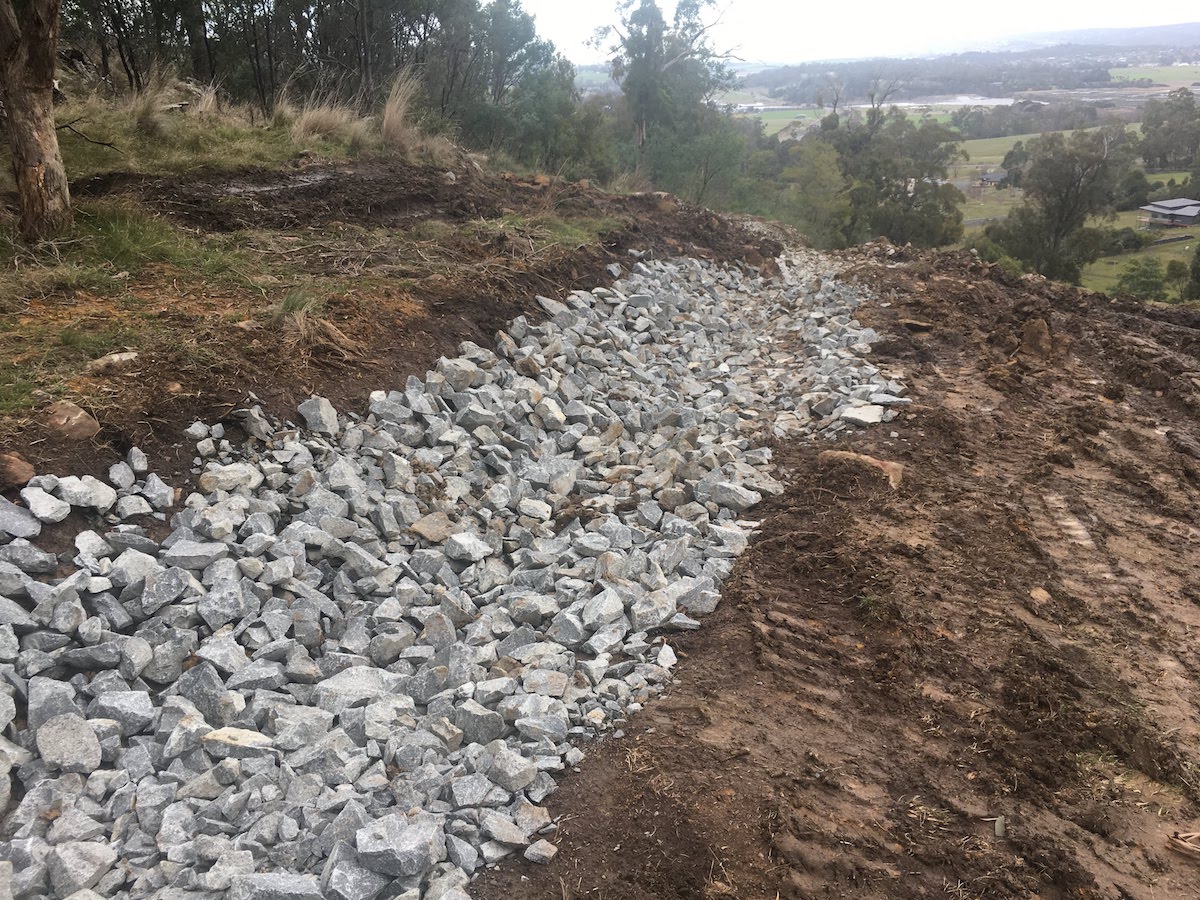
We bought a block of land that was within our budget back in 2016. We wanted to be within 10-15 minute drive from the city but have some land around us and have that rural feel so we settled on a very steep and rocky block but we had a vision to make it work because we loved the view, the location and the general feel of the place.

067c8395165f96cb94e09f60b8cc7c8c.jpg


We had to do some major excavations to get the space up the top of the property to build our house and fit the garage.
The property is 4 acres but for the most part it is steep and we are only really using the acerage to give us space from the neighbours.

When I took this drone pic we had already started the excavation but this pic shows the boundary of the property.

b55587ab79b9b5218a93af63b8aa8e5b.jpg


We wanted around 1500m2 of flat area so we had a lot of rocks to move and built a massive cut to fill platform.

4fd6ce70879c0f2bde6909fffd5690fa.jpg


45b63afc294e3ce8bda3e7a431dcfc64.jpg


a54ea4bff23b63a6722b3ada945b97e7.jpg


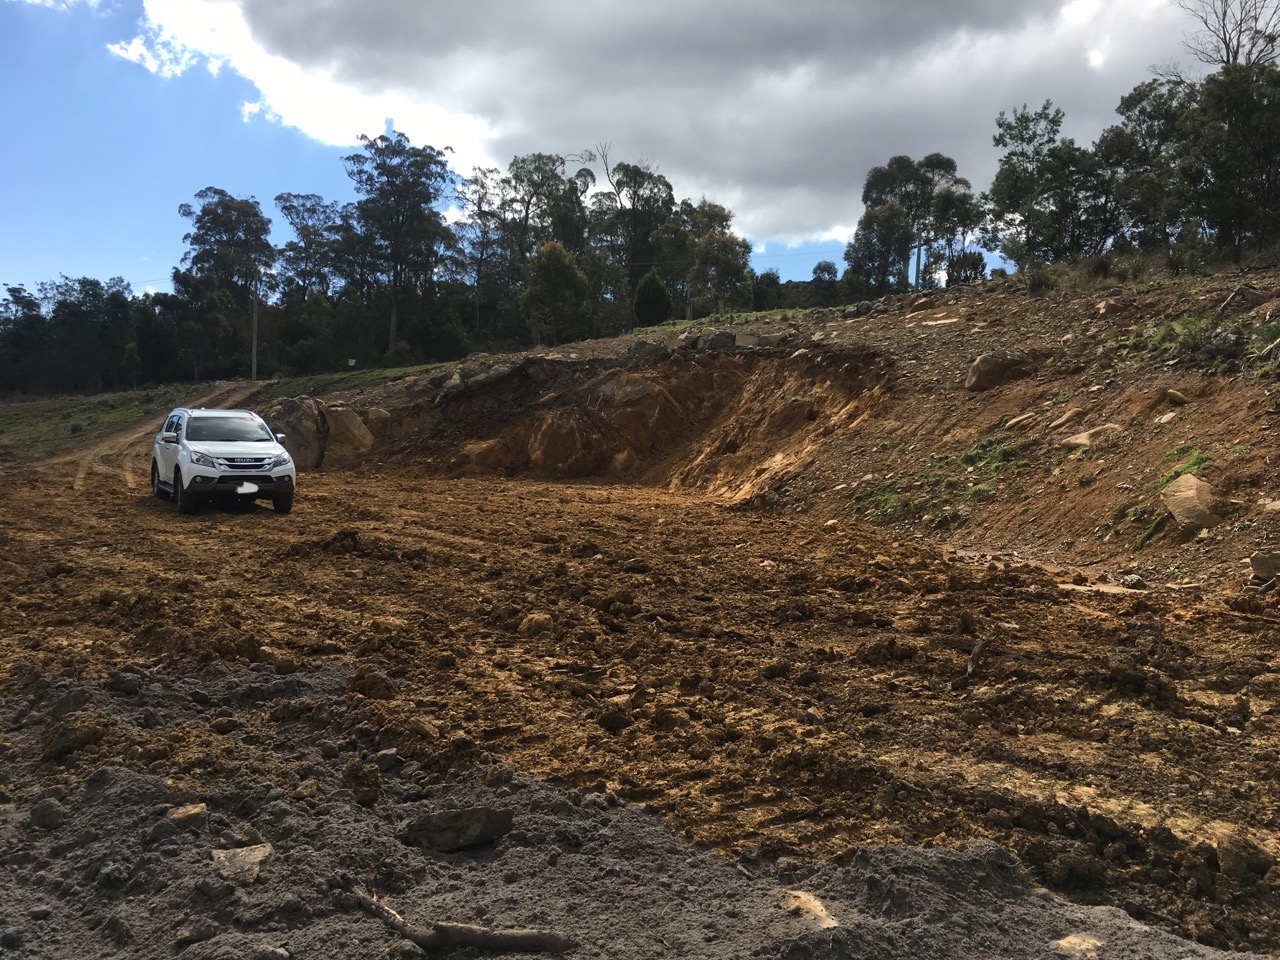
And finally this gives an idea of a before and after, even though there were a few more rocks moved after this pic.

9d380b397de81d70b88f2a1ef5082b5f.jpg
 
To avoid these ads, REGISTER NOW!
OP
D

Danshell

Well-known member
Joined
Jun 26, 2016
Messages
206
Location
Tasmania Australia
So we finally got our excavations done, built some drains and removed a massive amount of dead wood laying around the property.

30f918a19bcaa1738cb5033397cc8ec8.jpg


d70272491489b8737afdea5da1f5099f.jpg


1ae5dd6ee9667109931522c43392e68e.jpg


9a73f13a2af9a6cd886dd520e2e10b99.JPG


And with that we started to clean up all the scrappy bush to remove the fire hazards and generally tidy the place up.

b964bd7f511443a03deb1b6c88bf591e.jpg


It was then time to hand it over to the builder and let the fun begin......

0cbd764ffc0e542237e26a8d35e37a67.jpg
 

wasfast

Well-known member
Joined
Apr 10, 2014
Messages
874
Location
San Diego CA
Beautiful land and view. It's hard to believe sometimes how much time, cost, and effort goes into just getting the land prepared, especially on a more difficult lot. Looking forward to seeing what you do for the house and garage.
 
OP
D

Danshell

Well-known member
Joined
Jun 26, 2016
Messages
206
Location
Tasmania Australia
I know this is about my shed but ill post the progress of the house as we go as well for those that may be interested.

The shed is being built in two stages. The first stage is by the builder. It is a typical Aussie steel frame and colorbond garage with one large roller door on the front.

The first stage is 12mtrs x 6 mtrs or approx 40ft x 20ft.

The second stage is being built by us, it is a lean to off the side of the main shed that is approx 2.5mtrs x 9 mtrs.

So one set of plans only show the main shed at this stage but the smaller amended show the lean to.

79ea8c15f3aad5b989f0be38762bafd7.jpg


ba33bb3ce24b9308a75e3a67db3c82bc.png


afd2665a5fd56afcdf1b9557f2e6f23a.jpg


e0ab062fbbb1f7f858957c28af2cbd27.png


And the amended drawings showing the proposed lean to.

0567a035c18b2e5469bcc2fd302211d1.jpg


d4fc92ac0c334305cdc5395b97a7a987.jpg


6881f580f42a21adbcbfe4009df2e87f.jpg


Heres a couple of very rough 3D images that give an idea of the lay of the land so to speak......

ed0bf417047ecbb7ac50d8dd96d08b02.jpg


7f3a83cd0a93360b47ed358cbecc2764.jpg


A drone pic showing the space restrictions......

5ed4ebba3201cb5ae01c1160a89060dd.jpg


And finally a house plan pic just in case there is some interest in whats going on there.....

d523f267c4be7a727512c825eb2711aa.jpg


We are about to start building in the next few weeks. I am not 100% sure of the time frame for the build but Id imagine it will be anywhere from Feb 2019 to April 2019, weather permitting.

Ill keep you posted and if it starts dragging out Ill post some pics of some of my projects over the years.
 
OP
D

Danshell

Well-known member
Joined
Jun 26, 2016
Messages
206
Location
Tasmania Australia
Beautiful land and view. It's hard to believe sometimes how much time, cost, and effort goes into just getting the land prepared, especially on a more difficult lot. Looking forward to seeing what you do for the house and garage.


Thanks very much. Yes we knew there would be a lot of work required to get us in a position to build and the block of land was priced accordingly, but here we are a bit over 2 years later......we didn't know it would take us that long!!
 

bj383ss

Well-known member
Joined
Sep 29, 2011
Messages
3,166
Location
TX
Man this is going to be awesome. What a great piece of property you have.

Bret
 

1/2 Cup

Member Emeritus
Joined
Apr 28, 2012
Messages
19,283
Location
Shepparton. Victoria. Australia
Danshell hello and welcome aboard:thumbup:

Your home and garage build are going to be simply stunning.:bowdown:

Not to mention the spectacular view.:bowdown:

Looking forward to following your build..:thumbup:
 
OP
D

Danshell

Well-known member
Joined
Jun 26, 2016
Messages
206
Location
Tasmania Australia
Thanks for the comments and welcomes.

I’ll try and keep the thread rolling while I wait on the builder to start by posting some past projects.
 

Bob Heine

ALLIANCE MEMBER
Joined
Oct 24, 2009
Messages
10,703
Location
Boca Raton, Florida
Danshell, your build is going to be amazing. I know materials are expensive down under but you live on Tasmania or the island Under Down Under. Is there a big difference in material prices between Melbourne and where you are in Tasmania? You mention "the city" so I assume you are near Hobart. One of the prettiest cities I've visited with some of the best fresh seafood in Australia. We bought oysters right off the boat and thought we were getting tiny Sydney rock oysters. I saved a couple of Hobart oyster shells to wear in the event my shoes gave out.
 
OP
D

Danshell

Well-known member
Joined
Jun 26, 2016
Messages
206
Location
Tasmania Australia
Danshell, your build is going to be amazing. I know materials are expensive down under but you live on Tasmania or the island Under Down Under. Is there a big difference in material prices between Melbourne and where you are in Tasmania? You mention "the city" so I assume you are near Hobart. One of the prettiest cities I've visited with some of the best fresh seafood in Australia. We bought oysters right off the boat and thought we were getting tiny Sydney rock oysters. I saved a couple of Hobart oyster shells to wear in the event my shoes gave out.

For the most part building materials in Tassie would be very similar than the Melbourne...we grow our own timber....make our own bricks etc. Anything that has to be shipped over we could possibly be paying a premium but the local builders down here need to be competitive so they would keep the costs respectable.

By city I mean near Launceston which as you may know is at the other end of the state. Yes our oysters can be large, did you get to try our Scallops?

Looks like by the plans you are going to have an interesting build. Location looks interesting as well. Plenty of fire wood from you ground works.

There was a massive amount of fire wood but we sold it all or traded it for some excavation works. I will be having a wood heater in my shed though so Ill be making use of any limb wood that falls around the property.
The build will be interesting. Not so much after the slabs are poured but the pier work that is going to happen for the foundations will be interesting considering the amount of rock we are building on. $$$$$$$$$$$$ :wtf:
 
OP
D

Danshell

Well-known member
Joined
Jun 26, 2016
Messages
206
Location
Tasmania Australia
As I suggested while waiting for my shed build to start Ill post up some projects if I can find the photos.

This one is easy as it is already well documented so a simple copy and paste from another forum works..........

This dates back to around 2011-2012.


445ec8591952e9d4a829bfc5b9a7c1bf.jpg

__________________________________________________

It started as a design concept, didnt really turn out exactly like the concept but you get the idea ;)

websketch.jpg


No special modelling skills here just real basic stuff.

web5.jpg


web7.jpg


web9.jpg


web10.jpg


web6.jpg


web1.jpg


I think its fair to say even the virtual designs are subject to change and in my case they were changed quite a bit after going to the camping show and seeing what I wanted. I didnt bother to make the changes virtually because I completed the cutting lists and designs on paper....its easier to have out in the shed with me!

The day I picked the tent up.....excitement plus
IMG_0214ss.jpg


Set up at home so I could take all the vital measurements to build the trailer
IMG_0215ss.jpg


The trailer like all trailers, started life as a pile of steel on the floor.
IMG_0219ss.jpg


The draw bar and chassis is all one piece, I had rollfab in Hobart roll the steel into shape for me. He didnt do it exactly to my drawings but I let him off and worked with it anyway.
IMG_0218ss.jpg


And not long after it started to take shape. All pretty simple stuff really.
IMG_0221ss.jpg


I tend to over engineer at times but I was concerned about a slight kink in the steel where the metal roller rolled my chassis/drawbar shape so I put a nice sized gusset in that area.
IMG_0220ss.jpg


I should mention the main section is 100x50x3 with the rest being 50x50x3 all blue steel except all the top section or any other non structural area was made with 50x50x1.6 gal.
IMG_0224ss.jpg


Now it is starting to look like a CT!

Sheet metal time.....I should mention we have a milling machine, several lathes and a couple of sheet metal folders at work ;)
IMG_0252.jpg


Before the boxes were cut out
IMG_0277.jpg


Test fit lol The fridge has a place inside the kitchen when the tent is set up also. It is on a slide in this front box where it stays for quick overnight stops, like wise there is another large slide out box opposite the fridge here
IMG_0278.jpg


Cutting things out and tacking on weather strip holders
IMG_0260.jpg


Starting to sikaflex the seems I think
IMG_0280.jpg


Trying to make 14 different lids, shelves etc fit onto 2 sheets of steel!
IMG_0261.jpg


It was about now I started on the box lids. They are folded up with 1.6mm steel using flash chromed brass hinges and double locks.

IMG_0284.jpg


Messy shed is a sign of lots of work happening ;)
IMG_0283.jpg


I used a Mchitch and his hand brake. I was going to use a poly block but the supplier told me they are not adr approved so Id have to use a standard ball hitch to rego it....go figure!
IMG_0259.jpg


IMG_0281.jpg


I also made my own tent base. I cut up the original Chinese base and used the steel for making some of the kitchen because it was very thin light steel, more suited to a light weight kitchen rather than a strong tent base.
IMG_7812.jpg


My wife made our stone guard cover using double shade cloth. She cut it out so it velcro's on but leaves the corners of the guard exposed (I didnt make mandrel bent corners to cover them LOL)
IMG_0286.jpg


IMG_0285.jpg


The camper has a 60ltr water tank at each end both with a filler each but feeding into the one pump. All my water tanks, pump, suspension components, accessories, brakes etc etc were all bought off huntsman products in Melbourne. Everything else I sourced off Ebay.
 
OP
D

Danshell

Well-known member
Joined
Jun 26, 2016
Messages
206
Location
Tasmania Australia
Ok now for all the fun stuff....time to start modding it! ;D

Keep in mind when I installed all this stuff I knew I would be stripping it all down again to paint it so a lot of what you see is not really in its proper place or clamped down correctly etc because we just wanted to give it all a trial run first before we committed to drilling too many holes and making too many brackets if you know what I mean. I have never done this before so it was a test first, commit later situation LOL

Fridge in its transport or over night sliding hidey hole
IMG_7984.jpg


Very large storage box on opposite side of fridge. Also on its own slide. Great for large large longer term pantry items such as coke bottles etc amongst many other things.
IMG_7990.jpg


Battery area with only one battery at this stage. It also has circuit breakers from anderson plug at front of trailer and a circuit break for the battery charger. It also has a circuit breaker/isolator for the 1000w inverter. Where all this screws down is being replaced with a stainless sheet once the camper is painted.
IMG_7989.jpg


This area houses the 1000w Inverter. It is a cheap ebay job I used to use in the 4wd. I hate it, it uses to much power on stand by but it runs the wifeys hair straitener so you know, happy wife, happy life ;) Also I have a 25amp projector charger hard wired to an external power inlet. I have experience with a larger 40amp projector charger in a van, so they are tried and proven for me. Also obviously the fuse box is there and also the main isolator to the fuse box. Once again the sheet all this is bolted to will be removed and stainless is being put in its place, hence no grommets or insulation around the 12v wiring ;)
IMG_7987.jpg


Instant hot water unit. Wow there is some plumbing going on there! Water pump and general messy looking hoses. Obviously Ill mount all them properly now that i know it all works. In fact it doesnt quite work as good as Id like but thats due to how I have those messy looking pipes kinking each other and running in loops when they dont need to etc!
IMG_7985.jpg


Self explanatory. I probably should have sat the bottle in there properly for the photo but sticking to the pipes running everywhere and not mounted properly theme it suits the pic.
IMG_7986.jpg


This is probably the only box we access once the tent is up. It has the pump isolation switch. Stereo switch. Charger remote thingy. Water tank gauge. And a spare 12v plug. I might sika some stainless in here too after I paint the trailer.
IMG_7988.jpg


And finally a random pic of the hitch showing the handbrake etc
IMG_7983.jpg


Our maiden voyage. Remember I took time off work to build this thing so I was determined to test it out before I had to go back to work so it was a mad rush the last few days to get everything in enough of a working order to try it all out.......as you can see in the pics!

I was literally bolting the number plate on, greasing the wheel bearings and the wife was safety pinning her unfinished stone guard cover in place while we were packing it the morning we left.

So off we go having never towed it for even a test run around the block. I pulled over about 10 kays into the trip and checked the wheel bearings and everything was cold and as you would expect.

I pulled over about 40 kays into the trip for another inspection to find smoke coming from one of the wheels grrrrrrr
IMG_7793.jpg


On closer inspection one of the wheel bearings had collapsed! FFS I was 100% certain I didnt over tighten them and I am still baffled as to what went wrong. But to cut a long story short I quickly replaced it and after checking the rest off we went again. By the time we got home we had travelled another 200 kays without an issue so I am still baffled as to what I done wrong to cause that one bearing to collapse??

Anyway not to worry everything else went fantastic. Everything worked as expected and we are totally wrapped with our camper and cant wait to pull it apart and finish it off properly.

Here are some random pics from our maiden voyage.

Bogan flanny Dad and son starting to set up
IMG_7811.jpg


Open one side and pop him up
IMG_7815.jpg


Open other side and pop him up and there is the fast overnight stay...5 minutes :)
IMG_7816.jpg


IMG_7817.jpg


I finally have some paint on this thing!

I was going to be real fancy and paint it in a black pearl basecoat then clearcoat to give it a 'spray painter obviously owns this' look, but in the end captain sensible decided to paint it plain old black.

I used a quality poly urathane 2 pack to finish it in. Mainly for its excellent toughness or chip resistance and secondly because I wanted a nice finish.

I still have all the doors to paint. The doors are very much the main focal point as they pretty well dominate the sides of the camper so Ill take some photos with our good camera once they are on and its all finished.

In the mean time here are the latest phone pics I have.

IMG_5307s.jpg


IMG_5324s.jpg


IMG_5325s.jpg


IMG_5327s.jpg


IMG_0663s.jpg


IMG_0661s.jpg


IMG_0657s.jpg


IMG_0655s.jpg


IMG_0654s.jpg


Managed to get a few more pics this weekend while it was set up being used :)

My solution to a pole holder. It also houses the Inverter, some 12v plugs and fuse box for the internal lighting etc.

IMG_5753s.jpg


IMG_5755s.jpg


And finally some pics of the kitchen. I still need to tidy a few things up on it and give it a final coat of paint but this is essentially it. It houses everything we need permanently so its always ready to go.

IMG_8970s.jpg


IMG_5758s.jpg


IMG_5759s.jpg


IMG_5762s.jpg


Here are some more pics and a cut'n'paste from our blog for those that may be interested.

The vented Battery compartment house 2 x 10⁵ah deep cycle batteries, circuit breakers, solar controller, gauge shunt and inverter switch/breaker.

DSC00934s.jpg


The other electrical compartment holds the 240v smart charger, isolation switch, fuse box and some water elbows.

DSC00936s.jpg


Vented Gas compartment is pretty self explanatory it has the gas bottles and gas reg.

DSC00937s.jpg


This is the large slide out pantry that takes up half the large front box. It generally holds things like leads, hoses, pegs, guy ropes and various larger pantry items such as spare drink bottles etc with plenty of room to spare.

DSC00940s.jpg


This is the little control hatch that is easily accessible inside the tent and where I used to spend a lot of my time keeping an eye on everything when I first built the camper! It has the charger remote head unit which gives me all sorts of info when the charger is plugged in, a volt meter which obviously tells me the batteries volts at any given time, water pump isolation switch and an amp meter which allows me to see how may amps we are dragging from the battery when ever any power is being used.

DSC00945s.jpg


Not really a hatch but it is an area that gets used a lot when the tent is up. It is the hot and cold water quick release fittings, a 12v cig style plug, a 12v merit style plug and a bank of small anderson style plugs that all our LED strip lights and portable stereo plug into.

DSC00947s.jpg


This is the hot water unit and water pump area. It really is a work of art how it all works! It allows town water in, hot water out to a shower, water from the onboard tanks which have the ability to isolate one at a time and of course hot and cold water to the sink.

DSC00949s.jpg


My favourite thing, the fridge slide compartment :) The fridge stays in here unless we are staying for 2 or more days then we put it inside the tent in the kitchen. It is a 110 litre 12v or 240v fridge/freezer.

DSC00950s.jpg


NOW FAST FORWARD TO THIS MONTH DECEMBER 2015 The camper had taken us on many trips away with the kids over the last 3 years or so including a nice big one to Darwin and back via Oodnadatta, Uluru, Litchfield, Kakadu, Binns track, Simpson etc etc so it had seen ALOT of rough outback roads.
We decided to freshen it up a bit change a few things.

With the kids growing up we didn't need such a large tent even though we loved our circus tent so we sold it and bought a new smaller version.
We also fitted a diesel heater which is unbelievable and got rid of our large heavy kitchen to make way for a smaller, lighter version that fits the tent better and also houses our fridge in a convenient location. We moved the spare wheel from the draw bar to the rear as well amongst a few other minor things that annoyed us a little.

We are really happy with it now, not that we weren't before but it is now extremely well sorted and so easy to use. Oh and we painted it Isuzu Splash White.........


And just to finish this build off, here are a couple of more pics (not that we needed any more!) of it being used for its intended purpose ;)

DSC02547.jpg


IMG_5527.jpg


DSC05281.jpg


DSC01215.jpg


DSC01252.jpg
 

lidz

Member
Joined
Oct 15, 2012
Messages
13
Location
Melbourne, Australia
Looking forward to following your house / shed build Danshell. I've got a similar sized colorbond garage to what your building (6m x 10m) & would suggest, if you can, to go a slightly wider door to make it easier to get cars in alongside each other.
We went for a 5m wide one, was a standard size one from Strammit & makes it nice & easy to get cars in. Also if you want to potentially get a hoist down the track consider your wall heights now, again it was relatively cheap to upsize them.

cheers, Tim
 
OP
D

Danshell

Well-known member
Joined
Jun 26, 2016
Messages
206
Location
Tasmania Australia
Looking forward to following your house / shed build Danshell. I've got a similar sized colorbond garage to what your building (6m x 10m) & would suggest, if you can, to go a slightly wider door to make it easier to get cars in alongside each other.
We went for a 5m wide one, was a standard size one from Strammit & makes it nice & easy to get cars in. Also if you want to potentially get a hoist down the track consider your wall heights now, again it was relatively cheap to upsize them.

cheers, Tim

Thanks Tim I agree wholeheartedly with what your saying.

In fact I wanted a 7m wide shed and I wanted it higher from the start but unfortunately it wasnt an option due to energy rating matters and the width of our platform.

For the most part our houses living areas are facing south west. I am not sure of the regulations on the mainland but down here we are supposed to have a certain amount of living area facing North.

So because I dont, the builder has to meet the energy criteria in other ways. Better insulation etc

This also meant that my shed which is on the northern side of the house couldn't be any higher and blocking the northern sun :(
As for the door I also requested a 5m door but due to having to fire rate our shed (due to our close proximity to the bush) it was quite a bit cheaper going with a 4m door with our particular supplier because of whatever it is they need to do to meet the fire rating they have a lot of 4m doors but the 5m would have been a special order.........
It all sounded sus to me but thats what we have.

Its just going to be a case of making do with what I get....unless I do some dodgy modifications once the builder has gone and we are not being watched by council regulators :)
 

lidz

Member
Joined
Oct 15, 2012
Messages
13
Location
Melbourne, Australia
Ah fair enough Danshell, two factors I definitely didn't need to contend with when building mine!

At the end of the day, still a fantastic sized shed to be building, congrats!
 
To avoid these ads, REGISTER NOW!
OP
D

Danshell

Well-known member
Joined
Jun 26, 2016
Messages
206
Location
Tasmania Australia
Danshell that is one awesome Camper Trailer, many thanks for sharing:bowdown:

Thanks. There has been a lot of refinement of every area over the years to get it exactly how we like it.

One person can set it up in 10 minutes easily which is perfect for us as we now use it all the time. Especially since installing the diesel heater :)
 

gazza

Well-known member
Joined
Dec 24, 2009
Messages
364
Location
Melbourne Aust
Great build so far, looking forward to see it all come together as it looks like everything is well planned.
 

oldironfarmer

Well-known member
Joined
Jun 25, 2016
Messages
6,664
Location
Terlton, Oklahoma
I love your camping trailer, great work!:bowdown: Even better that you don't just build, you use!:bowdown::bowdown:

I'll second that all sheds are welcome here. Mine's a pole barn and not well finished but that's what it is. Looking forward to seeing your house and shed come together. We like to see everything you're doing so don't be shy. It's obvious you do great work.
 

bj383ss

Well-known member
Joined
Sep 29, 2011
Messages
3,166
Location
TX
One word for your camper trailer "you built from scratch" Bada$$! Your thread sir is definitely worthy for the forums.

Bret
 

Bob Heine

ALLIANCE MEMBER
Joined
Oct 24, 2009
Messages
10,703
Location
Boca Raton, Florida
By city I mean near Launceston which as you may know is at the other end of the state. Yes our oysters can be large, did you get to try our Scallops?
Danshell, we landed in Devenport on the Abel Tasman (the Sea Cat was also finishing sea trials in November 1990). We headed east as far as the Nut. Turned around and came back to Launceston for our first overnight stay on the island.

Launceston was beautiful and we spent the day at the Cataract Gorge and took the Tasmanian Chair lift ride through the Rhododendrons, which were in full bloom.

We often bought Tasmanian Scallops on our weekly visits to the Sydney Fish Market. I was surprised the first time I saw them because here in the US we normally don't serve or sell Scallops with the Roe attached. I did find a photo of the oysters -- I ordered six dozen (thinking they were going to be small) and three rock lobsters (even 30 years ago I couldn't bring myself to eat an endangered giant fresh water crayfish).
attachment.php
 

Attachments

  • Tasmania - Hobart Oysters.jpg
    Tasmania - Hobart Oysters.jpg
    89.3 KB · Views: 638
OP
D

Danshell

Well-known member
Joined
Jun 26, 2016
Messages
206
Location
Tasmania Australia
Danshell, we landed in Devenport on the Abel Tasman (the Sea Cat was also finishing sea trials in November 1990). We headed east as far as the Nut. Turned around and came back to Launceston for our first overnight stay on the island.

Launceston was beautiful and we spent the day at the Cataract Gorge and took the Tasmanian Chair lift ride through the Rhododendrons, which were in full bloom.

We often bought Tasmanian Scallops on our weekly visits to the Sydney Fish Market. I was surprised the first time I saw them because here in the US we normally don't serve or sell Scallops with the Roe attached. I did find a photo of the oysters -- I ordered six dozen (thinking they were going to be small) and three rock lobsters (even 30 years ago I couldn't bring myself to eat an endangered giant fresh water crayfish).
attachment.php

Thats awesome Bob, I agree about the cray fish. Unfortunately all our seafood down here is really expensive at retail outlets. So any time I get to eat Scallops or Oysters is when dining out or I happen to come across a fishmonger.

One word for your camper trailer "you built from scratch" Bada$$! Your thread sir is definitely worthy for the forums.

Bret

I love your camping trailer, great work!:bowdown: Even better that you don't just build, you use!:bowdown::bowdown:

I'll second that all sheds are welcome here. Mine's a pole barn and not well finished but that's what it is. Looking forward to seeing your house and shed come together. We like to see everything you're doing so don't be shy. It's obvious you do great work.

Great build so far, looking forward to see it all come together as it looks like everything is well planned.

Thanks very much for the kind words gents.

Trailing arm IRS ! Not really hard to build and it gives you a lot of suspension travel, independently. Very cool. I'll bet it works great on rough terrain.

Yes it does work well on rough terrain and it rides very nice in general use.
The camper has version 2 suspension under it now as I slightly under engineered version 1 and bent it in the worst possible place in outback Australia, but thats another story.

Thats where this photo came from!

IMG_5527.jpg


That is one SERIOUS drain ! You must get some big rains during the "wet" season !!

Its not so much the amount of rain, although we probably do get our fair share. It is more because we are on a hill and our block is half way down the hill so the drain is to catch and re-direct the water that flows from the top before it gets to our cut to fill platform.
 

gazza

Well-known member
Joined
Dec 24, 2009
Messages
364
Location
Melbourne Aust
Thanks Tim I agree wholeheartedly with what your saying.

As for the door I also requested a 5m door but due to having to fire rate our shed (due to our close proximity to the bush) it was quite a bit cheaper going with a 4m door with our particular supplier because of whatever it is they need to do to meet the fire rating they have a lot of 4m doors but the 5m would have been a special order.........
It all sounded sus to me but thats what we have.

Its just going to be a case of making do with what I get....unless I do some dodgy modifications once the builder has gone and we are not being watched by council regulators :)

Hi, just reading through this and I thought I should mention that your bal rating may not change the type of door that you are allowed. The fittings/sealing strips and gaps are specified but with a metal door there is not much if any difference in the bal rating system.
I only know this because I was sick of suppliers trying to upsell me products due to the bal rating saying that a certain material cant be used etc, so I lashed out just over a $100 and got my own copy of all the bal building rules.They are very specific and amazingly very easy to read.
If you interested let me know your Bal rating and I can forward you a copy of the garage door requirements.
cheers
Gazza
 
OP
D

Danshell

Well-known member
Joined
Jun 26, 2016
Messages
206
Location
Tasmania Australia
Hi, just reading through this and I thought I should mention that your bal rating may not change the type of door that you are allowed. The fittings/sealing strips and gaps are specified but with a metal door there is not much if any difference in the bal rating system.
I only know this because I was sick of suppliers trying to upsell me products due to the bal rating saying that a certain material cant be used etc, so I lashed out just over a $100 and got my own copy of all the bal building rules.They are very specific and amazingly very easy to read.
If you interested let me know your Bal rating and I can forward you a copy of the garage door requirements.
cheers
Gazza

Thanks Gazza we are expecting a BAL of 19 but hoping for 12.5. They havent actually told me yet which it will be, except that it is one of those.
From my research there isnt a lot of difference between the two?
 

gazza

Well-known member
Joined
Dec 24, 2009
Messages
364
Location
Melbourne Aust
Here are the 12.5 rules, apart form the sealing around the door it pretty basic, hope this helps
 

Attachments

  • Bal 12.5 garage doors.jpg
    Bal 12.5 garage doors.jpg
    105.8 KB · Views: 57
OP
D

Danshell

Well-known member
Joined
Jun 26, 2016
Messages
206
Location
Tasmania Australia
Thanks gents.

For the most part we havent really been involved in what the BAL rating requires except I vaguely recall the builder saying it requires double glazing, sealed ridge caps, sealed gutters, better fly screens and few other things I dont remember.

In regards to the shed it only has to be BAL rated because I couldn't get a 6 mtr space between the house and shed, only 4 mtrs, otherwise down here it wouldnt have needed a BAL rating at all.
 
OP
D

Danshell

Well-known member
Joined
Jun 26, 2016
Messages
206
Location
Tasmania Australia
Another quick little project I did a few years ago, just to keep this thread rolling until my new shed gets built.

The starter circuit on my compressor motor wasnt liking the load of my compressor pump when it was starting so I decided to use it to build a 72" sander.

Luckily it starts fine on the sander as it isnt really under a lot of load!

Anyway, pretty poor photos but here's a couple of photos of the finished product. All built with scrap products (and looks it ;) ) but works really well.
 

Attachments

  • IMG_2735.JPG
    IMG_2735.JPG
    100.5 KB · Views: 88
  • IMG_2734.JPG
    IMG_2734.JPG
    73.3 KB · Views: 80

Terrick down Under

Well-known member
Joined
Jul 2, 2015
Messages
1,904
Location
Royalla, NSW, Aust.
Great build start. I can appreciate your weather conditions, I lived on top of Glebe Hill, just above Howrah for 18 months, (6 weeks after the bridge went down) 360 degrees of cold. Insulation up front and planning can save you a lot of money over the years. The view from your porch will be postcard quality when you are done.
 
To avoid these ads, REGISTER NOW!
Top Bottom