To avoid these ads, REGISTER NOW!

Between 265 & 485 SQ/FT A Space Efficient Scandinavian Workshop

Workspaces sized between 265 and 485 squarefeet.

adanielsson

Active member
Joined
Aug 4, 2015
Messages
33
Hi all, long time lurker without a garage, thought I would give something back as a thanks to all the inspiration this forum has given me.

Me and my lovely SO bought a house and moved in January this year. More importantly the house came with a detached 6x6.5m (~20x21ft) double garage which meant I could finally live the dream and create my own workshop. As a reference, our previous apartment was smaller than this garage.

I am what you would call a maker in my free time (mechanical engineer by trade), I do a little bit of everything, (pedal)bikes, cars, small vehicles, ”art pieces”, home renovations, furniture etc. This means the shop has to do metal, wood, electronics and painting, in 40 sqm. It also has to store raw material and a few ongoing and finished projects, as well as my very first car and life-companion for 13 years so far, a '70s Mini Clubman - which I hope to be able to restore in this shop.

I can be all over the place when I'm in the zone, but very much appreciate order and visual appearance when I do a clean. I save too much "good-to-haves", so this will be an exercise in finding a balance between having free workable space and material storage. I hate running to the shops.

My inspiration:

I will be cherry picking ideas from a lot of different places.
  • Tom Sachs: Loving his repair stations and sculptures, and most of all his aesthetical and very functional way of making custom tool holders in plywood - I’ll be having some of those!
  • Adam Savage: First order retrievability is something I have been aiming for a long time, I want as many tools possible availability to grab or use as quickly as possible. This also goes for switching materials, doing a wood work -> welding -> painting. Minimize prep time - that just kills the workflow.
  • Jack Olsen: Using a homogeneous color scheme to make odd second hand furniture look new and matching is simply genius! Hats off. Also: matching table heights - check! And: His beautiful garage made me realize the difference between neatly organized bins in open shelves vs closed cabinets. Where I think the second alternative is so much neater, less of a fire hazard and easier to keep clean.
My plan:
  • Create separate workbenches or zones for different kinds of activities, from clean to dirty:
  • Electronics, computer work, sketching & fine tinkering.
  • Main workbench, a bit universal but mainly woodworking.
  • Cut & drill station, this bench will house 3m lengths of pipe underneath and have an internal infeed table for the metal miter saw that goes under the drill and lathe.
  • Metal shop: Creating a dedicated metal shop within the garage which is fully sealed and can cope with sparks from welding and grinding. This space will also house a future metal lathe and sink.
  • Paintbooth: Combined paint storage & paint booth with proper ventilation.
  • Large projects & car space: If I need to do work on cars or bigger projects, this is where that will happen. This is also where the Mini will be parked most of its time.
Artboard 1.png

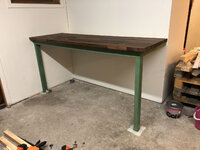
This is how it looked in the very beginning, basically just moved all of my stuff in there and used it for the most urgent house fixes, what a mess:

IMG_8558-2.jpg

IMG_8559.jpg

IMG_8562.jpg

The previous owner had an interior+exterior dog cage with a dog flap in the wall. However the dog had eaten (?) away pretty wildly at the wall. Also, mice had been living in the insulation for a while.

IMG_8512.jpg

First thing we did was patch up that wall, it didn't have to be perfect since I'll put an extra layer of plasterboard later. We also built the wall that will enable a welding room.

IMG_8570.jpgIMG_8725.jpgIMG_8723.jpgIMG_8744.jpg

Some fresh paint on that quarter made such a difference. Next up, work surfaces and tool storage..

//AD
 

Attachments

  • IMG_8754.jpg
    IMG_8754.jpg
    284.3 KB · Views: 31
To avoid these ads, REGISTER NOW!
OP
A

adanielsson

Active member
Joined
Aug 4, 2015
Messages
33
Lacking any kind of work surface, I set about building the one for finer mechanics and electronics (soldering etc.). Say hi to my chosen accent color, my homage to Mr Olsen.

IMG_8754.jpg

Now first order retrievability means having tools easy to reach at all times without shuffling in drawers or behind other tools. To me this means wall mounted tool boards/peg boards. I generally don't like metal ones, they aren't as flexible I feel, and I hate it when the hooks aren't securely mounted. My solution was to buy 4mm perforated board and glue it to plywood. This way I can make custom hangers for different tools (Tom Sachs style) and mount them securely to the plywood. I could have skipped the perforated board, but then I would end up with a bunch of holes if I move stuff around. The plywood sides will be covered up with a wooden frame, probably green or white.

IMG_8768-2.jpg

Now the issue is that some tools I'll want within easy reach both on the electronics workbench, and the wood working bench. Therefore I split the board in two, and put the outer one on hinges. It will later have a small gas strut, a latch and a handle that you can reach from the wood bench. So if you pull the handle, the board swings out so you can reach you tools without having to go around the bench.

IMG_8770-2.jpg

IMG_8771-2.jpg

IMG_8780-2.jpg

Found some red ikea cabinets for cheap that I might build into the electronics bench. Started adding some tools on the wall and made the prototype wood bench. It's on casters and I'm trialing the size (~150x90cm). I'm thinking this bench (or the next proper version of it) might house my shop vac and maybe some wood working tools like sander and drop saw.

Next up was some storage cabinets that I found second hand, bought 4 as it was the most I could fit in the trailer. Trial fitted them along the wall. I think I'll keep them white since they were so unscathed and also to brighten up the car space. Super happy with them, even though they aren't four of the same, they could have been deeper but for the price I couldn't say no.

IMG_8917.jpg

Next up, some more tool storage and IKEA hacking..

P.S. Sorry about the multiple postings, trying to work within the 10 attachment/post limit. Hope this doesn't upset anyone.
 
OP
A

adanielsson

Active member
Joined
Aug 4, 2015
Messages
33
Scored a free IKEA roll-up cabinet, was around 45x80x80. The roll-up is made from alu so my plan is to make a tool-cabinet that I can use in the metal shop to store tools that I don't want to get metal dust on. Cut it down from 45 depth to about 22 and painted it green to match. Also removed all the shelves and added a pegboard in there instead.

IMG_9237.jpg
IMG_9238.jpg
IMG_9239.jpg
IMG_9265.jpg
IMG_9389.jpg

Very happy with out it turned out. I have another one as well that is a lot taller, not sure where I'm going to use that one.

Next up was the paint booth + hardware + clothes storage corner.

Gave the wall some fresh paint and set about building a frame.

IMG_9335.jpg

IMG_9349.jpg

IMG_9354.jpg

What I did was I mounted one of the cabinets into the wooden frame, then cut the back open, this way I have 70cm of depth instead of 40 cm. Notice that I do not have any bottom threshold. I plan on having a rolling paint storage cart in there that goes up to half way. Above will be a paint booth (100x70x100) with filters and fan extraction. If I need to paint larger items I can (in theory) simply roll the paint storage cart out and have 100x70x200cm.

IMG_9371.jpg

IMG_9378.jpg
 
OP
A

adanielsson

Active member
Joined
Aug 4, 2015
Messages
33
Gave everything some green paint via roller which worked out much better than anticipated.

IMG_9380.jpg

Added the drawers again, was planning on painting them as well but I kind of like the contrast for now. Will replace the filing handles though from plastic to matching metal ones.

IMG_9388.jpg

This meant I could finally begin sorting out some hardware into the cabinets..

IMG_9406.jpg

IMG_9404.jpg

IMG_9405.jpg

I just realized I have not taken any picture of the whole unit with the painted doors yet. Will have to do that tomorrow.
 
OP
A

adanielsson

Active member
Joined
Aug 4, 2015
Messages
33
Next in line was to remove one of the garage doors along with a trash can storage shed (accessed from the outside) that was taking up valuable space where my (future) lathe is supposed to go.

IMG_9500.jpg

IMG_9501.jpg

Turns out mice had been living the good life in my wall. It reeked of pee in there. Anywho, tore everyhing out and did a proper clean of everything that was damaged. More so after the next picture was taken also.

IMG_9503.jpg

Next up the garage door..

The floor had become pretty damaged by snowmobile skis and studded tires and what not.

IMG_9510.jpg

IMG_9514.jpg

So I did a simple jig and filled it out before we began to build a new structure around the openings.

IMG_9522.jpg

IMG_9524.jpg

IMG_9530.jpg

IMG_9531.jpg

Just waiting for the shop to get the correct paneling in stock and we'll have a nice new wall on the outside.

On the inside, we insulated and sealed the walls before we installed OSB and plasterboard (double plaster in the metal area).

IMG_9551.jpg
 
OP
A

adanielsson

Active member
Joined
Aug 4, 2015
Messages
33
Now for the walls in the welding corner I wanted to put extra protection on the walls so I got some thin aluminium sheeting and put that up on the walls where most spatter and sparks would reach.

IMG_9614.jpg

I also mounted the IKEA cabinet to the wall to house some tools. Underneath this is where the sink will be.

IMG_9642.jpg

IMG_9672.jpg

Got some new lights installed, just need some insulation boxes for it. Also mounted a pegboard above the future welding and heavy duty work table, this time a metal pegboard of course. The window will get white paint, coverings and some protective sheet as well from weld spatter.

IMG_9673.jpg

IMG_9676.jpg

A new 380V outlet as well for the future lathe. Ran out of aluminium to finish off the wall. But I'm really starting to see some hints about what this might look like all finished, and I like it.

//AD
 
OP
A

adanielsson

Active member
Joined
Aug 4, 2015
Messages
33
Thanks guys! You sir are correct on your guess. :)

I have been busy working on the welding corner. I managed to buy an old welding bench that had both a 4mm steel top plate and a 25mm steel plate stacked on top of each other. I probably won't keep the wooden top or the legs but they'll be a temporary placeholder for the time being.

It as a hurdle getting everything into the trailer, the 25mm sheet weighted a bit over 200kg, and optimistic me hadn't brought any kind of lifting device.

IMG_9637.jpg

IMG_9660.jpg

I also got a big proper metal pegboard as a freebie when I bought the table, which I cleaned up and painted and hung over the future "cutting & drilling station". The table will be replaced though.

IMG_9644.jpg

IMG_9647.jpg

IMG_9677.jpg

I just need to buy some more hooks for it so I can start fill it up.

Back to the big chunk of steel plate.. That I'm turning into the main welding table. It needs to be able to roll out though if I want to use it for larger projects that won't fit in the corner.

IMG_9662.jpg

It had previously been plasma cut which meant the edges were very rough. Nothing that a few cutting disks on the big Bosch couldn't fix though..

IMG_9663-2.jpg

Then I cleaned up some space inside and brought it in to start fabricating the legs.

IMG_6113.jpg

IMG_6119.jpg

IMG_6125.jpg
 
OP
A

adanielsson

Active member
Joined
Aug 4, 2015
Messages
33
IMG_6128.jpg
IMG_6131.jpg

Not yet fully in tune with my new welder (Parweld XTM 161). Couldn't do any lengths though, only tacks, otherwise my 10A/220V fuse went immediately. Will run it on 16A later. But still getting a bit too much spatter and the wire noticeably pushes against the metal before the arc starts. Not sure what I can do to adjust it.

I grabbed a few Foot Master replica castors and made some flat bar mounts. They seem very nice so far. We'll see how they hold up over time.

IMG_6135.jpg

IMG_6137.jpg

Voila, that will have to make do for the time being. I left the square tubes open if I want to do any add-on structures etc. I would like to do a threaded hole pattern on the top to mount fixtures and vices.

My job had a lottery where you could win old stuff they were clearing out. I managed to score a metal tool cabinet which I aim to turn into a washing station.

IMG_6149.jpg

Started out by cutting a big hole up top.

IMG_6152.jpg

Test fitting an IKEA sink.

IMG_6155.jpg

Roll some paint on it.

IMG_6157.jpg

The sides won't be visible later on so those didn't have to be perfect.

IMG_6158.jpg
 
OP
A

adanielsson

Active member
Joined
Aug 4, 2015
Messages
33
And this is how these two additions fit into the welding corner:

IMG_6165.jpg

The welding table is 77x140 cm. The right side wall with the water pipes will be covered by something similar to the washing station. So it kind of ends up being a benchtop along the entire length.

IMG_6166.jpg

Very happy with this. I would like to do some kind of fume extractor over the bench for welding and grinding. Need to investigate what kind of fans and piping I could use for that.

IMG_6172.jpg

Washing station. I still need to add a faucet and finish the sewer pipes. The red X on the wall is where I hope to fit a 30L water heater.

IMG_6173.jpg

I think I might store a parts cleaner setup underneath the sink.

Thats all for now! Next up is I need to finish and seal all the corners of the welding area so that it is safe for sparks.
 

garfieldzzz

Well-known member
Joined
Jun 30, 2014
Messages
305
Location
BY
That washing station is a great idea which could be turned in to a parts washer with a little extra efford.
 

kaymccampbell

Well-known member
Joined
Feb 27, 2015
Messages
29,439
Location
Upstate New York
This is lovely work. I'm going to make a suggestion. Caulk the bottom seam between the walls and the floor. This is to prevent hot metal and slag from hiding under the lower edge of the drywall and burning the wooden sill plate.
 

rmack898

Well-known member
Joined
Jan 23, 2007
Messages
3,145
Location
Honu Grove NE Florida
I agree with Kay that this is a nice work space you have going and I'm also going to make a suggestion. Welding with all that bright aluminum on the walls is going to reflect a lot of UV light, take precautions to keep from getting burned where you don't expect it.
 
To avoid these ads, REGISTER NOW!
OP
A

adanielsson

Active member
Joined
Aug 4, 2015
Messages
33
Thanks guys for the kind comments!

@rmack898 , thanks, hadn't thought about that aspect to be honest. I usually dress up for the occasion and don't skimp on long sleeves, but maybe I should finally make or buy a rear hoodie for the weld helmet, for the UV but also for preventing getting weld spatter down your neck.

@kaymccampbell , that's exactly what todays mission was. I wen't for 0.5mm aluminium sheet that I cut in 100mm wide strips and bent 90 deg.

IMG_6383.jpg

These got screwed in around the entire perimeter in the welding corner.

IMG_6387.jpg

The ones against the floor got some Sika Fire sealant (caulk?) to help seal against the uneven floor.

IMG_6388.jpg

IMG_6389.jpg

I hope this should do the trick. BTW I like the Footmaster caster knockoffs for the welding table so far. They roll pretty good along my very rough floor.

IMG_6405.jpg

This area will be covered up with a big box later as mentioned. So I will have to do some extra aluminium sheeting to seal that one up later.

IMG_6404.jpg

And this is how it looks in its current state, I'll probably keep them raw for the time being, if it looks odd when it's all done I might paint them white to blend in with the wall and ceiling.

IMG_6390.jpg

Oh, in other news.. A small step for mankind, but a giant leap for me, I finally managed to score a lathe, cheap too! It's an old swedish knockoff of a south bend called Storebro GW, these knockoffs were also produced under the name Blomqvist VL600/BS600. I settled on one of these since it seems to be the most rigid lathe for its size, while being the biggest one I can fit, and nothing new seems to be able to compete unless you multiply the price by atleast 10x. Looking forward to refurbing this one. The legs will be removed and it will be mounted to the upcoming workbench that will be up against that wall.

IMG_6394.jpg

The lathe corner looks a bit meh, and that I think will be the next thing to tackle.

IMG_6393.jpg

The plan is to do a long workbench (3.5m) along that wall to house steel pipe, sheet material, drill press and horizontal band saw for metal. Behind the narrow section of the lathe (where the motor isn't taking up space) I will put another modified IKEA cabinet to house lathe tooling I think. What I do in the far corner is anyones guess right now. Welding helmet storage? I dunno, we'll see. I made a quick sketch to show my plan:

1660077361059.png
 
OP
A

adanielsson

Active member
Joined
Aug 4, 2015
Messages
33
Oh and I've also painted an old closet door and got that one up on the entrance-wall-of-many-cabinets. Behind that one will be clothes mainly. I'm very unsure of what to do with the compressor, currently it sits on a ~70cm deep, 90cm wide, ~90cm tall opening above some cabinets. I'm tempted to throw it up on the attic if it can withstand the cold. That space would house the paint fume extractor fan, but I'm pondering if I should move four of my small-storage stacks on top of those drawers, in front of the compressor and/or extractor fan. Or could I utilize that space for something else? 3D printer space behind glass (or whiteboard) doors? Small CNC mill? Not that I own either one (yet at least). Suggestions are welcome..

IMG_6396.jpg

Still lots of stuff on this corner left to do.. and the entrance door.. and ceiling.. and lighting.. That's future problems.

IMG_6401.jpg

IMG_6397.jpg

I've also spent way to much money on steel tubing for the lathe workbench.. But that's another chapter..

IMG_6400.jpg

That's all for now! Thanks for tuning in.
 

loganb

ALLIANCE MEMBER
Joined
Dec 29, 2011
Messages
5,504
Location
Omaha, NE
Just found this space and enjoying seeing it come together! Great work and great planning
 
OP
A

adanielsson

Active member
Joined
Aug 4, 2015
Messages
33
Thank you!

@kaymccampbell , haha, feel free to elaborate on your cabinet, I'm torn. How's the dust situation? Do you feel like it was a good choice to place them in the workshop as compared to say a cleaner room in the home or similar?
 

kaymccampbell

Well-known member
Joined
Feb 27, 2015
Messages
29,439
Location
Upstate New York
The cabinet is a welded aluminum frame, covered in Plexi, caulked where it meets the wall and shelf. Much like a 70's phone booth on its side. Each front panel is hinged at the top with piano hinge, and closed with a pair of rare earth magnets. I get pretty much no dust in it.

Since my house is a small house, about 90 m², and the shop is smaller, about 65 m², and is pretty dense, being divided between metal/auto and wood shops, there is really nowhere else to put it. The shelf it sits on is where it is to clear the chopsaw and RAS infeed table.
Here's the house and shop. I live over the shop.
20201229_172058.jpg
 
Last edited:

gearhead1960

ALLIANCE MEMBER
Joined
Mar 21, 2019
Messages
1,809
Location
Manassas, VA, a small blot in history
@adanielsson I would consider putting the compressor up in the overhead space both for space efficiency and noise abatement. However, since you mention possible cold temperatures, you should check the specs on the compressor as it should list operating temperatures. If it doesn't, contact the manufacturer. The limitation might be the weight of the oil.....
 

larry4406

Well-known member
Joined
Jan 27, 2006
Messages
19,062
Location
Northern Virginia
Very nice thought on creating useful work spaces for your different types of projects. I too have high respect for those that make it work with the space they have vs building the new 60x80 sf space.
 
OP
A

adanielsson

Active member
Joined
Aug 4, 2015
Messages
33
Thanks guys, designing a shop within a limiting canvas is quite fun as well in a challenging way.

Thanks Kay for the input, might not be such a bad idea then to possibly place a printer up there. Cool house and shop btw!

@gearhead1960 , yeah it would definitely free up a significant chunk of space. I'll have alook in the manual. A buddy said I could otherwise just change the oil and it should be good to go.

I've been deliberating the to-be or not-to-be "door solution" into the metal corner. Mainly to keep wood dust away from the welding table and lathe. A regular door into such a small area would take up a lot of space when open, but be easy to install. On the other hand, a sliding door would be more difficult to install but I think provide a better solution since it basically disappears when open.

Excuse the mess..

IMG_6410.jpg

As luck would have it, I scored a second hand glass sliding door for ~$30 the other day.

However, had I known a sliding door would be my choice when I made the dividing wall, I would have just incorporated it into that wall. And I reeally don't feel like tearing that one down to save ~30mm of depth. I'll have to live with that one.

Still needed to take a few steps backwards in order to make progress, so I started by removing the tool boards and clearing the area.

IMG_6412.jpg

Started out on the framing. The opening will be just over 80 cm, which means that I will just about be able to roll the welding table through (77cm).

IMG_6422.jpg

IMG_6424.jpg

After I had gotten the slider mounted I realized I'd measured just once and ended up 100mm too far down. So I moved it upwards a bit.. The extra metal bracket will be removed later when the OSB and plasterboard is added.

IMG_6428.jpg

Got the door in, perfect! I am very happy with this one.

IMG_6429-2.jpg

I kind of lucked out on the size of the door matching everything so well.

IMG_6434.jpg

Next up on the todo list is to create a new wall so that I can get the tool board up again. I'm currently sketching that wall, I think I'll accept some extra depth in order to create a horizontal storage slot for long materials, drop saw guides etc. This will be accessed from the left side of the wall in the image above, beside the "clean desk".

I'm also deliberating what to do on the right side, there will be a benchtop up against from both sides. But above that bench I'm unsure if I'll put a narrow window to open the area up, or have it closed off with a wall that I can use for storage.
 
OP
A

adanielsson

Active member
Joined
Aug 4, 2015
Messages
33
Continuing on yesterdays project, I've now managed to build a new wall with some incorporated storage space. Very nice to get the drop saw tracks out of the way.

Not much to write about, framing, OSB, plasterboard. Hoping to get it painted in the next few days.

IMG_6440.jpg

IMG_6446.jpg

IMG_6450.jpg

IMG_6459.jpg

IMG_6461.jpg

Not sure what I'll store in the bottom, maybe it'll be another space for sheet material since I seem to want to save a lot of it. Not sure either what I'll do with my swing out tool board since it's now too far away in the swung-out position. Will have to think about that one for a while.
 

wreckdiver1321

Well-known member
Joined
Aug 12, 2021
Messages
1,039
Location
Billings, MT
Just read through all of this, and bravo!

I love the amount of thought and purpose you're putting into this build. It's obviously a somewhat limited space, you want to do a lot with it, and you're making it happen. I really like the "zones" approach, keeping all of the different types of work segregated. Can't wait to see all the finishing work get done.

I also took a lot of nods from Jack Olsen and Paul Bilek, who took a lot of inspiration from Jack. I really like the homage you're paying to it.

All of it, it's great. Keep up the awesome work and I can't wait to see it all get used!
 

Snip's

Well-known member
Joined
Apr 29, 2017
Messages
1,850
Location
Ohio
You might want to think about putting some sheet metal on the wall directly behind the metal lathe.
It will make for easy cleanup of the cutting oil that will get thrown back there.
 
OP
A

adanielsson

Active member
Joined
Aug 4, 2015
Messages
33
@wreckdiver1321 , thanks man, kind words! You have done great on your space as well.

@Snip's , that's the plan! There will be a sliding door drawer unit there as well. Hopefully that one won't be completely full of oil.

I've managed to paint the storage wall and gotten somewhere on the other end of the wall. Found a few cheap windows locally that fit pretty good.

IMG_6466-2.jpg

IMG_6476-2.jpg

This wall looks a bit incomplete but it's like that for reasons that will become clear later.

IMG_6477-2.jpg

Still need to paint the end green to blend with the table structure.

IMG_6474.jpg
 
Last edited:

CoyoteDuster

Well-known member
Joined
Dec 21, 2016
Messages
49
Location
USA
I love this build. Really thoughtful, with a big overall idea, but attacking it in pieces, as you can.
 
OP
A

adanielsson

Active member
Joined
Aug 4, 2015
Messages
33
Made some more progress these past week.. Continued with making the main sheet material storage.


IMG_9994-2.jpg

IMG_9997-2.jpg

IMG_0002-2.jpg

Some paint on that..

IMG_0041.jpg

IMG_0045.jpg

This is what I aim to get away from, cutting stock on the floor. I like the new metal band saw though.

IMG_0058.jpg

IMG_0060.jpg

IMG_0064.jpg

Pardon the mess.. again. I'm sorting this garage out one end at a time.

IMG_0065.jpg

IMG_0072.jpg
 
Last edited:
OP
A

adanielsson

Active member
Joined
Aug 4, 2015
Messages
33
IMG_0089.jpg

Here's the metal pipe storage, the back OSB wall will get a hole in it so that a few squares can protrude into the space underneath the lathe which makes total storage length 3.5m.

IMG_6507.jpg

Really liking this sheet storage. it can take 120x200cm sheets in two levels. The garage door spring linkage is a bit of a pain but we'll see if that will get changed in the future.

IMG_6497.jpg

Please note the combination of luck and skill that led to the fit lengthwise of the tool board and the wall. Phew..

IMG_6518.jpg

IMG_6515.jpg

IMG_6490.jpg

Got a sticker for the sliding door as well, says "workshop". Might add "metal" above it later, we'll see.

IMG_6501.jpg

Got some green paint on the secondary sheet storage as well, that takes ~60x160cm sheets.

IMG_6514.jpg

The metal chop bench will get some doors and covers so it's not fully open. Also need to make the feed roller track beneath the drill press.

That's all for now, next up, lathe table maybe?
 
Last edited:
To avoid these ads, REGISTER NOW!
Top Bottom