
155'Ringman
Well-known member
Been looking at a lot of the very lovely garages here and getting ideas for a new extension I am hoping to build onto my own garage and a lot of tidying that i'd like to do on my current workspace.
The pictures here are what I'd like to say are the 'before' pics but I have to say it all functions pretty well so most of what I want to do in here is storage related to clear up the clutter that will be obvious....

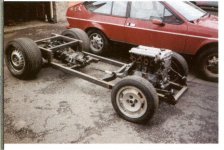
This is the garage from the outside which is a 20' x 20' cavity wall block built and cement rendered inside & out. The floor is VERY badly tamped concrete and quite uneven but it was all there when we bought the house so I made do with what I had. Those are the majority inhabitants of the cave, mid 90's Alfa 155's. That's where the username comes from as I used the oldest one (inside up on stands) to go to the Nurburgring Nordshlife when I was working in Berlin.

This is a sewn picture after I had done 'the basics' around 9 years ago after moving in and getting some time to work on it. I had taken the benches and the 6' steel cabinet from my old garage to this one. It was handy to just take them and bolt them to the walls / floor (I like my benches anchored down so they don't move when I'm performing fine adjustment tasks") ) I had sheeted out the loft area with chipboard for storage, painted the walls white and floor red. I then made a 'cool box' in the loft on the north facing end where the compressor lives with an external vent to always get cool air and keep any workshop dust away from the inlets. That was a lesson learned from my previous garage when the same compressor lived under the bench and the inlets got clogged with all sorts of **** which eventually caused the head gaskets to go. I rebuilt the comp with new head gaskets and filters before winching it up into the coolbox. The floor of the coolbox is carpeted to keep the noise down too.
) I had sheeted out the loft area with chipboard for storage, painted the walls white and floor red. I then made a 'cool box' in the loft on the north facing end where the compressor lives with an external vent to always get cool air and keep any workshop dust away from the inlets. That was a lesson learned from my previous garage when the same compressor lived under the bench and the inlets got clogged with all sorts of **** which eventually caused the head gaskets to go. I rebuilt the comp with new head gaskets and filters before winching it up into the coolbox. The floor of the coolbox is carpeted to keep the noise down too.

The main benches are 2 1/2" thick rough sawn timber (secondhand some 20 years ago..) in an L shape 6' x 6' in the corner. There is a 4" swivel vice on the right corner and a cheapy drill press in the middle. Two blockboard shelves hold mostly old biscuit boxes with parts and some tools as the steel cabinet is overflowing with tools. The bench off the the left is a 6' long hinged drop bench made from 3" thick heavy flooring with 2" angle iron supports and 1 1/2" thick wall galvanised tube legs that are bolted in place when required.(again, secondhand 20 years ago). Oh, by secondhand, I mean free / scavanged from a demolition yard.

The 6' steel cabinet is sheet metal but has an angle iron locking bar covering the central door join. This is a legacy of having seen most of my father's tools stolen from his garage years ago and having a serious paranoia about it since.

This is an up to date picture which is a little bit more organised but it still is way off some of the organised caves in here..

Again, an up to date picture of the bench area showing some changes from the earlier pic.

The side bench up and in play..


One aspect I like about the garage is the home built air distribution system. I used 3/4" dia thickwall polythene water tube in a ring main around the eves of the roof falling away from the compressor coolbox location. I used brass tee's pointing upwards for the drop lines which were saddle clipped to the wall and then into the wall mounted QD's of which there are 6 around the walls.
If you look closely, you will see that I employed skinflint engineering to avoid buying bespoke wall mounted QD fittings.. I found a bunch of male inlet / double female outlet Y pieces in a box at my local tool cave and a reducer fitting that 'self tapped' into the poly tube. I then found some double male straight unions which I sawed one end off at 45 degrees and welded to some flat stock 1" x 1/4" thick steel bar. With a couple of countersunk holes, these became the mounting plates. I then used PTFE tape to wrap the joints so I could make the y's line up to the wall mount and the reducer. I added a good quality jubilee clamp around the poly to stop it spreading away from the reducer threads. I think the component parts cost me £15 with the male threaded QD's costing £3.50 each on top as opposed to £15 each for 'proper' wall mounted QD's. Skinflint engineering..
I hope to post some improvements as I make them and of course the extension build but I thought I'd introduce myself and my cave first..
The pictures here are what I'd like to say are the 'before' pics but I have to say it all functions pretty well so most of what I want to do in here is storage related to clear up the clutter that will be obvious....
This is the garage from the outside which is a 20' x 20' cavity wall block built and cement rendered inside & out. The floor is VERY badly tamped concrete and quite uneven but it was all there when we bought the house so I made do with what I had. Those are the majority inhabitants of the cave, mid 90's Alfa 155's. That's where the username comes from as I used the oldest one (inside up on stands) to go to the Nurburgring Nordshlife when I was working in Berlin.
This is a sewn picture after I had done 'the basics' around 9 years ago after moving in and getting some time to work on it. I had taken the benches and the 6' steel cabinet from my old garage to this one. It was handy to just take them and bolt them to the walls / floor (I like my benches anchored down so they don't move when I'm performing fine adjustment tasks
) I had sheeted out the loft area with chipboard for storage, painted the walls white and floor red. I then made a 'cool box' in the loft on the north facing end where the compressor lives with an external vent to always get cool air and keep any workshop dust away from the inlets. That was a lesson learned from my previous garage when the same compressor lived under the bench and the inlets got clogged with all sorts of **** which eventually caused the head gaskets to go. I rebuilt the comp with new head gaskets and filters before winching it up into the coolbox. The floor of the coolbox is carpeted to keep the noise down too.
The main benches are 2 1/2" thick rough sawn timber (secondhand some 20 years ago..) in an L shape 6' x 6' in the corner. There is a 4" swivel vice on the right corner and a cheapy drill press in the middle. Two blockboard shelves hold mostly old biscuit boxes with parts and some tools as the steel cabinet is overflowing with tools. The bench off the the left is a 6' long hinged drop bench made from 3" thick heavy flooring with 2" angle iron supports and 1 1/2" thick wall galvanised tube legs that are bolted in place when required.(again, secondhand 20 years ago). Oh, by secondhand, I mean free / scavanged from a demolition yard.
The 6' steel cabinet is sheet metal but has an angle iron locking bar covering the central door join. This is a legacy of having seen most of my father's tools stolen from his garage years ago and having a serious paranoia about it since.
This is an up to date picture which is a little bit more organised but it still is way off some of the organised caves in here..
Again, an up to date picture of the bench area showing some changes from the earlier pic.
The side bench up and in play..
One aspect I like about the garage is the home built air distribution system. I used 3/4" dia thickwall polythene water tube in a ring main around the eves of the roof falling away from the compressor coolbox location. I used brass tee's pointing upwards for the drop lines which were saddle clipped to the wall and then into the wall mounted QD's of which there are 6 around the walls.
If you look closely, you will see that I employed skinflint engineering to avoid buying bespoke wall mounted QD fittings..
I found a bunch of male inlet / double female outlet Y pieces in a box at my local tool cave and a reducer fitting that 'self tapped' into the poly tube. I then found some double male straight unions which I sawed one end off at 45 degrees and welded to some flat stock 1" x 1/4" thick steel bar. With a couple of countersunk holes, these became the mounting plates. I then used PTFE tape to wrap the joints so I could make the y's line up to the wall mount and the reducer. I added a good quality jubilee clamp around the poly to stop it spreading away from the reducer threads. I think the component parts cost me £15 with the male threaded QD's costing £3.50 each on top as opposed to £15 each for 'proper' wall mounted QD's. Skinflint engineering..I hope to post some improvements as I make them and of course the extension build but I thought I'd introduce myself and my cave first..


 You can see where I'm going with this eh?
  Need a bigger garage to house more cars...


 This was today which very nearly got me to the corner. It's hard graft lifting shovel loads of wet clay up to the barrow above when you're normally an office dweller.


