
You are using an out of date browser. It may not display this or other websites correctly.
You should upgrade or use an alternative browser.
You should upgrade or use an alternative browser.
Above 1200 Sq/FT Barn Workshop build
- Thread starter ururk
- Start date
Wokspaces above 1200 squarefeet.
Monday, September 19: Day was too good to pass up, so I took the afternoon off. Onto progress:
Frog hiding in a crack - had to evict him before he was entombed:


Progress:

More progress, and more wrinkles. For what I'm doing, provided the wrinkles don't interfere with the edges sealing, they should be fine:


Done!

Onto the foam - tomorrow. Too beat to do anymore today. I have the lift until Saturday. I'm not too sure I'm going to renew it for another month, a least initially. The foam should go a bit more quickly, provided all the testing I did woks out in the "real world".
Frog hiding in a crack - had to evict him before he was entombed:
Progress:
More progress, and more wrinkles. For what I'm doing, provided the wrinkles don't interfere with the edges sealing, they should be fine:
Done!
Onto the foam - tomorrow. Too beat to do anymore today. I have the lift until Saturday. I'm not too sure I'm going to renew it for another month, a least initially. The foam should go a bit more quickly, provided all the testing I did woks out in the "real world".
Blackhawks63
Well-known member
Very interesting and congratulations. For the life of me I can't understand the logic behind those window boxes, but it's your project and you should take great pride. Hope you get things buttoned up before the snow flies.
Sent from my QTAQZ3 using Tapatalk
Sent from my QTAQZ3 using Tapatalk
4" of foam insulation is going on the outside - when everything is done they will be flush with the siding.Very interesting and congratulations. For the life of me I can't understand the logic behind those window boxes, but it's your project and you should take great pride. Hope you get things buttoned up before the snow flies.
Wednesday, September 21: Progress of sorts was made yesterday. Since I'm shifting to a new set of steps, progress might be slow for a little while.
First, I had to cut some insect screening to 5.5" and place in the flashing:


Then, a quick test fitting:

After a short while:

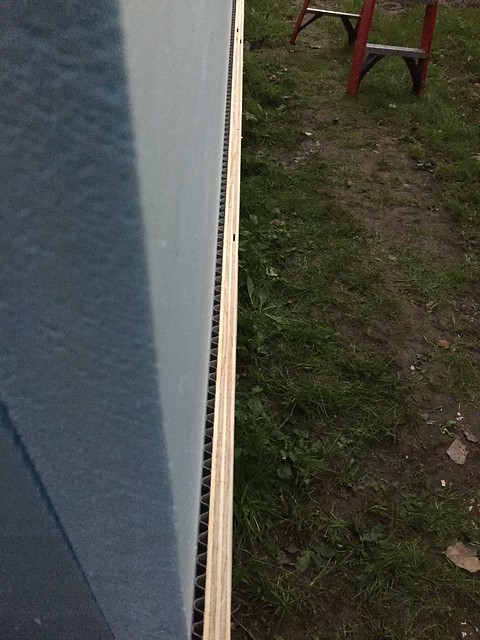
Single furring strip installed:
View from the top of the strip showing the air gap:
So the next 100 days (I kid!) will be some variation on this. I'm putting together a hot wire foam cutter, just waiting for a few supplies. For now I'm using conventional power tools and a metal guide to cut the foam.
First, I had to cut some insect screening to 5.5" and place in the flashing:
Then, a quick test fitting:
After a short while:
Single furring strip installed:
View from the top of the strip showing the air gap:
So the next 100 days (I kid!) will be some variation on this. I'm putting together a hot wire foam cutter, just waiting for a few supplies. For now I'm using conventional power tools and a metal guide to cut the foam.
Wednesday, September 21: A few more sheets up. I had a bit of help yesterday, but today was on my own. I set up a block to hold one end of the furring strip:

All "done":

At this pace, I could have the entire thing covered in a week... if I had every day off. I don't. I was being eaten up by mosquitos, otherwise would have worked till it was dark. We've had a bit of rain, which I think has revived the population some. The next step is to get the top row installed and cut - supplies for the foam wire cutter will arrive this week, but so far my circular saw works well, although it is a bit messy.
All "done":
At this pace, I could have the entire thing covered in a week... if I had every day off. I don't. I was being eaten up by mosquitos, otherwise would have worked till it was dark. We've had a bit of rain, which I think has revived the population some. The next step is to get the top row installed and cut - supplies for the foam wire cutter will arrive this week, but so far my circular saw works well, although it is a bit messy.
smschriefer
Well-known member
Are you using the saw with the blade installed backwards for the cuts? I know that is how you cut plastics and would think it would cause more heat when cutting the panels.
Keep it up, you are doing great!
Keep it up, you are doing great!
I would be interested in seeing how you are setting up your hot-wire cutter.
On your outside corners, would a reverse stagger joint offer up more seperation?
approx. 2:00 into the video on this page explains it for inside corners, which would be similiar to an outside corner
http://www.greenbuildingadvisor.com/video-how-install-rigid-foam-insulation-outside-house
so using the picture below, the piece of foam that is being propped up by the foam sheet would slide 2" to the right and the piece with the strapping would slide down that additional 2"
minor detail, but I can see you are very interested in the "minor details"
Are you using the saw with the blade installed backwards for the cuts? I know that is how you cut plastics and would think it would cause more heat when cutting the panels.
Keep it up, you are doing great!
No, regular direction. I don't think the reversed blade applies to foam like you'd cut acrylics.
I would be interested in seeing how you are setting up your hot-wire cutter.
As soon as the transformer arrives I'll post some details.
Yes - and basically I'm doing that. It is hard to tell from the picture, but when you walk up to the corner the seams are staggered in a way that doesn't have a direct path "in".On your outside corners, would a reverse stagger joint offer up more seperation?

Friday, September 23: Took another day off.
Made some progress this time around! Weather was a bit humid and filled with the threat of rain, but only got a few small sprinkles midday.
Both layers up on the back:

"Finished". Not really finished - I have to install furring strips every 24", but this is enough to move onto the side:

This is where I ended the day:

As you can see, the 3" furring strip stops 8" from the door - I'm going to install a picture frame of 8" wide plywood around the door. It will be at the same plane as the furring.
My hope is to work a bit later Saturday - and get this side "completely" done. With the one condition that I use as little strapping as possible - because I can install the furring strips from a ladder, as I really need to finish the perimeter so I can put the foam on the roof.
Fun times ahead!

Made some progress this time around! Weather was a bit humid and filled with the threat of rain, but only got a few small sprinkles midday.
Both layers up on the back:
"Finished". Not really finished - I have to install furring strips every 24", but this is enough to move onto the side:
This is where I ended the day:
As you can see, the 3" furring strip stops 8" from the door - I'm going to install a picture frame of 8" wide plywood around the door. It will be at the same plane as the furring.
My hope is to work a bit later Saturday - and get this side "completely" done. With the one condition that I use as little strapping as possible - because I can install the furring strips from a ladder, as I really need to finish the perimeter so I can put the foam on the roof.
Fun times ahead!
cosmo52
Well-known member
Great looking build.
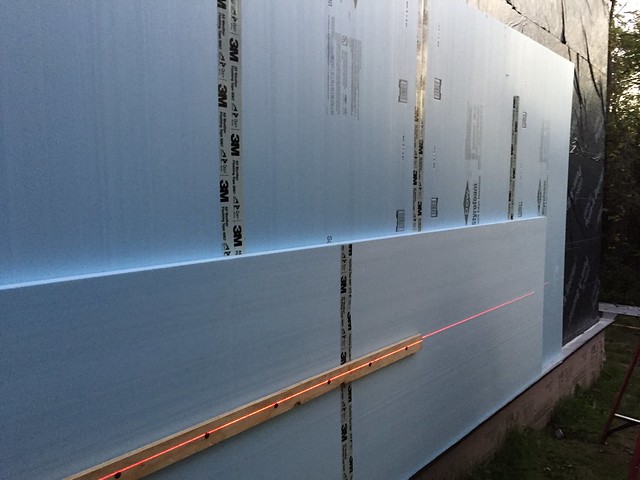
Saturday, September 24: Didn't quite finish, but am close. Installing foam on this side has been quite tedious.
Each layer must be taped to prevent air infiltration.


As you can see I haven't fully taped everything:

I made a miscalculation with the flashing tape, and am running out. I have more on order, but Amazon seems to be out of stock and they have the best prices.
My laser level isn't bright enough (even with laser enhancing goggles), nor can I get it high enough, so I'm back to using a level:

1/2 a stack inside gone:

I should have enough tape to finish the one side, rain Monday, and then Tuesday finish taping it.
Each layer must be taped to prevent air infiltration.
As you can see I haven't fully taped everything:
I made a miscalculation with the flashing tape, and am running out. I have more on order, but Amazon seems to be out of stock and they have the best prices.
My laser level isn't bright enough (even with laser enhancing goggles), nor can I get it high enough, so I'm back to using a level:
1/2 a stack inside gone:
I should have enough tape to finish the one side, rain Monday, and then Tuesday finish taping it.
Sunday, September 25: "Finished" the side of the barn! Again, by finished I'm strictly talking fitting the foam and set enough not to fly off. I still have quite a bit to do - finish taping (when more tape arrives) and put all of the furring stirps on, along with other repetitive tasks.
This is a mistake that cost me time and could have been avoided had I referred to my CAD file:

See that angle on the top? I was supposed to let the top edge be square.
First layer complete:

After finishing the second layer, I started to put the eave boards on:


What those pictures don't show is a 12" piece of flashing that covers the foam and ties in with the roof. I'll have to add some flashing tape to that, but it is enough I think to "waterproof" the top of the wall assembly.
The eave board makes up a box frame which the overhang will eventually connect to. It will tie into roof girts which rest on foam, so while some downward pressure will be exerted on the screws, it should be mostly supported by 2x4's laying on top of the roof foam.
This is a mistake that cost me time and could have been avoided had I referred to my CAD file:
See that angle on the top? I was supposed to let the top edge be square.
First layer complete:
After finishing the second layer, I started to put the eave boards on:
What those pictures don't show is a 12" piece of flashing that covers the foam and ties in with the roof. I'll have to add some flashing tape to that, but it is enough I think to "waterproof" the top of the wall assembly.
The eave board makes up a box frame which the overhang will eventually connect to. It will tie into roof girts which rest on foam, so while some downward pressure will be exerted on the screws, it should be mostly supported by 2x4's laying on top of the roof foam.
Last edited:
Monday, September 26: Got home late. I learned a few things from the other side, will hopefully avoid a few mistakes I made.

This is all I got done - I switched the layers around from what I did on the other side. The first layer is 4', 8', 2'. The front layer is 8' + 6'. Additionally, I'm trying to use full sheets of foam and cut openings rather than trying to cut narrow pieces.

The foam piles shrink:

I'm expecting rain W-Sunday. I'm tempted to use one of the tarps as a sort of makeshift roof, but that would probably not work all that well, and I don't know how I'd tie it down.
This is all I got done - I switched the layers around from what I did on the other side. The first layer is 4', 8', 2'. The front layer is 8' + 6'. Additionally, I'm trying to use full sheets of foam and cut openings rather than trying to cut narrow pieces.
The foam piles shrink:
I'm expecting rain W-Sunday. I'm tempted to use one of the tarps as a sort of makeshift roof, but that would probably not work all that well, and I don't know how I'd tie it down.
Blackhawks63
Well-known member
It's foam board! You don't need to be so danged precise. Also it up, tape and trim the excess. You're going to cover it up and it's silly to be dinking around with a level. Take it from a fellow craftsman who is focused on high quality. You are getting bogged down and need to increase your speed. It will still be a first-class job that you can be proud of and your psyche will thank you later my friend!
Sent from my QTAQZ3 using Tapatalk
Sent from my QTAQZ3 using Tapatalk
camaross0002
New member
It's foam board! You don't need to be so danged precise. Also it up, tape and trim the excess. You're going to cover it up and it's silly to be dinking around with a level. Take it from a fellow craftsman who is focused on high quality. You are getting bogged down and need to increase your speed. It will still be a first-class job that you can be proud of and your psyche will thank you later my friend!
Sent from my QTAQZ3 using Tapatalk
I have to say i agree. But get that thing enclosed everything is calling for a bad winter this year don't want to see all that work ruined. Wish I had your patience.
matt_i
Well-known member
Wow, peel and stick city ") I put that stuff on my roof edges (only) and really hated it after the very first sheet, but I got better at it. That's an entire building's worth!
I put that stuff on my roof edges (only) and really hated it after the very first sheet, but I got better at it. That's an entire building's worth!
I feel like you're going to be able to heat this with 4 lightbulbs in the dead of winter when it's all finished.
Looks good, looks like you are picking up the pace working late, etc. Should be just enough time to get it finished up by snow-season.
I put that stuff on my roof edges (only) and really hated it after the very first sheet, but I got better at it. That's an entire building's worth!I feel like you're going to be able to heat this with 4 lightbulbs in the dead of winter when it's all finished.
Looks good, looks like you are picking up the pace working late, etc. Should be just enough time to get it finished up by snow-season.
Saturday, October 1: After several horrible horrible days (of rain), I had some time to work on the barn, or so I thought. I agreed to help with a metal drive and spent most of the day driving with a trailer picking up ($22) worth of metal scrap. This was when I thought it would rain Saturday.
I ended up getting to see an old barn from the 1800's, and cut several boards for the next day:


After cutting these, 15 minutes later it decided to pour for 30 minutes:

I ended up getting to see an old barn from the 1800's, and cut several boards for the next day:
After cutting these, 15 minutes later it decided to pour for 30 minutes:
Sunday, October 2: "Finished" the side. I put up just enough furring strips to keep the foam on.
I had to cut around each window. Next time I decide to build a barn like this I'll do it differently - hire somebody*:

Doing the top rows:

Slowly refining the system to putting these together:

Done!

*In all seriousness - I would install the foam before cutting the window holes, and then cut the window opening out through the layers of foam.
I had to cut around each window. Next time I decide to build a barn like this I'll do it differently - hire somebody
*:
Doing the top rows:
Slowly refining the system to putting these together:
Done!
*In all seriousness - I would install the foam before cutting the window holes, and then cut the window opening out through the layers of foam.
Also... this is my speed. I try to be precise when it comes to measurements even if things are off - even when I don't want to, I tend to take twice the time it should take a regular person. However, I have been refining my techniques to cut time where I find waste. This second side took less time, even though it took more days - this is because the weather was rainy for the past week.
Monday, October 3: Took another day off, taking Wednesday off too (I have a lot of vacation time, as I don't take vacations).
I didn't get quite as much done today as I should have. I spent the morning picking up furring strips and a few electrical supplies, put together the hot wire cutter:

Yes, it looks extremely dangerous. This part of the device is fairly safe, however. It is the business end that carries a shock hazard. Eventually I'll package this up, but just don't have the time.
This is the cutter I made:

It works - but is slow. It takes about 2 minutes to cut a board - not bad, but tedious. Also, though the foam board is "square" it isn't perfect - the middle of the boards is thicker, and my guide had trouble moving the full length.
I needed to refine my wire-holding setup, so instead of making a second guide I decided to cut the other side of the board with the saw. Messy and a pain, but I got all of the boards cut for tomorrow and Wednesday.

I didn't get quite as much done today as I should have. I spent the morning picking up furring strips and a few electrical supplies, put together the hot wire cutter:
Yes, it looks extremely dangerous. This part of the device is fairly safe, however. It is the business end that carries a shock hazard. Eventually I'll package this up, but just don't have the time.
This is the cutter I made:
It works - but is slow. It takes about 2 minutes to cut a board - not bad, but tedious. Also, though the foam board is "square" it isn't perfect - the middle of the boards is thicker, and my guide had trouble moving the full length.
I needed to refine my wire-holding setup, so instead of making a second guide I decided to cut the other side of the board with the saw. Messy and a pain, but I got all of the boards cut for tomorrow and Wednesday.


Blackhawks63
Well-known member
With all due respect you must get that foam board covered before winter or you will have an ungodly nightmare on your hands. You cannot let snow and ice hit that stuff for long before it is ruined. I feel your pain but get out of your comfort zone and start slapping that stuff up in a much faster way. Don't need to be that obsessive on foam board. Good luck
Sent from my QTAQZ3 using Tapatalk
Sent from my QTAQZ3 using Tapatalk
augustus
Well-known member
Maybe re-enlist your big *** tarp and make a temporary awning so you can work in the rain? Dunno, might be more work than its worth. It's looking good!


Sunday, October 9: Finished the front. I feel like this is going faster, due to a few things:
1) I have a process down for cutting the openings accurately with minimal measurements
2) Getting used to cutting foam
3) The rolls of 4" flashing tape are properly slit. I lost several hours per day to the 4" flashing when I did the side windows.

First layer done:


All screwed down:

Tomorrow I'm going to cut template boards for the roof (all four pitches).
Though it isn't really important for me to say this, my plan is essentially to finish the roof, order the metal panels (target date end of October, as I have to return the machine). While I'm waiting I will be putting the big tarp over the roof, and install leftover housewrap (the stuff I pulled down) over the girts. This will protect the girts from the elements (we won't get snow until at least end of November). By then the roof should be on, and I will have started on the trim and siding.
1) I have a process down for cutting the openings accurately with minimal measurements
2) Getting used to cutting foam
3) The rolls of 4" flashing tape are properly slit. I lost several hours per day to the 4" flashing when I did the side windows.
First layer done:
All screwed down:
Tomorrow I'm going to cut template boards for the roof (all four pitches).
Though it isn't really important for me to say this, my plan is essentially to finish the roof, order the metal panels (target date end of October, as I have to return the machine). While I'm waiting I will be putting the big tarp over the roof, and install leftover housewrap (the stuff I pulled down) over the girts. This will protect the girts from the elements (we won't get snow until at least end of November). By then the roof should be on, and I will have started on the trim and siding.
priesttherunner
Member
- Joined
- Feb 19, 2016
- Messages
- 17
Got a section cut view of the metal panel transition at the roof?
Panel type?
Nice work thus far!
Panel type?
Nice work thus far!
Not too sure I understand - do you mean a slice of the barn with all the layers? Or just the type of metal panel? I'm looking at a standing seam hidden fastener metal roof system, sold by a local company that manufactures it - they use this roller system:Got a section cut view of the metal panel transition at the roof?
Panel type?
Nice work thus far!
http://www.englertinc.com/1-1/4-integral-snap-lock-metal-roof-system-a1100.html
From what I can tell, they bend this profile in-house.


Thursday, October 13: Finished the hot wire foam cutter design and cut all the bottom angles of the roof foam.
It isn't clear in this photo, but I drilled a hole in the scrap plywood with a forstner bit, drilled a small hole from edge to edge, and inserted a piece of threaded rod. Washers and nuts inside of the hole keep the wire centered. The spring helps keep the tension on the wire as it heats up - when nichrome wire heats up it stretches (or rather loosens up).

It took about two minutes to cut the angle per board - this does not include the time it takes to move the board into position to cut. Spent most of the day cutting foam.

It isn't clear in this photo, but I drilled a hole in the scrap plywood with a forstner bit, drilled a small hole from edge to edge, and inserted a piece of threaded rod. Washers and nuts inside of the hole keep the wire centered. The spring helps keep the tension on the wire as it heats up - when nichrome wire heats up it stretches (or rather loosens up).
It took about two minutes to cut the angle per board - this does not include the time it takes to move the board into position to cut. Spent most of the day cutting foam.
Friday, October 14: Spent the day cutting the angle for the foam at the very top pitch, and cut the board to length for the first layer of roof foam.
Hopefully this is a better picture of the cutter:

Am I happy with the design? Sort of - this is the second profile I made, and the same design. I wish I had made it possible to change the angle with some slots and wingnuts/hanger bolts. The other alternative was some sort of carriage system that allowed 1" of travel for both ends of the wire. In the end, since I only needed two different angles, I decided to cheat and make fixed designs. The only other change I'd make would have been to add a small piece of tube around the threaded rod so the wire would slip around it with ease.
Hopefully this is a better picture of the cutter:
Am I happy with the design? Sort of - this is the second profile I made, and the same design. I wish I had made it possible to change the angle with some slots and wingnuts/hanger bolts. The other alternative was some sort of carriage system that allowed 1" of travel for both ends of the wire. In the end, since I only needed two different angles, I decided to cheat and make fixed designs. The only other change I'd make would have been to add a small piece of tube around the threaded rod so the wire would slip around it with ease.
Saturday, October 15: First layer of foam was installed! Had a beautiful day, cloudy and dreary at first but the weather improved by the time night rolled around:
That board I installed acted as a stop for the first layer - all that holds the foam on is gravity and tape:

I wish I knew how to be more efficient with the boards, essentially I lifted each one up one at a time:


Other side:

Nearly done:

The roof has three angles to cut - bottom, mid, and top. I realized based on some quick tests that there is no way I'd get the mid angles to meet up satisfactorily, and because of how long the other angles took to cut, wasn't worth the hassle. I did square cuts on the middle angles, and used spray foam to fill the gap:

The danger here is that the spray foam and roof foam will shrink enough to separate - I'm willing to take that risk. In five or ten years I can take the assembly apart and investigate
View from above:

Again, just tape and gravity.
That board I installed acted as a stop for the first layer - all that holds the foam on is gravity and tape:
I wish I knew how to be more efficient with the boards, essentially I lifted each one up one at a time:
Other side:
Nearly done:
The roof has three angles to cut - bottom, mid, and top. I realized based on some quick tests that there is no way I'd get the mid angles to meet up satisfactorily, and because of how long the other angles took to cut, wasn't worth the hassle. I did square cuts on the middle angles, and used spray foam to fill the gap:
The danger here is that the spray foam and roof foam will shrink enough to separate - I'm willing to take that risk. In five or ten years I can take the assembly apart and investigate
View from above:
Again, just tape and gravity.
