To avoid these ads, REGISTER NOW!

Between 265 & 485 SQ/FT Basement Bike Cave and 3D Printing Workspace

Workspaces sized between 265 and 485 squarefeet.

Griff79

Well-known member
Joined
Jun 9, 2018
Messages
584
Location
Denver
This is a guy I can hang out with! A Green Bay Packer waste basket, a **** ton of really cool bikes 🚴‍♂️, a pool table, sweet Golden Retriever and an old school red Coleman cooler, just like the one I grew up with. Keep up the good work! :thumbup:
Regards,
Griff
 
Last edited:
To avoid these ads, REGISTER NOW!
OP
K

kppolich

Well-known member
Joined
Apr 7, 2020
Messages
348
Location
Eastern Iowa
OP
K

kppolich

Well-known member
Joined
Apr 7, 2020
Messages
348
Location
Eastern Iowa
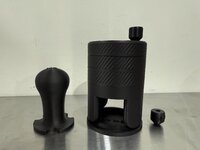
I remixed the Bambu rear 'poop' catcher and made a smaller version, 2 magnets, etc.
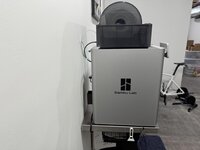
I also replaced the stock power cable with a 90 degree end to save on some space.

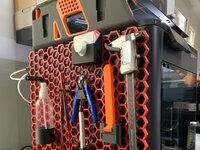
Later today I'll be working on a side mount grid for some simple tool storage to replace my current 2 tool mounted on magnets on the left hand side.

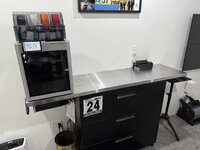
Current Setup
bAtHsI5.jpeg
u8O07ud.jpeg
6bFB9fj.jpeg

Inspiration for grid, mine will be more discreet.
2024-09-03_785826f406f9.jpg
 
Last edited:

Xti04

Well-known member
Joined
Nov 11, 2016
Messages
2,345
I did hex grid for our printer. Wasnt thrilled with it though it does look cool.
 

jonshonda

Well-known member
Joined
Jul 17, 2017
Messages
4,749
Location
Wisconsin
You are really slacking on the 3D printed goodies!! Time to step it up and start stacking those empty spools! Haha
 
OP
K

kppolich

Well-known member
Joined
Apr 7, 2020
Messages
348
Location
Eastern Iowa
Updated HWS layout
zibDyBP.jpeg


The other weekend project was for my wife. She wanted a place to hang her robe when it's time for bed. We have a barn door, so instead of making more holes in the wall, I went with this option. Yes, the door can fully open without hitting the hook.
LHhXJFR.jpeg
 
OP
K

kppolich

Well-known member
Joined
Apr 7, 2020
Messages
348
Location
Eastern Iowa
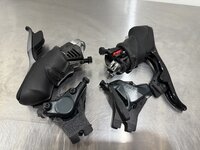
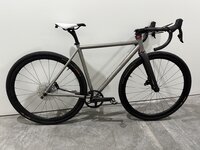
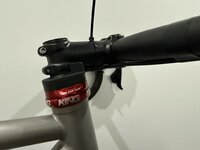
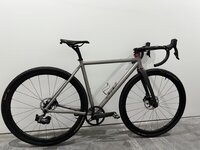
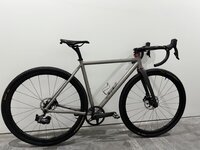
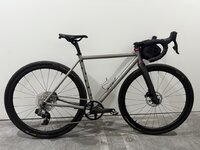
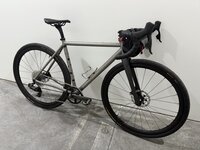
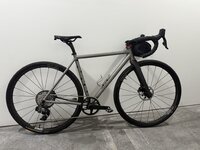
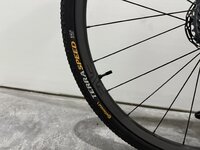
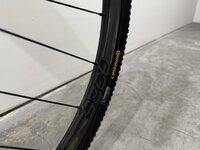
So I'm building my wife a new bike and scored a Walty Titanium Frame, Enve Allroad In Route Fork, Chris King Aeroset 3 headset for $850 to get things started. Then came a smoking deal on a set of Roval Terra C wheels with 40mm Terra Speed tires. I ended up moving over her cockpit and crankset/chainring and scored a nice deal on some Rival AXS Shifters/Calipers and XPLR RD + Cassette.

Only small hiccup I was the front rotor size that the Enve fork could support. I caught an error on their website, as it said it could support a 140mm rotor or 160mm rotor. I run 140mm's on all of my bikes (except MTB) so I can easily swap wheel sets. between everything.

Urz0HTq.jpg

Anyway, back to the project here -

  • Ordered a black power mimic 143 saddle
  • Added headset spacer
  • Installed shrink wrap and training the hoses for future final install
  • Ordered long (120 link) rival AXS chain for 46Tx11-44 gearing
  • Installed 140mmRotors/Calipers/Black Ti Caliper bolts


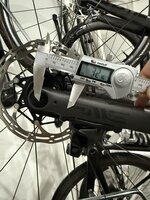
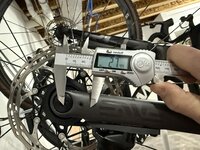
Issue: The Enve AR In Route Fork says it will support 140 or 160mm rotors, but I measured the caliper plate mounting holes and there's no way the caliper will get enough bite on the 140mm rotor, so my options are:

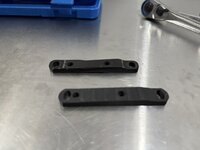
1.) 3D Print an adapter
2.) Run 160mm rotor up front.

Will post an official answer from Enve when I get one on why it was advertised to support 140 or 160.

Pics:
mBhWujK.jpg
sKUIuvd.jpg
CjmWvE2.jpg
ujnS9Md.jpg
 
OP
K

kppolich

Well-known member
Joined
Apr 7, 2020
Messages
348
Location
Eastern Iowa
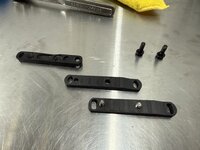
3D printer to the rescue once again.....
Just doing this for Proof of Concept before either getting one CNC'd out of aluminum or just running a 160mm rotor up front.

o56qPa8.jpg

Anyway, the spacing between the lowest caliper plate mounting hole and center of the Thru axle is supposed to be 23.5mm
Shown here:
https://support.enve.com/hc/article_attachments/25100221075355
4ZbSBvi.png

With the original flat mount adapter installed, it was almost 33mm
BAhVTFt.jpg

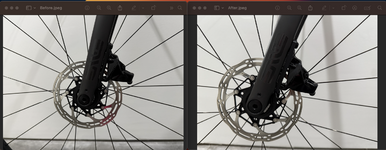
Before:
ujnS9Md.jpg

Here's how it looks as far as brake rotor consumption with the new flat mount adapter I designed and printed.

1QxvI42.jpg

After
Much closer to that 23.5mm now and much better pad/rotor contact
eDAqZB8.jpg

I'm doing some fine tuning to get the spacing for the plate bolt and caliper itself to clear. Pretty tight on v1 shown here:
7rwikhF.jpg

Before/After:
rst1ijV.png
v2 almost there, just need a little more clearance for the caliper mounting bolt

From top to bottom
Original
v1
v2 with better rounded corners

aECZwxT.jpg

Underside of v2
VVCyyWt.jpg

v2 Mounted Countersunk.
ubJVSXX.jpg
Edit: Yep - just ordered a 160mm from Elevate Cycling to put this to bed.
I will post the reply I get from Enve though on this issue.


Here's the response from Enve:
y0x5rfD.png
 

tweidman

Well-known member
Joined
Dec 1, 2009
Messages
505
Location
Ackermanville, Pa.
I'm not sure if you have used larger front rotors on other bikes? I do, I run a larger front rotor on all my mountain bikes, and I like it, it feels completely normal, but I think the extra front braking power is an advantage and it seems to keep me from locking the rear brake as often.
Btw, nice build, I'm not familiar with Walty, but it sounds like you got a deal on it.
 
OP
K

kppolich

Well-known member
Joined
Apr 7, 2020
Messages
348
Location
Eastern Iowa
I'm not sure if you have used larger front rotors on other bikes? I do, I run a larger front rotor on all my mountain bikes, and I like it, it feels completely normal, but I think the extra front braking power is an advantage and it seems to keep me from locking the rear brake as often.
Btw, nice build, I'm not familiar with Walty, but it sounds like you got a deal on it.
I run 160's on my MTB, but my goal for all other bikes in the Haus is to keep 140mm on front and back so I can easily swap all the whelsets between the bikes that aren't mtb.

Yes, I know it takes literally 30 seconds to swap out a center lock rotor, but this is my wife's bike and I'd rather not have her bug me to swap the front rotor between wheel sets each time she wants a dedicated road wheel set on there.

I did end up buying a 160mm for this and Enve was fan-tastic!

They gave me a code that was supposed to be 30% off but ended up being 100% off so I picked up another All-Road fork that will be used 100% with my Enve CX Tubulars on my new race bike being built soon by Paul at Rock Lobster.
enve.jpeg

Bought it before they knew they made a mistake, and it'll be paint matched the same Flat Barney Purple color my Steel SSCX bike will be.

Color example:9020ea459f18fdb85976f2775d2f1f79.jpg


Build will be done in August, just in time for Cross'

-Rock Lobster Steel Frame
-Paragon Machineworks Sliding Rear Dropout
-56.5cm top tube
-Enve AR In Route Disc Fork
-Enve In Route 1 Piece cockpit
-Enve 27.2mm Seatpost
-SRAM Red AXS D1 Levers
-SRAM Red AXS D1 172.5mm Crankset, 42T, Quarq Powermeter
-Enve CX Tubulars with Baby Limus
-Chris King Aeroset Headset for internal hose routing
-XTR 9100 Pedals
-S-Works Power Arc 143mm Saddle
 

trytochaseme

Well-known member
Joined
Sep 3, 2014
Messages
447
Location
616 in the Mitten
Ive had quite a few enve products and always been very happy with them. Awesome to see that customer service. You want to share that discount code??? HAHA just kidding. Your wife will have a sweet ride, that is a steel for $850 when that headset alone is about half that brand new.
 

tweidman

Well-known member
Joined
Dec 1, 2009
Messages
505
Location
Ackermanville, Pa.
Have you ever had an issue with throwing that belt in muddy conditions? We lose our timing belt on the tandem a bunch in wet gravel, but maybe that is because of the length of the belt?
 
OP
K

kppolich

Well-known member
Joined
Apr 7, 2020
Messages
348
Location
Eastern Iowa
Have you ever had an issue with throwing that belt in muddy conditions? We lose our timing belt on the tandem a bunch in wet gravel, but maybe that is because of the length of the belt?
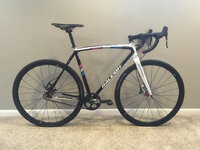
That's not my build. Just a photo of the paint color my bike will be running. I won't be running the Gates Carbon Belt Drive either.

However, I have experience running a belt drive sscx rig in the past.

2015-raleigh-rxs-belt-drive-37711_13.jpg

This was a few years ago, and I just hated the Eccentric Bottom Bracket used to set the belt tension. This is why I'm going with the Paragon MachineWorks sliding rear dropout to set chain tension on the Rock Lobster.

The EBB was constantly slipping, I tried 3-4 different EBBs without success. I also broke a belt my first ride on it so I haven't had the best experience with the whole Gates family of Products.
YMMV
 
OP
K

kppolich

Well-known member
Joined
Apr 7, 2020
Messages
348
Location
Eastern Iowa
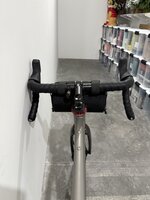
New Saddle arrived, have the brake hoses cut and connected.
Tomorrow I'll be bleeding the brakes and wrapping the bars.
Bar tape is Wolftooth 2.5mm, black

I also sprayed the center section of the handlebars matte black today to cover up the Fizik logos.

Then I'll use the SRAM Chain sizing tool to size the chain. Yes, I'll need to re-install the cassette first.

https://axs.sram.com/guides/fullmount/chain/calculator

King Ti Cage is nice as usual!

jADgyc9.jpg
8rufFtV.jpg
f0qwJci.jpg
 

Attachments

  • f0qwJci.jpg
    f0qwJci.jpg
    594.9 KB · Views: 4
  • 8rufFtV.jpg
    8rufFtV.jpg
    688.9 KB · Views: 2
  • jADgyc9.jpg
    jADgyc9.jpg
    651.2 KB · Views: 5
OP
K

kppolich

Well-known member
Joined
Apr 7, 2020
Messages
348
Location
Eastern Iowa
Calling this build Done, just toying with chain length after setting up with SRAMs recommendation vs what I'm noticing on the bike, I'll probably remove a few links today as I fine tune otherwise ready for the road.

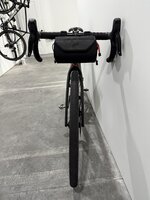
Likely losing the King Stainless Cage/Flask and looking for a sleek top tube mount bag instead of the previous Post Co Bar Bag to keep the tops free of clutter.

Sitting just north of 20.4lbs as pictured

85Ts457.jpg

Wrapped up, chain cut by 2 links, chain CeramicSpeed UFO drip waxed, King Flask cage removed, PostCo bar bag on and cockpit finished off with the Spurcycle bell.

6ujCOj9.jpg
1g6HwXs.jpg
drVGjYN.jpg
 
To avoid these ads, REGISTER NOW!
OP
K

kppolich

Well-known member
Joined
Apr 7, 2020
Messages
348
Location
Eastern Iowa
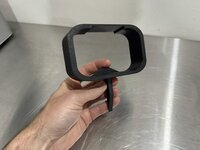
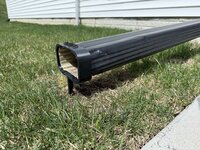
Outside project today, this time I needed to print a replacement gutter downspout riser as the one I made of PLA+ finally gave way after 18 months of sun, snow, and abuse.

PETG this time around, I like these as it keeps the downspouts off the grass and helps disperse the water during heavy rains while reducing washout.

Uwkpucs.jpeg

hNYVCtO.jpeg
 
OP
K

kppolich

Well-known member
Joined
Apr 7, 2020
Messages
348
Location
Eastern Iowa
Little quick Friday print to clean up my closet.

Previously, I had 5 Apple Watch bands, 1 always installed on my watch and then 4 on the hanger in my closet. I recently downsized and a band and had my extra wedding rings propped on top as well so I figured I would re-print my watch band holder to hold 3 bands and then add a peg to hang some extra rings on.

I also wanted to adjust the position relative to the two 3D printed hat hooks I already had on the wall as well.

Before:
0eySrXs.jpeg

After:
BG1a9fk.jpeg

I tell ya, these 4 for $12 rings are a heck of a lot more affordable than my wife's engagement ring and wedding band.....but you know how it goes Gents ---'Happy Wife, Happy Life'


and our dog turned 3 this week so she got her first hamburger fresh off the grill.

Happy Birthday Marley!
tempImagesjS62F.jpg
 
Last edited:
OP
K

kppolich

Well-known member
Joined
Apr 7, 2020
Messages
348
Location
Eastern Iowa
MTB Sunday

Found a nice deal on a 8 Bolt Quarq so that meant a new 34T chainring as well as my previous chainring was direct mount.

Of course once I got it installed the chainline, specifically the clearance on the DriveSide between the chainring and chain stay was too close for comfort with the current DUB SL Spindle.

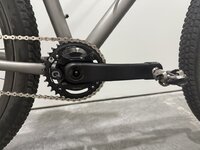
That meant ordering a new SRAM XX1 Dub Wide crankset to get 6mm of additional width (3mm each side).


vhhBf6t.jpg
 
OP
K

kppolich

Well-known member
Joined
Apr 7, 2020
Messages
348
Location
Eastern Iowa
Monday organization time.

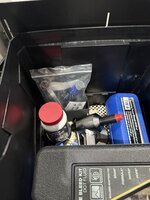
First up was a little toolbox organization cubby for my disc brake bleeding tools and DOT Fluid. This keeps things stable and organized in the bottom of my bike specific toolbox. I haven't joined the Toolbox wars clan yet...

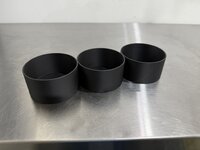
Then I have these 3 spray bottles that I usually keep handy for working on bikes. One is 99% IPA, the other is simple green/water or pinesol and water, and the 3rd is usually just soapy water for general cleaning.

Anyway, they live in the back of my cabinet and always tip over if I open the drawer too fast. 1 hour later I had a magnetic tray for them to live in with some glued on magnets to keep the whole thing stable. I guess I could have just glued the magnets to the bottles directly but not the orientation of the bottles can stay independent from the tray.

Not bad for 90 minutes and 2 prints at the end of a Monday.

Pics!
4uZCBjK.jpg
haenzOT.jpg
j2NMZuZ.jpg
QcB9yRN.jpg
ipHMVKt.jpg
 
OP
K

kppolich

Well-known member
Joined
Apr 7, 2020
Messages
348
Location
Eastern Iowa
Updates:
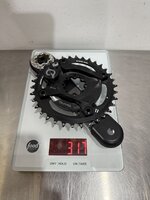
-New SRAM Dub Wide XX1 Eagle Cranks arrived and they are perfect to fix the chainring clearance issues with the 34T due to the Quarq Offset.

I did custom 3D Print a DS spacer as the SRAM Instructions called for a 3mm outer left spacer and 7.5mm outer right spacer with my BSA(73) bottom bracket shell.

The 7.5mm was too wide and didn't allow the DS Crank arm to fully tighten before binding with the preload collar. I printed off a 5mm version and it's perfect.

Fresh CrankSkins to finish off the look and keep things stealth should make for a fun ride this summer!

Pics:
a4LhYX4.jpg
xe8X5Jf.jpg
SS5RmEk.jpg
7K61xi8.jpg

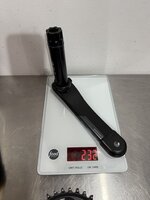
XX1 Dub Wide spindle is longer than the standard MTB Dub
b7QCFv1.jpg
X4wgw6W.jpg

vJ2gUD2.jpg
lA03oF1.jpg
Xs3uOMM.jpg
MseUnT7.jpg
 
OP
K

kppolich

Well-known member
Joined
Apr 7, 2020
Messages
348
Location
Eastern Iowa
A few updates to another bike in the house today too:

-I ordered some different wheels for this bike to match the other wheels in the house. Enve AG25 (used of course, just like everything else) with Enve Alloy hubs and XDR Freehub, so these Roval Terra C's with DT370 hubs/shimano free hub body and Apex 11-44 cassette will be up for grabs soon if anyone is interested in some 700c, wide, carbon wheels with DT hubs and runs Shimano.

-My wife thought the bike was a little bland looks wise. I call it timeless, but my attempt to liven it up a bit with some black polka dots on the seat tube. These were left over vinyl circles from the CrankSkins crank arm protectors I've installed on all of the bikes in the house to protect the arms and also cover up the bad branding SRAM typically plasters on them.

Wheels should be here Monday!


Pics of polka dots:
JXgIGM9.jpg
cW4xdTW.jpg
 
Last edited:
OP
K

kppolich

Well-known member
Joined
Apr 7, 2020
Messages
348
Location
Eastern Iowa
2 updates

1.) New wheels are here for my wife's bike, just waiting on the Force 10-44 XPLR cassette I ordered (used) and some matte black wheel decals from Silk Graphics to replace the stock grey versions.

12DAruv.jpeg


Then I installed a rubber mulch tree ring and metal free ring around the tree in our front yard. The old mulch pile that was there when we moved in was a pain to mow around and just didn't look great. Plus this should allow for some more water to get to the tree as well.

Next up, moving the two stabilizing stakes and getting them in line with the tree itself.
LwDAamS.jpeg

Cycling related, I have a Time Trial tomorrow night and I'll be on my Tarmac SL7. It's. nice 10 mile TT, 5 miles out - 5 miles back and is a monthly thing all summer with 4 occurrences from May-August so its a nice ~20-24 minute benchmark/FTP test.

Here's the Tarmac SL7 stripped down and setup for a full on roadie 10 mile TT

Enve 4.5 SES wheels w/ DT180 hubs
Roval Aero cockpit (38mm x 115mm)
No Bottle cages, light mounts, etc
50/37 Gearing up front and 10-28 cluster out back.


tempImagewQRiV7.jpg
 
Last edited:

Xti04

Well-known member
Joined
Nov 11, 2016
Messages
2,345
2 updates

1.) New wheels are here for my wife's bike, just waiting on the Force 10-44 XPLR cassette I ordered (used) and some matte black wheel decal from Silk Graphics.

12DAruv.jpeg


Then I installed a rubber mulch tree ring and metal free ring around the tree in our front yard. The old mulch pile that was there when we moved in was a pain to mow around and just didn't look great. Plus this should allow for some more water to get to the tree as well.

Next up, moving the two stabilizing stakes and getting them in line with the tree itself.
LwDAamS.jpeg

Cycling related, I have a Time Trial tomorrow night and I'll be on my Tarmac SL7. It's. nice 10 mile TT, 5 miles out - 5 miles back and is a monthly thing all summer with 4 occurrences from May-August so its a nice ~20-24 minute benchmark/FTP test.
I used to do a time trial out in Oak Ridge TN. 8 miles pretty flat, I loved it. Its fun because its at your pace but at the same time its such a push to go as hard as you can for the length on the trial. I need to get my **** back on a bike and get back after it.
 

jonshonda

Well-known member
Joined
Jul 17, 2017
Messages
4,749
Location
Wisconsin
The attention to detail on tire logo placement is certainly amusing, and a key element of bike building! Haha

Now if you really want to get into the weeds, when photographing the bike the chain should always be shifted to the highest gear, with the tire logos (valve stems) and crank arms at the 3-9 position.
 
OP
K

kppolich

Well-known member
Joined
Apr 7, 2020
Messages
348
Location
Eastern Iowa
Yeah I'm a snob, but not that big of a snob so just the crank arms have to be aligned for me to be happy with a bike photo.
Nobody rides in the highest gear anyway!
 
OP
K

kppolich

Well-known member
Joined
Apr 7, 2020
Messages
348
Location
Eastern Iowa
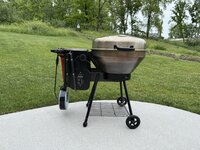
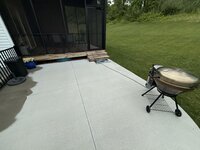
A little Recteq project today as I was finally sick enough of winding up the extension cord after each use to finally get to something I've been looking to do.

I started with this rectractable extension cord reel from Amazon.
615Y8RoxrJL._AC_SL1500_.jpg

Then I cut both ends off and installed my own ends to flip flop the direction of male/female in order to keep the female end at the grill and have the male end extend out so it can be plugged into the indoor outlet within our screened in porch.

15 minutes and $40 later I still need to make 1 quick trip to Lowes tomorrow to grab some larger bolts to fix it to the bottom of the grill body. For now, some small machine screws are doing the job. The grill lives under a pretty nice cover year round so this should suffice and I'm happy with the overall look to blend in with the RecTeq Bullseye itself.


BbsvQLx.jpeg

xWyvqd8.jpeg
Krk5jHc.jpeg
NF1EN8e.jpeg
He7uy6j.jpeg

The long run inside ~20-25 feet.


OwRHrOV.jpeg
 

Xti04

Well-known member
Joined
Nov 11, 2016
Messages
2,345
That's a wrap on the walty

Before:
5seUTps.jpg

After:
utHBeCR.jpg

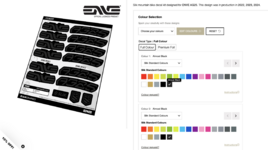
Decal Details:
MOOPIaH.jpg
9CYkWCQ.jpg
moxRhhi.jpg
Nice work on the bike. I drug my gravel bike down after looking at your build ( and stepping on my wifes scale) and realized I need to get my **** back on it and try to shed some pounds. Pulled it down, sealant arrived this morning for tubless setup and hopefully tonight or tomorrow I can get the tires redone and swapped out, and bike cleaned up to ride.
 
OP
K

kppolich

Well-known member
Joined
Apr 7, 2020
Messages
348
Location
Eastern Iowa
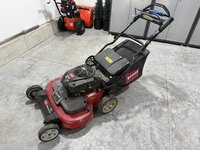
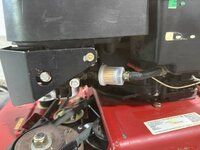
Toro Timemaster update - replaced Air Filter, Spark Plug, and Fuel Filter.

I gave the deck undercarriage a good scrape and the body a quick wipe down and blasted some air compressor air everywhere to clean out the grass, dust, and buildup.

Parts coming:
- Front Heigh Adjustment Lever
- Side discharge cover
- Undercarriage Trailing Cover
- 1 new bolt as a snapped one removing the plastic
- New electric start 12v battery
- Oil for an oil change before first start attempt
- Starting fluid

tempImagehs5Olu.jpg

tempImageq0CQD7.jpg
tempImage4DeokK.jpg
 
OP
K

kppolich

Well-known member
Joined
Apr 7, 2020
Messages
348
Location
Eastern Iowa
Started right up after an oil change and squirt of starting fluid. Likely needs a tune up but I’ll do the rest of the items on my list and then repaint the deck.

Will be exciting to get the new battery in and charged up to test the electric start and starter out.

I also gave everything a power wash today and it’s looking great. When I ran it a bit in the driveway it did bog down a little when engaging the blades the first few times which leads me to believe a proper tune up is in order.

I should have asked the guy I bought it from when the last time it ran, but for the price I wasn’t hanging around any longer.

I let it run a while and will re-check the oil. That’s all until more parts show up this weekend.
 

loganb

ALLIANCE MEMBER
Joined
Dec 29, 2011
Messages
5,606
Location
Omaha, NE
$50 Marketplace score arrived this afternoon. Seller said it didn't run, I didn't ask questions and loaded it up.

Stay tuned as we replace a few parts and see what we can do.

tempImageOg5Cmx.jpg
I'd be all over that lawn mower as well at that price! I have several neighbors with them who all love them. If they had a 36" wide option I'd probably own one
 
Last edited:
To avoid these ads, REGISTER NOW!
Top Bottom