To avoid these ads, REGISTER NOW!

BEFORE & AFTER....A Tool Polisher's Haven

To avoid these ads, REGISTER NOW!

Firstram

Well-known member
Joined
May 16, 2017
Messages
1,390
Very nice! You do know that if you keep this up you will need more peg board.
 

eric.holmslice

Well-known member
Joined
May 28, 2015
Messages
99
BEFORE & AFTER....A Tool Polisher's Haven

That looks sweet! Probably just fills tires or a soccer ball. I might have to hunt one down,


Sent from my iPhone using Tapatalk
 

rickhigginshtbr

Well-known member
Joined
Aug 7, 2012
Messages
1,551
Location
Lower Bucks, PA
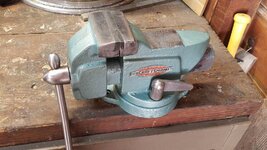
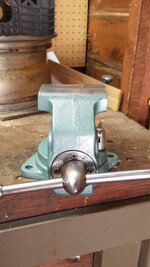
Craftsman 283.1842 air compressor (https://thumbs.worthpoint.com/zoom/...ng-air_1_affca21d5bfde5362151ed1034a33e1b.jpg)

This air compressor is at a local antique store, and I found one on FB I think. Any ideas what it might be used for? I want to restore them, I think it would look amazing, but I also want to have a use for it.

Some of them were marked as a paint sprayer. But it doesn't shoot air out constantly, more like puffs. I bought one a few years ago and got it running, but haven't played much with it. To give you an idea, I paid $50, and once in a blue moon one pops up on CL around Philly for about that price.
 

Dogwoodfarms

Active member
Joined
Aug 8, 2018
Messages
28
Location
Canton GA
Some of them were marked as a paint sprayer. But it doesn't shoot air out constantly, more like puffs. I bought one a few years ago and got it running, but haven't played much with it. To give you an idea, I paid $50, and once in a blue moon one pops up on CL around Philly for about that price.

Awesome! That's what I was wanting to know. I was curious how it worked as it didn't have a tank. I was hoping it would be enough to paint some smaller tools, more detail work. I like my vintage tools to be functional. I guess even if it's used to pump up small tires it still has a function, other than hopefully looking amazing on the shelf.

Hope to polish up the metal and repaint the top and other areas with a high gloss red so it pops.

Thanks again for the info. Exactly the kind I was looking for.
 

rickhigginshtbr

Well-known member
Joined
Aug 7, 2012
Messages
1,551
Location
Lower Bucks, PA
Awesome! That's what I was wanting to know. I was curious how it worked as it didn't have a tank. I was hoping it would be enough to paint some smaller tools, more detail work. I like my vintage tools to be functional. I guess even if it's used to pump up small tires it still has a function, other than hopefully looking amazing on the shelf.

Hope to polish up the metal and repaint the top and other areas with a high gloss red so it pops.

Thanks again for the info. Exactly the kind I was looking for.

Anytime, I was actually going to use it for air brushing and adapt it down to 1/8" hose for that, but still haven't gotten around to it lol
 

Dogwoodfarms

Active member
Joined
Aug 8, 2018
Messages
28
Location
Canton GA
Anytime, I was actually going to use it for air brushing and adapt it down to 1/8" hose for that, but still haven't gotten around to it lol

Just watched a video of a guy restoring a compressor of similar style, no tank, older unit used for a spray gun. The gun he had was an older spray gun as well. I wonder if you have the proper gun it all works properly. The gun below is the "style" that he showed, obviously older but I would assume it would still work.
prod_1415466212


Here is the video


If I could get something like this to work for basic painting of my tools I would pay $50 all day.

Got a photo of your compressor?
 

don long

Well-known member
Joined
Mar 31, 2012
Messages
8,841
Location
southern california
I have a collection of those air brush compressors.
They all push very little CFM They were designed to do detail type of work with a finger sprayer

IMG_4785 by don long, on Flickr

Hope to see your resto to give me some incentive to clean up a few of mine

Thanks
Don
 

Slednut

Well-known member
Joined
Dec 20, 2012
Messages
2,550
Location
Washington state
I'm in the middle of a project car and the side trim was pitted and dented. It's aluminum and I've never polished anything in my life.

After not being able to find any trim that looked better I ordered an Eastwood polisher and buffing pads. I removed and straightened all the dents and then sanded off all the clear and tried to get most of the rock pits out.

I'm really amazed how they turned out. I still need to hand polish and re-clear them. I was about ready to weld up the 75 holes in the side of the car and not reinstall the trim.

Anyone have an opinion on what clear to use?
 

Attachments

  • IMG_0639.jpg
    IMG_0639.jpg
    119.5 KB · Views: 192

pdubss

Well-known member
Joined
Mar 16, 2013
Messages
72
Craftsman 5176 vise I touched up. I've been searching trying to find out who made these for Craftsman, so far to no avail. I'm happy with it!4b6ba3ffc498c1411dc55dc801e7b0e1.jpgb88ce7edc80ff27e605ad052c88218c3.jpg635d5c65c2ae72df119c52c99ef7df71.jpgf25ff9f9bababdb3dad344980f6547b1.jpge5d251a5ecb200817fdb10db45e8e1e2.jpg6e6f2e8e208c0ab636077e3d2844c0ee.jpga947e2edb6c70250e1033b17a9799956.jpg

Sent from my SM-G930P using Tapatalk
 

Attachments

  • 6e6f2e8e208c0ab636077e3d2844c0ee.jpg
    6e6f2e8e208c0ab636077e3d2844c0ee.jpg
    99.4 KB · Views: 9
  • 4b6ba3ffc498c1411dc55dc801e7b0e1.jpg
    4b6ba3ffc498c1411dc55dc801e7b0e1.jpg
    79.3 KB · Views: 3
  • b88ce7edc80ff27e605ad052c88218c3.jpg
    b88ce7edc80ff27e605ad052c88218c3.jpg
    80.7 KB · Views: 2
  • 635d5c65c2ae72df119c52c99ef7df71.jpg
    635d5c65c2ae72df119c52c99ef7df71.jpg
    69.8 KB · Views: 2
  • f25ff9f9bababdb3dad344980f6547b1.jpg
    f25ff9f9bababdb3dad344980f6547b1.jpg
    56.8 KB · Views: 2
  • e5d251a5ecb200817fdb10db45e8e1e2.jpg
    e5d251a5ecb200817fdb10db45e8e1e2.jpg
    80.8 KB · Views: 2
  • a947e2edb6c70250e1033b17a9799956.jpg
    a947e2edb6c70250e1033b17a9799956.jpg
    67.3 KB · Views: 2

don long

Well-known member
Joined
Mar 31, 2012
Messages
8,841
Location
southern california
I'm in the middle of a project car and the side trim was pitted and dented. It's aluminum and I've never polished anything in my life.

After not being able to find any trim that looked better I ordered an Eastwood polisher and buffing pads. I removed and straightened all the dents and then sanded off all the clear and tried to get most of the rock pits out.


Slednut
I'm really amazed how they turned out. I still need to hand polish and re-clear them. I was about ready to weld up the 75 holes in the side of the car and not reinstall the trim.

Anyone have an opinion on what clear to use?

I'm curious.
What process did you use to polish those moldings?
what car is your project?
 

Slednut

Well-known member
Joined
Dec 20, 2012
Messages
2,550
Location
Washington state
I'm curious.
What process did you use to polish those moldings?
what car is your project?

I have to apologize, I just noticed that this was a "tool" before and after thread.

Like I said I'm new to this, it's a 1970 Mercury Cyclone GT. The aluminum trim over the wheel wells were really dented up so the first thing I did was straighten them out, I then sanded them down with a DA using 150 sandpaper, this smoothed out the dents and rock pits it also removed the clear coat.

I then wet sanded them by hand starting with 220,then 320, 400 and finally 600 grit. I then polished them using the instructions from the Eastwood DVD that came with the buffer motor.
 

Attachments

  • IMG_0635.jpg
    IMG_0635.jpg
    92.6 KB · Views: 146
  • IMG_0636.jpg
    IMG_0636.jpg
    84.2 KB · Views: 155
  • IMG_0637.jpg
    IMG_0637.jpg
    81.2 KB · Views: 156
  • IMG_0599.jpg
    IMG_0599.jpg
    144.7 KB · Views: 157
  • P82A0776.jpg
    P82A0776.jpg
    110.5 KB · Views: 188

bubinga

Well-known member
Joined
Jul 26, 2014
Messages
12,744
Location
Bridgeport Ohio. (Across River From Wheeling WV)
I have to apologize, I just noticed that this was a "tool" before and after thread.

Like I said I'm new to this, it's a 1970 Mercury Cyclone GT. The aluminum trim over the wheel wells were really dented up so the first thing I did was straighten them out, I then sanded them down with a DA using 150 sandpaper, this smoothed out the dents and rock pits it also removed the clear coat.

I then wet sanded them by hand starting with 220,then 320, 400 and finally 600 grit. I then polished them using the instructions from the Eastwood DVD that came with the buffer motor.
Tool thread, but you polished the molding.
Close enough, I say.... [emoji56]

Sent from my MotoG3 using Tapatalk
 

bluebolt

Well-known member
Joined
Dec 28, 2008
Messages
5,435
Location
Benton LA
I have to apologize, I just noticed that this was a "tool" before and after thread.

Like I said I'm new to this, it's a 1970 Mercury Cyclone GT. The aluminum trim over the wheel wells were really dented up so the first thing I did was straighten them out, I then sanded them down with a DA using 150 sandpaper, this smoothed out the dents and rock pits it also removed the clear coat.

I then wet sanded them by hand starting with 220,then 320, 400 and finally 600 grit. I then polished them using the instructions from the Eastwood DVD that came with the buffer motor.


429 car?
 

bluebolt

Well-known member
Joined
Dec 28, 2008
Messages
5,435
Location
Benton LA
Craftsman 5176 vise I touched up. I've been searching trying to find out who made these for Craftsman, so far to no avail. I'm happy with it!6e6f2e8e208c0ab636077e3d2844c0ee.jpga947e2edb6c70250e1033b17a9799956.jpg

Sent from my SM-G930P using Tapatalk


You need more practice, let me send you 3 more to do! :lol_hitti


On a more serious note I think they may have been made by Rock Island.
 

Attachments

  • 6e6f2e8e208c0ab636077e3d2844c0ee.jpg
    6e6f2e8e208c0ab636077e3d2844c0ee.jpg
    96.1 KB · Views: 9
  • a947e2edb6c70250e1033b17a9799956.jpg
    a947e2edb6c70250e1033b17a9799956.jpg
    65.5 KB · Views: 9
To avoid these ads, REGISTER NOW!

Dogwoodfarms

Active member
Joined
Aug 8, 2018
Messages
28
Location
Canton GA
I have to apologize, I just noticed that this was a "tool" before and after thread.

Like I said I'm new to this, it's a 1970 Mercury Cyclone GT. The aluminum trim over the wheel wells were really dented up so the first thing I did was straighten them out, I then sanded them down with a DA using 150 sandpaper, this smoothed out the dents and rock pits it also removed the clear coat.

I then wet sanded them by hand starting with 220,then 320, 400 and finally 600 grit. I then polished them using the instructions from the Eastwood DVD that came with the buffer motor.

Tool or not, great car and great polishing job. I personally just like to see things restored, especially polished.
 

braidmeister

Well-known member
Joined
Mar 31, 2011
Messages
589
Wow! Great stuff guys! Kudos for all your hard work :bowdown:

It's really cool to see the old tools made BETTER than new! That circular saw on the first page is gorgeous!

Question - what kind of clear coat do you like for protecting your polished surfaces? I've used PermaLac in the past for special jobs. It really holds up well - even outside or exposed to salt air/water...and believe it or not foot traffic (6' brass floor inlay @ university).
 

freudianfloyd

Well-known member
Joined
Feb 12, 2015
Messages
3,426
Location
Nowhere
Can I play?

I am sure my project is pretty lame compared to some of these projects but I felt like I should give tool polishing a try.

This old Snap On ratchet was left to die in the barn of the house we bought last year. It was rusted solid. I wish I had a picture of when I found it.

Anyway, I remembered the picture after it spent some time in the Evaporust, and then proceeded to flash rust.
View media item 86439View media item 86440
After some sanding, I tried to do it by hand, but got sore quick, so I decided to use my da.
View media item 86441
Then over to the buffer for a progressive cut and buff...
View media item 86442
And finally cleaned, greased, and reassembled....
View media item 86443View media item 86444View media item 86445
I just realized it was put together wrong in the first few pictures.
 
Last edited:

bubinga

Well-known member
Joined
Jul 26, 2014
Messages
12,744
Location
Bridgeport Ohio. (Across River From Wheeling WV)
Can I play?

I am sure my project is pretty lame compared to some of these projects but I felt like I should give tool polishing a try.

This old Snap On ratchet was left to die in the barn of the house we bought last year. It was rusted solid. I wish I had a picture of when I found it.

Anyway, I remembered the picture after it spent some time in the Evaporust, and then proceeded to flash rust.


After some sanding, I tried to do it by hand, but got sore quick, so I decided to use my da.


Then over to the buffer for a progressive cut and buff...


And finally cleaned, greased, and reassembled....
View media item 86443


I just realized it was put together wrong in the first few pictures.
Beautiful!!!
 

fowldarr

Well-known member
Joined
Oct 23, 2009
Messages
1,067
Location
Coastal Oregon
Are you going to redo the red latters?

Should look sweet when done. Waiting for the progress report...


That’s my plan. I’m a little intimidated to get started. Have to finish up a couple of projects currently on the bench. Then I’m going to get started on it.

The cord needs to be replaced (looks like somebody hit it with the saw), a good polishing. Some letter work. Should have something to show off.


Sent from my iPhone using The Garage Journal mobile app
 

Loose Ctrl

Well-known member
Joined
Dec 21, 2014
Messages
759
Location
Upstate SC
That’s my plan. I’m a little intimidated to get started. Have to finish up a couple of projects currently on the bench. Then I’m going to get started on it.

The cord needs to be replaced (looks like somebody hit it with the saw), a good polishing. Some letter work. Should have something to show off.


Sent from my iPhone using The Garage Journal mobile app


A little hand polishing and you won't have to touch the lettering. :bounce:
 

freudianfloyd

Well-known member
Joined
Feb 12, 2015
Messages
3,426
Location
Nowhere
Keeping with the polishing bug, figured I would polish up a few other hammers I had laying around.

First one was just a rusted log, after about 3 hours of sanding and polishing, I learned it was actually a pretty desirable hammer. Unfortunately I dont have a before picture.

Then I moved on to this body hammer
View media item 86515After some buffing....
View media item 86516And then decided to make it match my William's body hammer with some blue anodizing, ends were left uncolored...
View media item 86517And sitting on a dolly I also brought back to life after years of rusting.
View media item 86518
 

Xti04

Well-known member
Joined
Nov 11, 2016
Messages
2,295
Anybody know what this is? Its one I have been workin on at night when I get bored
Has taken a ton of buffing to get to this point
 

Xti04

Well-known member
Joined
Nov 11, 2016
Messages
2,295
Yep! Found it on the property here when we built the house.
 
To avoid these ads, REGISTER NOW!
Top Bottom