To avoid these ads, REGISTER NOW!

Between the River Hills & the River Bottom

OP
C

cliftonbros89

Well-known member
Joined
Jun 2, 2015
Messages
3,009
Location
Missouri
Between the River Hills & the River Bottom

Well Wednesday as far as activity goes was probably less exciting than the rest of the week has been.

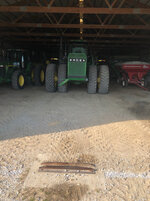
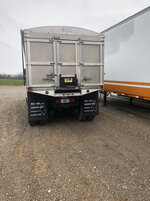
I hauled off 4 more loads of soybeans to fill out contract.
900bf3caca85020cf7fc868ed270d5d8.jpg
There’s only about 2 loads left in the bin but we’re going to wait to haul those off til later. There’s lots of other things going on right now.

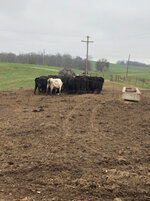
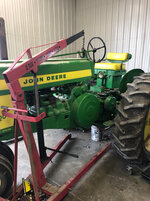
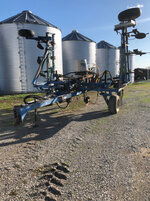
While I hauled beans dad continued to spread fertilizer on the pasture ground.

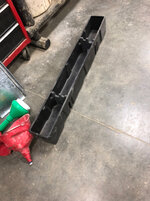
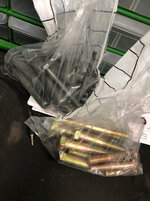
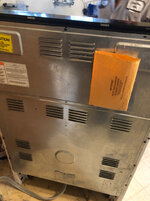
Today the insurance company is coming to pick up the wrecked truck. Dad took a few things out of the cab and pumped the fuel out of the tanks. We’re also going to swap 4 of the tires on the rear drive axle that are still good. One of the local shops had some junk tires they’re going to put on there for us.

That pretty well wrapped up Wednesday. The week is flying by. I also seem to have caught some sort of a bug as well. I’m suspecting maybe something from the kids last week. But who knows.

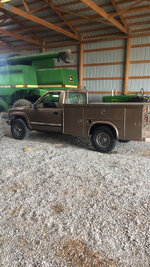
Oh I also took the new truck for a drive. Drives really well. It’s going to take awhile to get used to that automatic transmission though. I don’t think I’ve ever drove a diesel truck that hasn’t been a manual. Especially after driving the trailer truck all day I find myself looking for that phantom clutch pedal at stops.
 

Attachments

  • 900bf3caca85020cf7fc868ed270d5d8.jpg
    900bf3caca85020cf7fc868ed270d5d8.jpg
    1.2 MB · Views: 0
To avoid these ads, REGISTER NOW!
OP
C

cliftonbros89

Well-known member
Joined
Jun 2, 2015
Messages
3,009
Location
Missouri
Thursday we managed to get a few things done. I spent a good portion of the day finishing spreading fertilizer on the pastures
c191360794d0a837ecdc4ee8c908f9b2.jpg
That’s at least one job out of the way. Now if we could just get a little rain to melt the fertilizer down and some warmer days.

The tow company for the insurance came to pick up the truck.
8edddf725689247d6b1c8a623c627a2c.jpg
Took him a little while to get everything hooked up. But he got out of there once he was ready. Now dad just has to deal with a few more insurance things before we get the check.

Dad & I also went through our tires. We had a few spares that needed fixed and he dropped those off to have some of them replaced so we’ll have a few wagon spares around here again.

After I finished with fertilizer we took the 8400 and the drill back down to the bottom shed.
de3e8c71b9a70ddbbf5594eeb3754995.jpg
We wanted to get the planter out to do some work to it. That required moving the field cultivator with the 8760.
5c753365b5305efbbb7eb7a644898bfa.jpg
1c940e030de8b51dd9322b2f8bb4f1e4.jpg
We have to be careful with the field cultivator. It’s a little too big for the shed. You have to make sure it’s at the right height so it doesn’t catch the bottom of a truss or the top of the door when you’re moving in it and out.

So we finally hooked to the planter with the 4440.
c480f456beb5baab58193e109e407eaa.jpg
As you can see it’s one of the few non-green pieces of equipment that we have. But it’s a pretty good planter for the most part. One thing I like about it is that all the fasteners are SAE. It makes things a bit easier. Although some of the disk have bolts with left handed threads.

I put everything else back in the shed.
be445fec066dd12a623a21fe1aa970a8.jpg
Then I took the planter back to the shop.

There’s a few repairs to be made. There’s a few disk on it that have bearings that are or are going out.
73f16a767513ca9907f66b0e4025bd99.jpg
This is the one thing I don’t like about this planter. If you notice there’s a little dust cap goes over the bearing. These stupid little plastic rubbery things like to come out. It doesn’t take much dirt inside the bearing to make it come apart. Also the flange for the bearing is riveted on.
d32b427c1025cc1699fb91752b9daafd.jpg
The only way to replace the bearing is to grind down the rivets and knock them out. Sometimes a little easier said than done. Sometimes the flange gets messed up in this process too.

I think I may try to silicone the dust caps on the flange. Something to give them a little better hold. We’ll see what I come up with after I get the new bearings in.
 

Attachments

  • c191360794d0a837ecdc4ee8c908f9b2.jpg
    c191360794d0a837ecdc4ee8c908f9b2.jpg
    1.1 MB · Views: 0
  • 8edddf725689247d6b1c8a623c627a2c.jpg
    8edddf725689247d6b1c8a623c627a2c.jpg
    922.7 KB · Views: 0
  • de3e8c71b9a70ddbbf5594eeb3754995.jpg
    de3e8c71b9a70ddbbf5594eeb3754995.jpg
    909.9 KB · Views: 0
  • 5c753365b5305efbbb7eb7a644898bfa.jpg
    5c753365b5305efbbb7eb7a644898bfa.jpg
    997.1 KB · Views: 0
  • 1c940e030de8b51dd9322b2f8bb4f1e4.jpg
    1c940e030de8b51dd9322b2f8bb4f1e4.jpg
    891.7 KB · Views: 0
  • c480f456beb5baab58193e109e407eaa.jpg
    c480f456beb5baab58193e109e407eaa.jpg
    965.2 KB · Views: 0
  • be445fec066dd12a623a21fe1aa970a8.jpg
    be445fec066dd12a623a21fe1aa970a8.jpg
    881.3 KB · Views: 0
  • 73f16a767513ca9907f66b0e4025bd99.jpg
    73f16a767513ca9907f66b0e4025bd99.jpg
    927.2 KB · Views: 0
  • d32b427c1025cc1699fb91752b9daafd.jpg
    d32b427c1025cc1699fb91752b9daafd.jpg
    803.2 KB · Views: 0

Toothaker

Well-known member
Joined
Nov 25, 2016
Messages
1,367
Location
Wichita, Kansas
Would it speed things up to drill out the rivet first? You'd have a lot less to grind, which might ensure the flange doesn't get damaged. What do you replace the rivets with, bolts?

Show the fixed bearings / disks, if you have time.

Are all the new JD tractors metric?
 
OP
C

cliftonbros89

Well-known member
Joined
Jun 2, 2015
Messages
3,009
Location
Missouri
Would it speed things up to drill out the rivet first? You'd have a lot less to grind, which might ensure the flange doesn't get damaged. What do you replace the rivets with, bolts?

Show the fixed bearings / disks, if you have time.

Are all the new JD tractors metric?


I’m not sure if drilling the river would help much or not. It’s a worth a shot though.

Only thing to put the new bearings in with is more rivets. There’s no room for a nut on the back of the disk. They fit too close for a regular nut and bolt unfortunately.

As far as the newer JD’s we have and that I’ve worked on they’re actually a combination of both SAE and metric fasteners. That’s why my socket and wrenches drawers in the toolbox are so fully. But at least for the most part 7, 10, 13, 15, 18, 30 and 32 are about the most common needed metric on the JD stuff. Every once in awhile there’s few others they throw in
 
OP
C

cliftonbros89

Well-known member
Joined
Jun 2, 2015
Messages
3,009
Location
Missouri
Between the River Hills & the River Bottom

Not much activity for me the last few days.

Whatever bug I managed to catch really got to me Friday and Saturday. Some sort of stomach virus I guess. Then I took some over the counter stuff. Which ended up causing(I’m assuming this was the cause) some sort of allergic reaction that caused the heels of my feet to swell up and become super sensitive. When I would walk it would hurt real bad or feel like there were a bunch of tiny needles in my feet stinging me. Not to mention it made me extremely groggy.

But I’m better after today. So it’s a new week starting tomorrow.

Oh. Dad got a new replacement truck yesterday too. Pictures of it will be coming as well.
 
Last edited:
OP
C

cliftonbros89

Well-known member
Joined
Jun 2, 2015
Messages
3,009
Location
Missouri
Well here’s the new truck...
92bc72b65118fe416f7bc4cd50458494.jpg0223bbbb21dd682184863140640c400d.jpg
a4d429f0e4e1d234d47a86131380fa9d.jpg
I don’t have all the stats on it hand. But it’s a nice truck. I have to say it is a really nice upgrade from what we had. Definitely had to pay for it though.

Dad bought it at a farm auction over the weekend. A hold up with the title that we weren’t informed of. But we should hopefully get it worked out.
 

Attachments

  • a4d429f0e4e1d234d47a86131380fa9d.jpg
    a4d429f0e4e1d234d47a86131380fa9d.jpg
    814.8 KB · Views: 1
  • 92bc72b65118fe416f7bc4cd50458494.jpg
    92bc72b65118fe416f7bc4cd50458494.jpg
    767.1 KB · Views: 1
  • 0223bbbb21dd682184863140640c400d.jpg
    0223bbbb21dd682184863140640c400d.jpg
    780 KB · Views: 0
OP
C

cliftonbros89

Well-known member
Joined
Jun 2, 2015
Messages
3,009
Location
Missouri
Monday morning we did all the feeding. Now that we have the calves weened we’re bucket feeding them every morning
6ceb277f45b9639e4194c4976c185df3.jpg
It took most the morning to do all the feeding. Plus run to town for a few things.
By the afternoon I was back in the shop. I was able to finally get the parts for the Kubota. I got the boots on.
da071fd09a8d4e5d00bf49840c33e3b2.jpg
c3f6ec7910fab856502d21eda74921bc.jpg
I didn’t have enough time to finish putting it back together before my MU Extension meeting.

My uncle also started taking about the PTO on our 720. It hasn’t worked since we bought it. We decided to fix it so we can actually use it for things.
575b4ef0c9b375a1d6d8b8714e5cd864.jpg
07170764804aa8760ad3d440663ba974.jpg
He likes to take things apart, make a mess, leave tools everywhere, and then expect some one else to put things back together.

We’ll see how it goes once the parts for it get here.
 

Attachments

  • 6ceb277f45b9639e4194c4976c185df3.jpg
    6ceb277f45b9639e4194c4976c185df3.jpg
    861.9 KB · Views: 0
  • da071fd09a8d4e5d00bf49840c33e3b2.jpg
    da071fd09a8d4e5d00bf49840c33e3b2.jpg
    973.2 KB · Views: 0
  • c3f6ec7910fab856502d21eda74921bc.jpg
    c3f6ec7910fab856502d21eda74921bc.jpg
    861.7 KB · Views: 0
  • 575b4ef0c9b375a1d6d8b8714e5cd864.jpg
    575b4ef0c9b375a1d6d8b8714e5cd864.jpg
    899.3 KB · Views: 0
  • 07170764804aa8760ad3d440663ba974.jpg
    07170764804aa8760ad3d440663ba974.jpg
    847 KB · Views: 0
OP
C

cliftonbros89

Well-known member
Joined
Jun 2, 2015
Messages
3,009
Location
Missouri
Today I was on my own again. I will likely be for the remainder of the week. Dad went to Maryland to see one of his sisters.

I fed the calves. I also strawed the barns for the small calves and the big calves.

I also was held up a bit by a calf that ventured under a fence it wasn’t supposed to go under. The cow was sure to let me know it was in the wrong side of the fence too.

I also had to make a trip to town for some things. Plus I finished getting everything official with the new service truck. Inspection and licensing ****.

This afternoon I finished the Kubota.
e0674c8766b1557a3989a850d43db513.jpg
It looks like everything I working correctly.

After the Kubota I picked up the shop.
be0b1bb6cd98b658a38f0c3208ad7ac7.jpg
It was a mess from the Kubota, 720, dad cleaning his truck over the weekend for his trip, plus all the in and out we did last week. I don’t like the clutter. Nor do I like the dirty floor.

So I also got started on the disk for the planter again. I tried the method of attempting to drill out the rivets. Didn’t really work out. I ended up having to grind the ends off anyway. These first 2 disk I’ve worked on and the worst I’ve ever had to work on. Usually the rivets aren’t this difficult to punch out.

Plus, my air chisel isn’t working right. Hopefully I can figure it out.

I’ll see what I can get done tomorrow.
 

Attachments

  • e0674c8766b1557a3989a850d43db513.jpg
    e0674c8766b1557a3989a850d43db513.jpg
    873.6 KB · Views: 0
  • be0b1bb6cd98b658a38f0c3208ad7ac7.jpg
    be0b1bb6cd98b658a38f0c3208ad7ac7.jpg
    738.8 KB · Views: 0

cvairwerks

Well-known member
Joined
Aug 12, 2016
Messages
7,183
Location
Within hearing distance of Texas Motor Speedway
Quick method to remove bucked rivets...Center drill the head with a fairly small bit to provide a guide path. Now drill with a bit slightly smaller than the hole in the disc. Drill until you are thru the head and into the disc. Use a sharp chisel from the side and knock the head off then use a punch and hammer, with something backing the area around the buck tail, to drive the rivet body out. Takes longer to describe it than it does to do the task.
 
OP
C

cliftonbros89

Well-known member
Joined
Jun 2, 2015
Messages
3,009
Location
Missouri
Wednesday arrived. Started with feeding as usual. Checked on the cows. The main project for the day was getting back to the planter.

I’m getting it ready to go for planting corn when the time comes. First thing I did was wash it up. It was pretty dirty and it’s a lot nicer to work on when it’s cleaned up. After that the next step was to take the bean meters out of the back units to swap in the corn meters.
087a67137785a52cc9c7e640e83fd56b.jpg
0f2461f8ffbc055e8e99f09ff095920a.jpg
We use it for corn and for beans. For corn we swap the meters and just use the back 8 rows. For beans we use the 8 in back and the 7 up front.

After I put the corner meters on I looked over each unit. Checked and lubed the chains, checked all the bolts and bushings. I went over the closing wheels, disk and gauge wheels, checked all the springs too.

One thing that needed fixed was a hydraulic valve. It had been leaking and causing issues with the raising and lowering of the planter. Dad had bought a whole new valve. I’m hoping to just get a new seal kit for the old leaking one to have a fixed one on hand should we need it.
eef3388a0c03b593ba451656d299be2c.jpg
3db3415d31065f227e9785eb39e6ac08.jpg
Just undoing a few fittings and the mounting bolts and it was swapped out no problem.

I also got back to the disk with the bad bearings. I attempted to use the suggesting of drilling out the rivets. This process seemed to take just as long as grinding the rivets down. I only managed to drill one completely thru to pop it out. It felt like it was actually taking more time to attempt to drill them than to just grind them down. So that’s just what I did. I started knocking some of them out with the air hammer. But then my air hammer didn’t want to work.

I stopped on the bearings and started looking over more things on the planter. I checked over all the hydraulic hoses, checked the wires and the hazard lights. I also put the monitor for the planter in the tractor cab and hooked everything up on it. I adjusted the drive chains and sprockets and lubed all of them up. Then I went over all the front rows, even if we won’t be using them right now. After that I greased everything on it.

There were also 2 closing wheels I had to replace. We have full closing wheels but we also have parts to rebuild them too. So I decided to take the route of rebuilding one. The closing wheels are the smaller black wheels in the back of each unit. Just rubber, a 2 piece plastic rim bolted together and a bearing in the center. But I forgot how much of a pain the the *** it is to get the rubber mounted on the rim pieces. It took too much time. (I forgot to take a picture of it)

In the late afternoon my brother-in-law came by. He’d brought a brand new set of batteries and a door handle for the passenger side door for the new service truck I bought from him. We put in the batteries and put in the door handle as well.

After messing with the truck I mentioned my air hammer problem too him. So we decided to take it apart.
d345875919958ec8d9e40cc04b4407f9.jpg
Turns out there was too much lube in it. It couldn’t move freely enough to operate. I don’t use my air hammer that often. But when I do I usually add a drop or 2 of lube just to keep it clean. Some how there ended up being an excessive amount. So we cleaned it up and put it back together and it worked as good as ever!

Off the topic my air hammer is made my St. Louis Pneumatic. I bought it direct from St.LP and it is a great tool. It’s all U.S. made and, when not over lubricated it works great. It’s one of 4 of my St.LP tools and they all work great. Awesome quality. They’ll also rebuild any of their tools for a flat reasonable fee. I’ve really been satisfied with their stuff.

So getting back to it. I finished taking apart the last few bad bearings. Just grinding the rivets and punching them out with the air hammer.

To end the day I made my last few 1/2” crowfoot holders. I finally got some more 1/2” square stock and I wanted to finish them up.
1c3ea12330a8488f7cf9b845d6485e97.jpg
847e4b8f3de3cccb349b056f753633c2.jpg
These were for my Snap On flare nut set. I put the smaller sizes, up to 1 7/16” on one rail. They’re sizes I use more often and they fit in my wrench drawer. The rest on the second rail are the bigger sizes. They reside in the drawer with my 3/4” sockets and torque wrenches.
 

Attachments

  • 1c3ea12330a8488f7cf9b845d6485e97.jpg
    1c3ea12330a8488f7cf9b845d6485e97.jpg
    831.2 KB · Views: 0
  • d345875919958ec8d9e40cc04b4407f9.jpg
    d345875919958ec8d9e40cc04b4407f9.jpg
    704.5 KB · Views: 0
  • 847e4b8f3de3cccb349b056f753633c2.jpg
    847e4b8f3de3cccb349b056f753633c2.jpg
    745.4 KB · Views: 0
  • 3db3415d31065f227e9785eb39e6ac08.jpg
    3db3415d31065f227e9785eb39e6ac08.jpg
    790.8 KB · Views: 0
  • 087a67137785a52cc9c7e640e83fd56b.jpg
    087a67137785a52cc9c7e640e83fd56b.jpg
    827 KB · Views: 0
  • eef3388a0c03b593ba451656d299be2c.jpg
    eef3388a0c03b593ba451656d299be2c.jpg
    695.2 KB · Views: 0
  • 0f2461f8ffbc055e8e99f09ff095920a.jpg
    0f2461f8ffbc055e8e99f09ff095920a.jpg
    804.4 KB · Views: 0
OP
C

cliftonbros89

Well-known member
Joined
Jun 2, 2015
Messages
3,009
Location
Missouri
Today I started out of corse feeding the calves. I also went around and gave some of the cows some corn too. After that it was a list of errands to run.

My Silverado was still full from all the cardboard I’d cleaned up from the truck shed before the big preschool visit. I wanted it gone. I took it to the recycling center to get rid of it. Then it went back to the farm to get the service truck.

I drove out to the “retirement farm” to check on the cows.
e0a8f76f8bf4bb0373dbfcef8b745600.jpg
I gave them some corn and put out mineral for them too. Then to town I went. I dropped off a the 3020/4020/4440 spare tire at one of the local tire shops. They finally got our new spare rim that we’ve been waiting over 2 months for. I also had to run to the bank and pick up some stuff to ship off a few packages this weekend. I also went to the New Holland/Kubota dealer to order a few things I want to keep on hand for the Kubota. They’re also the Kinze dealer and I picked up a few more things for our planter.

After getting back to the shop I started back in on the planter. Since I had the bearings out of the disc it was time to put the new ones on. Getting the rivets in place to hammer them is really a pain in the *** when you only have 2 hands. But I finally got them.
82b0cdcec87223fd15185c410282ac36.jpg
Once you get 2 started the rest aren’t bad.

Now along with the disc to put back on I had new seed firmers to put on. Unfortunately, the dealership didn’t have enough on hand to get them all done today.
6ff47bdbcaa615ca73b434feba83453c.jpg
The seed firmer is the white piece. To take the old one off and put the new one on the gauge wheel and disc have to be removed from one side of the unit. It’s clamped on and also tied down to help hold it in place. Then each disc and gauge wheel goes back on. I was going to do just the back for now since they’re all we’re using for corn. But I came up 2 short and waiting for them to arrive to the dealership next week. As you can see in the last picture there was also a disc scraper broken it was one of 2 that needed to be replaced as well.

After putting on the seed firmers I had to raise the front units up. They raise up to keep out of the way and to avoid ware and damage when they’re not being used when we’re planting corn.
bc24d782195f8710a33d3f5c0f7dfcfd.jpg
I used a floor jack and some blocks to lift up the front rows. They each have blocks to keep them held up. This process is a little easier on the flat floor in the shop. However, it won’t fit with the 720 in there.

I went over everything once again. I had to tighten the nut on bolt for the tongue on the planter.
e2dfa27639d6e418e316250ce5de571f.jpg
It takes a 1 7/8” socket. That called for the XXL SK breaker bar. That thing is by far one of the best investments I’ve ever made. Majorly tough and has broke loose everything I’ve put it on. It’s one of my favorite.

On a side note I also applied some silicone to the troublesome disc bearing dust caps I mentioned. I guess we’ll see if it helps any down the road.

I wrote down everything I did on the planter.
3db2adfe59b884e7c9ff10907484f71b.jpg
Also, wrote down all the parts I replaced. I find it makes things a little easier to remember when and what you replaced. I think it will also help identify problem areas if you find you’re replacing certain parts more often.

On to a GJ related topic.
937d5bd39d4adfa09dd1cf538e6d0ba0.jpg
My ratchet repair kit arrived in the mail today. It’s on one that’s in the 1/2” ratchet in a 3/8” body thread. I’m curious to find what 3/8” ratchet I could get to put it in and use it. GJ defiantly got me again on this one.

This evening I went to see my Matco guy.
ac45bbf34bf55d1db7814b663f4c3d39.jpg
He ordered me Wright 1 3/16” combo and a Martin 1 3/16” angle wrench. I’ve found I needed that particular size on a few hydraulic fittings that hoses are connected to. That was one size wrench I’ve never had. So I thought I’d cover my bases before I’d need it again. I also picked up a chisel bit for the air hammer. Figured I may give that a try on those bearing rivets should the occasion present itself in the future.

Tonight I also started on organizing the service truck. I decided to eliminate my toolbox and use the drawers that are in the one box on the bed.
c2895589a975eec438c459dc7ee854b2.jpg
efd5071cb81677d3997d5831648002ad.jpg
aaf85f68cbb92aaf567495dd52c4e9f4.jpg
It’s not super organized. But it’s easier to find things in those drawers than it was in that toolbox. It may take some getting used to. Also make take some reorganizing later. But I think I’ll like this set up. I moved in all the hand tools for now. It was a bit of a reminder on how there’s several other tools I’d like to have on the truck too. If only I had a duplicate of my shopboxes on a mobile unit. Unfortunately, that’s a little out of budget. So this is what gets me by for now. I only have the hand tools moved in for tonight. I’ll have to work on the rest of the supplies and likely adding some more tools later on.

I also still have the box to add behind the seat as well.
b7677a7491a8a22f1f7f188bcf265150.jpg
It’s nice to hold supplies. Plus things like my rain suit, jumper cables and toe strap. I really like having lots of storage possibilities.
 

Attachments

  • bc24d782195f8710a33d3f5c0f7dfcfd.jpg
    bc24d782195f8710a33d3f5c0f7dfcfd.jpg
    996.9 KB · Views: 0
  • e2dfa27639d6e418e316250ce5de571f.jpg
    e2dfa27639d6e418e316250ce5de571f.jpg
    836.2 KB · Views: 0
  • 3db2adfe59b884e7c9ff10907484f71b.jpg
    3db2adfe59b884e7c9ff10907484f71b.jpg
    706.2 KB · Views: 0
  • 937d5bd39d4adfa09dd1cf538e6d0ba0.jpg
    937d5bd39d4adfa09dd1cf538e6d0ba0.jpg
    785.5 KB · Views: 0
  • ac45bbf34bf55d1db7814b663f4c3d39.jpg
    ac45bbf34bf55d1db7814b663f4c3d39.jpg
    685 KB · Views: 0
  • c2895589a975eec438c459dc7ee854b2.jpg
    c2895589a975eec438c459dc7ee854b2.jpg
    953.7 KB · Views: 0
  • efd5071cb81677d3997d5831648002ad.jpg
    efd5071cb81677d3997d5831648002ad.jpg
    962.5 KB · Views: 0
  • aaf85f68cbb92aaf567495dd52c4e9f4.jpg
    aaf85f68cbb92aaf567495dd52c4e9f4.jpg
    780.1 KB · Views: 0
  • b7677a7491a8a22f1f7f188bcf265150.jpg
    b7677a7491a8a22f1f7f188bcf265150.jpg
    769 KB · Views: 0
  • 6ff47bdbcaa615ca73b434feba83453c.jpg
    6ff47bdbcaa615ca73b434feba83453c.jpg
    900 KB · Views: 0
  • e0a8f76f8bf4bb0373dbfcef8b745600.jpg
    e0a8f76f8bf4bb0373dbfcef8b745600.jpg
    1,019.1 KB · Views: 0
  • 82b0cdcec87223fd15185c410282ac36.jpg
    82b0cdcec87223fd15185c410282ac36.jpg
    813.4 KB · Views: 0
OP
C

cliftonbros89

Well-known member
Joined
Jun 2, 2015
Messages
3,009
Location
Missouri
I’ve come quite a ways as far as the service truck is concerned especially in just get last 5 years or so.

I started out in my half ton ‘91 Chevy. Just 2 wheel drive, short bed, it didn’t have a lot of options.
5d3ecf0158dae040f80ba24ab006c8fb.jpg
At first everything I owned fit in this
488e5858a9a6f58b6a2ff9f6ccab3dbb.jpg
The classic Craftsman 3 drawer box. I basically just had some sockets, wrenches, screwdrivers and a few pairs of plies. But I upgraded a little. I added the toolbox in the back I bought from a friend for cheap. Had some things shoved behind the seat. Then I graduated from the Craftsman box.

I don’t have any pictures but I’d bought a Montezuma style angle toolbox from Napa. It was a cheaper brand. It wasn’t built too bad. But I quickly out grew it. It wasn’t made for much more than wrenches, sockets and screwdrivers either. Plus the “powdercoated” finish didn’t hold up to well to the elements either. That’s when I moved on yet again.
56c6cae761f712412fef5452fcc296ea.jpg
I found the Snap On box which you’ve already seen. I bought it via Craigslist with another old Snap On top box. The guy gave me a deal since I bought them both. I managed to sell the other one to recover a bit. It has by far held up the best. It’s still in great shape.

I of corse moved on to the truck which I just recently sold.
0828791e01090749af3c66d1660672f7.jpg
It was exciting for me. Four wheel drive, 3/4 ton. The heat and a/c actually worked. Plus the utility bed was the best. But I’ve found there’s more and more things that are necessary to have on hand in the truck.

So I guess I outgrew again. It’s on to the 1 ton diesel. I think I’ll get along with this one for quite awhile. Lots of storage. I know more now of the things I’d like to have available on the truck. I know more now of certain things that we haven’t had before on the truck that we could have now. It’ll be a work in progress for awhile. But it’ll get there. It’s so much nicer having everything available on hand when you need it if something happens. It can really save a lot of time and hassle when you’re prepared. It doesn’t waste as much time. I hate to waste time when we’re really hitting it hard.
 

Attachments

  • 5d3ecf0158dae040f80ba24ab006c8fb.jpg
    5d3ecf0158dae040f80ba24ab006c8fb.jpg
    832 KB · Views: 0
  • 488e5858a9a6f58b6a2ff9f6ccab3dbb.jpg
    488e5858a9a6f58b6a2ff9f6ccab3dbb.jpg
    808.9 KB · Views: 0
  • 56c6cae761f712412fef5452fcc296ea.jpg
    56c6cae761f712412fef5452fcc296ea.jpg
    919.1 KB · Views: 0
  • 0828791e01090749af3c66d1660672f7.jpg
    0828791e01090749af3c66d1660672f7.jpg
    766.1 KB · Views: 0
OP
C

cliftonbros89

Well-known member
Joined
Jun 2, 2015
Messages
3,009
Location
Missouri
The end of the week wasn’t too exciting. Friday morning I started with all the feeding. Putting out hay everywhere, giving the calves corn, and putting straw down in the barns.

I also had some paper work things to do. I had to take care of some bills. Not to mention I had to mail off my tax payments...

I also had a few packages to mail off. One being a non working blockage module that is for the monitoring system that is on our drill. It’s a module that quit working a couple years ago and replaced. I sent it to the Loup Electronics company to give me an estimate of repair for the module. I’d like to have one on hand should be experience technical difficulties with another module in the future.

Friday afternoon I went to the shed in the bottom to work on the field cultivator.
d0099378b22a2f37b9673f901e39fa35.jpg
I checked over all the hydraulic lines and hoses to make sure nothing was about to blow. Looked over the frame a bit to make sure there are no cracks or breaks. I gauged and aired up all the tires.

These tires go under a lot of weight and pressure. It isn’t uncommon for one to go flat now and then. That is why I’m trying to design a spare tire holder to mount to the frame. Also come up with some sort of jack to help support the frame to swap out a tire. The idea is to kind of make it more of a one man job if needed to be. This way someone else doesn’t have to bring a jack and a spare. Or who ever is running the field cultivator doesn’t have to stop and get something if they don’t have it. But that is still in the works.

I also had several shovels to replace on it as well.
5c898761e1d93725da15e141f72f431c.jpg
Some of them may have had a little life left in them but not much. Even several of the yellow “shank savers” are starting to wear pretty thin. I like to have a good amount of shovels on there that will last awhile. It’s nice to not to have to replace some every few days. They seem to go pretty quick for as much as they cost a piece.

After that and looking over the 8760 a bit again I kind of wrapped things up for the day.

Friday I’d also for the most part putting things back in the service truck. I’ve just about got it packed up. But I need to go back through the general supplies and hardware just to replenish some things I used in the fall. Got to be prepared for spring work.
 

Attachments

  • d0099378b22a2f37b9673f901e39fa35.jpg
    d0099378b22a2f37b9673f901e39fa35.jpg
    938.7 KB · Views: 0
  • 5c898761e1d93725da15e141f72f431c.jpg
    5c898761e1d93725da15e141f72f431c.jpg
    713.1 KB · Views: 0
OP
C

cliftonbros89

Well-known member
Joined
Jun 2, 2015
Messages
3,009
Location
Missouri
Saturday I naturally fed the calves yet again.
78b76eccab95f579b30f701b0c08bab7.jpg
Most of them are started to get pretty excited for corn in the morning. Sometimes too excited. They get a little rambunctious.

I also gave some of the cows corn as well.
4ed28dbd4330c4292745ef449e06f122.jpg
Some of the heifers we have are looking a bit thin. I thought if we’d start giving them corn a few days a week or more it might encourage a little weight gain on them. Plus the cows with the heifers are cows that still have cows that need to be weened. Enticing them with corn helps get them up in the lot a little easier when it comes time to ween the calves.

For Saturday afternoon there wasn’t much I could just start in on since the old man is still out of the state yet. I decided to work on getting some more things in the parts loft put away.
467368d5627d4c53afedb1e72d99d0de.jpg
18021c9ba61b9ad731f33149fdeb954b.jpg
I got quite a bit done yesterday. Unfortunately, I ran out of bins. I think I may order some more. But I’ve made progress that’s for sure. There’s still more to go. But it’s fairly smaller and easy stuff to take care of. I know it may not necessarily look like it. But I fell like it’s really coming together well. I’ve catalogued over 350 types of parts. So far that’s just counting parts for the tractors and implements. That’s not counting filters, truck parts, or other miscellaneous parts we have for other things like augers. But it’s becoming less and less. I can actually walk across the floor now in the back too. I think this whole process should really help the flow of things. I think I may even have a bit of free shelf space.

In the evening I picked up a few new things to keep in the service truck since I have a bit more space for things now.
ecebca1c78a67957829c3313b0c30a2e.jpg
Four foot ladder, which is handy for lots of things. A high-lift jack. We have one. But I know as soon as I put it in the truck my uncle will be wanting to use it some where else and complain because he can’t find it. I can’t say I use a high-lift jack often. But they’re nice to have around as well. Then 2 shovels. There’s been more than one occasion when I could’ve used one for something. So I thought it’d be nice to have options. With a little modification these should all fit under the sliding drawers that have all my hand tools on the passenger side. I’m really starting to like this set up.
 

Attachments

  • 78b76eccab95f579b30f701b0c08bab7.jpg
    78b76eccab95f579b30f701b0c08bab7.jpg
    1.1 MB · Views: 0
  • 4ed28dbd4330c4292745ef449e06f122.jpg
    4ed28dbd4330c4292745ef449e06f122.jpg
    856.5 KB · Views: 0
  • 467368d5627d4c53afedb1e72d99d0de.jpg
    467368d5627d4c53afedb1e72d99d0de.jpg
    844.2 KB · Views: 0
  • 18021c9ba61b9ad731f33149fdeb954b.jpg
    18021c9ba61b9ad731f33149fdeb954b.jpg
    849.1 KB · Views: 0
  • ecebca1c78a67957829c3313b0c30a2e.jpg
    ecebca1c78a67957829c3313b0c30a2e.jpg
    988.2 KB · Views: 0
OP
C

cliftonbros89

Well-known member
Joined
Jun 2, 2015
Messages
3,009
Location
Missouri
Today I think I’m going to take things kind of easy. I got up to feed the calves.
c29a331f4dc8fb8154f6c78f95b7b431.jpg
I also scattered out a few more bales of straw for them to bed down in. There’s another chance for some rain tomorrow. They’ve managed to stay pretty clean so far. If I keep a decent bed of straw down they’ll hopefully stay cleaner and drier.

I also drove around just to check on the cows. It seems like they’ve all been doing pretty good the last week or so. Same for the calves. They’re starting the smell the grass growing so they tend to stand by the gates now and then bawling to be let out. They’re just going to have to wait awhile yet.

So I have a few things I’d like to get typed up. Maybe shape up my parts inventory list a bit too.

It’ll be back at it tomorrow. I think by late tomorrow or possibly Tuesday dad will be coming back. Not sure what his schedule is yet.

We still have plenty of things to work on before everything is ready for the fields. I hope to get some of those jobs knocked off the list this week. Maybe then I can relax about that for a little while.
 

Attachments

  • c29a331f4dc8fb8154f6c78f95b7b431.jpg
    c29a331f4dc8fb8154f6c78f95b7b431.jpg
    1.1 MB · Views: 0

GGB

Well-known member
Joined
Oct 26, 2011
Messages
388
I’m really enjoying this thread-it’s my “fix” when I can’t be up at our family farm. Unfortunately, I describe ours as too big to be a hobby, too small to be a livelihood. Our day jobs support our farming addiction!

For those not familiar with the routine of a family farm, your thread should help dispel the notion that all farmers do is sit in a tractor or combine cab and then go to the Co-op to drink coffee and complain about commodity prices.....

(Full disclosure-we still complain about commodity prices, but are usually drinking coffee while doing repairs at the farm. Not enough time to go to town for coffee, except when we are at the parts counter at the John Deere dealership waiting for the parts man to fill our parts orders!)

Thanks for sharing.

GGB
 

sweet victory

Well-known member
Joined
Jun 9, 2016
Messages
1,262
Location
USA
By no means a farmer, but really appreciated reading this post. I think it gave me more appreciation on where my food comes from. Your schedule seems to be packed, and the only thing I can suggest is trying a product called Optiseal. It's a product developed by a guy who previously worked as a chemist for Dupont. It's hydrophobic, has UV protection, lasts around 2 months, but best of all is a breeze to apply. Simply spray it on and spread. There is no buff off process. I think it will save you a bunch of time since you're coating large equipment. I have been using this stuff for about 6 months and basically ditched all of my other waxes and sealants.

https://www.autogeek.net/optimum-opti-seal.html
 
OP
C

cliftonbros89

Well-known member
Joined
Jun 2, 2015
Messages
3,009
Location
Missouri
Well I definitely took it easy today. I ended up traveling about 45 minutes north to visit my aunt and uncle (one of dad’s five sisters) and 2 of their sons and their wives and kids.

So we’ll see what tomorrow brings.
 
OP
C

cliftonbros89

Well-known member
Joined
Jun 2, 2015
Messages
3,009
Location
Missouri
I’m really enjoying this thread-it’s my “fix” when I can’t be up at our family farm. Unfortunately, I describe ours as too big to be a hobby, too small to be a livelihood. Our day jobs support our farming addiction!


For those not familiar with the routine of a family farm, your thread should help dispel the notion that all farmers do is sit in a tractor or combine cab and then go to the Co-op to drink coffee and complain about commodity prices.....


(Full disclosure-we still complain about commodity prices, but are usually drinking coffee while doing repairs at the farm. Not enough time to go to town for coffee, except when we are at the parts counter at the John Deere dealership waiting for the parts man to fill our parts orders!)


Thanks for sharing.


GGB

Thanks.

Yes. Farming certainly is different than what most people think. No thanks to the current country music scene.

Don’t worry everyone complains about commodity prices.

By no means a farmer, but really appreciated reading this post. I think it gave me more appreciation on where my food comes from. Your schedule seems to be packed, and the only thing I can suggest is trying a product called Optiseal. It's a product developed by a guy who previously worked as a chemist for Dupont. It's hydrophobic, has UV protection, lasts around 2 months, but best of all is a breeze to apply. Simply spray it on and spread. There is no buff off process. I think it will save you a bunch of time since you're coating large equipment. I have been using this stuff for about 6 months and basically ditched all of my other waxes and sealants.

https://www.autogeek.net/optimum-opti-seal.html


I’ll try to check it out sometime. Looks similar to something my dad uses on one his trucks.
 
To avoid these ads, REGISTER NOW!
OP
C

cliftonbros89

Well-known member
Joined
Jun 2, 2015
Messages
3,009
Location
Missouri
Monday started out as it always does. I put out hay everywhere. Also fed the calves.

After feeding I ground a batch of corn.
580ab93df02f93001e69a0c1942ae61c.jpg
We also keep ground corn in a tank in the barn. It’s what I use to feed the cows every once in awhile. I ran out last week. I wanted to get a batch ground before possible rain tomorrow.
0184011dda08d170fe72bcce535ec847.jpg
I put a full batch in there so it should last awhile.

Since I pretty well finished up getting the planter ready to go last week I wanted to start on the disk. That required moving some things around. I drove my truck down to the bottom shed. I had to unhook the 8400 from the drill to hook to the grain cart to move it out of the way of the disk.
7df190c46cf4da039160bab52ea60c5b.jpg
That also required moving out the 8760 and field cultivator. After moving the grain cart, the hooking the 8400 to the disk I moved the 8760 and cultivator to where the disk and grain cart were.

We also had a wagon with some wheat seed on it in the shed as well. I hooked to it with the truck and took it to dad’s.

After I returned from the bottom I backed the 4440 and planter out of the shed.
88248d93436555ce28813d2d216d45da.jpg
Naturally, as soon as I decided to move things around it started to mist and sprinkle. Made the nicely waxed tractors messy. Moving out the planter also required moving some things in the shed at the house.
1c62ae8ebd7aee02e3b2d6ab6e13fc53.jpg
I also pulled in the wagon with the wheat seed for now too.

So I drove the 4440 with the planter back down to the bottom shed. I backed it in at the shed down there for now.
9072c95432e6decac3138e6d0fe2b4fa.jpg
I left from there with the 8400 and the disk to take it to the shop.
ed58a00bf2e8795a6315e3e0bbf8cdfb.jpg

Somehow last fall dad managed to bend one of the gang bolts on the disk. So not only did it bend the bolt but it caused one of the bearings to blow out as well. So the plan was to take the gang section off and replace the bolt and the bearings.
1ff6a5dfa636096187e2fdb149092b8b.jpg
I dropped that section off and rolled it in the shop to take it apart.
cbb40e2816662c9908977f73a8dbff78.jpg
As you can see it was bent pretty bad.
cb9f83d7ba76ff1cb056291b274f19af.jpg
It’s definitely not worth try to bend it back in shape either. It’s never worth the trouble.
So I started taking it apart. Sliding all the pieces off the bolt.

I had already had a new gang bolt and 3 new bearing for that section to put back together.
770f0eb70dff9c64906f85ec26875f4e.jpg
One thing I didn’t think about was the sleeve that the bearing sits on. The bearing that went out at the bend also had a bent sleeve.
34102f2f286161e8622f0b60d8f3379e.jpg
Luckily I will have a new one arriving tomorrow so I can finish putting it back together.

Besides that and a few other small things that pretty well wrapped up the day. Dad will be returning tomorrow. I should have plenty for him to do when he returns.
 

Attachments

  • 34102f2f286161e8622f0b60d8f3379e.jpg
    34102f2f286161e8622f0b60d8f3379e.jpg
    950.3 KB · Views: 0
  • 770f0eb70dff9c64906f85ec26875f4e.jpg
    770f0eb70dff9c64906f85ec26875f4e.jpg
    901.8 KB · Views: 0
  • 580ab93df02f93001e69a0c1942ae61c.jpg
    580ab93df02f93001e69a0c1942ae61c.jpg
    951.5 KB · Views: 0
  • 0184011dda08d170fe72bcce535ec847.jpg
    0184011dda08d170fe72bcce535ec847.jpg
    916 KB · Views: 0
  • 7df190c46cf4da039160bab52ea60c5b.jpg
    7df190c46cf4da039160bab52ea60c5b.jpg
    712.9 KB · Views: 0
  • 88248d93436555ce28813d2d216d45da.jpg
    88248d93436555ce28813d2d216d45da.jpg
    998.9 KB · Views: 0
  • 1c62ae8ebd7aee02e3b2d6ab6e13fc53.jpg
    1c62ae8ebd7aee02e3b2d6ab6e13fc53.jpg
    963.7 KB · Views: 0
  • 9072c95432e6decac3138e6d0fe2b4fa.jpg
    9072c95432e6decac3138e6d0fe2b4fa.jpg
    876.1 KB · Views: 0
  • ed58a00bf2e8795a6315e3e0bbf8cdfb.jpg
    ed58a00bf2e8795a6315e3e0bbf8cdfb.jpg
    889.4 KB · Views: 0
  • 1ff6a5dfa636096187e2fdb149092b8b.jpg
    1ff6a5dfa636096187e2fdb149092b8b.jpg
    957.6 KB · Views: 0
  • cbb40e2816662c9908977f73a8dbff78.jpg
    cbb40e2816662c9908977f73a8dbff78.jpg
    848.6 KB · Views: 0
  • cb9f83d7ba76ff1cb056291b274f19af.jpg
    cb9f83d7ba76ff1cb056291b274f19af.jpg
    1,020 KB · Views: 0
OP
C

cliftonbros89

Well-known member
Joined
Jun 2, 2015
Messages
3,009
Location
Missouri
So one debate I’ve seen often on GJ is battery vs. pneumatic impacts. Today I decide to test that one 2 different nuts on the disk.
98a3f16c979da309063728fe69bc8b74.jpg
It was my 20v DeWalt with a fresh charge battery vs. my pneumatic Snap On impact.

The DeWalt couldn’t even budge either but. It hammered and hammered but didn’t go anywhere. I followed it up the with Snap On and neither nut even made it grunt. It whizzed then right off.

Don’t get me wrong. I really like this DeWalt. It’s nice to not have to deal with an air hose and it comes in handy where there isn’t s compressor around. However, it can’t seem to beat a pneumatic impact for slightly rusted, dirty, high torque situations. I can’t say there’s much to debate about it.
 

Attachments

  • 98a3f16c979da309063728fe69bc8b74.jpg
    98a3f16c979da309063728fe69bc8b74.jpg
    927.4 KB · Views: 0
OP
C

cliftonbros89

Well-known member
Joined
Jun 2, 2015
Messages
3,009
Location
Missouri
Came up with another homemade tool. It may not see much use but it will work good.
449eef7518e4dcb91de00c15887b489f.jpg
f4f2040a434cd56a4a6691202ed0c4cd.jpg
It’s an Industro 15/16” offset wrench, cut down shorter with a 1/2” drive end of a socket welded to it. I had my brother-in-law do the weld for me. I trust his more than mine.

I’m going to use it to check the torque on the nuts for the wheel weights on the 7230.
a268b5c15d5ac6629a093e17f08ee038.jpg
1d70e7643a92796b86a8fff397511c85.jpg
The 2 inner weights, without the offset can only be accessed if the weight in front of it is removed. This lets me get on the nut while also being able to have length to torque down on the nut.

We had an incident where the very inside nuts weren’t properly torqued on the weight to the rim. While in the middle of baling hay on day a bolt broke. That of corse stressed the other 2 bolts causing another bolt to break. So all 3 weights were hanging on by just one bolt. That caused all the weight to flop around while driving. As you can imagine it made some noise and really made dad think something major was wrong. Luckily it was an easy fix.

I know some people may be disappointed in cut a perfectly good Indestro wrench in half. But I’d rather use a good wrench than a crappy one. Plus it was the only 15/16” offset that was laying around in the spare wrench pile. But don’t worry. I have another perfectly good one just like it in my toolbox. It won’t be getting cut up.
 

Attachments

  • 1d70e7643a92796b86a8fff397511c85.jpg
    1d70e7643a92796b86a8fff397511c85.jpg
    757.4 KB · Views: 1
  • a268b5c15d5ac6629a093e17f08ee038.jpg
    a268b5c15d5ac6629a093e17f08ee038.jpg
    741.2 KB · Views: 1
  • 449eef7518e4dcb91de00c15887b489f.jpg
    449eef7518e4dcb91de00c15887b489f.jpg
    736.4 KB · Views: 1
  • f4f2040a434cd56a4a6691202ed0c4cd.jpg
    f4f2040a434cd56a4a6691202ed0c4cd.jpg
    739.6 KB · Views: 0

rpenterics

Well-known member
Joined
Jun 7, 2012
Messages
362
Location
SE Michigan
I’m going to use it to check the torque on the nuts for the wheel weights on the 7230.
a268b5c15d5ac6629a093e17f08ee038.jpg
1d70e7643a92796b86a8fff397511c85.jpg
The 2 inner weights, without the offset can only be accessed if the weight in front of it is removed. This lets me get on the nut while also being able to have length to torque down on the nut.

It doesn't appear that you are using that adapter with a torque wrench and you may already know this but as an FYI anyway - using an adapter on a torque wrench changes your actual applied torque - there are formulas to calculate the difference.
A high quality homemade tool nonetheless
 

Attachments

  • 1d70e7643a92796b86a8fff397511c85.jpg
    1d70e7643a92796b86a8fff397511c85.jpg
    92.7 KB · Views: 0
  • a268b5c15d5ac6629a093e17f08ee038.jpg
    a268b5c15d5ac6629a093e17f08ee038.jpg
    95.4 KB · Views: 0

lis2323

Well-known member
Joined
Dec 25, 2016
Messages
3,234
Between the River Hills & the River Bottom

It doesn't appear that you are using that adapter with a torque wrench and you may already know this but as an FYI anyway - using an adapter on a torque wrench changes your actual applied torque - there are formulas to calculate the difference.

A high quality homemade tool nonetheless


I noticed too but assumed the OP was merely tightening/ retorqueing and not actually using a torque wrench.

cliftonbros89: I just stumbled upon this thread and have enjoyed binge reading it. Being a retired farmer makes it even more enjoyable. Thanks for your documentation.[emoji106]
 

Maddog10

Well-known member
Joined
Nov 16, 2016
Messages
151
Location
Paducah, Kentucky
It doesn't appear that you are using that adapter with a torque wrench and you may already know this but as an FYI anyway - using an adapter on a torque wrench changes your actual applied torque - there are formulas to calculate the difference.
A high quality homemade tool nonetheless

Mathematically this isn't true for a standard adapter/extension. Torque = Force x Distance, with distance being how far away the force is being applied in a perpendicular plane.

Let's say you are tightening a nut, and the axis running straight through the center-hole of the nut is the Y axis (the bolt would be the Y-axis on which the nut is spinning around). This would make the X-axis perpendicular, which is the one in which your torque wrench is aligned with. Total torque is the force applied times the distance in which it is applied perpendicular to the X-axis. Distance from the nut in the Y-axis (which an adapter affects) does not matter and will not affect torque. You could add a 3' extension in the Y axis and not change the torque whatsoever, but a 3' extension in the X axis (aka "cheater bar") changes things tremendously.

Now math and real life can differ, mainly depending on the quality of the adapter. If it's a high quality adapter with no bending/slipping you'll see essentially no change in torque. If it's harbor freight adapter you might experience some minor losses.

Now in the OP's instance you are right because the wrench isn't calibrated for that extra length along the same axis. It's essentially a cheater bar, so if the bar is 2' long and the wrench is 8" long, the torque applied at the nut is a factor of 1.3333 higher than the torque wrench readout.

Sorry for the rant. I'm an engineer and can't help myself.
 
Last edited:
OP
C

cliftonbros89

Well-known member
Joined
Jun 2, 2015
Messages
3,009
Location
Missouri
Yes I’m aware it is not actually a torque wrench. I was simply trying to demonstrate the usage of the wrench. The ratchet was easier to grab than the torque wrench for the sake of a photo.

I’m also aware of the different types of formulas for extended lengths when using something such as a torque adaptor (which this would probably qualify as).

I actually have 2 different torque wrench calculator apps on my phone and my iPad as well. I’ve found them to be quite handy.

I know with the certain angles and lengths of the wrench it effects the torque. But in the situation of actually using the torque wrench in the specific situation I’m not entirely worried about reaching an exact pinpointed amount. So long as it’s close the first time. Then I can at least use this with a breaker bar to follow up after some usage to check for looseness.
 

omrkr

Member
Joined
Sep 5, 2016
Messages
21
Location
N. Ia
Just a thought on your plan for a jack on the cultivator. For our 2210 John Deere We just use a couple of blocks and drive the walking tandem up on them. That will lift the flat off enough to change. Luckily we haven’t had any troubles with the swivel casters on the front. We would need a jack then for sure.
 
OP
C

cliftonbros89

Well-known member
Joined
Jun 2, 2015
Messages
3,009
Location
Missouri
Well today wasn’t very busy. I kind of feel like I didn’t really get anything done. I got up and fed the calves. I also put down some more straw for them since we were getting rain. Then I fed the cows some corn.

After those daily chores I had to run in town for a few parts and supplies. One of those for the other 2 seed firmers for the planter. I also dropped by the retirement farm to check on the cattle and give them some corn as well.

Dad and mom returned from their trip late this morning. I’d just returned to the shop when they arrived. I helped them unload everything from the truck since it was still raining.

After helping them I headed to the shed in the bottom to put the other 2 seed firmers on the planter.
3bcb20ea20cbd198339a02bdb313c6af.jpg
Just a light and the cordless impact and I had the new ones on. The planter should now be officially ready to go when the time arrives.

Amongst the trip to town I picked up some bolts.
cd913db3a450dd7d9e191ae81b37ba4d.jpg
I thought I’d keep a variety on hand by my toolbox to use for types of studs and things like that I make need to customize for a certain job. A few of them I already have plans for. I also decided to pick up some fine threaded bolts just in case. Unfortunately, the only variety of fine threaded bolts I can find in town that can be bought in bulk are grade 8. So they were a bit more expensive. But they’ll work.

This afternoon my uncle was attempting to rush to put the 720 back together. The parts arrived at the end of last week. He tends to rush in taking things apart and then rush to put them back together. He doesn’t always pay attention to the whole process which can cause some trouble. I’d attempted at helping him with it. Dad also ended up coming down to see what was going on.
7affc43877e33e19933248a46fa68825.jpg
My uncle also informed me that there are a few other problems near the pto and it turns out the clutch on the pto wasn’t the only issue. So we were in debate on what to do about that.

If you noticed the picture of the back on the 720 looks a bit dark that is because we lost electric this afternoon. Not sure that it was due to the weather since we’ve just had rain, no lightning or winds. But there was apparently a pole damaged up to road. So we continued to work with some flashlights.

I had to make another trip to town. The part for the disk was finally at the parts drop box in town from JD. I’d also got a call that the parts I’d order to keep in hand for the Kubota were in as well. So I made a trip to pick those parts up.

When I’d returned to the shop there was still no electric.
37fcd217c093fdd3f9a9a019aa587f3e.jpg
It was still raining. My uncle had apparently damaged something on the pto clutch when trying to put it back in the tractor. It clutch wouldn’t adjust right so I’d arrived just in time to take it out again. So with lack of parts, dad still tired from his cross country trip, and no electric. We decided to call it a day a little early. I was going to need a little assistance to put the disk gang back together. Plus I was going to need electric to the compressor to run the air impact for the nuts on the gang bolt. So I called it a day as well.

My sister and her husband which are just out the road had electric yet. So they invited the rest of us to their house for supper. They’re electric ended up being shut off for a little over an hour as well. I guess their line had to be disconnected to make repairs and replace the pole for the line that dad’s house and the shop is on. Luckily, supper had just been finished being prepared when the electric went out.

So tonight the electric is back up and going. Still some rain for overnight to come. It will definitely be wet for awhile now. Hopefully I can finish up on the disk tomorrow. Have to do the regular feeding. Also may need to check over the smaller calves out with the cows after this rain. We don’t need any of them getting sick.
 

Attachments

  • 37fcd217c093fdd3f9a9a019aa587f3e.jpg
    37fcd217c093fdd3f9a9a019aa587f3e.jpg
    668.9 KB · Views: 0
  • 7affc43877e33e19933248a46fa68825.jpg
    7affc43877e33e19933248a46fa68825.jpg
    825.9 KB · Views: 0
  • cd913db3a450dd7d9e191ae81b37ba4d.jpg
    cd913db3a450dd7d9e191ae81b37ba4d.jpg
    747.4 KB · Views: 0
  • 3bcb20ea20cbd198339a02bdb313c6af.jpg
    3bcb20ea20cbd198339a02bdb313c6af.jpg
    778.7 KB · Views: 0
OP
C

cliftonbros89

Well-known member
Joined
Jun 2, 2015
Messages
3,009
Location
Missouri
Just a thought on your plan for a jack on the cultivator. For our 2210 John Deere We just use a couple of blocks and drive the walking tandem up on them. That will lift the flat off enough to change. Luckily we haven’t had any troubles with the swivel casters on the front. We would need a jack then for sure.


Ours is a 2210 as well. I’ve used blocks to drive the tandem on before. It seems like we unfortunately are usually somewhere that we don’t have any blocks sitting around. Or we don’t have blocks in the truck at the time. Although with the new truck intend to have some.

I was just trying to come up with a way we could have some sort of adjustable jack that could be used. The cultivator could be lifted to maximum height, then lowered to rest on the jack, hopefully allowing that tandem to lift high enough to remove the flat and put on the spare. The spare could be mounted to the frame. Then we could keep a breaker bar and socket in the toolbox on the tractor. Essentially everything could be right there for it to be a one man job if it had to be.

We move around so much that there isn’t always a truck with tools or blocks near by. Or someone else is off in another field doing another job. So if everything isn’t where you are you have to stop and get everything before you can start up again. I’d just like to eliminate some of that possible down time. Then make it a bit easier for one guy to do it.
 
OP
C

cliftonbros89

Well-known member
Joined
Jun 2, 2015
Messages
3,009
Location
Missouri
Well today was a dreary yet somewhat productive day.

Fed the calves as always.
965d961c54fbbb761d954906aba2a358.jpg

After feeding I headed back to the shop. First thing I wanted to get the disk back together. I finished putting the gang back together after yesterday’s lights out stall.
a38a60f8e59479da4aab8de50edf037d.jpg
It makes things easier to put the gang back on if the bar of disk scrapers is removed first.

I also checked all the tires over. Along with the other gang bolts, disks, scrapers, and frame.
2e91f5dadd528c05572757bdc93c16c5.jpg
I also greased it up so it’ll be ready to go when we need it.

The only problem I found was the wiring harness for the hazard and tail lights was in pieces. I removed all of it.
7b92b95796bc75fdd37c5cb4b2712223.jpg
So another project has been added to the list. We’re going to need some wire for this.

While I worked on the disk my uncle tore further into the 720.
1f560cf0973fab561f26bc7f918f97c0.jpg
There’s been an issue when trying to shift between gears. So he took more things apart. He thinks it’s something with the shifting lever.

My extra bins arrived today. Unfortunately, if the 2 sizes I’d ordered before I by accident ordered the smaller size. I meant to buy the larger size.
77ad4f41b12b346ae73d22510a7d8b40.jpg
Never the less they still work. This evening and later in the night I continued on the parts project.

0d8f302b456719c696917a22f1c67224.jpg
I’ve managed to inventory and reorganize all the parts for the tractors, implements, the Kubota, lawn mower, chain saws, and weed eaters. I’ve officially inventoried 500 different parts thus far. Things are much more organized and picked up than before. Some of the shelves actually have space for more things. Underneath the the floor has space for some items as well.

I relocated some of the much larger, very limited use parts out to the truck shed loft where we usually keep the larger, limited use parts. They’ve yet to be added to the inventory list but they will be soon.

I also grabbed out some parts we no longer need, a few I know fit nothing we no longer have, and some stuff that had been left up there that is just junk. Now if I can only get dad to go through the parts sitting up there for all the two cylinder JD’s and the pulling tractors. I’m hoping he’ll decide to relocate several of them to the shed over at my uncle’s that, as I’ve shared before, houses quite an abundance of JD two cylinder tractor parts.

That part took up majority of the evening. But besides the new bins I had 2 other items arrive today.
c59e53e471024951bffdfbbb64236656.jpg
First was my warrantied Wers chiseldriver. They’ve been really awesome on warranty so far. This is the second chiseldriver I’ve had to warranty. I’ve emailed them a few pictures both times and within about 2-3 days I’ve received a replacement and they just ask that you throw away the damaged one. You don’t even have to send it back.

Second was my back plate for my new work truck.
7b5d60ad7cb88b4be5c59f0d233b661a.jpg
I thought I’d dress it up a little. I’m also interested to see what my Matco guy thinks when he sees it.

So another thing I’m on the search for is some sort of storage, that can also be mobile, for the bolts, washers and nuts for the cultivator.
45dfc424e073bae3b0a5e0f96bfb8c17.jpg
Usually when we get new shovels, or sweeps (whatever you want to call them) for the cultivator they send a box of new nuts and bolts. This definitely causes some clutter on the shelf. As you can see someone will take a box to the field to change a few sweeps and then the box is left in the bed of the truck. Then it gets rained on and the box is ruined so everything falls out. I want to find something that I can put them in, that will also keep them dry. If we need to take them to the field we can grab them and go. When we don’t need them they can stay on the shelf with the rest of the parts. Not sure what I’ll do yet.

More rain moved in this evening and more on the way tomorrow. Looks like we’ll be catching up on some more shop work tomorrow.

We also had a few escapee calves this evening at dads. They managed to knock a wire down and it was just right to crawl over. Luckily they were pretty cooperative and wanted back in with their moms.
 

Attachments

  • 45dfc424e073bae3b0a5e0f96bfb8c17.jpg
    45dfc424e073bae3b0a5e0f96bfb8c17.jpg
    805.5 KB · Views: 0
  • 7b5d60ad7cb88b4be5c59f0d233b661a.jpg
    7b5d60ad7cb88b4be5c59f0d233b661a.jpg
    826.8 KB · Views: 0
  • c59e53e471024951bffdfbbb64236656.jpg
    c59e53e471024951bffdfbbb64236656.jpg
    718.7 KB · Views: 0
  • 0d8f302b456719c696917a22f1c67224.jpg
    0d8f302b456719c696917a22f1c67224.jpg
    830.1 KB · Views: 0
  • 77ad4f41b12b346ae73d22510a7d8b40.jpg
    77ad4f41b12b346ae73d22510a7d8b40.jpg
    676.9 KB · Views: 0
  • 1f560cf0973fab561f26bc7f918f97c0.jpg
    1f560cf0973fab561f26bc7f918f97c0.jpg
    849.7 KB · Views: 0
  • a38a60f8e59479da4aab8de50edf037d.jpg
    a38a60f8e59479da4aab8de50edf037d.jpg
    836.2 KB · Views: 0
  • 965d961c54fbbb761d954906aba2a358.jpg
    965d961c54fbbb761d954906aba2a358.jpg
    266.5 KB · Views: 0
  • 7b92b95796bc75fdd37c5cb4b2712223.jpg
    7b92b95796bc75fdd37c5cb4b2712223.jpg
    968.8 KB · Views: 0
  • 2e91f5dadd528c05572757bdc93c16c5.jpg
    2e91f5dadd528c05572757bdc93c16c5.jpg
    623.9 KB · Views: 0
OP
C

cliftonbros89

Well-known member
Joined
Jun 2, 2015
Messages
3,009
Location
Missouri
Maybe I’m a bit of a hoarder. I tend to feel like it sometimes. Today I grabbed a few scrap pieces left from replaced parts from the disk.
047c3ccc57d6731d80d7a0d64515ea07.jpg
I used a wire wheel to remove some of the dust, dirt, rust, and grease from them. I figure they could come in handy. Used for some type of driver of some sort.

I added them to a drawer in the box.
25f7dac3792849b107348cf086eb665f.jpg
This box on top of my smaller toolbox has started to become the “box for tools that aren’t actually tools”. It now contains the newly added pieces. Some cut off bolts. My supply of new bolts for customizing that I picked up yesterday, and several other odd and end pieces. I also have some gaskets cut to use for things like thermostat gaskets for cooling system flushes. That way I can use those instead of the actual good gasket for the flush and won’t ruin it when I have to reinstall the thermostat.

I suppose there’s nothing wrong with repurposing. So I’ll see what I can use those new additions for some day.

Forgive me if I’ve discussed the box before. I may have. It’s starting to be a bit difficult to remember what I have and haven’t covered. I may have to read my own thread over.
 

Attachments

  • 25f7dac3792849b107348cf086eb665f.jpg
    25f7dac3792849b107348cf086eb665f.jpg
    813.5 KB · Views: 0
  • 047c3ccc57d6731d80d7a0d64515ea07.jpg
    047c3ccc57d6731d80d7a0d64515ea07.jpg
    725.5 KB · Views: 0

welder57

Well-known member
Joined
Feb 26, 2011
Messages
414
Can you put the bolts & nuts in the boxes in a 2 1/2" gallon bucket with a lid? Ryan's here gave me 4 of these with lids that I use. They had icing in them but they clean out well and the lids keep the water and junk from falling in them. Just saying buckets come in handy.
 
OP
C

cliftonbros89

Well-known member
Joined
Jun 2, 2015
Messages
3,009
Location
Missouri
Can you put the bolts & nuts in the boxes in a 2 1/2" gallon bucket with a lid? Ryan's here gave me 4 of these with lids that I use. They had icing in them but they clean out well and the lids keep the water and junk from falling in them. Just saying buckets come in handy.


Actually, this morning I looked around a bit and thought I had something that would work. Turns out I did.
6dc1149ce93dcb11d33a5c95bf3c74ac.jpg
Not a 2-1/2 gallon but then I also would’ve had to have a couple. Turns out we had quite a few more bolts and nuts than I’d thought. I have a few bucket lids around somewhere. I’ll probably be putting a lid on top too. I’d hate for them all to spill out somewhere.
 

Attachments

  • 6dc1149ce93dcb11d33a5c95bf3c74ac.jpg
    6dc1149ce93dcb11d33a5c95bf3c74ac.jpg
    760.6 KB · Views: 0
OP
C

cliftonbros89

Well-known member
Joined
Jun 2, 2015
Messages
3,009
Location
Missouri
The start for today was slightly exciting. It started raining late last night and just kept going. But the first part of the day started out like this.
b6d9ad6099513183e1a8bfdd9d73af35.jpg
She was patiently waiting by the gate. She knew she wasn’t supposed to be out. They can never find their way back in and usually don’t like to be out alone after awhile. But I got her back in without much trouble.

After that I left to feed the calves. I put a good bed of straw down for them. It looked like they’ve been smart enough to not venture out in the rain too much. They were fairly dry. I gave them a little extra corn this morning than it was back to the shop.

I got to start with something a little different. I got to do a little work to mom’s stove
4dbd1ef631a26c07eb4f0f94d826c6e5.jpg
I’m not completely for sure what took place. I guess while opening the door on the oven she accidentally hit the clean button so it tried to lock the door. Then the motor for the lock locked itself up and would not unlock.
15cc18c88837ba51d0b999216fe4f55e.jpg
Luckily I just took the back cover off, took the lock motor loose and unhooked the linkage for the lock. I was able to move the linkage back to the unlocked position and hooked everything back together. It was good to go after that.

Dad wanted to go in to town for a few things so I was alone at the shop for most the day. It just kept raining so I didn’t have a lot of options. The sprayer doesn’t fit all the way in the shop. I didn’t want a bunch of rain getting in the shop with the doors open. Nor did I want to work on the sprayer all wet. So I decide to continue work in the parts loft.

The rain continued on. A little after 1 this afternoon I checked the rain gauge.
9470d9dd2cdf027281290dc992414e1c.jpg
Just a bit over 4 inches from the last few days.

I ended up really making some progress. For the most part I think I pretty much have things wrapped up. At least good enough for now.
844ee98f290e6d19570cb9f833ee27e1.jpg
I relocated some more things that didn’t really need to be there. Threw away a few more things. Grabbed a few things to get rid of to possibly sell too.
51d6806002070a401b13b8d88f6764a0.jpg
I could go through the whole tour. But that may wait til later. There are a few things to move around yet. I have some more things to finish adding to the inventory list too. The pictures may not show a lot but it is different than it was a few months ago. You can actually walk the whole length of the loft. Plus there’s actually shelf space. It’s nice.

When dad arrived this afternoon he started on making a hitch for the new grain truck with some metal he picked up this morning.
b63f33537ab6f45fa38843e875e1e31c.jpg
We plan to use it to haul water and chemicals for spraying as we used the formerly wrecked truck.

We pulled the truck in the truck shed, out of the rain to put the hitch on.
587851e0a320f785fdd7d39db9ee4066.jpg
We used our big heavy duty Milwaukee magnetic drill press to drill some holes for bolts to attach the hitch. We’ll use it to pull a trailer that holds the chemicals for spray. Sometimes we’ll also pull a wagon that has another water tank for extra water for spraying. I’ll try to have a picture of it finished in the daylight tomorrow.

I’d check the gauge again before we but the hitch on.
a97d2b09f052dc02754375910ab88f4d.jpg
That was a little before 6 this evening. There wasn’t much room left so I emptied the gauge. We’ll see how much we ended up with after today. Tomorrow is supposed to be dry. But there’s a bit of s chance for more by the weekend. Also a few chances for the beginning of the week.

Have to feed hay tomorrow. Along with the rest of the feeding. Hopefully we’ll be able to really work on something tomorrow. I’d like to get the 720 back together and out of the shop and get the sprayer pulled in to start servicing it.
 

Attachments

  • b6d9ad6099513183e1a8bfdd9d73af35.jpg
    b6d9ad6099513183e1a8bfdd9d73af35.jpg
    551 KB · Views: 0
  • b63f33537ab6f45fa38843e875e1e31c.jpg
    b63f33537ab6f45fa38843e875e1e31c.jpg
    809.7 KB · Views: 0
  • 51d6806002070a401b13b8d88f6764a0.jpg
    51d6806002070a401b13b8d88f6764a0.jpg
    789 KB · Views: 0
  • 844ee98f290e6d19570cb9f833ee27e1.jpg
    844ee98f290e6d19570cb9f833ee27e1.jpg
    788.9 KB · Views: 0
  • 9470d9dd2cdf027281290dc992414e1c.jpg
    9470d9dd2cdf027281290dc992414e1c.jpg
    755.4 KB · Views: 0
  • 587851e0a320f785fdd7d39db9ee4066.jpg
    587851e0a320f785fdd7d39db9ee4066.jpg
    719.7 KB · Views: 0
  • a97d2b09f052dc02754375910ab88f4d.jpg
    a97d2b09f052dc02754375910ab88f4d.jpg
    725.3 KB · Views: 0
  • 15cc18c88837ba51d0b999216fe4f55e.jpg
    15cc18c88837ba51d0b999216fe4f55e.jpg
    745.7 KB · Views: 0
  • 4dbd1ef631a26c07eb4f0f94d826c6e5.jpg
    4dbd1ef631a26c07eb4f0f94d826c6e5.jpg
    676.8 KB · Views: 0

FTWingRiders

Well-known member
Joined
Mar 21, 2012
Messages
1,558
Location
Central Ma
Man.. I get tired just reading about your day!! LOL!! It must feel good to get this organized tho, definitely a job well done, and one that will pay off in the future..

I spent some time in my youth chasing cows.. fond memories..NOT!! HAHA!!
 
OP
C

cliftonbros89

Well-known member
Joined
Jun 2, 2015
Messages
3,009
Location
Missouri
Not too much crazy action for Friday. I also have a lack of photos.

Got up to start off feeding as usual. It was still spitting some rain yet in the morning. Dad and I fed hay everywhere. I also fed the calves their corn for the day. I increased the amount a little bit too.

I drove out to the retirement farm to feed hay and check the cows. While I did that dad and my uncle started putting the 720 back together. My uncle also changed the oil in one of our old model A’s too. He suddenly wants to run all the two cylinders that have been sitting all winter. Even though he had all winter to run them.

After feeding the cows I drove to town. I went to the JD dealers parts drop box. Finally after waiting almost 2 months my new JD wrenches arrived.
5e396a6654cd7248a77f782c413204c9.jpg
ae03df9ad6613644b95d75bb809cb6ab.jpg
1-5/16” - 2” full polish. I’ll admit the wait to get them makes me wonder how well a warranty would work for them. But they seem pretty tough. If I break one of these the wrench probably won’t be the only thing broke. I have a similar set in my truck. But it’s nice to have a good set in my shop box so I don’t always have to run to the truck when I need a larger wrench. Dad has several large wrenches hanging on the wall from a set he has but it skips several sets. I’ve found the size I use most often is 1-7/16” for hydraulic fittings. Dad’s set skips that size.
75795e95d6be5fc36b409c83819a5f9f.jpg
I cleaned out the bottom drawer of my main box and put them all there for now. Although now they’re the only tools in the drawer. That may change later.

So we worked on getting the 720 out of the way. As is common my uncle was the one who took it apart and put the nuts and bolts scattered out all about the shop. Then some how dad and I are the ones who get stuck putting everything back together. Then locating all the bolts is always fun.

My dad’s friend (the one who was in the truck when it turned over) stopped by for a few minutes. He had is 14 year old son with him. He decided to stick around for the afternoon. He thinks it’s fun to “work on the farm” but that usually consist of him not really working. Mainly just walking around asked questions about everything but what we’re doing. So I put him to work sweeping the shop and helping me move some tires around.

I finally picked up all those tires dad dropped off to be fixed week before last. Now we’ll have a few wagon spares.

Dad fixed a piece for the harrow that broke last spring. I took it down to the bottom shed to put it back on the harrow.

We also took the disk back down to the bottom shed as well. It’s ready to go, with the exception of the wiring harness for the warning lights. So we put the disk in the shed and hooked the 8400 to the anhydrous applicator.
6922a08ba03d63c8001aee7ff8c9f4a4.jpg
It shouldn’t require much. Just checking tires, hoses and disk bearings. This is one of the other non-Deere pieces of equipment we have. It belonged to a local fertilizer dealer that rented it out for use. We bought it at auction when they went out of business. Since it was a rental it was abused. Constantly. So we’ve made several repairs to it. We keep it rolling because even a decent used JD anhydrous applicator is overly expensive.

To end the day I put the recently charged batteries back in our 4630 sprayer. I started it up and let it run for awhile. Dad has always been the one to take care of spraying all the fields. So with him unable to work last year and me having more than enough to take care of we hired out most of spraying last year. So the sprayer hasn’t actually been used or really even ran for 2 years now. After going over the anhydrous applicator we’ll be going through the sprayer rather thoroughly. It’ll be getting a full service I intend to replace all the filters on it. It has several filters too.

That was pretty much it for Good Friday.

I forgot to check what the final rainfall amount was. But there will be more on the way tonight, and tomorrow, and possibly Monday and Tuesday. It’s going to be wet.
 

Attachments

  • 5e396a6654cd7248a77f782c413204c9.jpg
    5e396a6654cd7248a77f782c413204c9.jpg
    822 KB · Views: 0
  • ae03df9ad6613644b95d75bb809cb6ab.jpg
    ae03df9ad6613644b95d75bb809cb6ab.jpg
    763.4 KB · Views: 0
  • 6922a08ba03d63c8001aee7ff8c9f4a4.jpg
    6922a08ba03d63c8001aee7ff8c9f4a4.jpg
    1.1 MB · Views: 0
  • 75795e95d6be5fc36b409c83819a5f9f.jpg
    75795e95d6be5fc36b409c83819a5f9f.jpg
    693.1 KB · Views: 0
OP
C

cliftonbros89

Well-known member
Joined
Jun 2, 2015
Messages
3,009
Location
Missouri
My sets finally came in too. Did you get the metric sets too


No not yet. I was tempted to but I’m holding off for a little while yet. It seems like the metric are even more expensive. Luckily, it seems as though I don’t need the larger metric sizes very often.
 
OP
C

cliftonbros89

Well-known member
Joined
Jun 2, 2015
Messages
3,009
Location
Missouri
Well no pictures for Saturday. Just did the feeding, had the help of my 4 year old nephew. He was more interested in asking questions about every item he could pick up in the barn that watching me actually feed the calves.

After feeding we headed back to work on some fences. We actually had the electric shut off on the fences. They usually never bother with it during the winter. But with the grass greening up they’re tempted to go through the fence. Hence the escape we had last week. But it’s charged up now.

Took Easter off. Had breakfast with the girlfriends family. Then lunch with my parents, grandparents, sister, her husband and my nephew. That also involved a 4 hour game of Monopoly: Mega Edition
 
To avoid these ads, REGISTER NOW!
Top Bottom