To avoid these ads, REGISTER NOW!

Bevo's Corvette Garage Project with Pictures

BevoZ06

Well-known member
Joined
Nov 30, 2011
Messages
165
Location
Austin Texas
Well, I have been a member of this forum for just about two weeks and I must say I am inspired by what I have read and seen, as well as how much I have learned in a short time from all of you. I have been inspired and challenged to attack my own garage project. We own two new Corvettes that sleep in the garage every night. My daily driver is a GMC Sierra extended cab truck and my wife drives a Nissan sedan daily. They have to sleep outside.

We were annexed into the city over our objections and the environuts who control the city council and zoning board will not permit any expansion of the current garage. So I am now going to try to make the most of what I have and I have decided to finally finish off the interior of a detached garage that was originally built 19 years ago. I have pretty well decided to use plywood on the interior walls rather than drywall/sheetrock.

It has the 16' wide overhead door and a 3' walk-in door. I ran the electrical rough in when we first bought the property and have installed receptacles about every four feet around the perimeter. There are no windows, so I have ordered windows and the window installation will be the first step of finishing.

I need to do one wall at a time because I already have so much in the garage that I cannot clear more than one wall at a time to work on it. I will need to park the two vehicles inside each night so I can't just clear everything from all the walls and move it all to the center at the same time.

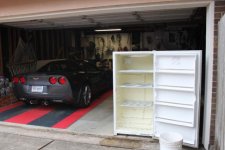
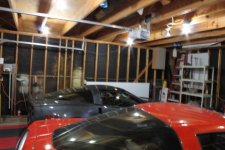
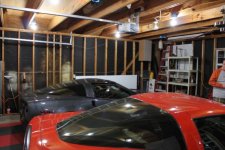
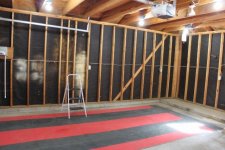
Here is the garage as seen from the driveway approach. The second photo is also shot from the driveway. I am defrosting and cleaning a freezer that will be moved from the garage to an inside utility room. The third shot shows the approach from the walk-in door. When I moved the freezer outside I discovered the remains of a long-ago ant invasion. It was surprising how much dirt was behind and under the freezer.

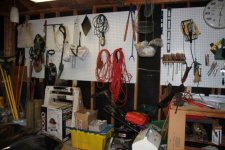
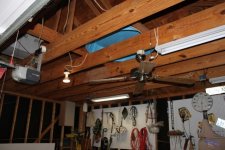
There are about a dozen photos showing the various interior walls and ceiling joists. The half-done flooring was put in some years ago when I had one Corvette that was black exterior with a red/black interior. That car was sold and I will redo the entire floor before the project is complete.

I have worked out a floor plan on the Grizzly Workshop site and will begin next weekend when my windows should arrive. This will be a weekend project and I anticipate that it will take several months, but by posting this publicly I will be encouraging, if not shaming, myself to keep at it until I am done.

I will appreciate any and all suggestions any of you may have along the way. I'll especially appreciate it if you can save me from making a big mistake along the way. I will keep this thread updated with progress reports and photos. Thanks for reading along with me. Here are the "before" photos taken today, December 10, 2011.

Bevo
 

Attachments

  • IMG_4309 (640x427).jpg
    IMG_4309 (640x427).jpg
    51.1 KB · Views: 682
  • IMG_4310 (640x427).jpg
    IMG_4310 (640x427).jpg
    35.7 KB · Views: 674
  • IMG_4312 (640x427).jpg
    IMG_4312 (640x427).jpg
    40.8 KB · Views: 597
  • IMG_4313 (640x427).jpg
    IMG_4313 (640x427).jpg
    54.4 KB · Views: 632
  • IMG_4314 (640x427).jpg
    IMG_4314 (640x427).jpg
    44.1 KB · Views: 733
  • IMG_4315 (640x427).jpg
    IMG_4315 (640x427).jpg
    44.7 KB · Views: 622
  • IMG_4316 (640x427).jpg
    IMG_4316 (640x427).jpg
    48 KB · Views: 636
Last edited:

To avoid these ads, REGISTER NOW!
OP
B

BevoZ06

Well-known member
Joined
Nov 30, 2011
Messages
165
Location
Austin Texas
Here are the remaining "before" photos.
 

Attachments

  • IMG_4318 (640x427).jpg
    IMG_4318 (640x427).jpg
    43.1 KB · Views: 263
  • IMG_4319 (640x427).jpg
    IMG_4319 (640x427).jpg
    49.1 KB · Views: 252
  • IMG_4320 (640x427).jpg
    IMG_4320 (640x427).jpg
    53.3 KB · Views: 236
  • IMG_4321 (640x427).jpg
    IMG_4321 (640x427).jpg
    49.5 KB · Views: 371
  • IMG_4322 (640x427).jpg
    IMG_4322 (640x427).jpg
    33.8 KB · Views: 268
  • IMG_4323 (640x427).jpg
    IMG_4323 (640x427).jpg
    44.6 KB · Views: 257
  • IMG_4325 (640x427).jpg
    IMG_4325 (640x427).jpg
    47.2 KB · Views: 265

bigdav160

Well-known member
Joined
Apr 14, 2007
Messages
2,027
Location
Deep in the heart of Texas
Welcome to the forum. Too bad about your annexation. It's all about the tax revenue.

Austin is a beautiful area but the political climate would send my blood pressure soaring.
 
OP
B

BevoZ06

Well-known member
Joined
Nov 30, 2011
Messages
165
Location
Austin Texas
Thanks for the welcome, bigdav. What part of Texas are you in?

Not much photo-worthy to report from the first day. I did get the freezer moved inside to the utility room and moved some things out of the garage to free up some floor space. Moved a lawn mower, fertilizer spreader and other like items that consumed floor space and prevented usage of space above them.

I am waiting for the windows to arrive. They should be here this week sometime. I hope it's not raining this weekend so I can make the rough openings and get installed weathertight. Will post some photos of the window installation.
 
OP
B

BevoZ06

Well-known member
Joined
Nov 30, 2011
Messages
165
Location
Austin Texas
Here is a very minor update. I have been waiting on delivery of a shed I ordered from The Home Depot as well as two windows ordered. If you looked at the photos in the first post, you can see that there is a lot of lawn and garden stuff and other items that need to be removed from the garage in order to make room.

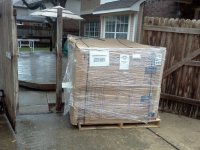
The shed was delivered today in the rain. The driver was nice enough to move the pallet up the driveway, but it would not fit through my 6' wide gate. The rain is supposed to stop tomorrow and I will take off work the following day to assemble it. Once I have cleared some space in the garage, and assuming the rain stops, the window installation will be next.
 

Attachments

  • Shed Delivery 1 (2) (512x384).jpg
    Shed Delivery 1 (2) (512x384).jpg
    67.2 KB · Views: 93
  • Shed Delivery 3 (2) (512x384).jpg
    Shed Delivery 3 (2) (512x384).jpg
    58.8 KB · Views: 132
OP
B

BevoZ06

Well-known member
Joined
Nov 30, 2011
Messages
165
Location
Austin Texas
We had a day of no rain and I had the day off work, so I was able to make some small progress.

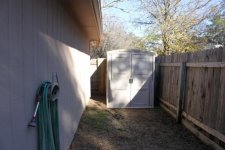
We located an out-of-the way spot behind the garage and assembled the shed back there. We got it finished and weather-tight about an hour before the rain moved back in. Notice that we removed and replaced the fence pickets on the fence section behind the shed. They were due for replacement anyway and now there's not much room to work back there.

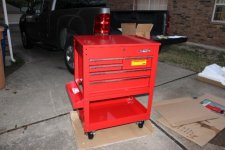
Then I went to Harbor Freight and used a coupon I got on this forum (thanks again to member "anyheck") to purchase the five drawer roller cart for $149.99. We got it assembled fairly quickly and I will use it to store some tools that are now hanging on pegboard, as well as put it to good use during the garage project. Here are some shots below of the assembly.

I picked up the windows I had ordered from The Home Depot this morning, but rain is moving in again this evening. Between the rain tomorrow and spending some family time for Christmas, it looks as if the garage windows will be a project for next weekend.
 

Attachments

  • IMG_4373 (640x427).jpg
    IMG_4373 (640x427).jpg
    38.7 KB · Views: 240
  • IMG_4372 (640x427).jpg
    IMG_4372 (640x427).jpg
    41.4 KB · Views: 197
  • IMG_4369 (640x427).jpg
    IMG_4369 (640x427).jpg
    43.8 KB · Views: 260
  • IMG_4367 (640x427).jpg
    IMG_4367 (640x427).jpg
    37.9 KB · Views: 206
  • IMG_4364 (640x427).jpg
    IMG_4364 (640x427).jpg
    44.1 KB · Views: 174
  • IMG_4365 (640x427).jpg
    IMG_4365 (640x427).jpg
    41.6 KB · Views: 182

55chevy

Well-known member
Joined
May 16, 2009
Messages
417
Location
Hendersonville, Tn.
Hey Bevo, are you sure about windows? It is not too late to change your mind. Windows take up alot of wall space.

It is nice to have natural light, but I have two windows in my shop and if I were doing it again, I would leave them out.

Thanks for posting your project and good luck to you.

Glad to hear that you folks are getting some rain. :thumbup:
 
OP
B

BevoZ06

Well-known member
Joined
Nov 30, 2011
Messages
165
Location
Austin Texas
Hey Bevo, are you sure about windows? It is not too late to change your mind. Windows take up alot of wall space.

It is nice to have natural light, but I have two windows in my shop and if I were doing it again, I would leave them out.

Thanks for posting your project and good luck to you.

Glad to hear that you folks are getting some rain. :thumbup:

The rain is still needed badly, but I just wish it would happen on week days and give me some dry weekends.

I have thought carefully about the windows and wall space, but after 19 years of no natural light I have decided to install them. If, after the installation, I really cannot make it without the wall space I will just stand some tall cabinets, shelving or whatever in front of them. I do plan to have some short cabinets or my rolling cart in front of them so the floor space beneath them will not be wasted below.
 

cashishift

Well-known member
Joined
Sep 2, 2008
Messages
1,254
Location
Omaha, NE
Mostly sporting clays, but occasionally some trap or *****.

I do the opposite, mostly trap but some sporting clays.

SC is about 75-90 minutes away from where I live, so we don't get there as much as I would like to.

What do you shoot?
 
OP
B

BevoZ06

Well-known member
Joined
Nov 30, 2011
Messages
165
Location
Austin Texas
I do the opposite, mostly trap but some sporting clays.

SC is about 75-90 minutes away from where I live, so we don't get there as much as I would like to.

What do you shoot?

I have more than a dozen shotguns, almost all Berettas. The one I shoot most frequently is a model 682 Gold. I have Beretta over/unders, semi-autos, and an old Mark II single shot break-loading trap gun. I have a couple of 390s that have never been fired.
 

cashishift

Well-known member
Joined
Sep 2, 2008
Messages
1,254
Location
Omaha, NE
I have more than a dozen shotguns, almost all Berettas. The one I shoot most frequently is a model 682 Gold. I have Beretta over/unders, semi-autos, and an old Mark II single shot break-loading trap gun. I have a couple of 390s that have never been fired.

You're my kind of guy.. I have a Beretta also. 686 White Onyx Sporting 30"

I love it to death, it is my first and only shotgun so far.. but the bug has bitten me. I'm also fairly certain I am a italian gun guy for life. :beer:

My dream gun is a 682 Gold E, Unsingle combo. 32/34.. someday :)
 
OP
B

BevoZ06

Well-known member
Joined
Nov 30, 2011
Messages
165
Location
Austin Texas
It's been a few weeks since I have posted, but I have made a little progress. We got the shed assembled and started moving some of our "junk" into it.

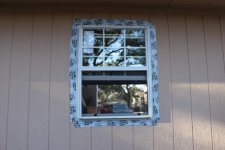
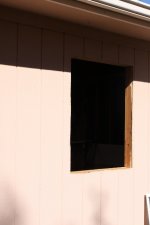
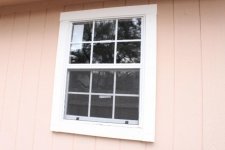
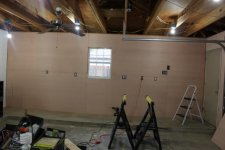
Then I started on installing two windows after living with this garage without windows for 19 years. I did these over New Year's weekend.
 

Attachments

  • IMG_4430 (640x427).jpg
    IMG_4430 (640x427).jpg
    32.7 KB · Views: 103
  • IMG_4423 (427x640).jpg
    IMG_4423 (427x640).jpg
    120.9 KB · Views: 89
  • IMG_4420 (640x427).jpg
    IMG_4420 (640x427).jpg
    54.9 KB · Views: 99
  • IMG_4506 (640x427).jpg
    IMG_4506 (640x427).jpg
    23.2 KB · Views: 87
OP
B

BevoZ06

Well-known member
Joined
Nov 30, 2011
Messages
165
Location
Austin Texas
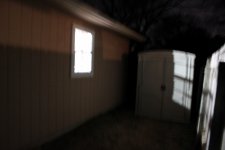
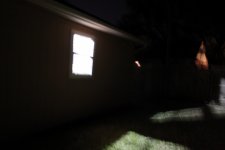
About two weeks ago I started on the electrical wiring. I had to move some Romex around where I cut the window openings. I installed nine overhead lighting fixtures controlled by three switches. Temporarily they have porcelain sockets until I get to finishing the ceiling. Here are some pics of it. I have nine 100 watt equivalent cfl bulbs installed. They really light up the place, especially with no walls or ceilings to reflect the white lights.
 

Attachments

  • IMG_4531 (640x427).jpg
    IMG_4531 (640x427).jpg
    128.3 KB · Views: 97
  • IMG_4530 (640x427).jpg
    IMG_4530 (640x427).jpg
    117 KB · Views: 107
  • IMG_4532 (640x427).jpg
    IMG_4532 (640x427).jpg
    48.4 KB · Views: 136
  • IMG_4525 (640x427).jpg
    IMG_4525 (640x427).jpg
    41.6 KB · Views: 143
  • IMG_4522 (640x427).jpg
    IMG_4522 (640x427).jpg
    46.5 KB · Views: 168
  • IMG_4516 (640x427).jpg
    IMG_4516 (640x427).jpg
    135.2 KB · Views: 113

70CopperZ28

Well-known member
Joined
Aug 14, 2009
Messages
53
Location
Pflugerville, TX
Nice work and Vettes! I shoot at Cap City every now and then. I shoot a Beretta Silver Pigeon and love it! I just picked up a 20 gauge Wingmaster LW and getting pretty good with it.
 
OP
B

BevoZ06

Well-known member
Joined
Nov 30, 2011
Messages
165
Location
Austin Texas
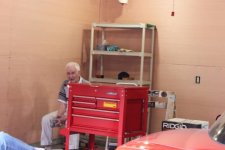
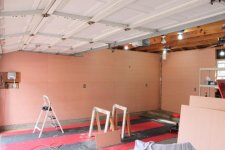
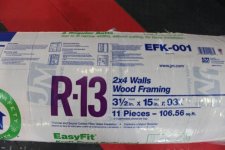
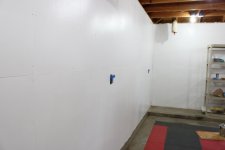
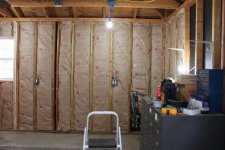
Last weekend I cleared everything from the left half of the garage and insulated the walls. Then I installed some plywood paneling. As I was finishing this phase, I had a visit from an 88-year-old friend who likes to visit and see what I'm doing. He was nice enough to point out a couple of screws that needed to be sunk just a little more.

This weekend I will paint the left half, and then repeat the steps for the front wall. Here are a couple of pictures.
 

Attachments

  • IMG_4559 (640x427).jpg
    IMG_4559 (640x427).jpg
    27.4 KB · Views: 247
  • IMG_4557 (640x427).jpg
    IMG_4557 (640x427).jpg
    141 KB · Views: 148
  • IMG_4553 (640x427).jpg
    IMG_4553 (640x427).jpg
    32.8 KB · Views: 158
  • IMG_4547 (640x427).jpg
    IMG_4547 (640x427).jpg
    49.3 KB · Views: 144
  • IMG_4544 (640x427).jpg
    IMG_4544 (640x427).jpg
    37.3 KB · Views: 127
  • IMG_4541 (640x427).jpg
    IMG_4541 (640x427).jpg
    44.7 KB · Views: 135
To avoid these ads, REGISTER NOW!
OP
B

BevoZ06

Well-known member
Joined
Nov 30, 2011
Messages
165
Location
Austin Texas
I haven't posted in awhile. Here are some shots from a week or so ago.

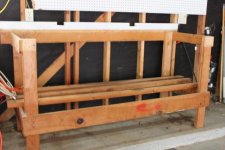
I got the first 1 1/2 walls painted, then had to attack the remainder of the front wall. First, I had to remove my shotgun shell reloader and then dismantle and remove the existing workbench that had been there for 19 years.
 

Attachments

  • IMG_4581 (640x427).jpg
    IMG_4581 (640x427).jpg
    36.4 KB · Views: 136
  • IMG_4578 (640x427).jpg
    IMG_4578 (640x427).jpg
    47.3 KB · Views: 177
  • IMG_4577 (640x427).jpg
    IMG_4577 (640x427).jpg
    53.6 KB · Views: 170
  • IMG_4575 (640x427).jpg
    IMG_4575 (640x427).jpg
    51.6 KB · Views: 145
  • IMG_4572 (640x427).jpg
    IMG_4572 (640x427).jpg
    49.3 KB · Views: 156
  • IMG_4569 (640x427).jpg
    IMG_4569 (640x427).jpg
    33.5 KB · Views: 149
  • IMG_4567 (640x427).jpg
    IMG_4567 (640x427).jpg
    119.7 KB · Views: 149
OP
B

BevoZ06

Well-known member
Joined
Nov 30, 2011
Messages
165
Location
Austin Texas
Then it was time to move out the workbench and insulate, followed by more plywood paneling. Will prime and paint this front wall tomorrow.

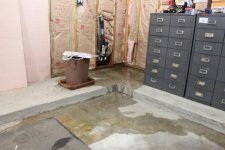
Oops!!! I hit the main water shut-off line and broke off the valve. This resulted in a quick trip to the water meter at the front curb to turn it off. We flushed toilets overnight courtesy of water buckets filled from the neighbor's hose.
 

Attachments

  • IMG_4589 (640x427).jpg
    IMG_4589 (640x427).jpg
    42.3 KB · Views: 81
  • IMG_4587 (640x427).jpg
    IMG_4587 (640x427).jpg
    47.2 KB · Views: 80
  • IMG_4585 (640x427).jpg
    IMG_4585 (640x427).jpg
    44.9 KB · Views: 75
  • IMG_4582 (640x427).jpg
    IMG_4582 (640x427).jpg
    51.9 KB · Views: 84
  • IMG_4595 (640x427).jpg
    IMG_4595 (640x427).jpg
    36.9 KB · Views: 110
  • IMG_4596 (427x640).jpg
    IMG_4596 (427x640).jpg
    40.8 KB · Views: 166

fredtech

Well-known member
Joined
Aug 16, 2007
Messages
53
Location
Manvel, Texas
Great work!

I live near Houston and I'm really curious at the improvement after all the insulation is complete. If you can take the temperature before and after insulation is installed that would be greatly appreciated.

My garage (20x20) is not insulated and can reach 110F during the summer sunny afternoon :sad:
I have a 20" fan on the workbench and installed a roof exhaust fan but it barely help. I suspect that a roof insulation job would be the greatest improvement?
It's hard to spend more than an hour working in scorching heat and humidity.

I like your windows. In my case it wouldn't be so much for lighting purposes but more for added ventilation/air circulation. I installed two, 8' double fluorescent and I can see very well inside.

You are doing great. Looking forward to see more.
Fred
 
OP
B

BevoZ06

Well-known member
Joined
Nov 30, 2011
Messages
165
Location
Austin Texas
A three-day weekend is here and I hope to make some progress. Here is the Saturday, February 18, update.

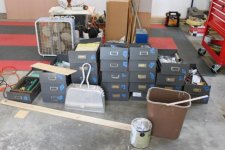
It was time to attack the third and final wall. First we had to empty 28 heavy drawers from the Cole Steel cabinets and move 15 cases of shotgun shells to another location in the garage. Bending over to pick up lead-filled shotgun shells is not easy on the back. Once we got the Corvettes moved out of the garage, everything else went on the floor to the center of the garage. And then I began insulating and installing the plywood to the third and final wall.

Here are a few photos.
 

Attachments

  • IMG_4659 (640x427).jpg
    IMG_4659 (640x427).jpg
    31.4 KB · Views: 46
  • IMG_4658 (640x427).jpg
    IMG_4658 (640x427).jpg
    32.8 KB · Views: 46
  • IMG_4654 (640x427).jpg
    IMG_4654 (640x427).jpg
    40 KB · Views: 46
  • IMG_4653 (640x427).jpg
    IMG_4653 (640x427).jpg
    40.5 KB · Views: 42
  • IMG_4648 (640x427).jpg
    IMG_4648 (640x427).jpg
    46.8 KB · Views: 45
OP
B

BevoZ06

Well-known member
Joined
Nov 30, 2011
Messages
165
Location
Austin Texas
February 19, the second day of a three-day weekend update.

I put one coat of primer on the plywood wall, and then waited for it to dry before applying the top coat of semi-gloss latex paint.

In the meantime, my dear wife painted the trim lumber we will install tomorrow. She painted 13 1"x4"x8' boards. She is a great partner in this venture. Here are some pics of the progress.
 

Attachments

  • IMG_4665 (640x427).jpg
    IMG_4665 (640x427).jpg
    50.8 KB · Views: 78
  • IMG_4668 (640x427).jpg
    IMG_4668 (640x427).jpg
    28.5 KB · Views: 70
  • IMG_4673 (640x427).jpg
    IMG_4673 (640x427).jpg
    43.8 KB · Views: 67
  • IMG_4679 (427x640).jpg
    IMG_4679 (427x640).jpg
    43.5 KB · Views: 81
OP
B

BevoZ06

Well-known member
Joined
Nov 30, 2011
Messages
165
Location
Austin Texas
Update for Monday, Feb 21: Today was Presidents' Day holiday, so I was able to make some more progress.

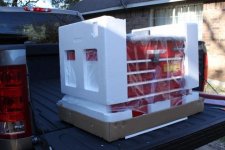
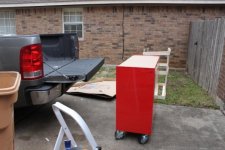
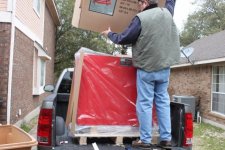
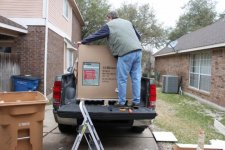
I started out at Harbor Freight and picked up the glossy red 13-drawer cabinet. HF loaded it on my pickup truck with a fork lift. My wife and one of my sons helped me remove the packing crate and the drawers.

As we prepared to put up the window casings and frames, the two Corvettes waited patiently at the curb while I cleaned up their home.

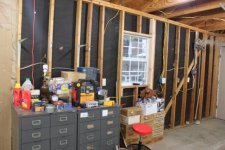
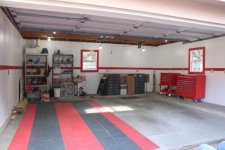
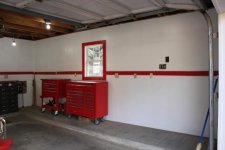
We framed the windows and added a red railing around the perimeter of the garage. We moved the Cole Steel cabinets into place and finally put the cars back into the garage.

We have made a lot of progress, but still to do are deciding what kind of top to make for the workbench. I will use the two Cole Steel cabinets as pedestals to support the top. They have 28 drawers where I can store fasteners, supplies, etc. I will also have to decide how to finish the floor. I don't know whether to complete it with the same flooring I got from The Home Depot, or to remove it and start fresh.

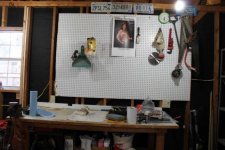
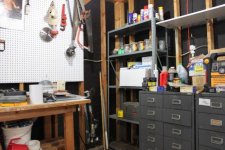
I also have to dig out all my tools I removed from the pegboard and under the old bench and fill up the HF rolling service cart and the 13-drawer cabinet.

Pictures below.
 

Attachments

  • IMG_4703 (640x427).jpg
    IMG_4703 (640x427).jpg
    37.4 KB · Views: 192
  • IMG_4700 (640x427).jpg
    IMG_4700 (640x427).jpg
    35.1 KB · Views: 240
  • IMG_4692 (640x427).jpg
    IMG_4692 (640x427).jpg
    28.5 KB · Views: 197
  • IMG_4689 (640x427).jpg
    IMG_4689 (640x427).jpg
    53.2 KB · Views: 185
  • IMG_4684 (640x427).jpg
    IMG_4684 (640x427).jpg
    42.2 KB · Views: 134
  • IMG_4682 (640x427).jpg
    IMG_4682 (640x427).jpg
    53.3 KB · Views: 129
  • IMG_4681 (640x427).jpg
    IMG_4681 (640x427).jpg
    52.6 KB · Views: 136
OP
B

BevoZ06

Well-known member
Joined
Nov 30, 2011
Messages
165
Location
Austin Texas
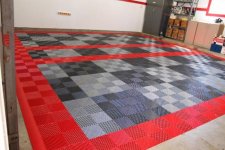
I just ordered Race Deck flooring. It will be in a graphite and alloy checkered pattern with red borders. It should be delivered the middle of next week and I'll install it next weekend.
 

JoeMopar

Well-known member
Joined
Nov 4, 2010
Messages
179
Don't know if I missed it, but what do you have planned for the ceiling?
 
OP
B

BevoZ06

Well-known member
Joined
Nov 30, 2011
Messages
165
Location
Austin Texas
Don't know if I missed it, but what do you have planned for the ceiling?

I haven't decided yet. Because it has been open for all this time, there is no roof or soffitt ventilation. I will probably contract out the roof and ceiling part of the project, so that part of it will be last. I'll update this thread as it goes. Thanks for the inquiry.
 
OP
B

BevoZ06

Well-known member
Joined
Nov 30, 2011
Messages
165
Location
Austin Texas
I just picked up a great workbench top from a Craigslist ad. It is a 34" X 80" X 1 3/4" birch solid core door. It is unfinished and has not been drilled or machined for a lockset or hinges. I got it for $30, which I thought was a great bargain.

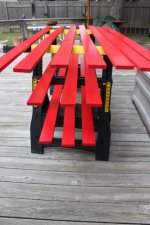
I ripped it to 27" deep on a table saw and will have to decide how to finish it. I don't want to darken it much, so I am thinking of a honey-colored stain followed by a polyurethan sealer. The top has a nice grain pattern to it and I want that to be visible. I will need to do a little sanding on the edges, but otherwise it is ready to finish and attach to the steel cabinets I'm using as double pedestals.
 
OP
B

BevoZ06

Well-known member
Joined
Nov 30, 2011
Messages
165
Location
Austin Texas
My RaceDeck floor tiles were delivered yesterday. I'll install them Saturday morning and will have more photos then.
 
OP
B

BevoZ06

Well-known member
Joined
Nov 30, 2011
Messages
165
Location
Austin Texas
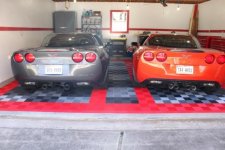
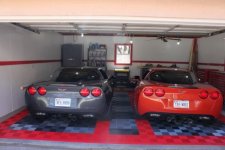
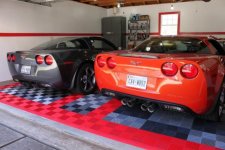
Here are the RaceDeck tiles as delivered by UPS, and the completed installation. I have more detail in the Flooring section.
 

Attachments

  • IMG_4736 (640x427).jpg
    IMG_4736 (640x427).jpg
    42.4 KB · Views: 48
  • IMG_4734 (640x427).jpg
    IMG_4734 (640x427).jpg
    49.2 KB · Views: 55
  • IMG_4731 (640x427).jpg
    IMG_4731 (640x427).jpg
    49.2 KB · Views: 64
  • IMG_4730 (640x427).jpg
    IMG_4730 (640x427).jpg
    50.9 KB · Views: 66
  • IMG_4710 (427x640).jpg
    IMG_4710 (427x640).jpg
    49.5 KB · Views: 61
  • IMG_4708 (427x640).jpg
    IMG_4708 (427x640).jpg
    55.6 KB · Views: 69
OP
B

BevoZ06

Well-known member
Joined
Nov 30, 2011
Messages
165
Location
Austin Texas
Here are some photos of the birch door I bought for a workbench top. I think it finished nicely. It has a very distinctive grain pattern that looks like a three-toed animal with claws.

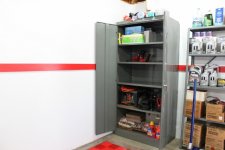
I also bought a storage cabinet at a state surplus sale. It came from the Texas DPS (highway patrol). It is heavier gauge steel than the common office cabinets and came with a hasp for a padlock.
 

Attachments

  • IMG_4725 (640x427).jpg
    IMG_4725 (640x427).jpg
    145.6 KB · Views: 37
  • IMG_4716 (640x427).jpg
    IMG_4716 (640x427).jpg
    143.1 KB · Views: 30
  • IMG_4711 (427x640).jpg
    IMG_4711 (427x640).jpg
    28.8 KB · Views: 31
  • IMG_4722 (427x640).jpg
    IMG_4722 (427x640).jpg
    25 KB · Views: 34
  • IMG_4720 (427x640).jpg
    IMG_4720 (427x640).jpg
    26.7 KB · Views: 36
  • IMG_4719 (640x427).jpg
    IMG_4719 (640x427).jpg
    24.1 KB · Views: 29
  • IMG_4714 (640x427).jpg
    IMG_4714 (640x427).jpg
    27.1 KB · Views: 31
OP
B

BevoZ06

Well-known member
Joined
Nov 30, 2011
Messages
165
Location
Austin Texas
For those who have followed along this far, this will be my last post of this weekend. What would a Corvette Garage be without Corvettes?
 

Attachments

  • IMG_4750 (640x427).jpg
    IMG_4750 (640x427).jpg
    40.9 KB · Views: 52
  • IMG_4753 (640x427).jpg
    IMG_4753 (640x427).jpg
    34.3 KB · Views: 50
  • IMG_4755 (640x427).jpg
    IMG_4755 (640x427).jpg
    45.1 KB · Views: 51

BackNBlackTJ

Well-known member
Joined
Jan 24, 2010
Messages
52
Location
Right here!
\m/ :bounce: \m/

seeing the name and location I kinda expected to see more burnt orange... corvette corral looks great... nice work!
 
To avoid these ads, REGISTER NOW!
Top Bottom